Beginners Guides
How to Paint on a Mug
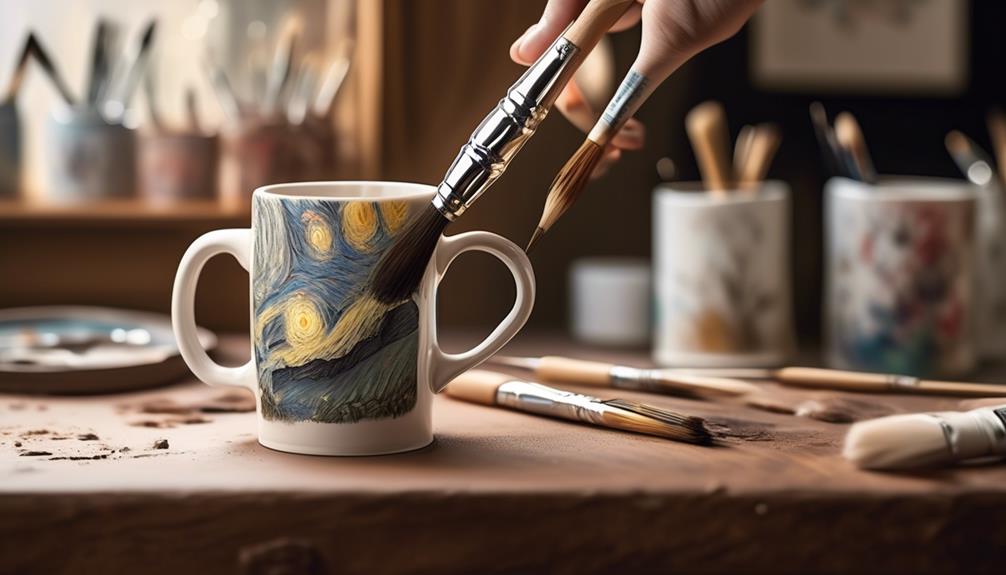
When it comes to painting on mugs, some may have concerns about the paint’s durability and its ability to withstand washing and daily use. However, with the proper materials and techniques, it is completely feasible to create a durable and lovely design on a mug that will be enjoyed for years to come.
In the following discussion, we'll walk you through the essential steps for painting on a mug, from selecting the right materials to sealing your artwork for long-lasting results.
So, let's dive into the world of mug painting and unlock the secrets to creating your own personalized and eye-catching designs.
Key Takeaways
- Consider the size, shape, and material of the mug for your painting project.
- Thoroughly clean the mug and prime the surface with a ceramic or glass primer.
- Choose a design that matches the recipient's preferences and sketch it out before painting.
- Use painting techniques like blending colors and adding texture to bring your design to life.
Selecting the Right Mug
When choosing the perfect mug for your painting project, consider the size, shape, and material to ensure it meets your creative vision and practical needs.
The material of the mug is crucial. Porcelain and ceramic mugs are ideal for painting due to their smooth texture, which provides an excellent surface for your artwork. Additionally, their heat resistance makes them suitable for dishwasher use, ensuring your masterpiece remains intact.
The shape of the mug is equally important. A mug with a cylindrical body and a flat, wide handle is easier to paint and hold. The cylindrical shape offers a large painting area, while the flat handle provides a stable grip, enhancing your comfort while painting and using the mug.
As for heat resistance and dishwasher safety, it's imperative to choose a mug that can withstand both. This will ensure that your beautiful designs endure frequent use and washing without fading or chipping, allowing you to enjoy your personalized mug for years to come.
Preparing the Surface
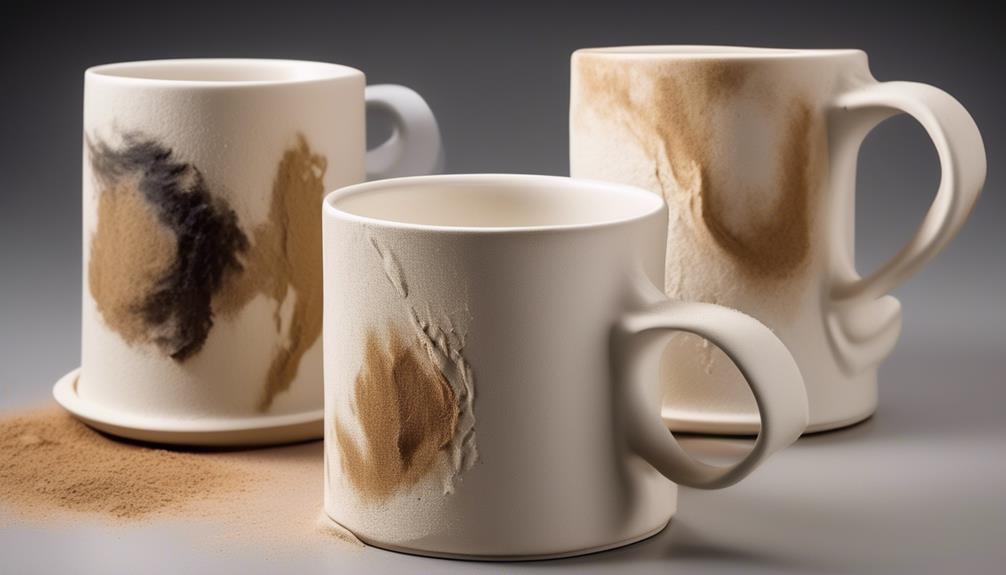
To ensure a flawless painting surface, thoroughly clean the mug with soap and water, then wipe it down with rubbing alcohol to remove any lingering oils or residue. Cleaning the mug is crucial as it ensures that the paint will adhere properly to the surface.
Once the mug is clean and dry, it's time to prime the surface. Applying a ceramic or glass primer designed for use with acrylic paints will help the paint adhere better and last longer. Make sure to follow the manufacturer's instructions for the primer, as application methods can vary.
Allow the primer to dry completely before starting the painting process. Additionally, consider sanding the surface lightly with fine-grit sandpaper before priming to help the primer adhere even better. This step is especially important if the mug has a glossy finish.
Choosing Your Design
After preparing the flawless painting surface on the mug by cleaning and priming it, we're now ready to explore the exciting process of choosing a design that will beautifully adorn our personalized creation.
When it comes to choosing a design for your mug, the first step is to consider the color palette. Think about the recipient's favorite colors or the hues that will complement their kitchen decor. Creating a harmonious color scheme will elevate the visual appeal of the mug.
Next, consider the personalization options. Whether it's a monogram, a favorite quote, or a meaningful symbol, the design should reflect the recipient's personality and preferences. Personal touches add sentimental value to the mug and make it a cherished keepsake.
If you're feeling adventurous, explore different design ideas such as floral motifs, geometric patterns, or even a whimsical landscape. Take inspiration from art, nature, or cultural patterns to create a unique and eye-catching design.
Remember to sketch out your design on paper before painting to ensure that you're satisfied with the layout and composition. Once you've settled on the perfect design, it's time to bring it to life on the mug with precision and creativity.
Painting Techniques
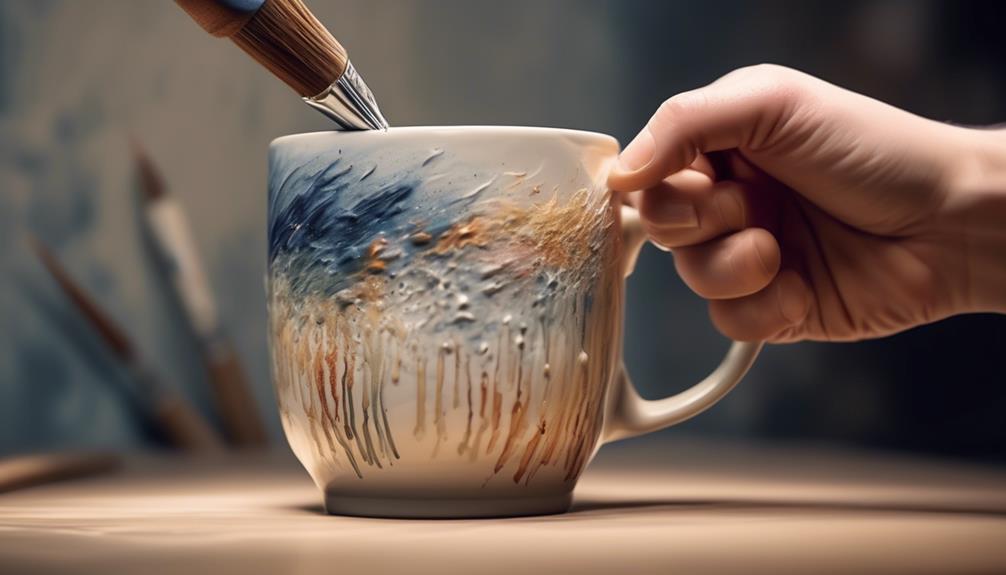
We will demonstrate a variety of brush techniques to achieve different textures and effects in our mug painting.
- Blending colors: To create smooth color transitions, start by applying a base coat and then, while the paint is still wet, gently blend the edges of two different colors together using a soft, dry brush. This technique works best with acrylic or enamel paints.
- Adding texture: Use a stippling technique to add texture to your mug. Dip the tip of a stiff brush into the paint and then dab it onto the surface of the mug to create a raised, textured effect. For a more subtle texture, try dry brushing by using a small amount of paint on a dry brush and lightly brushing it over the surface.
- Layering for depth: Layering different colors and shades can add depth to your design. Start with lighter colors as a base and then gradually add darker shades on top, blending them together to create a sense of depth and dimension. This technique works well for creating intricate designs or realistic illustrations on your mug.
Sealing and Curing Your Art
After completing the painting process, we proceed to seal and cure our art to ensure its longevity and durability. The sealing techniques are crucial to achieving long-lasting results on your painted mug. Once the paint has fully dried, carefully apply a food-safe sealant to the entire painted area. This will protect the design from scratches, chipping, and fading over time. When choosing a sealant, opt for one that's specifically designed for ceramics and is labeled food-safe to ensure it's suitable for use on mugs.
After sealing the artwork, it's essential to cure the mug properly. Place the mug in a cool oven and then set the temperature according to the sealant's instructions. Slowly bring the oven up to the recommended temperature and allow the mug to bake for the specified time. This curing process will help the sealant bond to the paint and ceramic surface, creating a durable finish that can withstand hand washing and gentle handling.
Frequently Asked Questions
Can I Use Regular Acrylic Paint on a Mug, or Do I Need Special Ceramic Paint?
Regular acrylic paint can be used on a mug, but for increased durability, special ceramic paint is recommended.
When considering mug painting techniques, the use of ceramic paint ensures that the design remains vibrant and intact over time.
Additionally, using ceramic paint opens up a world of creative mug design possibilities and provides inspiration for creating unique and long-lasting pieces.
Is It Safe to Drink From a Mug That Has Been Painted With Non-Toxic Ceramic Paint?
Absolutely, it's safe to drink from a mug painted with non-toxic ceramic paint. The key is to ensure the paint is food-safe and durable.
Safety concerns are paramount, so opting for high-quality, non-toxic ceramic paint is essential.
Additionally, paint durability is crucial for a long-lasting finish that won't flake off with use.
When it comes to enjoying a beverage from a painted mug, the right kind of paint makes all the difference.
Can I Put a Painted Mug in the Dishwasher, or Do I Need to Hand Wash It?
We can put a painted mug in the dishwasher, but it's best to hand wash it to maintain the durability of the paint.
The heat resistance of the paint is vital for dishwasher safety, and hand washing ensures a longer lifespan for your beautifully painted mug.
It's important to maintain the integrity of the design, and hand washing allows for a more gentle cleaning process, preserving the intricate details of the artwork.
How Long Should I Wait Before Using a Painted Mug After Sealing and Curing the Design?
After we've completed the sealing techniques, it's crucial to allow ample time for the design to cure properly.
It's important to follow the recommended curing time to ensure the best results. Rushing this step could compromise the durability and longevity of the painted mug.
We need to be patient and allow the design to fully set before using it to ensure it lasts.
Can I Use Oil-Based Paint Markers on a Mug, or Do I Need to Use a Different Type of Paint?
We've found that oil-based paint markers are a fantastic choice for adding intricate and durable designs to mugs.
However, if you're looking for alternative paint options, consider using ceramic or enamel paints that offer excellent heat resistance and design durability.
When it comes to personalized gift ideas and creative mug designs, these paints can help you achieve vibrant and long-lasting results, making your mugs stand out as thoughtful and unique gifts.
Can Acrylic Paint be Used for Painting on Mugs?
Yes, acrylic paint can be used for painting on mugs. With the right acrylic mug painting techniques, you can create beautiful and durable designs on your favorite mugs. Be sure to use the right materials and seal the paint properly to ensure that your designs last.
Conclusion
In conclusion, painting on a mug is the ultimate way to express your creativity and make a one-of-a-kind piece of art.
With the right mug, preparation, design, and techniques, you can create a masterpiece that will make everyone jealous of your artistic skills.
So go ahead, grab a mug and let your imagination run wild – the possibilities are endless!
- About the Author
- Latest Posts
Introducing Ron, the home decor aficionado at ByRetreat, whose passion for creating beautiful and inviting spaces is at the heart of his work. With his deep knowledge of home decor and his innate sense of style, Ron brings a wealth of expertise and a keen eye for detail to the ByRetreat team.
Ron’s love for home decor goes beyond aesthetics; he understands that our surroundings play a significant role in our overall well-being and productivity. With this in mind, Ron is dedicated to transforming remote workspaces into havens of comfort, functionality, and beauty.
Beginners Guides
Tips To Put An End To The Mess In Your Home

Everyone faces the challenge of a cluttered home. It can feel disheartening and irritating. By taking some simple steps, you can tackle the clutter. One helpful tip is to designate a “drop zone” to pinpoint where clutter accumulates. Once you pinpoint the source of clutter, you can work on eliminating it.
Decluttering
Prioritizing is a key step in organizing your house. It is important to break the task down into manageable steps. Begin with the smallest space first. You can then tackle bigger projects. Each week, declutter one room. Reduce piles.
If you are familiar with the basics of organizing your home, it doesn’t need to be difficult. If you’re new to organizing, it might be worth hiring an interior design professional. After you have created a plan and decided how to proceed, you can start to get rid of items that don’t serve you anymore. These items can be donated, sold, or recycled.
Designating a drop zone to store clutter
Drop zones are a way of making your home cleaner. You should locate the drop zone near your front door. Here you can store your shoes and coats. This area needs hooks, shelves, and a bench. Drop zone can be used in your garage to store items.
A drop zone is a place in your home that you can store any items that aren’t being used. You will find this area closest to your main entry. This is where you most often drop off items. You can also create a “drop zone” if you have too many clutter items.
Identifying clutter sources
A clutter-filled home can make your house look chaotic. Anxiety and stress can be caused by a feeling of disorder. Clutter can make cleanup more difficult and take up much more. Clutter creates a safe environment for pests and other creatures to hide.
It is important to identify clutter sources before you start organizing your home. There are many ways to accumulate clutter in your home, including electronic clutter and paper clutter. Keep cords, chargers and other electronic devices away from your eyes. If you leave them out, your home will look messy. Make sure you keep items off of nightstands or dressers.
Clear out a clutter-filled space
There are many ways to declutter your home. Start by deciding which items should be moved to what area. You might, for example, consider whether your bed clothes are necessary. Donate some of the items you don’t use anymore.
It is a great way for you to organize your life and prevent falling hazards. It will help you to stay organized and reduce stress.
Everything should be labeled
Labeling items can make it easier to find them and put them in the right place. This is especially useful for people who live in the same house or those with difficult-to-reach storage areas. You can decorate your space with chalkboard labels and vinyl lettering.
You can label everything to make your house look cleaner. Label everything with clear bins. It will be much easier to identify what’s in the bins later.
- About the Author
- Latest Posts
Introducing Ron, the home decor aficionado at ByRetreat, whose passion for creating beautiful and inviting spaces is at the heart of his work. With his deep knowledge of home decor and his innate sense of style, Ron brings a wealth of expertise and a keen eye for detail to the ByRetreat team.
Ron’s love for home decor goes beyond aesthetics; he understands that our surroundings play a significant role in our overall well-being and productivity. With this in mind, Ron is dedicated to transforming remote workspaces into havens of comfort, functionality, and beauty.
Beginners Guides
Ceiling Fans For Girl Bedroom

Ceiling fans can create a light and breezy atmosphere in a young girl’s bedroom, adding a fun touch. Opt for a neutral or softly colored fan to complement the room’s vibe. A soft color palette would work well for a teenage girl’s room. Keep the room neutral but incorporate vibrant colored decor or artwork. Installing a copper or washed-copper ceiling fan will help to soften the space.
Craftmade Bloom 10-blade ceiling fan
You have many choices when it comes to selecting a ceiling fan for a girl’s bedroom. You have two choices you can choose from a classic design like a vintage ceiling fan, or go modern with the Craftmade Bloom 10-blade fan. Both are stunning and can be customized with different blade widths. You can also find ceiling fans made of craft materials and equipped with dimmable LED lighting.
A ceiling fan makes a great focal point in a girl’s room. You can buy a traditional ceiling fan with a white blade. A bow-shaped ceiling fan might be a better choice if you are looking for something unique. You can also get a metallic ceiling fan.
Another option is the Craftmade Aged bronze Vintage Ceiling fan. This fan is perfect for Victorian-style rooms. It features traditional blades with bronze detailing. A fan with a mock-iron finish can be used in rustic poolhouses. A fan with disc-shaped blades is also available.
Hunter Norden ceiling fan
Hunter Norden ceiling fans make a great choice for girls who want princess rooms or girls’ bedrooms. Hunter Norden ceiling fan features six speeds and dimmable LED lighting. It is also available in grey or white with wood blades.
There are three settings for the fan’s light: warm, cool, and dimmer. A dimmer switch allows for the fan’s on/off control. The fan is also half as energy-efficient as other ceiling fans and uses up to half of the power. Modern design is worth the investment. This light can be used in every room.
Because it is neutral and soft, this fan is perfect for a girl’s room. Although the fan retains bright pink and mint artwork, it has a subtle tint. Copper Norden fans feature warm-toned wooden blades with a soft-washed appearance that matches the girl’s bedroom.
Minka Aire Tear ceiling fan
The Minka Aire Tear ceiling fan is 60 inches wide and features splashes in color. This fan is powered by an efficient DC motor and LED light kit. It is also energy-efficient. This fan is great for large rooms, such as bedrooms or playrooms.
Its soft and feminine design makes it an excellent choice for a girl’s bedroom. You can choose from six speeds and a quiet mode. Minka Aire fans move over 5,700 cubic feet per minute. It is also available in matte black and rich koa.
Another option for a girl’s room is the Monte Carlo Lily ceiling fan. This fan features a fun flower design. The fan measures medium in size with a dusty-green finish. You can also get a remote control and dimmable LED lights.
You have many options when it comes to quiet ceiling fans. A fan with a DC motor is ideal for a girl’s bedroom. You have six-speed options and an LED light kit that can be dimmed. The blades can be ordered in three colors and are made from wood.
- About the Author
- Latest Posts
Meet Bethia, the visionary designer at ByRetreat who brings a touch of magic to every remote workspace she creates. With a boundless imagination and an eye for beauty, Bethia is passionate about transforming ordinary spaces into extraordinary havens of creativity and comfort.
Bethia possesses a unique talent for envisioning the perfect combination of furniture, colors, and textures that harmonize seamlessly in a room. She understands that selecting furniture goes beyond mere functionality; it’s about curating pieces that evoke a sense of style and sophistication while enhancing the overall ambiance.
Beginners Guides
5 Interior Design Ideas That Will Transform Your Home

Renovating your home requires careful planning, creativity, and dedication. It’s unrealistic to expect a quick transformation by simply purchasing something on a whim or following a passing trend. Patience is key as it will take time to achieve the desired look for your home. Despite the initial chaos, you will eventually start to see the beautiful results.
#1 Mirrors can make a room appear larger
Mirrors create the illusion of depth and make a space appear larger. Mirrors reflect light and color from the surrounding area to create this optical illusion. The eye perceives these bouncing reflections as an increase of volume. The room will appear larger if the mirror is larger. This effect can be amplified if the mirror is large enough. A large mirror can make a room seem larger than it is.
Mirrors can increase the size of a space because they reflect both artificial and natural lighting. Mirrors can also give the illusion of depth and openness. Mirrors placed on the walls or the ground can create the illusion of more space. You can give your room a unique look by using different styles and patterns of mirrors.
Although mirrors may not be the best choice for small spaces, they can improve the look of smaller rooms. Mirrors can increase the size of a room by increasing its lighting and making it feel more spacious. Mirrors can be used in bathrooms.
Mirrors look their best when placed in front of a light source, such as a candle holder or pendant light. Large mirrors can be costly. You can find smaller mirrors at thrift shops or discount stores if you have a tight budget. They can be painted the same color you paint your window frames.
#2 Large-scale art makes a space appear more cohesive
Decorated accessories make a room look more cohesive. The navy accent color in the walls coordinates well with the blue trellis pattern of the drapes in the guest room. Too many tchotchkes can make a room boring. A room will look cohesive if it has a few collectibles.
How well the furniture blends in a room depends on its size. It will feel cluttered if you stuff large spaces with small furniture. The room can look chaotic and crowded if it has too many pieces. It is better to have larger pieces of art on large walls.
Decorating a room is as important as choosing the main colours. Choose three main colours and use them throughout your room. The room’s dominant color should comprise 60% of its overall palette. Then, add 30% secondary colors. You can also use neutral colors on the walls and large furniture pieces. These colors will create a more cohesive space.
Wall art should fit in the space. A large-scale work of art is better than a smaller one. To complement each other, group works of art from the same artist using the same color scheme. Triptychs and wall-art sets are two popular options for wall art. These are specifically designed for certain placements and look great.
#3: Adding a gallery to your home
A gallery wall is a great way to integrate art into your home’s design. First, decide what type of subject matter you want to put on your wall. You can include family photos, travel photos, and artwork from your children. Next, decide where to hang the artwork. It is possible to place different frames in different parts of the room. Also, be creative about how you hang them.
Another important tip when creating a gallery wall is to choose a color scheme. Before you begin selecting pieces, choose the color you wish to highlight. Next, build your gallery wall around that color. You don’t need to use this color in every piece. However, it should be subtle throughout the design.
Start by hanging the largest piece of art in the middle. This will give the art a balanced appearance. You can also add smaller frames to fill in any gaps or bare areas. Make sure to level the wall. You can use art gallery glue to ensure your walls are level.
You can add a gallery wall to any corner of your home. It can be used in any room, including a bathroom. This will allow you to create a relaxing sitting area. You can also display large-scale art in larger rooms.

#4 Bring color into your home
You can brighten up any space by using color in your interior design. You can achieve this by using one, strong color on the wall and accessories. Be aware of the lighting conditions in the room. Use color wisely.
A blue color scheme might be a good choice for a small dining room. Gray is a classic neutral color. You might consider adding a small piece of orange accent to it. It is important that the color scheme remains consistent.
In choosing the right colour for your interior design, taste and mood are important. Some people are motivated by bright colors, while others feel irritated by intense colors. You should be mindful of how your home projects a mood for guests. Design elements can help create an inviting and warm atmosphere.
If you’re afraid of bold colors, start small and move up. Interior designers will tell you that color can have a profound emotional impact. Choose a color you are passionate about and that you can live with.
#5 Create a spectacular fixture
An attractive fixture can make a huge difference in your interior design. A striking fixture can make a space stand out and give it an expansive feel. Designers recommend that at least one of these fixtures be included in large rooms.
- About the Author
- Latest Posts
Introducing Ron, the home decor aficionado at ByRetreat, whose passion for creating beautiful and inviting spaces is at the heart of his work. With his deep knowledge of home decor and his innate sense of style, Ron brings a wealth of expertise and a keen eye for detail to the ByRetreat team.
Ron’s love for home decor goes beyond aesthetics; he understands that our surroundings play a significant role in our overall well-being and productivity. With this in mind, Ron is dedicated to transforming remote workspaces into havens of comfort, functionality, and beauty.
-

 Vetted3 days ago
15 Best Boxwood Varieties for Thriving in Full Sunlight
-

 Vetted6 days ago
15 Best Ways to Label Clothes for Nursing Home Residents – Stay Organized and Efficient
-

 Vetted4 days ago
15 Best Dryer Vent Hoses to Keep Your Laundry Room Safe and Efficient
-

 Vetted4 days ago
15 Best Spider Sprays to Keep Your Home Arachnid-Free
-
 Vetted3 days ago
14 Best Cleaners for Aluminum Surfaces – Shine Bright Like a Diamond
-

 Vetted4 days ago
15 Best Nightstand Charging Stations to Keep Your Devices Organized and Ready to Go
-

 Beginners Guides2 days ago
How to Slow Down My Ceiling Fan to Reduce Wind Chill
-

 Beginners Guides1 day ago
Can You Use a Ceiling Fan Instead of a Range Hood?


