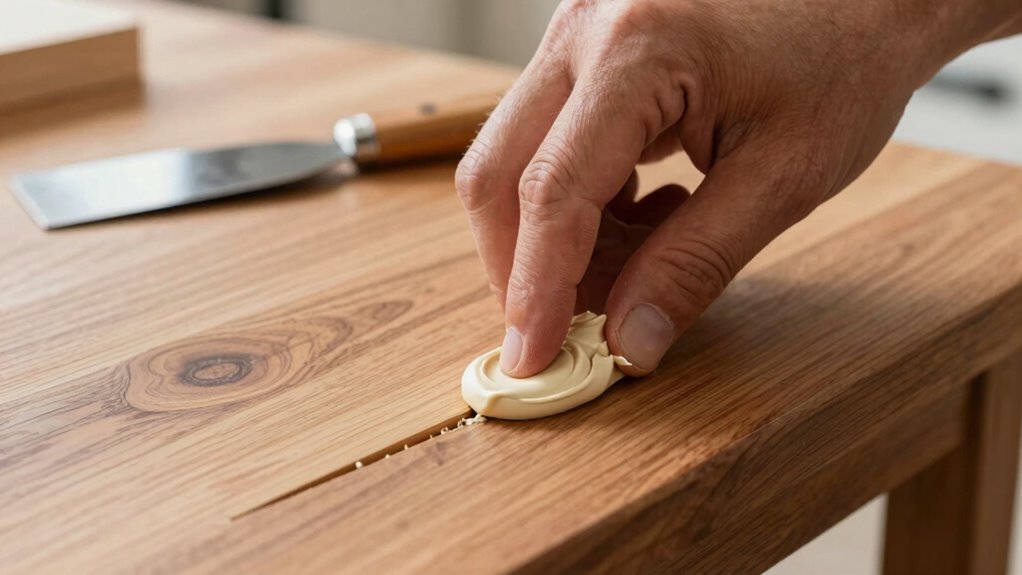

To use wood filler smoothly on furniture, start by cleaning the surface thoroughly and lightly sanding glossy areas for better adhesion. Apply the filler with a putty knife, pressing it into the cracks or holes, and overfill slightly to account for shrinkage. Let it dry completely as per the product instructions. Once dry, sand the area with fine-grit sandpaper until flush with the surface. For a flawless finish, learn more about finishing techniques and tips to achieve professional results.
Key Takeaways
- Clean and lightly sand the surface for better filler adhesion and a smooth base.
- Overfill slightly with filler and press it into cracks or holes using a putty knife.
- Allow proper drying time as per manufacturer instructions before sanding or finishing.
- Sand the filled area gently with fine-grit sandpaper until flush with the surrounding surface.
- Match the filler color with the existing finish using stains or touch-up markers for seamless blending.

If your furniture has scratches, holes, or cracks, applying wood filler is an effective way to restore its appearance. Before you start, proper wood preparation is essential. You need to clean the surface thoroughly, removing dust, dirt, or any loose debris. Use a tack cloth or a damp cloth to wipe down the area, ensuring a smooth surface for the filler to adhere to. If the furniture has a glossy or varnished finish, lightly sand the area with fine-grit sandpaper to create a better grip for the filler. Sanding also helps to level out any rough patches and smoothens the surface, making the repair less noticeable once finished.
Once the surface is prepped, choose the right type of wood filler. For small scratches and minor imperfections, a pre-colored or stainable filler works well. For larger holes or deep cracks, opt for a two-part epoxy or a thicker filler that can be shaped and sanded easily. When applying the filler, use a putty knife or a spatula, pressing it into the damaged area and smoothing it out with broad strokes. Be sure to overfill slightly, as some shrinkage can occur once the filler dries. After applying, remove any excess filler promptly to avoid uneven surfaces or ridges. Allow the filler to dry according to the manufacturer’s instructions—this can range from a few minutes to several hours, depending on the product.
Choose the right filler, overfill slightly, and remove excess promptly for a smooth, professional repair.
Once dry, the key to achieving a smooth, seamless finish lies in finishing techniques. Lightly sand the filled area with fine-grit sandpaper until it’s flush with the surrounding surface. Be gentle—too much pressure might damage the surrounding wood or create unevenness. If needed, apply additional layers of filler, sanding between each coat, until the repair is level and smooth. After sanding, clean off the dust thoroughly before moving on to staining or painting. If you want the repair to blend seamlessly, match the color of the filler with the existing wood stain or finish. You can also use touch-up markers or stains to fine-tune the color after the filler is sanded and polished. Additionally, understanding wood preparation and how to properly finish the surface can significantly improve the final appearance of your repair. Proper drying times are also crucial to prevent cracking or imperfect adhesion, ensuring a durable repair. To ensure the longevity of your repair, it’s also helpful to learn about proper drying times for different fillers and finishes. Taking the time to understand repair techniques can help you achieve a more professional-looking result.
Incorporating proper wood preparation and finishing techniques ensures your repairs look natural and professional. Taking your time during each step will give you a smooth, durable result, making your furniture look as good as new.
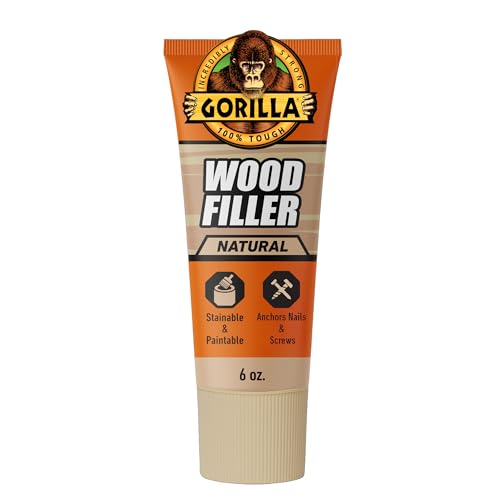
Gorilla All Purpose Wood Filler, Natural Color, 6 Ounce Tube (Pack of 1) – Water Resistant for Indoor or Outdoor Projects and Repairs
- Gorilla Tough Water-Resistant Repair: Ideal for cracks, gouges, and holes
- Natural Finish: Easy to spread for smooth results
- Indoor and Outdoor Use: Resists water, doesn't shrink or crack
As an affiliate, we earn on qualifying purchases.
As an affiliate, we earn on qualifying purchases.
Frequently Asked Questions
Can Wood Filler Be Painted Immediately After Application?
You shouldn’t paint wood filler immediately after application. First, guarantee proper surface preparation by smoothing the filler with a putty knife and removing excess. Then, allow sufficient drying time—usually a few hours or as specified on the product label. Rushing the process can cause uneven paint adhesion or cracks. Once the filler is fully dry and sanded smoothly, you can confidently paint over it for a seamless finish.
How Long Does Wood Filler Take to Fully Cure?
Wood filler typically takes about 2 to 24 hours to fully cure, depending on the product and environmental conditions. During the drying process, it’s best to allow ample time before sanding or painting. You should consider the application timing carefully; rushing the drying process can compromise the repair. Always follow the manufacturer’s instructions for drying times, and verify the filler is completely cured before proceeding with finishing touches.
Is It Necessary to Sand Wood Filler Before Finishing?
Is sanding wood filler before finishing really optional? Not quite. You’ll want to do some surface preparation, which means sanding to smooth out any bumps and guarantee a seamless finish. Skipping this step can leave your project looking uneven or rough. If you prefer, alternative materials like sanding sponges or fine-grit paper can help achieve a polished surface. Trust me, a little prep makes all the difference in your final look.
Can Wood Filler Be Used on Outdoor Furniture?
Yes, you can use wood filler on outdoor furniture, but choose one with weather resistance to withstand the elements. Make sure to select a color-matching filler that blends seamlessly with your furniture’s finish. After applying, let it cure fully and sand smooth before sealing with a weatherproof topcoat. This process guarantees durability and a seamless appearance, keeping your outdoor furniture looking great longer.
What Types of Wood Filler Are Best for Antique Furniture?
For antique furniture, you want a wood filler that matches the wood grain and is age-compatible. Choose a finely-textured, flexible filler to blend seamlessly with the original finish and accommodate wood movement over time. Epoxy-based fillers work well for structural repairs, while latex or solvent-based fillers suit surface repairs. Always test the filler on a hidden area first to confirm it matches the age and grain of your antique piece.
Conclusion
Now that you know how to apply wood filler smoothly, you’ll be able to restore your furniture with confidence. Remember, the average person repairs their furniture about three times a year—so mastering this skill can save you money and extend your piece’s life. With a little patience and practice, you’ll achieve professional-looking results every time. Your furniture will look brand new, and you’ll enjoy the satisfaction of a job well done!