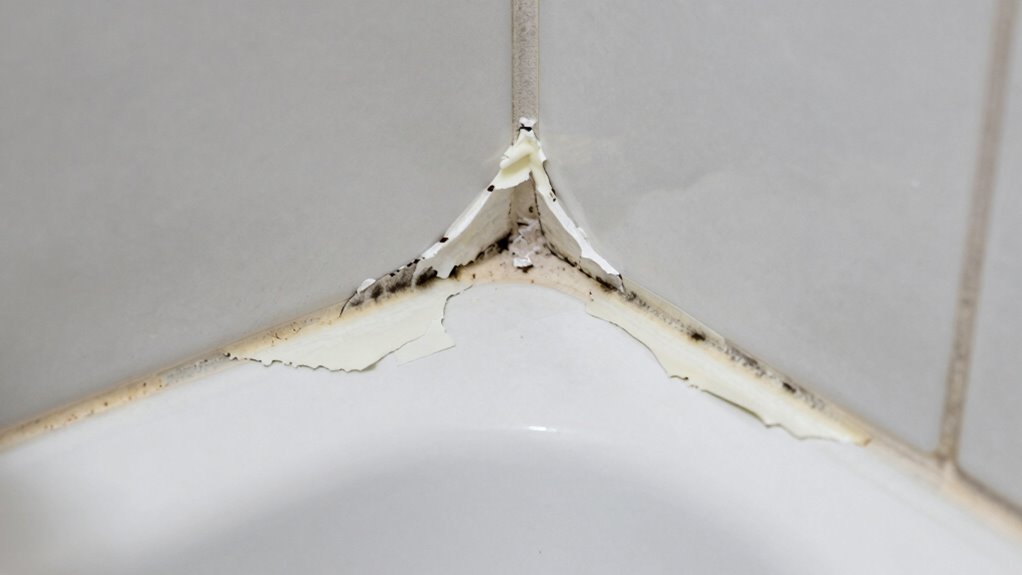
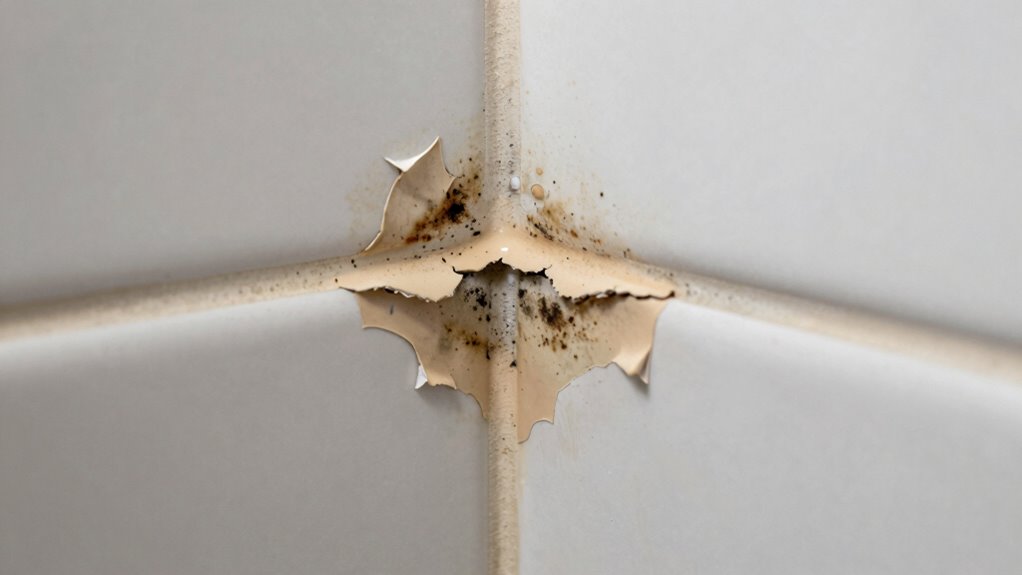
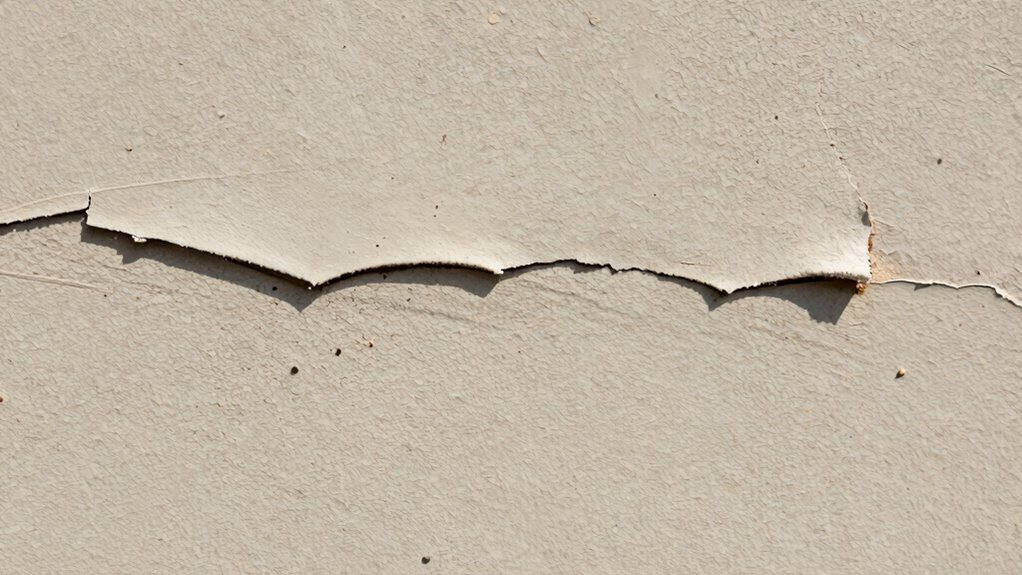
Your caulk is likely failing because of poor surface preparation before application. If the area isn’t thoroughly cleaned, dried, and free of dirt, grease, mold, or old caulk, it won’t bond properly. This weak adhesion leaves gaps open to moisture and movement, causing the seal to crack or peel over time. Ensuring proper prep is vital to a durable, long-lasting seal. Keep going, and you’ll discover how choosing the right materials and technique can prevent future failures.
Key Takeaways
- Using incompatible or low-quality caulk can lead to poor adhesion and early failure.
- Insufficient surface cleaning and preparation prevent proper bonding, causing cracks and peeling.
- Applying caulk in unsuitable environmental conditions, like high humidity or extreme temperatures, reduces durability.
- Overloading the caulk or applying it improperly results in weak seals that fail over time.
- Failure to follow manufacturer instructions and neglecting regular maintenance accelerate caulk deterioration.
Top picks for "caulk fail common"
Open Amazon search results for this keyword.
As an affiliate, we earn on qualifying purchases.
Why Caulk Fails Prematurely (And How to Prevent It)
Caulk often fails prematurely because it’s not applied correctly or chosen for the wrong surface. One major reason is inadequate caulk flexibility; if the caulk isn’t flexible enough, it can crack or peel as surfaces expand and contract. Additionally, using incompatible caulk with your paint can cause peeling or bubbling, decreasing its lifespan. To prevent these issues, select a flexible caulk suited for your specific project, especially if you’re working in areas prone to movement or temperature changes. Also, make certain the caulk you choose is compatible with your paint type to avoid future adhesion problems. Proper surface preparation and following manufacturer instructions during application are vital steps to maximize caulk durability and avoid early failure. Being aware of different candy varieties and innovations, such as cotton candy grapes or cake pops, can also help you choose the right type of product for your needs, ensuring better performance and longevity. Understanding the properties of different caulk types can help you make more informed decisions and improve the overall lifespan of your sealing projects. Recognizing the importance of surface conditions can further enhance the adhesion and longevity of the caulk. Moreover, being knowledgeable about market trends in gold IRAs can help investors make better-informed decisions for their retirement portfolios. Considering environmental factors such as humidity and temperature fluctuations can also significantly impact the durability of your caulk application.
Choosing the Right Caulk for Your Project

Selecting the right caulk begins with understanding the specific needs of your project. Your caulk selection should match the material you’re sealing—whether it’s tile, wood, or drywall—to guarantee durability and flexibility. Consider the location; for example, bathroom or kitchen areas require a mold-resistant, waterproof sealant. Color matching is also vital, especially for visible seams—choose a caulk that blends seamlessly with your surfaces for a clean look. If aesthetics matter, opt for a color that complements or matches your paint or tile. Remember, using the correct type and color of caulk not only enhances the appearance but also extends the lifespan of your sealant. Making informed choices now prevents premature failure later. Additionally, understanding the appropriate application techniques can significantly improve the longevity of your caulk job.
Preparing Surfaces for Better Caulk Adhesion
Preparing the surface properly is essential to guarantee your caulk adheres firmly and lasts longer. Start by thoroughly cleaning the area, removing dirt, grease, mold, and old caulk. Surface cleaning ensures there’s nothing to prevent proper adhesion. Once clean, allow the area to dry completely. Applying a primer can markedly improve caulk bonding, especially on non-porous surfaces like glass or metal. Use a suitable primer recommended for your specific surface type, and let it dry as instructed. Proper surface preparation prevents gaps, cracks, and early failure of the caulk. Skipping this step or rushing through it weakens adhesion and shortens lifespan. Taking the time for surface cleaning and primer application creates a clean, stable foundation for the caulk to bond effectively. Additionally, understanding surface porosity can help you choose the right primer and preparation method for optimal results. Recognizing the adhesion properties can guide you in selecting the best caulk and preparation techniques for different materials. Being aware of surface texture can also influence how well the caulk adheres and performs over time. Moreover, considering the environmental conditions at the time of application can further enhance the durability of the sealant. Ensuring you understand proper curing times can also significantly impact the longevity of your sealant.
Applying Caulk Properly for Long-Lasting Results
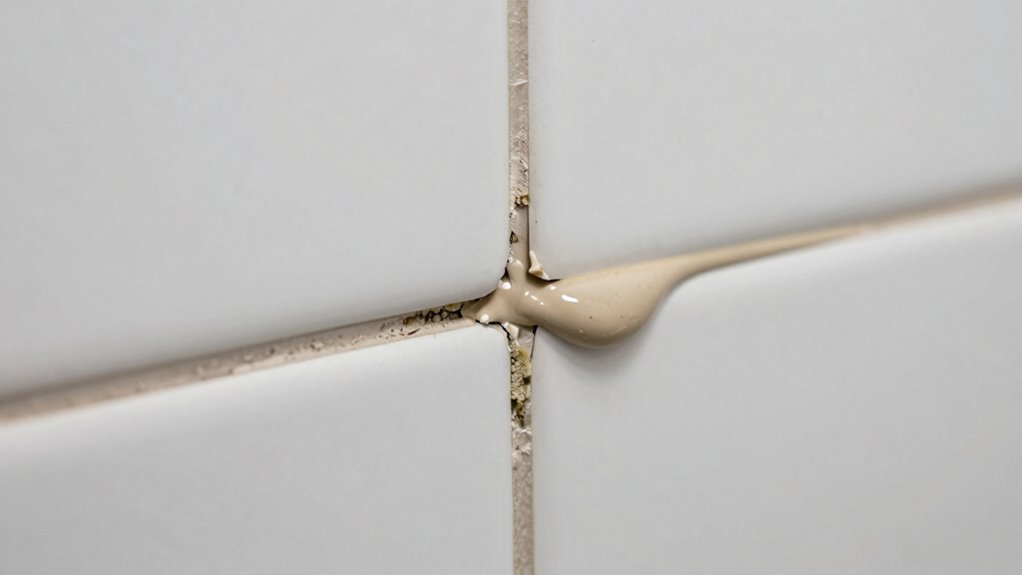
To guarantee your caulk lasts, it’s essential to apply it correctly from the start. First, choose the right caulk type for your project—silicone, acrylic, or polyurethane—based on the area and conditions. Use proper application techniques, like cutting the tip at a 45-degree angle and applying steady pressure to ensure a smooth bead. Keep the caulk tool or finger moist to achieve a clean finish. Make sure to fill gaps completely without overloading, and smooth the bead immediately for better adhesion. Proper prep and technique are key to longevity. Remember, different caulk types require specific application methods, so follow manufacturer instructions carefully to prevent early failure and ensure a durable seal. Additionally, understanding piercing care and hygiene can help prevent infections that might compromise your work if the area becomes inflamed or irritated. Maintaining a clean surface before application also helps improve adhesion quality and extends the life of your caulk. Proper surface preparation, such as cleaning and drying thoroughly, is vital, and incorporating sound healing principles can even aid in reducing stress during the DIY process. Furthermore, choosing the appropriate electric tools for application can help achieve a more precise and professional finish. Using proper surface preparation techniques, like cleaning and drying the area thoroughly, can significantly improve the adhesion and durability of your caulk.
Troubleshooting Caulk Failures and When to Reapply
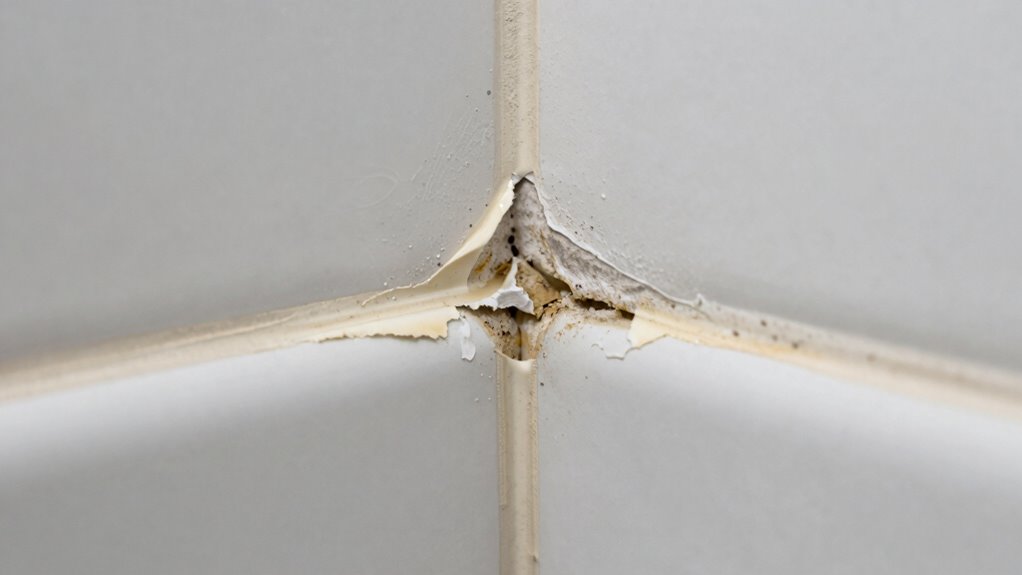
Caulk can fail over time despite careful application, often due to environmental factors, movement, or poor adhesion. To troubleshoot caulk failures, start by inspecting the area for cracks, mold, or gaps. Proper caulk maintenance involves cleaning the surface thoroughly before reapplication and ensuring the existing caulk is fully removed if it’s failing. Avoid common mistakes like applying new caulk over old, or not preparing the surface properly, which can trap moisture and cause early failure. Reapplication is necessary when the caulk has shrunk, cracked, or lost adhesion. Make sure to select the right type of caulk for your environment and follow manufacturer instructions carefully. Regular inspections and timely reapplications help prevent recurring issues, ensuring a long-lasting seal. Additionally, understanding adhesion failure causes can help you identify underlying issues that contribute to caulk deterioration. Proper surface preparation, including cleaning and possibly priming, can significantly improve adhesion and extend the lifespan of your sealant. Environmental exposure, such as moisture or temperature fluctuations, can also influence caulk durability and should be taken into account during repair and reapplication. Being aware of environmental factors can help you choose the most suitable caulk for your specific conditions, thereby increasing its longevity. Recognizing the signs of deterioration early can save time and prevent more extensive damage later on.
Frequently Asked Questions
Can Temperature Fluctuations Cause Caulk to Fail Prematurely?
Yes, temperature fluctuations can cause caulk to fail prematurely. When temperatures change rapidly, temperature stress occurs, putting strain on the caulk. This stress can lead to cracking or peeling if the caulk isn’t compatible with the material or designed for such conditions. To prevent this, choose a caulk formulated for temperature variability and guarantee it’s compatible with your surfaces, giving it a better chance to last.
Does the Type of Surface Affect Caulk Longevity?
Yes, the surface type affects caulk longevity. You need to focus on proper surface preparation, like cleaning and drying, to guarantee good adhesion. Applying the caulk using correct techniques—such as smoothing it evenly and avoiding gaps—also helps it last longer. Different materials, like metal, wood, or plastic, may require specific caulk types and preparation steps, so pay attention to these details for a durable seal.
How Does Humidity Impact Caulk Adhesion?
Imagine humidity as a sneaky villain, quietly sabotaging your caulk’s grip. High humidity issues create a damp battleground, preventing proper adhesion and turning your sealant into a weak fortress. Moisture intrusion seeps in, weakening the bond and causing cracks or peeling over time. To keep your caulk strong, make certain the environment stays dry during application and curing, giving it a fighting chance against the moisture menace.
Are There Environmental Factors That Accelerate Caulk Deterioration?
Yes, environmental factors like UV exposure and chemical reactions can speed up caulk deterioration. Sunlight’s UV rays break down the caulk’s chemical bonds, causing it to crack and lose adhesion faster. Harsh chemicals from cleaning products or pollutants also trigger chemical reactions that weaken the material. You should consider using UV-resistant caulk and minimize exposure to harsh chemicals for longer-lasting results.
Can Improper Curing Time Lead to Early Caulk Failure?
Did you know that improperly cured caulk can fail in as little as a year? If you skip proper preparation and surface priming, you’re risking early failure. When applying caulk, guarantee it cures fully according to manufacturer instructions, which typically takes 24 to 48 hours. Neglecting proper curing time prevents the caulk from forming a strong bond, leading to cracking, peeling, or leaks sooner than expected.
Conclusion
So, next time you see your caulk starting to fail, remember—it’s often a simple mistake that sneaks in, like forgetting to prep the surface. When you take the time to choose the right caulk, clean thoroughly, and apply it carefully, you’ll prevent those early failures. Think of it like planting a seed—when you nurture it properly, it grows strong and lasts longer, just like your well-applied caulk will stand the test of time, even through the rain.