
To avoid making drywall patches obvious, guarantee you thoroughly clean and sand the area before applying primer and joint compound. Fix any texture mismatches by carefully blending and building texture gradually. Use proper application techniques, like thin coats and smooth finishing, and wait for full drying and curing times. Choosing the right paint finish and blending seamlessly also helps hide repairs. If you’re interested, there are more tips to help your repairs look flawless and invisible.
Key Takeaways
- Skipping thorough cleaning and priming causes uneven adhesion, making patches stand out.
- Applying uneven joint compound or rushing drying leads to visible ridges and cracks.
- Failing to sand smoothly creates bumps and texture differences that reveal repairs.
- Not matching wall texture or sheen results in noticeable patches.
- Using improper painting techniques or finishes makes patches obvious and unblended.
As an affiliate, we earn on qualifying purchases.
How to Prepare Your Wall Before Drywall Repair

Before you begin repairing your drywall, it’s essential to properly prepare the wall surface. Start by examining the existing wall texture; matching or smoothing it helps your patch blend seamlessly. Next, assess the paint sheen—whether it’s matte, eggshell, or glossy—as this affects how your repair will look. Lightly sand the area around the damage to ensure the surface is smooth and free of loose paint or debris. If needed, clean the wall with a damp cloth to remove dust and dirt, which can interfere with adhesion. When choosing your patching materials, consider how the wall’s texture and paint sheen will influence the final appearance. Proper preparation guarantees your repair won’t stand out and provides a solid foundation for the subsequent finishing steps. Additionally, understanding wiring basics can help you address any electrical considerations if necessary during repairs. Being aware of professional email etiquette can also be useful if you need to contact a contractor or supplier for advice. Also, taking a seasonal maintenance approach ensures you stay on top of ongoing upkeep to prevent future damage. Incorporating a quality patching compound can further improve the durability of your repair. To achieve the best results, it’s helpful to know your wall type so you can select the appropriate repair techniques and materials.
Common Mistakes When Applying Joint Compound
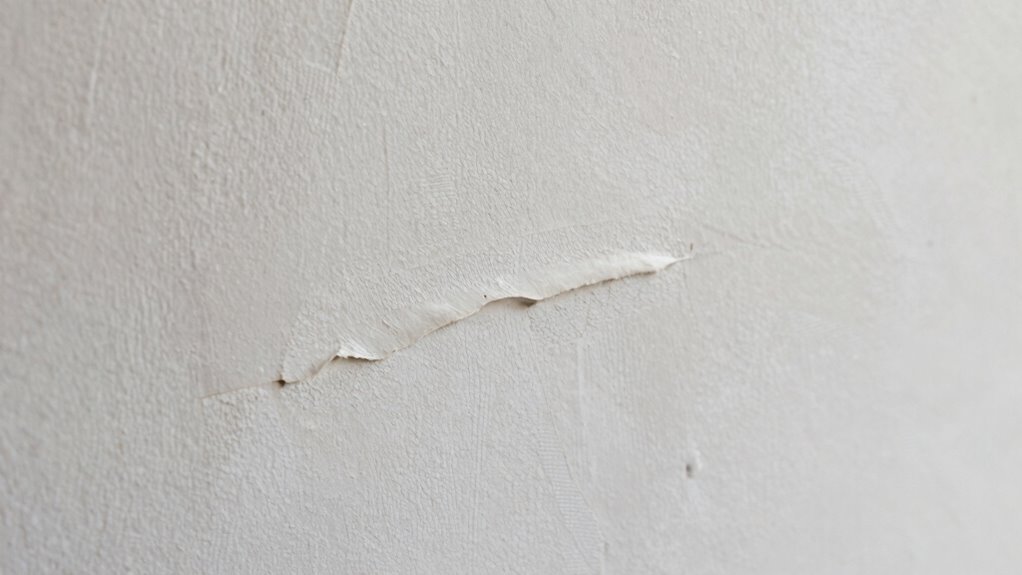
Applying joint compound unevenly can lead to visible ridges and an unprofessional finish. Skipping primer and taping can cause cracks and poor adhesion, making repairs less durable. To get the best results, pay attention to your technique and follow proper application steps. Using consistent technique can help analyze your application process to improve future projects. Additionally, understanding the proper drying times ensures the compound cures correctly and reduces the risk of imperfections. Properly managing application thickness also plays a crucial role in achieving smooth, seamless patches. Being aware of lease terms and how they impact your project timeline can help plan repairs more effectively.
Uneven Application Techniques
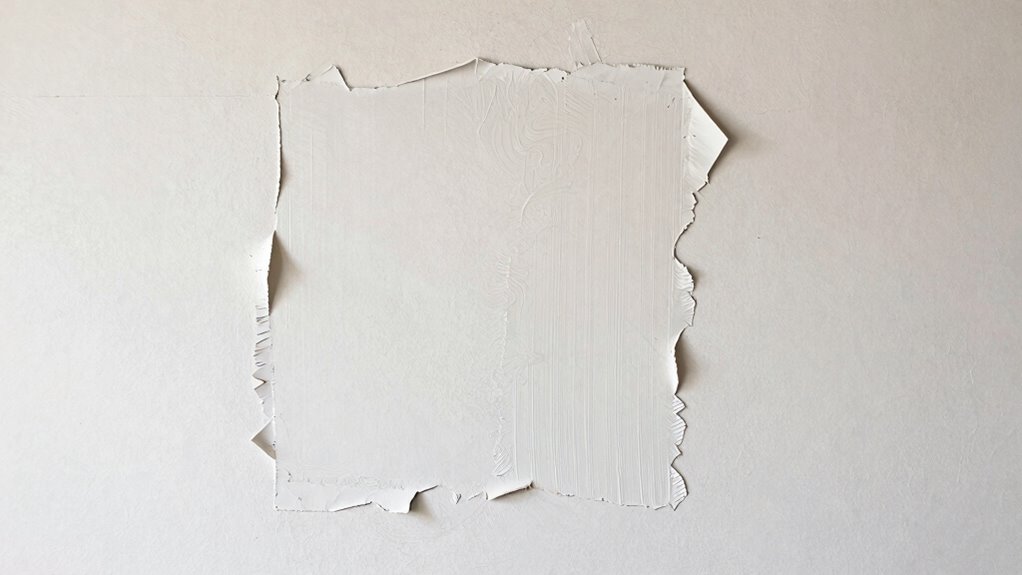
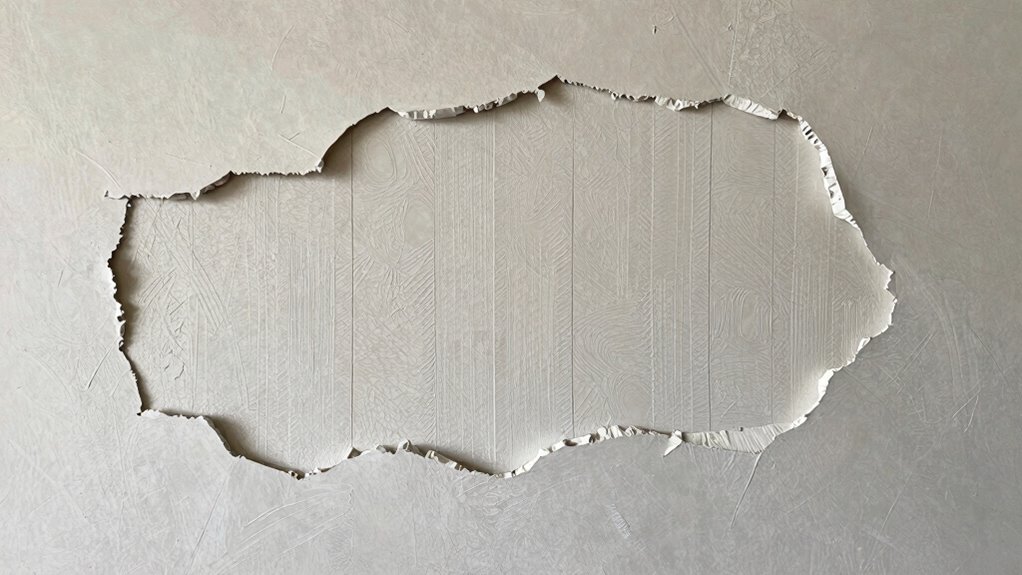
Uneven application of joint compound is a common mistake that can lead to noticeable imperfections on your drywall surface. When you don’t use proper taping techniques, the joint compound application becomes inconsistent, causing bumps and ridges. To avoid this, apply the compound smoothly in thin, even coats, feathering the edges to blend seamlessly with the drywall. Rushing the process or applying too much at once can create uneven surfaces that are hard to sand down. Proper taping techniques involve pressing the tape firmly into the joint, then smoothing out excess compound to prevent bubbles or lumps. Taking your time with each coat ensures a flat, professional-looking finish. Consistent, even joint compound application is key to achieving a smooth drywall patch that won’t stand out.
Skipping Primer and Taping
Skipping primer and taping is a common mistake that can compromise the quality of your drywall finish. Proper priming techniques help seal the surface, ensuring better adhesion of joint compound and reducing visible imperfections. Neglecting to prime can result in uneven texture and difficulty blending patches seamlessly. Additionally, skipping taping methods leaves joints vulnerable to cracks and creases over time. Using the right taping techniques, like embedding fiberglass or paper tape correctly, creates a smooth, strong foundation for your compound layers. When you skip these steps, you risk uneven patches that stand out and degrade the overall appearance. To avoid this, always apply primer before taping and follow proper taping methods for a durable, professional-looking drywall repair. Understanding proper drywall techniques can help ensure a seamless finish and long-lasting results. Proper joint compound application is essential for achieving a smooth, flawless surface, and learning about proper drywall preparation can further improve your results.
Why Sanding Smooth Makes a Big Difference
Sanding smooth is a crucial step in drywall repair because it guarantees a seamless surface that blends perfectly with the surrounding wall. Proper sanding techniques help eliminate ridges, bumps, and imperfections, ensuring your patch isn’t obvious. When you focus on surface smoothness, your repair looks professional and polished. Using the right tools and consistent pressure makes a big difference in achieving an even finish. Here’s a quick guide:
| Technique | Result |
|---|---|
| Light, even strokes | No gouges or uneven spots |
| Fine-grit sandpaper | Smooth, paint-ready surface |
| Check frequently | Maintain consistent surface |
Mastering these techniques ensures your patch becomes virtually invisible, avoiding the common mistake of rough, noticeable repairs. Proper surface preparation is essential for a flawless drywall repair. Paying attention to sanding pressure helps prevent damage and ensures an even finish. Additionally, correct sanding technique minimizes dust and maximizes efficiency during the process. Developing good sanding habits can further improve your results and reduce rework. Incorporating sanding safety measures can also protect you from inhaling dust particles and ensure a safer work environment.
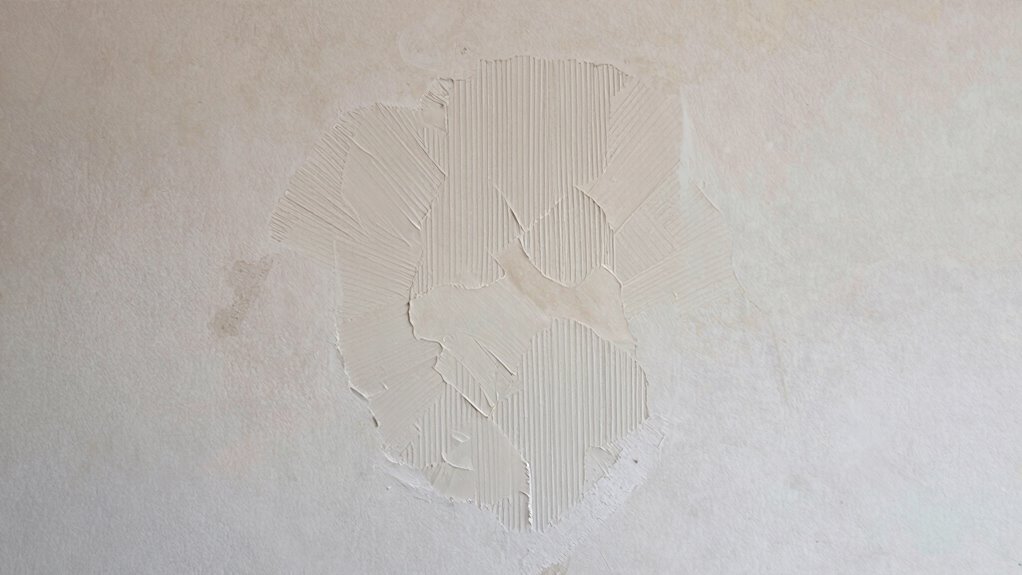
Matching Texture and Blending Patches Seamlessly
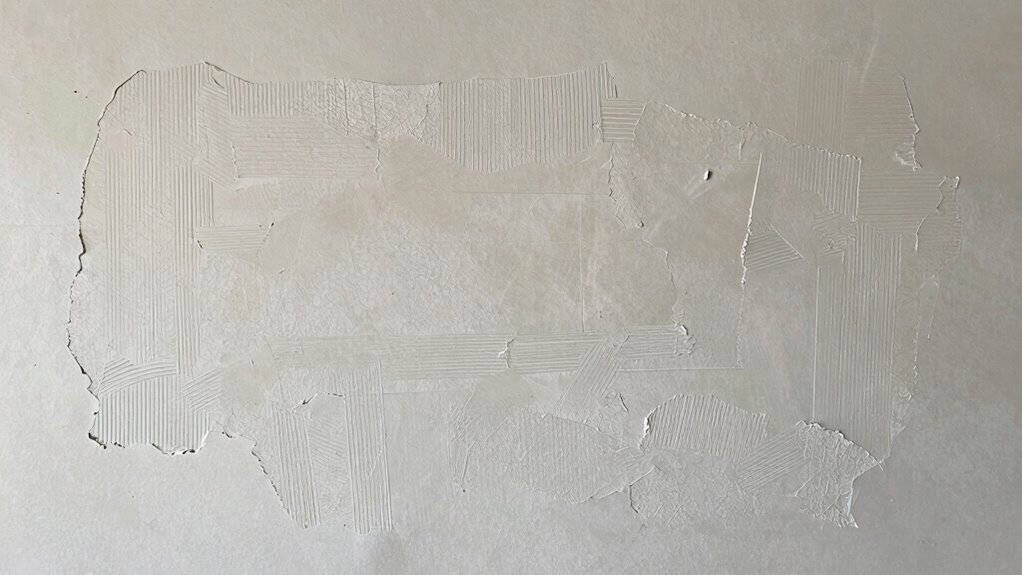
To achieve a seamless drywall repair, you need to carefully match the existing texture and blend your patch so it blends naturally with the surrounding wall. Start by examining the wall’s texture type—whether it’s knockdown, orange peel, or another pattern. Use appropriate tools, like a sponge, brush, or roller, to replicate that texture during blending. Apply blending techniques gradually, building up texture in thin layers rather than trying to match it all at once. Lightly mist the area with water if needed to soften the surface, making it easier to blend. Consistency is key—keep your tools and pressure steady. With patience and proper texture matching, your patch will disappear into the wall, avoiding obvious repairs.
Choosing the Best Paint and Finish to Hide Repairs
Choosing the right paint and finish is essential for hiding drywall repairs effectively. Your paint selection should closely match the existing wall color and texture, preventing the patch from standing out. Opt for high-quality, flat or matte finishes, as they better conceal surface imperfections and reduce glare. Finish types matter because glossier paints tend to highlight flaws, while matte finishes help hide unevenness. When selecting a paint, consider blending in a slightly tinted shade to make the repair less noticeable. Proper finish choices can make a significant difference in achieving a seamless look. Take the time to test your paint and finish on a small area first, ensuring it blends well with your existing wall. This careful approach helps your repair stay invisible and your wall looking flawless. Additionally, understanding paint adhesion and proper surface preparation can further improve the durability and concealment of your repair. Using an appropriate primer can also enhance the paint’s ability to bond and hide repairs more effectively. Paying attention to matching paint sheen can further ensure your patch blends seamlessly with the surrounding wall. Incorporating advanced blending techniques and considering the use of texture-matching tools can also help achieve a nearly invisible repair.
Should You Use Primer Before Painting Over Patches?

Using primer before painting over patches guarantees the surface is properly prepared and the paint adheres well. Applying an effective primer creates a smooth base, preventing uneven coverage or visible repairs. Skipping this step may lead to patchy results and long-term damage to your wall finish. Additionally, selecting the right paint preparation materials can help ensure a seamless and durable finish. Proper surface sanding techniques also play a crucial role in achieving an even coat and hiding repairs effectively. Incorporating the appropriate thermal behavior understanding can also help in selecting primers that withstand environmental changes, ensuring your repair remains discreet over time.
Proper Surface Preparation
Before painting over drywall patches, it’s vital to make certain the surface is properly prepared. Start by thoroughly surface cleaning to remove any dirt, grease, or stains that could affect paint adhesion. Dust removal is essential; wipe down the patched area with a damp cloth or tack cloth to eliminate dust and debris. This step ensures a smooth, clean surface that promotes even paint application. Skipping proper surface cleaning and dust removal can lead to uneven patches or streaks, making the repair obvious. Once the surface is clean and dust-free, you’re ready to proceed, whether that means applying primer or painting directly. Taking the time for proper surface preparation helps your patch blend seamlessly with the surrounding wall.
Effective Primer Application
Applying primer before painting over drywall patches is a essential step that can substantially improve the final result. Using the right primer technique ensures even coverage and helps seal the patch, preventing visible edges or texture differences. A quality primer enhances paint adhesion, making your topcoat more durable and smooth. It’s important to choose a primer compatible with your paint type—latex or oil-based—to avoid issues like peeling or uneven finish. Applying primer in thin, even coats with a brush or roller minimizes streaks and promotes a seamless blend. Skipping this step or applying it improperly can make patches stand out, undoing your repair efforts. Take your time with primer application to achieve a uniform surface that ensures your paint job looks professional and long-lasting.
How Long Should You Wait for Drying and Curing?

Drywall compound needs adequate time to dry and cure properly to guarantee a strong, smooth finish. The drying time varies depending on the type of compound used, thickness applied, and room conditions like humidity and temperature. Typically, lightweight compounds dry faster, often within a few hours, while setting-type compounds may take 24 hours or more. It’s essential to avoid rushing the curing process; premature sanding or painting can cause cracks or uneven surfaces. To ensure the compound is fully dried and cured, check that it’s hard to the touch and no longer feels tacky. Patience during this phase prevents mistakes that make patches obvious and ensures your repair blends seamlessly with the existing drywall.
Final Tips for a Flawless, Invisible Drywall Repair
Achieving a flawless, invisible drywall repair requires careful attention to detail and proper finishing techniques. Start by ensuring your texture matches the existing wall; practice blending the repaired area with the surrounding surface using the right tools and techniques. Once the texture is seamless, focus on paint selection—choose a color that closely matches the original wall hue. Test the paint on a hidden area or sample board before applying it to the patch. Use thin, even coats and avoid overloading your brush or roller to prevent uneven coverage. Sand lightly between coats to achieve a smooth finish. With patience and precision in texture matching and paint selection, your repair will blend seamlessly, leaving no visible signs of the patch.
Frequently Asked Questions
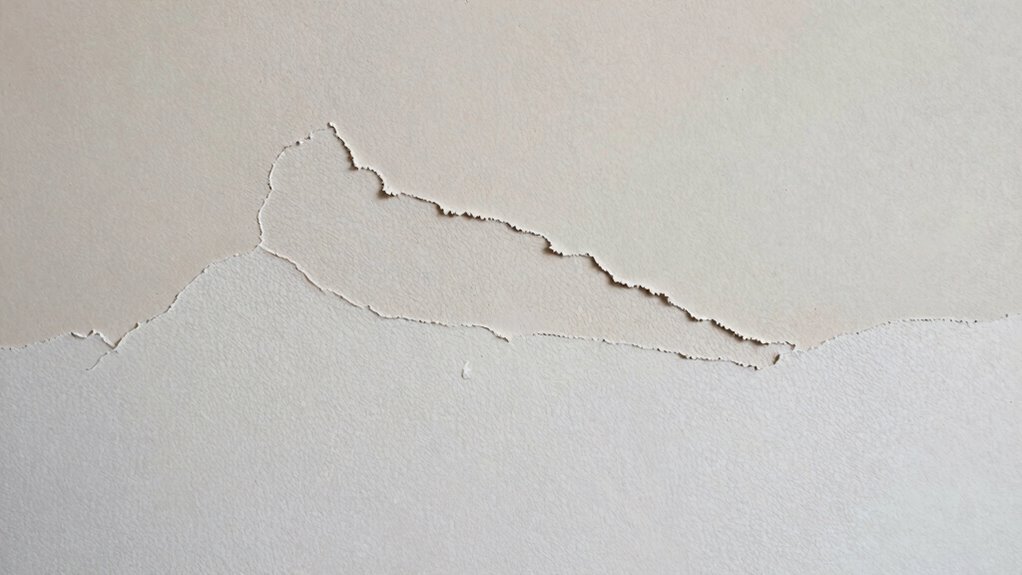
How Can I Prevent Cracks From Forming After Drywall Repair?
To prevent cracks after drywall repair, make certain you use proper sanding techniques to smooth the patch seamlessly. When painting, match the paint color and finish closely to the existing wall to hide the repair. Avoid overworking the area, which can weaken the patch. Also, apply joint compound correctly and allow it to dry thoroughly before sanding or painting. These steps help maintain a smooth, crack-free surface that blends seamlessly with your wall.
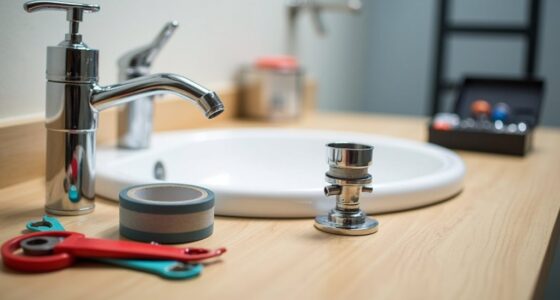
What Tools Are Essential for Professional Drywall Patching?
You need essential tools like a putty knife, sanding sponge, and a drywall saw for professional patching. A taping knife helps you apply joint compound smoothly, ensuring seamless patches. Use different-sized knives for various patching techniques, and always have extra joint compound on hand. A sanding sponge finishes the surface, preventing visible edges. These tools help you achieve a clean, professional look while minimizing cracks and imperfections.
How Do Temperature and Humidity Affect Drying Times?
Ever wonder why your drywall patch looks like a science experiment gone wrong? Temperature effects and humidity influence drying times more than you think. Cold temperatures slow down evaporation, leaving patches sticky and vulnerable. High humidity drags out drying, making your patience test your sanity. To avoid obvious patches, keep the room warm and dry, and give your repair ample time to cure fully—no shortcuts for professional results!
Can I Use Alternative Materials to Joint Compound?
Yes, you can use alternative materials like repair tapes and alternative sealants instead of traditional joint compound. Repair tapes, such as fiberglass or mesh, help reinforce seams and cover small cracks, while alternative sealants can provide a quick, lightweight fix for minor damages. However, keep in mind these options might not offer the same smooth finish or durability as joint compound, so choose carefully based on your repair needs and desired results.
How Often Should I Inspect Drywall for Potential Issues?
Think of inspecting your drywall like tending a garden—you need to check it regularly to catch problems early. You should inspect your drywall every 6 to 12 months, especially in high-humidity areas. During inspections, focus on moisture monitoring and look for cracks, stains, or soft spots. Regular checks help prevent issues from escalating, keeping your walls strong and beautiful. Stay vigilant, and your drywall will thank you!
Conclusion
To get truly invisible drywall repairs, avoid common mistakes like skipping sanding or mismatching paint. Remember, a recent study shows that properly blended patches are 70% less noticeable. Take your time with each step, from prepping to finishing, and you’ll achieve a seamless look. Patience and attention to detail make all the difference. With these tips, you’ll confidently repair your walls and keep your home looking flawless without anyone ever noticing the patch.