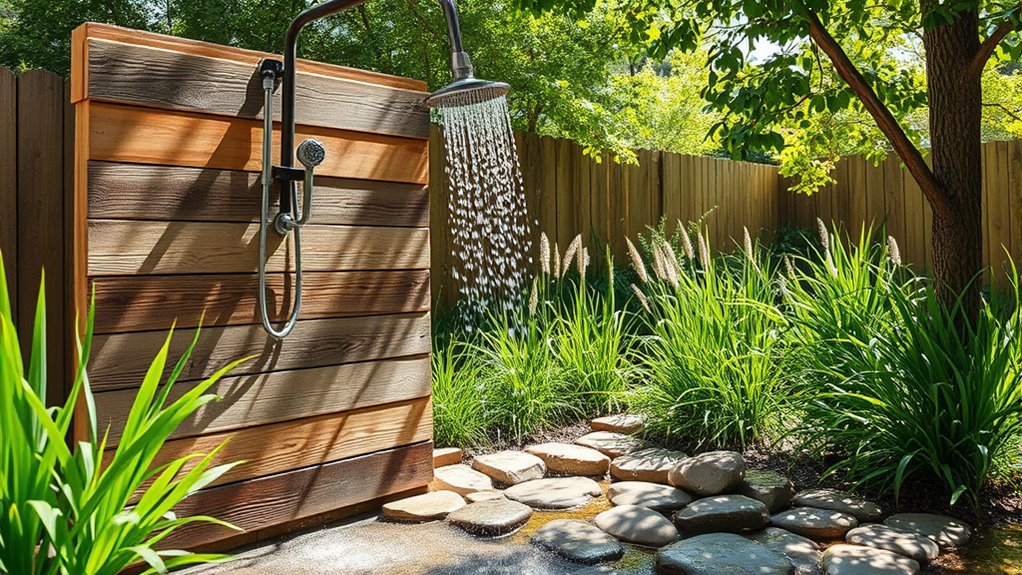

To build a DIY outdoor shower, start by planning your design, considering privacy, layout, and eco-friendly materials. Gather durable plumbing supplies, weather-resistant materials, and tools like a drill and level. Build a sturdy frame and waterproof base, then connect the water supply and install proper drainage. Finish with rust-resistant fixtures and weatherproof finishes. Regular maintenance guarantees longevity. If you keep going, you’ll discover detailed steps to create a functional, attractive outdoor shower tailored to your space.
Key Takeaways
- Plan your outdoor shower layout, privacy features, and select eco-friendly, weather-resistant materials before starting construction.
- Gather durable plumbing components, privacy materials, and essential tools such as drills and wrenches.
- Build a sturdy, level frame with waterproof base options like concrete or gravel for stability.
- Connect to a water source, ensure proper fittings, and install drainage systems for efficient water runoff.
- Finish with rust-resistant fixtures, weatherproof treatments, and perform regular maintenance for longevity.
Planning and Designing Your Outdoor Shower
Before building your outdoor shower, it is vital to carefully plan and design it to suit your space and needs. Consider how much outdoor shower privacy you want; adding screens, natural barriers, or curtains can help create a private oasis. Think about the layout and how the shower will connect to existing plumbing or water sources. Opt for eco-friendly materials like reclaimed wood, bamboo, or recycled tiles to make your project environmentally conscious. Sketch out your design, keeping accessibility and functionality in mind. Decide on features like a simple showerhead, drainage, and storage. Proper planning guarantees your outdoor shower fits seamlessly into your landscape, offers privacy, and aligns with your eco-friendly goals. Incorporating rustic decor elements can enhance the natural aesthetic and complement your outdoor setting.
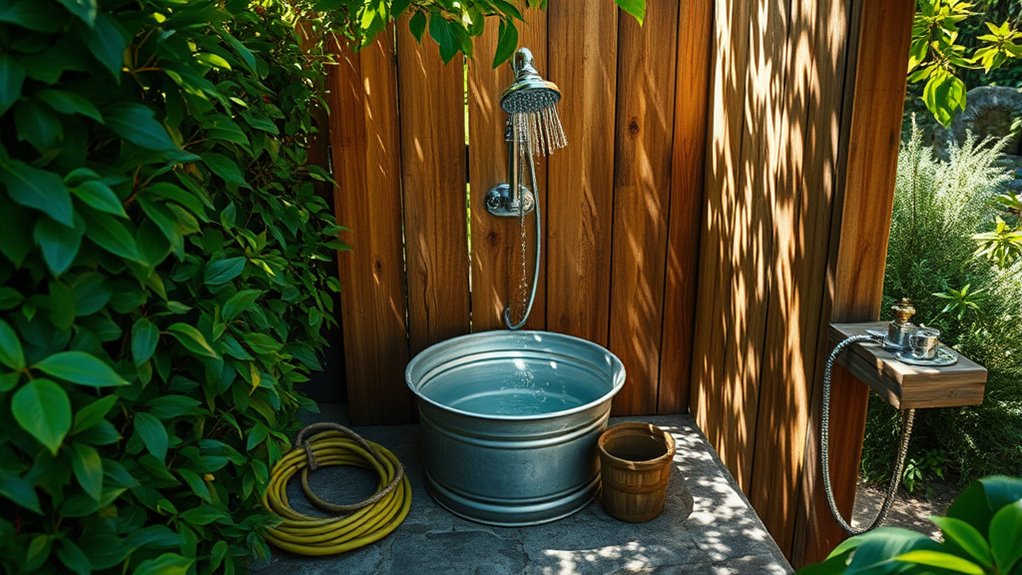
Gathering Materials and Tools
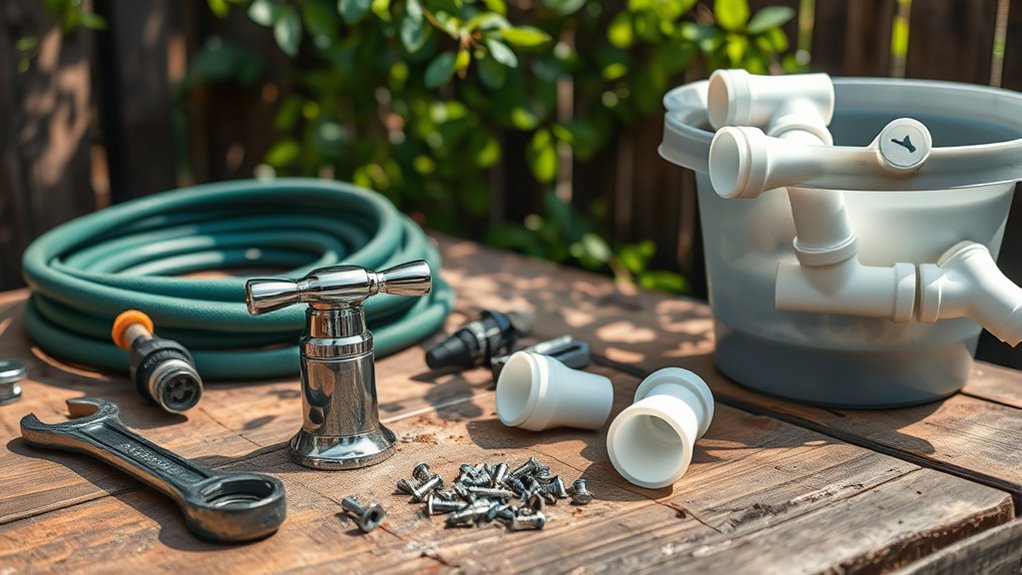
To successfully build your outdoor shower, gathering the right materials and tools is essential. Start with durable plumbing components, such as hoses, connectors, and a showerhead. For sustainable water use, consider rainwater harvesting options, like a simple barrel or collection system. You’ll also need materials for privacy, such as outdoor curtains, lattice panels, or privacy screens, to ensure outdoor privacy while showering. Don’t forget essential tools like a drill, screwdriver, wrench, and level to assemble everything securely. Make sure to select weather-resistant materials like galvanized metal or treated wood to withstand the outdoor elements. Choosing toilet functionality and maintenance-friendly materials can help ensure your outdoor shower remains easy to use and durable over time. Having everything on hand before you begin will streamline the process and help you create a functional, private outdoor shower that’s both eco-friendly and enjoyable.
Building the Shower Base and Frame
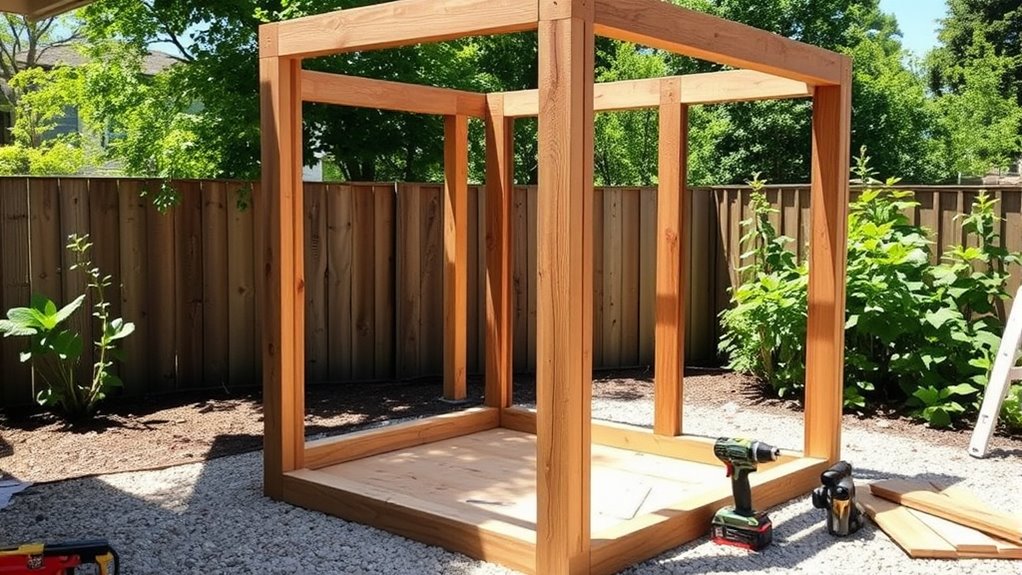
Building the shower base and frame is a crucial step that provides stability and defines the overall structure. Start by constructing the frame using sturdy materials like pressure-treated lumber or metal, making sure it’s level and square. This frame will support the shower base and keep everything secure. For the shower base, choose a durable, waterproof material such as concrete, gravel, or a pre-made shower pan. Carefully measure and cut the base to fit your frame, then secure it firmly in place. Proper frame construction guarantees your shower remains stable over time. Take your time to double-check measurements and level everything as you go. Additionally, incorporating structural integrity principles during framing ensures long-term durability of your outdoor shower. Once complete, you’ll have a solid foundation ready for the next steps of your outdoor shower project.
Installing Plumbing and Water Supply
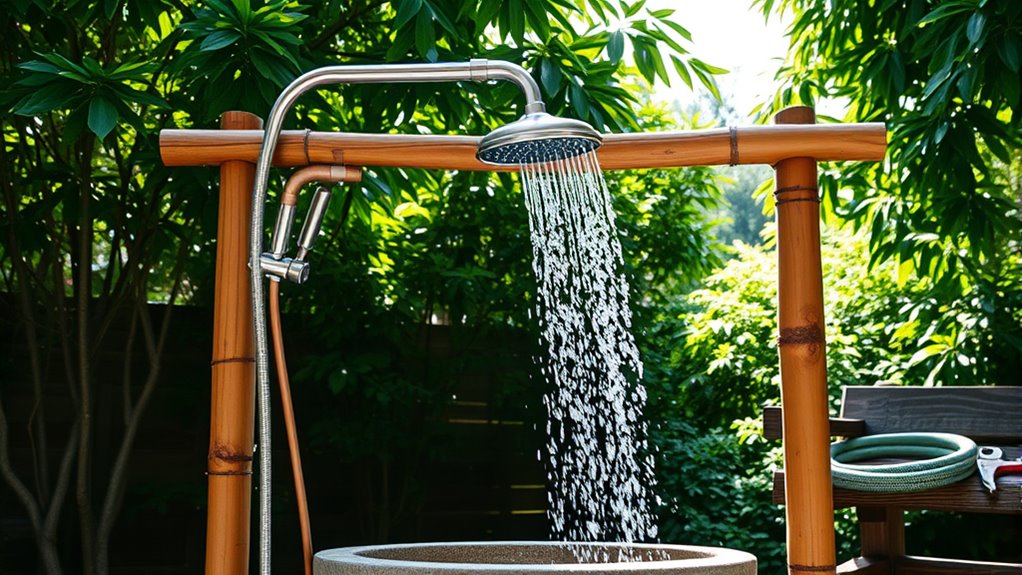
Installing the plumbing and water supply is a critical step that guarantees your outdoor shower functions properly and delivers consistent water flow. Begin by connecting your water source, whether a garden hose hookup or a dedicated line, ensuring the water pressure is adequate for a comfortable shower experience. Use appropriate fittings and secure connections to prevent leaks. Next, choose a drain option that suits your setup—consider a trench drain or a simple gravel bed, depending on space and drainage needs. Properly sealing all joints and testing the water supply before finishing guarantees reliable operation. Remember, maintaining steady water pressure is key to a satisfying shower, and selecting the right drain options will keep your outdoor space clean and odor-free. Regularly inspecting your water filtration system helps ensure safe drinking water and optimal performance.
Finishing Touches and Maintenance
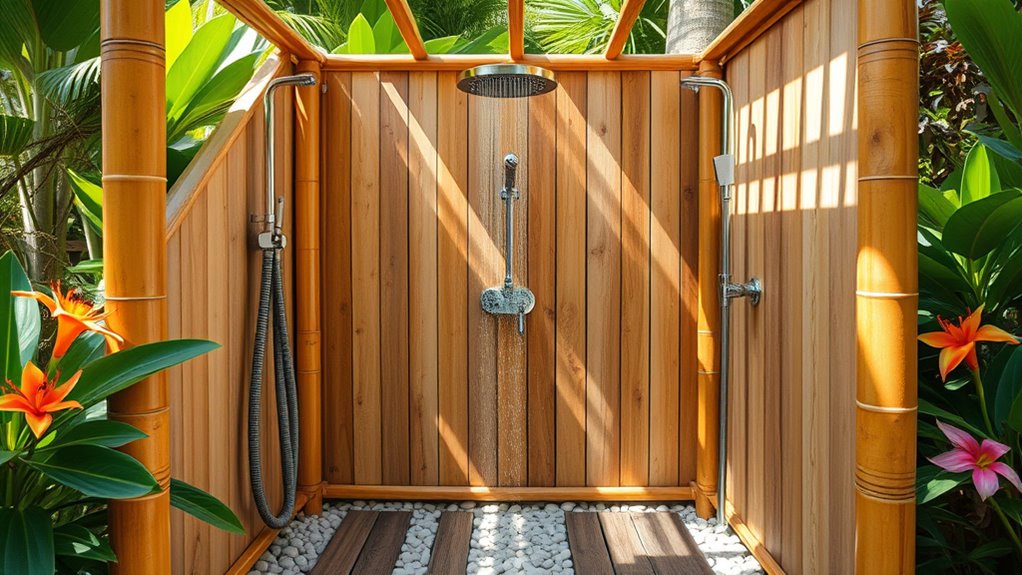
Once your outdoor shower is set up and tested, focusing on finishing touches and ongoing maintenance makes sure it stays functional and inviting. Start by installing rust resistant fixtures to prevent corrosion from exposure to moisture and weather. Applying weatherproof finishes to any wood surfaces protects them from rain, sun, and humidity, extending their lifespan. Regularly check the plumbing connections for leaks and clean the showerhead to maintain good water flow. Inspect the area for mold or mildew, and clean surfaces with a mild solution to keep it hygienic. Cover exposed fixtures during harsh weather or winter months to prevent damage. Proper maintenance guarantees your outdoor shower remains a durable, attractive feature of your outdoor space, providing reliable comfort for years to come. Additionally, understanding outdoor plumbing considerations can help you troubleshoot and enhance your setup over time.
Frequently Asked Questions
What Are the Best Materials for an Eco-Friendly Outdoor Shower?
When choosing materials for an outdoor shower, you want eco-friendly options that reduce environmental impact. Recycled materials like reclaimed wood or recycled plastic are great for framing and flooring, while sustainable options such as bamboo or cork offer durability and renewability. These choices help you minimize waste and support eco-conscious living. By selecting recycled and sustainable materials, you create a shower space that’s both environmentally responsible and functional.
How Can I Ensure Privacy in My Outdoor Shower Area?
To guarantee privacy in your outdoor shower area, you should use privacy screens like bamboo or lattice panels that block the view without blocking airflow. Incorporate natural barriers such as tall plants, shrubs, or trees to create a secluded space. Position your shower thoughtfully, away from neighbors and busy areas, and consider adding a retractable curtain for flexibility. Combining these elements will give you a private, relaxing outdoor shower experience.
What Are Common Issues With Outdoor Showers and How to Fix Them?
Outdoor showers often face issues like leaks and inconsistent water pressure. You might notice leaks around connections or fittings, which you can fix with leak repairs—tighten or replace damaged parts. Water pressure problems could stem from clogged nozzles or a low-flow setup; clear blockages or adjust your water source to improve flow. Regular maintenance helps prevent these issues, ensuring a smooth, enjoyable outdoor shower experience.
Can I Install an Outdoor Shower on Uneven Terrain?
You can install an outdoor shower on uneven terrain, but terrain challenges require careful planning. Use level platforms or adjustable supports to stabilize the shower base, ensuring it’s secure and safe. Follow installation tips like grading the area for proper drainage and anchoring the structure firmly. With these adjustments, you’ll create a functional outdoor shower that handles uneven ground effectively, providing a comfortable and durable setup.
How Do I Winterize My Outdoor Shower in Cold Climates?
To winterize your outdoor shower in cold climates, you’ll want to follow some essential winterization tips. First, drain all water from the pipes to prevent freezing. Use pipe insulation around any exposed plumbing to protect it from cold temperatures. Consider adding antifreeze if necessary. Cover the shower components or disconnect hoses to keep everything safe during winter. These steps help prevent pipe bursts and damage, ensuring your outdoor shower stays in good condition year-round.
Conclusion
Now that you’ve built your outdoor shower, you’re all set to enjoy the great outdoors while staying fresh. Remember, a project like this is only as good as the effort you put into it — so don’t cut corners. Keep up with regular maintenance to keep everything running smoothly. With your new shower, you’re ready to take the plunge and make outdoor cleaning a breeze. The ball’s in your court — go ahead and make it happen!