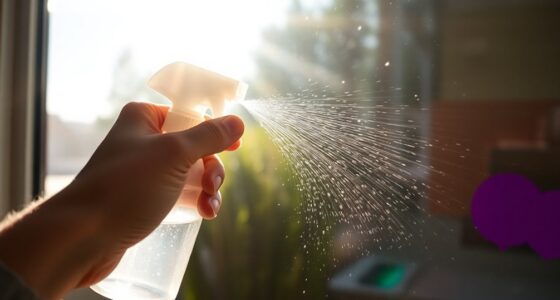
Mirror painting lets you showcase your creativity and personal style. Start with a clean mirror, using painter's tape for precise edges. Choose a few complementary colors—acrylic paint pens work best—and apply light colors first. For unique effects, try shaving cream marbling or dirty pour techniques. Seasonal designs can refresh your look: think pastels for spring or warm tones for autumn. After painting, make sure to cure your work for durability and use gentle cleaners for maintenance. With these tips, you're ready to transform your mirrors into stunning art pieces that truly reflect your personality! There's so much more to explore!
Key Takeaways
- Explore seasonal themes like floral patterns for spring or snowflakes for winter to keep your mirror art fresh and engaging.
- Use acrylograph acrylic paint pens for vibrant colors, and apply painter's tape for clean lines and precise designs.
- Incorporate unique techniques like shaving cream marbling or dirty pour painting for textured and abstract finishes on your mirror.
- Experiment with color schemes, choosing complementary colors or bold hues to create striking focal points in your decor.
- Share your creations on social media and engage with local art communities for inspiration and skill enhancement in mirror painting.

Scotch Felt Pads 162 PCS Beige, Felt Furniture Pads for Protecting Hardwood Floors, Round, Assorted Sizes Value Pack, Self-Stick design, Protecting from nicks, dents and scratches (SP845-NA)
- Suitable for Various Furniture: Protects chair legs, tables, and more
- Easy to Install: Peel and stick for quick setup
- Universal Surface Protection: Safeguards hardwood, tile, laminate, vinyl
As an affiliate, we earn on qualifying purchases.
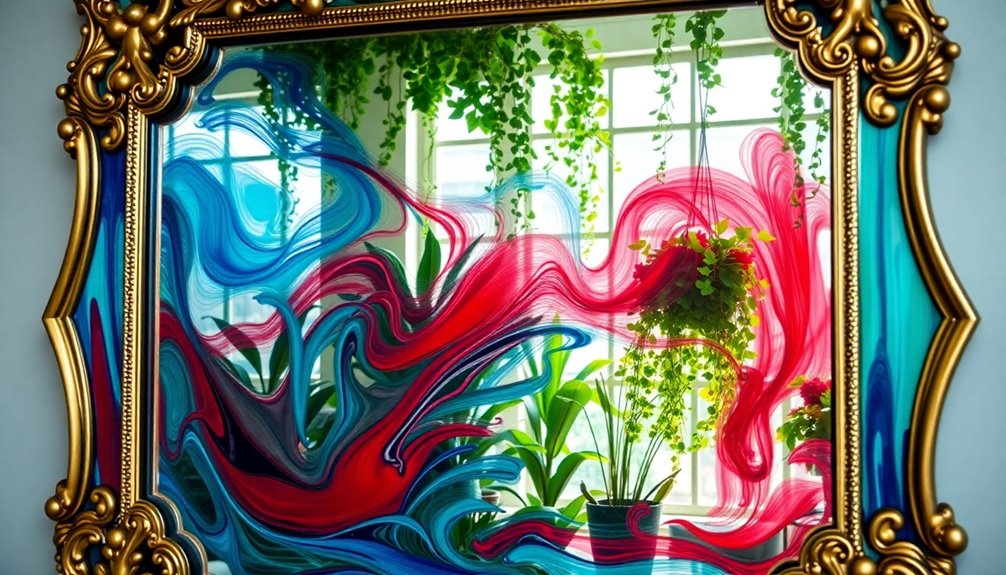
Understanding Mirror Painting
Understanding mirror painting can open up a whole new world of creativity, especially since it allows you to transform a simple reflective surface into a stunning work of art.
With mirror art, you can use acrylic paint pens or tempera paints to create eye-catching designs directly on the glass. Start by cleaning the mirror thoroughly and applying painter's tape along the edges for clean lines.
Sketch your design lightly with a pencil, making it easy to adjust as needed. You can play with seasonal themes, using warm colors for autumn or floral elements for spring.
If you make a mistake, just use nail polish remover to correct it, making mirror art accessible for everyone.
Let your creations cure for 24 hours to enjoy their full beauty!
Essential Supplies for Mirror Art

Creating stunning mirror art requires a few essential supplies to guarantee your vision comes to life. Here's what you'll need:
- Clean Mirror: Start with a mirror frame that's at least 12×12 inches for ample design space.
- Acrylograph Acrylic Paint Pens: These pens from Archer & Olive provide vibrant colors and quick application, perfect for detailed designs.
- Painter's Tape: Use this for crisp lines and to prevent smudging during your outlining or geometric patterns.
Don't forget to keep paper towels on hand for quick clean-ups and confirm all your materials, especially paints and cleaners, are safe for glass. Additionally, ensuring your workspace has proper lighting control can enhance your overall painting experience.
With these supplies, you're ready to transform your mirror into a unique piece of art!
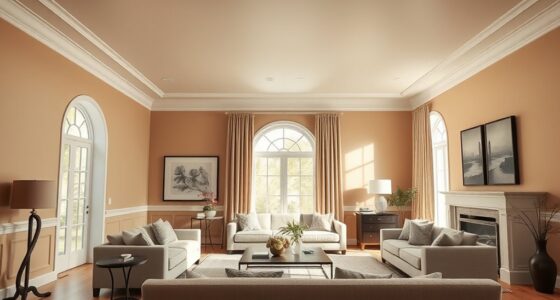
Seasonal Design Inspirations

When you think about seasonal design inspirations for your mirror paintings, consider how fall's warm color palettes can transform your space with shades like burnt orange and deep red.
In spring, vibrant floral elements in bright pinks and yellows can bring life to your art.
Don't forget to add summer accents or winter motifs to keep your designs fresh and engaging throughout the year!
Fall Color Palettes
As the leaves change and the air turns crisp, fall color palettes bring warmth and coziness into your home. To create an inviting atmosphere, consider these three elements for your mirror using art:
- Warm Hues: Deep oranges, rich browns, and muted yellows reflect the changing foliage.
- Earthy Tones: Incorporate olive green and burgundy to enhance that autumnal feel.
- Metallic Accents: Add touches of gold or copper for a glamorous contrast.
You can also embrace seasonal motifs like pumpkins and leaves, which resonate beautifully with fall.
Changing your mirror art with the seasons not only refreshes your space but also celebrates the beauty of autumn in a dynamic way. Enjoy the cozy vibes!
Spring Floral Elements
Spring brings a burst of color and life, making it the perfect time to infuse your mirrors with floral elements. You can embrace vibrant pastels and bright shades that reflect the freshness of the season.
Popular designs like tulips, daisies, and cherry blossoms can be effortlessly created using acrylic paint pens, ensuring a vivid finish. For a modern touch, try minimalistic arrangements with just three to four colors.
Layering techniques also work wonders; start with lighter shades as your base and build depth with darker hues. Remember, you can easily update your seasonal mirror art as new flowers bloom, allowing your decor to evolve with the enchanting beauty of spring.
Summer Vibrant Accents
With the arrival of summer, it's time to energize your mirror art with vibrant accents that capture the essence of the season. Here are three creative ideas to get you started:
- Bright Color Palette: Use shades of turquoise, sunny yellow, and coral to create a lively backdrop for your designs.
- Tropical Motifs: Incorporate palm leaves and sunflowers for a fun, fresh touch that screams summer.
- Layered Techniques: Start with lighter shades and gradually add darker hues for depth.
Using acrylic paint pens and stencils, you can easily swap out designs to refresh your decor.
Just remember to maintain your artwork with gentle cleaning methods, ensuring your summer mirror remains a stunning focal point throughout the season! Additionally, it's important to keep your home environment clean and fresh by using an air purifier, especially one with HEPA filters to effectively trap allergens and pollutants.
Step-by-Step Painting Techniques

To achieve stunning results when painting a mirror, start by selecting three to four complementary colors that work well together. Use light colors as base layers, then apply darker shades for inner designs, shifting to lighter shades for depth. Incorporate painter's tape for clean lines and stencils for intricate patterns.
Here's a simple guide to help you:
| Step | Action |
|---|---|
| 1. Choose Colors | Pick three to four complementary colors |
| 2. Base Layer | Apply light acrylic paint as the first layer |
| 3. Design Details | Add darker shades, then lighter for depth |
| 4. Clean Up | Use nail polish remover for mistakes |
Allow each layer to dry completely before adding details. Enjoy the process!
Finishing Touches and Maintenance
Once you've completed your mirror painting, it's important to add those final touches and guarantee proper maintenance for lasting beauty. Here are some key steps to take into account:
- Inspect for missed spots and use a fine-tip pen for detailed outlines to enhance your design.
- Remove the painter's tape while the paint is still slightly wet to avoid smudging, and clean any excess paint with a damp cloth.
- Allow your mirror art to cure for 24 hours before displaying it.
To maintain your artwork, avoid abrasive cleaners; instead, gently clean the mirror with a soft cloth.
Store painted mirrors in a cool, dry place, away from direct sunlight, to prevent fading and preserve the integrity of those vibrant colors.
Creative DIY Mirror Makeovers
Transforming a unique frame can turn an ordinary mirror into a stunning focal point in your space.
Think seasonal design inspirations that keep your decor fresh and exciting all year round.
With a bit of creativity, you can craft a mirror that reflects your personal style and adds character to any room.
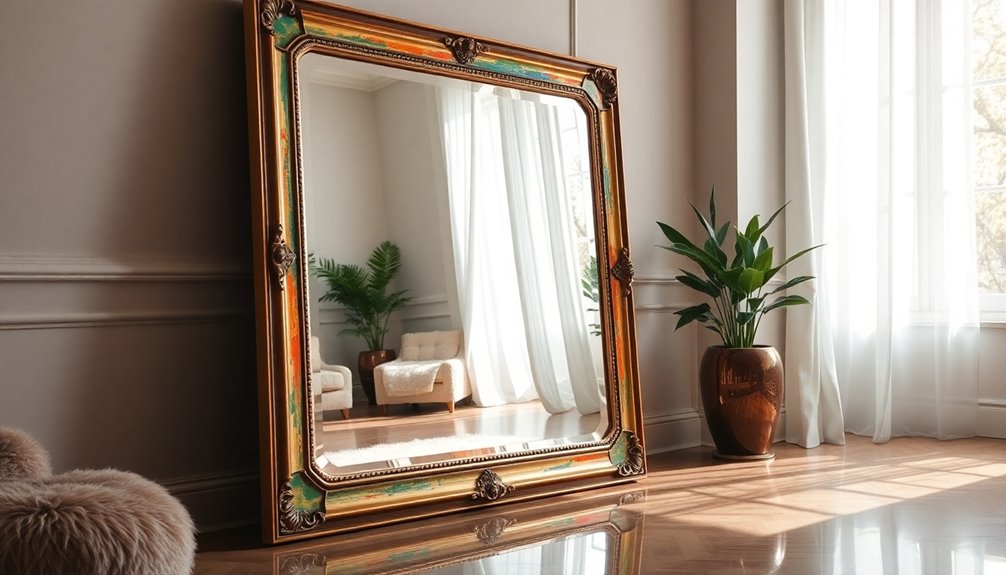
Unique Frame Transformations
A few creative frame transformations can turn an ordinary mirror into a stunning centerpiece. Here are a bunch of different ideas to inspire your next DIY project:
- Repurpose Vintage Frames: Give your mirrors a unique charm by using vintage frames that add character.
- Layering Frames: Create depth and texture by layering multiple frames of varying sizes and colors for visual interest.
- Decorative Elements: Use washi tape, stencils, or LED lights to personalize your mirror frames, making them chic and functional.
Don't forget to experiment with spray paint techniques like distressing or ombre effects to modernize traditional styles.
With these transformations, your mirrors can truly reflect your personal style and enhance any space.
Seasonal Design Inspirations
As the seasons change, your mirror can become a canvas for reflecting the beauty of each time of year. For fall, consider using warm hues and leaf motifs, while spring might inspire you to paint bright florals and pastel colors.
These seasonal design inspirations can create an inviting atmosphere in your home. Using painter's tape and stencils allows for clean lines and intricate patterns, making painting on a mirror easier than ever.
Opt for a minimalistic approach with three to four complementary colors to keep it visually appealing. Engage with the community on social media for fresh ideas, and remember to let your design cure for 24 hours for durability and vibrancy.
Transform your mirror with each season!
Unique Painting Techniques
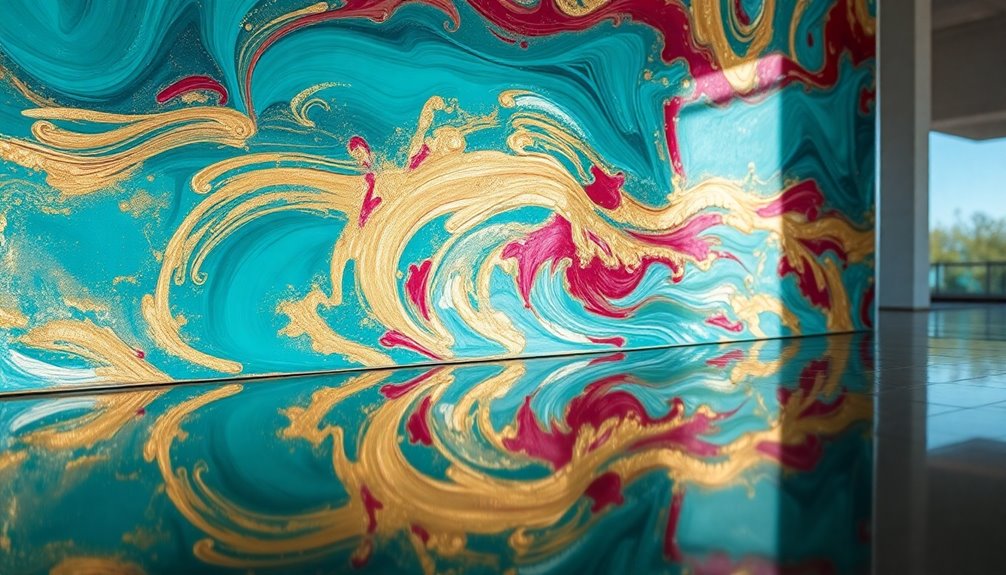
While exploring unique painting techniques for mirrors, you'll discover a variety of creative methods that can elevate your decor.
Here are three standout ideas to get you started:
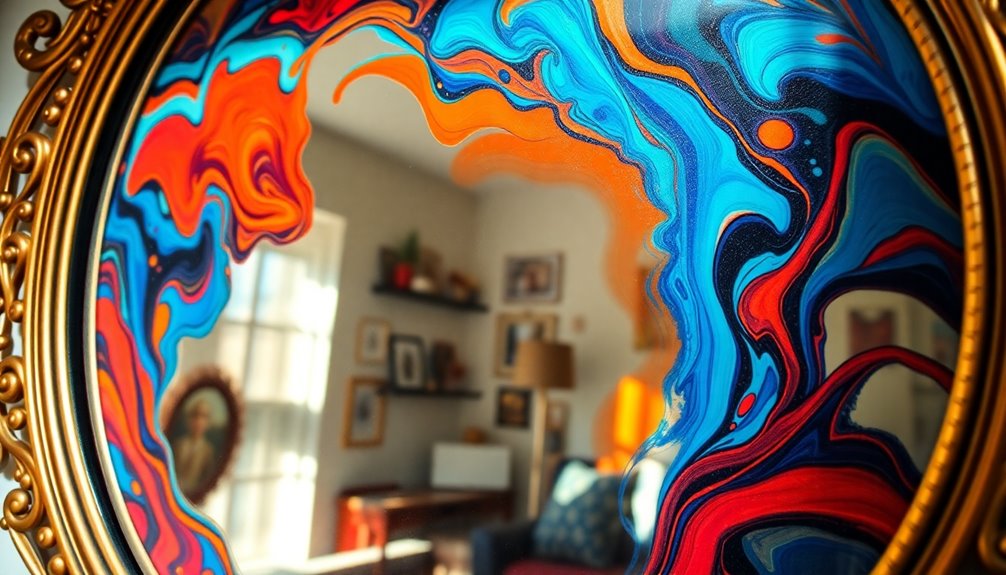
- Shaving Cream Marbling: Mix shaving cream with food coloring for a fun, textured finish that's sure to impress.
- Dirty Pour Painting: Pour layers of paint to create abstract designs that blend beautifully as they flow down the glass.
- Acrylic Paint Pens: Use these for detailed work, allowing precise application and layering of colors for intricate designs.
These unique painting techniques not only enhance the aesthetic of your mirrors but also let your creativity shine.
Immerse yourself, and let your imagination guide you!
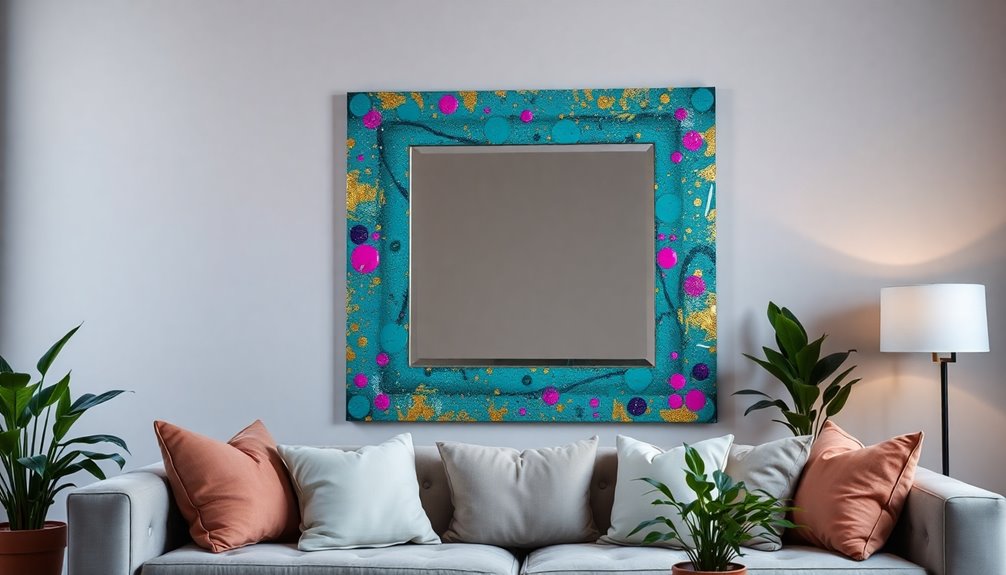
Color Scheme Considerations

Choosing the right color scheme for your mirror painting can greatly impact the overall look and feel of your space. Feel free to experiment with three to four complementary colors to create a cohesive design. Here's a quick guide to help you decide:
| Color Type | Effect |
|---|---|
| Neutral Colors | Versatile, adapts easily |
| Bold Colors | Striking focal points |
| Pastel Shades | Calming, fresh atmosphere |
| Metallic Finishes | Glamour and sophistication |
Engaging With the Community

How can connecting with the community elevate your mirror painting experience? Engaging with the community opens up countless opportunities to enhance your craft.
Here are three ways to get involved:
- Share Your Work: Use social media platforms to showcase your mirror art, gather feedback, and inspire others with your unique designs. You'll be surprised by the supportive comments yet to come!
- Join Local Groups: Participate in workshops or art groups to hone your skills and collaborate with fellow artists on projects.
- Explore Online Forums: Immerse yourself in DIY forums to exchange tips and techniques specific to mirror painting. Additionally, embracing failure in creativity can lead to innovative designs as you experiment and learn from your artistic journey.
Frequently Asked Questions
How Can I Make My Mirror More Interesting?
To make your mirror more interesting, consider incorporating seasonal themes with warm autumn hues or vibrant spring florals.
You can use painter's tape for clean lines and geometric patterns, giving it a modern touch.
Try stencils for intricate designs, or add metallic finishes and ombre effects for depth and glamour.
Finally, engage with your community on social media to share your creations and draw inspiration from fellow artists, fostering a creative exchange.
How Do You Turn a Mirror Into Art?
You might think turning a mirror into art is too complicated, but it's easier than you think!
Start by cleaning the mirror's surface and using acrylic paint pens for precision. Grab some painter's tape and stencils to create sharp designs.
Layer your colors for depth, beginning with light shades and adding darker accents.
Let your masterpiece cure for 24 hours, and you'll have a stunning piece that transforms your space effortlessly!
How to Customize Your Mirror?
To customize your mirror, start by choosing a size and shape that fits your space.
Decide on a design theme, whether it's minimalist or floral.
Use acrylic paint pens for vibrant colors and painter's tape for sharp lines.
Layer your colors, beginning with lighter shades, to add depth.
After you finish painting, let your design cure for at least 24 hours before cleaning, ensuring your artwork stays intact and looks great.
What to Paint a Mirror Frame With?
You might think painting a mirror frame is too challenging, but it's actually quite simple!
For a durable and vibrant finish, use acrylic paint. If you prefer a vintage look, chalk paint's matte finish is perfect. Spray paint is a great option for a sleek, modern appearance.
Don't forget to prime your frame for better adhesion, and seal it with a clear coat for added protection. Your mirror will look stunning in no time!
Conclusion
In the world of mirror painting, your creativity can shine like a beacon, reflecting your personal style in every brushstroke. By exploring unique techniques and seasonal inspirations, you can transform ordinary mirrors into stunning art pieces. Remember to choose color schemes that resonate with you and maintain your creations for lasting beauty. Immerse yourself in this artistic journey, and let your mirrors tell your story, illuminating your space with your own vibrant flair.