Decor
How to Clean Algae From Aquarium Decor
2025
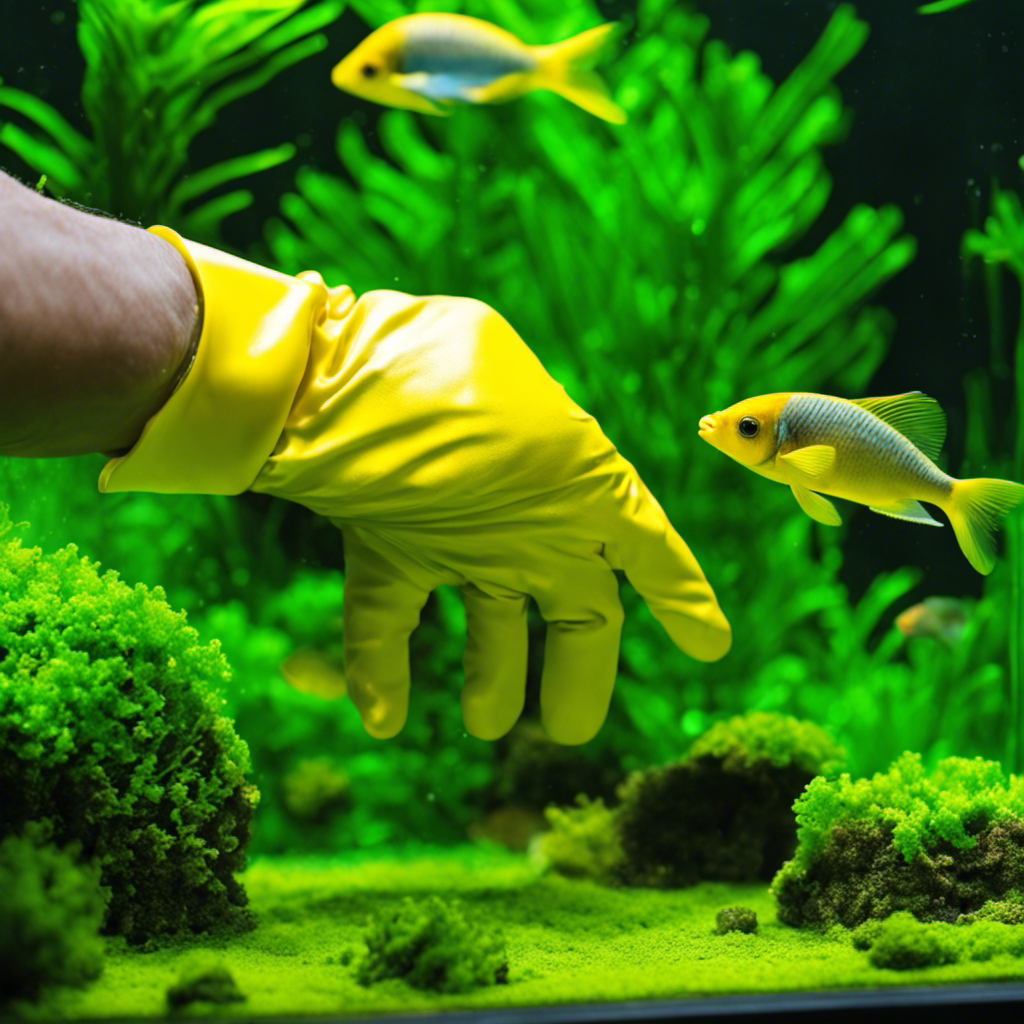
Are you tired of constantly fighting the green invasion on your aquarium decorations? No need to fret, we have a solution for you. Contrary to what many may think, removing algae from aquarium decor is not as challenging as it may appear. By utilizing the correct tools and knowledge, you can effortlessly bring your aquarium back to its original pristine state.
In this article, we will guide you through the step-by-step process of removing algae from rocks, ornaments, plants, and even glass surfaces. Say goodbye to algae and hello to a clean and healthy aquarium environment!
Key Takeaways
- Algae growth in aquariums is fueled by excess light and nutrients.
- Proper maintenance of water parameters, such as temperature and pH, is important in preventing algae growth.
- Investing in a quality filtration system helps remove excess nutrients that promote algae growth.
- Regularly cleaning and monitoring the aquarium, along with providing appropriate lighting, can prevent algae blooms.
Understanding Algae Growth in Aquarium Decor
To understand why algae grows on your aquarium decor, you’ll need to consider factors like excess light and nutrients. Algae are plant-like organisms that thrive in water environments. There are different types of algae that can grow in your aquarium, such as green algae, brown algae, and red algae.
Green algae are the most common and can form a slimy green layer on your decor. Brown algae, also known as diatoms, appear as a brownish film on the surfaces. Red algae, on the other hand, can give a reddish or purplish tinge to your decor. These different types of algae not only affect the appearance of your aquatic setup but can also impact its overall health if left unmanaged. Regular cleaning and maintenance are essential to keeping your tank free of unsightly buildup, much like how careful planning is crucial when arranging hanging flowers for wedding decor to achieve the perfect aesthetic. Whether underwater or at an event, attention to detail makes all the difference in creating a visually stunning display.
Algae growth is fueled by excess light and nutrients, such as nitrates and phosphates. To control algae growth, it is essential to regulate the lighting and nutrient levels in your aquarium.
Now that you understand the factors contributing to algae growth, let’s move on to gathering the necessary cleaning supplies.
Gathering the Necessary Cleaning Supplies
Before you start, make sure you have all the necessary cleaning supplies. Cleaning algae from aquarium decor requires specific tools to ensure a thorough and effective cleaning process.
First, you will need an algae scraper or brush to remove the algae from the surfaces of the decor. Look for a scraper or brush that is specifically designed for aquarium use, as these are often made of non-toxic materials that won’t harm your fish or plants.
Additionally, you will need a bucket or container to hold the dirty water that you’ll be removing from the aquarium. It’s important to choose a container that is clean and free of any chemicals or residues that could harm your aquarium’s ecosystem.
You can find these cleaning supplies at your local pet store, aquarium supply store, or even online.
Once you have gathered all the necessary cleaning supplies, you can move on to preparing the aquarium for cleaning by following these steps…
Preparing the Aquarium for Cleaning
When it comes to removing algae effectively from your aquarium, it is important to choose the right tools for the job. A scrub brush or algae scraper can be useful for manually removing algae from the walls and decor.
Additionally, using a gravel vacuum can help to remove any algae that may have settled on the substrate.
To prevent future algae growth, it is important to maintain proper water parameters, ensure adequate filtration, and limit the amount of light and nutrients available to the algae.
Removing Algae Effectively
One effective way to remove algae from aquarium decor is by using a scrub brush. Algae can be classified into different types, such as green algae, brown algae, and blue-green algae. Each type requires a specific approach for effective cleaning.
Green algae, for example, can be easily scrubbed off using a brush. Brown algae, on the other hand, are more stubborn and may require a more thorough scrubbing. Blue-green algae can be a bit trickier to remove and may require the use of specialized algae scrapers or brushes.
Understanding the different types of algae and their characteristics is crucial in determining the most effective cleaning methods. With the right techniques, you can ensure a clean and healthy environment for your fish and plants.
Now, let’s move on to the next section and discuss choosing the right tools for the job.
Choosing the Right Tools
To effectively choose the right tools for the job, it’s important to consider the specific needs of your aquarium. Cleaning tools come in various shapes and sizes, each designed to tackle different types of algae and aquarium decor. When selecting your cleaning tools, ensure that you have the proper equipment to safely and effectively remove algae without damaging the decor or harming the fish. Here is a table outlining some commonly used cleaning tools and their purposes:
| Cleaning Tool | Purpose |
|---|---|
| Algae scraper | Removes algae from glass and acrylic |
| Algae brush | Scrubs algae off rocks and ornaments |
| Gravel vacuum | Cleans debris from the aquarium floor |
Preventing Future Algae Growth
Implementing regular maintenance tasks, such as changing the water and monitoring nutrient levels, helps prevent future algae growth in your aquarium. By following these steps, you can effectively prevent algae bloom and maintain optimal water parameters:
-
Regular water changes: Replace a portion of the aquarium water every week to remove excess nutrients that can fuel algae growth.
-
Proper filtration: Ensure your aquarium has a well-functioning filter to remove debris and maintain water clarity.
-
Adequate lighting: Avoid excessive light exposure by using a timer and providing your aquarium with the appropriate amount of light for your plants and fish.
-
Nutrient control: Monitor and adjust the levels of nutrients, such as nitrates and phosphates, to prevent algae from thriving.
By implementing these practices, you can keep your aquarium clean and prevent future algae growth.
Now, let’s move on to the next section on removing algae from rocks and decorative ornaments.
Removing Algae From Rocks and Decorative Ornaments
When it comes to preventing algae growth in your aquarium, there are several effective methods you can employ. Regular water changes, maintaining proper filtration, and controlling the amount of light and nutrients in the tank are all essential in keeping algae at bay.
However, if you do find yourself faced with an algae problem, it’s important to know the best cleaning techniques to remove it safely and effectively. While some aquarists prefer natural solutions such as introducing algae-eating fish or manually scrubbing the affected areas, others may opt for chemical treatments that can quickly eradicate algae.
Prevention Methods for Algae
Make sure you’re regularly cleaning your aquarium decor and keeping the water quality in check to prevent algae growth.
Algae blooms can be a common issue in aquariums, but with proper prevention methods, you can keep your aquarium clean and free from excessive algae.
One of the most effective ways to prevent algae bloom is to maintain balanced water parameters, including pH, temperature, and nutrient levels.
Additionally, limiting the amount of light exposure to your aquarium can help control algae growth. You can do this by placing your aquarium away from direct sunlight or by using a timer to regulate the lighting duration.
Another method is to incorporate live plants into your aquarium setup, as they can compete with algae for nutrients.
By implementing these algae control methods, you can maintain a clean and healthy environment for your aquatic pets.
Now, let’s move on to the best cleaning techniques to remove algae from your aquarium decor.
Best Cleaning Techniques
To effectively remove algae from your aquarium, start by scrubbing the surfaces of your tank accessories using a soft brush or sponge. This will help remove the initial algae buildup and prevent it from spreading further. Once the surfaces are clean, it’s important to use the best cleaning products to ensure a thorough job.
Here are three recommended techniques:
-
Use an algae scraper: This tool is specifically designed to remove algae from glass or acrylic surfaces without scratching them. It usually has a long handle for easy reach and a sharp blade or pad to scrape off the algae.
-
Try hydrogen peroxide: This chemical solution can be effective for spot-treating stubborn algae. Dilute it with water and carefully apply it to the affected areas using a clean cloth or sponge. Be sure to follow the instructions and use it sparingly to avoid harming your fish or other aquatic life.
-
Consider professional cleaning services: If your aquarium is heavily infested with algae or you’re unsure about the best cleaning methods, it may be worth hiring a professional. They have the expertise and equipment to safely and effectively remove algae from your aquarium decor.
Natural Versus Chemical Solutions
You may be wondering which option, natural or chemical solutions, is best for removing algae from your fish tank. When it comes to cleaning algae from your aquarium decor, there are pros and cons to both natural alternatives and chemical solutions. Let’s take a closer look:
| Natural Alternatives | Pros | Cons |
|---|---|---|
| Vinegar | Effectively removes algae | May leave a lingering odor |
| Hydrogen Peroxide | Kills algae without harming fish | Can be harmful if not used properly |
| Algae-eating Fish | Provides a natural solution | May not be effective for all types of algae |
Natural alternatives like vinegar and hydrogen peroxide can be effective in removing algae, but they may have some drawbacks. On the other hand, algae-eating fish can provide a natural solution, but they may not be effective for all types of algae. Now, let’s explore how to clean algae from plastic plants and silk decorations.
Cleaning Algae From Plastic Plants and Silk Decorations
When cleaning algae from plastic plants and silk decorations in your aquarium, it’s important to gently scrub them using a soft brush. Algae can quickly accumulate on these surfaces, diminishing the aesthetic appeal of your tank and potentially harming your aquatic inhabitants.
To effectively clean algae from plastic plants and silk decorations, consider the following tips:
- Use a soft-bristled brush to gently scrub the surfaces, being careful not to damage the delicate material.
- Rinse the plants and decorations thoroughly with clean water to remove any loosened algae.
- For stubborn algae, you can soak the items in a mild bleach solution for a short period of time, followed by a thorough rinse.
- Avoid using abrasive materials or harsh chemicals, as they can damage the plants and decorations.
- Regularly inspect and clean ceramic decorations and driftwood, as algae tend to accumulate on these porous surfaces.
Now that you have learned how to clean algae from plastic plants and silk decorations, let’s move on to scrubbing algae off glass or acrylic surfaces without causing any damage.
Scrubbing Algae Off Glass or Acrylic Surfaces
Using a soft cloth or sponge, gently scrub the glass or acrylic surfaces to remove any algae buildup. Algae can be a common problem in aquariums, but understanding the different types of algae can help you prevent algae blooms and keep your tank clean and healthy.
There are several types of algae that can grow on aquarium surfaces, including green algae, brown algae, and blue-green algae. Green algae is the most common type and can easily be removed by scrubbing. Brown algae, also known as diatoms, can be more stubborn and may require a bit more effort to remove. Blue-green algae, or cyanobacteria, can be toxic to fish and should be treated promptly.
Preventing Algae Growth in Aquarium Decor
Now that you know how to scrub algae off the glass or acrylic surfaces of your aquarium, let’s talk about preventing algae growth in the first place.
Algae blooms can be unsightly and harmful to the overall health of your aquarium. To control algae growth, there are a few important factors to consider.
First, ensure that you don’t overfeed your fish, as excess food can contribute to excess nutrients in the water, promoting algae growth.
Additionally, it’s crucial to maintain proper water parameters, such as temperature, pH, and nutrient levels, as these can affect algae growth.
Another effective method is to provide adequate lighting for your aquarium, as too much or too little light can encourage algae growth.
Maintaining a Clean and Healthy Aquarium Environment
To keep your aquarium environment healthy, it’s important to regularly monitor water parameters and provide appropriate lighting.
Maintaining a clean and healthy aquarium is crucial for the well-being of your aquatic life. Here are three key steps you should follow to prevent algae blooms and control nitrate levels:
-
Regular water testing: Test the water regularly for pH levels, ammonia, nitrites, and nitrates. High nitrate levels can promote algae growth, so it’s essential to keep them in check.
-
Proper filtration: Invest in a quality filtration system that can effectively remove waste and excess nutrients from the water. This will help prevent the buildup of nitrates and reduce the chances of algae blooms.
-
Adequate lighting: Be mindful of the amount of light your aquarium receives. Excessive lighting can trigger algae growth. Provide a suitable lighting schedule, ensuring that your aquatic plants receive the necessary light for photosynthesis, while minimizing algae growth.
Frequently Asked Questions
Can I Use Bleach to Clean Algae From Aquarium Decor?
You could use bleach to clean algae from aquarium decor, but there are safer alternatives. Natural cleaning methods, such as vinegar or hydrogen peroxide, can effectively remove algae without harming your aquatic ecosystem.
How Often Should I Clean Algae off My Aquarium Decor?
To prevent algae growth on aquarium decor, it’s important to regularly clean it. Use the best tools, like algae scrapers or brushes, to remove the algae. Cleaning frequency depends on the rate of algae growth in your specific aquarium.
Can I Use Vinegar to Clean Algae off Glass or Acrylic Surfaces?
You can use vinegar to clean algae off glass or acrylic surfaces in your aquarium. Vinegar is a natural option that is effective in removing algae, but it may not be as strong as commercial algae cleaners.
What Should I Do if the Algae Keeps Coming Back After Cleaning?
If algae keeps coming back after cleaning, you can prevent its growth by controlling the conditions in your aquarium. Try natural remedies like reducing light exposure, maintaining proper water parameters, and adding algae-eating fish or snails.
Is It Safe to Use Algae-Eating Fish or Snails to Control Algae Growth in My Aquarium?
Using algae-eating fish or snails in your aquarium can be safe and effective in controlling algae growth. However, there are pros and cons to consider. It’s also possible to prevent algae without using these organisms through proper maintenance and water conditions.
Conclusion
In conclusion, cleaning algae from aquarium decor is an essential task to maintain a clean and healthy environment for your fish. By following the steps outlined in this article, you can easily remove algae from rocks, ornaments, plants, and glass surfaces.
However, some may argue that cleaning algae is a time-consuming process. While it may require some effort, the benefits of a clean and algae-free aquarium far outweigh the time spent.
Remember, prevention is key, so regularly maintaining your aquarium will help minimize algae growth.
- About the Author
- Latest Posts
Meet Katherine, the creative enthusiast at ByRetreat who infuses her boundless passion for design into every remote workspace she crafts. With an innate sense of creativity and an eye for unconventional beauty, Katherine brings a unique and inspiring perspective to the team.
Katherine’s love for design is infectious, and her ability to think outside the box sets her apart. She believes that true artistry lies in embracing a variety of styles and mixing them harmoniously to create captivating spaces. By combining different textures, colors, and patterns, Katherine weaves a tapestry of creativity that breathes life into each remote workspace.
Mardi Gras Decoration
StrongMocha News Group Unveils Berkley Vallone Website: A New Era in Interior Design

Welcome to Berkley Vallone: Where Beautiful Interiors Come to Life
StrongMocha News Group, a leader in diverse online publications, proudly announces the launch of the Berkley Vallone website, a new destination for exquisite interior design. Berkley Vallone is dedicated to transforming spaces into elegant and comfortable havens, offering a bespoke approach to interior design that reflects personal style and functionality.
With expertise in new builds, remodels, facelifts, room furnishings, and finishing touches, Berkley Vallone ensures every project is a sanctuary. The team’s commitment to quality and creativity guarantees that each space is not just a home but a reflection of the client’s unique personality and lifestyle.
“The launch of the Berkley Vallone website marks a significant milestone for StrongMocha News Group,” said Thorsten Meyer, CEO of StrongMocha News Group. “We are thrilled to offer a platform that embodies our mission to inspire and educate through high-quality content, now extending into the realm of interior design.”
The talented team at Berkley Vallone includes Founder and Lead Designer Berkley Vallone, Architectural Consultant Elliot Carter, Project Manager Sophia Nguyen, Furniture and Decor Specialist Liam Turner, Sustainability Advisor Amara Patel, Creative Director Isabella Hartwell, and Brand Storyteller Sophie Marlowe. Each member brings a unique blend of creativity and expertise, ensuring that every project is both beautiful and functional.
Explore the Berkley Vallone portfolio and discover the difference that a dedicated team can make in creating interiors that inspire and endure. From conceptualizing visionary ideas to overseeing the finest details, the team approaches every challenge with creativity, precision, and an unwavering dedication to excellence.
For those looking to build, remodel, or refresh their homes, Berkley Vallone offers a personalized journey to create dream spaces that resonate with timeless sophistication. The website invites visitors to meet the team and explore the possibilities of transforming their living environments into extraordinary spaces.
StrongMocha News Group continues to redefine the boundaries of creativity and deliver designs that resonate with timeless elegance. The launch of the Berkley Vallone website is a testament to their commitment to serving niche communities with specialized content tailored to their unique passions and needs.

Berkley Vallone Logo
About StrongMocha News Group
Established in 2007 and headquartered near Munich, Germany, StrongMocha News Group is a leading online publication providing in-depth content across diverse interests. Our mission is to inform, educate, and inspire readers through high-quality, detailed articles and reviews. With over 200 brands and magazines under our umbrella, we are committed to serving niche communities with specialized content tailored to their unique passions and needs.
- About the Author
- Latest Posts
Meet Bethia, the visionary designer at ByRetreat who brings a touch of magic to every remote workspace she creates. With a boundless imagination and an eye for beauty, Bethia is passionate about transforming ordinary spaces into extraordinary havens of creativity and comfort.
Bethia possesses a unique talent for envisioning the perfect combination of furniture, colors, and textures that harmonize seamlessly in a room. She understands that selecting furniture goes beyond mere functionality; it’s about curating pieces that evoke a sense of style and sophistication while enhancing the overall ambiance.

“Home is where the heart is,” is a popular saying. What better way to add warmth and personality to your space than with the classic beauty of wooden letters?
In this article, I’ll share my expertise on how to use wood letters in your decor, from choosing the perfect ones to arranging them creatively. Whether you’re a novice or a seasoned decorator, get ready to elevate your space with the charm and versatility of wood letters.
Key Takeaways
- Incorporate wood letters as statement pieces in a gallery wall or on a shelf for a rustic and personalized touch.
- Use wood letters to label different areas or rooms in your house for a stylish and organized look.
- Prepare wood letters for painting or staining by sanding them to ensure a smooth surface and sealing them for protection and enhanced beauty.
- Arrange wood letters in different patterns or formations to add creativity to your space and personalize them with names, initials, or meaningful quotes for unique gifts.
Choosing the Right Wood Letters for Your Decor
I’m going to find the perfect wood letters to complement my decor.
When it comes to incorporating wood letters in home accessories, there are plenty of design ideas to choose from.
One option is to use large, bold wood letters as a statement piece on a gallery wall. This can add a rustic and personalized touch to any space.
Another idea is to spell out meaningful words or phrases using smaller wood letters and display them on a shelf or mantel. This can be a great way to showcase your values or add a motivational element to your home.
Additionally, you can use wood letters to label different areas or rooms in your house, adding a stylish and organized look.
Whatever design idea you choose, wood letters are a versatile and charming addition to any home decor.
Preparing Wood Letters for Painting or Staining
Before painting or staining, I’ll sand the wood letters to ensure a smooth surface. Sanding is an important step in the preparation process as it helps to remove any rough edges or imperfections. There are different sanding techniques that can be used, depending on the type of wood and the desired finish. For softer woods, like pine, a fine-grit sandpaper is recommended to prevent any damage. Harder woods, such as oak or mahogany, may require a coarser grit to effectively smooth the surface. After sanding, it’s important to seal the wood to protect it from moisture and give it a finished look. There are various sealing options available, including clear varnish, polyurethane, or wood stain. These options not only provide protection but also enhance the natural beauty of the wood.
| Sanding Techniques | Sealing Options |
|---|---|
| Fine-grit sandpaper for soft woods | Clear varnish |
| Coarse-grit sandpaper for hard woods | Polyurethane |
| Sanding block for even sanding | Wood stain |
| Sand in the direction of the wood grain |
Creative Ways to Arrange Wood Letters in Your Space
To add a touch of creativity to your space, try arranging the wood letters in different patterns or formations.
Wood letter crafts for kids are a great way to introduce them to the world of DIY projects while also fostering their creativity.
Personalized wood letter gifts are another popular option, allowing you to customize the letters with names, initials, or meaningful quotes.
You can arrange them on shelves or tables as standalone decor pieces, or incorporate them into larger art installations.
Get creative with the arrangements – stack them, stagger them, or even create a word puzzle by scattering the letters and challenging your guests to put them together.
Adding wood letters to gallery walls and shelves adds a unique and personalized touch to your space.
Adding Wood Letters to Gallery Walls and Shelves
I love how adding wood letters to gallery walls and shelves instantly adds a unique and personalized touch to my space. It’s amazing how a simple arrangement of letters can transform a plain wall into a stunning focal point.
Here are three ways I love to incorporate wood letters in my decor:
-
Arranging wood letters on mantels: By spelling out meaningful words or phrases on my mantel, I create a warm and inviting atmosphere in my living room. It’s a great way to showcase my personality and make a statement.
-
Incorporating wood letters in nursery decor: Wood letters are perfect for creating a personalized space for my little one. I can spell out their name or inspirational words, adding a touch of charm to the nursery.
-
Adding wood letters to gallery walls: When creating a gallery wall, wood letters are a fantastic addition. I can mix and match different sizes and fonts to create an eye-catching display that reflects my style.
By incorporating wood letters in these ways, I can infuse my space with character and make it truly my own.
Now, let’s talk about how to maintain and clean wood letters for longevity.
Maintaining and Cleaning Wood Letters for Longevity
One way I’ve found helpful in maintaining and cleaning my wood letters for longevity is by using a soft cloth and a gentle cleanser.
Proper care is essential in extending the lifespan of wood letters. When cleaning, it’s important to avoid harsh chemicals or abrasive materials that can damage the delicate surface of the wood. Instead, opt for a mild cleanser specifically designed for wood surfaces.
Gently wipe the letters with the soft cloth, being careful not to apply too much pressure. This will prevent scratching or chipping of the wood.
Additionally, it’s crucial to avoid exposing the letters to excessive moisture or extreme temperatures, as these can cause warping or cracking.
Frequently Asked Questions
How Do I Choose the Right Size of Wood Letters for My Decor?
When choosing the right size of wood letters for my decor, I consider the size of the space and the desired visual impact. I also research different paint or stain techniques to effectively customize the letters.
Can I Use Any Type of Paint or Stain on Wood Letters, or Are There Specific Products I Should Use?
I’ve found that using the right type of finishes for wood letters is crucial. There are different products out there, but I recommend using specific paints and stains designed for wood.
Are There Any Unique or Unconventional Ways to Arrange Wood Letters in a Space?
There are countless possibilities for unique arrangements and unconventional placements of wood letters in a space. You can experiment with different sizes, orientations, and even incorporate them into unexpected objects or furniture. Get creative!
How Can I Securely Attach Wood Letters to a Gallery Wall or Shelf?
To securely attach wood letters to a gallery wall or shelf, I recommend using small screws or adhesive strips. For a unique twist, you could also try suspending the letters from clear fishing line for a floating effect.
What Are Some Tips for Preventing Dust Buildup and Keeping Wood Letters Looking Their Best Over Time?
To prevent dust buildup and keep wood letters looking their best over time, I recommend regularly dusting them with a soft cloth or using a gentle brush. Applying a thin coat of furniture polish can also help maintain their appearance.
Can Wood Letters be Incorporated into Rustic Decor?
Yes, wood letters can definitely be incorporated into rustic decor ideas. They add a charming and natural touch to any space, whether it’s a cozy cabin or a country farmhouse. You can use them to spell out words or simply as decorative accents on shelves or mantels.
Conclusion
In conclusion, wood letters are a versatile and stylish addition to any decor. Not only can they be customized to fit your personal style, but they also add a unique touch to your space.
Did you know that incorporating wood elements into your interior design can reduce stress levels by up to 30%?
So, why not give wood letters a try and enjoy the benefits of a calming and beautiful environment.
- About the Author
- Latest Posts
Meet Katherine, the creative enthusiast at ByRetreat who infuses her boundless passion for design into every remote workspace she crafts. With an innate sense of creativity and an eye for unconventional beauty, Katherine brings a unique and inspiring perspective to the team.
Katherine’s love for design is infectious, and her ability to think outside the box sets her apart. She believes that true artistry lies in embracing a variety of styles and mixing them harmoniously to create captivating spaces. By combining different textures, colors, and patterns, Katherine weaves a tapestry of creativity that breathes life into each remote workspace.
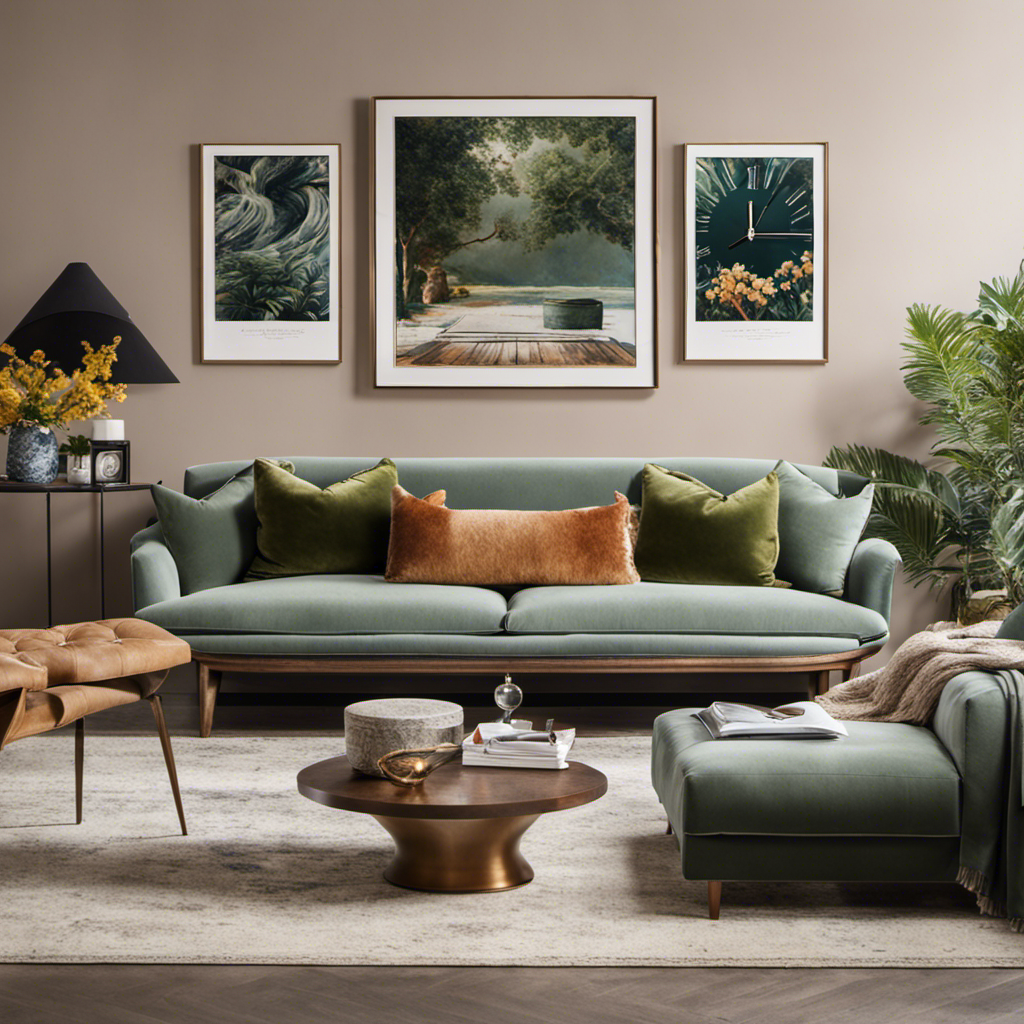
Have you ever thought about what kind of decoration to hang above your TV to really make it stand out in your living room? Look no further! In this article, we will discuss various options, sizes, and unique ideas to assist you in finding the ideal piece.
Whether you’re into framed art, wall-mounted shelves, or even mirrors, we’ve got you covered.
So, sit back, relax, and get ready to transform your TV area into a stylish and eye-catching space.
Key Takeaways
- Consider the size of the wall space above your TV when choosing decor
- Hang framed art or photographs to add a personal touch
- Use wall-mounted shelves or cabinets to create a functional and stylish display
- Incorporate mirrors to add visual interest and create the illusion of a larger room
Choosing the Right Size
You should consider the size of the wall space above your TV when choosing the right decor. Proper placement is key to creating a visually appealing and balanced look in your living room.
The size of the wall space will determine the scale of the decor you choose. If the space is small, opt for smaller pieces such as framed artwork or a collection of smaller prints. This will prevent the decor from overwhelming the TV and creating a cluttered look.
On the other hand, if you’ve a large wall space, you can go for a larger statement piece or create a gallery wall with multiple pieces. When selecting the decor, also consider choosing complementary colors that will enhance the overall aesthetic of the room.
For example, if your TV is black, consider adding pops of color through your decor to create visual interest. By considering the size of the wall space and choosing complementary colors, you can create a cohesive and visually pleasing look above your TV.
Framed Art and Photographs
Hang some framed art or photographs to add a personal touch to your TV wall. By incorporating canvas prints or vintage posters, you can create a unique and stylish focal point that complements your television. These pieces of artwork not only enhance the aesthetics of your space but also reflect your personality and interests.
To help you choose the perfect artwork, consider the size and style that will best suit your TV wall. For instance, if you’ve a large television, opt for a statement piece or a gallery wall of smaller frames. On the other hand, for a smaller TV, a single oversized canvas print can make a bold statement.
Now, let’s explore how wall-mounted shelves and cabinets can further enhance the functionality and style of your TV wall.
Wall-mounted Shelves and Cabinets
Place a few wall-mounted shelves or cabinets around your TV to create additional storage space for your electronics and decor items. Floating shelves are a great option for this, as they provide a sleek and modern look. You can arrange them in a symmetrical or asymmetrical pattern, depending on your personal style. Consider creating a gallery wall above your TV by mixing and matching different-sized shelves and incorporating photographs, artwork, and decorative items. This won’t only add visual interest but also allow you to showcase your favorite pieces. Use the shelves to display books, plants, or even small sculptures.
The possibilities are endless! With the addition of wall-mounted shelves and cabinets, you can optimize the space around your TV and transform it into a stylish and functional area.
Now, let’s move on to another great option for enhancing your TV wall: mirrors and decorative mirrors.
Mirrors and Decorative Mirrors
One way to add visual interest to your TV wall is by incorporating mirrors and decorative mirrors. Mirrors not only enhance the aesthetics of your space but also create the illusion of a larger room. Here are three ideas to inspire you:
-
Wall sconces and lighting fixtures: Install wall sconces on either side of the mirror to create a balanced and stylish look. The soft glow of the lights won’t only illuminate your TV wall but also add a cozy ambiance to the room.
-
DIY wall decor ideas: Get creative and make your own unique mirror designs. You can use different shapes, sizes, and frames to match your personal style. Consider adding embellishments like beads or paint to make your mirrors truly one-of-a-kind.
-
Grouped mirrors: Create a captivating focal point by grouping various mirrors together. Mix and match different sizes and shapes for an eclectic and eye-catching display. Play around with the arrangement until you find a configuration that suits your taste.
With these mirror ideas, your TV wall will become an artful and captivating centerpiece in your living space.
Creative Display Ideas
Get inventive with your display by arranging various decorative objects in a unique and eye-catching way. When it comes to displaying decor above your TV, there are plenty of display techniques and alternative options to explore.
One creative idea is to create a gallery wall above your TV. Mix and match different sized frames and artwork to add visual interest.
Another option is to use floating shelves and arrange a collection of decorative items, such as vases, candles, and small plants. This not only adds depth to your display but also gives you the flexibility to switch out items whenever you want.
If you want to go for a minimalist look, consider installing a sleek floating ledge and placing a few statement pieces on it.
The key is to experiment with different arrangements until you find the perfect display that reflects your style and personality.
Frequently Asked Questions
Can I Use a Large Mirror as a Decorative Piece Above My Tv?
Yes, you can definitely use a large mirror as a decorative piece above your TV. It adds a touch of elegance and reflects light, making the room feel brighter. Consider incorporating plants and string lights to enhance the display even more.
What Are Some Creative Ways to Display Family Photos Above the Tv?
Get creative with your family photos above the TV! Try a DIY photo gallery with eclectic frames, mix sizes and shapes for visual interest. Showcase your loved ones in a unique and personal way.
How Do I Choose the Right Size of Artwork to Hang Above My Tv?
To choose the right size of artwork above your TV, consider the dimensions of the TV and the wall space. Measure the width of the TV and leave some space on each side. Hang the artwork at eye level for optimal viewing.
Are There Any Specific Guidelines for Arranging Wall-Mounted Shelves and Cabinets Around the Tv?
Arranging a gallery wall around the TV? Remember, balance is key. Start with larger pieces in the center and build outwards. As for floating shelves, mix decorative items with practical storage to create a stylish and functional display.
Can I Use a TV Stand Instead of Wall-Mounting the TV, and What Decor Options Are Available for That Setup?
You can opt for a TV stand instead of mounting the TV. When it comes to decor, minimalist options work well. Consider sleek shelves, art pieces, or plants to create a stylish and clutter-free look.
– What Type of Decor Would Be Suitable to Hang Above Corbels?
When choosing decor to hang above corbels, consider the projection distance for corbels to ensure proper balance and support. Artwork, mirrors, or decorative shelves can complement the corbels while adding a touch of elegance to the space. Select pieces that harmonize with the surrounding decor and highlight the architectural details.
Conclusion
In conclusion, when it comes to choosing the perfect decor above your TV, the possibilities are endless.
Whether you opt for a beautifully framed artwork, a sleek wall-mounted shelf, or a captivating decorative mirror, the key is to select something that complements your style and enhances the overall aesthetics of the room.
Let your imagination soar and create a visual masterpiece that will captivate and inspire all those who enter your space.
- About the Author
- Latest Posts
Meet Bethia, the visionary designer at ByRetreat who brings a touch of magic to every remote workspace she creates. With a boundless imagination and an eye for beauty, Bethia is passionate about transforming ordinary spaces into extraordinary havens of creativity and comfort.
Bethia possesses a unique talent for envisioning the perfect combination of furniture, colors, and textures that harmonize seamlessly in a room. She understands that selecting furniture goes beyond mere functionality; it’s about curating pieces that evoke a sense of style and sophistication while enhancing the overall ambiance.
-

 Decor2 weeks ago
Maximalist Decor Explained: Embrace More Style
-

 Vetted3 weeks ago
15 Best Foot Massagers for Neuropathy to Soothe Your Feet and Relieve Discomfort
-

 Vetted4 weeks ago
15 Best Sports Laundry Detergents for Keeping Your Activewear Fresh and Clean
-

 Vetted4 weeks ago
15 Best Tall Toilets for Seniors That Combine Comfort and Safety
-
 Vetted6 days ago
15 Best Cleaners for Fiberglass Showers to Keep Your Bathroom Sparkling Clean
-
 Vetted2 weeks ago
15 Best Organic Pest Control Solutions for a Naturally Pest-Free Home
-
 Decor3 weeks ago
Where the Wild Things Are Nursery Decor
-

 Architecture Home Styles4 weeks ago
Exploring the Difference Between Traditional and Contemporary Styles


