Valentine's Day Decoration
How Do You Make a Backdrop for a Budget?
2025
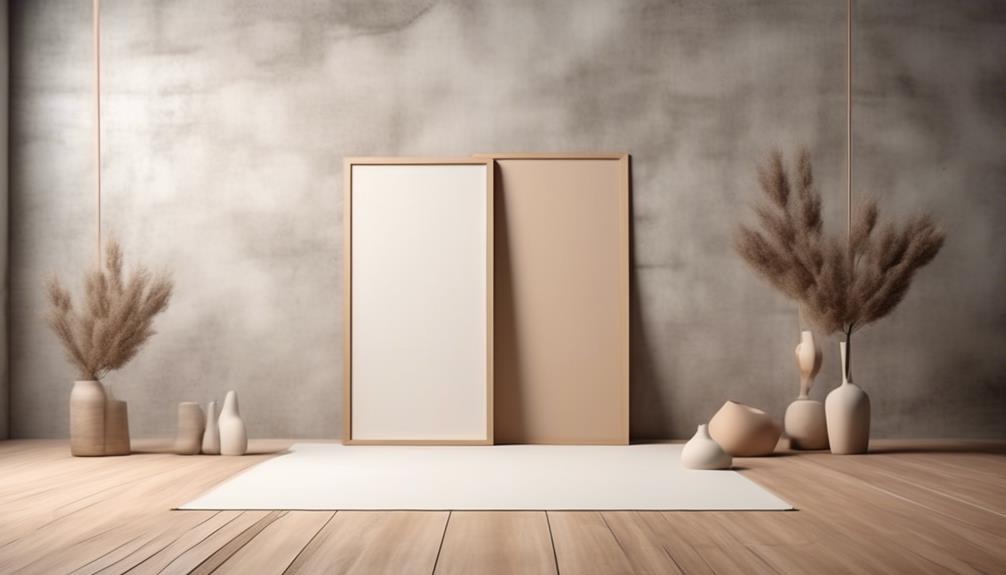
Ever pondered the secret to crafting an impressive background without splurging? Worry no more, as we’ve got the solution for you. By leveraging a bit of inventiveness and ingenuity, you can turn any area into an enchanting scene that’s sure to mesmerize your viewers.
So, whether you're planning a wedding, a photo shoot, or a theatrical production, join us as we unravel the secrets to crafting a budget-friendly backdrop that will make a lasting impression on everyone who beholds it.
Key Takeaways
- Choose affordable materials such as fabric, paper, or natural elements like branches or flowers
- Design the backdrop with a complementary color scheme and experiment with lighting techniques
- Add creative elements like DIY backdrops, murals, or props to enhance the backdrop
- Set up the backdrop considering lighting setups, location, and securing the material to a frame
Choosing the Right Materials
When it comes to creating a budget backdrop, selecting the perfect materials is an essential step in achieving a stunning and cost-effective result. We understand that you want to create a backdrop that's both visually appealing and wallet-friendly. Luckily, there are plenty of cost-effective options and DIY alternatives available.
One popular cost-effective option is using fabric. You can easily find affordable fabrics at your local craft store or even repurpose old bed sheets or curtains. Look for materials that are lightweight and easy to work with. Consider using fabrics with different textures or patterns to add depth and interest to your backdrop.
Another DIY alternative is using paper. You can create a backdrop using colored paper or even butcher paper. It's a versatile option that allows you to get creative with different shapes and designs. Plus, it's budget-friendly and readily available.
If you're feeling adventurous, consider using natural elements like branches or flowers to create a unique backdrop. You can gather branches from your backyard or local park and arrange them in a visually pleasing way. This not only adds a touch of nature to your backdrop but also saves you money.
Designing Your Backdrop
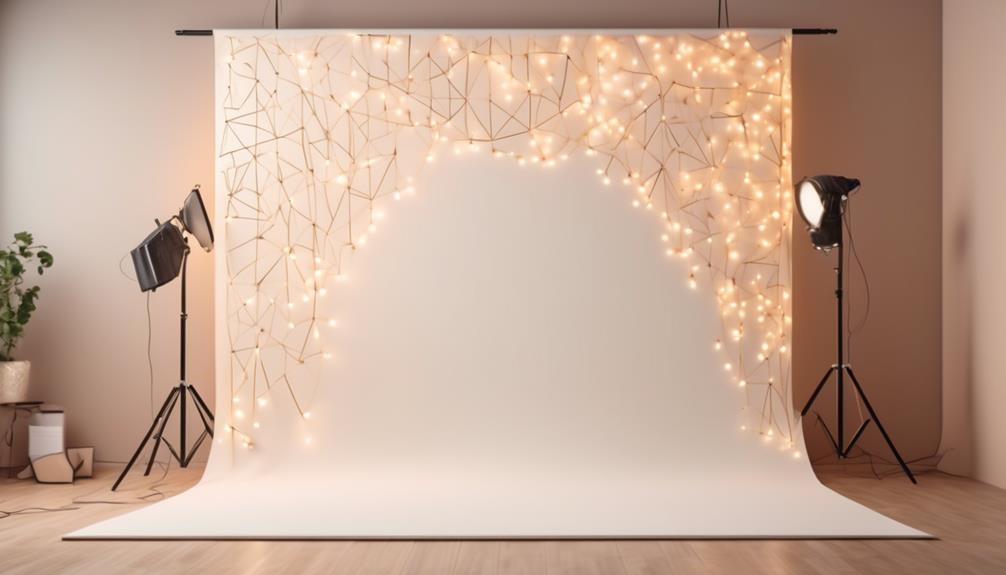
Now that you've chosen the perfect materials for your budget backdrop, it's time to unleash your creativity and dive into the exciting process of designing it. Designing your backdrop is where the magic happens, where you can truly transform your space into a stunning visual display.
One of the first things to consider is the color scheme. Think about the mood and atmosphere you want to create. Are you going for something vibrant and energetic or something calm and soothing? Choose colors that evoke the desired emotions and complement the theme of your event or project.
Next, let's talk about lighting techniques. Lighting can make or break your backdrop, so it's essential to get it right. Consider using different types of lighting to create depth and dimension. Play with shadows and highlights to add texture and interest. You can use spotlights to draw attention to specific areas or create a soft, diffused glow with fairy lights. Experiment with different angles and intensities to achieve the desired effect. Don't be afraid to get creative and think outside the box.
Adding Creative Elements
To infuse your budget backdrop with a touch of creativity, consider incorporating unique and imaginative elements that will captivate your audience.
One way to achieve this is by creating DIY backdrops using materials that are affordable and easily accessible. For example, you can use large sheets of colorful fabric or patterned wallpaper to create a backdrop that adds visual interest to your space. If you're feeling particularly crafty, you can also try your hand at painting a mural or creating a collage using old magazines and newspapers.
Another way to add creative elements to your backdrop is by using affordable props. Think outside the box and consider items that you already have or can easily find at thrift stores or flea markets. Vintage suitcases, old books, or even potted plants can bring depth and character to your backdrop.
Additionally, you can experiment with different lighting techniques to create a visually stunning effect. Fairy lights or paper lanterns can add a magical touch, while spotlights can create dramatic shadows and highlights.
Setting Up Your Backdrop

Once you have gathered all of your creative elements, it's time to set up your budget backdrop and bring your vision to life. Setting up your backdrop doesn't have to be complicated or expensive. With a little resourcefulness and some DIY skills, you can create a stunning backdrop that will make your photos or videos stand out.
Here are some practical tips to help you get started:
- Lighting techniques: Experiment with different lighting setups to create the desired atmosphere for your backdrop. Use softbox lights for a diffused and even light, or try using colored gels to add a unique touch to your backdrop.
- DIY backdrop stands: Instead of purchasing expensive backdrop stands, consider making your own. Use PVC pipes and connectors to create a sturdy and adjustable frame. Attach your backdrop material, whether it's fabric or paper, to the frame using clamps or clips.
- Consider the space: Before setting up your backdrop, take into account the available space and the look you want to achieve. Choose a location with enough room for your setup and make sure it complements the theme or style you have in mind.
- Test and adjust: Once your backdrop is set up, take some test shots or film a short video to see how it looks on camera. Make any necessary adjustments to the lighting, positioning, or backdrop material to achieve the desired effect.
Budget-Friendly Backdrop Ideas
Looking to create a stunning backdrop on a budget? Here are some creative and resourceful ideas to help you achieve the desired effect without breaking the bank.
DIY backdrops are a fantastic way to add a personal touch to your event while saving money. One inexpensive backdrop idea is to use fabric. Find some colorful or patterned fabrics at a local thrift store or repurpose old bedsheets to create a unique and eye-catching backdrop.
Another option is to use paper. You can create a backdrop by cutting out different shapes or designs from colored construction paper and arranging them in a visually appealing pattern.
If you want a more natural look, consider using greenery or flowers. You can create a backdrop by hanging vines or arranging potted plants in an attractive manner.
Finally, don't forget about lighting. String lights or fairy lights can instantly transform any backdrop into a magical setting.
With a little creativity and resourcefulness, you can create a stunning backdrop without spending a fortune. So, get ready to impress your guests with these budget-friendly backdrop ideas.
Frequently Asked Questions
How Do I Transport and Store My Backdrop After It's Been Used?
When it comes to transportation tips and storage solutions for your backdrop, we've got you covered.
After it's been used, you'll want to ensure it's safe and protected. Consider rolling it up tightly and securing it with elastic bands to minimize any potential damage.
Find a durable bag or container to store it in, keeping it away from direct sunlight and moisture.
Are There Any Safety Precautions I Should Take When Setting up My Backdrop?
When it comes to setting up our backdrop, safety precautions are key. We want to ensure a secure installation that keeps everyone safe. So, before diving into the creative process, it's important to consider a few things.
First, make sure the backdrop is properly supported and stable. Use sturdy materials and secure them tightly.
Additionally, check the surroundings for any potential hazards that could affect the backdrop.
Can I Use a Backdrop for Outdoor Events, or Is It Only Suitable for Indoor Use?
Outdoor events can definitely benefit from a backdrop! While backdrops are commonly associated with indoor use, there are ways to make them suitable for the great outdoors.
Weatherproofing backdrops is key to ensuring they can withstand the elements. By using materials like outdoor fabric or waterproof paint, you can protect your backdrop from rain or sun damage.
Don't let the weather limit your creativity – with a little preparation, your outdoor event can have a stunning backdrop that sets the perfect atmosphere.
How Can I Incorporate Lighting Into My Backdrop Design?
When it comes to creating a backdrop on a budget, incorporating lighting techniques can really elevate the design. By strategically placing lights, you can create depth and bring attention to certain elements of the backdrop.
One way to do this is by using spotlights or uplighting to highlight specific areas. This technique can be especially effective if you have certain focal points or props that you want to draw attention to. By placing a spotlight or uplight at the base of these elements, you can create a dramatic effect and make them stand out.
Another option is to use string lights or fairy lights to add a whimsical touch. These types of lights are typically inexpensive and easy to find at craft stores or online. You can drape them across the backdrop or intertwine them with any props or decorations you have. The soft, twinkling glow of the lights can create a magical ambiance and make your backdrop feel more enchanting.
Don't underestimate the power of lighting when it comes to making your backdrop stand out on a budget. With some strategic placement and creative use of different types of lights, you can transform a plain backdrop into something truly eye-catching and memorable.
What Are Some Tips for Maintaining and Cleaning My Backdrop to Ensure Its Longevity?
When it comes to cleaning, maintaining, and storing our backdrops, we've learned a few tips along the way.
First, choosing the right materials is key to ensuring durability. Opt for washable fabrics and avoid delicate materials that may tear easily.
Regularly vacuum or gently spot clean your backdrop to keep it looking fresh.
When storing, roll it up instead of folding to prevent creases.
Conclusion
In the end, creating a budget-friendly backdrop is all about thinking outside the box and using what you have. Who needs expensive materials when a little creativity can go a long way?
So, grab those old bed sheets, repurpose some thrift store finds, and let your imagination run wild. With a little resourcefulness and a touch of irony, you'll have a backdrop that not only fits your budget but also adds depth and complexity to your artistic endeavors.
Happy crafting!
- About the Author
- Latest Posts
Introducing Ron, the home decor aficionado at ByRetreat, whose passion for creating beautiful and inviting spaces is at the heart of his work. With his deep knowledge of home decor and his innate sense of style, Ron brings a wealth of expertise and a keen eye for detail to the ByRetreat team.
Ron’s love for home decor goes beyond aesthetics; he understands that our surroundings play a significant role in our overall well-being and productivity. With this in mind, Ron is dedicated to transforming remote workspaces into havens of comfort, functionality, and beauty.
When planning a Valentine’s Day dinner, imagine the setting: soft candlelight flickering, the tempting scent of a thoughtfully prepared meal wafting through the air, and the soothing sound of romantic music playing in the background.
But how do we ensure that this evening is truly special? Join us as we explore the art of crafting an unforgettable Valentine's Day dinner experience, from selecting the perfect menu to orchestrating the ideal ambiance.
Key Takeaways
- Consider wine pairings and experiment with different seasoning techniques to enhance the flavors of the meal.
- Create a romantic ambiance with decorations such as candles, rose petals, and soft lighting.
- Personalize the dining experience with personalized elements like custom-engraved wine glasses and handwritten love notes.
- Use music and entertainment to set the mood, evoke emotions, and create a memorable evening.
Choosing the Perfect Menu
Let's craft a delightful and romantic menu for your Valentine's Day dinner. When it comes to setting the mood, perfect wine pairings can elevate the entire dining experience. Consider a velvety pinot noir to complement a succulent filet mignon or a crisp sauvignon blanc to enhance the flavors of a delicate seafood dish. The right wine can enhance the flavors and create a sensory experience that adds an intimate touch to your evening.
Now, let's talk about the most anticipated part of any meal – dessert. For a Valentine's Day dinner, the dessert options should be nothing short of decadent and indulgent. How about a rich chocolate lava cake served with a side of fresh raspberries? The combination of luscious chocolate and tart fruit can tantalize the taste buds and add a touch of sweetness to your romantic evening.
As you plan your Valentine's Day dinner, keep in mind that the perfect wine pairings and delicious dessert options can truly elevate the experience and create an intimate atmosphere for you and your loved one. Cheers to a delightful and romantic evening!
Setting the Mood With Decorations
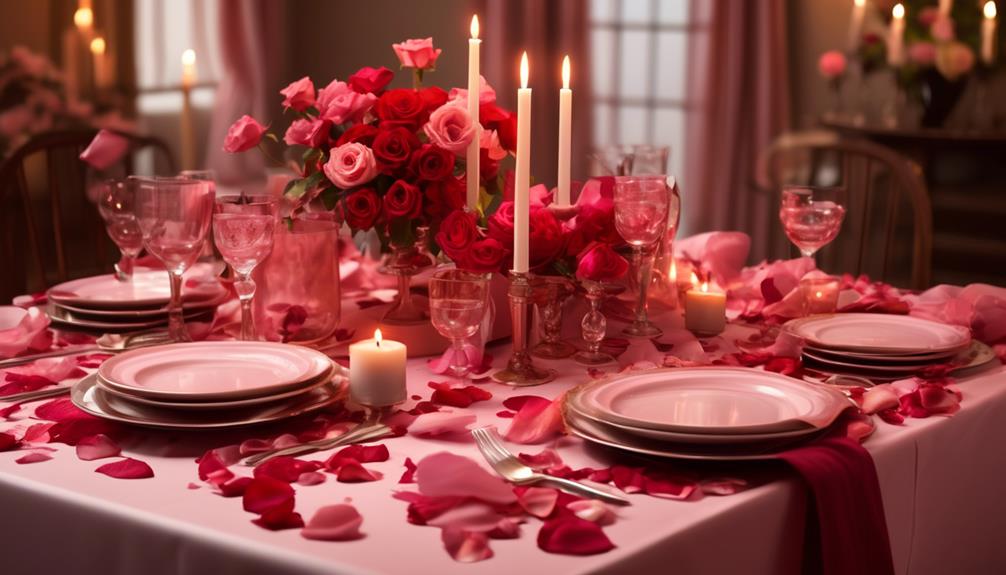
Enhancing the ambiance for our Valentine's Day dinner, we can now focus on setting the mood with decorations. Creating romantic tablescapes and elegant table settings is essential for a cozy and intimate atmosphere. Consider using soft, dim lighting with candles to add a warm glow to the room. You could also sprinkle rose petals on the table or around the dining area for a touch of romance.
DIY decor can add a personal and heartfelt touch to the evening. Crafting homemade centerpieces or personalized place cards can show your thoughtfulness and creativity. Consider incorporating themed decorations that reflect your shared interests or special memories, such as incorporating elements from your first date or a favorite vacation spot.
Don't forget the power of music in setting the mood. Create a playlist of your favorite love songs or songs that hold sentimental value for both of you. Soft melodies can enhance the romantic ambiance and create a memorable dining experience.
Creating a Cozy Ambiance
To create a cozy ambiance for our Valentine's Day dinner, we'll focus on incorporating warm lighting and comfortable seating to set the stage for an intimate and romantic evening.
- Dimmer Switches: Adjust the lighting to a warm, soft glow using dimmer switches or candles to create a cozy and intimate atmosphere.
- Candlelight: Place candles strategically around the room to add a touch of romance and warmth.
- Soft Textiles: Incorporate soft, plush throws or cushions on the chairs to provide comfort and encourage lingering conversations.
- Subtle Music: Play soft, soothing music in the background to enhance the intimate setting without overpowering the conversation.
Selecting Romantic Music

Selecting romantic music creates an atmosphere that enhances the mood and sets the tone for a memorable Valentine's Day dinner. The right playlist can evoke deep emotions and intensify the connection between you and your partner. When curating a romantic playlist, it's important to choose mood-setting songs that resonate with both of you. Whether it's soulful classics, acoustic melodies, or modern ballads, the music should reflect your shared memories and feelings. Here's a carefully curated selection of romantic songs to add to your playlist:
| Song Title | Artist |
|---|---|
| "Unchained Melody" | The Righteous Brothers |
| "At Last" | Etta James |
| "Can't Help Falling in Love" | Elvis Presley |
These timeless classics are perfect for setting a romantic ambiance and igniting the spark of love. Remember, the key is to choose songs that hold special meaning for both of you, evoking cherished memories and deepening your bond. As the music fills the air, let it create a backdrop for your intimate conversations and loving gazes, making this Valentine's Day dinner truly unforgettable.
Planning the Seating Arrangement
As we consider planning the seating arrangement for our Valentine's Day dinner, we aim to create a warm and inviting atmosphere that encourages meaningful conversations and shared moments.
- Guest Preferences: Understanding our guests' preferences is essential in creating a comfortable and enjoyable dining experience. Consider seating guests with similar interests or complementary personalities together to facilitate engaging conversations.
- Table Arrangements: When planning the seating, we should consider the table arrangements that best suit the dynamics of our guests. For couples, it's ideal to seat them together to enhance the romantic ambiance. For larger groups, a round table can foster inclusivity and interaction.
- Intimacy and Privacy: For those seeking privacy, consider placing them in a more secluded area or at a table with a bit more distance from other guests. This allows for intimate conversations without feeling crowded.
- Special Considerations: Be attentive to any special considerations, such as dietary restrictions or physical limitations, and accommodate them when planning the seating arrangement. This thoughtful gesture ensures that all guests feel valued and comfortable throughout the evening.
Deciding on a Color Scheme
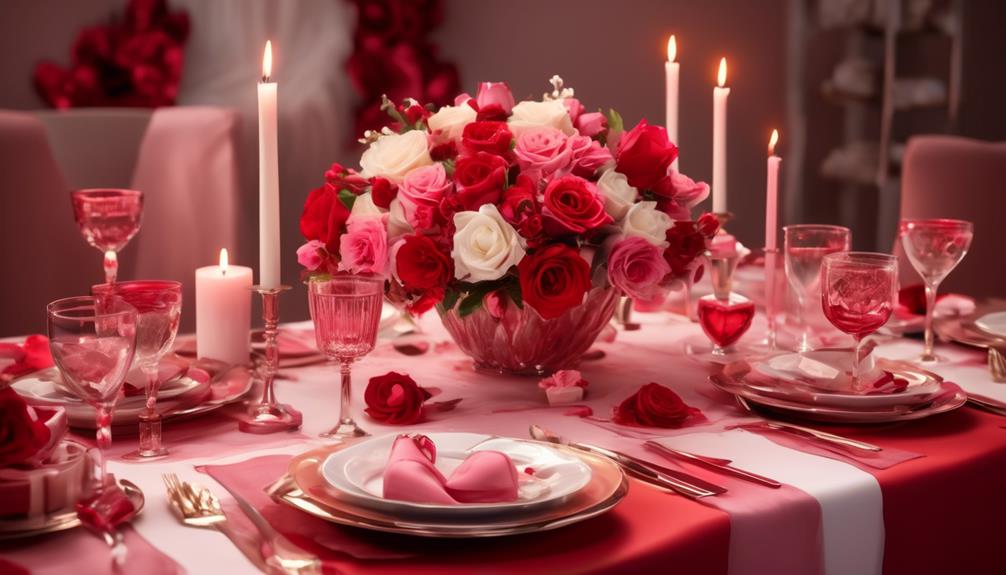
Considering our guests' preferences and the ambiance we wish to create, we'll choose a color scheme that complements the romantic atmosphere of our Valentine's Day dinner. When choosing floral arrangements, we'll opt for colors that evoke passion and love, such as rich reds, soft pinks, and lush greens. These hues will infuse the space with warmth and intimacy, setting the stage for a cozy and romantic evening.
Additionally, selecting linens in complementary shades will enhance the overall aesthetic, tying the color scheme together seamlessly. Soft, elegant fabrics in shades of ivory, blush, or deep burgundy can add a touch of sophistication and luxury to the dining experience. By carefully coordinating the floral arrangements and linens, we can create a visually stunning backdrop for our Valentine's Day dinner, elevating the overall ambiance and leaving a lasting impression on our guests.
With the right color scheme, we can set the tone for a truly enchanting and memorable evening filled with love and romance.
Crafting Personalized Place Settings

To personalize our place settings for the Valentine's Day dinner, we'll incorporate handcrafted name cards that reflect the individual style and personality of each guest. Personalized tablescapes add a charming touch, creating an intimate and thoughtful atmosphere.
Here's how we'll elevate our table settings:
- DIY Name Cards: Using craft paper, calligraphy pens, and decorative elements, we'll craft unique name cards for each guest. These will be tailored to their personalities and tastes, adding a personal touch to their place setting.
- Customized Tableware: We'll incorporate personalized elements such as monogrammed napkins or custom-engraved wine glasses. These details will create a sense of individuality and make each guest feel special.
- Handmade Table Decorations: Small handmade trinkets or mini bouquets at each setting will add an extra layer of personalization. Guests will appreciate the effort and thought put into these bespoke decorations.
- Special Touches: We'll also include personalized notes or small gifts at each place setting, tailored to the preferences of our guests. These gestures will show our thoughtfulness and consideration for their individual tastes and interests.
Preparing Delicious Appetizers

Crafting delectable appetizers is a delightful way to kick off our Valentine's Day dinner and set the stage for a memorable culinary experience. The appetizer presentation is key to igniting the senses and building anticipation for the meal to come.
For a cozy and intimate setting, consider serving individual portions or sharing platters that invite closeness and interaction. When it comes to flavorful pairings, think about contrasting textures and bold flavors.
A classic option is a charcuterie board with a variety of cured meats, cheeses, and accompaniments like olives, nuts, and artisanal bread. The combination of salty, savory, and tangy flavors creates a symphony for the taste buds.
If you prefer warm appetizers, consider options like bacon-wrapped dates stuffed with goat cheese or mini caprese skewers with balsamic glaze. These small bites aren't only delicious but also encourage sharing and conversation.
Remember to keep the appetizer portion sizes modest to whet the appetite without overshadowing the main course. With thoughtful presentation and tantalizing flavor combinations, our Valentine's Day appetizers will pave the way for an enchanting dining experience.
Cooking a Delectable Main Course
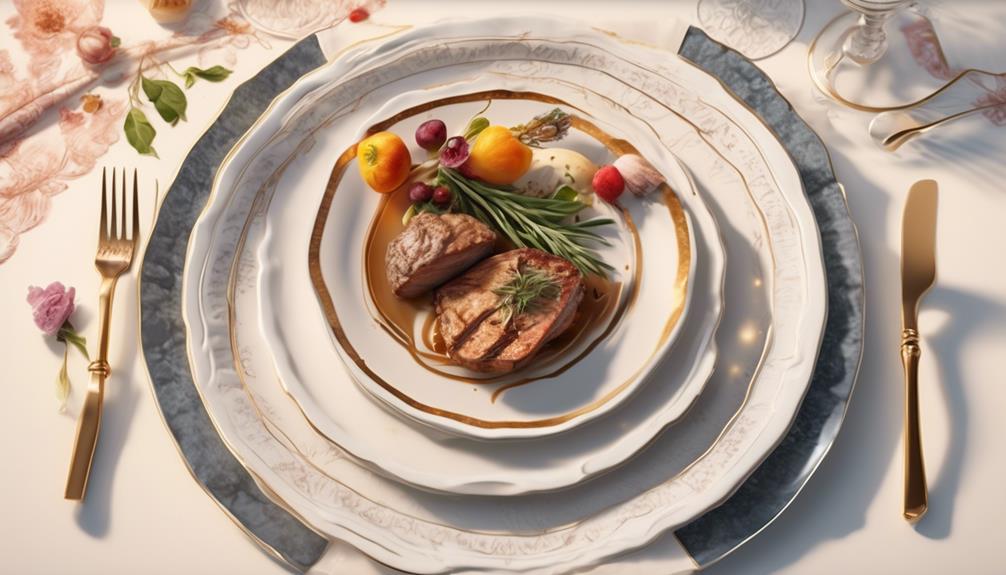
Now that we've set the stage with delightful appetizers, let's turn our attention to crafting a delectable main course for our Valentine's Day dinner. For an intimate and memorable dining experience, the main course should tantalize the taste buds and leave a lasting impression. Here's how we can achieve that:
- Flavorful Seasoning Techniques: Elevate the flavors of your main course by experimenting with different seasoning techniques such as dry rubs, marinades, and herb-infused oils. Enhance the romantic ambiance by incorporating aphrodisiac ingredients like saffron, vanilla, or chili peppers.
- Perfectly Seared Proteins: Whether it's a succulent steak, tender lamb chops, or a delicate piece of fish, the key to a mouthwatering main course lies in achieving the perfect sear. Searing locks in the juices and adds a beautiful caramelized crust, creating a sensory delight for you and your loved one.
- Balanced Flavors: Aim for a harmonious balance of flavors, incorporating elements of sweetness, acidity, and umami. Consider pairing your proteins with complementary sauces or glazes to add depth and complexity to the dish.
- Sensual Presentation: Arrange your main course thoughtfully on the plate, paying attention to colors, textures, and artistic flair. A visually stunning presentation enhances the overall dining experience and adds an extra touch of romance to the evening.
Savoring Decadent Desserts
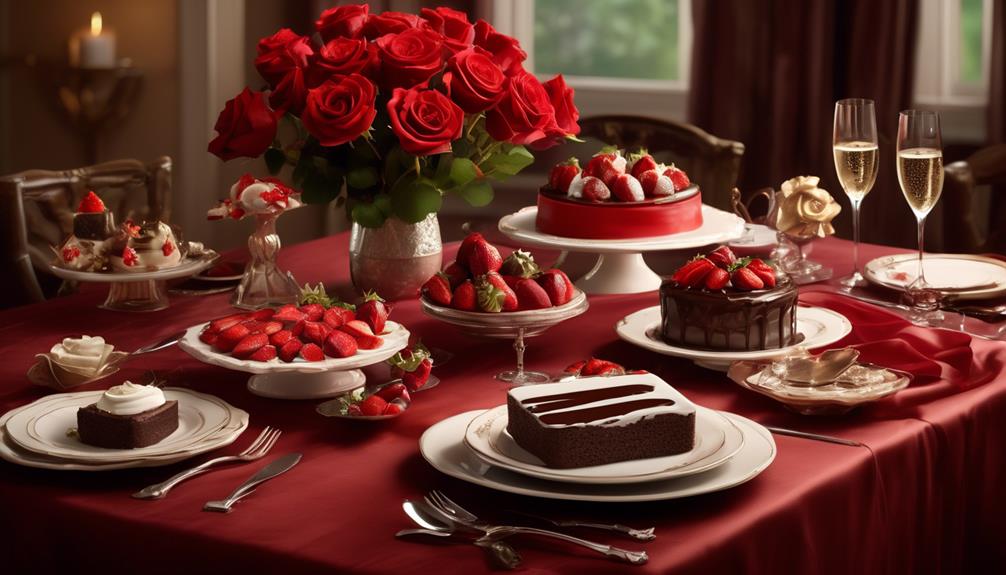
We can't wait to savor the decadent desserts on Valentine's Day.
Indulgent chocolate treats, romantic fruit creations, and sinful sweet delights await us.
Our taste buds are already tingling with anticipation!
Indulgent Chocolate Treats
Savoring indulgent chocolate treats brings an irresistible pleasure to any Valentine's Day dinner. The rich, velvety allure of chocolate fondue or a truffle assortment is the perfect way to end a romantic evening. Here are some indulgent chocolate treats to elevate your Valentine's Day dinner:
- Chocolate Fondue: Dipping strawberries, marshmallows, or even chunks of brownie into a warm, silky pool of chocolate is a delightfully interactive and indulgent experience.
- Truffle Assortment: Sampling an assortment of handcrafted truffles, each with its own luscious filling and decadent coating, adds an element of surprise and luxury to the dessert course.
- Molten Chocolate Cake: Breaking through the delicate exterior of a molten chocolate cake to reveal a gooey, molten center is an intensely indulgent and sensual experience.
- Chocolate-Covered Strawberries: The combination of juicy, ripe strawberries and smooth, rich chocolate is an irresistible treat that embodies the essence of romance.
Romantic Fruit Creations
Indulging in decadent desserts, we can continue to elevate our Valentine's Day dinner by exploring the realm of romantic fruit creations. Incorporating fruit garnishes in our desserts not only adds a burst of freshness but also enhances the romantic presentation. Edible arrangements, such as intricately designed passion fruit creations, can elevate the dining experience, evoking feelings of love and passion. Picture a luscious strawberry dipped in rich, velvety chocolate, or a succulent slice of mango arranged in an enticing pattern. These delightful creations not only tantalize the taste buds but also please the eyes, adding an extra layer of intimacy to the dining affair. Elevate your Valentine's Day dinner to new heights with these romantic fruit creations that are sure to captivate both your senses and your heart.
| Romantic Fruit Creations | Presentation |
|---|---|
| Chocolate-dipped strawberries | Heart-shaped arrangement |
| Mango and passion fruit medley | Intertwined design |
| Pineapple and kiwi skewers | Artful display |
| Mixed berry platter | Scattered rose petals |
Sinful Sweet Delights
Sinking our teeth into decadent desserts, we can further elevate our Valentine's Day dinner experience. Indulging in tempting confections is an intimate affair that ignites the senses and creates a memorable finale to the evening.
Here are some sinful sweet delights to savor together:
- Molten Chocolate Lava Cake: The rich, gooey center oozing out is a decadent delight for chocolate lovers.
- Raspberry and White Chocolate Mousse: A luscious blend of tart raspberries and creamy white chocolate creates a heavenly combination.
- Caramel Pecan Cheesecake: The buttery caramel and crunchy pecans add a sinful twist to the velvety cheesecake.
- Red Velvet Truffles: These bite-sized, velvety red treats are a perfect way to end the night on a sweet note.
These decadent confectionaries are sure to add an extra layer of romance and sweetness to your Valentine's Day celebration.
Pairing Wines and Cocktails

Let's talk about the perfect pairing of wines and cocktails for your romantic Valentine's Day dinner.
We'll explore which wines complement different dishes and how to create cocktails that enhance the flavors of your meal.
From bold red wines to refreshing cocktails, we've got you covered with tips for elevating your dining experience.
Wine Pairings
When selecting wine pairings for a Valentine's Day dinner, it's important to consider the flavors of the dishes and choose complementary options to enhance the overall dining experience. Here are a few tips to help you select the perfect wine for your romantic evening:
- Tasting Notes: Look for wines with tasting notes that complement the flavors of your meal. For example, a fruity Pinot Noir can enhance the taste of a rich, creamy pasta dish.
- Wine Selection: Consider your partner's wine preferences. Choosing a bottle of their favorite wine shows thoughtfulness and consideration.
- Food Pairings: Pair light, delicate dishes with a crisp white wine, and heartier meals with a robust red. The right pairing can elevate the flavors of both the food and the wine.
- Wine Preferences: Pay attention to your partner's wine preferences and select a bottle that aligns with their taste. It shows that you care about their likes and dislikes.
Cocktail Complements
Pairing wines and cocktails can add an extra layer of sophistication and enjoyment to your Valentine's Day dinner.
When it comes to cocktail pairing, consider starting off with a light and refreshing aperitif like a classic French 75 or a fruity Aperol spritz. These drinks set the stage for a delightful evening.
As the evening progresses, consider transitioning to a bold red wine such as a Cabernet Sauvignon or a spicy Shiraz to complement the main course.
For dessert, sweet cocktails like a chocolate martini or a creamy espresso martini can be the perfect way to round off the meal.
These drink suggestions are sure to elevate the romantic ambiance and create a memorable dining experience for you and your loved one.
Cheers to a wonderful Valentine's Day!
Incorporating Romantic Lighting
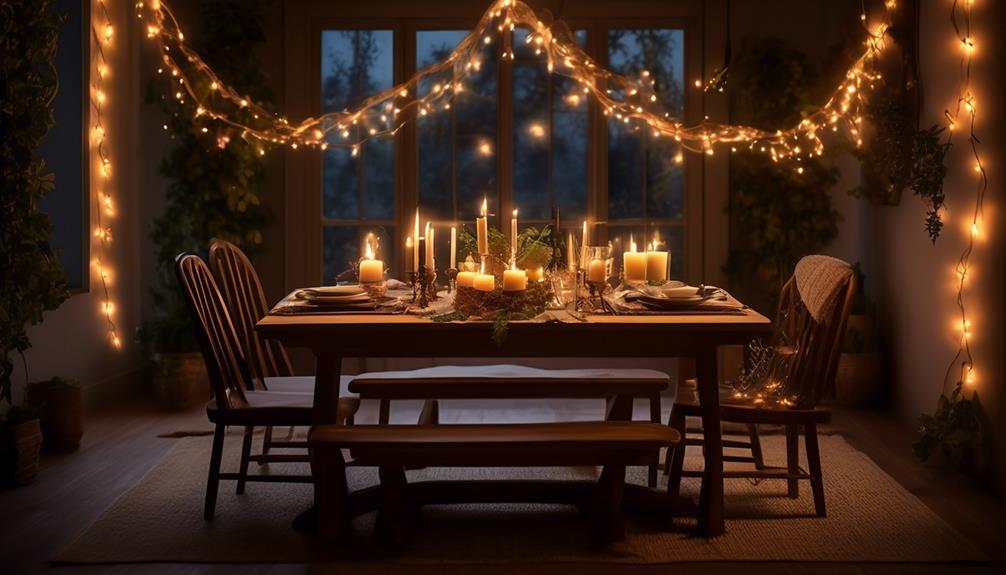
To create a romantic ambiance for your Valentine's Day dinner, consider incorporating soft, dim lighting to set the mood.
- Candlelit Ambiance: Candles are a classic choice for creating a romantic atmosphere. Place them strategically around the table and dim the overhead lights to enhance their warm glow.
- Dimmer Switch: If you have dimmer switches in your dining area, use them to adjust the level of lighting to a soft, flattering glow. This allows you to control the ambiance throughout the evening.
- Fairy Lights: Delicate fairy lights draped around the dining area can add a whimsical touch to your Valentine's Day dinner. Whether hung from the ceiling or wrapped around a centerpiece, they bring a magical feel to the setting.
- Lanterns or Hurricane Lamps: Opt for lanterns or hurricane lamps with soft, flickering candles inside. These can create a cozy, intimate atmosphere and add a touch of old-world charm to your romantic dinner setting.
Enhancing the Table Centerpiece
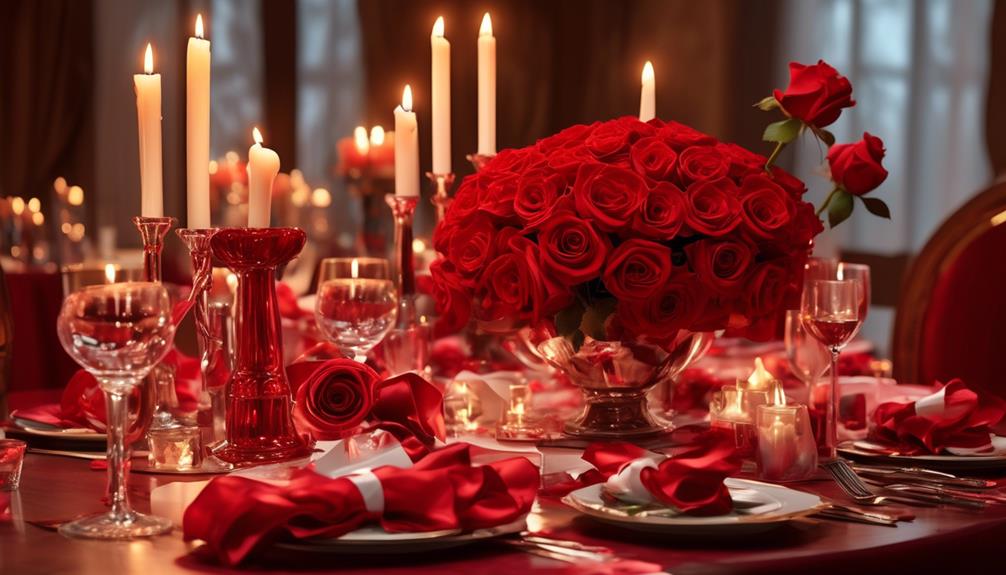
As we consider enhancing the table centerpiece, we can further elevate the romantic ambiance by incorporating elements that complement the soft, dim lighting we've established.
Floral arrangements are a wonderful way to add a touch of natural beauty and fragrance to the table. Consider using roses, lilies, or other favorite blooms of your special someone. These can be arranged in a simple yet elegant vase, or for a more intimate setting, scattered petals can be delicately placed around the base of the centerpiece.
Additionally, candlelight ambiance can be enhanced by strategically placing candles around the floral arrangement. The flickering glow of the candles will create a warm and inviting atmosphere, perfect for a cozy and romantic Valentine's Day dinner. To add an extra touch of elegance, consider using scented candles to further enhance the sensory experience.
With the perfect combination of floral arrangements and candlelight, the table centerpiece will serve as a captivating focal point, adding to the overall charm of the evening.
Adding Thoughtful Touches
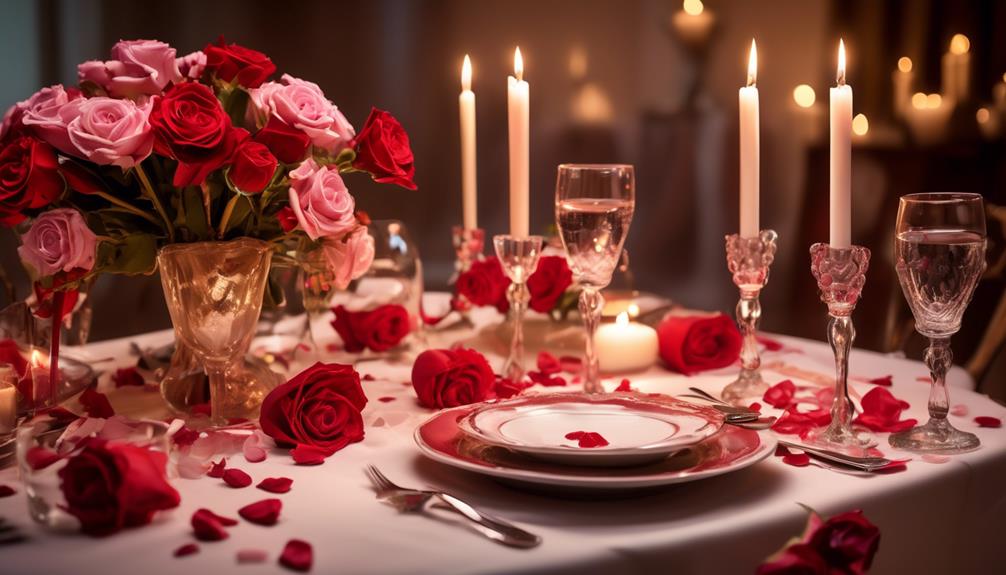
We often find that adding thoughtful touches to the dinner setting can greatly enhance the overall experience for our loved one. Creating an intimate and romantic atmosphere is essential for a memorable Valentine's Day dinner. Here are some simple yet meaningful ideas to add thoughtful touches to your celebration:
- Personalized Menu: Design a custom menu that includes your partner's favorite dishes or a meaningful meal from a significant time in your relationship. This thoughtful gesture shows your attention to detail and consideration for your loved one's preferences.
- Handwritten Love Note: Place a handwritten love note under your partner's dinner plate or napkin. Express your feelings and gratitude for their presence in your life. This small, personal touch can evoke deep emotions and create a heartwarming moment.
- Special Music Playlist: Curate a playlist of songs that hold sentimental value for both of you. Let the music enhance the romantic ambiance and bring back cherished memories.
- Thoughtful Gift Exchange: Exchange thoughtful gifts during the dinner. These gifts don't need to be expensive; the focus is on the sentiment behind the gesture. It could be something as simple as a framed photograph or a nostalgic token from your time together.
Frequently Asked Questions
What Are Some Creative Ways to Incorporate Valentine's Day Traditions Into the Dinner?
Incorporating Valentine's Day traditions into the dinner can be a delightful way to create a romantic atmosphere. We can start by adding Valentine's Day decorations to set the mood.
As for the menu, we can infuse the meal with romantic elements like heart-shaped appetizers or a chocolate fondue dessert. These creative touches can make the dinner experience more intimate and special for both of you.
How Can I Involve My Partner in the Planning and Preparation of the Dinner?
When involving my partner in the planning and preparation of our Valentine's Day dinner, we like to make it a collaborative experience. We start by brainstorming menu ideas together, sharing our favorite dishes and exploring new recipes.
This process not only brings us closer but also creates a sense of excitement and anticipation for the special evening. Working together on the menu selection sets the stage for a memorable and intimate Valentine's Day celebration.
Are There Any Tips for Avoiding Common Valentine's Day Dinner Pitfalls?
To avoid stress and create a romantic ambiance for Valentine's Day dinner, we focus on meal planning and table setting.
We ensure a smooth evening by planning ahead, choosing a menu that's easy to prepare and complements the mood, and setting the table with elegant touches.
What Are Some Thoughtful Gestures I Can Include to Make the Dinner Extra Special?
For a romantic ambiance, we love dimming the lights and adding some candles. It sets the perfect mood for an intimate dinner.
As for a personalized menu, we always try to incorporate each other's favorite dishes or cook something special that holds sentimental value.
It's these little thoughtful gestures that make the dinner extra special and create a memorable experience for both of us.
How Can I Make the Evening Feel Unique and Personal to Our Relationship?
To make the evening feel unique and personal to our relationship, we could add personal touches like creating a playlist of our favorite songs, writing love notes to each other, or incorporating inside jokes into the decor.
Setting an intimate ambiance can involve dimming the lights, lighting candles, and setting up a cozy seating arrangement.
These small gestures can make the evening extra special and reinforce the intimacy of our relationship.
Conclusion
As we sat down to enjoy our Valentine's Day dinner, the soft glow of candlelight illuminated the table, casting a romantic atmosphere over the room. The sound of gentle music filled the air, adding to the ambiance as we savored each delicious bite of our carefully chosen menu.
It was the perfect evening, filled with love, laughter, and the joy of being together. We couldn't have asked for a more magical Valentine's Day celebration.
- About the Author
- Latest Posts
Introducing Ron, the home decor aficionado at ByRetreat, whose passion for creating beautiful and inviting spaces is at the heart of his work. With his deep knowledge of home decor and his innate sense of style, Ron brings a wealth of expertise and a keen eye for detail to the ByRetreat team.
Ron’s love for home decor goes beyond aesthetics; he understands that our surroundings play a significant role in our overall well-being and productivity. With this in mind, Ron is dedicated to transforming remote workspaces into havens of comfort, functionality, and beauty.

We found ourselves in the position of wanting to create a heart-shaped wreath base for a special event, and we knew that finding the right base was crucial. We pondered over which material would be most suitable for this distinct shape.
After some trial and error, we discovered a method that produced beautiful results. If you're curious to learn how we did it, stick around for some helpful tips and a step-by-step guide to creating your very own heart-shaped wreath base.
Key Takeaways
- Choose a sturdy yet flexible wire for the base of the heart-shaped wreath
- Secure the ends of the wire and consider adding decorative elements to it
- Wrap floral tape around the entire perimeter of the heart shape to secure the base
- Select greenery that complements the heart-shaped design and intertwine it starting from the top of the base
Gather the Necessary Materials
What materials will we need to create our heart-shaped wreath base?
Well, first, let's gather some floral wire, which will help us secure the foliage and decorations onto the frame.
Next, we'll need a beautiful ribbon to add a final touch of elegance to our creation.
As for the heart-shaped frame, we can fashion one using flexible branches and shaping them into a lovely heart outline. Alternatively, we can purchase a pre-made heart-shaped frame from a craft store.
Don't forget a pair of sharp scissors to trim the foliage and ribbon to the perfect length. These will also come in handy for any adjustments we need to make to the frame.
Once we've all these materials ready, we can begin our creative process and bring our vision to life.
With the floral wire, ribbon, heart-shaped frame, and scissors at our disposal, we're well-equipped to embark on this crafting journey. Let's get ready to infuse our heart-shaped wreath base with love and creativity!
Form the Heart Shape With Wire

After gathering our floral wire, ribbon, and heart-shaped frame, we're ready to mold the wire into a beautiful heart shape to serve as the base for our wreath. Here's how we can achieve this:
- Choose the Right Wire: Select a sturdy yet flexible wire that can be easily bent into shape. A 16 or 18-gauge wire works well for creating the heart form.
- Bend and Shape: Begin by forming a loop at the top center of the heart. Then, gently curve the wire down to create the rounded sections of the heart shape. Use pliers to help make precise bends and curves.
- Secure the Ends: Once the heart shape is formed, secure the ends of the wire by twisting them together. This will ensure the shape remains intact as you add the decorative elements.
- Consider Decorative Embellishments: Get creative with the wire by adding decorative elements such as small beads, twisted wire accents, or even tiny artificial flowers to enhance the overall look of the wreath base.
- Explore Variation: Experiment with different wire bending techniques and consider heart-shaped wreath variations to fit various holiday themes, such as Valentine's Day, Christmas, or even a wedding motif.
Creating the heart shape with wire is an artful process that sets the stage for crafting a unique and personalized heart-shaped wreath base.
Secure the Shape With Floral Tape
To secure the heart shape formed with wire, carefully wrap floral tape around the entire perimeter, ensuring a tight and secure hold for the wreath base.
When using floral tape, it's essential to employ proper techniques to ensure the wreath's stability. Start by anchoring the end of the tape to the base and then gently stretch and pull the tape as you wrap it around the wire frame. This technique helps to activate the adhesive on the tape, creating a strong bond. As you continue to wrap, slightly overlap the tape to ensure complete coverage and a smooth finish.
Don't be afraid to get creative with floral tape; it's not only a practical tool but also versatile for artistic applications. Consider using different colored tapes to add an extra pop to your wreath or intertwine multiple hues for a playful, multi-dimensional effect.
For those seeking alternative wreath shapes, like ovals or teardrops, floral tape can seamlessly secure the wire into any desired form. Let your imagination run wild and draw design inspiration from the endless possibilities floral tape offers for wreath-making.
Wrap the Base With Greenery or Vine

Let's start by carefully selecting the right greenery to complement our wreath.
We'll then need to artfully secure the greenery to the base, ensuring it stays in place.
Lastly, we'll aim for a balanced and uniform look, creating a beautiful and harmonious arrangement.
Choosing the Right Greenery
Surround the heart-shaped wreath base with an assortment of lush greenery to create a vibrant and natural foundation for your wreath. When choosing foliage, consider the heart-shaped design and aim for varieties that complement its curves. To create texture, incorporate different types of greenery such as eucalyptus, ivy, ferns, and boxwood.
Selecting the right greenery also involves considering color. Mix in shades of green with pops of complementary colors like deep burgundy, vibrant red, or soft lavender to add visual interest. Additionally, think about the size and shape of the leaves to ensure a balanced and visually appealing arrangement.
Each piece of greenery should enhance the overall aesthetic of the heart-shaped wreath, bringing a touch of nature's beauty to your creation.
Securing the Greenery
We carefully intertwine the selected greenery, starting at the top of the heart-shaped base and working our way around, ensuring a secure and lush coverage. To achieve a stunning and secure result, it's essential to use the right securing techniques and greenery options. Here's a helpful table to guide you through the process:
| Securing Techniques | Greenery Options |
|---|---|
| Floral Wire | Eucalyptus |
| Green Floral Tape | Ivy |
| Hot Glue Gun | Rosemary |
Using floral wire allows for flexible manipulation, ensuring that the greenery stays in place. Meanwhile, green floral tape provides a natural look while keeping the greenery secure. A hot glue gun can be used for a more permanent and robust attachment. Pair these securing techniques with luscious eucalyptus, delicate ivy, or fragrant rosemary for a truly enchanting heart-shaped wreath.
Creating a Uniform Look
Carefully intertwining the selected greenery around the heart-shaped base ensures a secure and lush coverage, setting the stage for creating a uniform look by wrapping the base with greenery or vine.
To achieve a beautifully uniform appearance, here are some essential steps to consider:
- Creating Symmetry: Begin by evenly distributing the greenery around the entire base, ensuring that it flows seamlessly from one side to the other.
- Choosing Colors: Select a variety of greenery or vine in complementary shades to add depth and visual interest to the wreath.
- Layering Effect: Overlap the greenery to create a layered effect, adding dimension and fullness to the wreath.
- Balancing Fullness: Pay attention to the density of greenery to ensure a balanced and lush appearance all around the heart-shaped base.
- Weaving Technique: Use a weaving technique to secure the greenery, ensuring it stays in place and maintains its uniform look.
Creating a uniform look through these steps will result in a stunning and visually appealing heart-shaped wreath.
Add Decorative Elements or Flowers

Gently intertwine the vibrant red roses with the delicate baby's breath, creating a harmonious blend of colors and textures on the heart-shaped wreath base. The floral arrangement should evoke a sense of romance and warmth. Consider seasonal variations when selecting your flowers.
For spring, opt for pastel hues like soft pink peonies and white cherry blossoms. In summer, vibrant sunflowers and daisies can bring a cheerful touch. In autumn, rich burgundy dahlias and golden marigolds capture the essence of the season, while winter calls for deep red roses and snowy white poinsettias. As we weave these blooms into the wreath, we aim to create a visual symphony that reflects the beauty of nature's cycles.
Consider adding decorative elements such as sprigs of eucalyptus for a touch of greenery, or small pinecones for a rustic, woodland feel. These details not only enhance the overall aesthetic but also infuse the wreath with a personalized touch. Each element carefully chosen and placed, contributing to the overall charm of the heart-shaped wreath.
The process of adorning the wreath base with these floral accents is an opportunity for creativity and expression, resulting in a truly unique and enchanting creation.
Hang and Display Your Heart Wreath
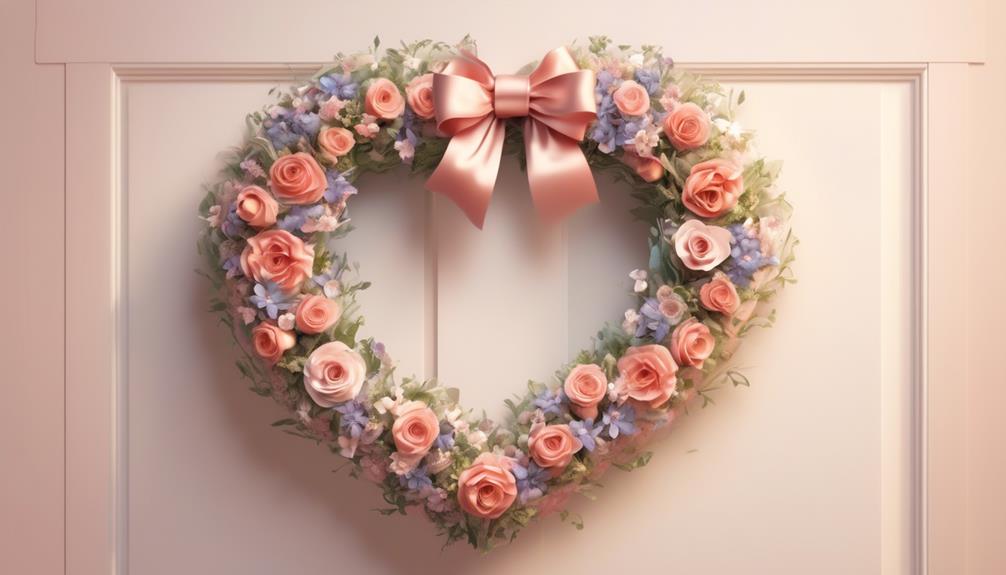
To showcase the heart wreath beautifully, consider adorning a prominent wall or door in your home with it, allowing its charm to captivate all who encounter it. Here are some creative display ideas and unique hanging options to enhance the visual appeal of your heart wreath:
- Over a Mantelpiece: Position the heart wreath above the mantelpiece to create a focal point in your living room. Pair it with some candles or small decorative items for an elegant display.
- On a Vintage Window Frame: Hang the heart wreath from an old window frame for a rustic and unique look. This adds character and charm to any space, especially if you're going for a shabby chic or farmhouse style.
- Seasonal Variations: Swap out the decorations on your heart wreath to reflect different seasons. For example, use colorful flowers for spring, seashells for summer, leaves for fall, and ornaments for winter.
- Alternative Shapes: Experiment with different shapes such as stars, ovals, or even animals, and hang them together with the heart wreath for an eclectic and eye-catching display.
- On a Wreath Hanger: Use a decorative wreath hanger to showcase your heart wreath on the front door, welcoming guests with its unique and inviting charm.
Tips for Maintaining Your Wreath
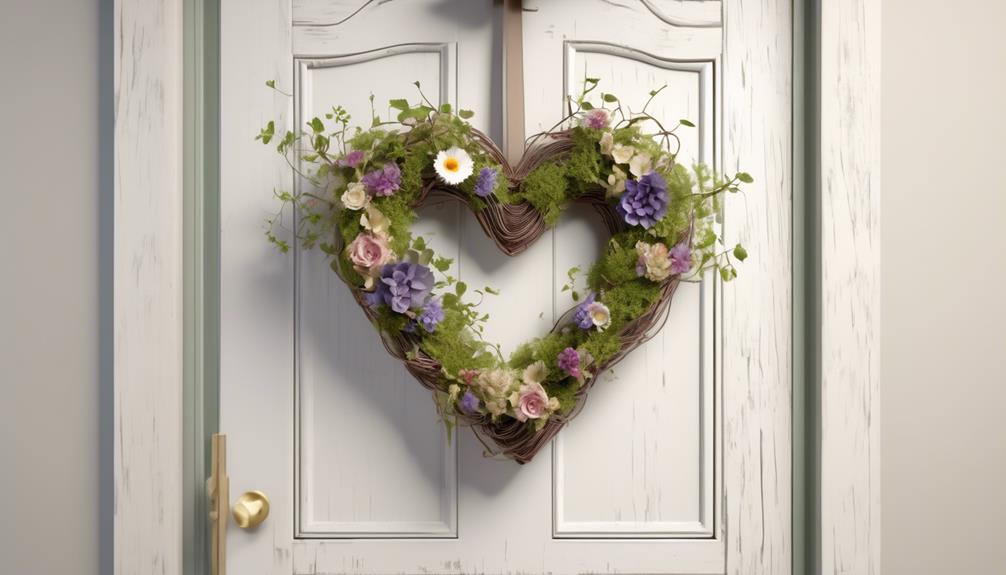
Let's explore some innovative techniques to maintain the beautiful shape of your wreath and keep it looking stunning year-round.
We'll also discover effective ways to weatherproof your wreath, ensuring it withstands the elements and remains vibrant and inviting.
These tips will help us preserve the craftsmanship and beauty of our wreaths, allowing us to enjoy their charm for a long time to come.
Shape Retention Techniques
To maintain the shape of your wreath, consider securing the greens and florals tightly when constructing the base, as this will provide a solid foundation for preserving its form over time.
Here are some techniques for retaining the shape and preserving the integrity of your heart-shaped wreath:
- Use Floral Wire: Secure the greenery and flowers to the base using floral wire, ensuring they're tightly fastened to maintain their position.
- Wrap Tightly: When adding new elements, wrap the stems tightly around the base, creating a snug fit that will help the wreath hold its shape.
- Support with Additional Wire: For larger or heavier pieces, use additional wire to provide extra support and prevent sagging.
- Regular Maintenance: Check the wreath periodically and adjust any loose or shifting elements to maintain its shape.
- Avoid Excessive Handling: Minimize handling to prevent distortion and maintain the wreath's original form.
Weatherproofing Methods
Using natural or artificial materials, we can weatherproof the wreath to ensure it withstands outdoor conditions and maintains its beauty for an extended period.
To protect the wreath from moisture, consider using waterproofing techniques such as spraying it with a clear acrylic sealant or applying a coat of outdoor varnish.
Preservation methods like using silica gel packets or storing the wreath in a dry, dark place during off-seasons can help maintain its integrity.
Seasonal variations require extra care, so during the winter months, consider adding a layer of water-resistant spray and checking for any signs of damage caused by frost.
Additionally, creative embellishments such as incorporating faux foliage or artificial flowers can add a touch of charm while also providing durability against the elements.
These methods ensure your heart-shaped wreath remains stunning throughout the year.
Ideas for Customizing Your Wreath

Personalize your wreath by adding a touch of your favorite color with a ribbon or by incorporating meaningful trinkets and decorations. Customizing techniques allow you to infuse your wreath with your unique personality and style. Here are some creative ideas to help you customize your heart-shaped wreath:
- Color combinations: Experiment with different color combinations to create a visually stunning wreath. Consider using complementary colors like red and green, or analogous colors like blue and purple for a harmonious look.
- Personalized monogram: Add a monogram of your family name or initials to the center of the wreath for a personalized touch.
- Seasonal accents: Incorporate seasonal accents such as miniature pumpkins for fall, or pastel-colored eggs for spring to reflect the time of year.
- Nature-inspired elements: Integrate natural elements like pinecones, berries, or dried flowers to bring a touch of the outdoors to your wreath.
- Themed decorations: Choose decorations that reflect your interests or hobbies, such as miniature musical instruments for music enthusiasts or tiny sports equipment for sports lovers.
Conclusion and Final Thoughts

As we infuse our heart-shaped wreath with personal touches and creative flair, it's important to reflect on the meaningful impact these customizations bring to our homes and hearts.
The final touches we add to our wreaths, whether it's a personalized monogram, a cluster of vibrant blooms, or a whimsical assortment of ribbons, aren't just decorative elements. They're expressions of our unique personalities, our love for beauty, and our desire to create a warm and inviting atmosphere within our living spaces.
In the end, the art of wreath customization goes beyond mere aesthetics. It becomes a reflection of the love and care we put into crafting our homes into havens of comfort and joy.
As we gaze upon the heart-shaped wreath hanging proudly on our doors or adorning our walls, we're reminded of the love that went into every detail. It's a reminder that our homes aren't just buildings; they're extensions of our hearts, filled with the warmth of our creativity and the beauty of our individuality.
Frequently Asked Questions
How Do You Store a Heart-Shaped Wreath Base When Not in Use?
When it comes to storing a heart-shaped wreath base, we've found some creative solutions.
To keep it safe and sound, consider hanging it on a hook in a closet or on a wall.
Another option is to place it in a storage box or bag, ensuring it's fully protected.
You could even display it as wall decor when not in use.
Whatever option you choose, make sure it's stored in a way that preserves its shape and beauty.
Can the Wreath Base Be Made Using Materials Other Than Wire?
Absolutely!
We've experimented with alternative materials like Styrofoam, twine, and moss-covered cardboard bases. These can all be shaped into creative heart designs.
Styrofoam is fantastic for a lightweight base, while twine adds a rustic touch. Moss-covered cardboard bases offer a natural look.
These materials allow for diverse wreath styles, and they're great for adding a unique flair to your decor.
What Are Some Alternative Options for Securing the Shape of the Wreath Base if Floral Tape Is Not Available?
Securing alternatives for the wreath base shape include using floral wire or thin, flexible branches.
For a creative touch, try using decorative ribbon to secure the shape.
Embrace nature by intertwining vines or twine for a rustic look.
To embellish, consider adding small flowers or foliage.
These options not only secure the shape but also add a unique, artistic touch to the wreath base.
Are There Any Specific Types of Greenery or Vine That Work Best for Wrapping the Base of a Heart-Shaped Wreath?
When crafting a heart-shaped wreath, choosing the best greenery and ideal vine is essential. We find that using eco-friendly options like eucalyptus, ivy, or boxwood creates a beautiful and sustainable base.
These choices not only provide a lush and elegant look but also offer durability and flexibility. Consider adding decorative touches like baby's breath or lavender for an extra charming touch.
The combination of these elements will result in a stunning and eco-conscious wreath.
How Can You Prevent the Decorative Elements or Flowers From Wilting or Falling off the Wreath Base Over Time?
To keep our wreath's beauty enduring, we've found that misting the decorative elements and flowers with water and placing the wreath away from direct sunlight can prevent wilting.
Securing elements using floral wire or hot glue ensures they stay put. It's like nurturing a delicate garden, tending to each bloom with care.
This way, our wreaths remain a timeless symbol of affection, everlastingly adorning our homes.
Conclusion
After creating your heart-shaped wreath base, it's time to get creative and add personalized touches to make it truly unique. Whether it's incorporating meaningful flowers, ribbons, or other decorations, the possibilities are endless.
Don't be afraid to experiment and make it your own. The beauty of crafting a wreath is the freedom to express your individual style and personality.
So, have fun with it and let your heart shine through your beautiful creation!
- About the Author
- Latest Posts
Introducing Ron, the home decor aficionado at ByRetreat, whose passion for creating beautiful and inviting spaces is at the heart of his work. With his deep knowledge of home decor and his innate sense of style, Ron brings a wealth of expertise and a keen eye for detail to the ByRetreat team.
Ron’s love for home decor goes beyond aesthetics; he understands that our surroundings play a significant role in our overall well-being and productivity. With this in mind, Ron is dedicated to transforming remote workspaces into havens of comfort, functionality, and beauty.
When it comes to creating a heart-shaped wreath base, we are usually attracted to the concept of making something that embodies love, while also bringing a sense of coziness and attractiveness to our living spaces. The process of molding the base and giving it vibrancy is a pleasurable experience that enables us to inject our artistic flair into each stage.
But how exactly does one go about shaping a heart wreath base that is sturdy, elegant, and ready to be adorned with seasonal accents? Well, let's just say there's a method that will make the process both enjoyable and rewarding.
Key Takeaways
- Choose a wire wreath frame in the shape of a heart.
- Bend and manipulate the wire to form the distinctive curvatures of a heart.
- Ensure a snug fit and frame stability by securing the wire ends properly.
- Use twine to loop around the frame, maintaining even tension and guiding it around curves and corners to maintain the heart shape.
Gather Your Materials
Let's gather the materials we need to create our heart-shaped wreath base. When it comes to wreath design, material selection is key to achieving the perfect look.
First, we'll need a wire wreath frame in the shape of a heart. These frames are readily available at craft stores and come in various sizes to suit your preference.
Next, let's choose the base material for our wreath. Whether it's fresh or artificial foliage, the choice is yours. Fresh foliage creates a vibrant, natural look, while artificial foliage ensures longevity. Consider the color scheme and theme you want to achieve with your wreath, and select foliage accordingly.
In addition to foliage, we'll need wire or floral tape to attach the foliage to the frame securely. If you're adding decorative elements such as flowers, ribbons, or ornaments, gather those as well. Ensure that the materials complement each other and enhance the overall wreath design.
With our materials assembled, we're ready to move on to the next step in creating our beautiful heart-shaped wreath base.
Shape the Wire Frame

We can begin shaping the wire frame by gently bending and molding it into the desired heart shape. Here are some wire manipulation and shaping techniques to help you achieve the perfect heart-shaped wreath base:
- Start by bending the top of the wire into a gentle curve, resembling the top of a heart.
- Carefully manipulate the wire to form a rounded curve for the bottom of the heart, ensuring symmetry.
- Use your hands to mold the wire, gradually shaping it into the distinctive curvatures of a heart.
- Pay close attention to the proportions, adjusting the bends as needed to create a balanced and pleasing shape.
- Continuously assess the form from different angles to ensure the heart shape is consistent and well-defined.
Secure the Frame Ends
After shaping the wire frame into a heart, the next step involves securing the ends to maintain the desired form and structure. This is crucial for ensuring frame stability and embellishment security. To secure the frame ends, gently twist the wire ends around each other at the point where they meet, ensuring a snug fit without distorting the heart shape. This step is essential to prevent any shifting or loosening of the frame, which could compromise the integrity of the wreath base.
Once the ends are securely fastened, it's time to prepare the frame for the greenery addition. Before adding any greenery, make sure to check the frame's stability by gently pressing on the wire to ensure that it retains its heart shape. This will ensure that the frame is ready to support the weight of the greenery and other embellishments.
Wrap the Frame With Twine
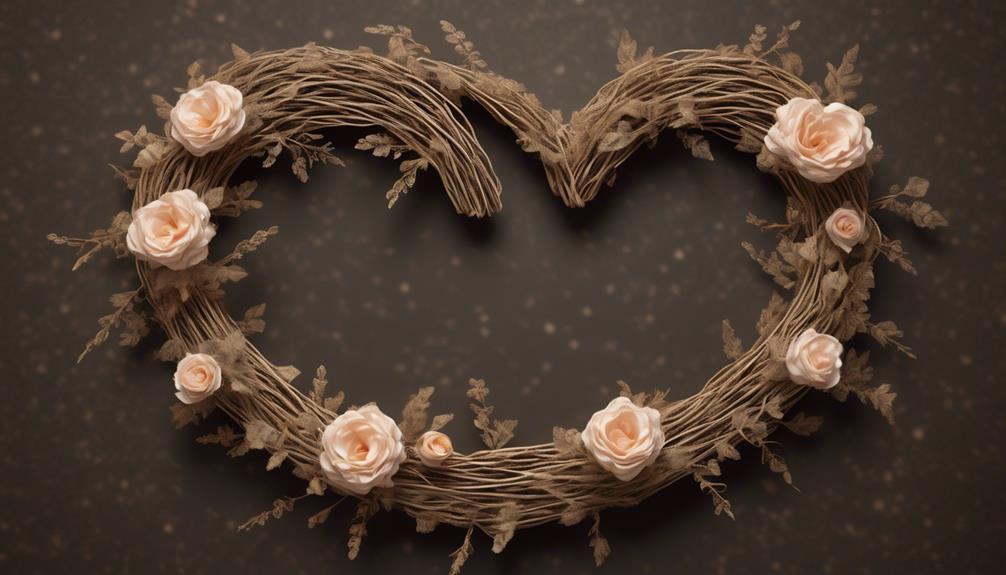
Using a natural jute twine, carefully wrap the wire frame to cover the entire surface, ensuring a tight and even application.
As we wrap the frame with twine, here's how to create a beautiful heart-shaped wreath base:
- Start at the top center of the heart, securing the twine with a knot to prevent unraveling.
- Gently loop the twine around the frame, keeping each loop close together to conceal the wire completely.
- Maintain an even tension as you wrap, ensuring the twine is snug but not overly tight to avoid warping the frame.
- As you reach curves or corners, gently guide the twine to maintain the heart shape, adjusting the tension as needed.
- Once the entire frame is covered, secure the end of the twine with a knot, ensuring it's well-hidden within the layers.
Add Decorative Elements
Let's talk about how to embellish the wreath and secure the decorative elements.
We'll explore different ways to add a personal touch and make the wreath unique.
It's important to ensure that the embellishments are securely attached to the base to prevent them from falling off.
Embellishing the Wreath
We can embellish the wreath by adding decorative elements such as ribbons, flowers, or small ornaments to enhance its visual appeal.
Here are some delightful ways to embellish your heart-shaped wreath:
- Silk ribbons: We love using silky ribbons in various shades of red and pink to create a soft, romantic look.
- Dainty flowers: Adding small faux flowers like roses, peonies, or baby's breath can infuse a charming and elegant vibe.
- Miniature ornaments: Incorporating tiny heart-shaped ornaments or small sparkling baubles can add a touch of whimsy.
- Lace accents: Delicate lace wrapped around the wreath can bring a vintage and timeless feel.
- Personalized monogram: Adding a wooden or metal monogram of your initials can make the wreath uniquely yours.
These embellishments will elevate your heart-shaped wreath and make it a stunning focal point in your home.
Securing the Embellishments
To secure the embellishments, carefully attach each decorative element to the wreath base using a hot glue gun or floral wire for a durable and polished finish.
When it comes to embellishment placement, get creative and consider different styles to bring your heart-shaped wreath to life. Whether you're using flowers, ribbons, or other decorative elements, think about practicality considerations.
For example, if you're using faux flowers, ensure they're securely attached to withstand any weather conditions if the wreath will be displayed outdoors. Additionally, consider the overall aesthetic and balance of the wreath when adding embellishments.
Take your time and experiment with various placements to achieve the perfect look.
Attach a Hanger
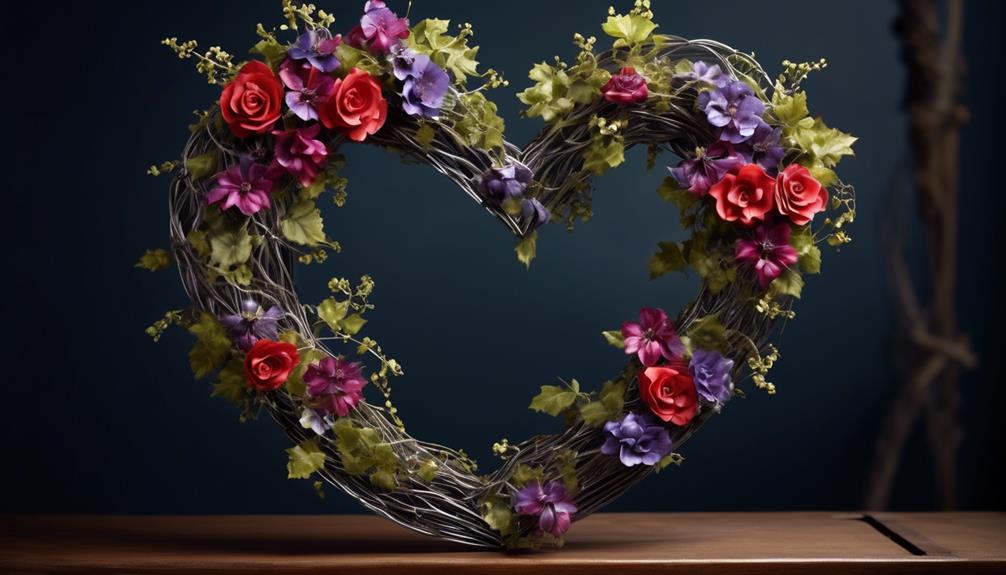
Attaching a hanger to the heart-shaped wreath base ensures easy display and adds a decorative touch. When deciding on hanger placement, it's important to consider the overall wreath stability.
Here are a few hanging options to enhance your wreath display:
- Ribbon: Tie a beautiful satin or lace ribbon to the top of the wreath base, allowing for a soft and elegant display.
- Wire: Secure a sturdy wire to the back of the wreath, ensuring a reliable and durable hanging option.
- Twine: For a rustic and charming look, use twine to create a natural and understated hanging feature.
- Command Hooks: Attach a small command hook to the back of the door for a seamless and damage-free hanging solution.
- Decorative Chain: Add a decorative touch with a stylish chain that complements the wreath's design, providing a unique and eye-catching display.
Each hanging option offers a distinct way to showcase your heart-shaped wreath base, allowing you to choose the perfect method to suit your personal style and display preferences.
Check the Stability

After considering the hanging options for the heart-shaped wreath base, it's important to check the stability to ensure the chosen method will support the wreath securely. First, let's conduct a stability assessment.
Take a moment to inspect the wreath base construction. Is it sturdy and able to bear the weight of the wreath and any embellishments? Consider the materials used and the overall structure. This step is crucial to avoid any mishaps once the wreath is hung.
Next, let's explore some wreath design ideas that can enhance stability. Incorporating a denser foliage or using wire to secure the elements in place can add strength to the overall design. Additionally, intertwining the branches or adding a layer of protective coating can contribute to the wreath's durability over time.
As we delve into wreath hanging techniques, it's essential to select a hanging method that complements the stability of the wreath base. Whether it's a sturdy nail, adhesive hook, or decorative ribbon, the chosen option should align with the wreath's weight and the surface it will be hung on.
Consider Color Options
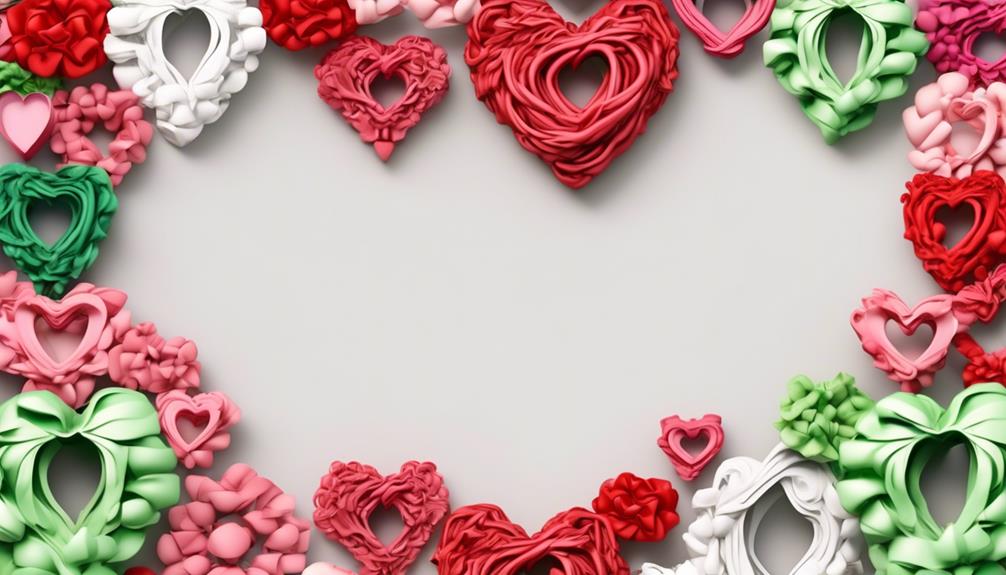
Exploring various color options will allow us to create a visually striking heart-shaped wreath that complements its surroundings. When considering color combinations, we can evoke a sense of intimacy and warmth through the following seasonal themes:
- Rich reds and deep greens: These classic Christmas colors can infuse the wreath with a cozy, traditional feel, perfect for the holiday season.
- Soft pastels: Using delicate pinks, blues, and yellows can bring a touch of springtime romance to the wreath, making it ideal for Valentine's Day or Easter.
- Earthy tones with pops of orange and gold: Incorporating warm browns, oranges, and golden hues can capture the essence of autumn, adding a rustic charm to the wreath.
- Vibrant summer hues: Bright and cheerful colors like turquoise, coral, and sunshine yellow can enliven the wreath, making it a delightful addition to summer decor.
- Monochromatic elegance: Opting for a single color scheme, such as varying shades of white or ivory, can create a timeless and sophisticated look that suits any season.
Personalize With Embellishments
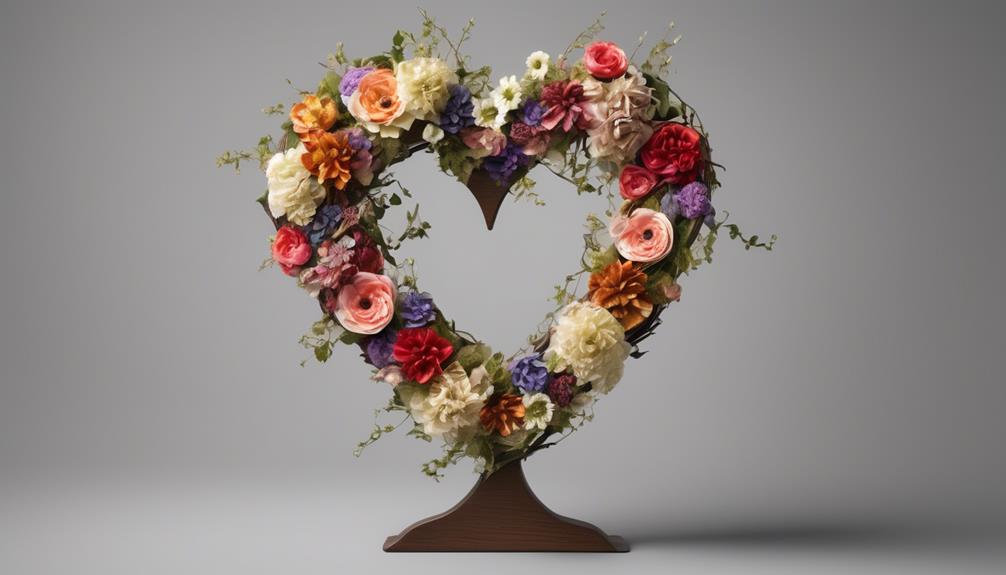
To infuse the wreath with our personal touch, let's carefully select and add embellishments that reflect our individual style and creativity. Craft ideas and decorative styles can be tailored to suit our preferences, allowing us to create a unique and meaningful piece.
One simple yet effective way to personalize the wreath is by incorporating craft ideas such as handmade fabric flowers, miniature bunting, or personalized wooden monograms. These elements can add a charming and distinctive touch to the wreath, reflecting our personality and style.
Additionally, we can explore decorative styles such as rustic, modern, or vintage to find inspiration that resonates with us. Whether it's incorporating natural elements like pinecones and dried flowers for a rustic charm or opting for sleek metallic accents for a modern twist, the embellishments we choose should evoke a sense of warmth and individuality.
Hang and Admire Your Creation
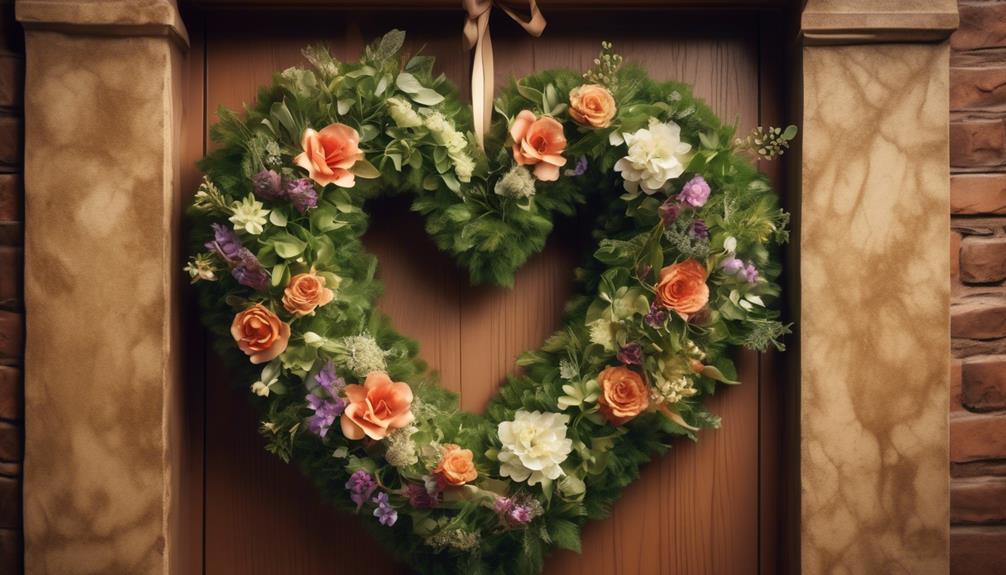
Let's find the perfect spot to hang our beautiful heart-shaped wreath and take a moment to admire our creation. As we step back and gaze at our DIY wreath, we can't help but feel a sense of pride and accomplishment.
Here are a few ideas for enjoying and showcasing our creative designs:
- Hang it on the front door to welcome guests with a touch of warmth and charm.
- Adorn a blank wall in the living room to add a pop of color and a cozy, inviting atmosphere.
- Place it above the mantel for a focal point that exudes love and creativity.
- Use it as a centerpiece for a romantic dinner, setting the perfect mood for a special evening.
- Gift it to a friend or family member to spread the joy and beauty of our handmade creation.
Taking in the intricate details and the personal touch we've added, we can't help but appreciate the time and effort we've invested. Our heart-shaped wreath isn't just a decoration; it's a reflection of our creativity and love.
Maintenance Tips

Let's talk about some maintenance tips for keeping your heart-shaped wreath looking fresh.
We'll cover shaping the wire, adding greenery, and securing it all with wire.
These pointers will help ensure your wreath stays beautiful for as long as possible.
Shape the Wire
We can shape the wire by bending it into a heart shape using our hands or a pair of pliers. When shaping the wire, we should ensure it's smooth and free from kinks to create a perfect heart outline. Here are some tips for shaping the wire:
- Gently curve the wire into half of the heart shape, starting from the bottom and working your way up to the top.
- Use pliers to make precise bends and adjustments, ensuring the heart shape is symmetrical.
- Regularly check the shape against a template or outline to maintain the desired form.
- Smooth out any rough edges or uneven curves to achieve a professional finish.
- Take your time and enjoy the process, allowing the wire to guide you in creating a beautiful heart-shaped wreath base.
Happy crafting!
Add Greenery
To maintain the greenery on the heart-shaped wreath base, regularly mist the foliage with water to keep it fresh and vibrant.
When selecting greenery, opt for a variety of textures and tones to create visual interest. Consider using different types of foliage such as eucalyptus, ferns, and ivy to add depth and dimension.
Get creative with the placement of the greenery by weaving it through the wire frame, ensuring full coverage and a lush appearance. Don't be afraid to mix and match different types of greenery to achieve a balanced and harmonious look.
Remember to step back and assess the arrangement as you go, making any necessary adjustments to achieve the desired aesthetic.
Secure With Wire
After arranging the greenery on the heart-shaped wreath base, it's important to secure it with wire to ensure that the foliage remains in place and retains its lush appearance.
When securing the greenery with wire, we often use a variety of wire gauges depending on the weight and texture of the foliage. We carefully wrap and twist the wire around the stems and branches, ensuring a firm grip without damaging the greenery.
Sometimes, we also incorporate wire shaping techniques to create unique and creative wreath designs, adding an extra touch of elegance.
If you prefer not to use wire, there are alternative wreath base options such as grapevine or foam forms that can also provide a secure foundation for your beautiful wreath.
Inspiration for Wreath Designs
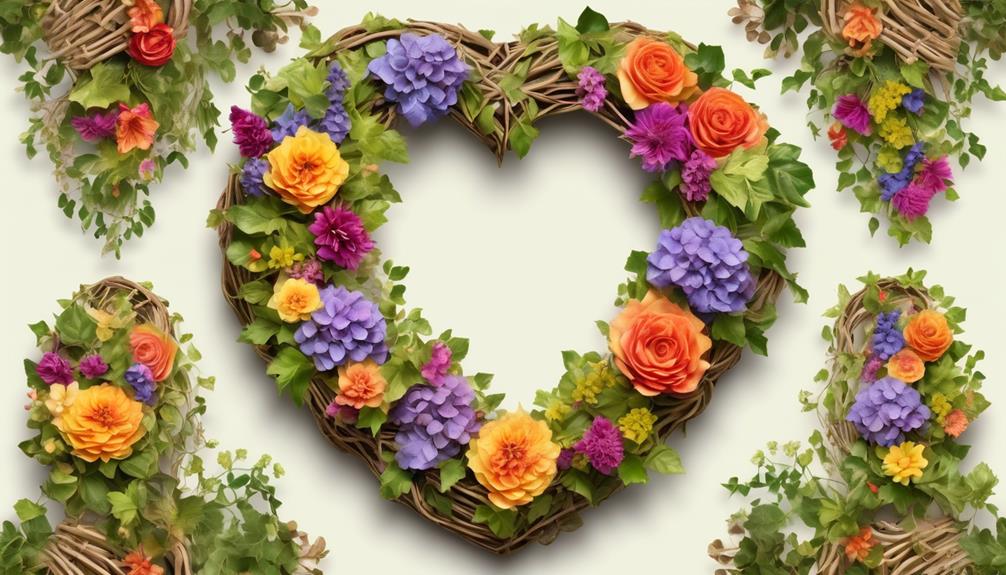
Looking for inspiration to create unique wreath designs can be as simple as taking a walk in nature or browsing through home decor magazines. Finding design inspiration for wreaths can ignite creative ideas and bring a personal touch to your creations. Whether it's incorporating seasonal elements or experimenting with different textures and colors, there are countless ways to infuse creativity into your wreath designs. Here are some ideas to help spark your imagination:
| Seasonal Themes | Natural Elements | Color Schemes |
|---|---|---|
| Spring florals | Pinecones | Pastel tones |
| Autumn foliage | Berries | Warm earthy hues |
| Winter greens | Seashells | Cool blues and whites |
Frequently Asked Questions
Can I Use a Different Type of Wire for the Frame, or Does It Have to Be a Specific Kind?
We've found that using a different wire for the frame is often a matter of personal preference. Some crafters swear by specific wire types for durability, while others have success with different options. Just be sure to consider the flexibility and strength of the wire to support the wreath form.
Also, keep in mind that the drying time and weight of decorative elements can influence the wire choice.
How Long Does It Take for the Twine to Dry After Wrapping the Frame?
After wrapping the frame with twine, the wreath base typically takes around 24-48 hours to dry completely, depending on the thickness of the twine and the humidity of the environment.
We've found that using a thinner twine can speed up the drying process, but it's essential to ensure that the twine is thoroughly dry before continuing with the crafting.
Different wire types can affect how the twine dries, so it's crucial to choose the right one.
Are There Any Specific Types of Decorative Elements That Work Better for a Heart Shaped Wreath Base?
When making a heart-shaped wreath, the best materials for decorative elements depend on the overall look you're going for. Flowers, ribbons, and wooden accents work well.
It's important to choose items that complement the wreath frame and can withstand the twine wrapping. Consider using artificial elements for easier wreath maintenance.
What Is the Best Way to Secure the Hanger to the Wreath Without Damaging the Frame?
Securing the hanger to the wreath without damaging the frame is essential for a sturdy and long-lasting wreath. We recommend using flexible wire, gently wrapping it around the frame and hanger to hold them together securely.
This method ensures the hanger stays in place without causing any harm to the delicate frame. It's all about finding that perfect balance between security and gentleness for a beautiful wreath.
Are There Any Specific Maintenance Tips for Preserving the Shape of the Wreath Over Time?
To preserve the wreath's shape, we recommend regularly fluffing and reshaping the foliage.
Also, consider storing it in a cool, dry place when not in use.
When making a heart shaped wreath base, we secure the hanger with twine wrapping to avoid damaging the frame.
After assembly, we allow ample drying time to ensure the wreath maintains its shape.
These steps help maintain the wreath's appearance over time.
Conclusion
We loved making our heart-shaped wreath base and we hope you'll too!
It's amazing how a simple wire frame can transform into a beautiful, personalized decoration with just a few materials and some creativity.
Just like a heart, a wreath can symbolize love, warmth, and welcome.
So, grab your supplies and let your imagination run wild – you'll be amazed at the results!
- About the Author
- Latest Posts
Introducing Ron, the home decor aficionado at ByRetreat, whose passion for creating beautiful and inviting spaces is at the heart of his work. With his deep knowledge of home decor and his innate sense of style, Ron brings a wealth of expertise and a keen eye for detail to the ByRetreat team.
Ron’s love for home decor goes beyond aesthetics; he understands that our surroundings play a significant role in our overall well-being and productivity. With this in mind, Ron is dedicated to transforming remote workspaces into havens of comfort, functionality, and beauty.
-

 Decor2 weeks ago
Maximalist Decor Explained: Embrace More Style
-

 Vetted2 weeks ago
15 Best Foot Massagers for Neuropathy to Soothe Your Feet and Relieve Discomfort
-

 Vetted3 weeks ago
15 Best Sports Laundry Detergents for Keeping Your Activewear Fresh and Clean
-

 Vetted4 weeks ago
15 Best Tall Toilets for Seniors That Combine Comfort and Safety
-

 Vetted4 weeks ago
15 Best Dish Scrubbers to Keep Your Kitchen Sparkling Clean
-

 Vetted4 days ago
15 Best Cleaners for Fiberglass Showers to Keep Your Bathroom Sparkling Clean
-

 Decor4 weeks ago
What Is Eclectic Home Decor
-
 Vetted1 week ago
15 Best Organic Pest Control Solutions for a Naturally Pest-Free Home


