Decor
How to Make Lighted Wine Bottle Decor
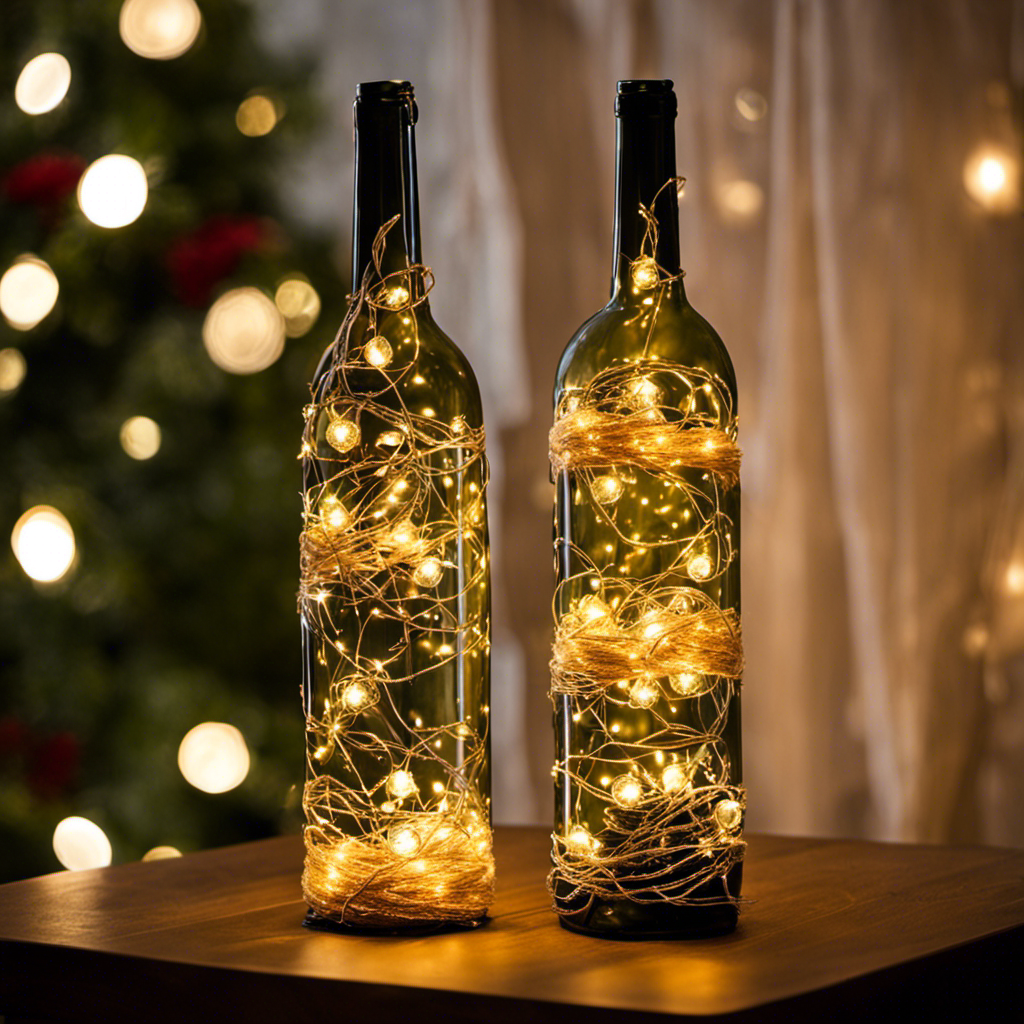
As a craft enthusiast, I have always been fascinated by the beauty and versatility of wine bottles. They can be transformed into stunning pieces of decor with just a little creativity and some twinkling lights.
In this article, I will guide you through the process of making your own lighted wine bottle decor. From choosing the perfect bottle to adding personalized touches, I will provide you with detailed instructions and expert tips to create a truly enchanting centerpiece for any occasion.
Get ready to let your creativity shine!
Key Takeaways
- Consider the shape, color, and size of the bottle to enhance the decor
- Thoroughly clean the bottle and remove any labels or adhesive residue
- Personalize the lighted wine bottle decor by choosing a design
- Explore different lighting options such as fairy lights or LED strip lights
Choosing the Right Wine Bottle
To start making your lighted wine bottle decor, you’ll want to choose the right wine bottle. Wine bottle selection is an important step in creating the perfect decoration. Not only does it determine the overall aesthetic of your project, but it also provides an opportunity for wine bottle recycling.
Look for bottles that have interesting shapes or colors that will enhance your decor. Consider the size of the bottle as well, as it will determine the amount of lights you can insert. When choosing a wine bottle, make sure it is clean and free from any labels or stickers. This will ensure a smooth surface for decorating.
Now that you have chosen the perfect wine bottle, let’s move on to preparing it for decoration.
Preparing the Wine Bottle for Decoration
Before starting, it’s important to clean the wine bottle thoroughly. Preparing the wine bottle for decoration is a crucial step in creating a stunning lighted wine bottle decor.
First, remove any labels or adhesive residue from the bottle by soaking it in warm, soapy water. Use a scrub brush or sponge to gently scrub away any stubborn residue. Rinse the bottle thoroughly and allow it to dry completely.
Next, consider applying a base coat of paint to the bottle to create a smooth and even surface for the decorative elements. Choose a color that complements your desired theme or aesthetic. Once the paint is dry, you can start decorating the bottle with lights, ribbons, or any other embellishments of your choice.
Get creative and let your imagination run wild to create a unique and eye-catching lighted wine bottle decor.
Selecting and Applying the Design
Once you have chosen a design, it’s time to apply it to the wine bottle. Design selection is an exciting part of the process, as it allows you to personalize your lighted wine bottle decor. Whether you opt for a delicate floral pattern or a bold geometric design, the possibilities are endless.
To apply the design, start by cleaning the surface of the bottle and ensuring it is dry. Then, carefully place the stencil or transfer paper onto the bottle, making sure it is centered and aligned properly. Next, use a brush or sponge to apply the paint or adhesive onto the stencil, filling in the design. Allow it to dry completely before removing the stencil.
Now that your design is applied, you are ready to move on to the next step: adding lights to the wine bottle.
Adding Lights to the Wine Bottle
Now that you’ve applied your design, it’s time to add the lights to your wine bottle. The lighting options for this project are endless, allowing you to create a beautiful and unique display. Here’s how to do it:
- Fairy lights: Wrap a string of fairy lights around the bottle, making sure to evenly distribute them for a magical effect.
- LED strip lights: Attach an LED strip light to the inside of the bottle, creating a stunning glow that illuminates the entire bottle.
By incorporating these lighting options, you can enhance the beauty of your wine bottle decor. Experiment with different bottle arrangements and lighting techniques to achieve the desired ambiance.
Once you’ve added the lights, it’s time to secure them in place, ensuring they stay put and provide a consistent glow.
Securing the Lights in Place
To keep the lights in place, you’ll simply need to use a small amount of adhesive or tape.
When it comes to fixing lights in your lighted wine bottle decor, securing the wires is essential. Start by positioning the lights inside the bottle, making sure the wires are neatly arranged. Then, use a clear adhesive or tape to secure the wires to the inside of the bottle. This will prevent them from moving around and tangling, ensuring a clean and polished look.
Additionally, you can use adhesive dots or double-sided tape to secure the battery pack or plug to the bottom of the bottle. This way, everything will stay in place and your lighted wine bottle decor will shine beautifully.
Now, let’s move on to enhancing the decorative features to make your creation even more stunning.
Enhancing the Decorative Features
When it comes to enhancing the decorative features of any space, creative lighting techniques and choosing complementary materials are two key points to consider.
With the right lighting techniques, you can create a captivating and inviting atmosphere that highlights the best features of your decor.
Additionally, selecting materials that complement each other can enhance the overall aesthetic and create a harmonious visual appeal.
In this discussion, I will delve into these two aspects in detail, providing you with valuable insights and tips to elevate your decorative game.
Creative Lighting Techniques
You’ll want to experiment with different lighting techniques to add a creative touch to your lighted wine bottle decor. Here are some innovative illumination techniques and unique lighting designs that you can try:
-
Fairy Lights: Wrap delicate strands of fairy lights around the bottle, creating a magical and ethereal glow.
-
LED Strips: Attach LED strips inside the bottle for a modern and futuristic look, allowing you to choose from a wide range of colors and effects.
-
Silhouette Shadows: Create captivating shadows by placing cut-out shapes, such as stars or flowers, in front of the light source.
By incorporating these lighting techniques, you can elevate your lighted wine bottle decor to new heights of visual appeal.
Now, let’s explore how to choose complementary materials to enhance the overall aesthetic of your creation.
Choosing Complementary Materials
For a visually pleasing result, consider incorporating complementary materials that enhance the overall aesthetic of your illuminated wine bottle creation.
When it comes to choosing unique materials, the possibilities are endless. You can opt for materials that add texture, such as burlap or lace, to give your wine bottle a rustic or vintage feel.
Incorporating natural elements like twigs, leaves, or dried flowers can bring a touch of nature into your design. These elements can be secured to the bottle using twine or adhesive.
Additionally, consider using colored glass pebbles or beads to add a pop of color and sparkle to your creation.
By carefully selecting materials that complement your design, you can create a truly stunning and personalized lighted wine bottle decor that will surely catch the eye of anyone who sees it.
Now, let’s move on to the next step of personalizing your lighted wine bottle.
Personalizing Your Lighted Wine Bottle
When it comes to personalizing your lighted wine bottle, there are a few key areas to focus on.
First, consider the design of the bottle itself. There are endless possibilities, from sleek and modern to rustic and vintage.
Next, think about the lighting options. You can choose from various colors, intensity levels, and even different effects such as flickering or fading.
Lastly, don’t forget about the label. You can create a custom label with your own design or message, adding a personal touch to your lighted wine bottle.
Decorative Bottle Designs
There’s a variety of decorative bottle designs that can transform a simple wine bottle into a stunning piece of decor. When it comes to decorative bottle crafts and repurposing glass bottles, the possibilities are endless.
Let me paint a picture for you:
-
Shapes: From sleek and slender to curvaceous and round, bottles come in all shapes and sizes. Choose a design that complements your style and the room you plan to place it in.
-
Colors: Glass bottles can be found in a multitude of colors, from clear and translucent to vibrant blues, greens, and even frosted finishes. Pick a color that matches your desired aesthetic.
-
Patterns and textures: Etched designs, frosted finishes, or even painted patterns can add an extra touch of elegance to your bottle. Consider incorporating intricate designs or textured surfaces for a truly unique look.
With these decorative bottle designs, you can easily elevate any space and create a stunning centerpiece for your home.
Customized Lighting Options
As I continue exploring the world of lighted wine bottle decor, I can’t help but be captivated by the endless possibilities of customized lighting styles. It’s incredible to see how different lighting techniques can transform a simple wine bottle into a stunning piece of art. From soft, warm fairy lights to bold, colorful LED strips, the options are truly limitless.
One of the most exciting aspects of creating lighted wine bottle decor is the opportunity to incorporate unique bottle embellishments. Whether it’s adding a touch of elegance with delicate lace or creating a rustic look with twine and burlap, these embellishments can truly elevate the overall design. I’ve also come across some extraordinary ideas, like using glass paints to create intricate designs or attaching small trinkets that reflect the light in mesmerizing ways.
With customized lighting styles and unique bottle embellishments, the world of lighted wine bottle decor is a treasure trove of creativity and personalization. It’s a delightful journey of transforming ordinary wine bottles into extraordinary works of art.
Personalized Label Ideas
You can unleash your creativity by designing personalized labels that add a unique touch to your lighted wine bottle creations. Here are some personalized label ideas that will elevate your wine bottle crafts and DIY home decor:
-
Customized Names: Personalize your wine bottle by adding the names of your loved ones. It could be a perfect gift for birthdays or anniversaries. Include special dates or memorable quotes to make it even more meaningful.
-
Themed Labels: Create labels that match the theme of your event or the season. From elegant floral designs for weddings to spooky Halloween themes, the possibilities are endless. Incorporate vibrant colors and patterns that reflect your personal style.
Adding personalized labels to your lighted wine bottle decor not only adds a personal touch but also makes them stand out. Now, let’s explore creative ways to display your beautiful creations.
Displaying Your Lighted Wine Bottle Decor
To showcase your lighted wine bottle decor, try placing it on a mantel or shelf for a cozy ambiance. However, if you’re looking for alternative options, there are various hanging options that can add a unique touch to your space. One option is to hang your lighted wine bottle decor from the ceiling using decorative hooks or chains. This creates a whimsical and eye-catching display that can instantly transform any room. Another option is to create a DIY wall-mounted display using a wooden board and hooks. This allows you to arrange multiple wine bottles in a creative pattern, adding depth and visual interest to your wall. Finally, consider using your lighted wine bottle decor as a centerpiece for your dining table or outdoor patio. This creates a warm and inviting atmosphere for gatherings and special occasions.
| Hanging Options | Alternative Uses |
|---|---|
| Ceiling Hooks or Chains | Wall-mounted Display |
| DIY Wooden Board and Hooks | Dining Table Centerpiece |
| Outdoor Patio Decor |
– Can Lighted Wine Bottle Decor be Used as a Studio Decor with Airfloat Gallery Frames?
Yes, lighted wine bottle decor can be used as studio decor with airfloat gallery frames. The weight of the studio decor airfloat gallery frames should be taken into consideration when choosing the appropriate display method for the lighted wine bottle decor.
Tips and Tricks for Maintaining and Troubleshooting
One important tip for maintaining your lighted wine bottle decor is to regularly check the batteries to ensure they are properly functioning.
Here are some additional tips and tricks for maintaining and troubleshooting your lighted wine bottle decor:
-
Maintaining lights:
-
Clean the bottles regularly to remove dust and dirt that can affect the brightness of the lights.
-
Replace the batteries as soon as they start to weaken to maintain optimal brightness.
-
Troubleshooting wiring:
-
If the lights flicker or don’t turn on, check for loose connections in the wiring and secure them properly.
-
If a section of lights goes out, use a voltage tester to identify the faulty bulb and replace it.
Frequently Asked Questions
What Are Some Safety Precautions to Consider When Working With Lighted Wine Bottle Decor?
When working with lighted wine bottle decor, it’s crucial to prioritize safety. Some important precautions include ensuring electrical components are properly insulated, avoiding overloading circuits, and keeping flammable materials away from the heat source. Safety first!
Can I Use Any Type of Lights for My Lighted Wine Bottle Decor?
Yes, you can use various types of lights for your lighted wine bottle decor. It’s important to consider factors such as the size of the bottle and the desired ambiance. Choose lights that complement your decor style and create a mesmerizing glow.
How Long Do the Lights Typically Last Before Needing to Be Replaced?
The lifespan of the lights in lighted wine bottle decor varies depending on usage, but typically they last for several months before needing to be replaced. To extend their lifespan, try troubleshooting common issues like loose connections or faulty wiring.
Can I Use a Different Type of Bottle Other Than a Wine Bottle for This Project?
Yes, you can use alternative bottles for this project. There are so many creative options available, such as liquor bottles or decorative glass bottles. Let your imagination run wild and choose a bottle that suits your style!
Are There Any Specific Cleaning Instructions for Maintaining the Decorative Features on the Lighted Wine Bottle Decor?
To keep the decorative features on the lighted wine bottle decor looking their best, follow these cleaning instructions and maintenance tips. Regularly dust the bottle with a soft cloth and avoid using harsh chemicals that could damage the design.
Conclusion
In conclusion, creating your own lighted wine bottle decor is a fun and rewarding DIY project. By following these steps, you can transform a simple wine bottle into a stunning decorative piece for your home or special event.
Remember to choose the right bottle, prepare it properly, and apply a design that suits your taste. Adding lights and securing them in place will bring your creation to life. Enhance the decorative features and personalize it to make it truly unique.
Finally, proudly display your lighted wine bottle decor and enjoy the beautiful ambiance it creates. Cheers to your creativity and craftsmanship!
- About the Author
- Latest Posts
Meet Bethia, the visionary designer at ByRetreat who brings a touch of magic to every remote workspace she creates. With a boundless imagination and an eye for beauty, Bethia is passionate about transforming ordinary spaces into extraordinary havens of creativity and comfort.
Bethia possesses a unique talent for envisioning the perfect combination of furniture, colors, and textures that harmonize seamlessly in a room. She understands that selecting furniture goes beyond mere functionality; it’s about curating pieces that evoke a sense of style and sophistication while enhancing the overall ambiance.
Decor
How to Include Large Globe Balloons Wedding Decor Diy
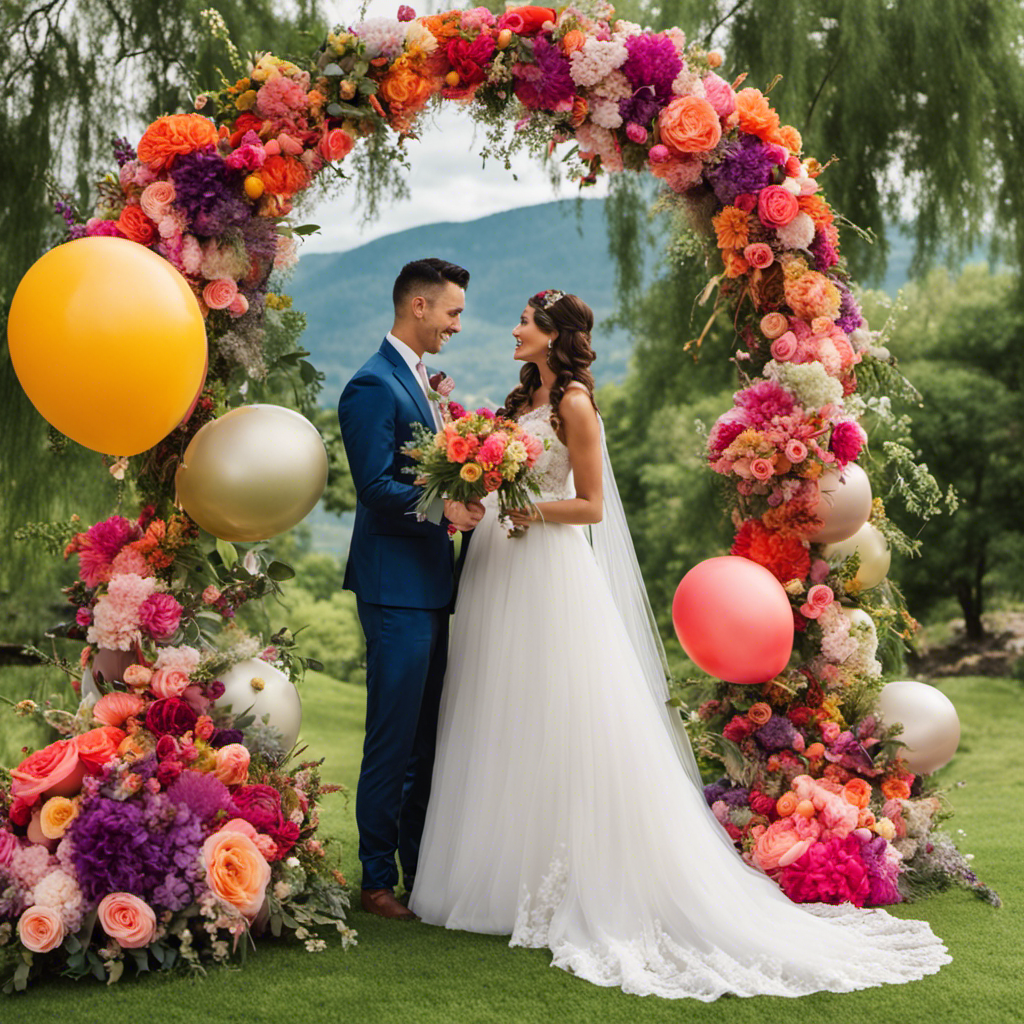
As I entered the enchanting world of wedding decorations, I was immediately drawn to the charm of oversized globe balloons. These whimsical floating orbs have become an essential element for couples seeking to infuse their big day with a sprinkle of magic.
In this article, I will guide you through the art of DIY large globe balloon decor, from choosing the right size to adding personalized touches. Get ready to elevate your wedding venue to new heights with these stunning creations.
Key Takeaways
- Consider the overall aesthetic and available space when choosing balloon size
- Customize balloon accessories like tassels and ribbons to match the color scheme
- Use a good quality balloon pump designed for large balloons
- Incorporate personalized wedding favors by attaching tags or labels to each balloon
Choosing the Right Size of Large Globe Balloons
When choosing the right size of large globe balloons for your wedding decor, it’s important to consider the overall aesthetic and space available. Large globe balloons can add a whimsical and dreamy touch to any venue.
But it’s essential to choose the size that complements your wedding theme and venue size. If you have a spacious venue, opt for larger balloons to create a grand and eye-catching display. On the other hand, if you have a smaller venue, consider using smaller-sized balloons to avoid overwhelming the space.
Additionally, keep in mind the height of your venue’s ceiling when selecting the balloon size. To create a visually pleasing arrangement, try grouping balloons of different sizes together or using a mix of small and large balloons throughout the venue.
With these tips in mind, you can create a stunning balloon display that perfectly suits your wedding venue.
Essential Supplies for DIY Large Globe Balloon Decor
When it comes to creating stunning DIY large globe balloon decor, two key factors that can make a big impact are the balloon color options and the hanging techniques.
Choosing the right balloon colors can set the mood and theme of the event, whether it’s a whimsical pastel palette or a bold and vibrant scheme.
Additionally, understanding the different hanging techniques can help ensure that your balloon arrangements are secure and visually appealing. Whether you opt for helium-filled balloons suspended from the ceiling or use clear fishing line to create floating clusters.
Balloon Color Options
Choose from a variety of vibrant colors for your large globe balloons wedding decor. When it comes to balloon arrangements, color is key to creating a visually stunning display. Whether you want to go for a classic white and gold theme or a bold and vibrant mix of colors, the options are endless.
Balloon accessories like tassels and ribbons can also be customized to match your chosen color scheme, adding an extra touch of elegance to your decor. From soft pastels to rich jewel tones, you can find the perfect shades to complement your wedding theme.
Now, let’s move on to the next step: hanging techniques.
Hanging Techniques
To create a beautiful display, consider using different hanging techniques for your balloons. When it comes to hanging balloons, there are various securing methods that can add a touch of elegance and creativity to your decor. Here are five techniques you can try:
-
Ribbon and String: Tie a colorful ribbon or string to the balloon and hang it from the ceiling or a sturdy object.
-
Balloon Clips: Use specially designed balloon clips that securely attach to the balloon and allow you to hang them easily.
-
Fishing Line: Invisible and versatile, fishing line can be used to suspend balloons from above, creating a floating effect.
-
Balloon Arch: Create a stunning balloon arch by attaching balloons to a sturdy frame or using a balloon arch kit.
-
Balloon Nets: For larger displays, consider using balloon nets to create a cluster of balloons that can be hung from the ceiling.
Preparing and Inflating Large Globe Balloons
Inflating large globe balloons for wedding decor is a fun and creative way to add a unique touch to your special day. When it comes to inflating these balloons, there are a few techniques you can use to ensure they look their best.
First, make sure you have a good quality balloon pump that is specifically designed for large balloons. This will make the process much easier and faster.
Start by stretching the balloon gently before inflating to prevent it from popping. As you inflate, be mindful of not overfilling the balloon, as it can burst.
If you encounter any issues, such as a balloon not inflating properly or air leaking out, try using a bit of soapy water to locate the leak and patch it up.
With these inflating techniques and troubleshooting tips, your large globe balloons will be the perfect addition to your wedding decor.
Creative Ideas for Hanging Large Globe Balloons
Get creative with how you hang those big globe balloons to make your wedding venue truly stand out. There are so many unique hanging ideas for outdoor wedding decor that will add a touch of whimsy and elegance to your special day. Here are some ideas to inspire you:
- Suspend the balloons from the branches of tall trees, creating a magical floating effect.
- Hang the balloons in clusters above the dance floor, adding a burst of color and movement.
- Use clear fishing line to hang the balloons at varying heights, creating an ethereal canopy.
- Attach the balloons to a decorative arch or pergola, framing the ceremony or reception area.
- Hang the balloons from shepherd’s hooks or stakes, lining the aisle or pathway.
These hanging ideas will transform your wedding venue into a dreamy and enchanting space that your guests will never forget.
Adding Personalized Touches to Large Globe Balloon Decor
Make your venue truly unique by adding personalized touches to your hanging globe balloon decorations.
One way to do this is by incorporating personalized wedding favors into the design. You can attach small personalized tags or labels to each balloon, showcasing the names of the bride and groom or a special message for your guests.
Another idea is to use unique table centerpieces that complement the hanging globe balloons. For example, you can place personalized photo frames or miniature replicas of famous landmarks on each table, creating a cohesive theme throughout your wedding decor.
These personalized touches will not only add a special touch to your hanging globe balloon decorations but also make your wedding day truly memorable for both you and your guests.
Tips for Arranging Large Globe Balloons in Wedding Venues
Arranging large globe balloons in wedding venues can be made easier by considering the size and layout of the space. As a wedding decorator, I’ve learned a few tips and tricks to ensure that these stunning balloons become the focal point of any wedding venue.
Here are my top tips for arranging large globe balloons:
-
Choose the right size: Large globe balloons come in various sizes, so it’s essential to select ones that will complement the venue’s proportions.
-
Create focal points: Place the balloons strategically to create visual interest and draw attention to key areas, such as the ceremony altar or the entrance.
-
Mix and match colors: Experiment with different color combinations to match the wedding’s theme and color palette.
-
Consider ceiling height: Make sure the balloons don’t obstruct the view or feel cramped. Adjust the height accordingly.
-
Follow wedding balloon trends: Stay up-to-date with the latest trends and incorporate them into your designs to create a modern and stylish atmosphere.
Maintenance and Removal of Large Globe Balloons After the Wedding
Now that the wedding is over and the large globe balloons have brought a touch of magic to the venue, it’s time to think about their maintenance and removal.
After the event, it is important to handle the balloons with care to ensure they can be reused or stored properly. Deflating them can be done by gently releasing the air through the valve.
Once deflated, it’s crucial to clean the balloons using a mild soap and water solution to remove any dirt or residue. After cleaning, allow them to dry completely before storing.
Speaking of storage options, consider using large plastic bins or airtight bags to keep the balloons protected from dust and moisture.
Additionally, don’t limit yourself to just weddings – these large globe balloons can be repurposed for other events or even as unique home decor pieces. Get creative and explore the alternative uses for these stunning balloons to maximize their value and beauty.
Can Large Globe Balloons be Used as Long-lasting Wedding Decorations?
Yes, large globe balloons can be used as long-lasting wedding decorations. Their durability and ability to retain helium for an extended period make them ideal for adorning wedding venues. Gift balloons longevity explained – they can be filled with helium and will maintain their fullness for several days, providing a beautiful and festive atmosphere.
Frequently Asked Questions
What Are Some Alternative Ways to Use Large Globe Balloons Other Than Hanging Them?
Some alternative balloon arrangements for large globe balloons, aside from hanging them, include using them as creative centerpiece ideas. They can be filled with confetti, attached to sticks, or placed in clear vases for a unique and eye-catching wedding decoration.
Are There Any Specific Types of Helium or Gas That Should Be Used to Inflate Large Globe Balloons?
I’ve found that using different gases for inflating large globe balloons can really make a difference in the overall effect. Helium gives them that classic float, while air makes them more grounded and durable.
Can Large Globe Balloons Be Customized With Different Colors or Patterns?
Yes, large globe balloons can be customized with various colors and patterns. They add a whimsical touch to any event, especially when incorporated in DIY balloon garlands of different sizes. Get creative and have fun!
How Long Do Large Globe Balloons Typically Last Before Deflating?
Large globe balloons typically last for several hours before they start to deflate. To make them last longer, ensure they are properly inflated and avoid exposing them to sharp objects or extreme temperatures.
Are There Any Safety Precautions to Consider When Using Large Globe Balloons at a Wedding Venue?
When it comes to wedding venue safety precautions and handling large globe balloons safely, there are a few things to keep in mind. Ensuring proper anchoring, avoiding sharp objects, and monitoring for any signs of deflation are all important steps to take.
Conclusion
As I conclude this guide on DIY large globe balloon wedding decor, I hope you feel inspired and ready to create a magical atmosphere for your special day.
By following the steps outlined, you can easily incorporate these stunning balloons into your wedding venue. Remember to choose the right size, gather the necessary supplies, and unleash your creativity.
Whether you hang them from the ceiling or use them as centerpieces, these balloons will add a touch of whimsy and elegance to your celebration.
So, let your imagination soar and let these balloons transport you and your guests to a world of enchantment.
- About the Author
- Latest Posts
Introducing Charles, the Editor in Chief at ByRetreat, whose passion for interior design and editorial excellence elevates every remote workspace to new heights. With his keen eye for detail, impeccable taste, and expertise in design, Charles brings a wealth of knowledge and creativity to the ByRetreat team.
As the Editor in Chief of a renowned lifestyle blog, Charles has honed his skills in curating captivating content and staying up-to-date with the latest trends in interior design. His deep understanding of aesthetics and the power of storytelling through design enables him to create remote workspaces that are not only visually stunning but also rich in personality and meaning.
Valentine's Day Decoration
What Size Should Balloons Be for a Column?
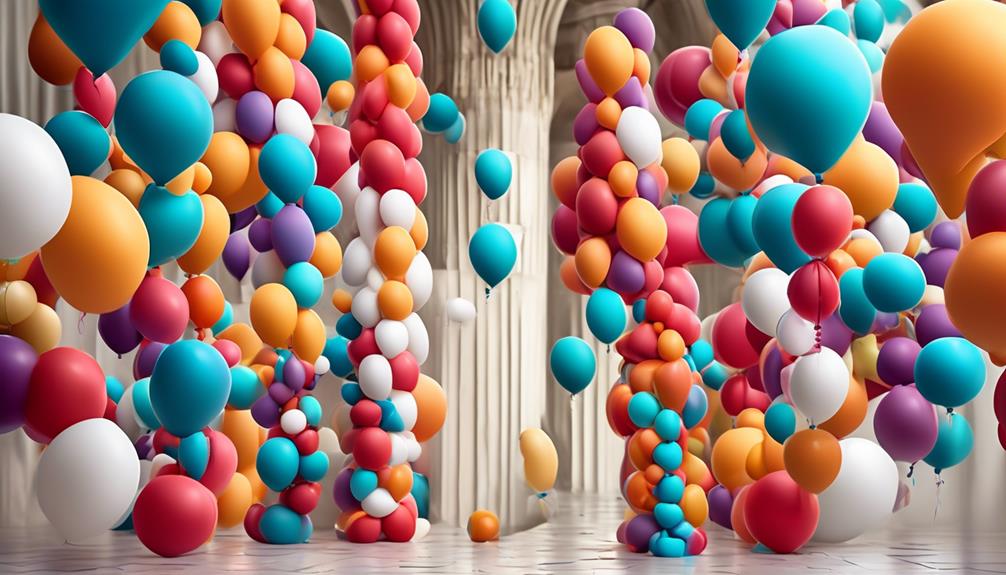
When it comes to crafting an eye-catching balloon column, the size of the balloons is a key factor that is often overlooked. It’s more than just inflating balloons and stacking them up. The size of the balloons can greatly influence the appearance and stability of the column.
But how do you determine the ideal size for your balloon column? It’s a question that often perplexes many, but fear not, we’re here to shed light on this important aspect of balloon décor.
Join us as we explore the various factors to consider when determining the size of balloons for a column, and how to make the best choice for your specific event or occasion.
Key Takeaways
- Balloon size directly impacts the visual appeal of the column
- Using a mix of sizes creates dimension and texture
- Balloon size should complement the overall aesthetic and venue
- Properly inflated balloons are crucial for stability and appearance
Importance of Balloon Size
Balloon size is a critical factor in creating a visually appealing and structurally sound column decoration. When it comes to event decor, the size of the balloons used can make a significant difference in the overall impact of the design. The visual appeal of a balloon column is directly influenced by the sizes of the balloons used. Larger balloons create a bold and eye-catching display, while smaller balloons can add intricate detail and texture. By strategically combining different balloon sizes, it’s possible to achieve a stunning visual effect that captures the essence of the event.
Moreover, the structural integrity of the column is closely tied to the balloon sizes. Using appropriately sized balloons ensures that the column is sturdy and can withstand the duration of the event without losing its shape or stability. It’s essential to carefully consider the proportions and distribution of balloon sizes to achieve a well-balanced and robust column decoration.
Ultimately, the right combination of balloon sizes contributes to a visually captivating and structurally sound column that enhances the ambiance of any event.
Standard Balloon Sizes

We’ve got a range of standard balloon sizes to consider, and each one can make a big difference in how your column turns out.
As we look at different column heights, we’ll need to think about which size will best fit the space and achieve the desired visual impact.
Plus, don’t forget that color plays a key role in the overall effect, so we’ll be exploring that aspect too.
Balloon Size Options
When considering balloon sizes for a column, it is essential to understand the standard balloon sizes available to achieve the desired effect. We have a range of options to suit various needs, from budget-friendly choices to customizable possibilities. Here’s a quick look at the standard balloon sizes:
Balloon Size Diameter (inches) Common Uses 5″ 5 Balloon animals, small decorations 11″ 11 Most popular size, versatile 36″ 36 Eye-catching displays, large events 16″ 16 Unique designs, personalized messages 24″ 24 Special occasions, grand entrances
Understanding these standard balloon sizes allows for creative and precise column designs that cater to specific preferences and event themes.
Column Height Considerations
Considering the balloon sizes for a column, it’s important to factor in the height considerations to ensure the desired effect is achieved. When determining the balloon size for a column in event decor, the height of the column plays a crucial role.
For standard balloon sizes, columns that are around 5-7 feet tall typically use 11-inch balloons. However, for taller columns reaching 8-10 feet, 16 or 24-inch balloons might be more suitable to maintain proportions and visual impact.
It’s essential to strike a balance between balloon size and column height to create an aesthetically pleasing display. By carefully considering the column height in relation to the appropriate balloon size, event decorators can achieve stunning and harmonious decor that captivates and delights guests.
Color and Visual Impact
To maximize the visual impact of event decor using standard balloon sizes, careful consideration of color selection is paramount. Color coordination plays a pivotal role in enhancing the overall aesthetic appeal of balloon arrangements.
When choosing balloon colors, it’s essential to align them with the event theme to create a cohesive and visually captivating display. Vibrant and complementary colors can infuse energy and excitement, while softer pastel shades can evoke a sense of elegance and tranquility.
The visual impact of balloon arrangements can be heightened by strategically incorporating contrasting hues or creating eye-catching patterns. By thoughtfully selecting balloon colors that harmonize with the event’s theme, one can elevate the atmosphere and create a truly captivating visual spectacle.
Large Balloon Options

Among the large balloon options available for creating a striking column, the 36-inch balloons offer a bold and impactful choice for adding visual appeal. When inflated, these larger-than-life balloons command attention and create a sense of grandeur.
Here are three reasons why 36-inch balloons are an excellent choice for column decorations:
- Balloon Inflation: The 36-inch balloons, when fully inflated, create a dramatic statement with their impressive size. They fill out the column beautifully and make a strong visual impact, setting the tone for the entire event.
- Decorative Elements: These large balloons provide a versatile canvas for incorporating decorative elements. Whether it’s tassels, garlands, or floral arrangements, the ample surface area of the 36-inch balloons allows for creative customization, adding a personalized touch to the column.
- Visual Impact: The sheer size of the 36-inch balloons ensures that the column stands out and becomes a focal point of the décor. Their presence adds a sense of festivity and celebration, elevating the ambiance of the space.
Utilizing 36-inch balloons for a column guarantees a captivating display that captivates the audience and sets the stage for a memorable event.
Small Balloon Options

After highlighting the impact of 36-inch balloons on column decorations, we can now explore the versatility and charm of smaller balloon options for creating visually captivating columns. Small balloon options offer a wide range of possibilities for creating stunning balloon columns. Let’s take a look at some popular small balloon options and their potential for creating beautiful columns.
Balloon Size Diameter (inches) Best Use Case 5-inch 5 Adding texture and filling in gaps 9-inch 9 Creating intricate designs 12-inch 12 Building the main structure of columns
Small balloon options, such as 5-inch, 9-inch, and 12-inch balloons, provide versatility in creating visually captivating columns. The 5-inch balloons are perfect for adding texture and filling in gaps between larger balloons, while the 9-inch balloons are ideal for creating intricate designs within the column. The 12-inch balloons serve as the main building blocks for the column structure, providing a solid foundation for the overall design. By using a combination of these balloon size alternatives, it’s possible to create columns that are not only visually stunning but also unique and eye-catching.
Choosing the Right Size

Selecting the appropriate size of balloons is crucial for achieving the desired visual impact in column decorations. When considering the right size for your balloon column, there are a few key factors to keep in mind:
- Size Variations: Balloons come in a variety of sizes, from small to large. Choosing the right size depends on the overall look you want to achieve. Larger balloons can create a bold and eye-catching effect, while smaller ones can add depth and intricacy to your design.
- Visual Impact: The size of the balloons directly impacts the visual appeal of your column. Larger balloons draw attention and can serve as focal points, especially in larger spaces. On the other hand, using a mix of sizes can create dimension and texture, making the column visually engaging from every angle.
- Theme and Venue: Consider the theme of your event and the venue where the balloon column will be displayed. The size of the balloons should complement the overall aesthetic and fit harmoniously within the space.
Carefully considering these aspects will help you choose the right balloon sizes to create a stunning and impactful column display.
Balloon Size Considerations

Considering the visual impact and theme of your event, we carefully evaluate the balloon sizes to ensure a stunning and harmonious display within the venue. Balloon size trends are constantly evolving, and it’s important to stay updated to create a modern and captivating look. Typically, for a column, we often opt for a variety of balloon sizes to add depth and visual interest. Larger balloons at the base provide stability and a grand foundation, while smaller balloons towards the top add delicacy and flair.
Inflation techniques also play a crucial role in determining the final size and look of the balloons. Using air provides a more controlled and consistent size, ideal for creating uniformity in the column. On the other hand, helium inflation allows for a floaty, ethereal appearance, adding a touch of whimsy to the arrangement.
Ultimately, the choice of balloon sizes and inflation techniques should align with the overall aesthetic and ambiance of the event. By carefully considering these factors, we ensure that the balloon column becomes a captivating focal point that seamlessly integrates with the event’s theme and decor.
Tips for Balloon Sizing

When it comes to balloon sizing, we’ve learned that there are a few key considerations to keep in mind.
We’ll be sharing some recommended balloon sizes to help you create stunning columns for any occasion.
Let’s dive into these essential tips and tricks for getting the perfect balloon sizes for your next event!
Balloon Size Considerations
Understanding the dynamics of balloon sizes is essential for creating visually appealing and structurally sound columns. When considering balloon size for a column, several important factors come into play:
- Balloon Inflation: Properly inflated balloons are crucial for achieving the desired look and stability of the column. Over-inflated balloons can lead to a column that looks overstretched and may be at risk of popping, while under-inflated balloons can result in a saggy and unappealing appearance.
- Balloon Size Impact: The size of the balloons directly impacts the overall look and feel of the column. Different sizes can create varying textures and visual interest, so it’s essential to consider the aesthetic effect desired for the specific event or space.
- Structural Integrity: Choosing the right balloon size is vital for ensuring the structural integrity of the column. Larger balloons might provide a more stable base, while smaller balloons could be used for intricate designs or to add detail.
Understanding these considerations will help in creating visually stunning and structurally sound balloon columns that leave a lasting impression.
Recommended Balloon Sizes
To achieve the desired visual impact and structural stability of a balloon column, it’s crucial to carefully consider recommended balloon sizes and their respective applications. Balloon size variations play a significant role in determining the overall look and feel of the column.
Larger balloons are ideal for creating a bold and eye-catching centerpiece, while smaller balloons work well for adding intricate details and patterns. When considering balloon size impact, event themes should also be taken into account.
For example, a whimsical and playful theme may call for a mix of different sized balloons to create an eclectic and dynamic column. Understanding the relationship between balloon size and decorating techniques is essential for achieving the perfect column that complements the event theme and captures attention.
Frequently Asked Questions
Can I Mix Different Sizes of Balloons in a Column?
Yes, mixing sizes of balloons in a column can create a stunning visual impact. By combining different sizes, we can add depth and dimension to the design, making it more visually appealing.
The variation in sizes adds interest and draws attention to the column. It’s a creative way to enhance the overall look and feel of the display, capturing the audience’s attention and making a statement.
Are There Any Safety Considerations When Using Different Balloon Sizes in a Column?
When using different balloon sizes in a column, safety considerations are crucial. We need to ensure structural stability, especially if incorporating larger and smaller balloons. The key is to evenly distribute the weight and maintain a secure base.
Additionally, securing the balloons properly prevents potential hazards. It’s important to consider these factors to ensure a safe and visually appealing balloon column.
How Do Outdoor Conditions, Such as Wind, Affect the Balloon Size Choice for a Column?
When considering outdoor conditions, such as wind, for our balloon columns, the impact of wind on balloon size is crucial. The right balloon size ensures stability and longevity.
Outdoor conditions play a pivotal role in our column design, prompting us to carefully select balloon sizes that can withstand various weather elements. Wind impact directly affects the balloon size choice, highlighting the importance of considering outdoor conditions when creating our stunning balloon columns.
What Are the Best Balloon Sizes for Creating a Spiral or Twisted Column Design?
When it comes to creating a spiral or twisted column design, color combinations and balloon arrangement are key. Design aesthetics and balloon inflation play a big role in achieving the desired look.
For a visually appealing column, consider using a variety of sizes and colors to create depth and visual interest. Experimenting with different balloon sizes and arrangements can help achieve a unique and eye-catching design.
Can I Use Non-Standard Balloon Sizes for a Column, and How Do I Determine the Best Size?
Sure, we can definitely use custom balloon sizes for a column. It’s a great way to add a unique design to our event. Get creative and consider unconventional materials for a truly one-of-a-kind look.
When determining the best size, consider the overall aesthetic and the intended impact. Custom sizes open up a world of possibilities, allowing us to craft columns that are truly unique and eye-catching.
Conclusion
In conclusion, the size of balloons for a column is an important factor to consider when creating balloon decor. It’s essential to choose the right size to achieve the desired look and effect.
By investigating different balloon sizes and considering important factors, such as the venue size and theme, you can ensure that your balloon columns make a big impact.
So, remember to choose your balloon sizes wisely to elevate your event decor to new heights!
- About the Author
- Latest Posts
Introducing Ron, the home decor aficionado at ByRetreat, whose passion for creating beautiful and inviting spaces is at the heart of his work. With his deep knowledge of home decor and his innate sense of style, Ron brings a wealth of expertise and a keen eye for detail to the ByRetreat team.
Ron’s love for home decor goes beyond aesthetics; he understands that our surroundings play a significant role in our overall well-being and productivity. With this in mind, Ron is dedicated to transforming remote workspaces into havens of comfort, functionality, and beauty.
Mardi Gras Decoration
How Do You Find Out What the Theme Nights Are on Royal Caribbean?

When it comes to theme nights on Royal Caribbean, it pays to plan ahead. We all want to maximize our cruise experience, and knowing about the theme nights in advance can enhance our trip with extra excitement.
There are several avenues to explore in order to uncover the upcoming themes, and some may surprise you. From the official Royal Caribbean website to insider tips from previous passengers, there are numerous ways to stay ahead of the game.
Let's explore the strategies and sources that can help us unlock the secrets of Royal Caribbean's theme nights.
Key Takeaways
- The Royal Caribbean website and app provide access to information about theme nights and the pre-cruise planner.
- The Cruise Compass and Daily Schedule are important sources for finding the schedule and details of theme nights.
- Social media platforms, online forums, and travel agents are additional sources of information and engagement regarding theme nights.
- Specialty restaurants collaborate with the cruise director to enhance theme night experiences and provide diverse dining options.
Royal Caribbean Website
When visiting the Royal Caribbean website, travelers can easily explore the wide array of theme nights offered on their cruises, providing an exciting glimpse into the diverse entertainment options available.
The website's pre-cruise planner is a valuable tool for guests to plan and prepare for their upcoming voyage. By simply logging into their account, travelers can access detailed information about the theme nights scheduled for their specific cruise.
The website offers an interactive experience, allowing users to browse through the various themes, from 70s disco parties to elegant formal nights, and select the ones that pique their interest. Additionally, the website provides insights into recommended attire for each theme night, ensuring that guests are well-informed and adequately prepared to participate in the festivities.
The user-friendly interface and comprehensive details make the Royal Caribbean website an indispensable resource for travelers seeking to immerse themselves in the onboard entertainment. It's a thoughtful touch that showcases Royal Caribbean's commitment to enhancing the guest experience and ensuring that everyone can fully enjoy the themed events during their cruise.
Pre-Cruise Planner

Upon exploring the diverse entertainment options available on the Royal Caribbean website, we can now turn our attention to the invaluable resource known as the Pre-Cruise Planner. This tool is a game-changer when it comes to maximizing your cruise experience.
The Pre-Cruise Planner allows us to delve into the array of cruise activities and entertainment options available on our upcoming Royal Caribbean adventure.
One of the key benefits of the Pre-Cruise Planner is the ability to secure reservations for popular entertainment options onboard. Whether it's securing a spot for a Broadway-style show, a thrilling aqua theater performance, or a comedy act, the planner ensures that we've access to the entertainment that excites us the most.
Moreover, the planner offers the opportunity to book cruise activities such as specialty dining, spa treatments, and shore excursions in advance. This not only saves time and hassle during the cruise but also allows us to secure spots for activities that tend to fill up quickly.
Cruise Compass
As we explore the world of theme nights on Royal Caribbean, it's crucial to understand the role of the Cruise Compass. This essential tool is our guide to the ship's daily activities, including the schedule for theme nights.
From locating the latest information on pirate or 70s disco nights to planning our evening entertainment, the Cruise Compass is our go-to resource for an unforgettable cruise experience.
Accessing Cruise Compass
To access the Cruise Compass on Royal Caribbean, simply navigate to the Royal Caribbean app on your mobile device and tap on the 'Cruise Compass' section to view the daily activities and events onboard.
The Cruise Compass is your go-to guide for interactive activities and onboard entertainment during your cruise. It provides a comprehensive schedule of everything happening on the ship, from live shows and themed parties to fitness classes and culinary demonstrations.
The app allows you to personalize your experience by setting reminders for activities you don't want to miss and exploring different categories such as family-friendly events, nightlife, and enrichment programs. With real-time updates, you can stay informed about any schedule changes or additional activities that may be added.
Accessing the Cruise Compass through the Royal Caribbean app ensures that you make the most of your cruise experience.
Theme Night Schedule
Navigating the Royal Caribbean app to access the Cruise Compass not only provides a comprehensive schedule of daily activities and events onboard but also offers valuable insights into the theme night schedule, ensuring an engaging and immersive cruise experience.
The theme night attire and activities are outlined in the Cruise Compass, allowing guests to plan and prepare for the themed evenings. From tropical nights requiring Hawaiian shirts and leis to formal nights with elegant attire, the schedule ensures that everyone can participate in the themed events.
In addition to dress codes, the Cruise Compass details the various theme night activities such as deck parties, live music, dance performances, and special dining experiences tailored to the theme. This comprehensive schedule ensures that guests can fully engage in the themed experiences and make the most of their Royal Caribbean cruise.
Finding Theme Nights
The Cruise Compass offers a convenient and comprehensive guide to locating the theme nights on Royal Caribbean cruises. When looking for the theme nights, consider the following tips:
- Check the Daily Schedule: The Cruise Compass outlines each day's activities and theme nights, making it easy to plan ahead.
- Consult Guest Services: The friendly staff at Guest Services can provide information about upcoming theme nights and help with any related inquiries.
- Review the Royal Caribbean App: Access the Cruise Compass through the Royal Caribbean app for quick and easy navigation to the theme night schedule.
- Participate in Trivia or Game Shows: Sometimes, theme nights are announced during onboard activities, so joining in on trivia or game shows can be a fun way to stay informed.
With these tips, you'll be well-prepared to make the most of the exciting theme nights during your Royal Caribbean cruise.
Mobile App

The Royal Caribbean mobile app enhances the guest experience by providing convenient access to onboard activities, dining options, and entertainment schedules. The app features a user-friendly interface and intuitive navigation, making it easy for guests to explore and plan their cruise experience.
One of the key benefits of the app is the notifications feature, which keeps guests informed about upcoming events, special offers, and important announcements. By enabling push notifications, guests can stay updated on theme nights and other onboard activities without having to actively seek out information.
The app's user interface is designed to be visually appealing and easy to navigate, allowing guests to effortlessly browse through theme night details, view dining menus, and explore entertainment options. Through the app, guests can also make reservations for specialty dining and activities, ensuring a seamless experience onboard.
Notifications play a crucial role in keeping guests informed about theme nights, allowing them to fully immerse themselves in the unique experiences offered during their cruise.
Social Media
Engaging with guests through various social media platforms, Royal Caribbean creates an interactive and dynamic community for sharing cruise experiences and providing real-time updates on theme nights and onboard activities. We understand the importance of social media engagement and community involvement in enhancing the overall cruise experience.
Here's how Royal Caribbean leverages social media to keep guests informed and engaged:
- Real-time Updates: Through platforms like Facebook, Instagram, and Twitter, we provide real-time updates on theme nights, special events, and onboard activities, allowing guests to plan and make the most of their cruise experience.
- Influencer Partnerships: We collaborate with influencers and content creators to showcase the unique experiences and theme nights offered by Royal Caribbean, providing an authentic and engaging glimpse into life on board.
- Brand Collaborations: By partnering with brands and local businesses, we create exclusive theme night experiences, bringing a touch of local culture and excitement to our cruises.
- Guest Interaction: Our social media channels serve as a space for guests to share their experiences, ask questions, and connect with fellow cruisers, fostering a sense of community and camaraderie both before and after the cruise.
Our commitment to social media engagement ensures that guests are well-informed and excited about the theme nights and activities awaiting them on their Royal Caribbean cruise.
Online Forums

Utilizing online forums as a platform for continued interaction and shared experiences, we aim to foster a vibrant community of cruisers who can exchange cruise tips, packing advice, stories, and excitement about upcoming theme nights and onboard activities.
Online forums provide an excellent space for cruisers to connect, ask questions, and share valuable insights based on their experiences. When seeking theme night information, these forums can be a treasure trove of firsthand knowledge. Members often discuss not only the themes themselves but also the best ways to prepare and make the most of these special evenings at sea.
For those seeking packing advice for theme nights, online forums are an invaluable resource. Here, fellow cruisers can offer tips on what to pack for specific themes, ensuring you have everything you need to fully participate and enjoy the festivities. Whether it's a tropical night, 80s party, or formal evening, the collective wisdom of the forum can help ensure you're well-prepared for a fantastic time onboard.
Engaging with these forums not only enriches your pre-cruise preparations but also allows you to contribute to the community by sharing your own experiences and insights.
Travel Agent

Frequently, our interactions with a travel agent have proven to be invaluable for securing the best deals and gaining insider insights into Royal Caribbean's theme nights and onboard activities. When it comes to planning a Royal Caribbean cruise, a travel agent can be an invaluable resource.
Here's why:
- Expert Advice: A travel agent with experience in booking Royal Caribbean cruises can provide expert advice on the best ships, itineraries, and onboard experiences tailored to your preferences.
- Exclusive Deals: Travel agents often have access to exclusive deals and promotions that may not be available through online booking platforms.
- Personalized Service: By working with a travel agent, you can enjoy personalized service, including assistance with special requests, dining reservations, and onboard activities.
- Streamlined Booking Process: A travel agent can simplify the booking process, handling all the details from selecting the right cabin to arranging transportation to the port, saving you time and hassle.
Customer Service

When planning a Royal Caribbean cruise, our team prioritizes exceptional customer service to ensure a seamless and enjoyable experience for all our guests. We are committed to continuously improving our services based on customer feedback. By listening to our guests, we have implemented various service improvements to enhance their overall satisfaction. Here's a glimpse of our customer service approach:
| Service Improvements | Customer Feedback |
|---|---|
| Enhanced dining experiences | "The variety and quality of food exceeded my expectations." |
| Streamlined embarkation process | "The embarkation process was smooth and efficient, making the start of the cruise stress-free." |
| Personalized onboard activities | "I appreciated the personalized recommendations for onboard activities based on my preferences." |
Our dedicated team understands the value of exceptional customer service and actively seeks ways to improve the overall experience for our guests. We continually strive to exceed expectations and create unforgettable memories for every individual aboard our Royal Caribbean cruises.
Onboard Announcement

As we explore the exciting world of theme nights on Royal Caribbean, we turn our attention to the crucial element of onboard announcements.
The theme night schedule, information sources, and communication methods all play a vital role in ensuring that guests are fully informed and able to make the most of the themed experiences onboard.
Let's delve into the various aspects of onboard announcements to understand how Royal Caribbean keeps its guests engaged and informed throughout their cruise.
Theme Night Schedule
Upon embarking on a Royal Caribbean cruise, guests eagerly anticipate the onboard announcement of the exhilarating theme night schedule, which promises an enchanting array of entertainment and activities. Here are some essential tips to make the most of the theme night excitement:
- Stay Informed: Keep an eye out for announcements in the ship's daily newsletter or on digital screens throughout the ship for the latest theme night schedule.
- Pack Accordingly: Plan your wardrobe to align with the different theme nights. From elegant formal nights to tropical Hawaiian luaus, having the right attire adds to the fun.
- Participate Wholeheartedly: Dive into the spirit of each theme night by fully engaging in the activities, whether it's dancing at a 70s disco party or showing off your best pirate costume.
- Capture Memories: Take plenty of photos to preserve the memorable moments of each theme night for a lifetime.
Information Sources
Navigating the excitement of theme nights on a Royal Caribbean cruise begins with seeking out the onboard announcements that unveil the captivating array of entertainment and activities. You can stay informed by checking the daily cruise compass, a newsletter delivered to your stateroom each evening, or by listening to announcements made by the cruise director and staff throughout the day.
When it comes to theme night etiquette, it's essential to embrace the spirit of the theme while being respectful to fellow guests. As for dress code suggestions, each theme night typically comes with recommended attire to enhance the experience, such as tropical wear for a Caribbean night or elegant attire for a formal night.
Communication Methods
Checking the daily cruise compass and listening to announcements by the cruise director and staff throughout the day are essential methods for staying informed about the theme nights on a Royal Caribbean cruise. Effective communication is key to ensuring guests are engaged and aware of the exciting theme nights onboard.
Here are four communication methods used to keep guests informed:
- Daily Cruise Compass: This detailed schedule is delivered to your stateroom each evening, outlining the next day's events and theme night details.
- Public Address Announcements: The cruise director and staff make regular announcements throughout the ship, including important information about upcoming theme nights.
- Digital Displays: Look for digital screens located throughout the ship, providing updates on theme night details and activities.
- Interactive Activities: Engage in onboard activities and games that are themed around the upcoming theme nights, providing subtle hints and clues about the next evening's festivities.
Engaging guests through effective communication ensures everyone can fully participate and enjoy the themed experiences.
Interactive TV

Exploring the interactive TV options aboard Royal Caribbean ships enhances the guest experience by providing a wide range of entertainment and information at your fingertips. The interactive TV features on Royal Caribbean offer a seamless user experience, allowing guests to easily access onboard entertainment options and activity schedules. With just a few clicks on the remote, guests can explore the day's events, browse through dining options, book shore excursions, and even check their onboard account.
The user-friendly interface makes it simple to navigate through the various entertainment choices available on the ship. Guests can catch up on the latest blockbuster movies, watch live performances, or tune in to informative lectures, all from the comfort of their stateroom. The interactive TV also serves as a valuable tool for staying updated on the ship's activity schedule, ensuring that guests never miss out on the exciting events and experiences happening onboard.
Cruise Director

As we immerse ourselves in the onboard entertainment options and activity schedules accessible through the interactive TV, the pivotal figure orchestrating and energizing these experiences is the Cruise Director. This dynamic individual plays a crucial role in shaping the atmosphere and ensuring that every guest is engaged and entertained throughout their cruise experience.
Here are four key aspects of the Cruise Director's role:
- Entertainment Coordination: The Cruise Director is responsible for overseeing the diverse range of entertainment options available onboard, from live shows and musical performances to theme nights and interactive activities.
- Activity Planning: From dance classes to trivia nights and poolside games, the Cruise Director and their team work tirelessly to organize a varied lineup of activities to cater to the diverse interests of guests.
- Specialty Restaurants Promotion: The Cruise Director often collaborates with the ship's specialty restaurants to promote unique dining experiences, ensuring that guests are aware of the diverse dining options available.
- Guest Engagement: One of the most vital roles of the Cruise Director is to foster a sense of community and excitement among guests, encouraging participation in onboard events and creating memorable experiences for all.
Daily Newsletter
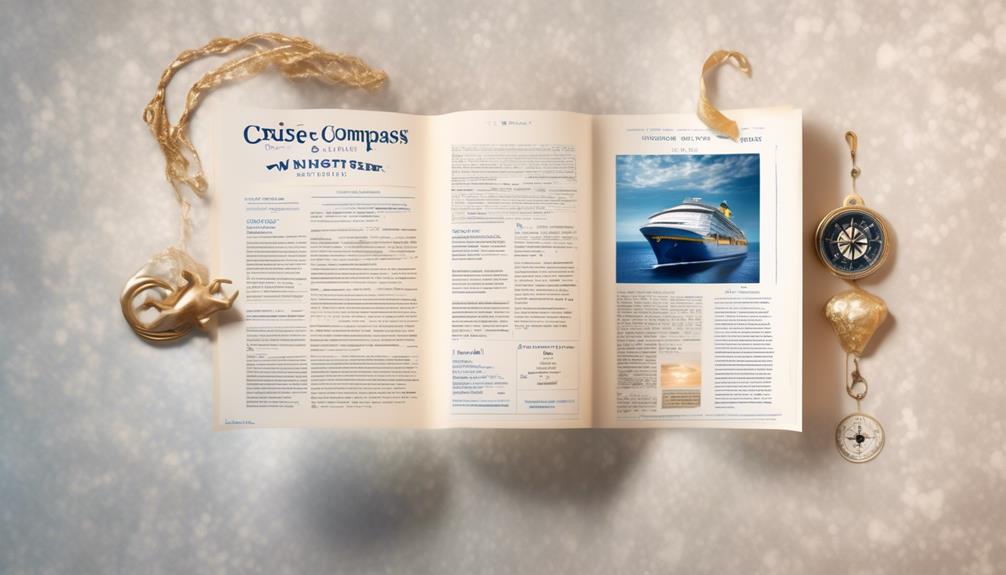
The Daily Newsletter provides guests with a comprehensive overview of the day's events, activities, and special offerings aboard the ship, ensuring that everyone can make the most of their cruise experience. This essential resource is delivered to your stateroom each evening, giving you a preview of the exciting theme nights to come. It's the perfect place to find Theme Night tips, such as costume suggestions or recommended activities to fully immerse yourself in the evening's festivities.
The newsletter also builds anticipation and excitement for the upcoming theme nights, providing a glimpse into the unique and vibrant atmosphere that each one promises to offer.
Reading through the Daily Newsletter each evening is like unwrapping a present, as it reveals the delightful surprises and experiences that await you the following day. It's a valuable tool for planning your activities and ensuring that you don't miss out on any of the Theme Night excitement. From themed dinners to dance parties and special performances, the newsletter gives you a sneak peek into the enchanting world of theme nights, allowing you to prepare and participate in the fun-filled events with enthusiasm and anticipation.
Specialty Restaurants
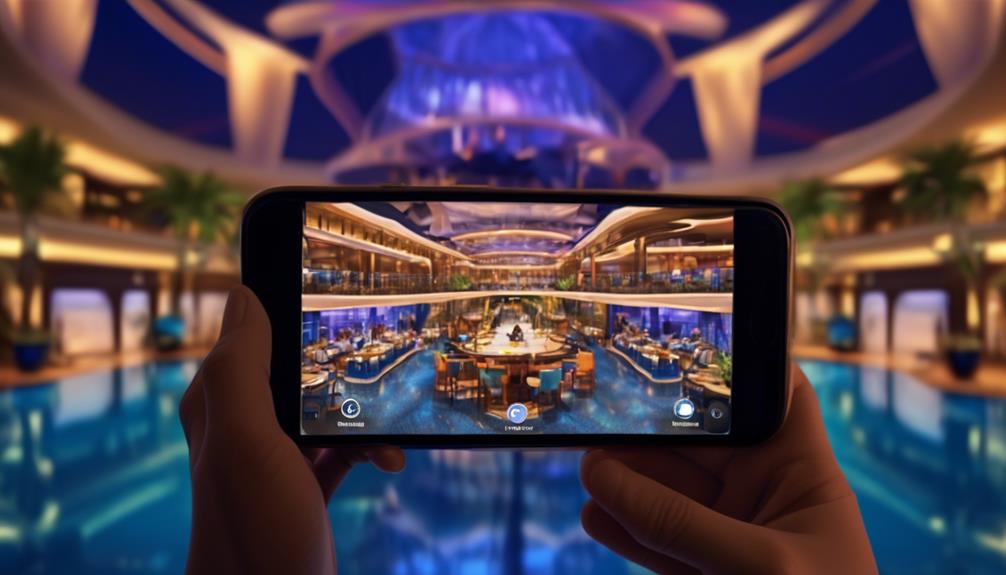
When it comes to specialty restaurants on Royal Caribbean, we have a wealth of options to choose from, each offering its own unique dining experience.
From upscale steakhouses to exotic Asian fusion, there's something to suit every palate.
We'll also cover the reservation process, ensuring you have all the insider tips for securing a table at these popular dining venues.
Restaurant Options
Several specialty restaurants on Royal Caribbean offer a diverse range of culinary experiences, providing guests with an opportunity to indulge in exquisite flavors and unique dining atmospheres. When it comes to restaurant preferences, Royal Caribbean caters to a variety of tastes, ensuring there's something for everyone. Whether you have dietary restrictions or are looking for a particular type of cuisine, the specialty restaurants onboard Royal Caribbean ships have you covered.
Here are the top restaurant options to consider:
- Chops Grille: Indulge in premium steaks and seafood in an elegant setting.
- Izumi: Savor fresh sushi and Asian-inspired dishes with a modern twist.
- Jamie's Italian: Enjoy rustic Italian fare crafted by celebrity chef Jamie Oliver.
- Wonderland: Immerse yourself in a whimsical dining experience with innovative cuisine.
No matter your culinary desires, these specialty restaurants offer an unforgettable dining experience.
Reservation Process
Exploring the diverse culinary experiences available on Royal Caribbean, it's essential to understand the reservation process for the specialty restaurants, ensuring a seamless and enjoyable dining experience.
To secure a table at one of the specialty restaurants, guests can make reservations through various communication methods. The most convenient way is through the Royal Caribbean website or mobile app, where guests can easily view restaurant availability and make their reservation with just a few clicks.
Alternatively, guests can also contact the dining reservations desk onboard the ship to make their bookings. It's important to note that popular specialty restaurants tend to fill up quickly, so we recommend making reservations as early as possible to secure your desired dining experience.
Previous Passenger Experiences

From our personal experiences, theme nights on Royal Caribbean have consistently added an extra layer of excitement and enjoyment to our cruises. Here's what we've learned from our encounters and the feedback from fellow passengers:
- Passenger Feedback: We've noticed that theme nights are among the most memorable aspects of the onboard experience for many guests. The vibrant and immersive themes have consistently garnered positive reviews and have become a highlight for numerous passengers.
- Theme Night Memories: The memories created during these events are truly unforgettable. From elaborate costumes to lively music and themed cuisine, these nights foster a sense of camaraderie and fun that stays with guests long after the cruise has ended.
- Guest Participation: One of the most delightful aspects of theme nights is the high level of guest participation. It's truly heartwarming to see passengers of all ages enthusiastically joining in the festivities, creating a lively and inclusive atmosphere.
- Enhanced Cruising Experience: Overall, the consensus among passengers is that theme nights greatly enhance the cruising experience, adding an extra layer of enjoyment and fostering a strong sense of community among guests.
Frequently Asked Questions
Can I Request a Specific Theme Night for My Cruise?
Certainly!
We do offer the option to request specific theme nights for your cruise. We understand the importance of creating memorable experiences, and we love when guests bring their own ideas to the table.
Whether it's a special occasion or a unique costume theme, our team is here to accommodate your requests.
Feel free to reach out to our customer service team for more information on custom costumes and requesting specific theme nights.
Are the Theme Nights the Same on Every Royal Caribbean Ship?
Theme night variations do exist across Royal Caribbean ships. The specific themes can differ based on the ship's itinerary, length of the cruise, and overall demographic of passengers. While some themes are consistent, such as formal night or 70s night, others may vary.
It's always a good idea to check with your cruise line or travel agent for the specific theme nights on your chosen ship and itinerary to ensure you're prepared for the fun!
Are There Any Additional Fees for Participating in Theme Night Activities or Dining?
Theme night charges and dining fees on Royal Caribbean vary by ship and event. Some theme nights may have an additional cost for participating, while others are included in the cruise fare.
Dining fees for specialty restaurants apply, but the main dining options are typically covered.
Additionally, costume allowances and age limits for theme night activities are worth considering when planning your onboard experience.
Our expertise ensures a seamless and enjoyable cruise for all guests.
Are There Any Age Restrictions for Participating in Theme Night Activities?
Age restrictions for participating in theme night activities vary based on the specific theme and the nature of the event. However, Royal Caribbean aims to provide inclusive and enjoyable experiences for all guests. Participation rules are typically designed to ensure that everyone can fully engage in the themed activities and dining options, regardless of age.
Guests can always inquire about age restrictions when exploring the various theme night options to accommodate their personal preferences.
Can I Bring My Own Costumes or Decorations for Theme Nights?
Bringing costumes and decorations for theme nights on Royal Caribbean is a fun way to enhance the experience. We encourage guests to express their creativity and fully participate in the themed activities.
When packing, ensure your costumes and decorations comply with safety guidelines and are appropriate for the event. Feel free to reach out to our crew for any specific guidelines or suggestions to make the most of the themed nights on board.
Conclusion
In conclusion, there are numerous ways to find out about the theme nights on Royal Caribbean. From checking the website and pre-cruise planner to following social media and speaking with the cruise director, the options are endless.
It's like uncovering hidden treasures on the high seas, each theme night adding a splash of excitement to your cruise experience.
So, get ready to immerse yourself in the fun and festivities of Royal Caribbean's theme nights!
- About the Author
- Latest Posts
Introducing Ron, the home decor aficionado at ByRetreat, whose passion for creating beautiful and inviting spaces is at the heart of his work. With his deep knowledge of home decor and his innate sense of style, Ron brings a wealth of expertise and a keen eye for detail to the ByRetreat team.
Ron’s love for home decor goes beyond aesthetics; he understands that our surroundings play a significant role in our overall well-being and productivity. With this in mind, Ron is dedicated to transforming remote workspaces into havens of comfort, functionality, and beauty.
-
 Vetted1 hour ago
15 Best Silver Polish Brands to Make Your Silver Shine Like New
-
 Vetted5 days ago
15 Best Fillers for Concrete Cracks – Expert Recommendations and Reviews
-
 Vetted1 week ago
15 Best Plants for Large Pots to Transform Your Outdoor Space
-
 Vetted6 days ago
15 Best Fairy Lights to Transform Your Space With Magical Illumination
-

 Vetted1 week ago
15 Best Folding Beds for Small Spaces – Space-Saving Solutions for Comfort and Convenience
-
 Vetted1 week ago
15 Best Waterproof Flooring Options for Your Bathroom – Ultimate Guide & Reviews
-

 Vetted2 weeks ago
15 Best Grocery Carts to Make Shopping a Breeze
-

 Vetted1 day ago
15 Best Subfloor Options for Your Basement Renovation – Ultimate Guide


