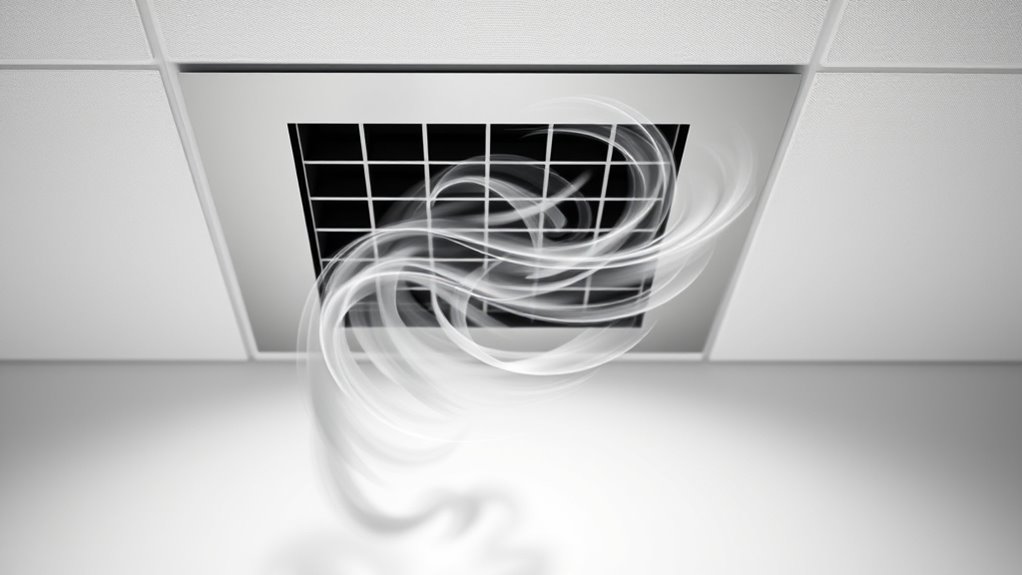
To quiet noisy air vents quickly, start by identifying the source of the noise—listen for rattling, whistling, or banging. Tighten loose screws and realign vent louvers to reduce vibrations and airflow issues. Install sound-absorbing materials around the vent without blocking airflow, and adjust dampers or registers to minimize turbulence. Regularly clean your vents to prevent debris and grime buildup. For persistent noise, exploring long-term solutions can make a noticeable difference. If you continue, you’ll discover more effective techniques to restore peace.
Key Takeaways
- Tighten loose vent screws and realign louvers to reduce rattling and wobbling sounds.
- Use sound-absorbing materials like acoustic foam or mineral wool around vents to dampen noise.
- Adjust vent dampers and registers to control airflow and minimize whistling or turbulence.
- Clean vent grilles and ductwork regularly to remove debris that can cause rattling or airflow issues.
- Seek professional help if noise persists, for accurate diagnosis and long-term solutions.
Identify the Source of the Noise

To effectively quiet noisy air vents, you first need to identify where the sound is coming from. Start by listening carefully to pinpoint the vent noise sources. Is the noise a rattling, whistling, or banging sound? These clues help you determine if airflow disturbances or loose components are causing the issue. Check if the noise occurs when the HVAC system is on or off, which can narrow down potential sources. Feel around the vent grille and ductwork for vibrations or loose parts. Identifying whether the noise is caused by airflow disturbances or mechanical issues allows you to target the right fix. This step ensures you don’t waste time on unnecessary repairs and sets the stage for more effective quieting methods. You can also consider headphone compatibility if you plan to listen closely without disturbance, making diagnosis easier.
Tighten or Adjust Vent Components

Start by checking for loose screws and tightening them to make sure they don’t cause rattling noises. Next, adjust the vent louvers to guarantee they’re aligned properly and not causing vibrations. Finally, secure any loose vent connections to prevent airflow disturbances and extra noise. Additionally, inspecting the vent components regularly can help maintain optimal airflow and reduce noise issues over time.
Tighten Loose Screws
Loose screws often cause air vents to rattle and produce noise. To fix this, you should check all screws securing the vent components. Over time, screws can loosen, leading to unnecessary noise. Start by tightening any loose screws with a screwdriver. If you notice stripped or damaged screws, consider screw replacement to guarantee a secure fit. This simple step stabilizes the vent and stops the rattling. Be aware that proper maintenance can prevent future issues with noisy vents and prolong their lifespan.
Adjust Vent Louvers
If the vent louvers are misaligned or wobbling, adjusting them can quickly reduce noise. Start by gently moving the vent cover or louvers to realign them. Proper airflow control depends on positioning the louvers evenly, which prevents rattling or whistling sounds. Use your fingers or a small tool to tighten any loose parts that hold the louvers in place. Check for wobbling or uneven gaps, and make small adjustments until all louvers sit flush and steady. This not only minimizes noise but also improves airflow efficiency. Be careful not to over-tighten, as this could damage the vent cover or restrict airflow. With a few simple tweaks, you’ll enjoy quieter operation and better airflow control in no time. Knowing supermarket hours today can help you plan your errands efficiently after making these adjustments.
Secure Vent Connections
Securing vent connections is essential for reducing noise and ensuring proper airflow. Loose vent covers or duct connections can cause rattling sounds and airflow issues. To fix this, start by tightening any screws holding the vent cover in place. Next, check for gaps around the duct where air might escape; applying duct sealing or foil tape can improve the seal. Also, ensure the vent cover is snugly attached without over-tightening, which could crack it. Properly secured connections prevent vibrations and noise, making your vents quieter. Regularly inspecting and tightening these parts keeps your system running smoothly. Remember, a well-sealed vent cover and tight duct connections are key to quiet, efficient airflow. Additionally, ensuring your vents are compatible with electric power generation devices can improve overall system efficiency.
Apply Sound-Absorbing Materials

Choosing the right sound-absorbing materials is key to reducing noise effectively. You need to guarantee proper installation techniques to maximize their soundproofing benefits. Regular maintenance will keep these materials functioning well and maintain a quieter environment. Incorporating soundproofing materials designed for home furnishings can enhance noise reduction efforts.
Select Appropriate Materials
Selecting the right sound-absorbing materials is essential to effectively reduce noise from air vents. Your goal with material selection is to maximize noise reduction while guaranteeing compatibility with your vent system. Look for materials that are dense and porous, as they absorb sound waves efficiently.
- Use acoustic foam or mineral wool to dampen vibrations and absorb sound energy.
- Install mass-loaded vinyl or thick fiberglass insulation for added noise control.
- Consider incorporating flexible, lightweight panels that can be easily attached to vents or ducts.
Choosing the appropriate materials directly impacts noise reduction success. Focus on materials designed for sound absorption, and guarantee they suit your space and vent design. Proper material selection helps quiet your air vents quickly and effectively.
Proper Installation Techniques
To guarantee sound-absorbing materials effectively reduce noise from your air vents, proper installation is essential. Begin by carefully considering vent placement; position sound-absorbing materials around the vents without blocking airflow or restricting airflow regulation. Ensure that the materials are securely attached to prevent gaps that could let noise escape. Use appropriate fasteners and avoid compressing the soundproofing, as it can diminish effectiveness. Maintain a clear path for airflow to prevent pressure buildup and noise amplification. Properly sealing any gaps or leaks around the vent area also helps improve sound absorption. Additionally, understanding the importance of airflow management can optimize both noise reduction and ventilation efficiency. When installed correctly, these techniques ensure that sound-absorbing materials dampen noise efficiently while maintaining optimal airflow regulation, resulting in quieter, more comfortable indoor environments.
Regular Maintenance Practices
Regular maintenance is key to ensuring that sound-absorbing materials continue to perform effectively over time. By routinely inspecting your vents, you prevent airflow obstruction that can amplify noise. Check for dust buildup or debris that may block airflow, reducing vent material durability and increasing noise levels. Clean vents regularly to maintain ideal airflow and prevent damage to sound-absorbing components. Additionally, replace worn or damaged insulation to preserve its noise-reducing properties. Proper maintenance keeps your vents quiet and prevents costly repairs. Regular inspections also help identify vibration sources that may contribute to noise issues, allowing for timely intervention.
Use Vent Dampers or Registers

Using vent dampers or registers offers a simple way to reduce noise from your air vents. Start by adjusting the vent damper, if available, to control airflow and minimize whistling or rattling sounds. Proper vent damper adjustment can redirect airflow smoothly, decreasing vibrations that cause noise. Additionally, check the register positioning; ensuring registers are fully open or closed as needed can help reduce turbulence and sound. Experiment with different settings to find the quietest configuration without sacrificing airflow. Sometimes, simply closing a register slightly can considerably lower noise levels. This quick adjustment is an effective, low-cost solution that allows you to target noisy vents directly, making your environment quieter and more comfortable. Incorporating airflow management techniques can further enhance noise reduction and improve overall comfort.
Perform Regular Maintenance and Cleaning

Cleaning and maintaining your air vents regularly keeps noise levels down by preventing dust buildup and obstructions that can cause rattling or whistling sounds. When you clean your vents, you also improve their aesthetics, making them look better and blend seamlessly with your room’s decor. Regular upkeep involves removing dust, debris, and grime, which can interfere with airflow and create noise.
- Use a soft brush or vacuum to clean vent grilles thoroughly
- Consider updating vent covers with new vent color options for a fresh look
- Wipe down vents with a damp cloth to enhance air vent aesthetics and keep dust at bay
Consistent cleaning helps your vents operate quietly and look attractive, preventing minor issues from becoming major noise problems.
Consider Professional Assistance if Needed

Sometimes, despite your best efforts to clean and maintain your vents, noise issues persist. If that’s the case, consider seeking professional assistance. A professional inspection can quickly identify the root cause of the noise, whether it’s loose parts, duct obstructions, or motor problems. During a noise diagnosis, experts use specialized tools to pinpoint issues you might overlook. They can advise on repairs or replacements that restore quiet and efficiency. While DIY fixes work for minor problems, a professional assessment ensures you don’t miss hidden issues that could worsen over time. Additionally, professionals are familiar with components like air vent mechanisms and can provide targeted solutions. Investing in expert help saves you time and prevents unnecessary damage, giving you peace of mind that your vents are functioning quietly and smoothly.
Frequently Asked Questions
How Do I Determine if the Noise Is From the Ductwork or the Vent Itself?
To figure out if the noise comes from the ductwork or the vent itself, start with a duct inspection. Listen closely when the noise occurs; if it’s present throughout the system, the ducts might be the source. Use sound diagnosis techniques by turning off vents one by one to see when the noise stops. This helps you identify whether the issue is in the ducting or the vent, so you can address it effectively.
What Tools Are Recommended for Tightening or Adjusting Vent Components Safely?
Your quest to fix noisy vents is like taming a wild beast! For tool recommendations, grab a screwdriver, pliers, and a wrench—they’re essential for tightening or adjusting vent components safely. Always follow safety precautions: wear gloves, turn off the power, and work gently to avoid damage. These tools help you make quick, effective fixes without risking injury or further noise issues. You’re ready to silence that vent roar!
Are There Specific Sound-Absorbing Materials Suitable for All Types of Vents?
You might wonder if sound-absorbing materials suit all vents. While soundproof foam and acoustic panels work well, their effectiveness depends on your vent’s type and location. These materials help reduce noise by absorbing sound waves, but make certain you choose options compatible with your vent system. Always check manufacturer recommendations and consider professional advice to achieve the best noise reduction without compromising airflow or safety.
How Often Should I Perform Maintenance and Cleaning to Prevent Noise Issues?
You should perform maintenance and cleaning every 1 to 3 months to prevent noise issues. Regularly check and replace vent filters to guarantee proper airflow, and inspect duct insulation for any damage or gaps. Keeping vents clean and well-insulated minimizes vibrations and noise. By staying consistent with this schedule, you’ll maintain quieter, more efficient air vents and avoid the buildup of debris that causes noise.
When Is It Necessary to Hire a Professional for Vent Noise Problems?
You should consider hiring a professional for vent noise problems when DIY fixes and vent inspections don’t resolve the issue. If you notice persistent rattling, banging, or whistling sounds despite cleaning and tightening connections, it’s time to call an expert. Professionals can identify underlying problems like duct damage or ventilation system faults, ensuring your vents operate quietly and efficiently. Don’t hesitate to seek help if your efforts don’t fix the noise.
Conclusion
By following these simple steps, you can silence your noisy air vents and restore peace to your home. Remember, sometimes a little elbow grease goes a long way, and it’s better to nip the problem in the bud before it gets worse. If you’re still hearing noise after trying these tips, don’t hesitate to call in a professional—better safe than sorry. With patience and a proactive approach, you’ll have quiet vents in no time.


