
To create simple wooden floating shelves, choose quality wood and plan your dimensions. Use concealed hardware like cleats that attach to the wall, then slide your shelf onto them for a sleek look. Make sure you locate wall studs for added stability, and level each shelf carefully before fixing. Finish with your preferred stain or sealant for a polished appearance. Keep exploring to discover the detailed steps and tips for a successful DIY project.
Key Takeaways
- Choose durable wooden planks and customize with finishes or colors to match your style.
- Use concealed cleats or wall-mounted hardware for a seamless floating appearance.
- Locate wall studs and ensure shelves are level before fixing for stability.
- Sand the wood smoothly, then apply your preferred finish to enhance durability and look.
- Double-check measurements and allow finishes to dry completely for a professional, functional result.

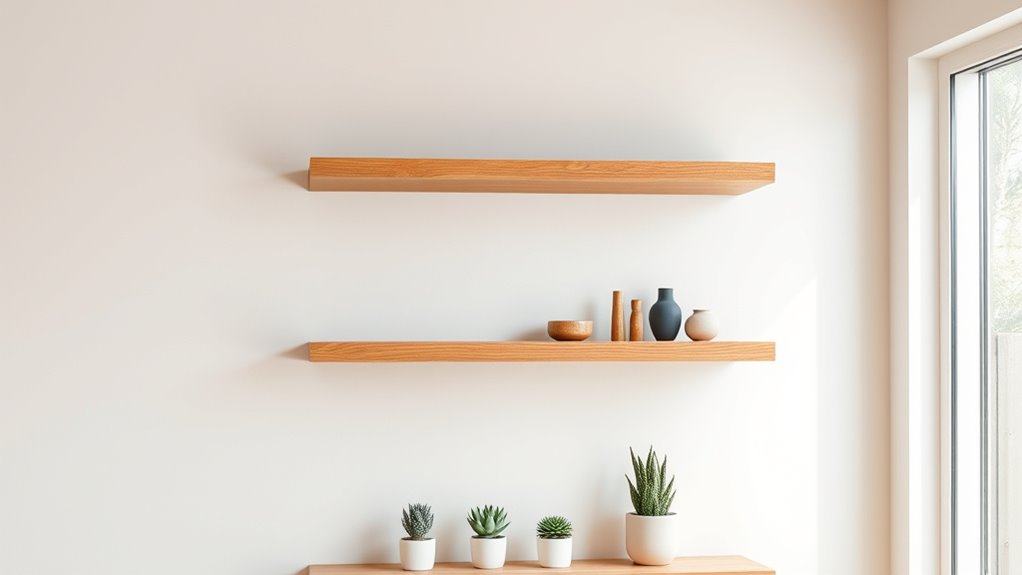
Floating shelves made from simple wooden planks offer an effortless way to add storage and style to any room. Whether you’re aiming for a sleek modern look or a rustic charm, these shelves are versatile and easy to customize. The key to a professional finish lies in choosing the right mounting techniques and finish options. When it comes to mounting, you want to assure your shelves are sturdy and secure, especially if you plan to hold heavier items. Concealed mounting hardware is popular because it creates a seamless floating effect, making the shelves appear as if they’re hovering without visible brackets. One common technique involves using cleats—long strips of wood attached to the wall. You screw the cleat into the wall, then slide the shelf onto it, hiding the hardware and creating a clean look. Alternatively, you can drill directly into the wall and use heavy-duty anchors or toggle bolts, especially if your wall is drywall. For added strength, make sure to locate studs with a stud finder before securing your shelves. This reduces the risk of wobbling or collapsing over time. Whichever mounting method you choose, double-check that your shelves are level and evenly spaced before fixing everything into place.
Using the right finish can also influence the shelf’s durability, especially if placed in humid environments like kitchens or bathrooms. Once your shelves are mounted securely, it’s time to contemplate finish options. The finish not only enhances the aesthetic appeal but also protects the wood from moisture and daily wear. You might opt for a clear polyurethane or varnish to showcase the natural beauty of the wood grain while adding durability. If you prefer a more rustic or matte look, a simple wax finish can bring out the wood’s character and provide a soft sheen. For a bold statement, consider painting or staining your shelves in vibrant or subtle hues, respectively. Sanding the wood beforehand ensures a smooth surface that absorbs stain or paint evenly, giving you a polished, professional appearance. After applying your chosen finish, allow sufficient drying time and consider applying multiple coats for added protection and depth of color. Remember, the right finish can dramatically change the overall look of your shelves, making them a striking feature or a subtle complement to your decor. Proper mounting techniques and thoughtful finish options will ensure your simple wooden floating shelves serve as both functional storage and a stylish element that enhances your space effortlessly.
Frequently Asked Questions
What Tools Are Needed for Assembly?
You’ll need a drill, screwdriver, level, measuring tape, and sandpaper for assembly. To guarantee proper shelf finishing, choose a good wood stain or paint, and apply it before installation. If you prefer, explore hardware alternatives like adhesive mounting options instead of brackets. These tools and choices help you securely assemble your floating shelves, giving them a polished look while customizing the style with different finishing options for your space.
How Do I Hide the Mounting Hardware?
To hide the mounting hardware, you can use concealed brackets that stay hidden behind the shelf. After installing the brackets, attach decorative covers or caps over the mounting points to conceal any hardware. This gives your floating shelves a sleek, seamless look. Make sure the covers fit snugly to prevent them from falling off over time, and double-check your brackets are securely installed before finishing.
What Weight Can These Shelves Support?
Your shelves can typically support between 10 to 20 pounds, depending on their construction and mounting method. To guarantee good shelf durability and maximize weight capacity, use sturdy brackets and proper wall anchors, especially if you’re attaching them to drywall. Always consider the material and thickness of the wood, and avoid overloading to prevent sagging or damage. With proper installation, your shelves will hold items securely and last longer.
Can I Customize the Shelf Length?
Yes, you can customize the shelf length with an adjustable design. When building your shelves, measure precisely and cut the wood to your desired custom length. An adjustable design allows you to easily modify the length later if needed. Just make certain your mounting brackets or supports are compatible with the custom size, providing stability and a clean look. This way, your shelves fit perfectly in your space.
How Do I Prevent Warping Over Time?
Think of your shelves as a delicate dance partner, needing care to stay graceful. To prevent warping over time, you should treat the wood with a good wood treatment and guarantee proper moisture control. Seal the wood to protect it from humidity and avoid placing them near water sources. Properly finished and moisture-aware shelves will stay sturdy and beautiful, dancing effortlessly through the years.
Conclusion
Now that you know how to build your own floating shelves, you’re ready to transform any space effortlessly. Did you know that homes with well-organized shelves can increase perceived value by up to 10%? With just a few simple materials and your creativity, you’ll create stunning storage that’s both functional and stylish. So go ahead—start your project today and enjoy the satisfaction of a personalized, beautiful addition to your home!