
Making envelope-fold throw pillows without zippers is simple and stylish. You cut fabric pieces with precision, then sew them together with an overlapping flap that acts as a closure. This design keeps your pillow secure while maintaining a clean look. Proper folding and finishing guarantee a snug fit, and you can customize with decorative trims or embellishments to match your décor. Want to perfect your technique? Continue exploring tips for seamless stitching and creative details.
Key Takeaways
- Use an overlapping flap design by folding one fabric edge over the other to create an envelope closure without zippers.
- Ensure the pillow insert fits snugly to prevent shifting and maintain a clean, seamless look.
- Sew the edges with a consistent seam allowance, leaving a small opening for inserting the pillow before closing completely.
- Incorporate decorative trims or topstitching along the flap for added style and durability.
- Choose durable, high-quality fabric with high thread count to ensure the envelope fold stays secure and resists wear.
Materials Needed for Envelope-Fold Throw Pillows

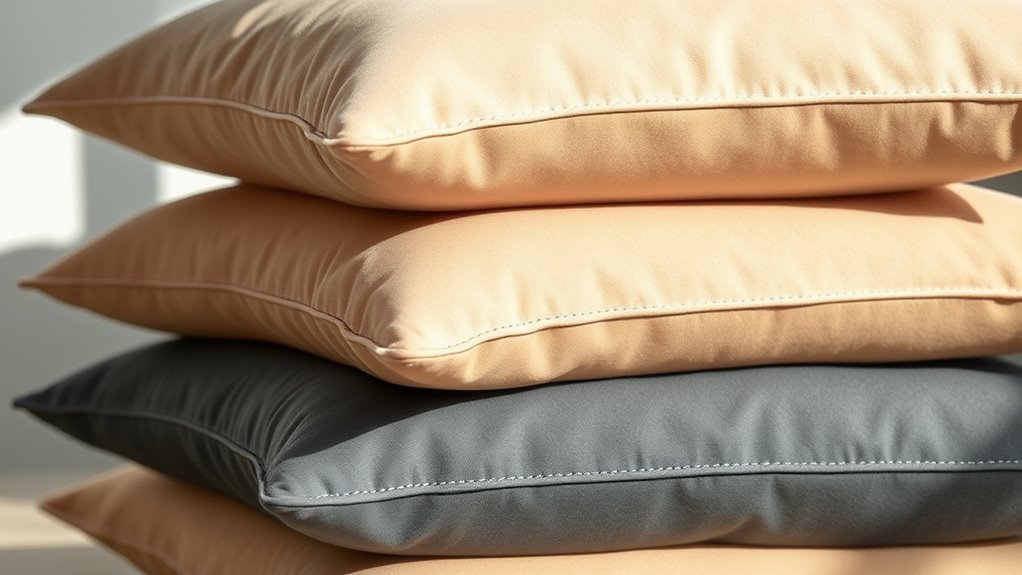
To make envelope-fold throw pillows, you’ll need a few basic materials. First, choose fabric with a suitable thread count; higher thread counts often mean softer, more durable fabric, which holds up better over time. Look for sturdy options like cotton or linen with at least 200 threads per inch for durability. You’ll also need matching or contrasting thread that complements your fabric and is strong enough to withstand frequent use. Keep in mind, the fabric’s durability guarantees your pillow resists tearing or fraying, especially around the envelope flap. Additionally, gather a sewing machine, scissors, and pins to help with assembly. Selecting quality materials now guarantees your finished pillow will look good and last long, making your sewing project both satisfying and worthwhile. Regularly inspecting your fabric for signs of wear can help maintain the pillow’s appearance over time, especially if you choose Glycolic Acid benefits for ongoing skin care.
Cutting and Preparing Fabric Pieces
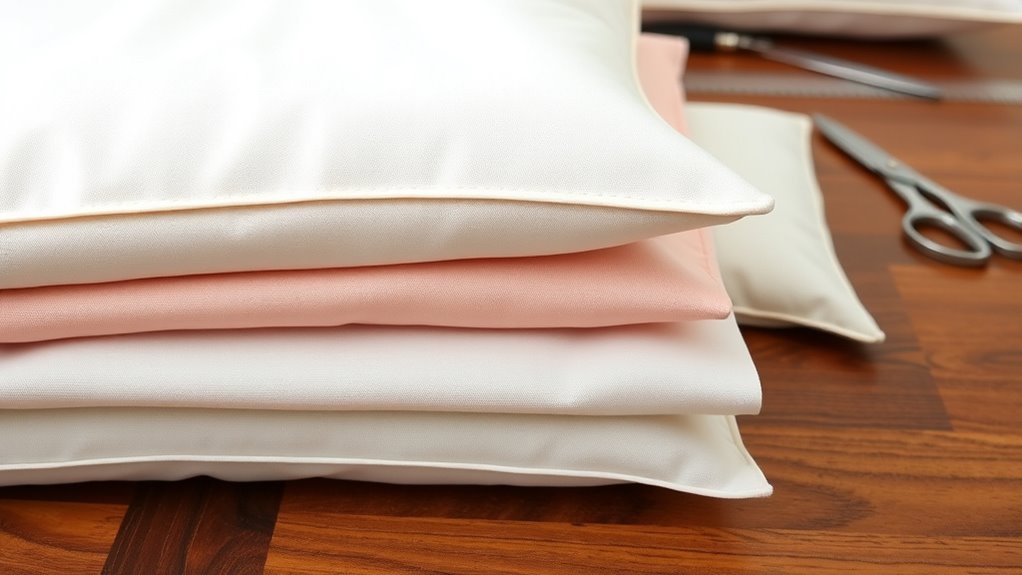
You need to choose the right fabric types that suit your pillow’s look and feel. Use measuring and marking tools carefully to guarantee accurate dimensions. When cutting, apply precision techniques to get clean edges and perfect pieces for a professional finish. Additionally, selecting appropriate fabric materials can enhance the durability and aesthetic appeal of your envelope-fold throw pillows.
Selecting Fabric Types
Choosing the right fabric for your envelope-fold throw pillow is essential to guarantee durability and a polished look. You want fabric that resists wear and maintains vibrant colors over time. Focus on selecting fabric durability and colorfast fabrics to ensure your pillow lasts and stays attractive. Additionally, selecting fabrics with high color accuracy can help you achieve consistent and appealing hues throughout your project.
Measuring and Marking
Before cutting your fabric, carefully measure and mark the pieces according to your pillow pattern. Use a ruler and fabric chalk or a fabric marker to draw precise lines, ensuring your measurements account for seam allowances. Accurate marking helps you create clean edges, especially when attaching decorative accents like piping or embroidery. Keep in mind that your pillow stuffing will fill the final piece, so double-check dimensions to ensure a snug fit. Avoid rushing this step; precision here results in a professional-looking pillow. Once marked, cut along the lines carefully. Proper measurement and marking prevent uneven edges and ensure the fabric pieces fit together seamlessly, making assembly smoother and giving your envelope-fold pillow a polished finish. Incorporating consistent measurements ensures your pillow maintains its shape and size throughout the process.
Cutting Precision Techniques
Achieving precise cuts is essential for a clean, professional-looking envelope-fold pillow. Proper cutting guarantees your fabric pieces fit together perfectly and reduces the need for resewing. Use sharp fabric scissors or a rotary cutter for clean edges. Before cutting, make sure your sewing machine is well-maintained to prevent uneven stitches, especially if you plan to add decorative stitch options later. Always measure and mark your fabric accurately to avoid mistakes. For best results:
- Cut along straight, steady lines, using a ruler or cutting mat for guidance.
- Maintain sharp blades to prevent frayed edges and uneven cuts.
- Double-check measurements before cutting, ensuring all pieces are uniform.
- Being aware of fabric grain can help ensure your pillow maintains its shape and durability.
These steps help you achieve clean edges and precise seams, making your final pillow look polished and professional.
Assembling the Pillow Cover

Once you have all your fabric pieces prepared, assembling the pillow cover is straightforward. Lay the two fabric pieces right sides together, matching edges carefully. Pin or clip the sides to keep everything aligned. Sew around the edges, leaving a small opening to insert your pillow filling. As you sew, consider fabric care; use a gentle stitch to avoid damaging delicate fabrics. Pay attention to attention to detail in your stitching to ensure a polished finish. Once sewn, turn the cover right side out through the opening, gently pressing the seams flat. Insert your pillow filling, ensuring it’s evenly distributed for a smooth finish. Close the opening with a neat stitch, either by hand or machine. This simple process results in a clean, professional-looking envelope pillow cover without zippers.
Creating the Envelope Closure
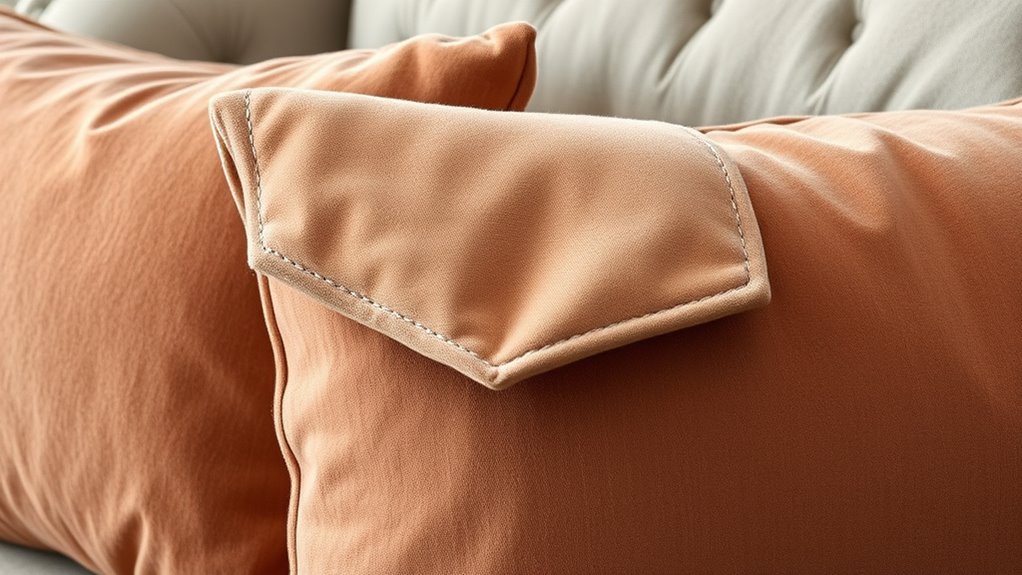
Creating the envelope closure involves folding and layering the fabric to form a clean, overlapping flap that secures the pillow inside. To guarantee a polished look, start by positioning the pillow stuffing neatly inside the cover. Then, fold the shorter edge of the flap over the opening, creating a smooth, even overlap. Add decorative trims along the edge for a finished touch, if desired. This flap should cover the opening completely, keeping the pillow snug without zipping. Here are key steps to follow: 1. Fold the fabric edge over the pillow stuffing, aligning edges neatly. 2. Layer the flap over the opening, making sure it overlaps enough to hold the pillow securely. 3. Attach decorative trims or stitches along the flap’s edge for added style and durability. Ensuring the fabric is tightly folded can help maintain the shape and prevent the pillow from slipping out over time.
Tips for Seamless Finishing
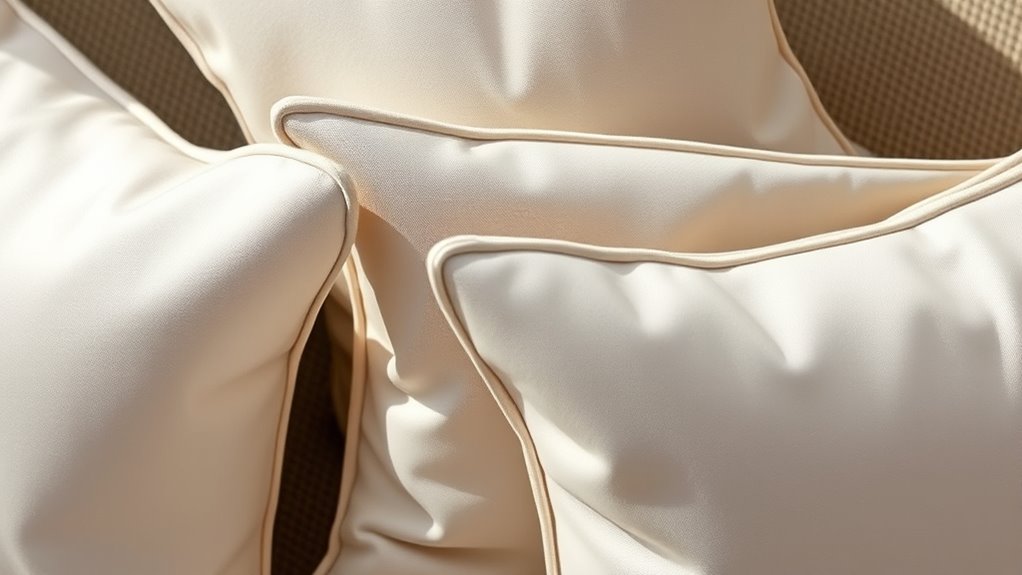
Looking to give your envelope-fold throw pillows a flawless finish? Start by carefully inserting your pillow stuffing to ensure an even, plump look. Before closing, smooth out the filling to eliminate lumps and create a tidy appearance. To enhance the finishing touch, add decorative trims along the edges or seams for a polished look. Secure trims with a fabric glue or hand stitch them neatly in place, making sure they lie flat. For a seamless appearance, press the pillow cover with an iron after sewing, especially around the envelope closure, to flatten seams. Keep your stitches tight and even, avoiding puckering. These small details—careful stuffing and decorative trims—help achieve a professional, seamless finish that elevates your homemade throw pillows. Additionally, paying attention to proper bicycle tire maintenance can extend the lifespan of your tires and ensure safety while riding.
Customizing and Decorating Your Pillow Covers

After completing the finishing touches on your envelope-fold throw pillows, it’s time to personalize and enhance their appearance. You can add pillow embellishments like appliqué, fabric flowers, or embroidered patches to give your pillows a unique touch. Decorative stitching, such as contrasting or decorative topstitching, can also elevate their look and add durability. Here are some ideas to contemplate:
Personalize your pillows with appliqué, decorative stitching, or fabric embellishments for a unique, stylish touch.
- Use contrasting thread for decorative stitching to make patterns or borders stand out.
- Attach small embellishments like beads, buttons, or patches for a personalized style.
- Experiment with fabric paint or markers to create custom designs or monograms.
- Consider incorporating WWE Raw’s financial impact insights to choose themes or symbols that reflect your interests or pop culture trends, making your pillows even more personalized.
These simple modifications let you tailor your pillows to match your decor while adding a creative flair.
Frequently Asked Questions
How Do I Wash and Care for My Envelope-Fold Pillow Covers?
To wash and care for your envelope-fold pillow covers, start by checking the fabric label for specific instructions. For stain removal, pretreat the stains with a gentle detergent or stain remover before washing. Use cold water and a mild cycle to protect the fabric. After washing, fabric softening can help keep your covers soft and fresh. Air dry or tumble dry on low heat to maintain their shape and quality.
Can I Make These Pillows With Waterproof or Outdoor Fabric?
Did you know outdoor upholstery fabrics can resist 100% of water penetration? You can definitely make envelope-fold throw pillows with waterproof fabric for outdoor use. Using waterproof fabric guarantees your pillows stay dry and last longer, even in rain or high humidity. Just choose a suitable outdoor upholstery material, and your pillows will be perfect for patios, gardens, or decks. It’s a smart way to combine style with durability.
What Size Pillows Can I Create With This Method?
With this envelope-fold method, you can create various pillow size options, depending on your fabric dimensions. Just follow fabric dimension guidelines, such as adding extra inches for seam allowances, to customize your pillow sizes. Common options include 16×16 inches, 18×18 inches, or even larger sizes like 20×20 inches. Adjust your fabric accordingly, and you’ll easily craft pillows that fit your space and style preferences.
How Do I Prevent the Fabric From Fraying Over Time?
Did you know that nearly 70% of fabric fraying occurs within the first few washes? To prevent this, you should focus on fabric reinforcement and seam finishing. Use zigzag stitches or serging along raw edges, and consider applying a fray-preventive solution for added protection. These techniques help maintain your pillow’s appearance and durability over time, ensuring it stays looking fresh and neat without zipper concerns.
Are There Alternative Closure Methods to Zippers for These Pillows?
You might want to explore alternative closure methods like button closures or hook and loop fasteners for your pillows. These options are easy to open and close, providing a sleek look without zippers. Button closures add a decorative touch, while hook and loop fasteners offer quick access. Both options help keep your pillow cover securely in place, giving your pillow a polished appearance while making maintenance simple.
Conclusion
With a little care and creativity, your envelope-fold throw pillows can become the charming centerpiece of any room. By mastering these simple steps, you’ll effortlessly craft cozy accents that invite a touch of warmth and personality. Remember, the magic lies in your hands—so don’t hesitate to add your own flair. Soon, your cushions will softly whisper comfort and style, making every space feel just a little more inviting and uniquely yours.