
To build a basic coat rack wall unit, start by choosing durable materials like plywood or painted MDF for a smooth finish. Measure your space carefully and cut the boards to size, sanding edges for safety. Attach hooks or pegs securely, evenly spaced on the board, using sturdy screws. Mount the unit to the wall with anchors, ensuring it’s level and firmly attached. By following these steps, you’ll create a functional and stylish coat rack, with more tips available if you keep exploring.
Key Takeaways
- Measure wall space and determine the number of hooks needed before selecting materials.
- Cut the board to size, sand edges, and prepare for finishing.
- Choose a finish like paint, stain, or veneer to match your decor.
- Attach hooks securely, then mount the unit to the wall with appropriate hardware.
- Regularly check stability and tighten screws for long-lasting use.
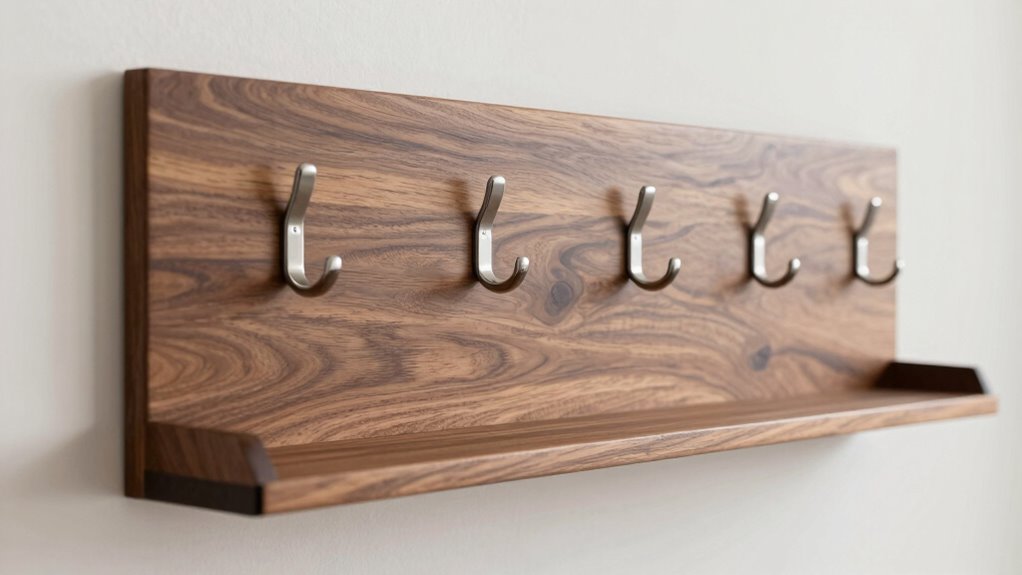
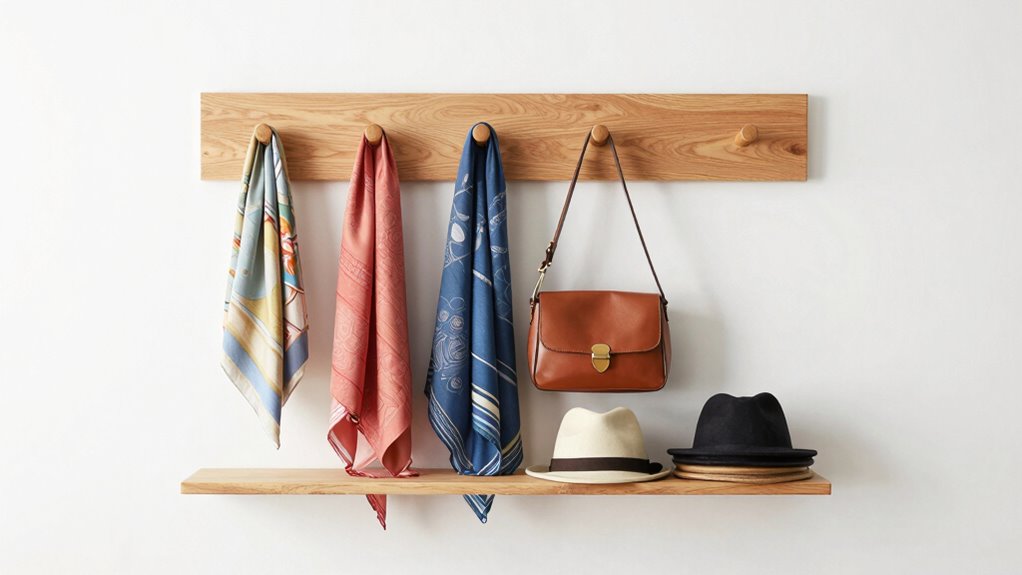
Are you ready to create a functional and stylish coat rack wall unit that fits perfectly in your space? Building your own allows you to customize the design, size, and finish to match your home’s aesthetic. To start, think about the overall look you want to achieve and how much storage you’ll need. The first step is selecting suitable materials, which will determine both the durability and appearance of your coat rack. Common choices include wood, plywood, or MDF. If you want a natural, warm feel, go for solid wood or plywood with a rich finish. For a more modern look, painted MDF offers a sleek, smooth surface. Keep in mind that material selection impacts the strength of your unit, especially if you plan to hang heavy coats or multiple accessories. When choosing your materials, consider material durability to ensure your coat rack holds up over time.
Once you’ve picked your materials, measure your space carefully. Decide how many hooks or pegs you’ll need and how wide the unit should be. Mark your measurements on the material and cut accordingly, using a saw that matches the thickness of your chosen board. Sand the edges and surfaces to remove splinters and create a smooth base for decorative finishing. This step ensures your coat rack looks polished and feels comfortable to use. When it comes to decorative finishing, think about how you want your wall unit to stand out or blend in. You can paint it a bold color, stain the wood for a natural look, or add a decorative veneer for extra style. Applying a clear sealant or polyurethane finish will protect your work and give it a professional, finished appearance. You might also consider adding decorative hardware or trim to enhance visual appeal, giving your coat rack a unique character. Additionally, choosing hardware made from high-quality materials can improve the longevity and overall look of your project. It’s also helpful to consider the ergonomics of your design so that hooks are accessible and easy to use for everyone in your household.
Next, attach your hooks or pegs securely to the board, spacing them evenly for balanced weight distribution. Use sturdy screws and anchors if mounting on drywall, ensuring they can support the weight of coats and bags. Mount the entire unit to the wall using appropriate brackets or cleats, making sure it’s level and firmly anchored. Once installed, you can add additional decorative touches, like a small shelf for keys or a mirror for convenience. Regularly check the stability of your coat rack and tighten any loose screws to keep it looking great and functioning well over time.

Optish Coat Rack Wall Mount, 16.5 Inches Wood Coat Hooks, Wall Hooks for Hanging, Hat Rack Bag Hanger Key Holder for Wall, Purse Hanger Towel Racks for Bathroom (1Pack, Brown)
Dimensions: The dimensions of our product are 16.5 x 2 inches, the length of the hook is 3.2…
As an affiliate, we earn on qualifying purchases.
As an affiliate, we earn on qualifying purchases.
Frequently Asked Questions
What Tools Are Essential for Building a Coat Rack Wall Unit?
You’ll need essential tools like a saw, drill, measuring tape, level, and screwdriver to build your coat rack wall unit. Start with careful material selection to guarantee durability. Remember safety precautions: wear goggles, gloves, and work in a well-ventilated area. These tools help you cut, assemble, and secure pieces accurately, making the process smoother and safer. Proper tool use and safety measures ensure a sturdy, long-lasting coat rack.
How Much Space Should I Allocate Between Hooks?
You should allocate about 4-6 inches between hooks for comfort and practicality. When choosing materials, opt for sturdy wood or metal that match your aesthetic, ensuring durability. Consider your space’s size and style — sleek metal for modern looks or rustic wood for warmth. Proper spacing prevents overcrowding and makes it easier to hang multiple items without clutter, creating a functional and visually appealing coat rack wall unit.
Can I Customize the Design for Different Wall Sizes?
Yes, you can customize the design for different wall sizes to improve wall space and enhance design flexibility. Measure your wall carefully, then adjust the length, number, and spacing of hooks or shelves accordingly. This way, you guarantee your coat rack fits perfectly and offers the right functionality. Customizing allows you to optimize space, create a unique look, and make the most of your available wall area.
What Types of Wood Are Best for Durability?
Imagine you’re choosing wood for your coat rack wall unit, and durability matters. Oak is an excellent choice; its tight wood grain resists dents and wear over time. It also offers versatile finish options, from natural to stained, enhancing its look. For your project, oak’s strength guarantees longevity, while its attractive grain makes it a stylish addition. This combination guarantees your coat rack stays sturdy and beautiful for years.
How Do I Prevent the Unit From Wobbling or Falling?
To prevent your coat rack wall unit from wobbling or falling, focus on proper mounting techniques and weight distribution. Secure the unit to wall studs using heavy-duty anchors or screws, ensuring even weight distribution across multiple mounting points. Balance the load by placing heavier items near the bottom and lighter ones higher up. Regularly check and tighten hardware to maintain stability, and consider adding bracing if needed for extra support.
wall mounted coat rack kit
As an affiliate, we earn on qualifying purchases.
As an affiliate, we earn on qualifying purchases.
Conclusion
Now that you’ve built your coat rack wall unit, it stands like a quiet guardian at your door, welcoming friends and family alike. It symbolizes more than just a place for jackets—it’s a proof of your effort and creativity. Just as a sturdy tree offers shelter, your handiwork provides comfort and organization. Every hook and shelf holds stories, memories, and connections, turning an ordinary space into a cherished part of your home’s story.

6 PACK Lumber Storage Rack Wall Mount Wood Organizer Storage Racks Heavy Duty Shelf Brackets with 9-Level System 1080 LB Sturdy Folding Garage Wall Shelving, Snowboard Rack for Indoor and Outdoor
HIGH-STRENGTH MATERIAL: Garage Lumber Storage Rack is made of 1.2mm high-quality thick steel pipe, which is not easy…
As an affiliate, we earn on qualifying purchases.
As an affiliate, we earn on qualifying purchases.

IBERDE 8 Pcs Stainless Steel Hooks for Hanging, Heavy Duty Hook, Wall Hooks Key Holder Wall Mount Hanger Coat Hook Garage Storage Screw Utility Hooks (Silver)
Sturdy and Stainless Steel Construction: The wall hooks are thick and tough. The hooks material thickness is 3…
As an affiliate, we earn on qualifying purchases.
As an affiliate, we earn on qualifying purchases.