Plants
Ideal Hydrangea Spots: Best Place to Plant Hydrangeas
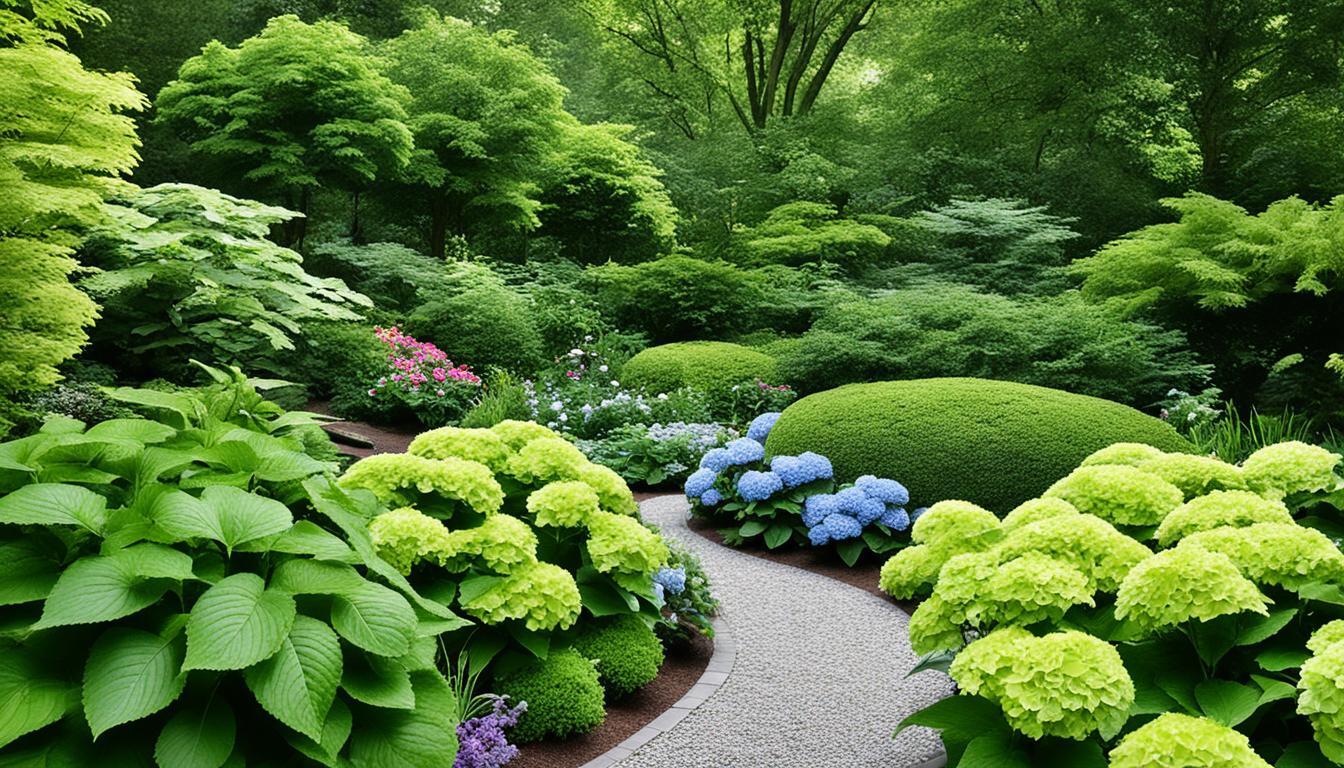
Did you know that the location where you plant your hydrangeas can have a significant impact on their growth and vibrancy? Finding the best place to plant hydrangeas is essential for optimal growth and to ensure that you get the most beautiful blooms.
In this guide, we will explore the different factors to consider when selecting the ideal spot for your hydrangeas. Whether you have a sunny garden or a shady corner, we’ll help you choose the right hydrangea varieties to thrive in various sun and shade conditions. By understanding their sunlight preferences and caring for them properly, you can enjoy vibrant and healthy hydrangea blooms year after year.
Key Takeaways:
- Choosing the right location is crucial for the growth and vibrancy of hydrangeas.
- Hydrangeas can thrive in different sunlight conditions, from full sun to partial shade.
- Consider the specific sunlight needs of different hydrangea varieties for optimal results.
- Proper care, including pruning, fertilizing, and watering, is essential for healthy blooms.
- By following our planting guide and care tips, you can transform your garden with stunning hydrangea displays.
Hydrangeas for Part Shade: Give Us Some Sunblock Please
When it comes to creating the perfect environment for hydrangeas, finding the right balance of sun and shade is key. While some hydrangea varieties thrive in full sun, others prefer a location with partial shade, where they can benefit from the morning sun and enjoy relief from the scorching afternoon rays. These hydrangeas are like beachgoers who know the importance of sunblock, seeking a little shade to protect themselves from the intense heat.
In the family of hydrangeas, there are several popular cultivars that are well-suited for part shade conditions. These varieties have the ability to produce stunning blooms when provided with a combination of filtered light and a few hours of full sun. Among them are the beloved Endless Summer® Hydrangea series, which includes BloomStruck®, Endless Summer®, Blushing Bride®, and Twist-n-Shout®.
Another great choice for morning sun and afternoon shade is the Annabelle Hydrangea, which is known for its spectacular large white flowers. And let’s not forget the many bigleaf hydrangea cultivars that can handle part shade and reward you with their vibrant blossoms.
Here are a few remarkable hydrangea varieties that thrive in part shade:
| Hydrangea Variety | Light Requirements |
|---|---|
| Endless Summer® series (BloomStruck®, Endless Summer®, Blushing Bride®, Twist-n-Shout®) | Morning sun, afternoon shade |
| Annabelle Hydrangea | Morning sun, afternoon shade |
| Bigleaf hydrangea cultivars | Morning sun, afternoon shade |
These hydrangeas have adapted to thrive in part shade by enjoying the gentle morning sun and being sheltered from the intense afternoon heat. This combination of light conditions allows them to produce their enchanting blooms and add a touch of elegance to any garden or landscape.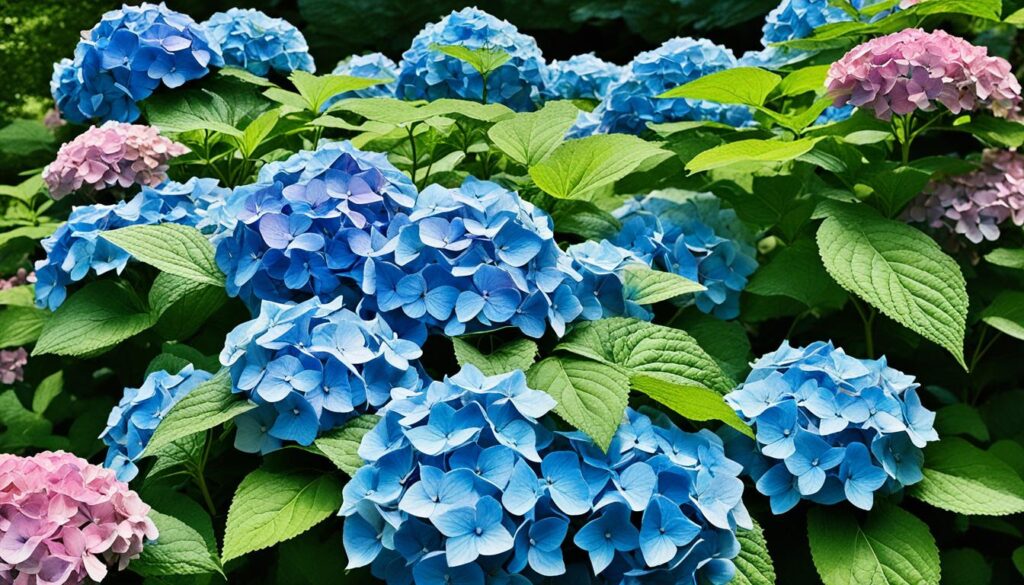
So, if you have a garden or yard with a mix of sunlight and shade, don’t worry! There are plenty of beautiful hydrangeas that will thrive in this environment. Just give them some sunblock (in the form of morning sun) and watch as their blooms light up your space with their breathtaking beauty.
Hydrangeas for Full Sun: We Like It Sunny
While most hydrangeas prefer some shade, there are certain varieties that can thrive in full sun. If your garden gets plenty of sunlight, don’t worry! There are hydrangeas that will flourish in these conditions and reward you with beautiful blooms.
Panicle Hydrangeas
Panicle hydrangeas, known for their cone-shaped flower clusters, are excellent choices for full sun exposure. They can tolerate the direct heat and intense sunlight, making them perfect for sunny spots in your garden. Some popular panicle hydrangeas include:
- Fire Light®
- Limelight
- Pinky Winky®
- Strawberry Sundae®
- Vanilla Strawberry®
Dwarf Varieties
If you have limited space or prefer compact hydrangeas, consider the Let’s Dance® and Cityline® series. These dwarf varieties are perfect for both full sun and part sun environments. They offer the beauty of hydrangeas in a smaller package without compromising on vibrant blooms.
Smooth Hydrangeas
Smooth hydrangeas are another type that can handle full or part sun conditions. These varieties are known for their large rounded flower heads and are a great choice for a sunny garden. Consider the following smooth hydrangeas:
- Incrediball®
- Invincibelle® Ruby
With these hydrangeas, you can enjoy the beauty and charm of these flowering plants even in full sun areas. Just make sure to provide them with proper care and maintenance, including regular watering and occasional fertilization.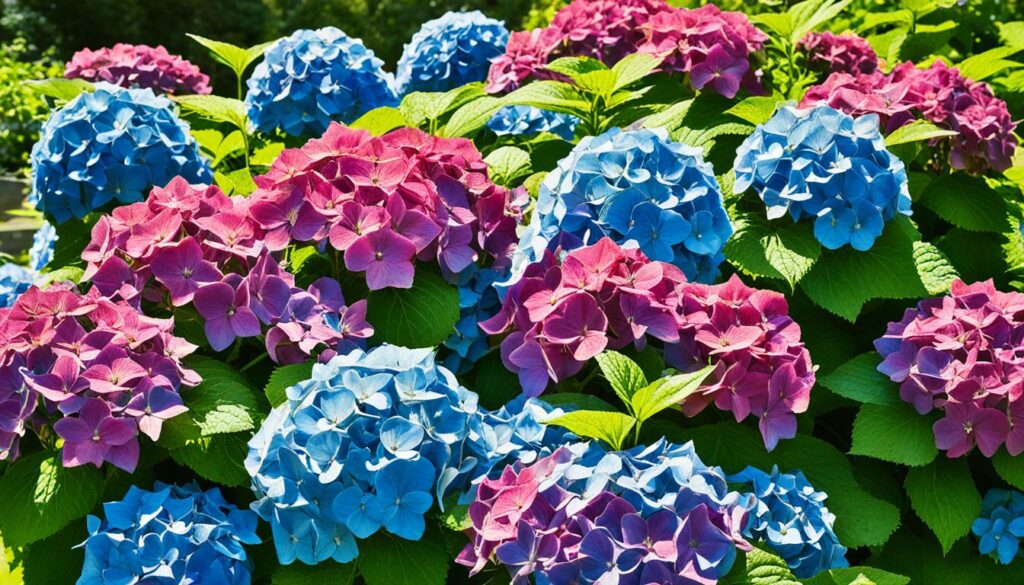
Overall, including hydrangeas that thrive in full sun can add a splash of color and vibrancy to your garden. Whether you choose panicle hydrangeas, dwarf varieties, or smooth hydrangeas, these sun-loving beauties will brighten up any sunny corner of your outdoor space.
Growing Hydrangeas in Different Sun and Shade Conditions
When it comes to growing hydrangeas, understanding their sunlight requirements is essential for their success. While many hydrangea varieties thrive in partial shade, oakleaf hydrangeas are known for their adaptability to different sun and shade conditions.
In the northern parts of the United States, oakleaf hydrangeas can tolerate full sun. However, in warmer and southern climates, they prefer some afternoon shade to protect them from excessive heat and sun exposure. This makes them an excellent choice for those looking to plant hydrangeas in regions with varying temperature and sunlight conditions.
What makes oakleaf hydrangeas unique is their ability to also tolerate full shade. This makes them ideal for areas of the garden that receive little to no direct sunlight. Whether it’s a densely shaded corner or underneath taller trees, oakleaf hydrangeas can thrive and add beauty to areas that are typically challenging for other hydrangea varieties.
It’s important to note that while oakleaf hydrangeas are the most adaptable, other hydrangea varieties have specific sunlight needs. When selecting the location for planting, it’s crucial to consider the specific requirements of each hydrangea type to ensure optimal growth and vigor.
By carefully assessing the sunlight conditions in your garden and selecting the appropriate hydrangea varieties, you can create a diverse and captivating display of hydrangeas that thrive in different sun and shade conditions.
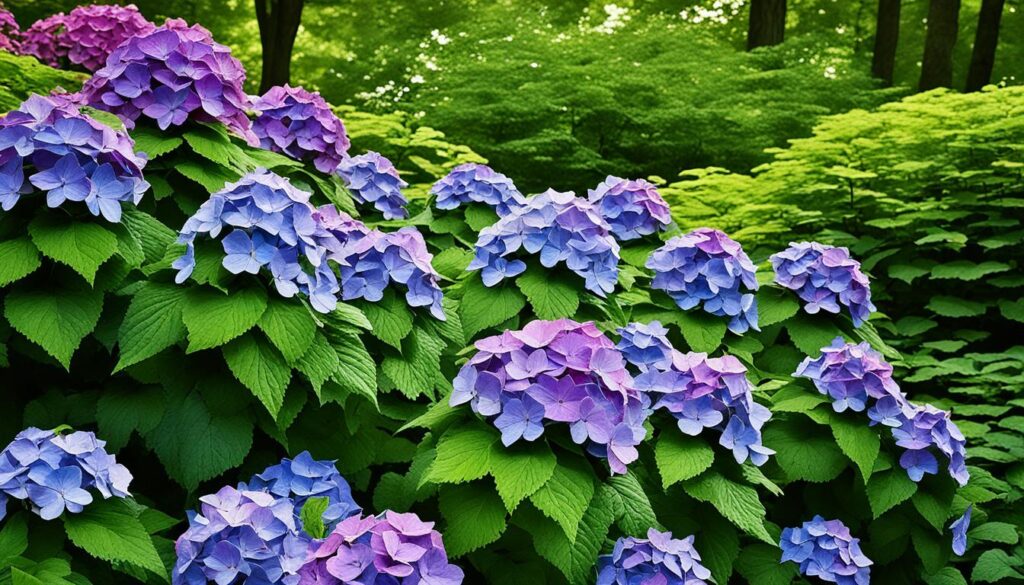
Pruning and Caring for Hydrangeas
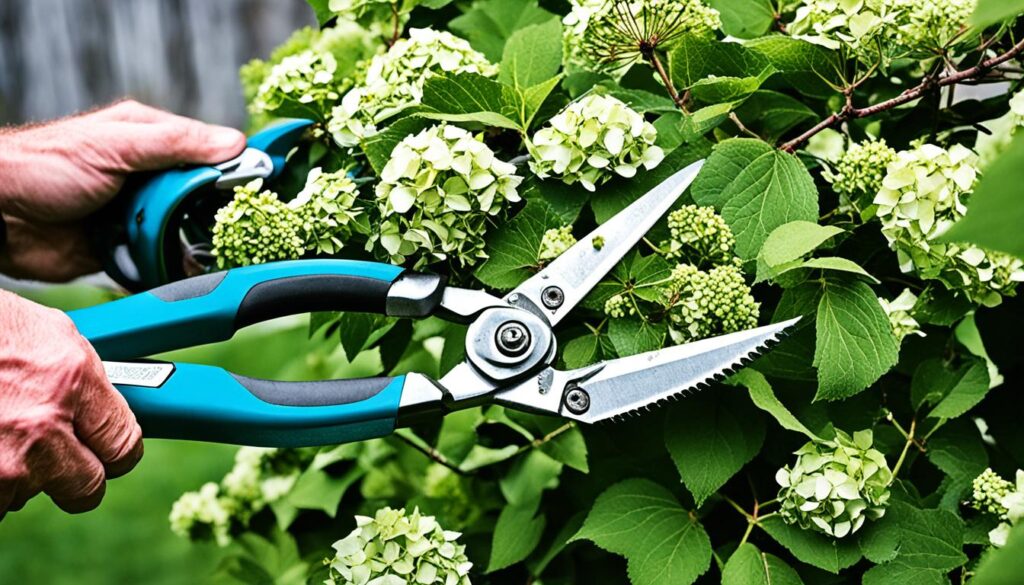
Proper pruning and care are essential for the health and vitality of hydrangeas. By implementing appropriate pruning techniques and providing the necessary care, gardeners can ensure the longevity and abundant blooming of their hydrangea plants. Here are some important tips to consider:
Understanding Pruning Methods
When pruning hydrangeas, it’s crucial to understand whether the plant blooms on old wood or new wood. This knowledge will help gardeners avoid accidentally cutting off next season’s flowers.
Tip: Prune hydrangeas that bloom on old wood immediately after flowering. This allows for new growth and development of flower buds for next year. On the other hand, hydrangeas that bloom on new wood can be pruned during late winter or early spring before new growth begins.
Optimal Soil Conditions
Hydrangeas thrive in well-drained soil that is rich in organic matter. A mixture of compost and native soil is ideal for providing the necessary nutrients and moisture retention.
Fertilizing for Healthy Blooms
To promote healthy blooming, it’s recommended to fertilize hydrangeas with a slow-release fertilizer that is high in phosphorus. Phosphorus is essential for promoting flower production and overall plant vitality.
Preventing Leaf Scorch
Hydrangeas are susceptible to leaf scorch, especially during hot and dry periods. To prevent leaf scorch, it’s important to provide hydrangeas with extra water and ensure they have adequate moisture in the soil.
Summary of Pruning and Care Tips
| Pruning Method | Soil Conditions | Fertilizing | Preventing Leaf Scorch |
|---|---|---|---|
| Prune hydrangeas that bloom on old wood immediately after flowering | Well-drained soil with organic compost | Use slow-release fertilizer high in phosphorus | Provide extra water during hot and dry periods |
By following these pruning and care tips, hydrangea enthusiasts can enjoy lush, vibrant blooms year after year. With proper maintenance, these stunning plants will continue to beautify gardens and landscapes.
Conclusion
Planting hydrangeas in the best location and providing proper care and maintenance are key to achieving beautiful and vibrant blooms. By selecting the right spot that balances sun and shade, ensuring well-drained soil, and following recommended pruning and watering practices, gardeners can enjoy the full potential of their hydrangea plants. With the right planting and care, hydrangeas can transform any garden into a colorful and inviting space.FAQ
What is the best place to plant hydrangeas?
What are the best types of hydrangeas for morning sun and afternoon shade?
Can hydrangeas grow in full sun?
Which hydrangea varieties are best for full shade?
How should I prune and care for hydrangeas?
Are there any tips for planting and caring for hydrangeas?
- About the Author
- Latest Posts
Meet Katherine, the creative enthusiast at ByRetreat who infuses her boundless passion for design into every remote workspace she crafts. With an innate sense of creativity and an eye for unconventional beauty, Katherine brings a unique and inspiring perspective to the team.
Katherine’s love for design is infectious, and her ability to think outside the box sets her apart. She believes that true artistry lies in embracing a variety of styles and mixing them harmoniously to create captivating spaces. By combining different textures, colors, and patterns, Katherine weaves a tapestry of creativity that breathes life into each remote workspace.
Plants
Grow Zucchini Successfully: Best Way & Tips
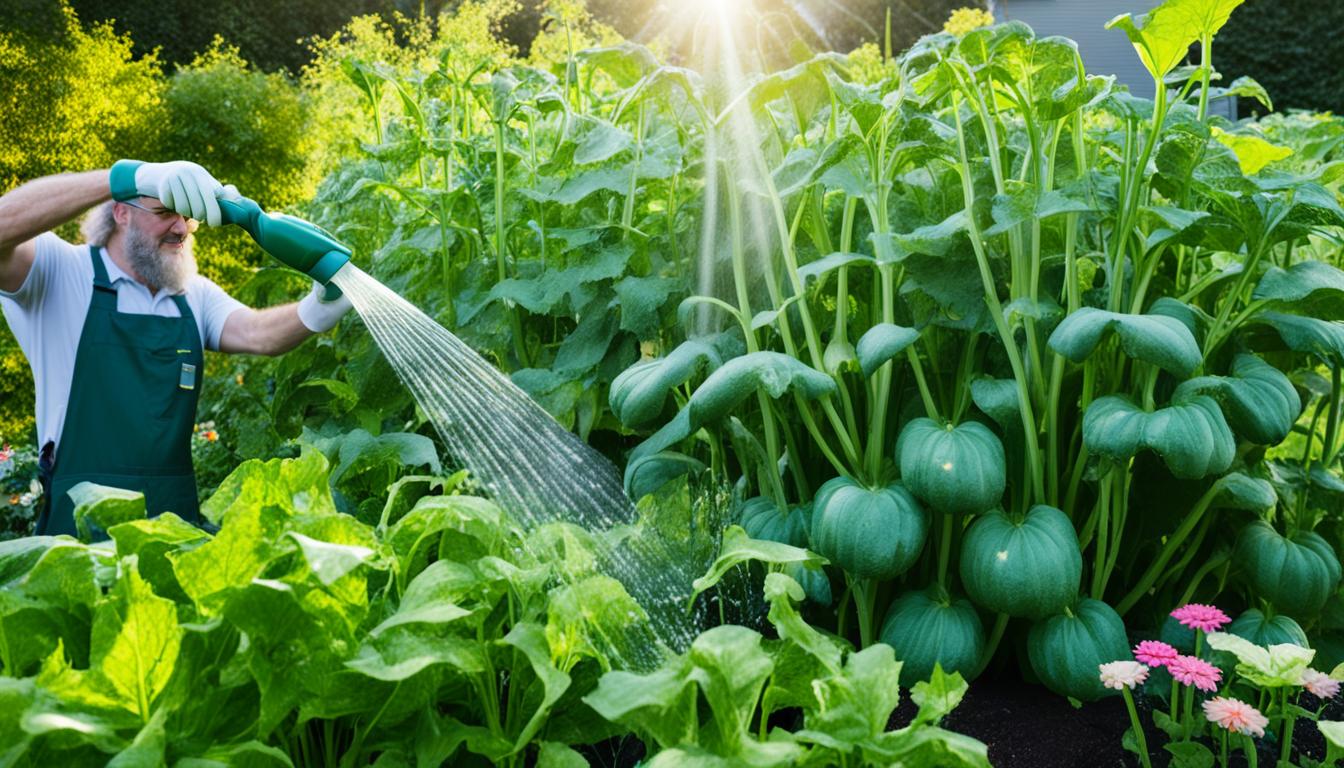
Did you know that zucchini plants are susceptible to squash vine borers, a pest that can quickly kill the plants by cutting off the flow of water? The impact of these destructive borers can be devastating to your zucchini harvest. However, by following the best practices and tips for growing zucchini, you can ensure successful cultivation and enjoy a bountiful harvest.
Whether you are a seasoned gardener or a novice looking to try your hand at gardening, this article will provide you with valuable insights on the best way to grow zucchini and tips for successful cultivation. From avoiding squash vine borers to proper planting techniques, soil requirements, spacing, and pollination, we will cover everything you need to know to grow zucchini successfully.
Key Takeaways:
- Delay planting zucchini until mid-July or use row covers to prevent squash vine borers
- Start zucchini from seeds or seedlings and choose the right time to plant
- Provide well-draining soil enriched with organic material for optimal growth
- Space zucchini plants at least 3-4 feet apart and consider trellising for better air circulation
- Ensure proper pollination for optimal fruit production and harvest zucchini at any size
Planting and Germination
Zucchini, a popular summer squash variety, can be easily grown from seeds or seedlings. While starting zucchini indoors is an option, direct sowing in the ground is the preferred and most common method of planting zucchini seeds. Here’s a step-by-step guide to planting zucchini seeds and ensuring successful germination:
1. Prepare the Soil
Before starting zucchini indoors or sowing the seeds outside, it’s crucial to have well-prepared soil. Ensure the soil is loose, rich in organic matter, and drains well. Incorporating compost or aged manure can greatly improve the soil’s fertility. Measure the soil temperature and wait until it consistently reaches above 55 degrees Fahrenheit for successful germination.
2. Planting Zucchini Seeds
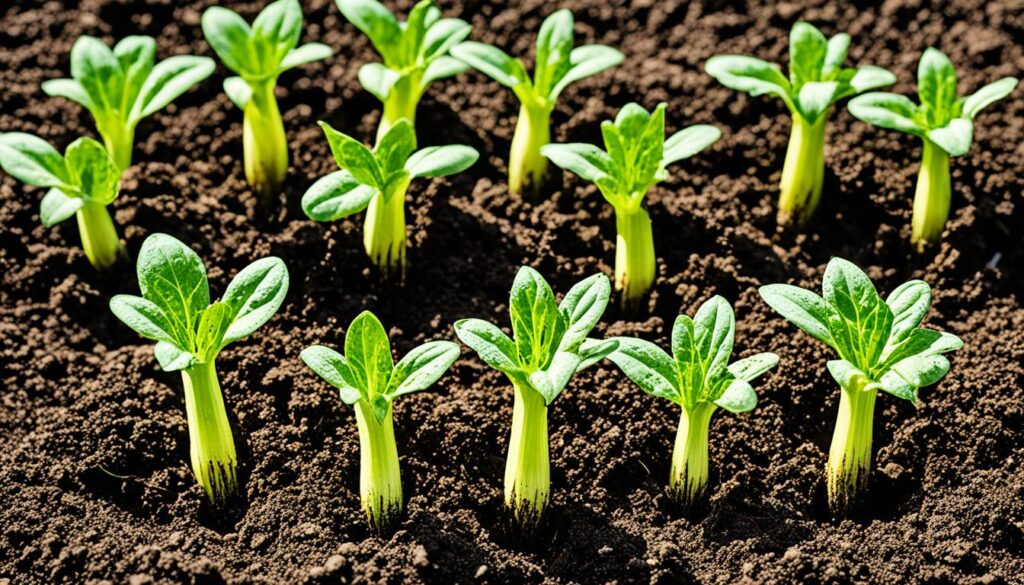
When the soil is ready, plant the zucchini seeds about an inch deep into the soil. Space the seeds at least 3 feet apart to allow ample room for growth. Lightly mist the top of the soil with water to ensure proper moisture levels for the germination of zucchini. Take care not to overwater the seeds, as it can lead to rotting.
Pro Tip: For those who prefer starting zucchini indoors, plant the seeds in peat pots or biodegradable seed starting trays about 2-3 weeks before the last expected frost. Transplant the seedlings outdoors once the soil temperature is suitable.
3. Germination and Thinning
The germination period of zucchini seeds typically ranges from 5 to 10 days. During this time, it’s important to keep the soil consistently moist but not waterlogged. Once the seedlings reach a height of around 3 inches and develop 2 sets of true leaves, it’s time to thin them out. Starting zucchini indoors often leads to more seedlings, so removing the weaker ones will allow the strongest ones to flourish.
4. Timing is Key
For optimal growth, it’s crucial to plant zucchini at the right time. Zucchini thrives in warm soil, so direct sowing should take place in the second half of May when the risk of frost has passed and the soil has warmed up. This timing ensures that the young seedlings will not succumb to cold temperatures.
“Direct sowing zucchini seeds is the most practical and successful method for home gardeners. The plants quickly establish themselves and produce abundant healthy foliage and fruit.” – Gardening Expert, Jessica Washington
By following these planting zucchini seeds and germination guidelines, you can give your zucchini plants a head start in their growth journey. Whether you choose to start the seeds indoors or directly sow them in the ground, with proper care and attention, you’ll soon be rewarded with healthy zucchini plants ready to produce an abundance of delicious squash.
| Benefits of Direct Sowing Zucchini Seeds | Benefits of Starting Zucchini Indoors |
|---|---|
| 1. Simplifies the planting process | 1. Provides an earlier start to the growing season |
| 2. Minimizes transplant shock | 2. Offers more control over seedling development |
| 3. Allows seeds to germinate and grow in their natural environment | 3. Enables better protection against adverse weather conditions |
Soil and Location Requirements
Zucchini plants require specific soil and an ideal location to thrive and produce a bountiful harvest. Providing the right conditions for your zucchinis will ensure their health and productivity.
Choosing the Best Soil
Zucchini plants prefer organically rich, fertile, and well-draining soil. When planting in raised beds or containers, it is essential to select a well-draining potting soil. To enhance the soil’s fertility, add organic material or compost at the time of planting. This will help create a nutrient-rich environment for the zucchini plants to thrive.
If you are planting zucchinis directly in the ground, it is crucial to amend the soil with rich organic material or compost. This will improve the soil’s texture and provide the necessary nutrients for the plants to grow strong and healthy. Additionally, good drainage is essential for zucchini plants, as they prefer moist but not waterlogged conditions.
Choosing the Ideal Location
When selecting a location for your zucchini plants, it is important to consider their sunlight requirements. Zucchinis thrive in areas that receive full sun for at least 6-8 hours a day. Choose an area in your garden that is not shaded by buildings or trees, as this can hinder their growth and development.
Furthermore, it is important to note that zucchinis should not be planted in soil where other cucurbits (such as pumpkins or cucumbers) were grown in the past 1-2 years. This practice helps prevent the spread of diseases and pests that may affect the zucchini plants.
By providing the right soil conditions and selecting an ideal location with ample sunlight, you will create an optimal environment for your zucchini plants to flourish and produce an abundant crop.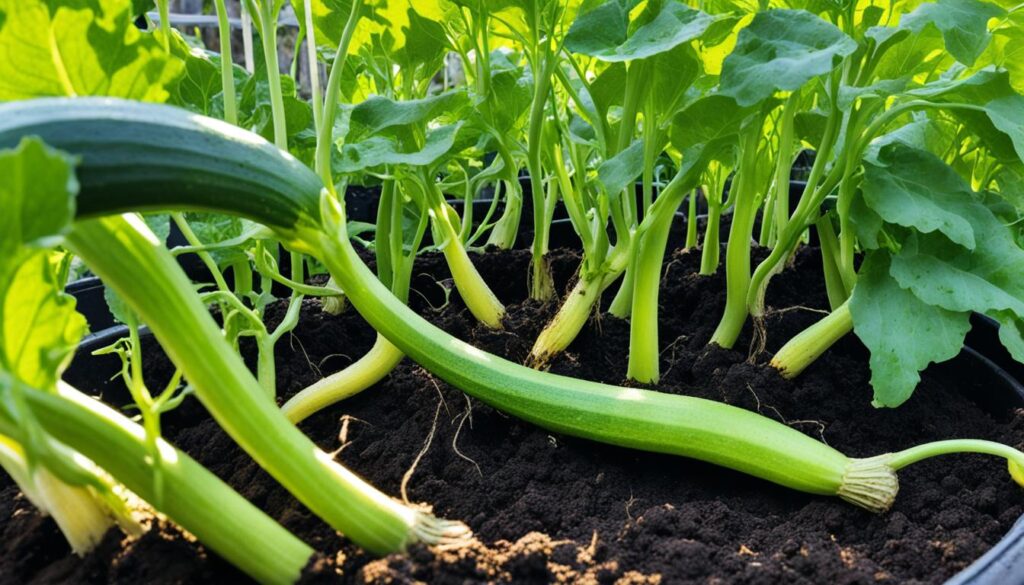
“Zucchini plants prefer organically rich, fertile, and well-draining soil. Provide the right conditions to help your zucchini plants thrive and produce a bountiful harvest.”
Spacing and Trellising
Proper spacing and trellising techniques are essential for the successful growth and development of zucchini plants.
Spacing Zucchini Plants
When it comes to zucchini plant spacing, giving enough room for each plant is crucial for optimal growth. It is recommended to space zucchini plants at least 3-4 feet apart, whether planting them in hills or rows.
For planting in hills, a general guideline is to plant 3 zucchinis per hill in a triangle pattern. Ensure the hills are also spaced 3-4 feet apart to provide enough space for the plants to receive nutrients and expand their root systems.
If growing zucchinis in containers, create a mound in the center of the container and plant three zucchinis around it. This arrangement allows for adequate airflow and efficient use of space while providing the plants with the necessary growing area.
Trellising Zucchini
Another option for maximizing space and aiding in pest management is trellising zucchini plants. By training them to grow vertically along a trellis or stakes, you can create a visually appealing and space-saving garden.
When trellising zucchini, ensure that the trellis or stakes are sturdy enough to support the weight of the plants and their fruit. As the zucchinis grow, gently guide the vines and tendrils toward the trellis, securing them with twist ties or plant clips.
The benefits of trellising zucchini include improved air circulation, which helps prevent disease, easier harvesting, and reduced pest damage since the plants are elevated off the ground.
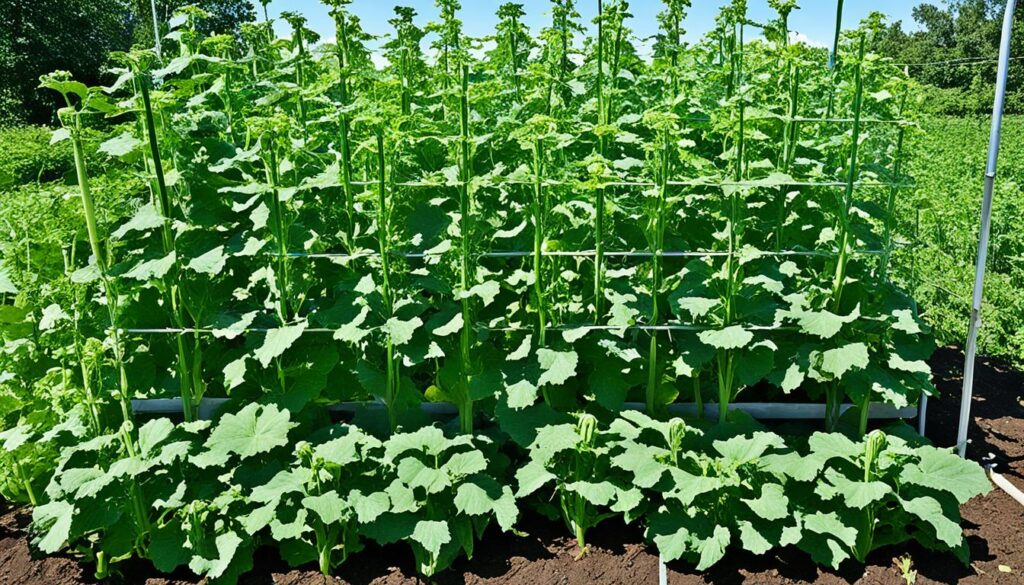
Implementing proper spacing and trellising techniques ultimately promotes healthier zucchini plants, increased productivity, and efficient use of garden space.
Pollination and Fruit Production
Zucchini plants rely on pollination for fruit production. These plants have separate male and female flowers, and the transfer of pollen from the male to the female flowers is crucial for the development of zucchini fruits. To ensure successful pollination, it’s important to understand how pollinators play a role in this process. 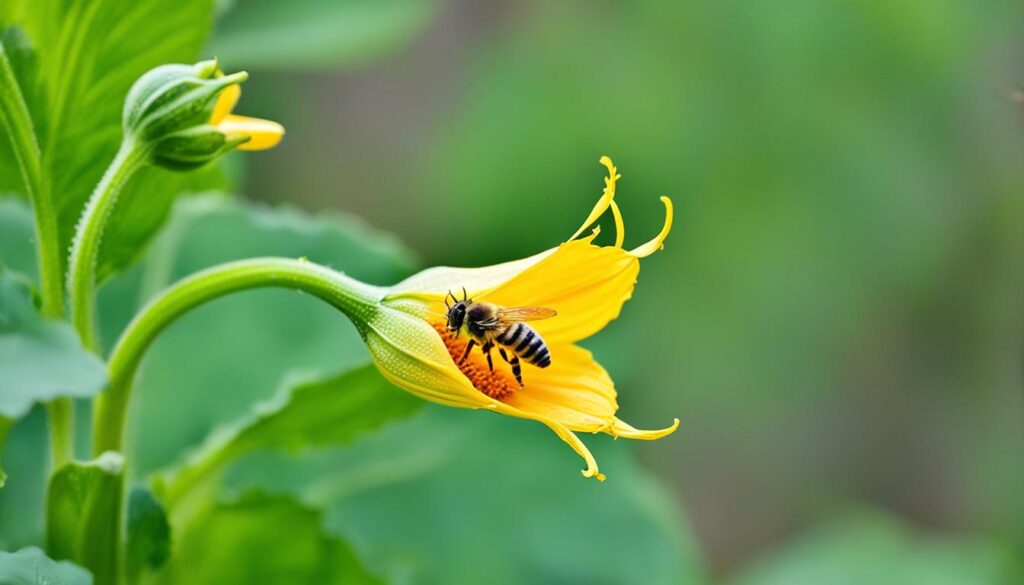
Pollinators such as bees, butterflies, and other insects are attracted to the bright yellow flowers of zucchini plants. To maximize their presence in your garden, consider planting companion flowers like borage, catmint, dill, or dahlias nearby. These flowers will help attract pollinators, increasing the chances of successful pollination.
In some cases, there may be a lack of natural pollination due to factors such as weather conditions or a limited number of pollinators in the area. In such situations, manual pollination can be done to ensure fruit production. This process involves using a small brush or cotton swab to transfer pollen from the male flowers to the female flowers. By gently brushing the inside of the male flower and then transferring the pollen to the stigma of the female flower, you can help facilitate pollination.
Tip: To identify male and female flowers, look for the presence of a small zucchini-shaped swelling at the base of the female flower. Male flowers, on the other hand, do not have this swelling.
Proper pollination is essential for optimal fruit development. It ensures that the female flowers receive the necessary pollen for fertilization, leading to the formation of healthy zucchini fruits. Be sure to monitor the progress of your zucchini plants and check for signs of fruits developing from the female flowers.
When it comes to harvesting zucchini, you can do so at any size. However, larger zucchinis may have more developed seeds and a denser texture, which might not be desirable for certain recipes. In such cases, it is recommended to remove the seeds before consumption. This can be done by slicing the zucchini lengthwise and scooping out the seeds with a spoon.
Conclusion
Successful zucchini cultivation requires attention to several key factors, including avoiding squash vine borers, following proper planting techniques, providing the right soil and location, spacing plants correctly, and ensuring proper pollination. By implementing these tips and techniques, gardeners can enjoy a bountiful harvest of zucchinis that can be incorporated into a wide range of dishes.
The best way to grow zucchini is to start by carefully timing the planting, ensuring that soil temperatures are consistently above 55 degrees Fahrenheit. This warm soil temperature provides an ideal environment for germination and growth. Additionally, choosing a well-lit area with full sun for at least 6 hours a day will help zucchinis thrive.
When it comes to soil and location requirements, zucchini plants prefer organically rich and well-draining soil. Amend the soil with compost or rich organic material to promote healthy growth. Adequate spacing is essential for proper plant development, with a recommended distance of 3-4 feet between plants. Trellising zucchini plants can also save space and improve airflow.
Finally, ensuring proper pollination is crucial for maximizing fruit production. Planting companion flowers near zucchinis can attract beneficial pollinators, and manual pollination can be done to supplement natural pollination. Harvesting can be done at any size, but larger zucchinis may require seed removal before consumption.FAQ
When is the best time to plant zucchini?
How can I prevent squash vine borers from killing my zucchini plants?
What type of soil do zucchini plants prefer?
How should I space my zucchini plants?
Do zucchini plants require manual pollination?
Can I grow zucchini vertically?
- About the Author
- Latest Posts
Meet Katherine, the creative enthusiast at ByRetreat who infuses her boundless passion for design into every remote workspace she crafts. With an innate sense of creativity and an eye for unconventional beauty, Katherine brings a unique and inspiring perspective to the team.
Katherine’s love for design is infectious, and her ability to think outside the box sets her apart. She believes that true artistry lies in embracing a variety of styles and mixing them harmoniously to create captivating spaces. By combining different textures, colors, and patterns, Katherine weaves a tapestry of creativity that breathes life into each remote workspace.
Plants
Best Conditions for Ginger Root Growth Explained
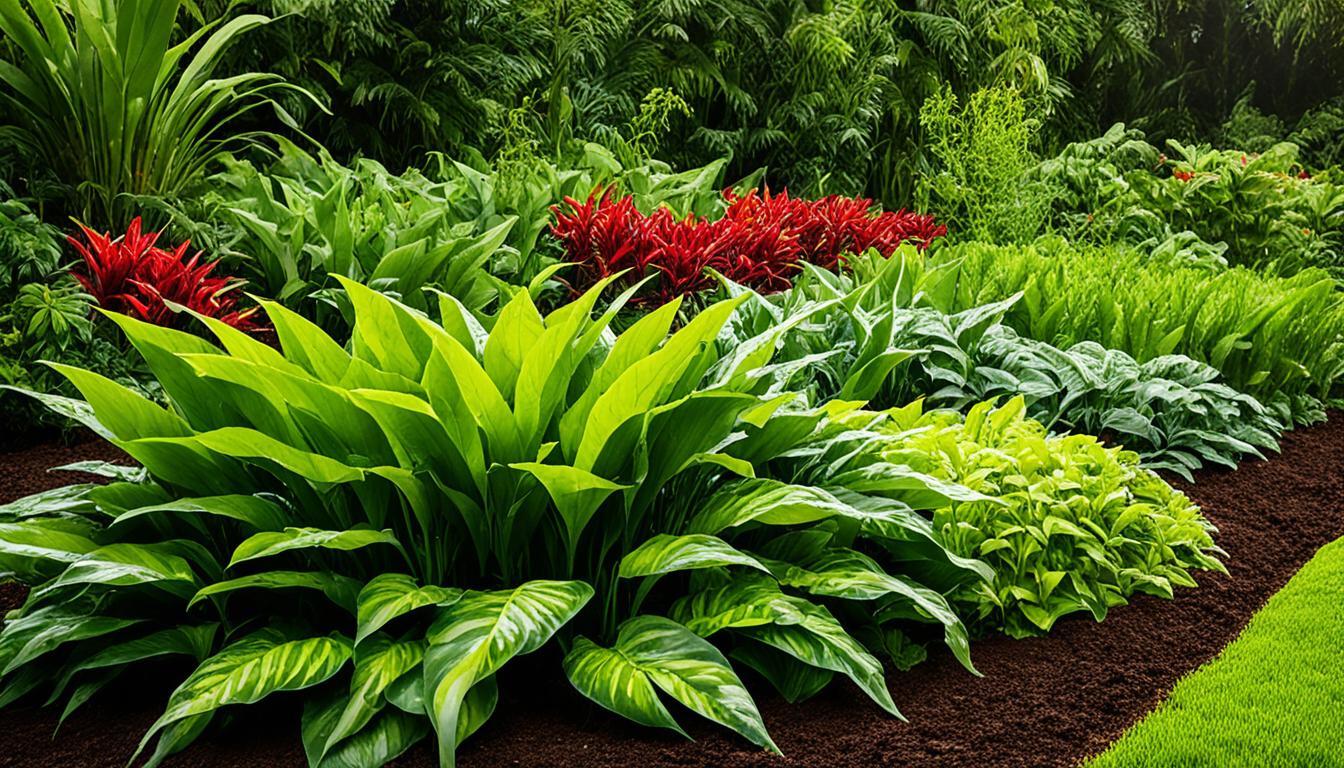
Ginger, known for its unique flavor and medicinal properties, is a versatile root used in everything from cooking to herbal remedies. But did you know that the success of ginger cultivation depends heavily on the conditions in which it is grown? Creating the best conditions for ginger root growth is essential to yield a bountiful harvest and vibrant plants.
From temperature to soil quality and moisture levels, each aspect plays a crucial role in ginger’s growth and well-being. By understanding the optimal conditions, gardeners and enthusiasts can replicate ginger’s tropical habitat and cultivate healthy plants with exceptional flavor and aroma.
In this article, we will explore the optimal conditions necessary for ginger root growth, offering insights and techniques to help you grow ginger successfully. Whether you’re an experienced gardener or a beginner with a green thumb, this guide will provide valuable knowledge to enhance your ginger cultivation.
Key Takeaways:
- Ginger root growth requires specific conditions to thrive.
- Temperature, soil quality, moisture, and shade are essential factors.
- Best practices include using organic matter, maintaining proper drainage, and providing dappled shade.
- Ginger can be grown in containers, hoop houses, or greenhouses.
- Pre-sprouting ginger indoors can maximize the growing season.
Optimal Soil Conditions for Ginger Root Growth
Ginger plants require optimal soil conditions to thrive and produce healthy root growth. By providing the right environment, gardeners can ensure that their ginger plants receive the necessary nutrients and support for robust growth. Here are some essential factors to consider when creating optimal soil conditions for ginger root growth:
- Rich in Organic Matter: Ginger prefers soil that is rich in organic matter, which provides essential nutrients and promotes healthy root development. Adding lots of compost to the ground or using a peat and wood bark-based soilless medium mixed with sand in containers can help create a fertile growing medium.
- Organic Fertilizers and Worm Castings: Supplementing the soil with organic fertilizers and worm castings can further enhance the nutrient content, ensuring that ginger plants have access to the necessary elements for their growth. These natural amendments provide a slow-release source of nutrients, promoting long-term plant health.
- Good Drainage: It is crucial to ensure good drainage in the soil to prevent waterlogging, as standing water can negatively affect ginger growth. To improve drainage, incorporating coarse sand or perlite into the soil can help create a well-draining environment for the roots.
- pH Levels: Maintaining the right pH levels is essential for optimal ginger growth. Ginger plants prefer slightly acidic soil, with pH levels between 5.5 and 6.5. Testing the soil’s pH and making appropriate adjustments using organic soil amendments or sulfur can help create the ideal conditions for ginger plants.
By creating soil conditions that are rich in organic matter, well-draining, and with the right pH levels, gardeners can provide the optimal environment for ginger root growth. The next section will explore the ideal temperature range for ginger plants and the impact it has on their growth and development.
Soil Conditions for Ginger Root Growth
| Soil Condition | Description |
|---|---|
| Rich in organic matter | Ginger prefers soil that is rich in organic matter, such as compost or a peat and wood bark-based soilless medium mixed with sand. |
| Organic fertilizers and worm castings | Adding organic fertilizers and worm castings can provide essential nutrients for ginger plants. |
| Good drainage | Ensuring good drainage in the soil is crucial to prevent waterlogging, which can negatively affect ginger growth. |
| pH levels between 5.5 and 6.5 | Maintaining slightly acidic soil with pH levels between 5.5 and 6.5 is ideal for ginger plants. |
Ideal Temperature Range for Ginger Root Growth
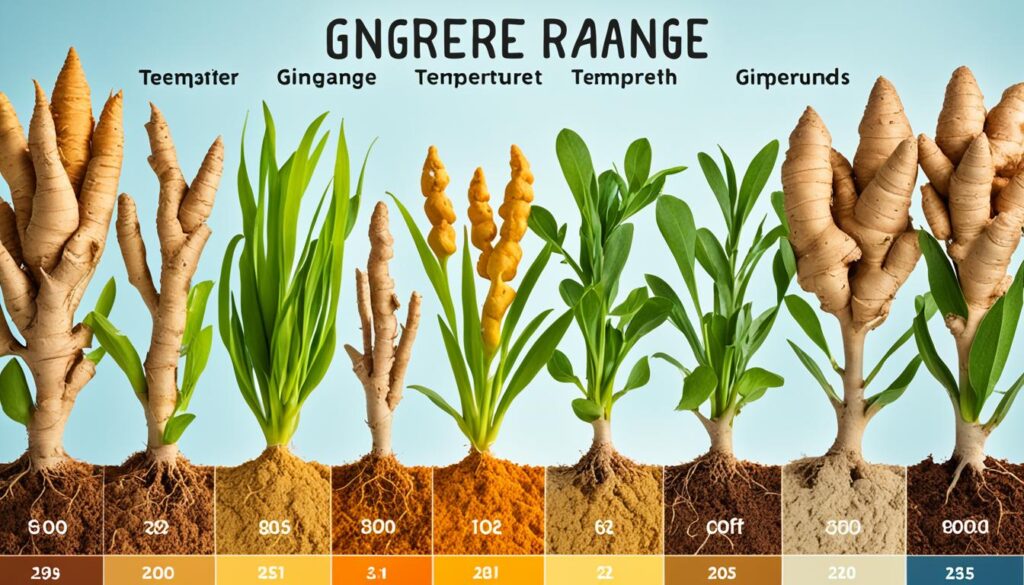
Ginger is a tropical plant that thrives in warm temperatures, making the ideal temperature range a crucial factor for its successful growth. The ideal temperature range for ginger root growth is 70° to 90°F (21° to 32°C). This range provides the optimal conditions for ginger plants to thrive and produce healthy rhizomes.
When growing ginger, it is important to consider the nighttime temperatures as well. It is recommended to plant ginger when nighttime temperatures are consistently above 55°F (13°C). Cooler temperatures can slow down the growth of ginger plants or even cause damage to them, hindering their development.
In regions with colder climates, it may be challenging to maintain these ideal temperatures for ginger growth. However, there are ways to overcome this obstacle and still grow ginger successfully. Growing ginger indoors in a controlled environment, such as a greenhouse or conservatory, can provide the necessary warmth for ginger plants to thrive.
Importance of Moisture for Ginger Root Growth
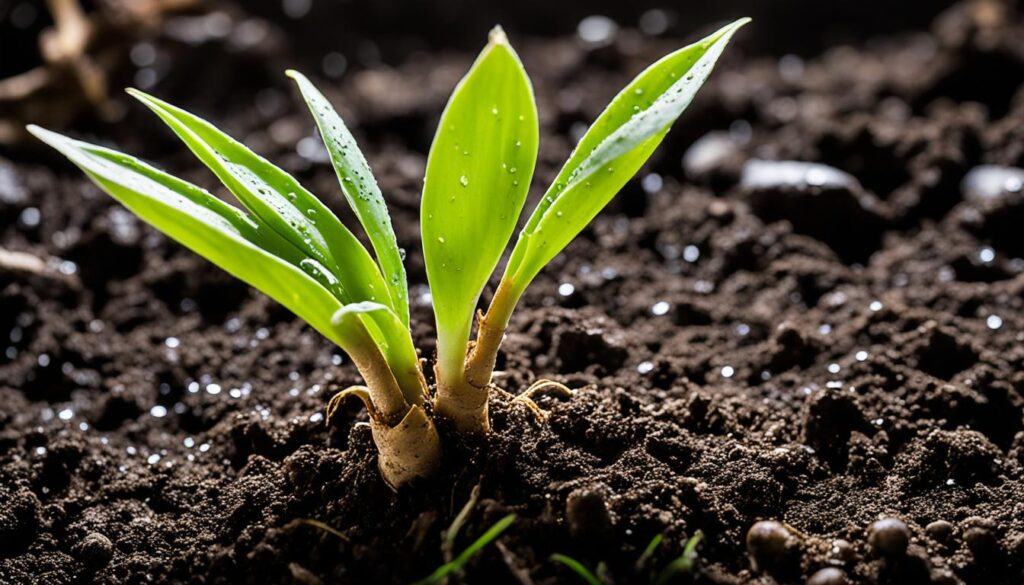
Ginger is a moisture-loving plant that requires consistent watering to thrive and produce healthy and flavorful roots. Proper moisture management is essential for ginger root growth.
The soil should be kept evenly moist, providing enough water to meet the plant’s needs without overwatering or allowing the soil to dry out completely. Overwatering can lead to waterlogged conditions, which can suffocate the roots and promote the development of root rot. Conversely, letting the soil dry out completely can cause stress to the plant and hinder its growth.
Watering frequency may vary depending on factors such as the climate, humidity levels, and container size. In general, it is advisable to water ginger plants whenever the top inch of soil feels slightly dry. This allows for proper hydration without risking waterlogging.
Proper irrigation techniques and good drainage are crucial for maintaining the ideal moisture levels for ginger root growth. In containers, ensure that there are drainage holes to prevent water from pooling at the bottom. For in-ground planting, selecting a well-draining soil or amending the soil with organic matter can improve moisture balance.
Expert Tip:
When watering ginger plants, it’s important to give them a deep soak, allowing the water to penetrate the root zone. However, avoid overhead watering as it can lead to the development of fungal diseases. Instead, direct the water towards the base of the plant or use a drip irrigation system to ensure precise watering.
By maintaining the right moisture levels through proper watering techniques and good drainage, gardeners can provide the optimal conditions for ginger root growth, ensuring healthy plants and a bountiful harvest.
Moisture Guidelines for Ginger Root Growth
| Moisture Level | Signs | Recommended Action |
|---|---|---|
| Soggy or Waterlogged | Wilting, yellowing leaves; foul odor; root rot | Improve drainage by adding organic matter; reduce watering frequency |
| Too Dry | Wilting, dry soil; slow growth | Increase watering frequency; mulch around plants to retain moisture |
| Evenly Moist | Healthy foliage; steady growth | Continue regular watering; monitor moisture levels |
Benefits of Dappled Shade for Ginger Root Growth
Ginger plants thrive in dappled shade, which provides them with a balanced environment for optimal growth. The benefits of dappled shade include protection from direct sunlight, prevention of soil overheating and excessive drying, and maintenance of suitable moisture levels.
Planting ginger under the shelter of taller crops or using shade cloth can create the perfect conditions for ginger root growth. The dappled shade allows the plants to receive filtered sunlight, which is essential for photosynthesis while reducing the risk of sunburn or heat stress.
“Dappled shade is like a natural sunscreen for ginger plants, shielding them from the harsh rays of the sun and maintaining a cool, comfortable environment.”
By providing dappled shade, you can create an ideal microclimate for ginger root growth. The shade helps regulate soil temperatures, preventing it from becoming too hot and drying out too quickly. This is particularly important for ginger, as it prefers consistently moist soil.
Moreover, dappled shade helps to reduce water evaporation, allowing the roots to stay moist for longer periods. This helps the ginger plants establish a strong root system and absorb essential nutrients from the soil, promoting healthy growth and development.
When setting up dappled shade for your ginger plants, it is important to strike a balance. While providing shade, ensure that there is still enough light penetration for proper photosynthesis. Ginger plants need adequate sunlight to produce energy for growth, but too much direct sunlight can be detrimental.
Consider planting ginger in an area where it receives morning sun and partial afternoon shade. This allows the plants to benefit from the warmth and light of the morning sun while being shielded from the intense heat of the afternoon sun.
To summarize, dappled shade provides numerous benefits for ginger root growth, including protection from direct sunlight, prevention of soil overheating and excessive drying, and maintenance of suitable moisture levels. By implementing dappled shade techniques, you can create an ideal environment for ginger plants to thrive and produce a bountiful harvest.
Pros and Cons of Dappled Shade for Ginger Root Growth
| Benefits of Dappled Shade | Considerations for Dappled Shade |
|---|---|
| Protection from direct sunlight | Ensure there is still enough light for photosynthesis |
| Prevents soil overheating | Find a balance between shade and sunlight |
| Reduces soil drying out | Choose an area with morning sun and partial afternoon shade |
| Maintains suitable moisture levels |

Recommended Planting Techniques for Ginger Root Growth
When it comes to cultivating ginger, selecting the right planting technique is crucial for successful root growth. Whether using whole rhizomes or cut pieces, understanding the proper methods will optimize your ginger harvest. Here are some recommended planting techniques:
1. Using Whole Rhizomes
Planting ginger with whole rhizomes is a straightforward technique that yields excellent results. Look for healthy, plump rhizomes with well-developed buds or eyes. These larger rhizomes tend to grow quicker and produce more robust plants.
To plant whole rhizomes:
- Prepare the soil by loosening it with a garden fork or tiller.
- Dig a trench that is about 6 to 8 inches deep.
- Place the rhizomes in the trench with the eyes facing upwards.
- Cover the rhizomes with soil, ensuring they are well-buried but not too deep.
- Water gently to settle the soil.
2. Using Cut Rhizome Pieces
If you have limited planting material or want to maximize your ginger yield, using cut rhizome pieces is a viable option. When cutting the rhizomes, ensure each piece has at least one bud or eye.
To plant cut rhizome pieces:
- Prepare the soil or select a suitable container with good drainage.
- Fill the container with a well-draining potting mix or amend the soil with organic matter.
- Place the cut rhizome pieces in the soil or container, burying them about 1 to 2 inches deep.
- Water thoroughly to encourage root establishment.
Note: Make sure there is adequate room for the rhizomes to grow when planting in containers. This will prevent overcrowding and promote healthier plant development.
3. Pre-sprouting Indoors
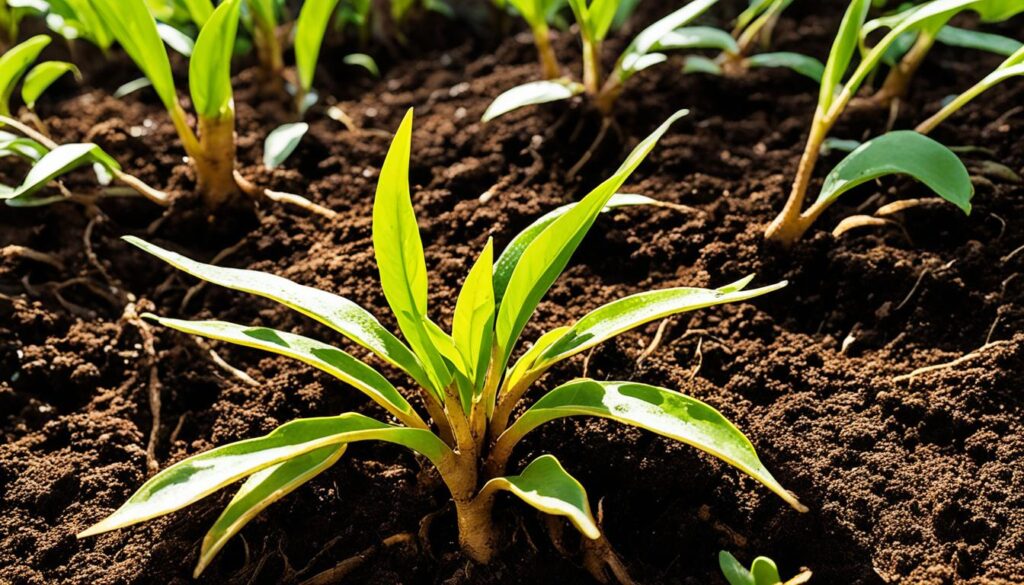
For gardeners who wish to extend the growing season or gain a head start on ginger production, pre-sprouting indoors is an effective technique. This method involves placing the rhizomes in a tray with moist compost or paper towel to encourage early sprouting.
To pre-sprout ginger indoors:
- Select healthy rhizomes with visible eyes.
- Fill a tray with moist compost or lay paper towels on a flat surface.
- Place the rhizomes on the compost or paper towels, positioning them with the eyes facing upwards.
- Maintain the moisture level by misting regularly.
- Keep the tray or paper towels in a warm location with indirect sunlight.
- Once sprouts have developed, carefully transplant them into individual containers or directly into the ground.
Pre-sprouting allows for an earlier harvest and ensures that the ginger plants have a strong start before being exposed to outdoor conditions.
Remember, ginger responds well to a warm and humid environment, so providing the optimal conditions during the planting process will contribute to its overall growth and development.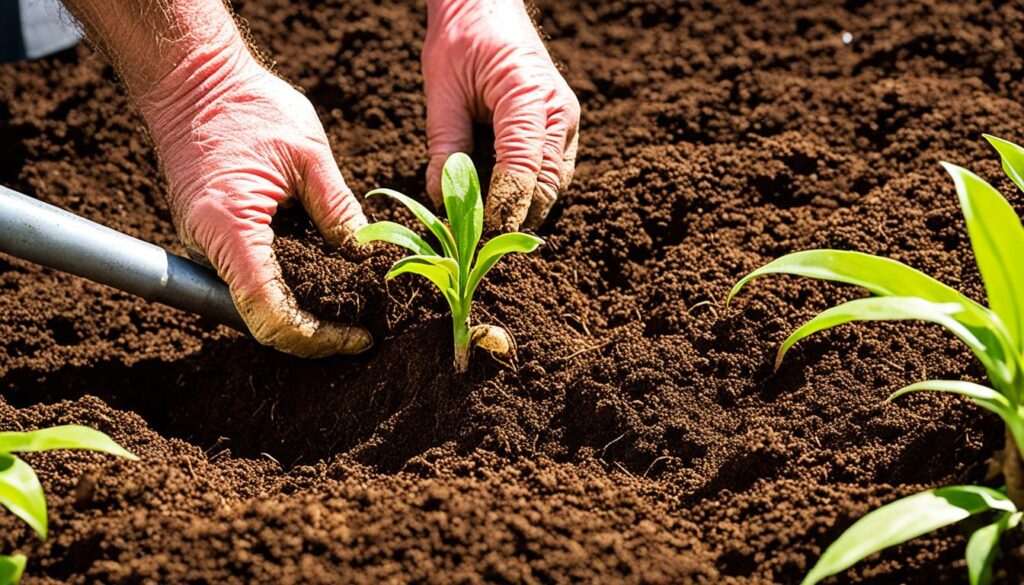
| Planting Technique | Advantages | Disadvantages |
|---|---|---|
| Using Whole Rhizomes | – Quicker growth – Larger harvests |
– Requires more planting material – Limited control over spacing |
| Using Cut Rhizome Pieces | – Maximizes planting material – Allows for precise spacing |
– Slower initial growth – Smaller rhizome yields |
| Pre-sprouting Indoors | – Provides an early start – Enhances germination rates |
– Requires additional indoor space – Requires regular misting |
Care Tips for Ginger Root Growth
Proper care is crucial for the successful growth of ginger roots. By providing the right conditions, you can ensure healthy plants and a bountiful harvest. Here are some essential care tips for ginger root growth:
1. Warmth: Ginger plants thrive in warm environments, so it’s important to provide them with a suitable temperature. During the summer, whether you are growing ginger outdoors or indoors, it’s beneficial to place the plants in a warm and humid area.
2. Humidity: Humidity is another important factor for ginger root growth. If you are growing ginger indoors, placing the plant near a bright windowsill can help simulate the ideal conditions. Additionally, occasional misting with water can create a humid environment that mimics the plant’s natural habitat.
3. Moisture: Adequate moisture levels are essential for ginger plants. It’s important to water the plants regularly, ensuring that the soil is evenly moist. However, be cautious not to overwater, as excessive moisture can lead to root rot. To promote proper drainage, use pots with drainage holes and allow the soil to dry out slightly between waterings.
4. Mulching: Applying a layer of mulch around ginger plants can serve multiple benefits. Mulching helps to conserve moisture in the soil, reducing the frequency of watering required. Additionally, it helps to suppress weed growth, keeping the area around the ginger plants clean and tidy.
Ginger plants require a combination of warmth, humidity, moisture, and proper drainage to thrive. By following these care tips, you can create optimal conditions for ginger root growth and enjoy a successful harvest.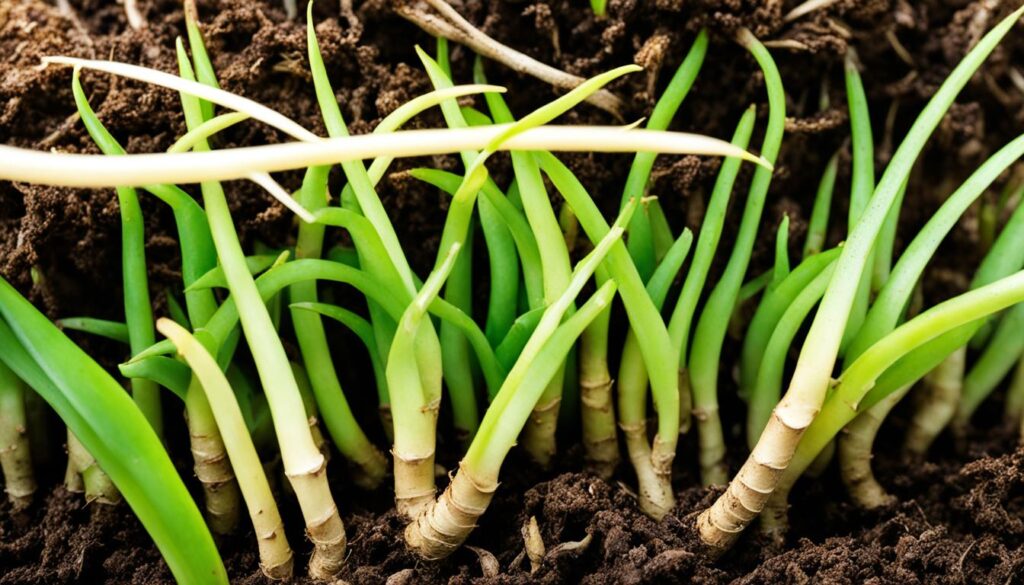
| Care Tips for Ginger Root Growth | Benefits |
|---|---|
| Provide warmth | Creates a favorable environment for ginger plants |
| Maintain humidity | Simulates the plant’s natural habitat and supports growth |
| Ensure proper moisture | Prevents drying out or waterlogging |
| Use mulch | Conserves moisture and suppresses weed growth |
Conclusion
Growing ginger successfully requires replicating its tropical natural habitat as closely as possible. Providing optimal soil conditions, the right temperature range, adequate moisture, and dappled shade is crucial. By following these best practices, gardeners can ensure the best conditions for ginger root growth and enjoy a bountiful harvest.
When it comes to planting ginger, there are two main methods: using whole rhizomes or cutting them into pieces and pre-sprouting indoors for an earlier harvest. Both approaches can be effective, but it’s important to pay careful attention to watering and drainage. Ginger cannot tolerate standing water or drying out completely, so finding the right balance is key.
Remember that ginger thrives in warm temperatures, ideally ranging from 70° to 90°F (21° to 32°C). Additionally, ginger plants appreciate some dappled shade, as it protects them from direct sunlight and helps prevent the soil from drying out too quickly. Creating these optimal conditions will give your ginger the best chance to grow and thrive.
So whether you’re growing ginger in the ground, in containers, or in a greenhouse, make sure to provide it with the right environment. By replicating its tropical natural habitat as closely as possible and paying attention to its specific needs, you can enjoy a bountiful harvest of delicious and aromatic ginger roots.
FAQ
What are the best conditions for ginger root growth?
What are the optimal soil conditions for ginger root growth?
What is the ideal temperature range for ginger root growth?
How important is moisture for ginger root growth?
What are the benefits of dappled shade for ginger root growth?
What are the recommended planting techniques for ginger root growth?
What are the care tips for ginger root growth?
- About the Author
- Latest Posts
Meet Katherine, the creative enthusiast at ByRetreat who infuses her boundless passion for design into every remote workspace she crafts. With an innate sense of creativity and an eye for unconventional beauty, Katherine brings a unique and inspiring perspective to the team.
Katherine’s love for design is infectious, and her ability to think outside the box sets her apart. She believes that true artistry lies in embracing a variety of styles and mixing them harmoniously to create captivating spaces. By combining different textures, colors, and patterns, Katherine weaves a tapestry of creativity that breathes life into each remote workspace.
Plants
Gerbera Daisy Care: The Ultimate Guide

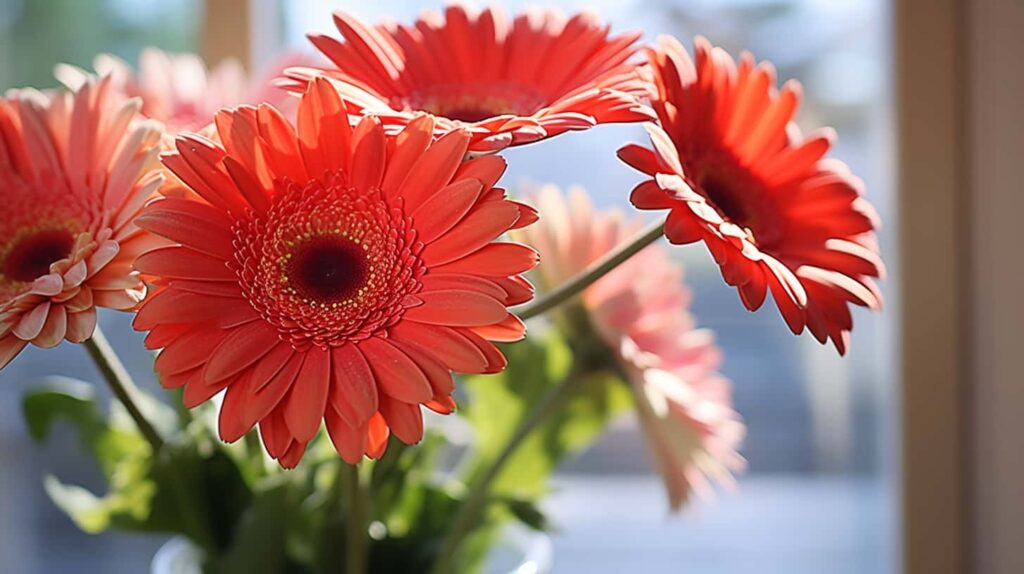
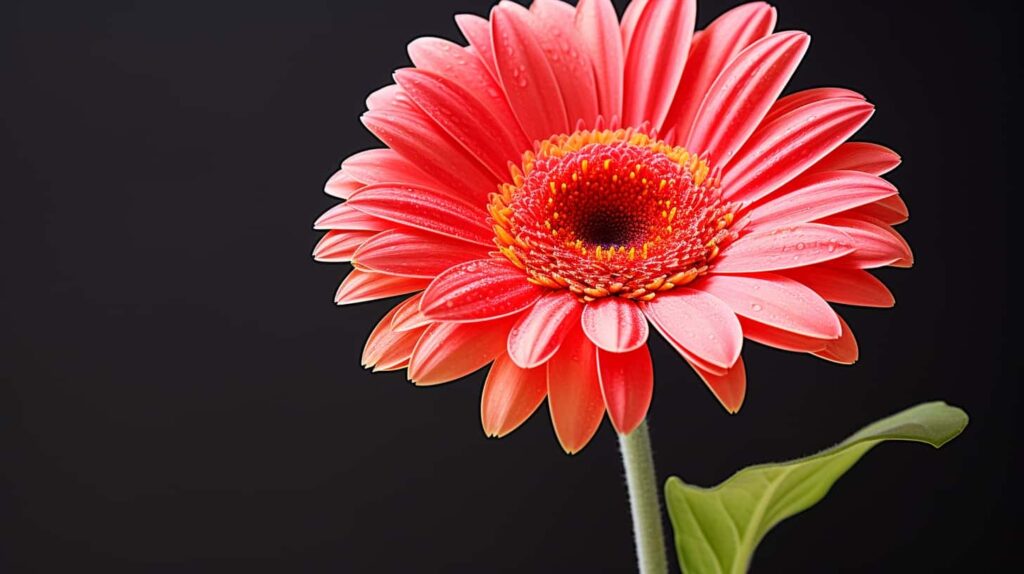
Were you aware that gerbera daisies, encompassing shades of purple and orange, are not just eye-catching but also available in a breathtaking selection of vivid colors? These cut flowers add a spectacular flair to any floral composition. Originating from South Africa, these exquisite gerbera daisy varieties are part of the Asteraceae family and have garnered popularity among both horticulturists and flower lovers. Cultivate gerbera to enjoy fresh blooms of gerbera daisies. Ranging from intense reds to soft pinks, bright yellows to pristine whites, gerbera daisies present a spectrum of colors, including purple and orange, which are sure to illuminate any area, particularly when planted in garden beds.
With their rosette-like growth habit, gerbera daisy plants can reach heights of 12-18 inches. The long stems emerging from the center of these herbaceous perennials showcase beautiful purple flowers. Plant gerbera for stunning results. Gerberas, with their enchanting orange flowers, are a perfect addition to any spring garden. Their dark green leaves add contrast and depth to their already enchanting blooms. If you’re looking for inspiration for your garden, check out the new Southern Living Garden Book. And the best part? There are countless gerberas cultivars available, each with its own unique characteristics. These orange flowers are perfect for spring and can thrive in various zones. Whether you’re looking for large or small pink gerberas, different petal shapes, or diverse growth habits, there’s a variety of gerbera daisies in spring that will suit everyone.
So join us as we delve into the world of gerbera daisies – their captivating colors like orange flowers and pink, varietal diversity, and fascinating growth characteristics in different zones. Get ready to be inspired by these delightful pink and orange gerberas that bring joy and beauty to all zones wherever they grow.
Starting Your Gerbera Daisies
Planting Guide
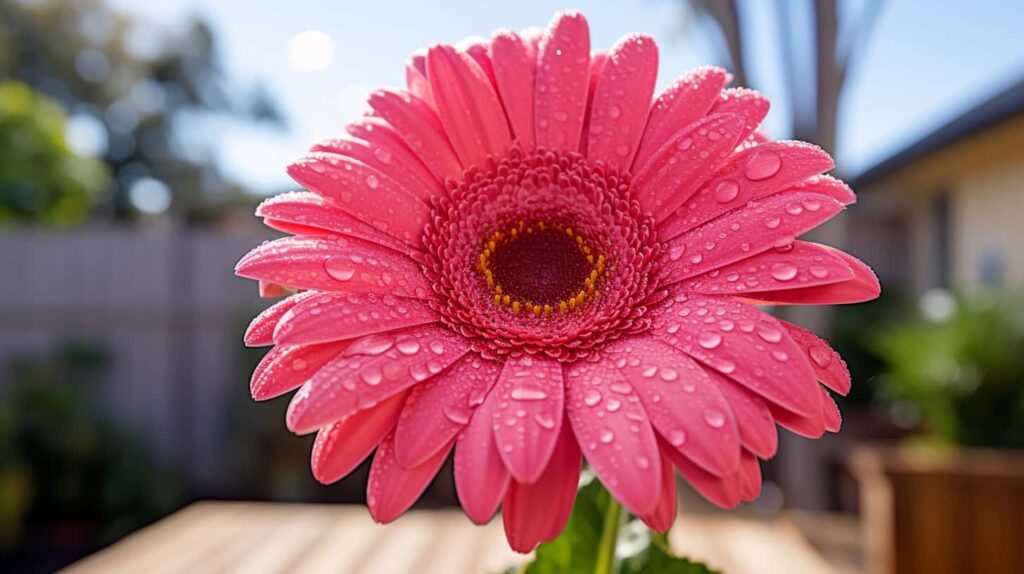
To start growing your gerbera daisies, choose a location in USDA hardiness zones 9 to 11 that receives full sun or partial shade. These vibrant flowers come in various colors, including pink and orange. Make sure to plant them at a depth of 2 inches for optimal growth. When choosing a spot for your plants, consider the different zones and find one with well-draining soil to avoid waterlogging and prevent root rot. Make sure the soil is pink and free of excess moisture, allowing the roots to thrive. Gerbera daisies prefer slightly acidic to neutral soil with a pH level between 6.0 and 7.0 for optimal growth in pink zones. These daisies can reach a height of up to 18 inches.
When planting pink gerbera daisies, make sure to space them about 12 inches apart. This spacing of inches allows for proper air circulation around the pink plants, which helps prevent diseases and promotes healthy growth. Adequate airflow also reduces the risk of fungal infections.

Soil Preparation
Before planting your gerbera daisies, it’s crucial to prepare the soil properly. Make sure to dig a hole that is the appropriate depth, typically around 6 inches. Start by adding organic matter, such as compost or well-rotted manure, to improve the soil’s fertility and structure. Aim for a depth of several inches. This organic matter provides essential nutrients and enhances moisture retention in the soil, helping plants grow and thrive. It also improves soil structure, preventing erosion and promoting root development. Additionally, it increases the soil’s ability to hold water, reducing the need for frequent irrigation. Organic matter is typically measured in inches and can vary depending on the type of soil and climate conditions.
Gerbera daisies thrive in loamy soil that retains moisture without becoming waterlogged. These daisies can grow up to 12 inches tall, making them a popular choice for gardeners. Loamy soil has a balanced texture, combining sand, silt, and clay in equal proportions, typically measuring a few inches deep. Avoid heavy clay soils that tend to hold excess water, leading to root rot and other issues. This can be particularly problematic for plants with shallow root systems, as they may not be able to access the necessary nutrients and oxygen. Additionally, the compact nature of clay soil can inhibit proper drainage, further exacerbating the problem. To prevent these issues, it is important to choose well-draining soil that allows water to flow freely, ensuring that plants receive the appropriate amount of moisture without becoming waterlogged.
Initial Care
Once you’ve planted your gerbera daisies, they require some initial care to establish strong roots and ensure their overall health. These flowers can grow up to 12 inches tall, so it’s important to provide them with the right conditions for growth.
Watering is crucial during the early stages of growth. Water your newly planted gerbera daisies thoroughly after planting to a depth of a few inches to help them settle into their new environment. Ensure that the water reaches the root zone without saturating the soil excessively.
To conserve moisture and suppress weed growth around your gerbera daisies, apply a layer of mulch around each plant. Mulching helps retain moisture in the soil while preventing weeds from competing for nutrients and sunlight.
Protecting young plants from extreme temperatures and frost is essential. Gerbera daisies are sensitive to cold weather, so cover them with row covers or cloths during chilly nights or frosty periods. This extra layer of protection shields the plants from temperature fluctuations and prevents potential damage.
Caring for Gerbera Daisies
Watering Essentials
Gerbera daisies are beautiful and vibrant flowers that require regular watering to thrive. It’s important to keep the soil consistently moist, but be careful not to overwater and leave it waterlogged. To ensure proper watering, we recommend watering deeply at the base of the plant rather than overhead watering. Overhead watering can increase the risk of fungal diseases, which can harm your gerbera daisies.
When determining how often to water your gerbera daisies, consider the weather conditions and soil moisture levels. During hot and dry periods, you may need to water more frequently to prevent the soil from drying out completely. On the other hand, during cooler and rainy periods, you may need to reduce the frequency of watering.
Fertilizing Needs
To keep your gerbera daisies healthy and encourage abundant blooms, it’s essential to provide them with proper nutrients. We recommend using a balanced, slow-release fertilizer specifically formulated for flowering plants. This type of fertilizer will provide a steady supply of nutrients over time without causing excessive foliage growth at the expense of flowers.
When applying fertilizer to your gerbera daisies, follow the instructions on the package carefully. Typically, fertilizing every 6-8 weeks during the growing season is sufficient. However, be cautious not to over-fertilize as this can lead to an imbalance in nutrients or excessive growth that hinders flower production.
Pruning Practices
Regular pruning is crucial for maintaining healthy and attractive gerbera daisy plants. One essential pruning task is removing spent blooms promptly. By deadheading or cutting off faded flowers, you encourage continuous blooming throughout the season and prevent seed production.
In addition to removing spent blooms, keep an eye out for damaged or yellowing leaves on your gerbera daisies. These leaves should be pruned to maintain a tidy appearance and prevent the spread of any diseases or pests.
Over time, gerbera daisies can become overcrowded as they produce new shoots and clumps. To rejuvenate the plants and promote healthy growth, it’s recommended to divide overcrowded clumps every few years. Dividing the clumps involves carefully separating the plant into smaller sections and replanting them in separate locations. This process allows each division to have enough space to grow and thrive.

Maximizing Gerbera Daisy Growth
Sunlight Exposure
Gerbera daisies are vibrant and beautiful flowers that can brighten up any garden or indoor space. To ensure the optimal growth of these stunning blooms, it is essential to provide them with the right amount of sunlight exposure. These daisies thrive in full sun conditions, which means they need at least 6 hours of direct sunlight per day.
However, in hot climates, it’s important to protect gerbera daisies from scorching heat by providing some afternoon shade. This will prevent the flowers from wilting or getting damaged by excessive heat. By finding a balance between sun and shade, we can create an ideal environment for our gerbera daisies to flourish.
It’s worth noting that insufficient sunlight can have negative effects on gerbera daisy growth. Without enough direct sunlight, the stems may become weak and the flower production may be reduced. Therefore, it’s crucial to place these plants in areas where they can receive adequate sunlight throughout the day.
Temperature Regulation
Just like humans, gerbera daisies have temperature preferences too! These lovely flowers prefer moderate temperatures ranging from 65°F to 75°F (18°C – 24°C). Keeping them within this temperature range will promote healthy growth and vibrant blooms.
During periods of extreme heatwaves, it’s important to protect gerbera daisies from high temperatures. Providing shade or moving potted plants indoors can help shield them from scorching heat that may damage their delicate petals and foliage.
On the other hand, if you live in a colder region where freezing temperatures are common, you’ll need to take extra precautions to keep your gerbera daisies safe. Mulching around the base of the plants can help insulate them from freezing temperatures and prevent frost damage.
By regulating temperature conditions for our gerbera daisies, we can ensure their well-being and help them thrive in various climates.
Humidity Control
Humidity plays a crucial role in the growth and overall health of gerbera daisies. These flowers appreciate moderate humidity levels, ideally around 50%. However, it’s important to avoid excessively humid conditions as they can promote fungal diseases like powdery mildew.
To maintain the right humidity level for our gerbera daisies, good air circulation is essential. Adequate airflow helps prevent the buildup of excess moisture around the plants, reducing the risk of fungal infections. Placing fans or ensuring that there is enough space between plants can help create a healthy environment with proper air circulation.
In addition to promoting air circulation, it’s also important to avoid overwatering gerbera daisies. Excess water can lead to stagnant moisture and increase humidity levels around the plants. By watering these flowers carefully and allowing the soil to dry slightly between waterings, we can prevent excessive humidity and keep our gerbera daisies happy and healthy.
Achieving Vibrant Blooms
Encouraging Flowering
To ensure that your gerbera daisies produce vibrant blooms, it’s important to take certain steps. One crucial practice is deadheading spent blooms regularly. By removing faded flowers, you stimulate the production of new ones, encouraging a continuous display of colorful petals. This process redirects the plant’s energy from seed production to flower formation.
In addition to deadheading, providing your gerbera daisies with adequate sunlight, water, and nutrients is essential for promoting healthy growth and abundant flowering. These plants thrive in full sun or partial shade, so make sure they receive at least six hours of direct sunlight each day. Water them deeply but avoid overwatering or underwatering, as both can negatively impact flower production. Finding the right balance will help keep your gerbera daisies happy and blooming.
Bloom Time Insights
Gerbera daisies are known for their long-lasting blooms that bring color to gardens throughout the warmer months. Typically, these flowers start blooming in spring and continue until fall. The peak flowering period occurs during summer when the weather is warm and favorable for their growth.
However, it’s important to note that bloom time may vary depending on the cultivar and growing conditions. Some varieties may have shorter or longer blooming periods compared to others. By selecting different cultivars with staggered bloom times, you can extend the overall blooming season in your garden.
To maximize the duration of blooms on your gerbera daisies, regular deadheading is key. Removing spent flowers not only improves aesthetics but also encourages new buds to form and open up into beautiful blossoms.

Flower Size Factors
Size matters! These charming blooms come in various sizes depending on the cultivar and environmental factors.
Genetics play a significant role in determining flower size. Different cultivars have been bred to produce flowers of varying sizes, ranging from small to large. If you prefer showier and more prominent blooms, opt for cultivars known for their larger flower size.
Plant health and growing conditions also influence the size of gerbera daisy flowers. Providing optimal care, including regular watering, adequate sunlight exposure, and proper nutrition, will help your plants reach their full potential in terms of flower size.
It’s worth noting that gerbera daisies are available in a wide array of colors, including purple and pink. When selecting cultivars based on flower color preferences, consider choosing those that offer vibrant shades of these hues to add a pop of color to your garden or floral arrangements.
Propagation Techniques
Seed Sowing
Gerbera daisies are beautiful flowers that can be easily propagated from seeds. However, it’s important to note that they require specific conditions for successful germination. To start the process, we need to sow the seeds in a well-draining seed-starting mix. This will provide the right environment for the seeds to grow.
Maintaining a temperature of around 70°F (21°C) is crucial for gerbera daisy seed germination. This can be achieved by placing the seeds in a warm location or using a heat mat if necessary. It’s important to keep an eye on the temperature and make adjustments as needed to ensure optimal conditions.
After sowing the seeds, it may take several weeks for them to germinate. Patience is key during this process, as it can sometimes take longer than expected. It’s essential not to give up hope and continue providing the ideal conditions for germination.

Division Method
Another propagation technique for gerbera daisies is through division. This method involves dividing mature clumps of gerbera daisies every 2-3 years to maintain plant vigor and promote healthy growth.
To begin the division process, we carefully lift the clump from the ground using a garden fork or spade. It’s important to handle the clump gently to avoid damaging the roots or stems. Once lifted, we separate the clump into smaller sections using a sharp knife or garden spade.
When dividing gerbera daisy clumps, it’s essential to ensure that each section has its own set of roots. This will give each new plant division a strong foundation for growth and development. We should also make sure that each section has enough foliage intact so that it can continue photosynthesis and produce energy.
Once divided, we replant each section in prepared soil or containers filled with well-draining potting mix. It’s crucial to provide the newly divided plants with adequate moisture and proper care during the initial stages of growth. Regular watering and monitoring for any signs of stress or disease will help the divisions establish themselves successfully.
Propagation through division allows us to expand our gerbera daisy collection and create new plants without relying on seeds. It’s a reliable method that ensures genetic consistency, as each division comes from the same parent plant. This means we can expect similar characteristics and traits in the new plants, including flower color and form.

Managing Pests and Diseases
Common Pests
Aphids are pesky insects that can cause trouble for gerbera daisies. These tiny bugs feed on the sap of the plant, leading to distorted growth and a sticky residue on the leaves. If left untreated, aphid infestations can weaken the plants and make them more susceptible to other issues.
Another common pest that may affect gerbera daisies is spider mites. These tiny arachnids can be difficult to spot with the naked eye but can cause significant damage to the plants. Spider mites feed on the foliage, sucking out vital nutrients and leaving behind yellowing leaves. They also produce fine webbing on the plants, which is another telltale sign of their presence.
During humid conditions, slugs or snails may become a nuisance for gerbera daisies. These slimy creatures feed on the foliage and can leave noticeable holes in the leaves. Keeping an eye out for slugs or snails and taking appropriate measures to control their population will help protect your gerbera daisies from damage.
To combat these pests effectively, there are several options available. One method is using insecticidal soap, which is a safe and effective solution for controlling aphids and spider mites. Insecticidal soap works by suffocating these pests upon contact while being gentle on your plants.
Disease Prevention
Proper air circulation is crucial for preventing fungal diseases like powdery mildew and botrytis in gerbera daisies. Good airflow helps reduce humidity around the plants, making it less favorable for fungal growth. Avoid overcrowding your plants by providing adequate spacing between them so that air can flow freely.
Overhead watering should be avoided as it promotes moisture accumulation on leaves, creating an environment conducive to fungal diseases. Instead, consider watering at ground level or using drip irrigation to keep the foliage dry. This simple change can go a long way in preventing diseases from taking hold.
Prompt removal of any infected plant material is essential to prevent the spread of diseases. If you notice signs of fungal infection, such as discolored or spotted leaves, promptly prune and dispose of the affected parts. Be sure to sterilize your gardening tools between cuts to minimize the risk of disease transmission.
Regularly sterilizing your gardening tools is a proactive measure that helps prevent the introduction and spread of pathogens. Use a solution of bleach and water or rubbing alcohol to disinfect your tools after each use. This practice will help maintain a healthy environment for your gerbera daisies.
Overwintering and Winter Care
Winterizing Steps
It’s important to take steps to protect them during the winter months. If you live in an area with frost or freezing temperatures, it’s crucial to shield your outdoor gerbera daisies from the harsh conditions. One way to do this is by covering them with a frost blanket. This protective layer will help insulate the plants and prevent damage caused by freezing temperatures.
In addition to using a frost blanket, you can also move potted gerbera daisies indoors during the winter. By bringing them inside, you create a controlled environment where you can better regulate temperature and moisture levels. Place the potted plants in a location that receives bright indirect light, such as a basement or unheated room.
To further safeguard your gerbera daisies from the cold weather, apply a layer of mulch around the base of the plants. Mulch acts as insulation for the roots, protecting them from extreme temperatures. Make sure not to pile mulch directly against the stems or crown of the plant, as this can lead to rotting.
While it’s important to provide some protection for your gerbera daisies during winter, it’s equally essential not to overwater them. During dormancy, these tender perennials require less water than they do during their active growing season. Reduce watering frequency while still ensuring that the soil doesn’t completely dry out. This balance helps prevent root rot and other moisture-related issues.

Indoor Overwintering
For those living in colder climates where outdoor overwintering may not be feasible, indoor overwintering is a great alternative for keeping your gerbera daisies thriving throughout winter. By bringing them indoors, you can create an environment that mimics their preferred growing conditions.
Choose a cool location with bright indirect light for your gerbera daisies. A basement or unheated room can work well for this purpose. Keep in mind that gerbera daisies prefer temperatures between 45-55°F (7-13°C) during their dormant period. This cool environment helps them conserve energy and prepare for the next growing season.
It’s crucial to strike a balance. While they don’t require as much water during dormancy, you should still provide some moisture to prevent the soil from drying out completely. Water sparingly, allowing the soil to dry slightly between waterings.
Troubleshooting Common Issues
Yellowing Leaves
Yellowing leaves on gerbera daisies can be a cause for concern. This discoloration may indicate various issues, including overwatering, nutrient deficiencies, or pest infestations. To address this problem, we need to take a closer look at the plant’s care.
Firstly, it is essential to check the moisture levels of the soil. Overwatering can lead to root rot and yellowing leaves. If the soil feels excessively wet or waterlogged, reduce watering frequency and allow the soil to dry out partially between waterings.
Next, inspect the leaves for signs of pests such as aphids or spider mites. These tiny creatures can feed on plant sap and cause damage that results in yellowing leaves. Treat any pest infestations promptly using appropriate methods recommended by local gardening experts.
Lastly, nutrient deficiencies can also contribute to yellowing leaves. Gerbera daisies require a balanced supply of nutrients for healthy growth. If you suspect nutrient deficiencies are causing the issue, consider applying a suitable fertilizer specifically formulated for flowering plants. Be sure to follow the instructions provided by the manufacturer regarding dosage and application frequency.

Wilting Concerns
Wilting gerbera daisies can be distressing, but it is crucial to identify the underlying cause accurately. Wilting may occur due to underwatering or root rot caused by overwatering.
To determine if underwatering is the issue, check the moisture levels of the soil. If it feels dry several inches below the surface, it’s time to give your gerbera daisies a good drink of water. Ensure that you thoroughly saturate the soil until excess water drains from the bottom of the pot.
On the other hand, if root rot is suspected as a result of overwatering, carefully inspect the roots for mushy or discolored sections. Trim away any affected roots and repot the plant in fresh, well-draining soil. Adjust your watering practices to prevent future occurrences of root rot.
Remember, finding the right balance between underwatering and overwatering is crucial for the health of gerbera daisies. Regularly monitor the moisture levels in the soil and adjust your watering routine accordingly.
Stunted Growth
If you notice that your gerbera daisies are not growing as expected, several factors could be contributing to this stunted growth. Inadequate sunlight, poor soil conditions, or nutrient deficiencies are common culprits.
Gerbera daisies thrive in full sun or bright indirect light. If your plants are not receiving enough sunlight, consider relocating them to a spot where they can receive at least six hours of direct sunlight daily. This will help stimulate healthy growth and encourage blooming.
Soil quality also plays a significant role in supporting optimal growth. Gerbera daisies prefer well-draining soil with good fertility. If you suspect poor soil conditions are hindering growth, consider amending the soil with organic matter such as compost or peat moss to improve its structure and nutrient content.
Nutrient deficiencies can stunt the growth of gerbera daisies. Ensure that you provide adequate nutrition by using a balanced fertilizer formulated for flowering plants. Follow recommended guidelines for fertilization rates and frequency to avoid overfertilization, which can lead to other issues.
Maintaining proper watering practices is essential for promoting healthy growth as well. Avoid both underwatering and overwatering by monitoring the moisture levels in the soil regularly.
Conclusion on Gerbera Daisy Care
Enjoying Vibrant Blooms Throughout the Season
By following proper care guidelines, we can ensure that our gerbera daisies bloom vibrantly throughout the growing season. These beautiful flowers are known for their bright and colorful petals, which can bring a touch of joy and cheerfulness to any garden or indoor space. To enjoy the full beauty of our gerbera daisies, we need to provide them with the right conditions and care.
Providing Adequate Sunlight, Water, and Nutrients
To promote healthy growth and abundant flowering, it is essential to provide our gerbera daisies with adequate sunlight, water, and nutrients. These plants thrive in full sun or partial shade, so it’s important to choose a location that receives at least 6 hours of direct sunlight each day. We should also ensure that the soil is well-draining to prevent waterlogged roots.
We need to strike a balance. Overwatering can lead to root rot, while underwatering can cause the plants to wilt and suffer. It’s best to water deeply but infrequently, allowing the top inch of soil to dry out before watering again. Using a moisture meter or checking the soil moisture with our fingers can help us determine when it’s time to water.
In terms of nutrients, gerbera daisies benefit from regular fertilization during the growing season. We can use a balanced fertilizer with equal amounts of nitrogen, phosphorus, and potassium (N-P-K) or a fertilizer specifically formulated for flowering plants. Following the instructions on the fertilizer package will help us provide the right amount of nutrients without overdoing it.
Regular Maintenance for Long-term Thriving
Regular maintenance tasks are crucial for keeping our gerbera daisies thriving for years to come. Deadheading is one such task that involves removing spent flowers to encourage the plant to produce more blooms. By deadheading regularly, we can extend the flowering period and keep our gerbera daisies looking neat and tidy.
Pruning is another important maintenance practice for gerbera daisies. It helps remove dead or damaged foliage, promotes airflow around the plant, and prevents the spread of diseases. We can use clean and sharp pruning shears to trim back any yellowing or diseased leaves, making sure to disinfect the tools between cuts to prevent the transmission of pathogens.
Over time, gerbera daisies can become crowded and may need division. This process involves carefully separating the plant into smaller sections and replanting them in fresh soil. Division not only helps rejuvenate older plants but also allows us to propagate new ones. It’s best to divide gerbera daisies in early spring or fall when the weather is cooler and the plants are dormant.
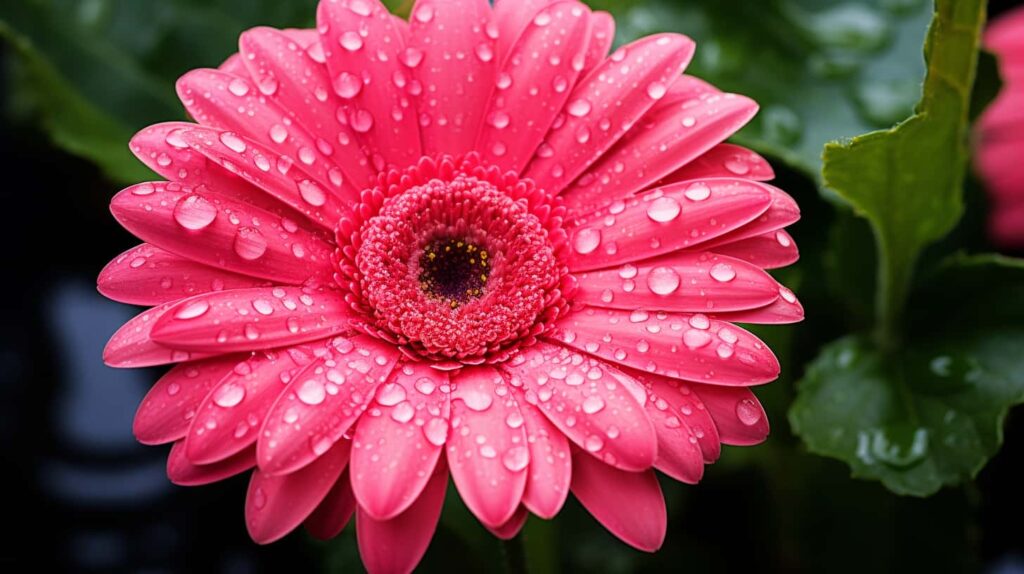
In conclusion, by following proper care guidelines, we can enjoy the vibrant blooms of gerbera daisies throughout the growing season. Providing adequate sunlight, water, and nutrients, along with regular maintenance tasks such as deadheading, pruning, and division, will help keep our gerbera daisies healthy and thriving for years to come. So let’s give these beautiful flowers the love they deserve and watch them brighten up our gardens and living spaces.
What Similarities in Care Do Gerbera Daisies and Calibrachoa Have?
Both Gerbera daisies and calibrachoa require proper calibrachoa care secrets for successful growth. They both thrive in well-draining soil and require regular watering and feeding. Both plants also benefit from deadheading to promote continuous blooming. Additionally, they both prefer full sun and warm temperatures for optimal growth.
Frequently Asked Questions
How do I start growing Gerbera Daisies?
To start growing Gerbera Daisies, prepare well-draining soil and choose a sunny location. Plant the seeds or young plants in the soil, ensuring they are spaced properly. Water regularly, but avoid overwatering to prevent root rot. Provide adequate sunlight and protect from extreme temperatures.
What care do Gerbera Daisies require?
Gerbera Daisies require regular watering, keeping the soil moist but not waterlogged. Deadhead spent flowers to encourage continuous blooming. Fertilize every two weeks with a balanced liquid fertilizer during the growing season. Protect them from strong winds and provide support for taller varieties.
How can I maximize the growth of my Gerbera Daisies?
Maximize Gerbera Daisy growth by providing them with full sun exposure for at least six hours a day. Ensure proper watering and drainage to prevent root issues. Use a well-balanced fertilizer to promote healthy foliage and vibrant blooms. Regularly remove dead leaves and flowers to maintain plant health.
What techniques can I use to propagate Gerbera Daisies?
Gerbera Daisies can be propagated through division or by collecting seeds from mature flowers. To divide, carefully separate the clumps of plants ensuring each division has roots attached. Sow collected seeds in well-prepared soil, keeping them moist until germination occurs.
How do I manage pests and diseases that affect Gerbera Daisies?
To manage pests like aphids or spider mites, spray plants with a mixture of water and mild soap solution or use organic insecticides if necessary. Prevent diseases by avoiding overwatering and improving air circulation around the plants. Remove infected leaves promptly and apply fungicides when needed.
How should I care for my Gerbera Daisies during winter?
During winter, move potted Gerbera Daisies indoors to a cool, well-lit location. Water sparingly, allowing the soil to dry between waterings. Avoid placing them near drafts or heat sources. In garden beds, cover the plants with straw or mulch to protect them from frost damage.
What are some common issues I may encounter when growing Gerbera Daisies?
Common issues when growing Gerbera Daisies include root rot due to overwatering, powdery mildew caused by poor air circulation, and yellowing leaves due to nutrient deficiencies. Address these problems by adjusting watering practices, improving airflow around the plants, and providing proper fertilization.
- About the Author
- Latest Posts
Meet Katherine, the creative enthusiast at ByRetreat who infuses her boundless passion for design into every remote workspace she crafts. With an innate sense of creativity and an eye for unconventional beauty, Katherine brings a unique and inspiring perspective to the team.
Katherine’s love for design is infectious, and her ability to think outside the box sets her apart. She believes that true artistry lies in embracing a variety of styles and mixing them harmoniously to create captivating spaces. By combining different textures, colors, and patterns, Katherine weaves a tapestry of creativity that breathes life into each remote workspace.
-

 Mardi Gras Decoration4 weeks ago
When Should I Decorate for Mardi Gras?
-

 Vetted2 weeks ago
Best Mop for Sparkling Clean Floors in 2024
-

 Christmas Decoration4 weeks ago
Does Orthodox Christmas Have Santa?
-

 Christmas Decoration4 weeks ago
What Happened to Christopher Radko?
-

 Christmas Decoration4 weeks ago
What Is Coptic Christmas Day?
-

 Christmas Decoration3 weeks ago
Why Do Orthodox Have Christmas on January 7th?
-

 Carnival Decoration3 weeks ago
How Tall Should a Balloon Column Be?
-

 Carnival Decoration3 weeks ago
What Food Is Served at a Circus


