Decor
How to Make Concrete Decor
2025
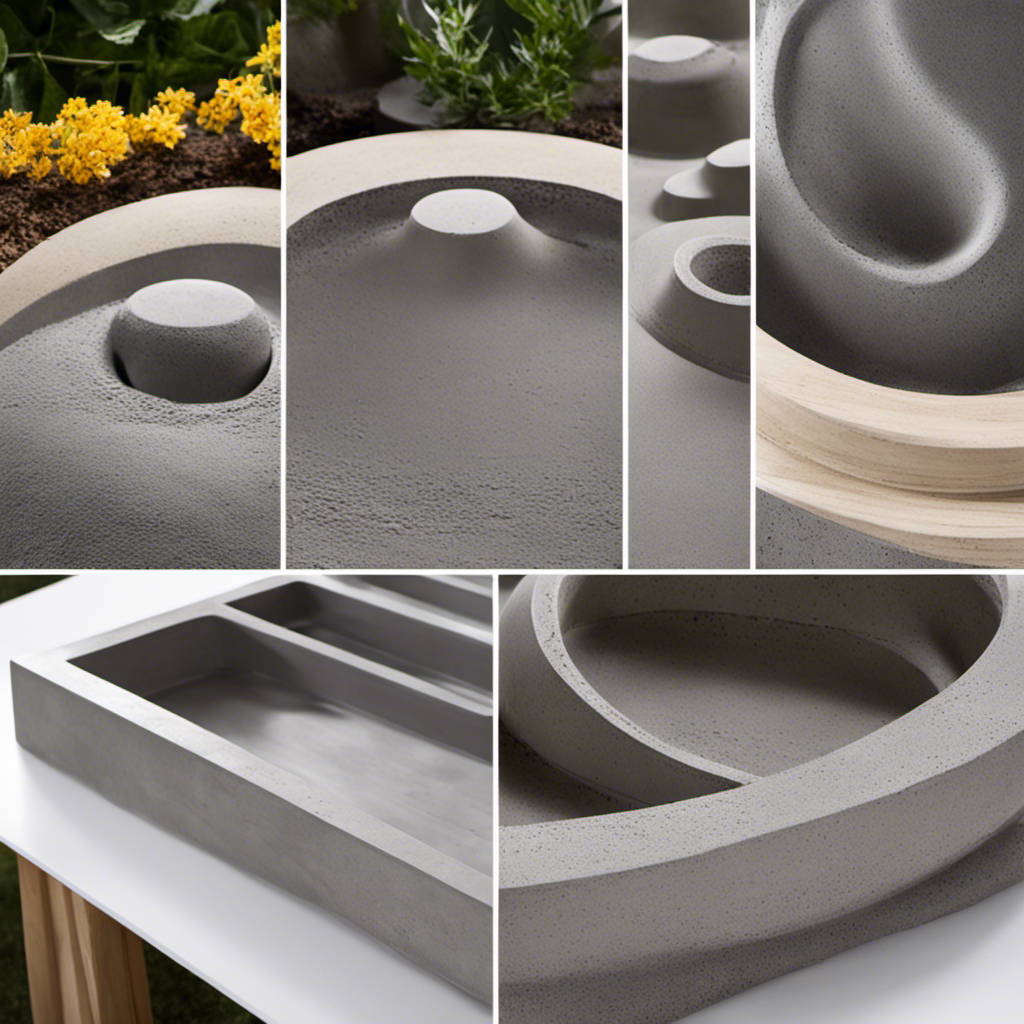
Did you know that concrete decor is a popular choice for adding a touch of modern elegance to your home?
In this article, I’ll guide you through the process of creating your own concrete decor pieces.
We’ll start by preparing the concrete mixture and choosing the right molds for your design.
Then, I’ll show you how to pour and shape the concrete, add decorative elements, and finish and seal your creations.
Get ready to unleash your creativity and transform your living space with stunning concrete decor.
Key Takeaways
- Thoroughly mix cement, sand, and water for even distribution
- Choose and maintain molds for consistent results
- Pour, shape, and color the concrete carefully for desired design
- Add decorative elements to enhance the overall look
Preparing the Concrete Mixture
I’m mixing the concrete by combining cement, sand, and water in a large bucket. After mixing the ingredients thoroughly, I pour the concrete into molds, ensuring that they’re filled evenly to prevent air gaps and weak spots.
The curing process is crucial for the strength and durability of the final product. The curing process begins as soon as the concrete is poured, and it involves keeping the mixture moist and at a consistent temperature for optimal hydration and hardening. This can be achieved by covering the molds with plastic or damp cloths.
As for color options, pigments can be added to the concrete mixture to achieve different shades and tones. These pigments are mixed in during the initial mixing stage, allowing for a variety of color choices for your concrete decor.
Choosing the Right Molds
To achieve the desired shape and style for my project, I’ll need to select the appropriate molds. When it comes to mold options, there are several factors to consider.
Firstly, I need to determine the size and dimensions of the final product. This will help me choose the right mold size and shape.
Secondly, I must decide on the material for the mold. Silicone molds are popular due to their flexibility and ease of use, while plastic molds are more durable and suitable for larger projects.
As for mold maintenance, it’s crucial to clean and dry the molds thoroughly after each use to prevent any residue from affecting the quality of future casts. Additionally, storing the molds in a cool and dry place will prolong their lifespan and ensure consistent results.
Pouring and Shaping the Concrete
After selecting the appropriate molds, I pour the concrete mixture into them, carefully shaping it to achieve the desired design.
To enhance the aesthetic appeal of the concrete decor, I employ various concrete coloring techniques. Depending on the desired outcome, I can mix integral color directly into the concrete mixture or apply acid stains or dyes after the concrete has cured.
These coloring techniques allow me to create unique concrete textures and patterns, adding depth and visual interest to the final product.
By manipulating the concrete with tools such as trowels or stamps, I can create different textures, from smooth and polished surfaces to rough and rustic ones.
Once the concrete is poured and shaped, I move on to the next step of adding decorative elements, further enhancing the overall design.
Adding Decorative Elements
Using specialized tools and techniques, I can seamlessly incorporate decorative elements into the concrete, such as embedded stones, glass, or even personalized designs. This process allows for the creation of unique designs that add a touch of elegance and individuality to any concrete decor project.
To create stunning visuals, I carefully select the materials that will be embedded into the concrete. Whether it’s vibrant colored glass pieces or natural stones with varying textures, these elements enhance the overall aesthetic appeal of the finished product. Additionally, I can experiment with different placement patterns and arrangements to create captivating designs that catch the eye.
Incorporating color and texture is another way to elevate the concrete decor. By adding pigments to the concrete mix, I can achieve a wide range of hues, from bold and vivid to soft and subtle. Texture can be introduced by using stamping techniques or creating patterns with specialized tools, giving the concrete a unique tactile quality.
With the decorative elements seamlessly integrated, it’s time to move on to the next step: finishing and sealing the concrete decor.
Finishing and Sealing the Concrete Decor
I carefully apply a high-quality sealant to protect and enhance the finished surface of the concrete decor. Applying protective coatings is a crucial step in ensuring the longevity and durability of the concrete decor.
The sealant acts as a barrier, preventing moisture, stains, and other contaminants from penetrating the surface and causing damage. It also helps to enhance the color and texture of the decorative elements, giving them a more vibrant and polished appearance.
Before applying the sealant, I thoroughly clean the surface to remove any dirt or debris. Then, using a brush or roller, I evenly distribute the sealant, making sure to cover all areas.
Once applied, the sealant needs to dry completely to achieve maximum effectiveness. By carefully applying a high-quality sealant, I can protect and enhance the beauty of the concrete decor.
Frequently Asked Questions
How Long Does It Take for the Concrete to Fully Dry and Cure?
It usually takes concrete about 28 days to fully dry and cure. However, proper drying technique is crucial for achieving maximum strength and durability. This involves keeping the concrete moist and protected during the curing process.
Can I Use Regular Household Items as Molds for Concrete Decor?
Yes, regular household items can be used as molds for concrete decor. I once used an old cereal box to create a unique concrete planter. Get creative and experiment with different objects for unique designs.
What Safety Precautions Should I Take When Working With Concrete?
When working with concrete, it is crucial to prioritize safety. Always wear appropriate safety equipment, including gloves, goggles, and a respirator. Additionally, ensure proper ventilation in your workspace to minimize the risk of inhaling harmful fumes.
Can I Add Color to the Concrete Mixture to Create Different Effects?
Yes, you can add color to the concrete mixture to create different effects. By using color options such as pigments or dyes, you can achieve a wide range of shades and tones. Additionally, alternative materials like glass or metallic flakes can be incorporated for unique finishes.
How Can I Prevent Air Bubbles From Forming in the Concrete While Pouring and Shaping?
To prevent air bubbles from forming in concrete while pouring and shaping, I recommend using a vibrating tool or tapping the mold to release trapped air. Additionally, carefully pouring the concrete in a steady stream can minimize the formation of air bubbles.
Can Concrete Decor be Incorporated into a Country Style Design?
Concrete decor can certainly be incorporated into a country style design. By combining the sturdy and industrial nature of concrete with the warmth and charm of building rustic country decor, a unique and interesting aesthetic can be achieved. The juxtaposition of the two elements can create a visually dynamic space that showcases the beauty of both materials.
Conclusion
In conclusion, creating concrete decor is a rewarding and artistic process. By carefully preparing the concrete mixture, choosing the right molds, pouring and shaping the concrete, adding decorative elements, and finishing and sealing the final product, you can achieve stunning and durable concrete decor pieces.
Just like a skilled sculptor molding clay into a masterpiece, you have the power to transform plain concrete into beautiful works of art that will enhance any space.
So let your creativity flow and start making your own unique concrete decor today.
- About the Author
- Latest Posts
Introducing Charles, the Editor in Chief at ByRetreat, whose passion for interior design and editorial excellence elevates every remote workspace to new heights. With his keen eye for detail, impeccable taste, and expertise in design, Charles brings a wealth of knowledge and creativity to the ByRetreat team.
As the Editor in Chief of a renowned lifestyle blog, Charles has honed his skills in curating captivating content and staying up-to-date with the latest trends in interior design. His deep understanding of aesthetics and the power of storytelling through design enables him to create remote workspaces that are not only visually stunning but also rich in personality and meaning.
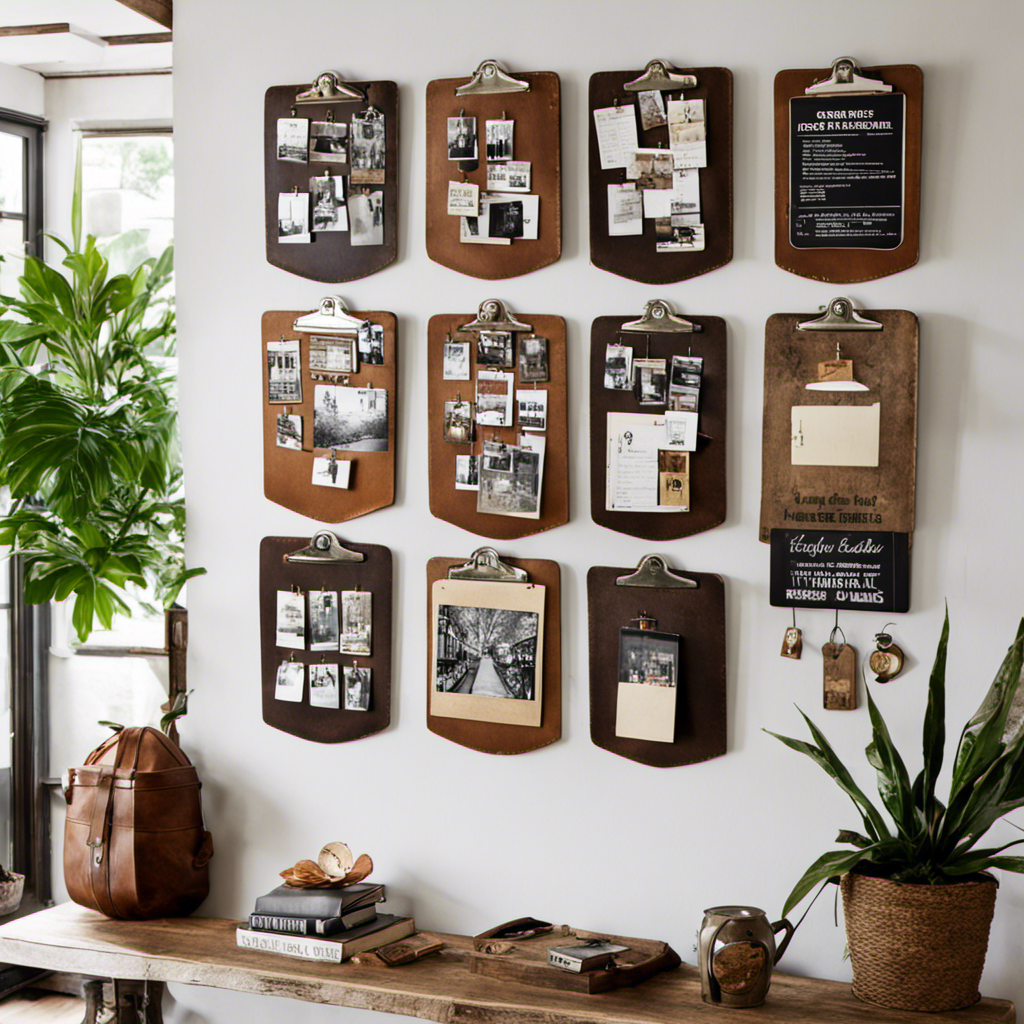
Did you realize that incorporating clipboards into your wall decorations can instantly enhance the style of any room? Translated in US English: Did you realize that incorporating clipboards into your wall decorations can instantly enhance the style of any room?
With their practicality and versatility, clipboards offer a unique and trendy way to display art, photos, or notes.
In this article, we will explore different ways to hang clipboards, providing you with creative DIY solutions and tips for styling them in your home.
Get ready to transform your walls into a personalized gallery that is both functional and visually stunning.
Key Takeaways
- Hanging clipboards as wall decor instantly elevates the style of any room.
- Select appropriate hanging hardware for secure installation and consider the overall theme and aesthetic of your home decor.
- Consider using adhesive hooks or picture hanging strips for easy installation and removal.
- Explore various ways clipboards can enhance your home decor or organizational system, such as incorporating them into office organization or using them as menu displays in restaurants.
Different Ways to Hang Clipboards as Wall Decor
You can use adhesive hooks or command strips to easily hang clipboards as wall decor. Incorporating clipboards in office organization isn’t only functional but can also add a touch of creativity to your workspace.
By hanging clipboards on the wall, you can keep important documents, to-do lists, and reminders easily accessible while also creating an aesthetically pleasing display. Additionally, clipboards can be used as photo displays, allowing you to showcase your favorite memories or inspiring images.
Simply attach photos to the clipboard using clips or magnets, and hang them on the wall. This not only adds a personal touch to your space but also allows you to easily change and update the photos whenever you want.
Choosing the Right Hanging Hardware for Clipboards
To properly display clipboards as decor, it’s important to select the appropriate hanging hardware. Proper installation techniques for hanging clipboards securely ensure that they stay in place and add a stylish touch to your home.
When choosing the right style of clipboards for your home decor, consider the overall theme and aesthetic you want to achieve. Whether you prefer a rustic, vintage look or a modern, sleek design, there are clipboards available to suit every taste.
Once you’ve selected the perfect clipboards, it’s time to choose the right hanging hardware. Look for hardware that’s durable, easy to install, and can support the weight of the clipboard. Options such as adhesive hooks, picture hanging strips, or wall-mounted hooks are ideal for hanging clipboards securely.
Remember to follow the manufacturer’s instructions for installation and use caution when handling any tools or hardware. With the proper hanging hardware and installation techniques, your clipboards will be securely displayed as stylish decor in no time.
DIY Hanging Solutions for Clipboards
When creating DIY hanging solutions for clipboards, consider using adhesive hooks or picture hanging strips for a secure and hassle-free display. These options provide a strong grip while also being easy to install and remove, making them perfect for repurposing clipboards into decorative pieces.
Adhesive hooks are versatile and can be attached to any smooth surface, such as walls or cabinets. They come in various sizes and weight capacities, ensuring that your clipboard stays securely in place.
Picture hanging strips are another great option, as they can hold heavier clipboards and provide a flush, seamless look. Simply apply the strips to the back of your clipboard and press firmly against the wall.
With these DIY hanging solutions, you can showcase your diy clipboard crafts with confidence and style.
Creative Display Ideas for Hanging Clipboards
Get creative with how you arrange and showcase your clipboards on the wall, using different sizes and orientations to create an eye-catching display.
Clipboards can be more than just functional office supplies; they can also be unique pieces of art that add personality to your home decor. Consider creating a visually appealing arrangement by combining clipboards of various sizes and orientations.
Picture this: a three-column, three-row table showcasing different clipboard styles. In the first column, you’ve a large vertical clipboard with a vibrant abstract painting. In the second column, a medium-sized horizontal clipboard displays a collection of vintage postcards. Finally, in the third column, a small square clipboard holds a mini gallery of your favorite photographs.
These unique clipboard wall displays not only serve as functional art but also allow you to easily switch out and update the contents whenever you desire.
Now, let’s explore some tips for styling clipboards in home decor.
Tips for Styling Clipboards in Home Decor
Arrange clipboards of different sizes and orientations in a visually appealing manner to create a unique and dynamic display in your home. Hang them on the wall to keep important documents within reach while adding an interesting visual element.
Incorporating clipboards into office organization adds a touch of creativity and functionality. Use larger clipboards to hold to-do lists, calendar reminders, or even inspirational quotes. Smaller clipboards can be used to display photos, notes, or memos.
Clipboards can also be repurposed as menu displays in restaurants. Attach the menu to the clipboard and hang it near the entrance or at each table. This allows for easy changes and updates to the menu, as well as adding a charming and rustic touch to the overall restaurant decor.
Get creative and explore the various ways clipboards can enhance your home decor or organizational system.
Frequently Asked Questions
Where Can I Purchase Clipboards for Wall Decor?
You can find clipboards for wall decor at various places like office supply stores, craft stores, or online retailers. They can be used creatively in home decor, and there are many DIY clipboard display ideas for wall decor.
Can Clipboards Be Hung Horizontally as Well as Vertically?
Sure! Clipboards can be hung both horizontally and vertically. This gives you endless creative possibilities for decorating with clipboards. You can display photos, artwork, to-do lists, or even a menu! Get ready to transform your space with a clipboard extravaganza!
Are There Any Specific Types of Clipboards That Work Best for Hanging as Wall Decor?
For creative ways to use clipboards as wall decor, consider DIY ideas like painting or adding fabric to customize them. Look for clipboards with sturdy hanging hooks or attach your own for easy display.
Can Clipboards Be Easily Removed From the Wall Without Causing Damage?
Removing clipboards without damage is as easy as peeling a sticker off a window. Gently lift and wiggle the clipboard to release it from the wall. Alternatively, use adhesive hooks for hassle-free hanging.
Are There Any Special Considerations for Hanging Clipboards in High Humidity Areas, Such as Bathrooms?
In high humidity areas like bathrooms, consider using alternative ways to decorate with clipboards. Try hanging clipboard alternatives like magnetic boards or adhesive hooks to display important papers without worrying about damage.
Can I Use a Clipboard to Decorate My Space?
Introducing your home decor a stylish clipboard can be a versatile and functional way to add a personal touch to any space. Whether you use it to display photos, artwork, or inspirational quotes, a well-decorated clipboard can be a unique and eye-catching addition to your home or office.
Conclusion
As you hang your clipboards as wall decor, you’ll discover a world of creativity and organization at your fingertips. The coincidental blend of functionality and aesthetics will bring a unique charm to any space.
So go ahead, choose the perfect hanging hardware, experiment with DIY solutions, and let your imagination soar as you find creative ways to display and style your clipboards.
Transform your home decor with this simple yet captivating addition.
- About the Author
- Latest Posts
Introducing Ron, the home decor aficionado at ByRetreat, whose passion for creating beautiful and inviting spaces is at the heart of his work. With his deep knowledge of home decor and his innate sense of style, Ron brings a wealth of expertise and a keen eye for detail to the ByRetreat team.
Ron’s love for home decor goes beyond aesthetics; he understands that our surroundings play a significant role in our overall well-being and productivity. With this in mind, Ron is dedicated to transforming remote workspaces into havens of comfort, functionality, and beauty.
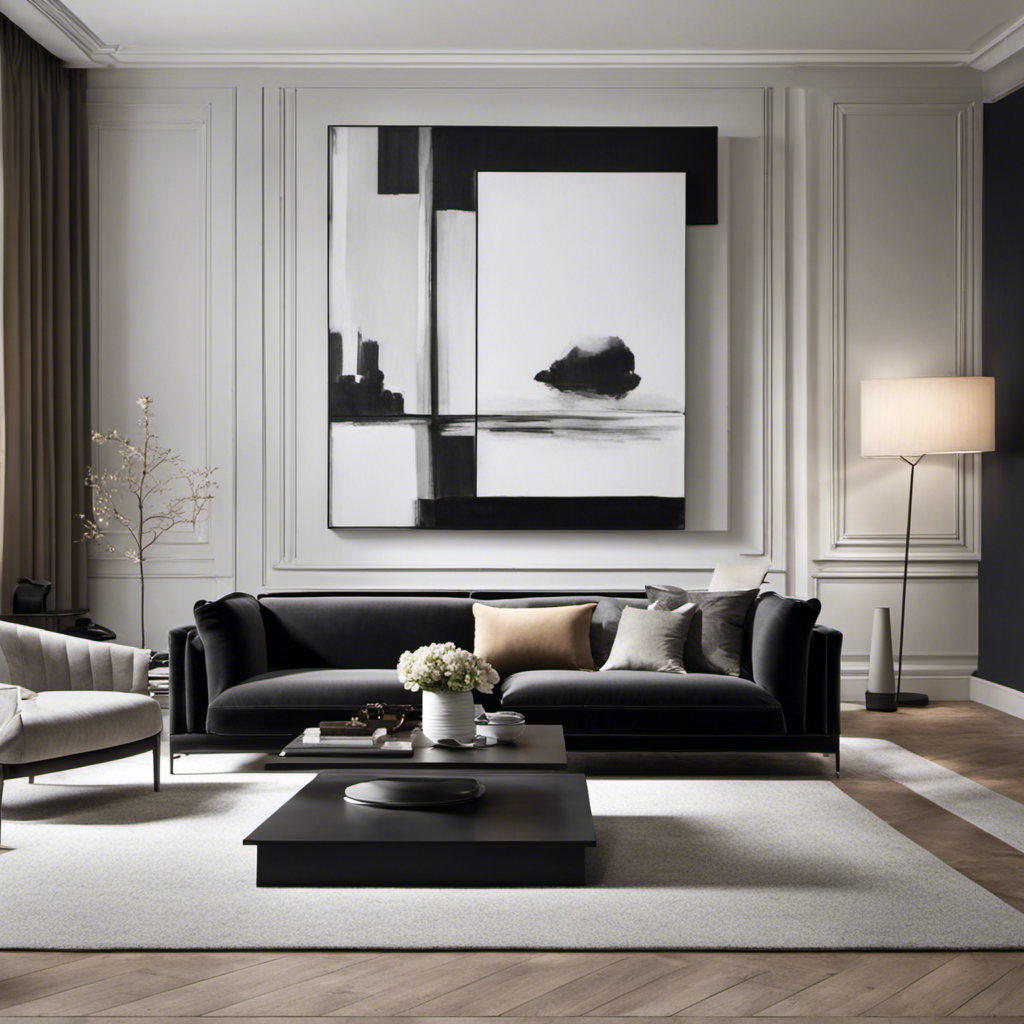
Are you feeling bored with plain walls that lack flair and character? You’ve come to the right place! In this article, we’ll show you how to turn your bare walls into beautiful pieces of art.
Discover the secrets of choosing the perfect wall decor, utilizing shelves and display units, creating captivating gallery walls, incorporating mirrors for added depth, and adding texture with wall hangings and tapestries.
Get ready to turn your bare walls into a visual masterpiece!
Key Takeaways
- Consider the size and style of your space
- Wall murals can transform a plain wall
- Framed artwork adds elegance
- Select pieces that reflect your personal style and interests
Choosing the Right Wall Decor
You should start by considering the size and style of your space when choosing the right wall decor. Whether you want to add a touch of whimsy or create a sophisticated atmosphere, there are endless possibilities to explore.
One option is a wall mural, which can transform a plain wall into a stunning focal point. Choose a design that complements your existing furniture and color scheme, and watch as your space comes to life.
Another option is framed artwork, which adds a touch of elegance to any room. Select pieces that reflect your personal style and interests, and arrange them in a way that creates visual interest.
Utilizing Wall Shelves and Display Units
Make the most of your space by utilizing wall shelves and display units. These stylish storage solutions not only help you declutter your living area but also provide a functional display for your favorite items.
Here’s why you should consider incorporating wall shelves and display units into your home decor:
-
Showcase your personality: Display your unique collection of books, artwork, or sentimental objects to add a personal touch to your space.
-
Maximize small spaces: Wall shelves and display units are perfect for small rooms where floor space is limited. They allow you to utilize vertical space effectively.
-
Create a focal point: Arrange your items creatively on the shelves to create a stunning focal point that catches the eye of anyone entering the room.
By incorporating wall shelves and display units, you can create a stylish storage solution that adds both functionality and aesthetic appeal to your home.
Now, let’s explore how to take your wall decor to the next level by creating a gallery wall.
Creating a Gallery Wall
To create a visually captivating gallery wall, arrange a variety of framed artwork and photographs in different sizes and orientations. Start by selecting artwork that resonates with you and complements the overall aesthetic of your space. Consider themes, colors, and styles that will tie everything together.
Mix and match frames to add visual interest and dimension. Opt for different materials and finishes, such as wood, metal, or acrylic, to create contrast. Play with the arrangement by placing larger pieces in the center and gradually filling in the surrounding space with smaller pieces. Experiment with different layouts by laying out the frames on the floor before hanging them.
Once you’ve achieved the desired composition, start hanging your artwork, making sure to space them evenly and at eye level. By carefully arranging artwork and selecting frames that enhance their beauty, you can create a gallery wall that’s both visually stunning and meaningful.
Now, let’s explore how incorporating mirrors and reflective surfaces can further enhance your wall decor.
Incorporating Mirrors and Reflective Surfaces
Start by choosing mirrors and reflective surfaces that complement the overall aesthetic of your space, adding depth and dimension to your gallery wall. Mirrors are a versatile choice that not only reflect light, but also create the illusion of a larger space. Reflective surfaces, such as metallic accents, can add a touch of glamour and sophistication to your wall decor.
To evoke an emotional response in the audience, consider the following:
- Maximizing natural light: Mirrors and reflective surfaces can help bounce natural light around the room, creating a bright and airy atmosphere that uplifts the mood.
- Creating a sense of luxury: Metallic accents, like gold or silver-framed mirrors, can bring a touch of opulence and elegance to your gallery wall, making it feel like a luxurious retreat.
- Adding depth and intrigue: By strategically placing mirrors and reflective surfaces, you can create visual interest and play with perspective, drawing the viewer’s eye and sparking curiosity.
Incorporating mirrors and reflective surfaces into your gallery wall not only enhances the overall aesthetic, but also adds a touch of magic and allure to your space.
Adding Texture With Wall Hangings and Tapestries
Enhance the visual appeal of your gallery space by incorporating textured wall hangings and tapestries that add depth and interest to your overall design.
Using macrame wall hangings and exploring different types of tapestries can bring a unique touch to your empty walls. Macrame wall hangings are made by knotting various threads together, creating intricate patterns and textures. They’re versatile and can be hung in various sizes and shapes, depending on your preference.
On the other hand, tapestries offer a wide range of options, from traditional to modern designs. You can choose from vibrant colors, intricate patterns, or even opt for a more minimalistic approach. Tapestries add visual interest and a sense of warmth to any space.
Frequently Asked Questions
How Can I Ensure My Wall Decor Matches the Overall Theme of My Room?
To ensure your wall decor matches your room’s overall theme, consider incorporating plants. The natural elements will bring harmony and balance to the space. Choose decor pieces that complement the colors and style of your room for a cohesive look.
What Are Some Creative Ways to Incorporate Plants Into My Wall Decor?
To incorporate plants into your wall decor, try using hanging planters for a unique touch. You can also explore vertical garden ideas to create a stunning display that adds life and vibrancy to your space.
Can You Provide Tips on How to Arrange Different Sized Frames and Artworks on a Gallery Wall?
Arrange frames and artworks on a gallery wall like a symphony conductor, blending different frame styles harmoniously. Play with sizes, textures, and themes. Let your creativity guide you as you curate a visually captivating wall display.
What Are Some Unique Ways to Use Mirrors in Wall Decor, Other Than Just Hanging Them on the Wall?
To make a statement with mirrors, consider using them as unique and eye-catching pieces in your wall decor. Think beyond hanging them and try incorporating mirrors into furniture for a stylish and unexpected touch.
Are There Any Specific Wall Hanging or Tapestry Materials That Work Best for Different Types of Rooms or Decor Styles?
For outdoor spaces, consider using wall hanging materials like weather-resistant fabrics or metal. When choosing tapestry colors for a vibrant decor style, opt for bold and bright hues that will make a statement in your space.
How Can I Incorporate Decor to Fill Up Empty Tan Walls?
Decorating tan walls can be a bit tricky, but there are ways to fill up the empty space. Add some colorful wall art or mirrors to create visual interest. Consider incorporating shelves to display unique decor pieces. Don’t be afraid to mix and match textures and patterns to bring life to your decor with tan walls.
Conclusion
In conclusion, decorating an empty wall is like adding the final brushstroke to a masterpiece. It’s an opportunity to showcase your personal style and bring life to a blank canvas.
Whether you choose to hang shelves, create a gallery wall, incorporate mirrors, or add texture with wall hangings, each option adds depth and character to your space.
So go ahead, unleash your creativity and transform that empty wall into a captivating work of art.
- About the Author
- Latest Posts
Meet Katherine, the creative enthusiast at ByRetreat who infuses her boundless passion for design into every remote workspace she crafts. With an innate sense of creativity and an eye for unconventional beauty, Katherine brings a unique and inspiring perspective to the team.
Katherine’s love for design is infectious, and her ability to think outside the box sets her apart. She believes that true artistry lies in embracing a variety of styles and mixing them harmoniously to create captivating spaces. By combining different textures, colors, and patterns, Katherine weaves a tapestry of creativity that breathes life into each remote workspace.
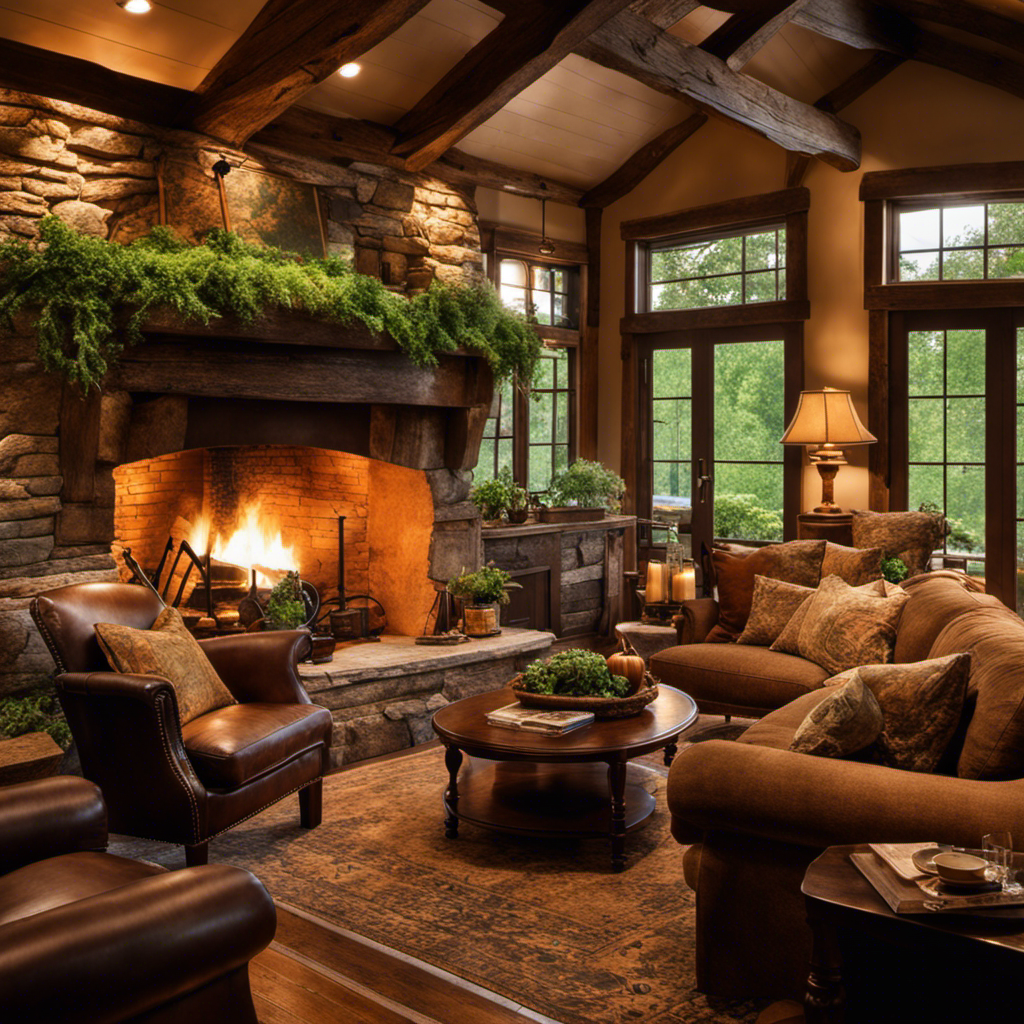
Picture entering a home that exudes a cozy sanctuary vibe, brimming with charm and whimsy. Envision being enveloped by rich hues, welcoming textures, and organic materials that add a hint of enchantment to every nook and cranny.
This is the essence of home decor like Baggen, inspired by the enchanting world of Hobbits. In this article, we will guide you on how to recreate the magic of Baggen in your own home, from choosing the right color palette to adding quirky and whimsical touches.
Get ready to transform your space into a haven of comfort and charm.
Key Takeaways
- Choose a color palette that reflects the cozy and earthy vibe of Bag End, incorporating warm base colors and pops of bold colors for contrast.
- Layer fabrics with different textures and mix and match patterns to create visual interest in your decor.
- Embrace natural elements like wood, stone, and plants to create a space that feels connected to the earth.
- Add quirky and whimsical touches through DIY projects, unique furniture pieces, and vibrant accent pieces to bring character to your space.
Choosing the Right Color Palette
You should start by selecting a color palette that reflects the cozy and earthy vibe of Bag End. To create a minimalist look inspired by the iconic home of Bilbo Baggins, consider exploring bold and vibrant colors.
Begin by choosing a base color that evokes a sense of warmth and comfort, such as a rich earth tone like deep brown or warm beige. This will serve as the foundation for your color scheme.
Next, add pops of bold colors like forest green or deep red to create visual interest and contrast. These bold hues will bring life and energy to your space, while still maintaining a cozy and earthy atmosphere.
Lastly, incorporate natural textures and materials like wood, stone, and woven textiles to enhance the overall cozy and organic aesthetic.
Incorporating Cozy Textures
To create a cozy atmosphere in your space, try incorporating soft textures like plush blankets and velvety cushions. These elements not only add visual appeal but also provide a tactile experience that invites you to relax and unwind. Here are some tips to help you incorporate cozy textures into your home decor:
-
Layering fabrics: Mix and match different textures by layering throw blankets and pillows of varying materials, such as faux fur, knits, and velvet. This adds depth and warmth to your space.
-
Mixing patterns: Don’t be afraid to mix and match patterns to create visual interest. Pairing a bold geometric pattern with a subtle floral print can create a harmonious balance in your decor.
-
Adding textured rugs: Incorporate rugs with plush textures like shag or sheepskin to add a soft and luxurious feel to your floors.
-
Using curtains and drapes: Opt for curtains or drapes made from thick, heavy fabrics like velvet or brocade. This not only adds privacy but also enhances the cozy ambiance of your space.
By incorporating these cozy textures, you’ll create a warm and inviting atmosphere in your home, perfect for curling up with a good book or enjoying a cup of tea.
In addition to cozy textures, embracing natural elements can further enhance the overall ambiance of your space.
Embracing Natural Elements
Embrace the beauty of nature by incorporating natural elements into your space, such as wooden furniture, potted plants, and stone accents. By using plants in your home decor, you can bring a sense of tranquility and freshness to any room. Not only do plants add visual appeal, but they also purify the air and create a calming atmosphere. When it comes to furniture and accessories, utilizing natural materials like wood and stone can enhance the overall aesthetic and create a warm and inviting ambiance. Imagine sitting on a comfortable wooden chair surrounded by lush greenery, with a stone accent table holding a cup of tea. It’s a perfect blend of nature and comfort, creating a space that feels connected to the earth.
| Wooden Furniture | Potted Plants | Stone Accents |
|---|---|---|
| Oak Dining Table | Fiddle Leaf Fig Tree | Marble Coasters |
| Teak Bookshelf | Snake Plant | Granite Vase |
| Walnut Coffee Table | Succulent Arrangement | Slate Candle Holder |
| Birch Nightstand | Monstera Deliciosa | Limestone Wall Art |
Incorporating these natural elements into your home decor not only adds visual interest but also brings a sense of harmony and serenity. So go ahead, embrace the beauty of nature and create a space that feels like a peaceful oasis.
Adding Quirky and Whimsical Touches
Let your space come alive with quirky and whimsical touches, adding a playful and unique charm to your home. Transform your living space into a whimsical wonderland by incorporating DIY projects and unique furniture pieces.
Here’s how you can achieve it:
-
DIY projects: Get creative and craft unique decor pieces like painted mason jars, hand-painted throw pillows, or a custom-made wall mural. These DIY projects will add a personal touch to your home and showcase your artistic side.
-
Unique furniture pieces: Look for one-of-a-kind furniture pieces that bring character to your space. Think vintage-inspired chairs, a funky coffee table, or a statement bookshelf. These unique furniture pieces will instantly become conversation starters and give your home a distinct personality.
-
Colorful accents: Add pops of color with vibrant accent pieces like bright rugs, colorful artwork, or funky lampshades. These playful accents will inject energy and liveliness into your space.
-
Whimsical details: Don’t forget the smaller details! Incorporate whimsical touches like fairy lights, quirky wall decals, or whimsical wallpaper to create a magical atmosphere in your home.
With these quirky and whimsical additions, your home will become a haven of creativity and imagination. Let your personality shine through and enjoy the delightful charm of your newly transformed space.
Creating Functional and Organized Spaces
Organize your space efficiently by utilizing storage solutions that maximize functionality and keep your belongings easily accessible.
When it comes to maximizing small spaces, incorporating multi-functional furniture is key. Think of pieces that can serve multiple purposes, such as a coffee table with hidden storage compartments, or a sofa that can be converted into a guest bed. These clever furniture options not only save space but also add versatility to your home decor.
Consider wall-mounted shelves or floating cabinets to make use of vertical space, freeing up floor area. Don’t forget about the power of organization. Invest in bins, baskets, and drawer dividers to keep everything in its place.
Frequently Asked Questions
What Are Some Tips for Finding Unique and Eccentric Home Decor Pieces to Add a Touch of Quirkiness to My Space?
Looking to add some quirkiness to your space? Try these tips for thrift shopping and DIY home decor projects. Find unique and eccentric pieces that will make your home feel like Baggend.
How Can I Create a Functional and Organized Space Without Compromising on Style?
To create a functional and stylish workspace, maximize storage in a small living space. Utilize vertical shelving, multipurpose furniture, and clever organization systems. Remember, a place for everything and everything in its place.
Are There Any Specific Natural Elements That Work Particularly Well in Creating a Baggend-Inspired Home Decor?
To create a Baggend-inspired home decor, incorporate specific natural materials like wood and stone. DIY projects such as making your own rustic furniture or creating a cozy fireplace can further enhance the whimsical charm of your space.
Can You Suggest Some Ways to Incorporate Cozy Textures Into My Home Decor Without Making It Look Cluttered?
To incorporate cozy textures into your home decor without clutter, try adding soft throw blankets and plush pillows. Opt for natural materials like wool and velvet for a warm and inviting feel.
What Are Some Common Mistakes to Avoid When Choosing a Color Palette for a Baggend-Inspired Home Decor?
When choosing a color palette for a Baggend-inspired home decor, common mistakes to avoid include using too many vibrant colors or neglecting to create a sense of warmth. The best color combinations are earthy tones with pops of rich, jewel-like hues.
Can Primitive Salt Box Decor Be Incorporated into a Baggend-themed Home Decor?
Yes, building primitive salt box decor can be seamlessly incorporated into a Baggend-themed home decor. The rustic and earthy elements of primitive salt box decor perfectly complement the cozy and whimsical feel of a Baggend-inspired home. Add some handmade wooden pieces and earth-toned textiles to complete the look.
Conclusion
So, there you’ve it – your guide to creating a home decor that would make even a hobbit feel right at home!
By choosing the right color palette, incorporating cozy textures, embracing natural elements, adding quirky touches, and creating functional spaces, you can transform your space into a Bagend-inspired haven.
So go ahead, embrace your inner hobbit and let your creativity run wild. Your home will be the envy of all Middle-earth!
- About the Author
- Latest Posts
Meet Katherine, the creative enthusiast at ByRetreat who infuses her boundless passion for design into every remote workspace she crafts. With an innate sense of creativity and an eye for unconventional beauty, Katherine brings a unique and inspiring perspective to the team.
Katherine’s love for design is infectious, and her ability to think outside the box sets her apart. She believes that true artistry lies in embracing a variety of styles and mixing them harmoniously to create captivating spaces. By combining different textures, colors, and patterns, Katherine weaves a tapestry of creativity that breathes life into each remote workspace.
-

 Decor2 weeks ago
Maximalist Decor Explained: Embrace More Style
-

 Vetted2 weeks ago
15 Best Foot Massagers for Neuropathy to Soothe Your Feet and Relieve Discomfort
-

 Vetted3 weeks ago
15 Best Sports Laundry Detergents for Keeping Your Activewear Fresh and Clean
-

 Vetted3 weeks ago
15 Best Tall Toilets for Seniors That Combine Comfort and Safety
-

 Vetted4 weeks ago
15 Best Dish Scrubbers to Keep Your Kitchen Sparkling Clean
-

 Vetted4 days ago
15 Best Cleaners for Fiberglass Showers to Keep Your Bathroom Sparkling Clean
-

 Decor4 weeks ago
What Is Eclectic Home Decor
-
 Vetted1 week ago
15 Best Organic Pest Control Solutions for a Naturally Pest-Free Home


