TL;DR
In tiny closets, controlling sound is about smart placement and effective barriers, not just adding foam. Distance, sealing gaps, and ventilation matter most. Properly treated, a closet can outperform larger, untreated spaces.
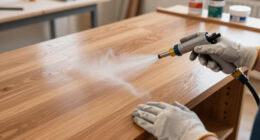
Ever tried recording in a closet? It’s a love-hate relationship. The room’s tiny, reflections bounce wildly, but it’s surprisingly doable with the right tricks. The secret isn’t just stuffing foam everywhere — it’s about where you place it, how you block sound leaks, and making sure the heat doesn’t turn your closet into a sauna. You might find it helpful to read about acoustic dampening, placement, and the ‘Rig in the Closet’ setup for more tips.
This guide cuts through the noise—literally—to show you how to turn your cramped space into a quiet, effective studio. Whether you’re podcasting, streaming, or recording vocals, you’ll learn the real strategies that make a difference. Ready to get it sounding right in that tiny room? Let’s go.
Acoustic dampening
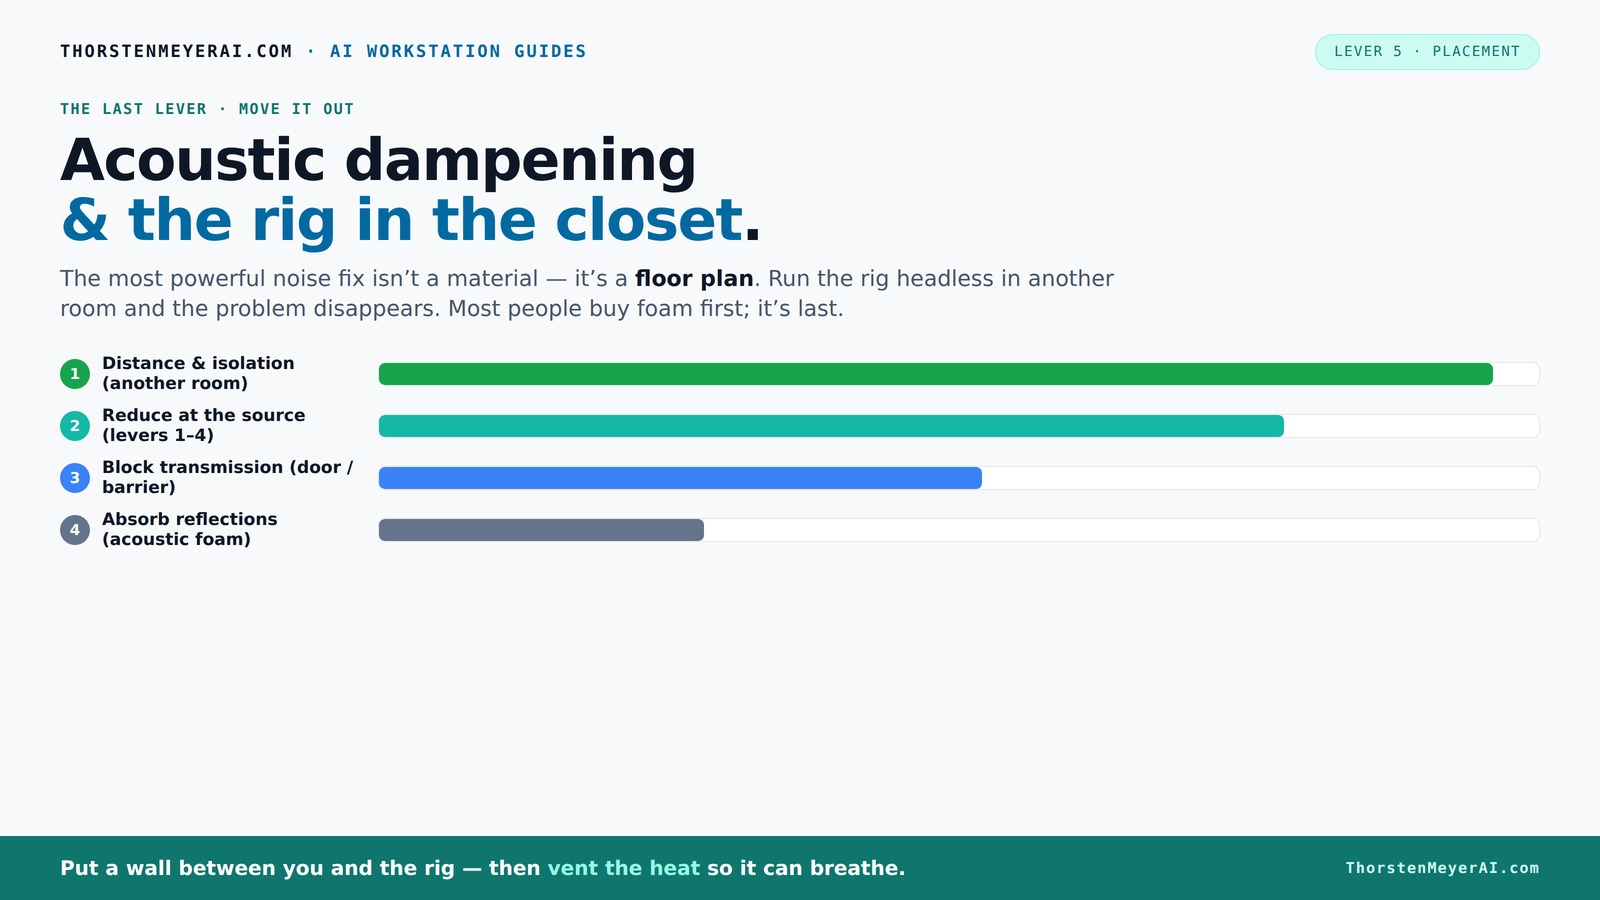
& the rig in the closet.
The most powerful noise fix isn’t a material — it’s a floor plan. A rig you can’t hear because it’s in another room beats any amount of foam. Tap the approaches in Part 1 to see what actually works.
(another room)
(levers 1–4)
(door / barrier)
(acoustic foam)
Contain the noise, not the heat
Key Takeaways
- Sealing gaps and blocking sound leaks are more effective than just adding foam panels.
- Placement of absorption at reflection points and corners has the biggest impact in small spaces.
- Ventilation is critical—without airflow, heat will throttle your rig and increase noise.
- Bass traps in corners prevent low-end buildup, making your recordings clearer.
- A closet can outperform larger rooms if you treat it carefully and isolate well.
soundproofing foam panels for recording studio
As an affiliate, we earn on qualifying purchases.
As an affiliate, we earn on qualifying purchases.
Why Soundproofing Your Closet Isn’t Just About Foam
Acoustic foam is great for reducing echo and making your recordings clearer, but it’s not a magic wand for noise. Think of foam as softening the sound inside the room, not stopping sound from escaping. If you want silence, you need a barrier—like a door or dense wall—that blocks sound transmission.
For example, if you hang foam on your closet door but leave gaps around the edges, sound still leaks out. That’s like putting a blanket over a window but leaving the gaps open. Foam alone isn’t enough—it's part of a bigger puzzle.
According to experts, a combination of sealing gaps, adding soundproof barriers, and strategic placement yields the best results. This matters because sound leaks can undermine your entire effort, especially in small spaces where even tiny gaps can cause significant noise bleed. The tradeoff is balancing accessibility and soundproofing—completely sealing a closet might hinder ventilation or access, so understanding where to focus your efforts is key. Proper sealing ensures your sound stays contained without creating an uncomfortable or impractical environment.
acoustic treatment bass traps and diffusers
As an affiliate, we earn on qualifying purchases.
As an affiliate, we earn on qualifying purchases.
The Power of Placement: Where to Put Absorption for the Best Effect
Placement is everything. In small spaces, putting absorption panels at the right spots makes a huge difference. For detailed guidance, see acoustic dampening, placement, and the 'Rig in the Closet' setup. The first reflection point — where sound bounces directly from your mouth or mic to the wall — is a prime target. Covering this point prevents echo and comb-filtering that muddles your recordings.
Imagine standing in front of a mirror; the wall behind you is the reflection point. Place a panel there, and you cut down on that unwanted bouncing. For a closet, treat the walls behind the mic, the ceiling, and any parallel surfaces that cause low-frequency buildup.
Understanding why this matters is crucial: reflections cause phase cancellations or reinforcements that distort your sound. By strategically placing panels at these points, you effectively control the room’s acoustic response, leading to clearer recordings. The tradeoff involves balancing absorption with natural room ambience—you don’t want to deaden your space entirely, just tame the worst reflections. Additionally, treating corners and parallel surfaces can prevent low-frequency buildup that makes recordings sound boomy or muddy, especially in small, reflective rooms.
portable soundproof room divider
As an affiliate, we earn on qualifying purchases.
As an affiliate, we earn on qualifying purchases.
How to Seal Your Closet Door & Gaps for Real Noise Blocking
Doors and gaps are the weakest links in soundproofing. To learn more about effective sealing techniques, check out acoustic dampening, placement, and the 'Rig in the Closet' setup. A closet door with cracks can let in and leak out way more noise than a wall full of foam. The best fix? Seal every crack with weatherstripping or acoustic sealant. Use draft stoppers at the bottom, and consider adding a door sweep.
For example, a streamer in a small apartment sealed their closet door with foam strips and a door sweep, dropping noise leakage by 80%. It’s affordable and surprisingly effective.
Remember: even tiny gaps can ruin your entire setup. Spend time sealing every opening, because in small spaces, a small gap can be the difference between a quiet space and a noisy one. The tradeoff is that over-sealing can make access difficult or restrict airflow, so prioritize gaps that are most likely to leak sound. Proper sealing not only improves sound isolation but also helps maintain a stable environment—important for equipment longevity and comfort.
studio monitor isolation pads
As an affiliate, we earn on qualifying purchases.
As an affiliate, we earn on qualifying purchases.
Bass Traps & Corner Treatment: Tackling Low-End Buildup in Tiny Rooms
Small closets often turn into bass traps—literally—because low frequencies love corners. For tips on treating low-end issues, visit acoustic dampening, placement, and the 'Rig in the Closet' setup. If your recordings sound boomy or boxy, adding bass traps in the corners is a game changer. Thick panels or DIY bass traps using rockwool or Owens Corning can soak up those low frequencies.
For example, a podcaster found that installing foam bass traps in the closet corners reduced low-end rumble by 50%. Now her voice sounds clearer and less muddy.
In tight spaces, neglecting bass buildup means your sound will always feel hollow or boomy, no matter how much foam you add elsewhere. Properly installed bass traps can balance the low-end response, providing a more natural and professional sound. The tradeoff is that bass traps can be bulky and expensive, so strategic placement—focusing on the most problematic corners—is essential. DIY options with rockwool or fiberglass can be cost-effective, but installing them correctly in the corners is critical for maximum impact.
Floor and Desk: Reducing Horizontal Reflection for Cleaner Sound
Hard floors and desks bounce sound right into your mic, creating harsh reflections. You can learn more about reducing reflections at acoustic dampening, placement, and the 'Rig in the Closet' setup. A simple rug or carpet under your feet can absorb a lot of that echo. Similarly, adding a desk pad or covering the surface with foam reduces harshness.
For instance, a streamer added a thick rug in her tiny closet. The difference? Her voice was warmer, with fewer reflections bouncing back from the surface.
In tight spots, every horizontal surface you can soften helps keep your sound tighter and more professional. The key is to understand that horizontal reflections can be as disruptive as wall reflections, especially in small, reflective environments. Using dense rugs, foam pads, or even DIY fabric coverings on desks and floors can significantly improve clarity. The tradeoff involves balancing aesthetic or practical considerations—adding too much soft material might clutter the space or interfere with equipment placement.
Ventilation & Heat: Keeping Your Closet Rig Cool and Quiet
Placing a high-power rig in a closet can turn into a sauna if you don’t plan ventilation. For advice on proper ventilation, see acoustic dampening, placement, and the 'Rig in the Closet' setup. Trapped heat not only risks overheating but also causes fans to spin faster, increasing noise. Proper airflow is critical.
Using vents, passive airflow, or ducted exhaust fans keeps the temperature down. For example, a hobbyist installed a quiet exhaust fan and ducted cool air into his closet. His rig runs cooler and quieter, with no throttling.
Effective ventilation strategies are essential because heat buildup can lead to thermal throttling, which reduces performance and increases fan noise. The tradeoff is ensuring that ventilation methods don’t introduce additional noise or compromise your room’s soundproofing. Options like ducted exhaust fans or passive vents can help maintain a stable, cool environment without sacrificing silence, but they require careful installation to avoid creating new noise paths.
When a Closet Gets Too Small: Recognizing Limitations & Alternatives
Sometimes, a closet is just too tiny. If reflections, bass buildup, and heat become unmanageable, it’s time to consider larger or more specialized solutions. Small spaces can be easier to treat but also easier to overload—low-end chaos and overheating are common pitfalls.
For example, if sealing gaps and adding foam still leave your recordings muddy or your rig overheating, moving to a small dedicated booth or a larger room might be better. Sometimes, a well-ventilated, semi-sealed closet is the best compromise.
Remember, a tiny room can be a blessing or a curse — success depends on understanding its limits. Recognizing when your setup is pushing the boundaries of what a small space can handle is crucial. It might mean investing in a dedicated vocal booth or upgrading to a room with better acoustics and ventilation. The key is to match your environment to your needs and be willing to adapt as your setup evolves.
Frequently Asked Questions
Is acoustic foam enough for a closet studio?
Acoustic foam helps reduce echo and reflections but doesn't block sound from escaping. For real noise reduction, combine foam with sealing gaps, barriers, and proper placement of absorption.
Where should I place panels or blankets first?
Start at the first reflection points—where sound bounces directly from your mouth or mic to the wall. Covering these spots instantly improves clarity and reduces echo.
Do I need bass traps in a small closet?
Yes. Bass traps in corners absorb low-frequency buildup that makes your recordings sound muddy or hollow. Thick foam or DIY traps work well in small spaces.
How much of the wall should I cover?
Cover enough to treat reflection points and corners—about 20-30% of the wall area is a good start. Focus on areas that cause the most bouncing and low-end issues.
Should treatment go behind the mic or behind the speaker?
Place absorption panels directly behind or around the mic’s first reflection points. For speakers, treat the wall behind them to prevent sound bouncing back into the room.
Conclusion
Your closet can be a surprisingly good studio—if you treat it right. Focus on sealing gaps, placing absorption strategically, and managing heat. Small space or not, the sound quality depends on what you put where, not just how much foam you add.
Think of your closet as a tiny control room—smart placement and good ventilation turn it from a box of echo into a professional-sounding space. Ready to quiet that rig and make your voice shine? Start with the door, then move to reflection points. The rest will follow.