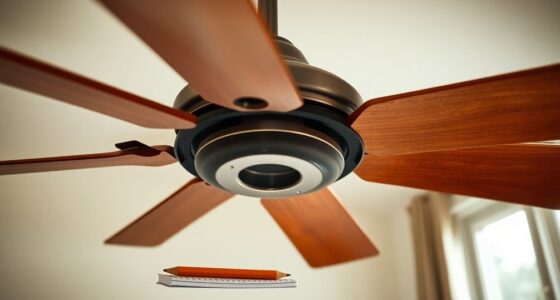
To upgrade to LED recessed lighting yourself, start by planning your layout, considering room function and light flow. Gather tools like a drill, screwdriver, and measuring tape, along with compatible LED fixtures and dimmers. Turn off power before removing old fixtures, then connect and secure the new ones carefully. Once installed, turn the power back on to test brightness and verify everything is working properly. Keep going to discover detailed steps for a safe, successful upgrade.
Key Takeaways
- Plan your lighting layout, considering room function, fixture placement, and energy-efficient LED options.
- Gather essential tools and compatible LED fixtures, including dimmers and wiring supplies.
- Turn off power, remove old fixtures carefully, and inspect the ceiling cavity for damage.
- Connect the new LED fixtures securely, matching wiring and ensuring proper fit and safety.
- Test the installed lights for proper operation, brightness, and alignment before securing wiring and finalizing.
As an affiliate, we earn on qualifying purchases.
Planning Your LED Recessed Lighting Project

Before you begin installing LED recessed lighting, it’s essential to plan carefully to guarantee a successful project. Focus on your lighting design first—consider the room’s function, layout, and how light will flow. Decide where to place the fixtures for even coverage and accentuate key areas. Keep energy efficiency in mind by choosing LEDs that consume less power while providing ample brightness. Think about color temperature too; warmer lights create cozy atmospheres, while cooler tones suit task lighting. Measure your space accurately and sketch out your plan. Proper planning helps you avoid errors, reduces installation time, and ensures your lighting design enhances the space effectively. Additionally, understanding lighting placement principles can help you achieve a balanced and harmonious illumination scheme. Taking these steps now sets a solid foundation for a smooth and efficient LED recessed lighting upgrade.
Gathering Tools and Materials Needed
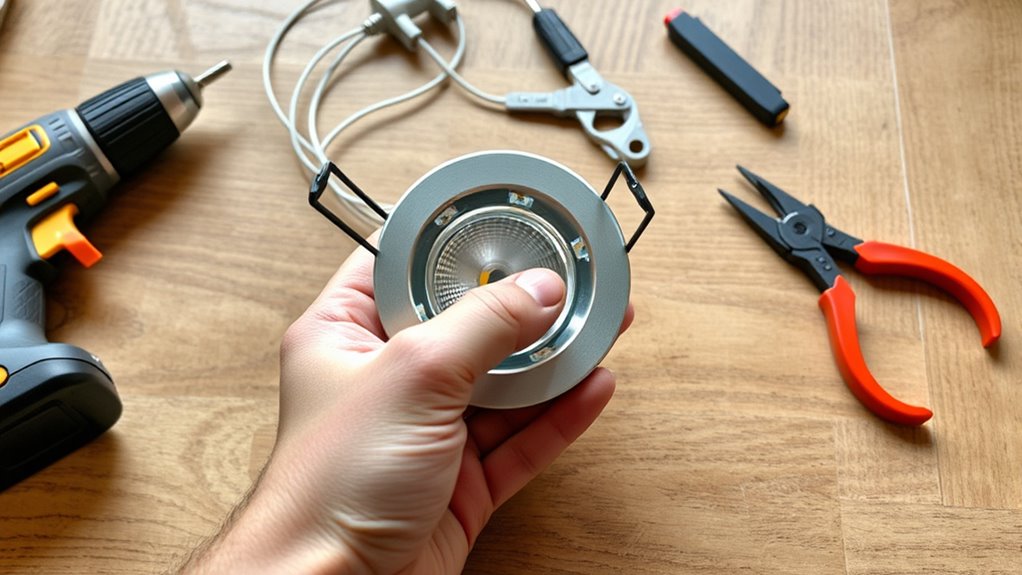
To guarantee your LED recessed lighting project goes smoothly, gather all the necessary tools and materials before you start. You’ll need a drill, screwdriver, voltage tester, and measuring tape for precise installation. Select LED recessed lights that match your lighting design goals, focusing on energy efficiency to save on electricity costs. Make sure you have compatible dimmers if you want adjustable lighting. You’ll also need wiring supplies like wire connectors and electrical tape. Don’t forget a ladder or step stool for ceiling access. Having everything on hand minimizes delays and keeps the project organized. Choosing high-quality LED fixtures aligned with your lighting design enhances energy efficiency and provides long-lasting illumination, making your upgrade both effective and sustainable. Additionally, understanding infidelity warning signs can help in personal relationships, just as proper planning ensures a successful DIY lighting upgrade.
Removing Old Fixtures and Preparing for Installation
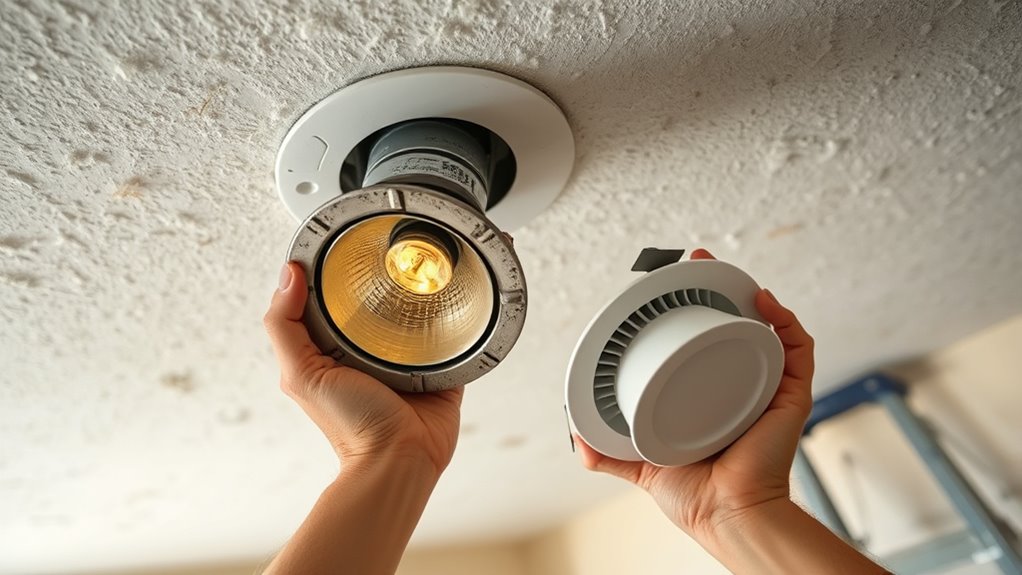
Removing old fixtures is a crucial first step that sets the foundation for a successful LED recessed lighting upgrade. Begin by turning off the power at the circuit breaker to guarantee safety. Carefully remove the fixture’s trim and bulbs, then disconnect the wiring, noting how everything is connected. During fixture removal, use safety precautions like wearing gloves and safety glasses to protect yourself from debris or accidental shocks. Check the ceiling cavity for any damage or obstructions, and clean the area thoroughly. If the existing fixture is stubborn, gently pry it free without damaging the ceiling. Proper fixture removal and preparation will make installing your new LED recessed lights smoother and safer, setting you up for a successful upgrade. Additionally, understanding the electrical wiring involved ensures a more efficient and safe installation process.
Installing the New LED Recessed Lights

With the old fixture cleared out and the ceiling prepared, you can now focus on installing your new LED recessed lights. Start by choosing fixture types compatible with your ceiling and ensuring bulb compatibility. Follow these steps:
- Connect wiring: Match the fixture’s wiring with your ceiling’s electrical box, ensuring power is off.
- Secure the fixture: Use clips or brackets designed for your fixture type to hold it firmly in place.
- Install the bulb: Insert the LED bulb compatible with your fixture type, verifying it fits properly.
- Check connections: Confirm all wiring connections are tight and secure before turning the power back on. Proper installation ensures safety and optimal performance of your LED recessed lighting.
Testing and Finalizing Your Lighting Upgrade

Once you’ve installed your LED recessed lights, verifying them thoroughly before finishing the project is essential. Start by checking fixture placement to ensure each light is aligned properly and evenly spaced for a balanced look. Turn on the power and test each fixture individually, confirming they illuminate correctly and at the desired brightness. Be attentive to any flickering or dimming, which could indicate wiring issues. During this process, prioritize electrical safety—shut off power before inspecting wiring or making adjustments. Use a voltage tester to double-check connections, and ensure all fixtures are securely mounted. Finalize your upgrade by tidying up any exposed wiring and confirming everything is functioning safely and as planned. This step guarantees your new lighting is both effective and safe for long-term use. Additionally, assessing lighting stability can help prevent future issues and ensure consistent performance over time.
Frequently Asked Questions
Can I Install LED Recessed Lighting in a Sloped or Vaulted Ceiling?
You can install LED recessed lighting in a sloped or vaulted ceiling, but beware of sloped ceiling challenges. You’ll need adjustable or slope-compatible fixtures to guarantee proper light placement and coverage. For vaulted ceiling installation, choose fixtures designed for angled ceilings to avoid uneven lighting. With careful planning and the right fixtures, you can successfully upgrade your space, creating a bright, modern look that complements your unique ceiling design.
What Is the Average Cost of DIY LED Recessed Lighting Upgrade?
When estimating the cost of a DIY LED recessed lighting upgrade, you’ll want to evaluate equipment, tools, and potential electrical work. The average cost ranges from $100 to $300 per fixture, including bulbs and trims. For effective budget planning, calculate how many fixtures you need and factor in any additional supplies. This helps you create a clear cost estimation, ensuring your project stays within your financial limits while achieving a bright, energy-efficient look.
Are There Specific Dimmer Switches Compatible With LED Recessed Lights?
You wonder if certain dimmer switches work with LED recessed lights. Yes, dimmer compatibility varies, so check that your switch is compatible with LED bulbs. Many smart dimmer options are available, offering seamless control and energy efficiency. Always verify the switch’s compatibility before installation to guarantee smooth dimming and avoid flickering. Choosing the right dimmer switch enhances your lighting experience and extends your LED’s lifespan.
How Do I Ensure Proper Insulation Around New LED Fixtures?
Did you know that proper insulation can reduce energy costs by up to 15%? To guarantee your LED fixtures are well-insulated, carefully check for insulation gaps and air leaks around the housing. Use fire-rated insulation and avoid compressing it, which can affect insulation effectiveness. Seal all gaps with appropriate materials like caulk or foam, ensuring a snug fit. This not only improves efficiency but also keeps your home safe.
What Are Common Troubleshooting Issues After Installation?
After installing your LED recessed lighting, you might encounter common troubleshooting issues like wiring issues or flickering problems. Check all connections to make sure they’re secure and properly insulated. If flickering persists, verify that your dimmer switch is compatible with LEDs, and consider replacing it if necessary. Also, inspect for loose wires or faulty bulbs. These steps help resolve most issues and ensure your lighting functions smoothly.
Conclusion
Upgrading to LED recessed lighting transforms your space, blending modern efficiency with timeless comfort. As you enjoy brighter, more inviting rooms, remember the effort it took to make this change—each step a demonstration to your DIY spirit. While the process may have been challenging, the warmth and style now radiate through your home, proving that sometimes, the hardest work yields the most beautiful results. Your space is brighter—and so is your achievement.