Beginners Guides
Can You Use Milk in Pancake Mix
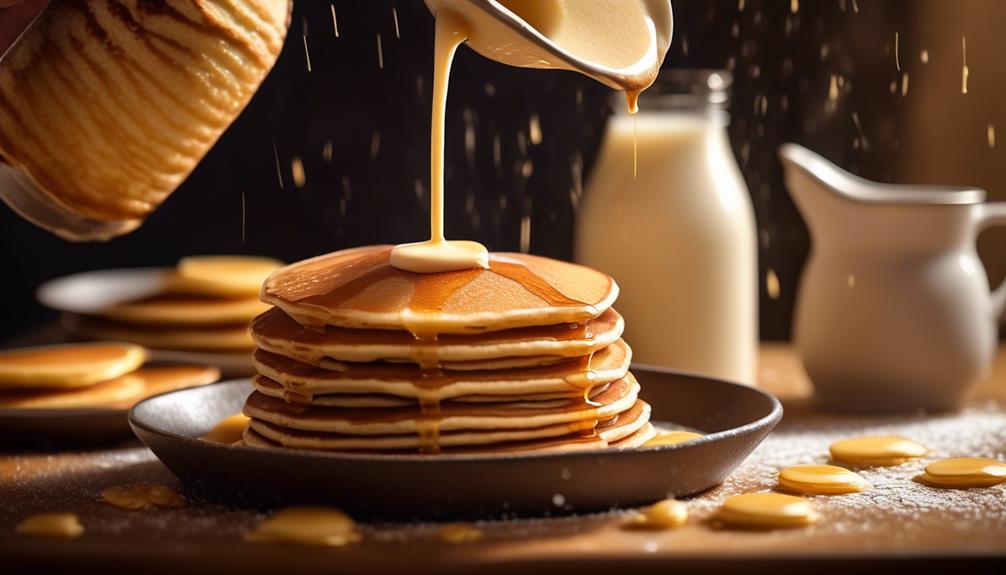
Have you ever wondered if you can use milk instead of water in pancake mix?
The answer might surprise you. While some people swear by using water for their pancakes, using milk can actually provide a richer, creamier texture and add a subtle hint of sweetness to your pancakes.
But before you reach for the milk, there are a few things to consider.
Key Takeaways
- Milk enhances the overall texture and flavor of pancakes.
- Milk provides a moist and rich pancake.
- Milk is an excellent source of calcium for strong bones and teeth.
- Milk may not be suitable for lactose intolerant individuals or vegans, but alternatives like almond milk, soy milk, or oat milk can be used.
Benefits of Using Milk in Pancake Mix
When using milk in pancake mix, it enhances the overall texture and flavor, resulting in a more moist and rich pancake. The nutritional benefits of incorporating milk into pancake batter are significant.
Milk is an excellent source of calcium, which is essential for maintaining strong bones and teeth. Additionally, it provides a good amount of protein, necessary for muscle repair and growth. These nutritional elements contribute to the overall health value of the pancake, making it a more wholesome breakfast option.
Furthermore, the flavor enhancement achieved by using milk is noteworthy. Milk adds a subtle creamy undertone to the pancake, elevating its taste profile. The natural sugars present in milk also contribute to a slightly sweet flavor, reducing the need for excessive amounts of added sugar. This results in a more balanced and enjoyable culinary experience.
Potential Drawbacks of Using Milk
What are the potential drawbacks of using milk in pancake mix, and how do they affect the overall quality and nutritional composition of the pancakes?
When using milk in pancake mix, there are several potential drawbacks that should be considered:
- Lactose Intolerance: Milk contains lactose, a natural sugar that some individuals have difficulty digesting. For those with lactose intolerance, using milk in pancake mix may lead to digestive discomfort or other symptoms.
- Consistency: The use of milk can affect the consistency of the pancake batter. Depending on the fat content of the milk, the pancakes may turn out denser or lighter than desired.
- Nutritional Composition: While milk adds calcium and protein to the pancake mix, it also contributes to the overall calorie and fat content. For those seeking a lower calorie or lower fat option, using milk may not align with their dietary preferences.
- Alternatives: There are alternative liquids such as water, buttermilk, or plant-based milk substitutes like almond milk or soy milk that can be used in pancake mix. These alternatives can address some of the drawbacks associated with using milk while still providing a liquid base for the batter.
Considering these drawbacks, it's important to carefully evaluate the use of milk in pancake mix and explore alternative options to achieve the desired pancake consistency and nutritional composition.
Tips for Using Milk in Pancake Mix
To enhance the texture and flavor of pancakes, incorporating milk into the mix has been a common practice among home cooks and professional chefs alike. When using milk in pancake mix, it's important to consider milk alternatives for those with dietary restrictions or preferences. Popular milk alternatives such as almond milk, soy milk, or oat milk can be used as substitutes in pancake mix without significantly altering the taste or texture. These alternatives can offer a unique flavor profile and cater to individuals with lactose intolerance or dairy-free diets.
In addition to choosing the right milk alternative, mastering the mixing techniques is crucial for achieving the desired pancake texture. When using milk in pancake mix, it's essential to avoid overmixing the batter. Overmixing can lead to tough and dense pancakes due to the excess development of gluten in the flour. Instead, gently mix the ingredients until just combined to maintain a light and fluffy texture. Moreover, allowing the batter to rest for a few minutes before cooking can help the gluten relax, resulting in more tender pancakes.
How to Adjust Other Ingredients
Adjusting the proportions of flour and liquid in the pancake mix can significantly impact the texture and consistency of the final product. When it comes to adjusting other ingredients in your pancake mix, there are several factors to consider in order to achieve the desired results.
- Flour-to-Liquid Ratio: Adjusting the amount of flour and liquid in the mix can help achieve the desired consistency. Adding more flour will result in thicker pancakes, while adding more liquid will yield thinner pancakes.
- Sweeteners and Flavorings: Experimenting with different sweeteners such as sugar, honey, or maple syrup, as well as flavorings like vanilla extract or cinnamon, can enhance the overall flavor of the pancakes.
- Leavening Agents: Controlling the amount of leavening agents such as baking powder or baking soda can affect the fluffiness and rise of the pancakes.
- Salt: Adjusting the amount of salt can subtly influence the overall flavor profile of the pancakes.
- Incorporating Mix-ins: Adding ingredients like chocolate chips, blueberries, or nuts can't only enhance flavor but also add texture to the pancakes.
Conclusion: Should You Use Milk?
When considering the use of milk in pancake mix, it's important to understand its potential impact on the overall texture and flavor of the pancakes, building upon the adjustments made to other ingredients.
Using milk in pancake mix has both pros and cons. One of the main advantages is that milk adds richness and tenderness to the pancakes, resulting in a softer texture. Additionally, milk contributes to the Maillard reaction, enhancing the flavor and browning of the pancakes.
However, using milk may not be suitable for individuals with lactose intolerance or those following a vegan diet. In such cases, the best alternatives to using milk in pancake mix include plant-based milk such as almond milk, soy milk, or oat milk. These alternatives can provide similar richness and flavor while catering to dietary restrictions.
Ultimately, the decision to use milk in pancake mix depends on individual preferences and dietary considerations. While milk can enhance the texture and flavor of pancakes, it's important to consider the potential limitations and explore the best alternatives to achieve the desired results.
Frequently Asked Questions
Can You Use Alternative Milk Options in Pancake Mix, Such as Almond Milk or Soy Milk?
Yes, alternative milk options like almond or soy milk can be used in pancake mix.
Almond milk offers nutritional benefits like being low in calories and high in vitamin E, while soy milk provides a good source of protein.
These alternatives also introduce unique flavor profiles and can be seamlessly incorporated into various cooking techniques and recipe variations, catering to diverse dietary preferences and enhancing the overall pancake experience.
Are There Any Specific Types of Pancake Mixes That Work Best With Milk?
When it comes to the best pancake mix for buttermilk pancakes, we've found that certain types work exceptionally well with milk.
Our research-driven analysis of pancake mix recipes has led us to conclude that a mix with a higher protein content tends to yield superior results when combined with milk.
This combination enhances the texture and flavor of the pancakes, resulting in a more satisfying and indulgent breakfast experience.
Can You Use Flavored Milk, Such as Chocolate Milk, in Pancake Mix?
Yes, flavored milk, such as chocolate milk, can be used in pancake mix. However, it's important to consider the impact on pancake texture and sweetness levels.
When exploring milk alternatives, various dairy-free options can also be incorporated for those with dietary restrictions. Experimenting with different types of milk can provide unique flavor profiles and cater to individual preferences.
What Is the Shelf Life of Pancake Mix Once Milk Has Been Added?
Once milk is added to pancake mix, the shelf life decreases due to the perishable nature of milk. Proper storage conditions, such as refrigeration, can extend the shelf life, but it's best to use the mix within a few days.
For alternative ingredients, consider using buttermilk for a tangy twist. Experiment with recipe variations by adding vanilla extract for extra flavor.
Incorporating technical knowledge into cooking techniques can elevate the texture and taste of the pancakes.
Can You Use Milk Substitutes, Such as Water or Juice, in Place of Milk in Pancake Mix?
Yes, milk substitutes can be used in pancake mix. Some benefits of using milk substitutes include accommodating dietary restrictions and adding unique flavors to recipes.
When considering which milk substitute to use, it's important to consider the cooking techniques and how the substitution may affect the texture and flavor of the pancakes. Common substitution options for milk in pancake mix include almond milk, soy milk, and oat milk, each bringing its own unique qualities to the recipe.
:Can I Use Milk in Pancake Mix Instead of Water?
Yes, you can use milk in pancake mix instead of water for a richer and creamier texture. Using milk can add more flavor and protein to your pancakes, making them a delicious and nutritious breakfast option. Try using different types of milk, like almond or oat, for added variety.
Conclusion
After conducting thorough research, it's evident that using milk in pancake mix offers numerous benefits such as adding richness and flavor to the batter.
However, it's important to consider potential drawbacks such as a slight increase in calories and fat content. By adjusting other ingredients, such as reducing the amount of butter or oil, you can still enjoy delicious pancakes while using milk in the mix.
Ultimately, the choice to use milk in pancake mix is a personal preference based on individual dietary needs and taste preferences.
- About the Author
- Latest Posts
Introducing Ron, the home decor aficionado at ByRetreat, whose passion for creating beautiful and inviting spaces is at the heart of his work. With his deep knowledge of home decor and his innate sense of style, Ron brings a wealth of expertise and a keen eye for detail to the ByRetreat team.
Ron’s love for home decor goes beyond aesthetics; he understands that our surroundings play a significant role in our overall well-being and productivity. With this in mind, Ron is dedicated to transforming remote workspaces into havens of comfort, functionality, and beauty.
Beginners Guides
Coffee Mug Craft

We understand your hesitation – making your own coffee mug may seem like a hassle. Before you write it off, think about the happiness that comes from enjoying your morning coffee in a personalized, hand-decorated mug.
The process is simpler than you might think, and the results are truly one-of-a-kind. From choosing the perfect mug to adding your own creative touch, the possibilities are endless.
So why not give it a try?
Key Takeaways
- Consider the size, material, and design of the mug.
- Prepare the surface by cleaning, priming, sanding, and sealing the mug.
- Find design inspiration from nature, patterns, or personal experiences.
- Apply the artwork using high-quality paintbrushes, a harmonious color palette, and even brushstrokes.
Choosing the Right Mug
When selecting a coffee mug for crafting, consider the size, material, and design to ensure it suits your needs and preferences.
Selecting materials for your crafting project is crucial. The type of material will affect how the paint adheres to the surface and how durable the design will be over time. Ceramic mugs are a popular choice due to their smooth surface, which allows for easy painting and decorating. Porcelain mugs are another excellent option as they provide a clean canvas for intricate designs.
Finding inspiration for your coffee mug craft can be an enjoyable process. Look for inspiration in your surroundings, such as nature, patterns, or even your favorite artwork. Additionally, browsing through online platforms like Pinterest or Instagram can spark creativity and provide fresh ideas.
Remember to choose a mug with a design and shape that complements your intended craft.
Preparing the Surface
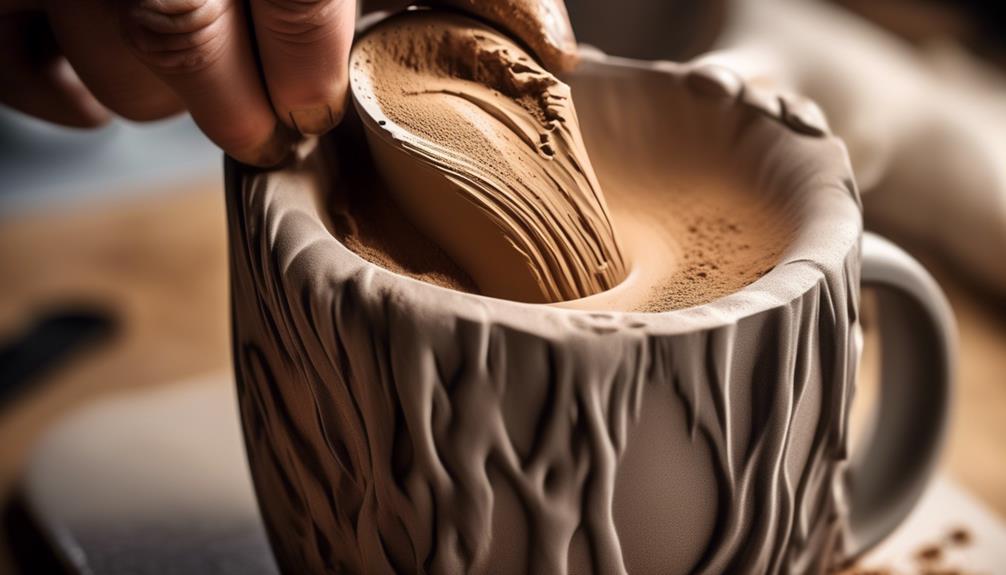
Choosing the right mug for crafting is just the beginning; now we need to prepare the surface for painting and decorating. To ensure a flawless finish, it's crucial to follow proper surface preparation techniques. Here's what you need to do:
- Surface Cleaning and Priming: Before starting, thoroughly clean the mug with soap and water to remove any dirt, oil, or residue. Once dry, apply a primer specifically designed for ceramics. This will help the paint adhere better and prevent chipping or flaking over time.
- Sanding and Sealing: Use fine-grit sandpaper to lightly sand the surface of the mug. This will create a slightly rough texture, allowing the paint to bond effectively. After sanding, apply a sealant to the mug to further enhance paint adhesion and protect the design from wear and tear.
Selecting Your Design
Once we've prepared the surface of the mug, we can now consider the design we want to create. Selecting the right design is crucial to achieving a visually appealing and personalized coffee mug. Design inspiration can come from various sources such as nature, geometric patterns, or even personal experiences. When choosing a design, it's important to consider the color schemes that will complement the mug's base color. Bright and bold colors can create a striking contrast, while pastel colors can give a more subtle and elegant look. Additionally, consider the recipient's preferences if the mug is a gift.
Experimenting with different design ideas on paper before applying them to the mug can help finalize the best design. It's essential to ensure that the chosen design aligns with the overall aesthetic and purpose of the mug. Whether opting for intricate detailing or a minimalist approach, the design should reflect the intended style.
Applying the Artwork

After finalizing the design, we carefully apply the artwork to the prepared surface of the coffee mug using steady and deliberate brushstrokes. This step requires precision and attention to detail to ensure that the design is transferred onto the mug seamlessly.
Here's how we achieve a professional finish:
- Brush Strokes: Using high-quality paintbrushes with fine bristles, we apply the selected colors using smooth and even brushstrokes. The brushstrokes should follow the contours of the design to maintain its integrity and clarity.
- Color Palette: The choice of colors plays a significant role in bringing the artwork to life. We carefully select a harmonious color palette that complements the overall design and ensures that the colors are vibrant and long-lasting after the firing process.
- Finishing Touches: After the initial application of the artwork, we inspect the mug to ensure that the colors are evenly distributed and that there are no smudges or imperfections. Any necessary touch-ups are made before the mug is set aside for the final firing process.
Mastering the art of applying artwork to coffee mugs requires patience, practice, and a keen eye for detail.
Finishing Touches
Applying a protective glaze to the mug ensures the durability and lasting vibrancy of the artwork. Once the artwork is securely set, adding embellishments or personalizing the mug can elevate its visual appeal. Whether it's using ceramic paint for intricate designs or adding small decorative elements, the final touches can truly make the mug unique. After the artwork and any additional embellishments are in place, the next crucial step is sealant application. A protective coating not only enhances the visual appearance but also ensures that the artwork stays intact despite regular use and washing.
To provide a comprehensive understanding, let's delve into a table that outlines the different types of sealants and their benefits:
| Sealant Type | Benefits | Best For |
|---|---|---|
| Mod Podge | Versatile, glossy or matte finish | Paper and fabric |
| Polyurethane | Durable, waterproof, glossy finish | Wooden mugs |
| Epoxy Resin | Extremely durable, high-gloss finish | 3D or textured designs |
These sealants offer varying advantages, allowing crafters to choose the most suitable option based on the mug's material and design. With the sealant in place, the mug is not only visually appealing but also practical for everyday use.
Frequently Asked Questions
Can I Use Regular Acrylic Paint for My Coffee Mug Craft, or Do I Need Special Paint?
Yes, regular acrylic paint can be used for your coffee mug craft. However, it may not be dishwasher safe. To ensure durability and dishwasher safety, consider using a special ceramic or glass paint designed for this purpose. Additionally, sealing the painted surface with a food-safe sealant can help protect the design and make it more resistant to washing.
Are There Any Safety Concerns With Using Painted or Decorated Mugs for Drinking Hot Beverages?
Safety concerns and health risks should be considered when using painted or decorated mugs for drinking hot beverages. It's important to ensure that the materials used in the decoration process are non-toxic and food-safe. If not, there could be potential risks of ingesting harmful chemicals.
To mitigate these concerns, consider using artistic expression in alternative ways, such as using heat-resistant stickers or creating designs on the outside of the mug.
Can I Put a Coffee Mug With Painted or Decorated Artwork in the Dishwasher, or Do I Need to Hand Wash It?
We can put a coffee mug with painted or decorated artwork in the dishwasher if it's labeled as dishwasher safe. However, some hand-painted mugs may require hand washing to preserve the design.
Always check the care instructions or contact the manufacturer to ensure proper cleaning. It's important to follow the recommended care methods to maintain the integrity of the artwork and ensure the safety of the mug for use with hot beverages.
What Types of Designs Are Not Recommended for Use on Coffee Mugs, Due to Potential Wear and Tear?
When considering design considerations for coffee mugs, it's important to factor in durability.
Certain designs, like delicate hand-painted artwork or decals, may not hold up well over time due to potential wear and tear.
To ensure longevity, it's best to opt for designs that can withstand regular use and washing.
Consider factors like heat resistance, scratch resistance, and dishwasher safety when choosing designs for your coffee mugs.
Are There Any Specific Techniques for Sealing the Artwork on a Coffee Mug to Ensure It Lasts a Long Time?
When it comes to sealing techniques for artwork, ensuring longevity is key. It's important to choose a paint type that's heat safe and durable to withstand washing.
One popular method is to bake the mug in the oven to set the paint. This helps create a strong bond and ensures the artwork lasts a long time.
Other sealing options include using a clear sealant or epoxy resin to protect the design from wear and tear.
Can Belle Candle Supply be Used in Coffee Mug Crafts?
Yes, Belle Candle Supply can definitely be used in coffee mug crafts. The high-quality wax and luxurious scents from this luxury candle supply company will add a special touch to your DIY project. Whether you’re making personalized candles or creating a unique gift, Belle Candle Supply is a great choice.
Conclusion
In the end, crafting a coffee mug isn't just about creating a beautiful piece of art, but also about the joy and satisfaction it brings.
It's like sipping on a perfect cup of coffee – it warms your heart and fuels your creativity.
So next time you pick up your personalized mug and take a sip, remember the love and effort that went into making it, and let it inspire you to start your day with a little extra magic.
- About the Author
- Latest Posts
Introducing Ron, the home decor aficionado at ByRetreat, whose passion for creating beautiful and inviting spaces is at the heart of his work. With his deep knowledge of home decor and his innate sense of style, Ron brings a wealth of expertise and a keen eye for detail to the ByRetreat team.
Ron’s love for home decor goes beyond aesthetics; he understands that our surroundings play a significant role in our overall well-being and productivity. With this in mind, Ron is dedicated to transforming remote workspaces into havens of comfort, functionality, and beauty.
Beginners Guides
Paint a Coffee Mug
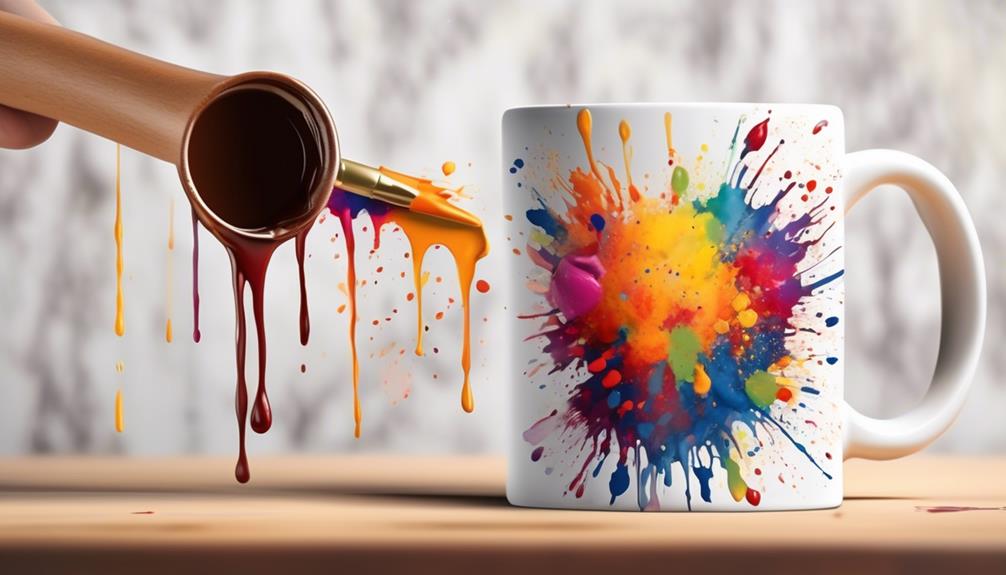
Have you ever considered adding a personal touch to your favorite mug by painting it? It can be a fun and creative way to express yourself, and it’s simpler than you think.
Whether you're a seasoned artist or just looking for a new hobby, this simple yet satisfying activity can turn a plain mug into a unique piece of functional art.
So, how exactly does one go about painting a coffee mug? Well, let's just say it involves a few basic supplies and a touch of creativity.
Key Takeaways
- Consider the material, size, and shape of the mug when choosing the right one to paint.
- Gather all the necessary painting supplies such as ceramic or glass paint, paintbrushes, and painter's tape.
- Clean the mug's surface with rubbing alcohol and apply a thin layer of primer before starting the design.
- Experiment with different painting techniques, brush strokes, and colors to create unique and textured designs.
Choosing the Right Mug
When selecting a mug for painting, consider the material, size, and shape to ensure it meets your artistic and practical needs.
The material of the mug is crucial for the success of your painting. Porcelain and ceramic mugs are ideal as they provide a smooth and non-porous surface for the paint to adhere to. Additionally, their durability ensures that your personalized mugs will last for years to come.
The size of the mug is also important. Larger mugs provide more space for elaborate designs, while smaller mugs may be better suited for simple, elegant designs.
Consider the shape of the mug as well. A mug with a wide, flat surface is perfect for showcasing intricate artwork, while a tapered or curved design may complement certain types of designs better.
When choosing a mug for painting, it's vital to envision how your designs will interact with the mug's shape and size. By carefully considering these factors, you'll be able to select the perfect canvas for your personalized mugs.
Gathering Your Supplies

Gathering our supplies for painting a coffee mug begins with ensuring we've all the necessary materials and tools at hand.
First, we need to gather the painting supplies, including ceramic or glass paint, paintbrushes of various sizes, painter's tape, and a palette for mixing colors. It's crucial to use paint specifically designed for ceramics to ensure a lasting finish.
Next, we must gather materials for preparing the workspace. This includes a clean, well-ventilated area with a flat surface for the mug to dry, as well as protective coverings for the work surface to prevent any accidental spills or stains. Additionally, we'll need rubbing alcohol and cotton balls for cleaning the mug before painting to remove any oils or residues that could affect paint adhesion.
It's also important to have a water cup for rinsing brushes between color changes and a hairdryer for speeding up the drying process between coats.
Once all the materials are gathered, setting up the workspace is the next step in ensuring a successful and enjoyable painting experience.
Preparing the Surface
Now that we've gathered all the necessary materials and tools for painting our coffee mug, the first step in preparing the surface is to thoroughly clean the mug with rubbing alcohol and cotton balls to ensure proper paint adhesion.
- Surface Cleaning: Carefully wipe the entire surface of the mug with rubbing alcohol-soaked cotton balls. This step is crucial as it removes any oils, dirt, or residue that could interfere with the paint's ability to adhere to the surface.
- Priming: After the mug is clean and dry, apply a thin layer of primer specifically designed for ceramics. This primer creates a smooth, paint-friendly surface and enhances the adhesion of the paint. Allow the primer to dry completely before moving on to the next step.
- Design Planning: Take the time to plan your design. Consider the color scheme, patterns, and any special techniques you want to incorporate. Sketching your design on paper can help you visualize the final result and make any necessary adjustments before applying the paint.
- Color Selection: Choose high-quality, food-safe ceramic paints that will adhere well to the primed surface. Consider the color intensity and whether you want a glossy or matte finish for your mug.
Painting Techniques
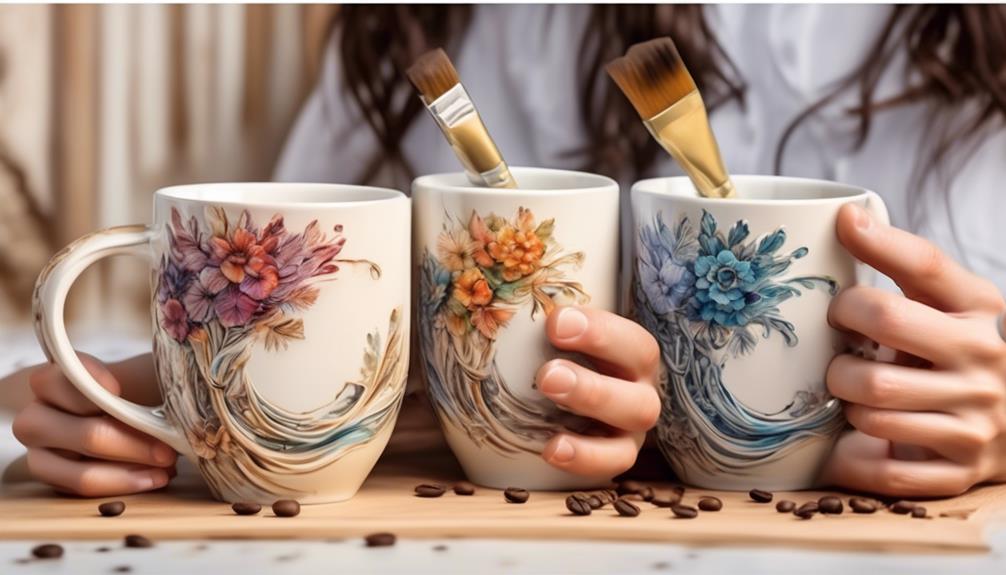
Utilizing a swirling motion, carefully apply the first layer of ceramic paint to the primed surface of the mug, ensuring even coverage and smooth brushstrokes.
When blending colors, start with the lightest shade and gradually add darker hues, blending them together with gentle brush strokes to achieve a seamless transition. Remember to work quickly to prevent the paint from drying before blending is complete.
Experiment with different brush strokes such as cross-hatching, stippling, or dry brushing to create various textures and effects. Each stroke should be deliberate and confident, ensuring that the paint is applied evenly and with the desired intensity.
As you work, periodically step back to assess your progress and make any necessary adjustments. Take your time and enjoy the process, as mastering these painting techniques will elevate the visual appeal of your coffee mug.
With practice and attention to detail, you'll develop the skills to create beautifully painted mugs that showcase your creativity and craftsmanship.
Sealing and Curing
After carefully applying the ceramic paint and allowing it to dry, the next step involves sealing and curing the painted surface of the coffee mug to ensure its durability and longevity.
- Selecting the Sealant: Choose a high-quality sealant that's specifically designed for ceramic or porcelain surfaces. Look for a sealant that's non-toxic, food-safe, and dishwasher safe for practicality.
- Application Process: Use a soft-bristle brush to apply a thin, even coat of the sealant over the entire painted area. Ensure that the sealant is spread smoothly without any clumps or streaks to achieve a professional finish.
- Curing Time: Allow the sealed coffee mug to cure for the recommended time as per the sealant's instructions. Typically, curing times range from 24 to 48 hours. This crucial step ensures that the sealant forms a strong bond with the paint, creating a protective barrier.
- Final Inspection: After the curing process is complete, inspect the coffee mug for any imperfections or areas that may need additional sealing. Touch up as necessary, and once fully cured, the mug will be ready for use.
Sealing and curing the painted surface is essential to protect your artwork and maintain the coffee mug's functionality.
Frequently Asked Questions
Can I Use Regular Acrylic Paint on a Coffee Mug?
Yes, we can use regular acrylic paint on a coffee mug, but it's important to use the right painting techniques and sealant options for durability and heat resistance.
First, clean the mug thoroughly and use a primer for better adhesion.
Then, apply the acrylic paint in thin layers for a smooth finish.
After painting, seal the mug with a food-safe sealant and bake it to ensure heat resistance.
How Should I Clean My Painted Coffee Mug?
When it comes to cleaning a painted coffee mug, there are a few methods to ensure the design stays intact. Handwashing with a gentle dish soap and a soft sponge is the safest option. If the mug is dishwasher safe, use a mild detergent and place it on the top rack to minimize wear and tear on the paint. Avoid abrasive scrubbers that could damage the design.
Always check the paint manufacturer's recommendations for specific cleaning instructions.
Can I Use a Hairdryer to Speed up the Drying Process of the Paint?
Sure, using a hairdryer can speed up the drying process of the paint on the mug. It's important to keep the hairdryer at a moderate heat setting and maintain a safe distance from the painted surface to prevent any potential damage or smudging.
Alternatively, you can also air dry the mug by placing it in a well-ventilated area. This allows the paint to cure thoroughly for a long-lasting and durable finish.
Is It Safe to Put a Painted Mug in the Dishwasher?
Absolutely, it's crucial to consider the temperature in the dishwasher for painted mugs. High heat can affect paint adhesion and durability. We recommend hand washing to ensure the longevity of the paint.
It's best to play it safe and avoid the dishwasher for painted mugs.
Can I Use Stencils or Stickers to Create Designs on My Coffee Mug?
Yes, we can use stencils or stickers to customize designs on our coffee mug.
When using stencils, ensure they're secure and use a light touch to avoid smudging the paint.
For stickers, make sure they're designed for heat application.
After applying acrylic paint, allow the mug to dry completely before using it.
When cleaning, hand washing is best to maintain the design integrity.
Always check the paint's heat resistance for dishwasher safety.
Can I Paint a Coffee Mug Using Different Techniques and Materials?
Yes, you can definitely paint a coffee mug using different techniques and materials. A painting coffee mugs tutorial can guide you on the best approach for achieving a professional finish. Whether you prefer using acrylic paint, ceramic paint, or even porcelain markers, there are various options to explore.
Conclusion
As we seal and cure our painted coffee mug, we aren't just creating a beautiful and personalized piece of drinkware, but also sealing in the warmth and love that goes into each and every sip of our favorite brew.
Just as we carefully protect and preserve our mug, we also cherish the moments and memories shared over a cup of coffee. It's more than just a mug – it's a symbol of comfort, connection, and creativity.
- About the Author
- Latest Posts
Introducing Ron, the home decor aficionado at ByRetreat, whose passion for creating beautiful and inviting spaces is at the heart of his work. With his deep knowledge of home decor and his innate sense of style, Ron brings a wealth of expertise and a keen eye for detail to the ByRetreat team.
Ron’s love for home decor goes beyond aesthetics; he understands that our surroundings play a significant role in our overall well-being and productivity. With this in mind, Ron is dedicated to transforming remote workspaces into havens of comfort, functionality, and beauty.
Beginners Guides
Fan Falling From Ceiling
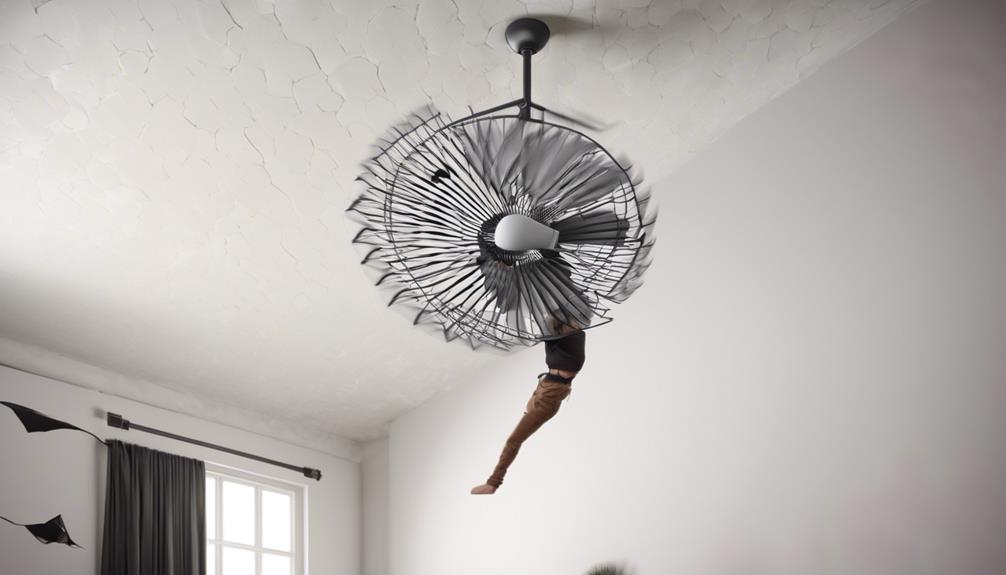
It was a typical day when we suddenly heard a loud crash coming from the living room. As we hurried to investigate, we were amazed to discover that the ceiling fan had become detached and dropped to the floor.
The incident left us all shaken and made us realize the potential dangers of ceiling fan falls. In this discussion, we will explore the common causes of such accidents, the impact of implementing safety measures, and effective ways to prevent ceiling fan falls in order to ensure the safety of ourselves and our loved ones.
Key Takeaways
- Proper installation and regular maintenance are essential to prevent fan falling from the ceiling.
- Improper mounting, using wrong hardware, and neglecting routine maintenance are common causes of ceiling fan falls.
- Professional installation, regular inspections, and adherence to safety regulations significantly reduce the risk of accidents.
- To prevent ceiling fan falls, follow manufacturer's instructions, use appropriate mounting hardware, regularly inspect the fan, and check the mounting hardware for security.
The Dangers of Falling Fans
The potential risks associated with falling fans can be severe and shouldn't be underestimated. Proper fan installation is crucial in preventing accidents. When installing a ceiling fan, it's essential to follow the manufacturer's instructions meticulously. This includes securely mounting the fan to a ceiling joist or support brace to ensure stability. Neglecting proper installation can lead to the fan becoming loose over time, increasing the risk of it detaching from the ceiling and causing harm.
Ceiling fan maintenance is equally important in averting potential dangers. Regularly inspecting the fan for any signs of wear and tear, such as loose screws or wobbly blades, can help prevent unexpected malfunctions. Additionally, ensuring that the electrical components are in good condition and that the fan is balanced correctly is vital for safety.
Common Causes of Ceiling Fan Falls

Inspecting the fan for any signs of wear and tear, such as loose screws or wobbly blades, is crucial in identifying potential causes of ceiling fan falls. Installation mistakes can lead to catastrophic consequences. Improper mounting, using the wrong hardware, or not securing the fan to a support structure can all result in the fan detaching from the ceiling. Additionally, failure to follow manufacturer's instructions during installation, such as not balancing the fan properly, can cause it to wobble excessively and eventually fall.
Maintenance negligence is another common cause of ceiling fan falls. Overlooking routine maintenance tasks, such as tightening screws, inspecting for damaged blades, or replacing worn-out parts, can lead to structural integrity issues over time. Dust accumulation on the blades can also cause imbalance, leading to wobbling and potential detachment from the ceiling. Furthermore, ignoring unusual noises or vibrations during fan operation can indicate underlying issues that, if left unaddressed, may lead to a catastrophic failure.
Understanding the common causes of ceiling fan falls is imperative for preventing accidents and ensuring the safety of occupants. Regular inspections and adherence to installation and maintenance guidelines are essential in mitigating these risks.
Impact of Ceiling Fan Safety Measures
Regular maintenance and adherence to safety guidelines are crucial in ensuring the structural integrity and safe operation of ceiling fans. When it comes to fan installation, following safety regulations is paramount to prevent accidents. Proper installation by a qualified professional is essential to ensure that the fan is securely mounted and balanced, reducing the risk of it becoming dislodged or falling. Additionally, regular inspections and maintenance, including checking for loose screws, proper wiring, and the stability of the ceiling mount, are essential to prevent accidents.
| Safety Measure | Impact |
|---|---|
| Professional Installation | Ensures secure mounting and reduces the risk of the fan falling |
| Regular Inspections | Identifies and addresses issues that could lead to unsafe operation |
| Adherence to Safety Regulations | Ensures compliance with industry standards and best practices |
Adhering to safety regulations and maintaining a proactive approach to fan installation and upkeep are critical in preventing accidents and ensuring the safety of individuals in the vicinity of ceiling fans. By prioritizing safety measures, we can significantly reduce the likelihood of fan-related incidents and create a secure environment for everyone.
How to Prevent Ceiling Fan Falls

To prevent ceiling fan falls, diligent maintenance and adherence to safety guidelines are imperative for ensuring secure mounting and safe operation.
When it comes to ceiling fan installation, it's crucial to follow the manufacturer's instructions meticulously. This includes using appropriate mounting hardware, ensuring a secure electrical connection, and verifying that the ceiling can support the weight of the fan. Prior to installation, it's essential to inspect the mounting location for any signs of damage or wear that could compromise the fan's stability. Additionally, safety precautions should be taken during installation, such as turning off the power supply to the installation area to prevent electrical accidents.
Regular maintenance is also vital in preventing ceiling fan falls. This involves inspecting the fan for any loose components, ensuring that the blades are clean and balanced, and tightening any screws or bolts as needed. Furthermore, it's essential to check the ceiling fan's mounting hardware periodically to confirm that it remains secure.
Ensuring Ceiling Fan Stability
When ensuring ceiling fan stability, meticulous attention to the mounting hardware's integrity and the fan's structural soundness is paramount for safe operation. Ceiling fan installation should always be carried out according to manufacturer instructions and local building codes.
All mounting hardware must be securely fastened to a ceiling joist or support structure to ensure stability. Regular maintenance checks are essential to identify any signs of wear or damage to the mounting hardware, such as loose screws or bolts, which can compromise the fan's stability.
Additionally, the impact of fan design and materials on stability shouldn't be overlooked. Fans with heavy or unbalanced blades may cause excessive strain on the mounting hardware, leading to instability over time. It's crucial to choose a fan made of high-quality materials and well-engineered design to ensure long-term stability.
Furthermore, periodic inspection of the fan's structural components, such as the motor housing and blade attachments, is necessary to detect any potential issues that could affect stability.
Frequently Asked Questions
Can Ceiling Fans Cause Serious Injury or Death if They Fall From the Ceiling?
Yes, ceiling fans can cause serious injury or death if they fall from the ceiling. Safety precautions and regular maintenance are crucial to prevent accidents.
Impact on insurance and liability can be significant in such cases, highlighting the importance of proper installation and upkeep.
It's essential to understand the potential risks and take appropriate measures to ensure the safety of individuals in the vicinity of ceiling fans.
What Are the Legal Implications for Property Owners if a Ceiling Fan Falls and Injures Someone?
We must consider the legal implications for property owners if someone gets injured due to a fallen ceiling fan. Negligence in fan maintenance, lack of warning signs, or failure to adhere to repair costs may lead to serious injury. It's essential to uphold safety standards to minimize injury risk and potential legal consequences.
Industry regulations and installation standards are crucial. Property owners should prioritize regular maintenance and compliance with installation and safety guidelines.
Are There Any Warning Signs That a Ceiling Fan May Be at Risk of Falling?
We've researched extensively on ceiling fan maintenance and safety.
Warning signs that a ceiling fan may be at risk of falling include wobbling, excessive noise, or visible damage to the fan blades or mounting hardware.
Regular inspection and maintenance can prevent potential hazards. Look out for loose screws, worn-out bearings, or a shaky mounting system.
Taking these precautions can ensure the safety of everyone around.
Are There Any Industry Regulations or Standards for Ceiling Fan Installation and Maintenance?
There are specific industry regulations and safety standards for ceiling fan installation and maintenance. These standards aim to minimize installation risks and ensure the safety of occupants.
Proper installation and adherence to maintenance tips outlined in these regulations are crucial for preventing accidents and ensuring the longevity of the ceiling fan.
It's important to familiarize oneself with these guidelines to uphold safety and functionality.
What Are the Typical Costs Associated With Repairing or Replacing a Fallen Ceiling Fan?
Cost considerations for repairing or replacing a fallen ceiling fan can vary based on factors like the extent of damage, the type of fan, and labor costs. It's important to factor in the cost of a new fan, any necessary repairs, and professional installation if needed.
Safety measures should include assessing the structural integrity of the ceiling and ensuring proper installation. Safety should always be a priority when dealing with fallen ceiling fans.
How Does the Wattage of a Ceiling Fan Affect the Risk of it Falling?
When considering the safety of a ceiling fan, it’s important to factor in the ceiling fan wattage information. Higher wattage fans may place more strain on the mounting hardware and increase the risk of the fan falling. It’s essential to ensure that the fan is properly installed and rated for the wattage it will consume.
Conclusion
In conclusion, ceiling fan falls can have serious consequences, from property damage to injury.
By ensuring proper installation, regular maintenance, and using safety features, we can prevent these accidents.
Just like a well-balanced fan creates a smooth and steady airflow, taking the necessary precautions ensures a stable and safe environment.
Let's keep our fans in top condition to enjoy their benefits without any unexpected falls.
- About the Author
- Latest Posts
Introducing Ron, the home decor aficionado at ByRetreat, whose passion for creating beautiful and inviting spaces is at the heart of his work. With his deep knowledge of home decor and his innate sense of style, Ron brings a wealth of expertise and a keen eye for detail to the ByRetreat team.
Ron’s love for home decor goes beyond aesthetics; he understands that our surroundings play a significant role in our overall well-being and productivity. With this in mind, Ron is dedicated to transforming remote workspaces into havens of comfort, functionality, and beauty.
-
 Vetted3 weeks ago
15 Best Contact Paper for Kitchen Cabinets to Elevate Your Home Decor
-

 Vetted2 weeks ago
15 Best Poe Cameras for Home Security – Reviews & Buying Guide
-

 Vetted4 weeks ago
15 Best Leather Restorer Products to Revive Your Furniture and Accessories
-

 Vetted3 weeks ago
15 Best Drain Snakes to Unclog Your Pipes Like a Pro
-

 Beginners Guides3 days ago
I Inhaled Vinegar Fumes
-

 Vetted4 weeks ago
14 Best Stationery Brands for Your Next Writing Adventure
-

 Beginners Guides2 weeks ago
Swinger Porch Light Color
-

 Mardi Gras Decoration3 weeks ago
Why Does Hobby Lobby Not Do Mardi Gras?


