Appliances
Will Toilet Water Go Down on Its Own
Have you ever wondered if toilet water will magically go down on its own? We’ve all experienced that frustrating moment when the water just won’t drain properly. In this article, we’ll delve into the common causes of toilet water blockage and explore the intricacies of the toilet drainage system.
We’ll also provide you with practical tips and DIY methods to unclog your toilet, as well as advice on prevention and regular maintenance.
Get ready to master the art of keeping your toilet water flowing freely!
Key Takeaways
- Common causes of toilet water blockage include foreign objects, accumulation of objects, tree roots, and lack of maintenance.
- Understanding the toilet drainage system is important, including the trapway, flush mechanism, and drainage pipes.
- Signs of improper toilet water drainage include discoloration, foul odors, and slow draining.
- Prevention and maintenance tips include regular maintenance, avoiding flushing foreign objects, and promptly addressing signs of a clogged toilet.
Common Causes of Toilet Water Blockage
We’ve found that common causes of toilet water blockage include foreign objects, excessive toilet paper, and tree roots infiltrating the sewer line.
When foreign objects such as toys, sanitary products, or excessive toilet paper are flushed down the toilet, they can easily become lodged in the pipes, causing a blockage. This blockage prevents proper drainage, leading to toilet water overflow and potential damage to your bathroom floor.
Additionally, tree roots infiltrating the sewer line can also cause blockages in the toilet drainage system. As the roots grow, they can crack or block the pipes, resulting in toilet water discoloration and reduced water flow.
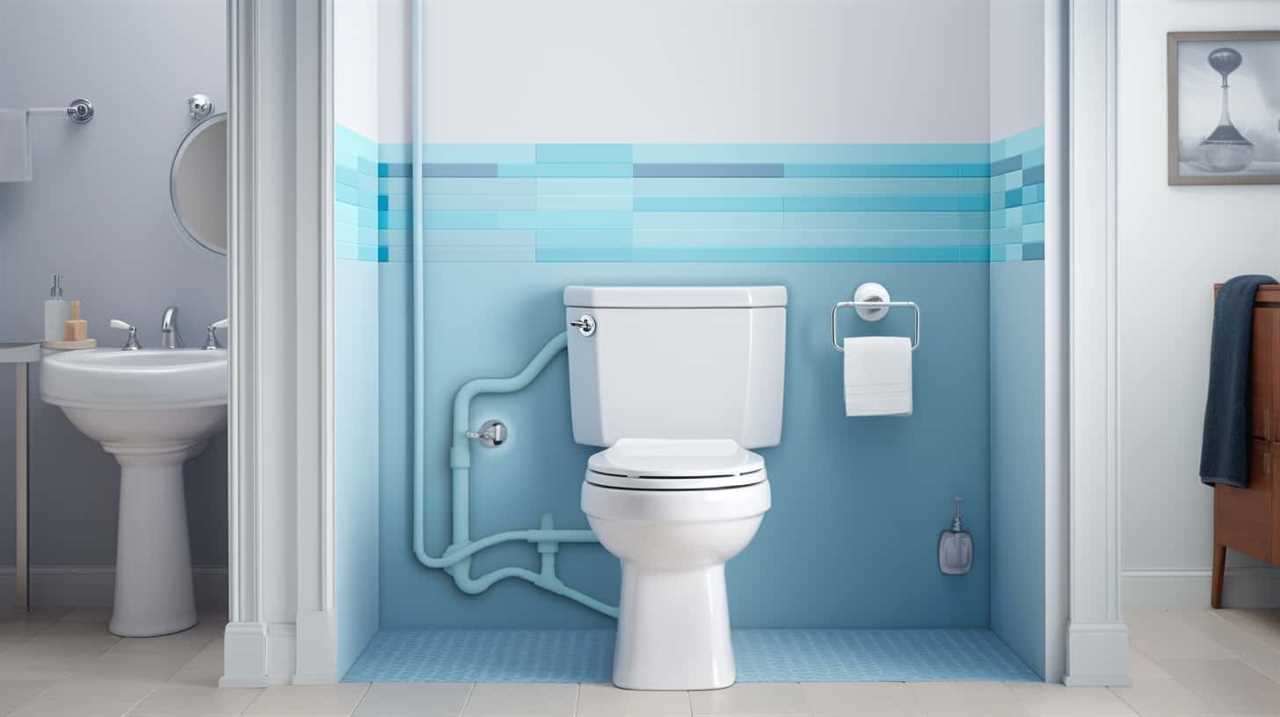
Understanding the toilet drainage system is crucial to preventing blockages. The toilet drainage system comprises various components, including the toilet bowl, trap, and sewer line. The trap, located beneath the toilet bowl, is designed to hold a small amount of water to prevent sewer gases from entering the bathroom. It’s important to ensure that the trap remains clear and unobstructed to maintain proper water flow.
Regular maintenance, such as avoiding flushing foreign objects and using only the recommended amount of toilet paper, can help prevent blockages and maintain the functionality of your toilet drainage system.
Understanding the Toilet Drainage System
To understand the toilet drainage system, let’s start by examining its key components and how they work together.
- Toilet Bowl: This is the visible part of the toilet where waste is deposited. It’s equipped with a trapway, a curved channel that prevents sewer gases from escaping into the bathroom. Proper maintenance of the toilet bowl is essential to prevent clogs and ensure efficient flushing.
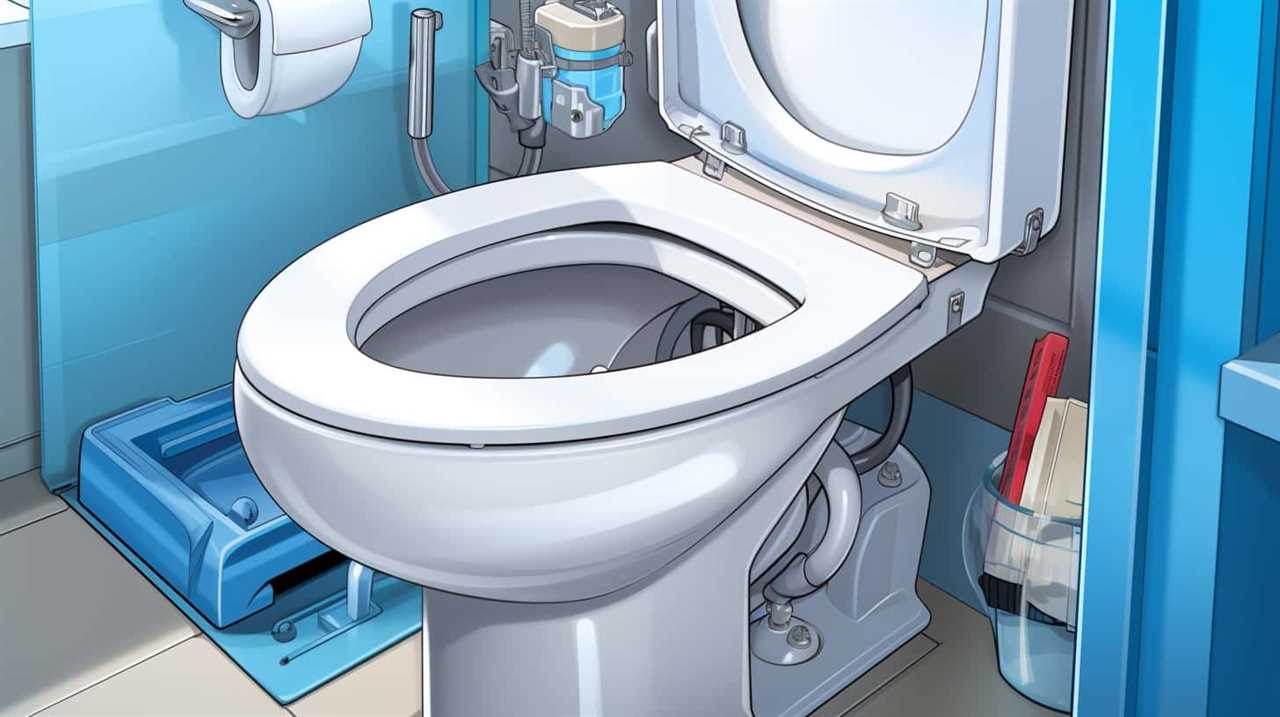
- Flush Mechanism: The flush mechanism is responsible for releasing water from the tank into the bowl. It consists of a flush valve and a fill valve. The flush valve opens to allow water to rush into the bowl, while the fill valve refills the tank after flushing. Regular maintenance of these components is crucial to prevent leaks and ensure proper flushing.
- Drainage Pipes: The toilet is connected to a network of drainage pipes that carry waste away. These pipes are typically made of PVC or cast iron and are sloped to facilitate the flow of waste. Regular inspection and cleaning of these pipes can help prevent common plumbing issues such as clogs and leaks.
Understanding the toilet drainage system is essential for proper toilet maintenance and avoiding common plumbing issues. By regularly inspecting and maintaining the toilet bowl, flush mechanism, and drainage pipes, you can ensure that your toilet functions efficiently and avoid costly repairs.
Signs Your Toilet Water Isn’t Draining Properly
As homeowners, it is important for us to recognize the signs that indicate our toilet water is not draining properly. When our toilet water doesn’t drain as it should, it can be a clear indication of an underlying issue in the drainage system. Two common signs to look out for are toilet water discoloration and foul odors.
Toilet water discoloration can be an early indicator that something is amiss with the drainage. If you notice that the water in your toilet bowl is consistently discolored, such as turning yellow or brown, it could be a sign of a clog or a problem with the sewer line. It is crucial to address this issue promptly to prevent further damage and ensure the proper functioning of your toilet.
Foul odors emanating from your toilet can also be a red flag that the water is not draining properly. If you notice persistent unpleasant smells, it could mean that there is a blockage or a problem with the ventilation system. These odors can be highly unpleasant and may even indicate a potential health hazard. Therefore, it is essential to investigate the source of the odor and take appropriate action to rectify the drainage issue.
To summarize, toilet water discoloration and foul odors are signs that your toilet water is not draining properly. Recognizing and addressing these signs promptly can help prevent further damage and ensure the efficient functioning of your toilet.
| Signs of Improper Toilet Water Drainage | Possible Causes |
|---|---|
| Toilet water discoloration | Clog or sewer line problem |
| Foul odors | Blockage or ventilation issue |
How to Identify a Clogged Toilet
Sometimes, we may notice that our toilet isn’t flushing properly. This can be a sign of a clogged toilet, which can be a frustrating and inconvenient problem to deal with. To help you identify if your toilet is clogged, here are some key indicators to look out for:
- Toilet Water Color: If your toilet water isn’t clear and instead appears discolored, such as brown or murky, it could be a sign of a clog. This discoloration can be caused by waste and debris accumulating in the pipes, preventing the water from draining properly.
- Toilet Water Level: Another way to determine if your toilet is clogged is by observing the water level. If the water level in the toilet bowl is higher than usual or constantly rising after flushing, it could indicate a clog. This occurs because the water is unable to flow freely through the pipes, causing it to back up and fill the bowl.
- Slow Draining: A clogged toilet may also result in slow draining. If you notice that the water is taking longer than usual to drain from the bowl after flushing, it could be a sign of a clog. This sluggish drainage occurs when the clog restricts the water flow, causing it to empty at a slower rate.
Identifying these signs can help you determine if your toilet is clogged, allowing you to take appropriate action to resolve the issue promptly. Remember, addressing a clogged toilet early can prevent further damage and inconvenience.
DIY Methods to Unclog a Toilet
When faced with a clogged toilet, there are two main DIY methods to consider: using a plunger or a snake.
A plunger creates pressure to dislodge the blockage, while a snake is a long, flexible tool that can reach deeper into the pipes.
Additionally, some people prefer to use natural drain cleaners, such as a mixture of baking soda and vinegar, as an alternative to harsh chemicals.
Plunger or Snake
We recommend using a plunger or a snake as effective DIY methods to unclog a toilet. When faced with a toilet water backup, it’s crucial to act quickly to avoid further damage and the need to call an emergency plumber.
Here are three reasons why using a plunger or a snake is the way to go:
- Cost-effective: DIY methods like plungers and snakes are affordable alternatives to hiring a professional.
- Immediate action: With a plunger or a snake readily available, you can address the issue immediately, preventing any potential overflow or damage.
- Control over the situation: By using these DIY methods, you take control of the situation, avoiding the need to rely on external help and minimizing any embarrassment or inconvenience.
Natural Drain Cleaners?
To continue addressing toilet clogs without relying on professional assistance, let’s explore the effectiveness of natural drain cleaners as DIY methods to unclog a toilet. Natural drain cleaner alternatives offer several benefits over chemical options. They are environmentally friendly, safe for septic systems, and often readily available in most households. Here are some popular natural drain cleaners and their benefits:
| Natural Drain Cleaner | Benefits |
|---|---|
| Baking Soda and Vinegar | Creates a fizzy reaction that helps break down clogs |
| Hot Water and Dish Soap | Dissolves grease and lubricates the pipes |
| Salt and Baking Soda | Absorbs moisture and clears minor blockages |
| Enzyme Drain Cleaners | Breaks down organic matter without harming pipes |
Using natural drain cleaners can be an effective way to unclog a toilet without resorting to harsh chemicals. However, if these methods fail, it may be necessary to use a plunger to clear the blockage.
Using a Plunger to Clear Toilet Blockage
When it comes to clearing toilet blockages, a plunger is an effective tool. By creating pressure and suction, a plunger can dislodge and push through clogs.
To use a plunger properly, make sure to cover the drain completely and use firm, controlled strokes.
Some common toilet blockages that can be cleared with a plunger include toilet paper buildup, small objects, and minor obstructions.
Plunger Effectiveness on Clogs
To effectively clear a toilet blockage, one must employ the use of a plunger. A plunger is a simple yet powerful tool that can save you from a messy situation. However, it’s important to properly maintain your plunger to ensure its effectiveness.
Here are some tips for plunger maintenance:
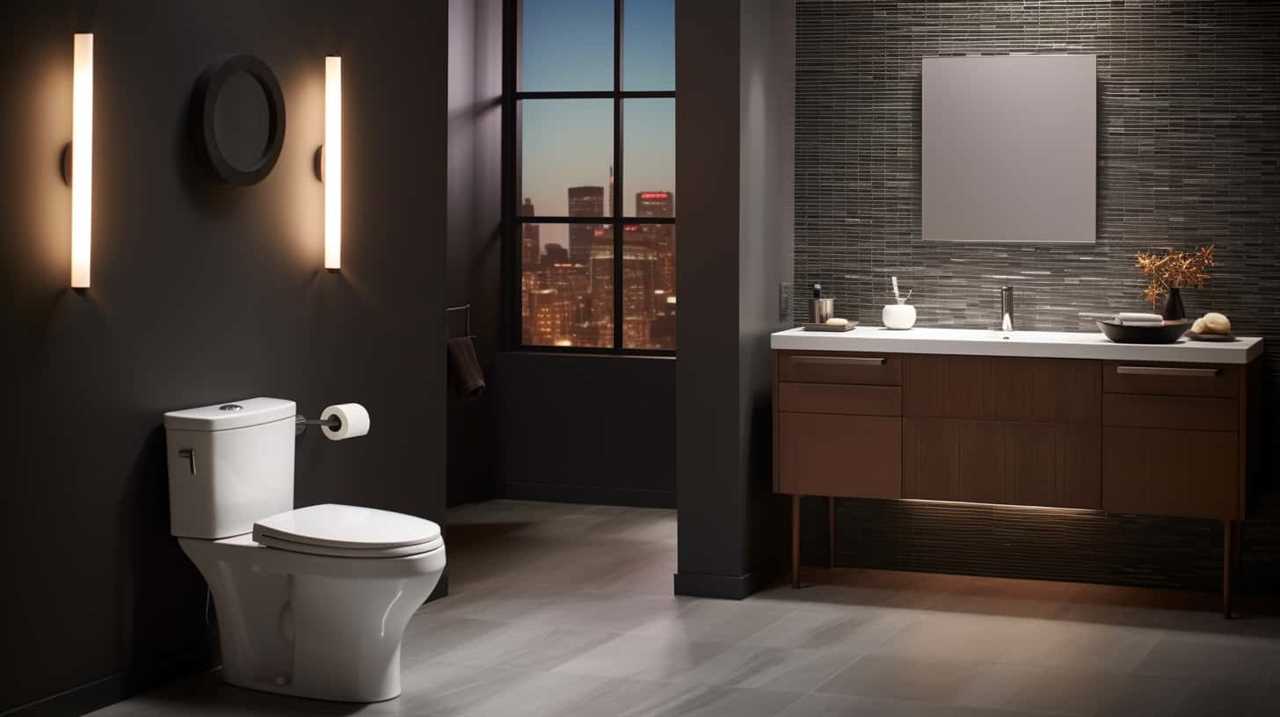
- Clean the plunger after each use to prevent the spread of bacteria and unpleasant odors.
- Store the plunger in a dry place to prevent mold and mildew growth.
- Replace the plunger if the rubber cup is cracked or worn out to maintain its suction power.
Now, let’s discuss common plunger mistakes that can hinder its effectiveness:
- Using too much force can cause water to splash out of the toilet bowl, leading to a bigger mess.
- Not creating a proper seal around the drain can result in weak suction and ineffective plunging.
- Pumping the plunger too quickly can cause air to escape, reducing the plunging power.
Proper Plunger Technique
To clear a toilet blockage, we use a plunger with a proper technique. First, ensure that the plunger has a tight seal around the drain hole. This creates a vacuum effect, allowing us to apply pressure to dislodge the blockage.
Begin by pushing the plunger gently down, then pull up quickly. Repeat this motion several times, maintaining a steady rhythm. The force created by the plunging action increases the toilet water pressure, helping to break up the obstruction.
If the blockage persists, try using hot water. Heat a pot of water to a near-boiling temperature and carefully pour it into the toilet bowl. The hot water can help soften and dissolve the blockage, making it easier to clear with the plunger.
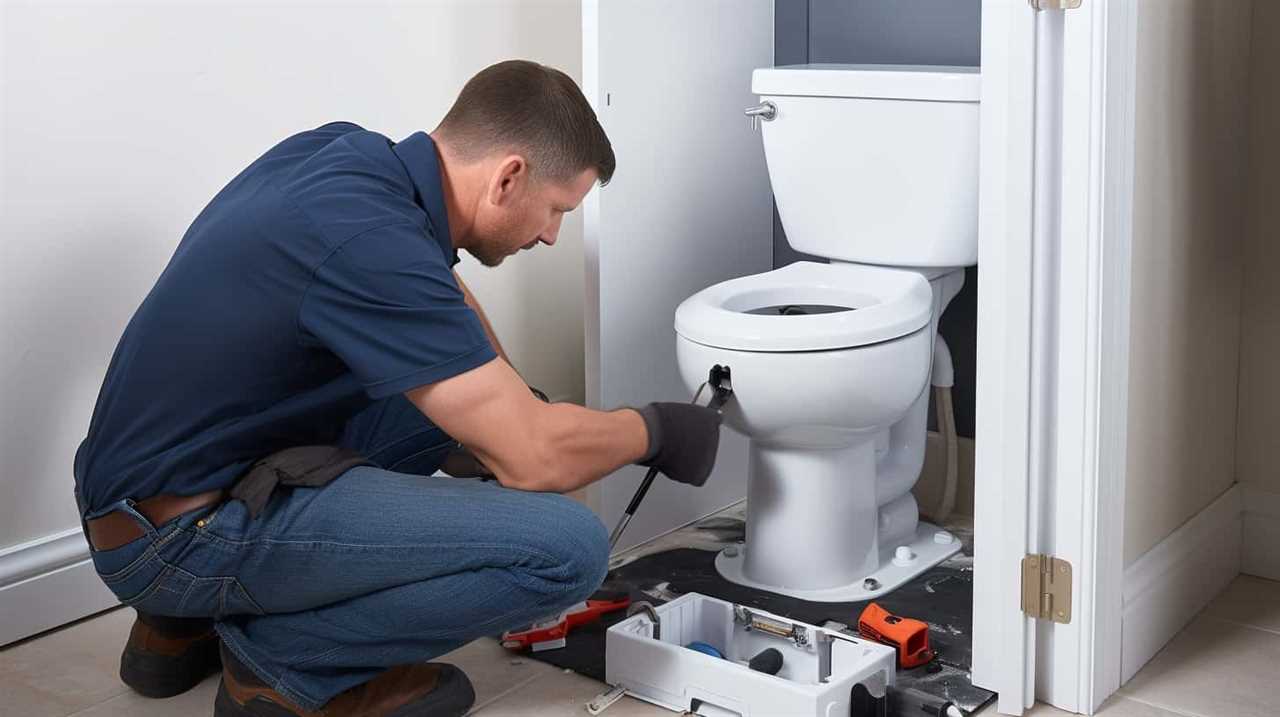
Remember to always exercise caution when using hot water, as it can cause burns.
Common Toilet Blockages
To effectively clear common toilet blockages, we rely on the plunger to create a tight seal around the drain hole and apply pressure to dislodge the obstruction. When faced with a toilet blockage, it’s important to understand the causes and take preventive measures to avoid future clogs.
Here are some common causes of toilet blockages and tips on how to prevent them:
- Causes of toilet blockages:
- Excessive toilet paper usage: Using too much toilet paper at once can lead to blockages.
- Flushing non-flushable items: Items like wipes, sanitary products, and paper towels should never be flushed down the toilet.
- Build-up of waste and debris: Over time, waste and debris can accumulate in the pipes and cause blockages.
- How to prevent toilet clogs:
- Use less toilet paper: Avoid using excessive amounts of toilet paper in one flush.
- Dispose of non-flushable items properly: Always throw non-flushable items in the trash.
- Regular maintenance: Regularly clean and maintain your toilet to prevent build-up of waste and debris.
The Power of a Toilet Auger
We rely on the power of a toilet auger to effectively clear clogs and ensure that toilet water goes down smoothly. A toilet auger, also known as a plumbing snake or a closet auger, is a tool specifically designed to remove blockages in toilets. Its benefits are numerous, making it an essential tool for anyone dealing with toilet clogs.
The main advantage of a toilet auger is its ability to reach deep into the toilet drain and break up stubborn clogs. Unlike a plunger, which can sometimes push the clog further down the pipe, a toilet auger has a long, flexible shaft that can navigate the twists and turns of the plumbing system. This ensures that the clog is completely cleared and the water can flow freely again.
When choosing the right toilet auger, there are a few key factors to consider. First, the length of the auger is important. It should be long enough to reach the clog without causing damage to the toilet bowl. Additionally, the auger should have a durable construction and a strong, reliable cable to withstand the pressure applied during use.
Chemical Drain Cleaners: Are They Effective
When it comes to clearing clogged drains, chemical drain cleaners are often the go-to solution for many homeowners. However, it’s important to consider the effectiveness of these cleaners and the potential long-term effects they may have on your plumbing system.
In this discussion, we’ll explore alternative drain cleaning methods and examine the potential risks and benefits of using chemical drain cleaners.
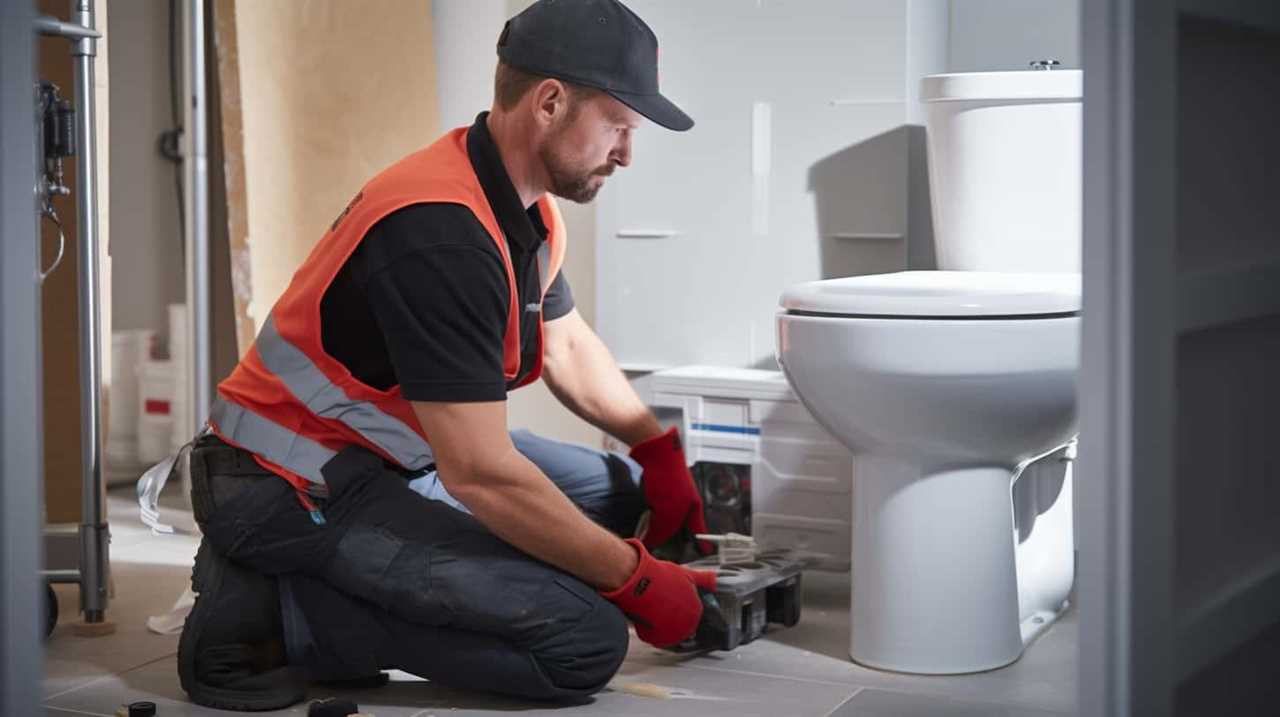
Alternative Drain Cleaning Methods
Chemical drain cleaners, commonly used as an alternative drain cleaning method, may or may not be effective in clearing clogged toilets. When considering alternative drain cleaning methods, it’s important to understand the limitations and potential risks associated with chemical drain cleaners. Here are some key points to consider:
- Toilet water pressure: Chemical drain cleaners aren’t designed to address issues related to toilet water pressure. If the clog is due to low water pressure, alternative methods like adjusting the water supply valve or using a plunger may be more effective.
- Eco-friendly drain cleaners: While chemical drain cleaners can be effective in some cases, they often contain harsh chemicals that can be harmful to the environment. Eco-friendly drain cleaners, on the other hand, use natural enzymes to break down clogs without causing harm to the ecosystem.
- Effectiveness: The effectiveness of chemical drain cleaners can vary depending on the severity and type of clog. In some cases, they may be effective in clearing minor clogs caused by organic matter. However, for more stubborn or complex clogs, alternative methods like drain snakes or hydro jetting may be necessary.
Considering these factors, it’s important to weigh the pros and cons of chemical drain cleaners and explore alternative methods that are effective, eco-friendly, and suited to the specific clog at hand.
Long-Term Effects of Chemicals?
The potential long-term effects of using chemical drain cleaners are a concern for many individuals. While these cleaners may effectively unclog drains in the short term, their use can have negative consequences for both human health and the environment. Chemical drain cleaners often contain corrosive substances such as sodium hydroxide or sulfuric acid, which can cause irritation and burns to the skin, eyes, and respiratory system. Ingesting or inhaling these chemicals can lead to more serious health issues, including organ damage and even cancer. Moreover, the environmental impact of chemical drain cleaners is significant. These substances can contaminate water sources and harm aquatic life. Additionally, the production and disposal of these chemicals contribute to air and water pollution. It is important to consider alternative drain cleaning methods that are safer for both our health and the environment.
| Long-Term Health Effects | Environmental Impact |
|---|---|
| Skin irritation | Water contamination |
| Respiratory issues | Harm to aquatic life |
| Organ damage | Pollution |
Natural Remedies for Toilet Water Blockage
One effective natural remedy for toilet water blockage is using a plunger. This simple tool creates pressure that dislodges the blockage and allows the water to flow freely again.
In addition to using a plunger, there are other natural remedies that can help with toilet water blockage. These remedies not only address the immediate problem but also provide eco-friendly alternatives to chemical-based solutions.
- Vinegar and Baking Soda: Mixing vinegar and baking soda creates a powerful foaming agent that can break down blockages. Pour half a cup of baking soda into the toilet bowl, followed by a cup of vinegar. Let the mixture sit for a few minutes before flushing with hot water.
- Hot Water: Boiling water can be an effective remedy for minor blockages. Carefully pour a pot of hot water into the toilet bowl, aiming for the center of the blockage. The hot water can help dissolve the materials causing the blockage and clear the way for the water to flow.
- Enzyme Cleaners: Enzyme-based cleaners are natural solutions that can break down organic matter, reducing toilet odor and preventing future blockages. These eco-friendly toilet cleaners use enzymes to digest waste and eliminate odors without the use of harsh chemicals.
Prevention Tips to Avoid Toilet Clogs
To avoid frequent toilet clogs, we should regularly maintain our plumbing system. Toilet clog prevention is crucial for ensuring smooth toilet water flow and avoiding costly repairs. Here are some tips to help you maintain your toilet and prevent clogs.
Firstly, be mindful of what you flush down the toilet. Avoid flushing items such as paper towels, feminine hygiene products, or any non-biodegradable materials. These can easily cause blockages in the plumbing system.
Secondly, use toilet paper sparingly. Excessive amounts of toilet paper can accumulate in the pipes and lead to clogs. Remember to flush only a reasonable amount at a time.
Thirdly, consider installing a toilet paper holder with a built-in shelf for wet wipes. This can help prevent these wipes from being flushed and causing clogs.
Regularly cleaning the toilet bowl and keeping it free from mineral deposits can also aid in preventing clogs. Mineral build-up can restrict water flow and lead to blockages. Use a toilet brush and a mild cleaner to remove any deposits.
Lastly, it’s important to schedule regular plumbing inspections. A professional plumber can identify any potential issues before they become major problems.
Regular Maintenance for a Healthy Toilet
Maintaining a healthy toilet involves regularly performing maintenance tasks to ensure proper functioning and prevent potential issues. To keep your toilet water flowing smoothly, here are three essential maintenance tips:
- Check the water level: Regularly inspect the water level in the tank to ensure it’s at the appropriate level. If it’s too high, it can lead to overflow and potential water damage. If it’s too low, the toilet may not flush efficiently. Adjust the water level by either turning the water supply valve or adjusting the float arm.
- Clean the toilet bowl: A clean toilet bowl not only looks better but also helps maintain proper water flow. Use a toilet bowl cleaner and brush to remove any stains or buildup. Pay special attention to the rim and siphon jets, as these can get clogged and affect water flow.
- Check the flushing mechanism: Regularly inspect the flushing mechanism to ensure it’s functioning correctly. Test the flush handle and ensure it’s engaging properly with the flapper or flush valve. If you notice any issues, such as weak flushes or continuous running, it may indicate a problem that needs attention.
By following these maintenance tasks, you can ensure that your toilet water flows smoothly and prevent potential issues.
However, there are times when professional assistance is necessary. Let’s explore when it’s appropriate to call a professional plumber in the next section.
When to Call a Professional Plumber
When it comes to toilet issues beyond regular maintenance, we may need to call a professional plumber. While some minor toilet problems can be fixed on our own, there are certain signs that indicate a major issue that requires the expertise of a professional.
Here are some key signs to watch out for when deciding whether to hire a professional plumber for your toilet troubles.

Firstly, if you notice persistent clogs that can’t be resolved with a plunger or drain cleaner, it may be time to call a professional. This could indicate a blockage further down the pipes that requires specialized tools and knowledge to fix.
Secondly, if you experience frequent leaks around the base of the toilet or from the tank, it’s advisable to consult a professional plumber. These leaks can lead to water damage and mold growth if left unattended, so it’s important to address them promptly.
Lastly, if you notice any unusual sounds or smells coming from your toilet, such as gurgling or sewage odors, it’s a clear indication of a major issue. These could be signs of a sewer line blockage or a problem with the toilet’s internal components, both of which require the expertise of a professional plumber to diagnose and repair.
Conclusion: Keeping Your Toilet Water Flowing Freely
In order to ensure that our toilet water continues to flow freely, we must take proactive measures. Proper toilet water maintenance is crucial to prevent clogs and backups. Here are some key steps to keep your toilet functioning properly:

- Regular cleaning: Clean your toilet regularly to prevent the buildup of dirt, grime, and mineral deposits. Use a toilet brush and appropriate cleaning solutions to maintain a hygienic and efficient toilet.
- Avoid flushing non-flushable items: Only flush toilet paper and human waste down the toilet. Flushing items like wipes, sanitary products, or paper towels can cause blockages and damage to your plumbing system.
- Choose the right plunger: Invest in a high-quality plunger that’s designed specifically for toilets. A plunger with a flange or accordion-style head will create a proper seal and provide the necessary suction to unclog your toilet effectively.
Frequently Asked Questions
How Can I Prevent Toilet Water Blockage?
Preventive measures are crucial to avoid toilet water blockage. By understanding common causes, we can take appropriate steps to prevent this issue.
Regular maintenance, such as using a plunger or drain cleaner, can keep the pipes clear and prevent clogs.
Avoid flushing items like wipes, cotton balls, or feminine products, as they can cause blockages.
Additionally, ensuring proper installation and water pressure regulation can help prevent toilet water blockage.
What Are Some Natural Remedies for Toilet Water Blockage?
When facing a toilet water blockage, it’s essential to explore natural remedies. A vinegar solution can be extremely effective in clearing the blockage.
By pouring a mixture of vinegar and hot water into the toilet bowl, the acidic properties of vinegar help break down any debris or clogs.
Another useful trick is to use baking soda. Sprinkle a generous amount of baking soda into the toilet bowl, followed by hot water.
The combination of vinegar and baking soda creates a powerful foaming action that can help dislodge the blockage.
How Do I Identify if My Toilet Water Isn’t Draining Properly?
When toilet water is overflowing or not draining properly, it’s a sign of a clogged toilet. Identifying this issue is crucial to prevent further damage.
Observe if the water level rises significantly after flushing and if it takes longer than usual to drain. Additionally, listen for gurgling sounds or notice an unpleasant odor.
If you notice these signs, it’s important to address the clog promptly to prevent any potential water damage.
What Are Some DIY Methods to Unclog a Toilet?
When it comes to DIY toilet unclogging, there are several effective home remedies that can help.
However, before trying any of these methods, it’s important to determine whether the toilet water will go down on its own. Sometimes, a clog can be easily resolved by simply waiting for the water to drain naturally.
However, if the water remains stagnant, it’s time to take action and try some of the tried-and-true DIY methods for unclogging a toilet.
When Should I Call a Professional Plumber for a Toilet Blockage?
When is it necessary to hire a plumber for a toilet blockage?
What’re the signs of a serious toilet water blockage?
Sometimes, toilet water may not go down on its own due to a blockage. If you’ve tried DIY methods and the water is still not draining, it might be time to call a professional plumber.
Signs of a serious blockage include water backing up into other drains or toilets, foul odors, or repeated clogs.
A plumber can help diagnose and fix the issue efficiently.
Conclusion
In conclusion, maintaining a healthy toilet is essential for the smooth flow of water. By understanding the common causes of blockages and recognizing the signs of a clogged toilet, you can take timely action to unclog it using DIY methods.
Regular maintenance and following prevention tips will help avoid future clogs. Remember, a stitch in time saves nine, so address any toilet water drainage issues promptly to ensure a trouble-free experience.
Keep those toilets flowing freely!
- About the Author
- Latest Posts
Introducing Charles, the Editor in Chief at ByRetreat, whose passion for interior design and editorial excellence elevates every remote workspace to new heights. With his keen eye for detail, impeccable taste, and expertise in design, Charles brings a wealth of knowledge and creativity to the ByRetreat team.
As the Editor in Chief of a renowned lifestyle blog, Charles has honed his skills in curating captivating content and staying up-to-date with the latest trends in interior design. His deep understanding of aesthetics and the power of storytelling through design enables him to create remote workspaces that are not only visually stunning but also rich in personality and meaning.
Appliances
6 Tips for Selecting Premium Stainless Steel BBQs

Are you prepared to elevate your grilling expertise? You’re in good company!
Did you know that over 75% of BBQ enthusiasts prefer using premium stainless steel grills for their outdoor cooking adventures? If you’re in the market for a new BBQ, it’s important to choose one that will meet your high standards of quality and performance.
That’s why we’ve put together these 6 tips for selecting the perfect premium stainless steel BBQ. From durability and heat distribution to grill size and additional features, we’ll guide you through the key factors to consider.
So, let’s dive in and find the ultimate BBQ that will make you the master of your backyard cooking domain!

Key Takeaways
- Premium stainless steel BBQs are highly durable and built to withstand harsh weather conditions and frequent use.
- The construction of stainless steel BBQs ensures even heat distribution, resulting in perfectly cooked meals without any hot or cold spots.
- When selecting a BBQ, consider the ideal grill size and cooking area that fits well in your outdoor space and can accommodate the desired number of guests.
- Evaluate the fuel type and efficiency of the BBQ, such as gas for convenience and consistent heat or charcoal for a smoky flavor preferred by barbecue purists.
Durability
When selecting premium stainless steel BBQs, we prioritize durability by ensuring that they’re built to withstand harsh weather conditions and frequent use. Durability is a crucial factor to consider when investing in a high-quality BBQ because it determines the longevity and performance of the grill. Stainless steel is renowned for its exceptional durability, making it an ideal material for BBQ construction.
One of the primary benefits of stainless steel is its resistance to rust. Unlike other materials, stainless steel is highly resistant to corrosion, which is a common issue with BBQs exposed to outdoor elements. This rust resistance ensures that your BBQ will remain in pristine condition, even after prolonged exposure to rain, humidity, and intense heat.
To further enhance the durability of our premium stainless steel BBQs, we employ innovative manufacturing techniques and rigorous quality control measures. By utilizing the highest grade of stainless steel, we guarantee that our BBQs are built to last. We understand that BBQs are subjected to intense heat and heavy-duty use, which is why we ensure that every component is designed to withstand these conditions.
As we transition into the next section about heat distribution, it’s important to note that durability and heat distribution often go hand in hand. The construction of our stainless steel BBQs not only ensures their longevity but also ensures even heat distribution, resulting in perfectly cooked meals every time.

Heat Distribution
To ensure optimal cooking results, we prioritize even heat distribution in our premium stainless steel BBQs. Here are three key factors that contribute to achieving this goal:
- Design of the Cooking Surface: The cooking surface of our BBQs is carefully engineered to promote even heat distribution. It features strategically placed burners and heat diffusers that help distribute heat evenly across the entire grilling area. This ensures that your food cooks uniformly, eliminating any hot or cold spots.
- Quality of Materials: We use high-quality stainless steel in the construction of our BBQs. Stainless steel is an excellent conductor of heat and helps to distribute it evenly throughout the cooking surface. This not only improves the cooking experience but also enhances the durability and longevity of our BBQs.
- Temperature Control: Our BBQs are equipped with precise temperature control mechanisms. This allows you to adjust the heat levels according to your desired cooking requirements. Whether you’re searing steaks at high temperatures or slow cooking delicate cuts of meat, our BBQs provide you with the ability to maintain a consistent heat throughout the grilling process.
Grill Size and Cooking Area
When it comes to selecting a premium stainless steel BBQ, one of the key factors to consider is the grill size and cooking area. The ideal grill dimensions will depend on your specific needs and preferences.
It’s important to take into account the cooking space options available and how they align with your cooking habits. Additionally, you’ll want to strike a balance between the size of the grill and its cooking capacity, ensuring that you have enough space to cook for your desired number of guests without sacrificing performance.
Ideal Grill Dimensions
We recommend selecting a premium stainless steel BBQ with a grill size and cooking area that comfortably accommodates a minimum of four to six people. When choosing the ideal grill dimensions, consider the following:

- Grill Size: Opt for a grill that fits well in your outdoor space and meets your cooking needs. If you have a smaller patio or balcony, a compact grill would be suitable. For larger outdoor areas, a bigger grill may be more appropriate.
- Cooking Area: Ensure that the cooking area is spacious enough to cook for your desired number of guests. It should allow you to grill multiple items simultaneously without overcrowding. Additionally, consider features like warming racks or side burners, which provide extra space and versatility.
- Grill Material and Maintenance: Look for a stainless steel grill that’s durable, rust-resistant, and easy to clean. Stainless steel is an excellent choice for grill material as it’s resistant to corrosion and retains heat well. Regular grill maintenance, such as cleaning and seasoning, will help prolong the lifespan of your BBQ.
Cooking Space Options
Our preferred cooking space options for premium stainless steel BBQs include a variety of grill sizes and ample cooking areas.
When it comes to the benefits of stainless steel BBQs, one of the standout features is the ability to choose the perfect size to suit your needs. Whether you’re hosting a small gathering or a large party, having options for different grill sizes ensures that you have enough space to cook all your favorite dishes.
Additionally, stainless steel BBQs offer generous cooking areas, allowing you to grill multiple items simultaneously. This not only saves time but also ensures that everyone’s appetites are satisfied.
To maintain the longevity of your stainless steel BBQ, it’s important to clean and maintain it regularly. Using non-abrasive cleaners and a soft cloth will help prevent scratches and keep your BBQ looking its best.

Now, let’s dive into the next section and explore the relationship between size and capacity.
Size Vs. Capacity
A key consideration when selecting a premium stainless steel BBQ is the available grill sizes and cooking areas, which offer a range of options to suit various needs. The ideal size for a BBQ will depend on the number of people you typically cook for and the amount of space you have available.
Here are three important factors to consider when it comes to size and capacity:
- Cooking Capacity: Determine the amount of cooking space you require based on the number of people you usually entertain. A larger cooking area will allow you to cook more food at once, making it easier to cater to a larger group.
- Grill Size: Consider the physical dimensions of the BBQ, including the width, depth, and height. Ensure that it fits comfortably in your outdoor space or on your patio.
- Versatility: Think about the different cooking methods you want to use on your BBQ. Some models come with additional features like side burners, rotisseries, or smoking capabilities, which can enhance your cooking experience.
Fuel Type and Efficiency
When considering the fuel type and efficiency of premium stainless steel BBQs, it is important to evaluate the options available and their effectiveness. One of the main decisions to make is between gas and charcoal as the primary fuel source. Gas BBQs are known for their convenience, as they are easy to start and provide consistent heat. They also offer better temperature control, allowing you to adjust the flame to achieve the desired level of heat. On the other hand, charcoal BBQs provide a unique smoky flavor and are often preferred by barbecue purists. While they may take longer to heat up and require more maintenance, many people enjoy the ritual of lighting the charcoal and the distinctive taste it imparts on the food.

To help you understand the differences between gas and charcoal BBQs, here is a comparison table:
| Gas BBQs | Charcoal BBQs |
|---|---|
| Convenient and easy to use | Provide a smoky flavor |
| Better temperature control | Longer heat up time |
| Consistent heat | Require more maintenance |
Considering the fuel type and efficiency of a premium stainless steel BBQ is crucial in determining which one suits your preferences and needs. Now, let’s move on to discussing additional features and accessories that you should consider when selecting your ideal BBQ.
Additional Features and Accessories
As we delve into the topic of additional features and accessories for premium stainless steel BBQs, it’s important to consider the various options available to enhance your grilling experience. These additional features and accessories can elevate your BBQ game to the next level, ensuring that you have all the tools and conveniences you need for a successful cookout.
Here are three key items to consider:

- Rotisserie kit: A rotisserie kit is a fantastic addition to any stainless steel BBQ. It allows you to slow-cook large cuts of meat, such as whole chickens or roasts, by rotating them over a steady heat source. This results in succulent, evenly cooked meat with a crispy exterior.
- Side burner: A side burner is a great feature to have on your BBQ, as it provides an additional cooking surface for preparing sauces, sautéing vegetables, or even boiling water. It offers versatility and convenience, allowing you to multitask and save time while grilling.
- Griddle plate: A griddle plate is a flat cooking surface that can be placed on top of your BBQ grates. It provides a smooth, even cooking surface for foods like pancakes, eggs, or even stir-fry. This accessory expands the range of dishes you can prepare on your BBQ and adds a whole new dimension to your outdoor cooking experience.
Price and Warranty Options
To explore the important aspect of price and warranty options for premium stainless steel BBQs, let’s now delve into the various considerations that can help you make an informed decision on your purchase.
When it comes to price range, premium stainless steel BBQs can vary significantly. You’ll find options that range from a few hundred dollars to several thousand dollars. The price is typically determined by factors such as size, brand reputation, and additional features. It’s important to set a budget and consider your needs before making a decision. Keep in mind that while a higher price often indicates better quality, it’s essential to read customer reviews to ensure that the BBQ you choose is worth the investment.
Warranty options are another crucial aspect to consider when purchasing a premium stainless steel BBQ. Look for brands that offer generous warranties, as they demonstrate confidence in their product’s durability and performance. A warranty will protect you against any manufacturing defects or issues that may arise, giving you peace of mind and ensuring that your investment is protected. Be sure to read the warranty terms and conditions carefully to understand what’s covered and for how long.
Frequently Asked Questions
Can Stainless Steel BBQs Be Used in Coastal Areas Without Rusting or Corroding?
Stainless steel BBQs are a great choice for coastal areas, as they’re resistant to rust and corrosion. However, it’s important to note that proper maintenance is key to ensure longevity.

Regular cleaning and drying after use, along with applying rust prevention products, can help protect your BBQ.
Alternatively, you may consider exploring alternative materials, such as aluminum or ceramic, which also offer good resistance to rusting and corrosion in coastal environments.
How Long Should a Stainless Steel BBQ Last Before Needing to Be Replaced?
When it comes to the longevity and durability of a stainless steel BBQ, it’s important to consider a few factors.
The quality of the stainless steel used plays a significant role in its lifespan. A premium stainless steel BBQ, made with high-grade materials, can last for many years before needing to be replaced.

However, it’s also essential to properly maintain and care for your BBQ to ensure its longevity. Regular cleaning, protecting it from harsh weather conditions, and storing it properly when not in use will all contribute to extending its lifespan.
Are There Any Specific Maintenance or Cleaning Requirements for Stainless Steel Bbqs?
When it comes to maintaining and cleaning stainless steel BBQs, there are a few important requirements to keep in mind.
Regular maintenance is key to ensuring the longevity and performance of your grill. This includes cleaning the grates and interior surfaces after each use, as well as periodically checking and replacing any worn-out parts.
As for cleaning techniques, using a mild detergent and warm water, along with a soft cloth or sponge, is usually sufficient. Just make sure to avoid abrasive cleaners or scrub brushes that could damage the stainless steel surface.

Can Stainless Steel BBQs Be Used With Wood Chips or Charcoal, or Are They Strictly for Use With Propane or Natural Gas?
Stainless steel BBQs are versatile and can be used with both wood chips and charcoal, in addition to propane or natural gas.
The choice between wood chips and charcoal depends on the desired flavor profile. Wood chips infuse a smoky taste, while charcoal provides a more traditional BBQ flavor.
As for fuel, propane offers convenience and precise temperature control, while natural gas is a cleaner-burning option.
Ultimately, it’s a matter of personal preference and the type of cooking experience you’re looking for.

Are There Any Safety Precautions or Certifications to Consider When Using a Stainless Steel Bbq?
When it comes to using a stainless steel BBQ, safety should always be a top priority.
There are important safety certifications to consider, such as UL or CSA, which ensure that the BBQ meets certain standards for safety.
Additionally, regular maintenance is crucial to keep your BBQ in good working condition.
Cleaning the grill grates, checking gas connections, and inspecting for any damage are all important maintenance tips to follow.

Conclusion
In conclusion, when selecting a premium stainless steel BBQ, it’s important to consider durability, heat distribution, grill size and cooking area, fuel type and efficiency, as well as additional features and accessories.
By taking all these factors into account, you can ensure a great cooking experience. Remember, quality comes at a price, so don’t forget to check warranty options and compare prices before making your final decision.
Happy grilling!
- About the Author
- Latest Posts
Introducing Charles, the Editor in Chief at ByRetreat, whose passion for interior design and editorial excellence elevates every remote workspace to new heights. With his keen eye for detail, impeccable taste, and expertise in design, Charles brings a wealth of knowledge and creativity to the ByRetreat team.
As the Editor in Chief of a renowned lifestyle blog, Charles has honed his skills in curating captivating content and staying up-to-date with the latest trends in interior design. His deep understanding of aesthetics and the power of storytelling through design enables him to create remote workspaces that are not only visually stunning but also rich in personality and meaning.
Appliances
4 Essential Tips for Cordless Handheld Vacuum Users

Do you find yourself frustrated with your cordless handheld vacuum? We’ve all experienced that struggle of trying to clean up only to end up feeling disappointed. But don’t worry, we have the answer!
In this guide, we will share with you four essential tips that will transform your vacuuming experience. From maintaining your battery to mastering optimal cleaning techniques, we’ve got you covered.
We’ll also give you storage and care tips, as well as troubleshoot common issues that may arise. So, get ready to take your cordless handheld vacuum skills to the next level. Let’s dive in and become true masters of clean!
Key Takeaways
- Proper power usage: Avoid unnecessary use of high power settings and be mindful of vacuum runtime.
- Regularly check battery health: Consider battery replacement if decline in battery life or decreased performance.
- Choose the right attachment for specific cleaning tasks.
- Store vacuum in a clean and dry area, avoiding extreme temperatures or humidity.
Battery Maintenance
We use a regular maintenance routine to prolong the battery life of our cordless handheld vacuums. Battery maintenance is crucial to ensure that our vacuums continue to perform at their best. One important aspect of battery maintenance is proper power usage. It’s essential to use the vacuum in a way that optimizes power consumption and minimizes strain on the battery. This means avoiding unnecessary use of high power settings and being mindful of how long the vacuum is running.

Additionally, it’s important to regularly check the battery’s health and consider battery replacement when necessary. Over time, batteries can lose their capacity to hold a charge, which can significantly impact the vacuum’s performance. If you notice a decline in battery life or the vacuum isn’t performing as well as it used to, it may be time to replace the battery. Replacing the battery won’t only improve the vacuum’s performance but also prolong its overall lifespan.
To ensure the longevity of the battery, it’s also recommended to fully charge it before using the vacuum for the first time. This helps condition the battery and maximize its capacity. Furthermore, it’s advisable to recharge the battery after each use and avoid leaving it in a discharged state for extended periods.
Optimal Cleaning Techniques
To optimize the cleaning performance of our cordless handheld vacuums, it is important to employ effective cleaning techniques. By utilizing these techniques, we can ensure maximum cleaning efficiency and maintain the longevity of our vacuum. Here are some practical tips to help you achieve optimal results:
- Choose the right attachment: Different attachments are designed for specific cleaning tasks. Selecting the appropriate attachment for the surface you are cleaning will enhance the efficiency of your vacuum.
- Use proper movements: Instead of random back-and-forth motions, try using long, straight strokes. This method allows the vacuum to pick up more debris in a single pass, saving time and energy.
- Empty the dust cup regularly: Regularly emptying the dust cup prevents it from becoming too full and affecting the suction power of the vacuum. Follow the manufacturer’s instructions for proper dust disposal methods.
| Technique | How to Do It | Benefits |
|---|---|---|
| Attachments | Choose the right attachment for the surface being cleaned | Enhanced cleaning efficiency |
| Movements | Use long, straight strokes instead of random motions | Saves time and energy |
| Dust Cup | Regularly empty the dust cup following manufacturer’s instructions | Maintains optimal suction power |
Storage and Care Tips
For proper maintenance and longevity of our cordless handheld vacuums, it’s essential to store and care for them correctly. By following a few simple tips, we can ensure that our vacuum remains in optimal condition and continues to provide us with efficient cleaning power.
First, it’s important to store the vacuum in a clean and dry area. Avoid exposing it to extreme temperatures or humidity, as these can damage the internal components. Additionally, keep the vacuum accessories, such as brushes and nozzles, in a designated storage compartment to prevent loss or damage.
Regular cleaning of the vacuum is also crucial for its performance. Empty the dust cup after each use and clean the filters according to the manufacturer’s instructions. This will prevent clogging and maintain suction power. A cleaning schedule can help us stay organized and ensure that we don’t neglect this important task.
Lastly, handle the vacuum with care to avoid unnecessary wear and tear. Avoid pulling on the cord when unplugging the vacuum and be gentle when using the attachments. Regularly check for any loose or damaged parts and replace them if necessary.
Troubleshooting Common Issues
When encountering common issues with our cordless handheld vacuum, it’s important to troubleshoot and resolve them effectively. Here are four common issues that users may face and how to address them:
- Power issues:
If your vacuum isn’t turning on or has a weak suction, check the battery level. Ensure that it’s fully charged before use. If the battery is fully charged and you still experience power issues, try cleaning the filter and removing any debris that may be blocking the airflow. - Suction problems:
If you notice a decrease in suction power, check the dust cup to see if it’s full. Empty it if necessary. Additionally, inspect the brush roll and remove any tangled hair or debris that may be obstructing the suction. Cleaning or replacing the filter can also improve suction performance. - Clogging:
If your vacuum gets clogged, turn it off and unplug it. Carefully remove any debris or blockages from the brush roll, nozzle, or hose. Regularly cleaning these areas can prevent clogs and maintain optimal performance. - Strange noises:
If your vacuum is making unusual sounds, it may indicate a problem. Turn off the vacuum and check for any loose parts or debris that may be causing the noise. Tighten any loose screws or connections and remove any obstructions.
Frequently Asked Questions
How Long Does the Battery of a Cordless Handheld Vacuum Typically Last Before Needing to Be Replaced?
The battery lifespan of a cordless handheld vacuum can vary depending on the model and usage. Generally, batteries can last from 2 to 5 years before needing replacement. However, factors such as frequency of use, charging habits, and overall maintenance can impact the battery’s longevity.
It’s important to follow the manufacturer’s guidelines for charging and storing the vacuum to maximize the battery life. Regularly checking the battery’s health and considering replacements when necessary can ensure optimal performance.
Is It Safe to Use a Cordless Handheld Vacuum to Clean up Wet Spills?
Yes, it’s safe to use a cordless handheld vacuum to clean up wet spills. Although some may worry about the potential for electrical hazards, modern cordless handheld vacuums are designed to handle wet messes without any issues.
To ensure safety and proper maintenance, it’s important to follow manufacturer guidelines and avoid submerging the vacuum in water.

When choosing the right cordless handheld vacuum for your needs, consider factors such as battery life, suction power, and the ability to handle wet spills.
Can I Use My Cordless Handheld Vacuum on Delicate Surfaces Such as Hardwood Floors or Delicate Fabrics?
Using a cordless handheld vacuum on delicate surfaces, such as hardwood floors or delicate fabrics, requires caution and the right attachments. It’s important to choose the appropriate setting or attachment to avoid causing any damage.
For hardwood floors, use a soft brush attachment or switch to the bare floor setting if available.
When vacuuming delicate fabrics, make sure to use a low suction setting and a fabric attachment.
Always test a small, inconspicuous area before proceeding to ensure no damage occurs.
What Should I Do if My Cordless Handheld Vacuum Stops Working Suddenly?
If our cordless handheld vacuum suddenly stops working, there are a few troubleshooting tips we can try before seeking professional help.
First, check if the vacuum is fully charged or if the battery needs replacement.
Next, inspect the filters and clean or replace them if necessary.
Additionally, make sure there are no blockages in the suction pathway.
Regular maintenance, such as cleaning the brush roll and emptying the dustbin, can also prevent sudden breakdowns.
Are There Any Specific Cleaning Solutions or Detergents That Should Be Used With a Cordless Handheld Vacuum for Optimal Cleaning Results?
When it comes to cleaning solutions for cordless handheld vacuums, it’s important to choose ones that are safe and effective.
Some recommended cleaning solutions include mild dish soap mixed with water, or a mixture of white vinegar and water. These solutions can help remove dirt, stains, and odors from your vacuum’s attachments and surfaces.
As for cleaning techniques, regularly emptying the dust cup, cleaning the filters, and wiping down the exterior can help maintain optimal cleaning results.
Conclusion
In conclusion, maintaining a cordless handheld vacuum is essential for its longevity and performance.
By following these tips for battery maintenance, optimal cleaning techniques, storage and care, and troubleshooting common issues, you can ensure that your vacuum remains in top shape.
Remember, just like a well-oiled machine, with a little TLC, your cordless handheld vacuum will continue to suck up dirt and debris with ease, making your cleaning routine a breeze.

- About the Author
- Latest Posts
Introducing Charles, the Editor in Chief at ByRetreat, whose passion for interior design and editorial excellence elevates every remote workspace to new heights. With his keen eye for detail, impeccable taste, and expertise in design, Charles brings a wealth of knowledge and creativity to the ByRetreat team.
As the Editor in Chief of a renowned lifestyle blog, Charles has honed his skills in curating captivating content and staying up-to-date with the latest trends in interior design. His deep understanding of aesthetics and the power of storytelling through design enables him to create remote workspaces that are not only visually stunning but also rich in personality and meaning.
Appliances
6 Smart Tips for Using Digital Nutrition Scales
When it comes to improving our nutrition, digital nutrition scales are our secret weapon. These convenient devices provide a level of precision and ease that traditional scales just can’t rival.
But, like any tool, they require a little know-how to get the most out of them. That’s why we’ve compiled six smart tips to help us become true masters of our digital nutrition scales.
- By understanding portion control, we can accurately measure the amount of food we consume. This is crucial for maintaining a healthy diet and managing our calorie intake.
- Utilizing the tare function allows us to measure ingredients without including the weight of the container. This is especially useful when measuring liquids or adding multiple ingredients to a recipe.
- Customizing settings on our digital nutrition scales can make our lives easier. We can choose between different units of measurement, such as grams or ounces, and adjust the display to suit our preferences.
- Tracking nutritional information is made simple with digital nutrition scales. Many models have the ability to store and recall data, allowing us to keep track of our daily intake of calories, protein, carbs, and more.
- Incorporating our scales into meal planning can help us stay on track with our nutrition goals. By pre-portioning meals and snacks, we can ensure that we’re eating the right amount of food and controlling our portion sizes.
- By following these tips, we can take our nutrition game to the next level. Our digital nutrition scales can revolutionize the way we approach our eating habits and help us make informed choices about what we put into our bodies.
So, let’s dive in and discover how these tips can revolutionize the way we approach our eating habits.
Key Takeaways
- Regular calibration of digital nutrition scales ensures accurate measurements and precise portion control.
- Customizing and adapting the scale to individual dietary needs allows for personalized measurements and informed choices.
- Digital nutrition scales provide precise measurements for tracking and monitoring nutritional information, aiding in adjusting the diet based on nutritional content.
- Incorporating digital nutrition scales into meal planning helps with portion control, calorie counting, and making informed decisions about the diet.
Accuracy of Digital Nutrition Scales
Digital nutrition scales offer a high level of accuracy in measuring the nutritional content of food. Understanding nutritional values and the importance of accurate measurements is crucial for maintaining a healthy diet. These scales utilize advanced technology to provide precise information about the macronutrients and micronutrients present in various food items.

By accurately measuring the nutritional content, individuals can make informed decisions about what they consume, ensuring they meet their dietary goals.
Accurate measurements allow for better tracking of calorie intake, macronutrient distribution, and portion control. This knowledge is especially important for those with specific dietary requirements, such as athletes, individuals with medical conditions, or those looking to lose or gain weight. Digital nutrition scales provide a detailed breakdown of the nutritional components, including calories, carbohydrates, proteins, fats, vitamins, and minerals. With this information at hand, individuals can tailor their meals to meet their specific dietary needs.
Furthermore, digital nutrition scales help individuals identify any discrepancies between their perception of portion sizes and the actual measurements. Often, people underestimate the amount of food they consume, leading to unintended overeating. With the accuracy provided by these scales, individuals can better manage their portion sizes and make more informed choices about their food intake.
Understanding Portion Control With Digital Scales
Understanding portion control is crucial for maintaining a healthy diet. Digital nutrition scales can be valuable tools in achieving this goal. By accurately measuring the amount of food we consume, these scales help us become more aware of our portion sizes. They also help us make informed choices about our meals. With their precise measurements, digital scales ensure that we’re getting the right amount of nutrients and calories. This allows us to better manage our overall health and well-being.

Benefits of Portion Control
We have found that using digital nutrition scales for portion control offers numerous benefits.
Portion control is an essential component of maintaining a healthy diet and achieving weight management goals. By using portion control plates or digital scales, individuals can better understand the appropriate serving sizes of different foods. This helps in preventing overeating and consuming unnecessary calories, which can lead to weight gain.
Additionally, portion control aids in regulating blood sugar levels and managing conditions such as diabetes. It also promotes mindful eating by encouraging individuals to pay closer attention to their food choices and portion sizes.
Furthermore, portion control can assist in reducing food waste by ensuring that only the necessary amounts of food are prepared and consumed.

Accuracy of Digital Scales
When using digital nutrition scales for portion control, accuracy is key to achieving our health and weight management goals. To ensure accurate measurements, it’s important to understand how to improve the accuracy of digital scales. One way to do this is through the calibration process.
Calibration involves adjusting the scale to account for any errors or discrepancies in its readings. This can be done by following the manufacturer’s instructions or using calibration weights. Regularly calibrating your digital scale can help maintain its accuracy over time.
By taking the time to calibrate your scale and ensuring its accuracy, you can have confidence in the portion sizes you’re measuring and make more informed decisions about your nutrition.
Now, let’s explore another feature that contributes to accurate measurements – the tare function.

Utilizing Tare Function for Accurate Measurements
To achieve precise measurements with your digital nutrition scale, it’s essential to frequently utilize the tare function. Understanding the tare function and its benefits can greatly enhance your measurement accuracy. Here are two key reasons why you should take advantage of this feature:
- Accurate Net Weight Measurement: The tare function allows you to subtract the weight of the container or plate from the total weight, giving you the accurate net weight of your food. This is particularly useful when you need to measure ingredients separately or when you want to determine the nutritional value of a specific portion of your meal. By using the tare function, you can eliminate any unnecessary weight and obtain the precise measurement you need.
- Convenient Multiple Ingredient Tracking: When preparing complex recipes that require multiple ingredients, the tare function becomes incredibly handy. You can weigh each ingredient separately by resetting the scale to zero after adding each one. This eliminates the need for multiple bowls or plates and simplifies the process of tracking the precise weight of each ingredient. It saves time, reduces mess, and ensures accurate measurements for your recipes.
Customizing Settings for Specific Dietary Needs
When it comes to our dietary needs, we all have unique requirements. That’s why it’s important to customize the settings on our digital nutrition scales.
By personalizing the scale to our individual needs, we can accurately measure our food and track our nutritional intake.
Whether it’s adjusting for allergies, dietary restrictions, or specific macronutrient goals, tailoring the scale’s measurements allows us to adapt to our own dietary journey.

Personalized Dietary Requirements
We can customize the settings on digital nutrition scales to meet our specific dietary needs. By personalizing our meal plans and using nutritional tracking tools, we can ensure that we’re getting the right balance of nutrients for our individual requirements.
Here are two key benefits of customizing the settings on digital nutrition scales:
- Accurate portion control: With personalized meal plans, we can set the scales to measure the exact portion sizes recommended for our specific dietary needs. This ensures that we aren’t overeating or underestimating our calorie intake.
- Nutrient tracking: Digital nutrition scales come equipped with nutritional tracking tools that allow us to monitor our intake of key nutrients such as protein, carbohydrates, fats, vitamins, and minerals. By customizing the settings, we can track our progress and make adjustments to our diet as needed.
Tailoring Scale Measurements
By customizing the settings on digital nutrition scales, we can tailor the scale measurements to meet our specific dietary needs. This feature allows us to adjust serving sizes and customize measurements based on our individual requirements. Whether we’re following a strict calorie-controlled diet or have specific dietary restrictions, such as low-carb or gluten-free, customizing the scale measurements can greatly assist us in tracking our nutritional intake accurately.
To customize the measurements, we can input our specific dietary targets into the scale’s settings. This may include setting a specific calorie goal, adjusting serving sizes, or even inputting specific macronutrient ratios. By doing so, the scale will then calculate and display the exact nutritional information for the foods we weigh, making it easier for us to stay on track with our dietary goals.

Customizing the scale measurements not only ensures that we’re accurately measuring our food portions, but it also helps us understand the nutritional content of our meals. This information is crucial for those who desire mastery over their dietary habits and wish to make informed choices about their nutrition.
Adapting to Individual Needs
How can we adapt digital nutrition scales to meet our specific dietary needs?
Adapting to allergies and modifying for special diets is crucial when it comes to using digital nutrition scales. These scales can be customized to cater to individual needs, ensuring accurate and personalized measurements.
Here are two ways you can adapt digital nutrition scales:

- Allergen customization: Many digital nutrition scales allow you to input specific allergens to avoid. By setting these preferences, the scale can alert you if a food contains any allergens you need to avoid, helping you make informed choices.
- Special diet modifications: Whether you follow a low-carb, gluten-free, or vegan diet, digital nutrition scales can be adjusted to reflect the nutritional values specific to your dietary requirements. This ensures that you’re getting accurate information about the foods you consume, allowing you to stay on track with your diet goals.
Tracking Nutritional Information With Digital Scales
To accurately track nutritional information, it’s essential to utilize a digital nutrition scale. These scales are designed to provide precise measurements of food portions, allowing you to keep track of your food intake and make informed choices about your diet. By measuring macronutrients such as carbohydrates, proteins, and fats, you can gain a better understanding of the nutritional content of your meals and adjust accordingly.
Digital nutrition scales offer several advantages over traditional kitchen scales. They often come with built-in databases that contain nutritional information for a wide range of foods, making it easier to calculate the exact nutritional value of your meals. Some scales even have the ability to connect to mobile apps or online platforms, allowing you to track your food intake and monitor your progress over time.
By incorporating a digital nutrition scale into your daily routine, you can take control of your nutrition and make more informed choices about what you eat. Whether you’re trying to lose weight, build muscle, or simply maintain a healthy lifestyle, tracking your nutritional information is a crucial step towards reaching your goals.
In the next section, we’ll explore how you can incorporate digital scales into your meal planning to further optimize your nutrition.

Incorporating Digital Scales Into Meal Planning
To incorporate digital scales into our meal planning, we can utilize their built-in databases and connect them to mobile apps or online platforms for a seamless tracking experience. This allows us to accurately measure and monitor the nutritional content of our meals, helping us make informed decisions about our diet.
Here are some smart tips for incorporating digital scales into your meal planning:
- Meal Prep: Digital scales are a valuable tool for meal preppers. By weighing the ingredients before cooking, you can ensure portion control and accurate calorie counting. This helps you stick to your dietary goals without sacrificing taste or satisfaction.
- Weight Loss Strategies: For those looking to shed pounds, digital scales are a game-changer. By tracking the calories and macronutrients in your meals, you can create a calorie deficit necessary for weight loss. Digital scales can help you stay accountable and make adjustments to your portion sizes as needed.
Incorporating digital scales into your meal planning not only improves accuracy but also saves time and effort. With the ability to connect to mobile apps and online platforms, you can easily track your progress and make adjustments to your diet as needed. So, take advantage of the built-in databases and connect your digital scale for a seamless and effective meal planning experience.
Frequently Asked Questions
Can Digital Nutrition Scales Accurately Measure the Nutritional Content of Homemade or Cooked Meals?
Digital nutrition scales can accurately measure the nutritional content of homemade meals to a certain extent. However, they’ve limitations when it comes to calculating the nutritional content of cooked meals. Factors like cooking methods and ingredient variations can affect the accuracy of these scales.
While they can provide a general idea of the nutritional value, it’s important to consider these limitations and use the scales as a tool rather than relying solely on them for precise measurements.
How Do Digital Nutrition Scales Account for Different Types of Food Packaging, Such as Cans or Bags?
Different types of food packaging, such as cans or bags, may pose challenges for digital nutrition scales. However, these scales are designed to account for variations in packaging and provide accurate measurements. They use advanced technology to analyze the weight and composition of the food, regardless of the packaging.
This ensures that you can accurately track the nutritional content of your meals, even if they come in different types of packaging. So, you can rely on digital nutrition scales to help you make informed choices about your diet.
Can Digital Nutrition Scales Calculate the Nutritional Information of Mixed or Blended Ingredients?
Calculating accuracy can be a challenge for digital nutrition scales when it comes to mixed or blended ingredients. These scales rely on pre-programmed databases to determine nutritional information, but they may struggle to accurately calculate the exact composition of complex mixtures.

Additionally, limitations such as the inability to account for variations in ingredient quality or cooking methods can further impact the accuracy of these scales. Therefore, it’s important to be aware of these limitations and use digital nutrition scales as a helpful tool rather than relying solely on their calculations.
Are Digital Nutrition Scales Suitable for Individuals With Dietary Restrictions or Food Allergies?
Digital nutrition scales are a valuable tool for individuals with dietary restrictions or food allergies. They provide accurate and precise information about the nutritional content of various ingredients, allowing users to make informed choices about what they consume.
These scales can be especially beneficial for those looking to lose weight, as they enable users to track their calorie intake and make adjustments accordingly. Incorporating digital nutrition scales into your daily routine can help you achieve your weight loss goals and maintain a healthy lifestyle.
Can Digital Nutrition Scales Be Synced With Mobile Apps or Other Devices to Track Nutritional Information Over Time?
Syncing digital nutrition scales with mobile apps has both benefits and limitations.

On the positive side, it allows for easy tracking of nutritional information over time, providing valuable insights into our dietary habits.
Additionally, it can help individuals with dietary restrictions or food allergies by providing real-time updates on their nutritional intake.
However, it’s important to note that not all digital nutrition scales are compatible with mobile apps, so it’s crucial to check for compatibility before purchasing.
To effectively use digital nutrition scales with mobile apps, ensure that the app is user-friendly, regularly update the app for accurate results, and follow the instructions provided by the manufacturer.
Conclusion
In conclusion, digital nutrition scales are a valuable tool for anyone looking to maintain a healthy and balanced diet. By accurately measuring portion sizes and tracking nutritional information, these scales can help individuals make informed choices about their food intake.
For example, a case study conducted with a digital nutrition scale showed that a person who consistently used the scale to measure their portions was able to lose 10 pounds in just three months. Incorporating a digital scale into meal planning can have a significant impact on overall health and weight management.
- About the Author
- Latest Posts
Introducing Charles, the Editor in Chief at ByRetreat, whose passion for interior design and editorial excellence elevates every remote workspace to new heights. With his keen eye for detail, impeccable taste, and expertise in design, Charles brings a wealth of knowledge and creativity to the ByRetreat team.
As the Editor in Chief of a renowned lifestyle blog, Charles has honed his skills in curating captivating content and staying up-to-date with the latest trends in interior design. His deep understanding of aesthetics and the power of storytelling through design enables him to create remote workspaces that are not only visually stunning but also rich in personality and meaning.
-

 Vetted1 hour ago
15 Best Silver Polish Brands to Make Your Silver Shine Like New
-

 Vetted5 days ago
15 Best Fillers for Concrete Cracks – Expert Recommendations and Reviews
-

 Vetted1 week ago
15 Best Plants for Large Pots to Transform Your Outdoor Space
-

 Vetted6 days ago
15 Best Fairy Lights to Transform Your Space With Magical Illumination
-

 Vetted1 week ago
15 Best Folding Beds for Small Spaces – Space-Saving Solutions for Comfort and Convenience
-

 Vetted1 week ago
15 Best Waterproof Flooring Options for Your Bathroom – Ultimate Guide & Reviews
-

 Vetted2 weeks ago
15 Best Grocery Carts to Make Shopping a Breeze
-

 Vetted1 day ago
15 Best Subfloor Options for Your Basement Renovation – Ultimate Guide


