Appliances
Why Is My Fan Spinning but Not Blowing Air?
Ever pondered over why your fan rotates smoothly but doesn’t seem to provide that cooling effect? Worry not, as we’re here to illuminate the reasons behind this baffling situation.
There could be several plausible explanations for your fan’s lack of airflow. It is possible that a loose or damaged fan blade is to blame, hindering the airflow despite the spinning motion.
Another potential culprit could be a motor malfunction or burnout, rendering the fan powerless in creating a gust of air. Additionally, clogged air filters, faulty capacitors, or wiring issues might also be contributing factors.
So, let us embark on this troubleshooting journey together, as we unravel the mysteries behind your spinning yet airless fan.
Key Takeaways
- Misalignment or bending of the fan blades can cause air turbulence and decrease air circulation.
- Fan blade balance should be checked and adjusted to avoid wobbling and excessive noise.
- Clogged air filters impede airflow and reduce the effectiveness of the fan, so they should be regularly cleaned or replaced.
- Faulty capacitors or loose/disconnected wires can prevent the fan motor from spinning at the required speed and blowing air. These components should be inspected and replaced if necessary.
Loose or Damaged Fan Blade
If the fan blade is loose or damaged, it may not be able to effectively circulate air, even if the fan itself is still spinning. One possible reason for this issue is misalignment of the fan blade. When the fan blade isn’t properly aligned, it can cause air turbulence and decrease the efficiency of air circulation.
To check for fan blade alignment, turn off the fan and visually inspect the position of the blades. They should be straight and evenly spaced from each other. If any blade appears bent or out of place, it may need to be realigned. This can be done by gently bending the blade back into its correct position.
Another factor that can affect the fan’s ability to blow air is fan blade balance. If the blades aren’t balanced, it can cause the fan to wobble and produce excessive noise. To check for fan blade balance, turn off the fan and observe if it wobbles when spinning. If it does, the blades may need to be balanced.
This can be achieved by adding small weights to the blades or by adjusting the position of the blades until the wobbling stops. By ensuring proper fan blade alignment and balance, you can optimize the air circulation and restore the functionality of your fan.
Motor Malfunction or Burnout
After addressing any issues with loose or damaged fan blades, the next potential culprit to consider when a fan is spinning but not blowing air is a motor malfunction or burnout. Motor maintenance is essential to keep your fan running smoothly and effectively. If you suspect a motor malfunction or burnout, here are some troubleshooting techniques to help you identify and resolve the problem:
- Check power supply: Ensure that the fan is properly plugged in and receiving power. Test the outlet using another device to rule out any electrical issues.
- Inspect the motor: Look for any visible signs of damage, such as burnt wires or a damaged capacitor. If you notice any abnormalities, it may indicate a motor malfunction.
- Test the motor windings: Using a multimeter, check the resistance of the motor windings. If the readings are significantly different from the manufacturer’s specifications, it could indicate a faulty motor.
- Verify the motor capacitor: A faulty capacitor can result in motor burnout. Use a capacitor tester to check the capacitance and voltage rating. Replace the capacitor if it falls outside the acceptable range.
Clogged Air Filters
Clogged air filters can significantly impede the airflow of a fan, causing it to spin but not blow air effectively. Restricted air flow occurs when the filters become clogged with dirt, dust, and other debris. As a result, the fan motor has to work harder to push air through the filter, reducing its effectiveness.
Proper maintenance is crucial to prevent clogged air filters. Regularly cleaning or replacing the filters ensures that the fan can function optimally. The frequency of maintenance depends on various factors such as the environment and usage. In dusty environments or high-traffic areas, more frequent cleaning or replacement may be necessary.
To clean the filters, start by turning off the fan and unplugging it from the power source. Remove the front grill or cover to access the filters. If the filters are washable, rinse them under running water or gently scrub them with a soft brush. Allow the filters to dry completely before reinstalling them. For disposable filters, simply replace them with new ones.
Taking care of clogged air filters is essential for maintaining proper airflow in your fan. By incorporating regular maintenance into your routine, you can ensure that your fan blows air effectively and efficiently, providing you with cool and refreshing ventilation.
Faulty Capacitor
When experiencing a fan spinning but not blowing air, a potential cause could be a faulty capacitor. A capacitor is an essential component of the fan motor that stores electrical energy and provides the initial boost to start the motor. If the capacitor is faulty, it can lead to the fan motor not spinning at the required speed to blow air.
Here are some steps for troubleshooting and replacing a faulty capacitor:
- Inspect the capacitor: Check for any visible signs of damage such as bulging or leaking. If the capacitor appears damaged, it’s likely the cause of the problem.
- Test the capacitor: Use a multimeter to measure the capacitance and voltage of the capacitor. Compare the readings to the manufacturer’s specifications. If the readings are significantly different, the capacitor needs to be replaced.
- Replace the capacitor: Disconnect the power supply and discharge any stored energy in the capacitor. Remove the faulty capacitor and take note of its specifications. Purchase a new capacitor with the same capacitance and voltage ratings. Install the new capacitor in the correct orientation.
- Test the fan: Reconnect the power supply and switch on the fan. Ensure that the fan is now spinning and blowing air properly.
Wiring Issues
One potential cause for a fan spinning but not blowing air is related to wiring issues. Electrical troubleshooting is crucial in identifying and resolving such problems. When it comes to troubleshooting fan speed control, it is important to examine the wiring connections and ensure they are properly connected and secure.
In order to better understand the wiring issues that may be affecting your fan’s performance, let’s take a look at the following table:
Wiring Component Possible Issue Solution Power Supply Loose connection or faulty wiring Check wiring connections and ensure they are secure. Replace any faulty wiring. Motor Wiring damage or loose connections Inspect the motor wiring for any signs of damage or loose connections. If necessary, rewire or replace the motor. Fan Speed Control Faulty wiring or incorrect installation Verify the wiring connections of the speed control. If there are any issues, fix the wiring or reinstall the speed control. Switches Wiring problems or faulty switches Examine the wiring connections of the switches. If there are any wiring problems, fix them. Replace any faulty switches. Capacitor Wiring damage or loose connections Check the wiring connections of the capacitor. If there is any damage or loose connections, address them accordingly.
Could a Fan That Spins But Doesn’t Blow Air Be Fixed to Increase Airflow?
If your ceiling fan isn’t blowing air as it should, try these ceiling fan air circulation tips. First, check for any dust buildup on the blades or motor, and clean it off. Also, make sure the fan is spinning in the correct direction for the season to maximize airflow.
Frequently Asked Questions
How Can I Tell if the Fan Blade Is Loose or Damaged?
When checking fan blades, it’s important to inspect them for any looseness or damage. One way to do this is by turning off the fan and carefully examining the blades. Look for any signs of cracks, chips, or warping.
Additionally, gently wiggle each blade to check for any excessive movement. If the fan blades are loose or damaged, it could be a potential cause for the fan spinning but not blowing air.
Troubleshooting motor issues may also be necessary to identify and fix the problem.
What Are the Signs of a Motor Malfunction or Burnout?
When a fan is spinning but not blowing air, it could be a sign of a motor malfunction or burnout. Signs of motor malfunction include unusual noises, overheating, or the fan not spinning at all.
Burnout can occur when the motor is overloaded or if there’s a power surge. To diagnose the issue, check the motor for any visible damage or loose connections.
If the problem persists, it may be necessary to replace the motor.
How Often Should I Clean or Replace the Air Filters in My Fan?
When it comes to improving fan performance, one important factor to consider is the cleanliness of the air filters. Regularly cleaning or replacing the air filters in your fan is crucial to ensure optimal airflow.
Clogged or dirty filters can significantly decrease the effectiveness of your fan in blowing air. By maintaining clean filters, you can prevent dust and debris from obstructing the airflow and enjoy better fan performance.
What Are the Symptoms of a Faulty Capacitor in a Fan?
When dealing with a fan that’s spinning but not blowing air, one possible reason could be a faulty capacitor.
A capacitor is an essential component of the fan motor that helps start and regulate its operation. If the capacitor is faulty, it may not provide the necessary electrical charge for the motor to function properly.
Troubleshooting the capacitor involves checking for physical damage or signs of leakage. If found faulty, a capacitor replacement would be necessary for the fan to resume normal operation.
How Can I Identify and Fix Wiring Issues With My Fan?
Identifying faulty wiring in a fan can be a challenging task. Troubleshooting common issues with fan wiring requires a methodical approach.
First, inspect the power supply to ensure it’s properly connected.
Next, check for any loose or damaged wires that may be causing the problem.
Use a multimeter to test the continuity of the wiring and identify any breaks or shorts.
Once the issue is identified, repair or replace the faulty wiring to restore proper functionality to your fan.
Conclusion
So there you have it, folks! If you find yourself wondering why your fan is spinning but not blowing any air, fear not! It could simply be due to a loose or damaged fan blade, a malfunctioning motor, clogged air filters, a faulty capacitor, or even just some pesky wiring issues.
But hey, who needs cool air anyway, right? Just sit back, relax, and enjoy the gentle breeze of disappointment.
Happy troubleshooting!
- About the Author
- Latest Posts
Introducing Ron, the home decor aficionado at ByRetreat, whose passion for creating beautiful and inviting spaces is at the heart of his work. With his deep knowledge of home decor and his innate sense of style, Ron brings a wealth of expertise and a keen eye for detail to the ByRetreat team.
Ron’s love for home decor goes beyond aesthetics; he understands that our surroundings play a significant role in our overall well-being and productivity. With this in mind, Ron is dedicated to transforming remote workspaces into havens of comfort, functionality, and beauty.
Appliances
Pancake Griddle Temp

We all understand how crucial it is to reach the perfect temperature for a pancake griddle for those golden and fluffy pancakes. Are you ready to learn the secret to making the best pancakes of your life? Keep reading to discover!
But how do we ensure that the temperature is just right every time? Well, it's not as straightforward as it may seem.
There are various factors to consider, from the type of griddle you're using to the batter composition and even the cooking environment.
So, let's dive into the world of pancake griddle temperature and uncover the secrets to mastering the art of pancake perfection.
Key Takeaways
- Preheating the griddle to the ideal temperature of around 375°F (190°C) is important for achieving a golden crust and moist interior in pancakes.
- The consistency of the pancake batter determines the thickness and fluffiness of the pancakes. A slightly thicker batter results in fluffier pancakes, while a thinner consistency produces flatter ones.
- Testing the griddle temperature without a thermometer can be done using methods like the water droplet test, butter melting test, and touch test.
- Different pancake types require different temperature settings, such as medium-high heat for fluffy buttermilk pancakes, lower heat for thin crepes, and slightly higher heat for crispy cornmeal pancakes. Adjusting the temperature based on the specific recipe and desired texture is crucial.
The Science of Pancake Cooking
In pancake cooking, the temperature of the griddle plays a crucial role in achieving the perfect texture and browning of the pancakes. When the griddle is preheated to the right temperature, typically around 375°F (190°C), the batter reacts swiftly, forming a golden crust on the outside while maintaining a soft, moist inside.
Pancake batter consistency is vital for ensuring the ideal thickness and fluffiness of the pancakes. A slightly thicker batter leads to fluffier pancakes, while a thinner consistency produces flatter ones. To achieve the desired consistency, the liquid-to-dry ingredient ratio must be meticulously calibrated.
Flipping technique is another critical aspect of pancake cooking. The key is to wait for the right moment before flipping. Bubbles forming on the surface and the edges starting to look set are indicators that it's time to flip. A swift, yet gentle motion is needed to ensure the pancake doesn't lose its height and fluffiness. The flipping motion should be decisive to avoid any breakage or misshaping of the pancake. Mastering the art of flipping is essential for achieving evenly cooked, perfectly golden-brown pancakes.
Ideal Temperature Range for Pancakes
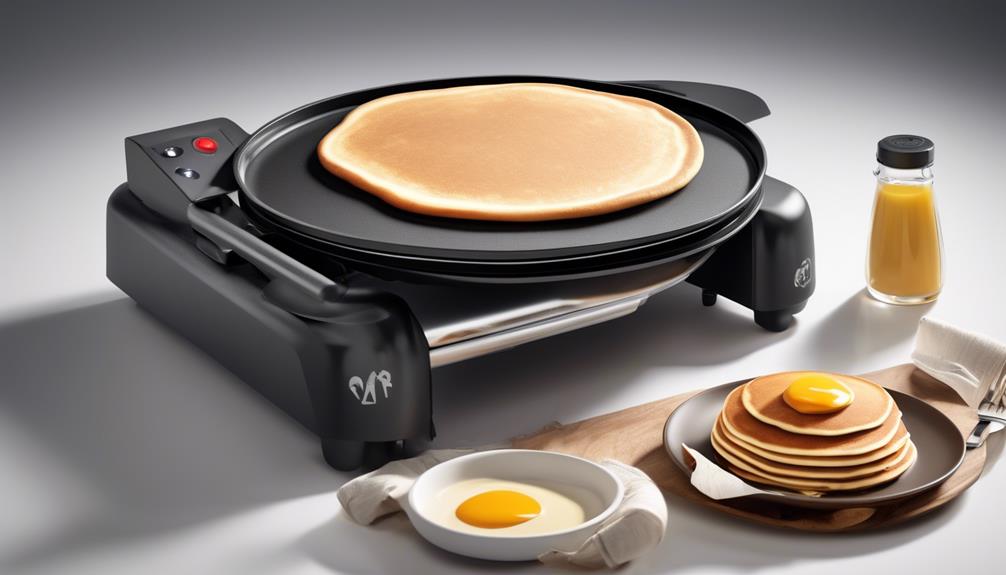
Mastering the ideal temperature range for pancakes is crucial for achieving the perfect texture and browning, which complements the carefully calibrated batter consistency. To attain pancake perfection, it's essential to understand the ideal temperature range for your griddle or pan. Here's what you need to know:
- Initial Heating: Preheat the griddle or pan over medium heat. A temperature of around 350°F (175°C) ensures even cooking without burning the surface of the pancakes.
- Testing Temperature: To test if the griddle is ready, sprinkle a few drops of water onto the surface. If the water sizzles and evaporates quickly, the griddle is at the right temperature for cooking pancakes.
- Adjusting Heat: Maintain a consistent temperature throughout the cooking process. If the pancakes are browning too quickly, reduce the heat slightly. Conversely, if they're taking too long to cook, increase the heat marginally.
- Flipping Techniques: When bubbles form on the surface and the edges appear set, it's time to flip the pancake. Use a flat spatula to ensure a smooth, seamless flip without disturbing the cooking process.
Understanding the ideal temperature range and mastering flipping techniques will elevate your pancake game to new heights.
Importance of Preheating Your Griddle
To achieve optimal cooking results, it's crucial to preheat the griddle thoroughly before starting the pancake-making process. A well-preheated griddle ensures that the pancake batter spreads evenly and cooks consistently, resulting in golden-brown perfection.
The importance of timing can't be overstated when preheating your griddle. It's recommended to preheat the griddle for at least 10-15 minutes before pouring the pancake batter. This allows the entire surface to reach the desired temperature and ensures uniform cooking.
Proper heat control is key to achieving the ideal texture and flavor in your pancakes. Preheating the griddle allows for even distribution of heat, preventing hot spots that can lead to uneven cooking. It also creates a non-stick surface, reducing the need for excessive oil or butter during the cooking process.
Proper heat control during preheating sets the stage for successful pancake making. It enables the batter to cook evenly, prevents sticking, and contributes to the characteristic fluffy texture of well-made pancakes.
Mastering the art of preheating your griddle is essential for consistently delicious pancakes.
Testing Griddle Temperature Without a Thermometer
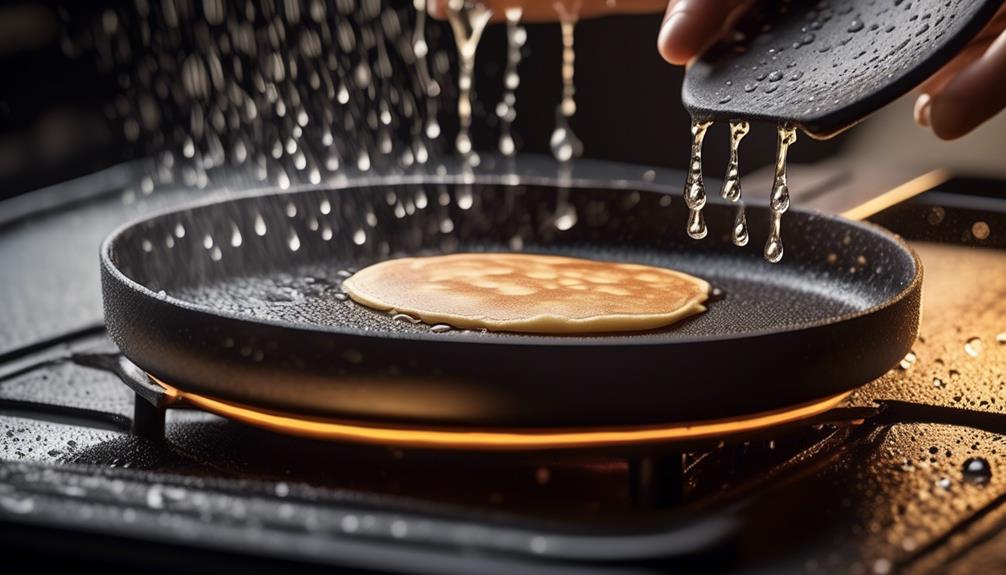
While a thermometer is the most accurate way to measure griddle temperature, you can also test it by sprinkling a few drops of water on the surface and observing their behavior. Here are some testing methods to determine griddle temperature without a thermometer:
- Water Droplet Method: Preheat the griddle and then flick a few drops of water onto the surface. If the water droplets sizzle, dance, and quickly evaporate, the griddle is likely around 375°F, perfect for pancakes. If the water droplets evaporate immediately, the griddle is too hot, and if they just sit there without much sizzle, it's not hot enough.
- Butter Melting Test: Another way to gauge griddle temperature is by placing a small pat of butter on the surface. If the butter melts quickly and evenly, the griddle is at the right temperature for cooking pancakes.
- Visual Cues: Look for visual cues like the color of the griddle surface. A properly preheated griddle usually has a slightly browned surface due to the seasoning or the non-stick coating.
- Touch Test: Carefully touch the griddle surface with a dampened hand. If it sizzles and evaporates immediately, the griddle is ready for cooking.
Using these testing methods can help you achieve the perfect griddle temperature for cooking delicious pancakes.
Adjusting Temperature for Different Pancake Types
When making pancakes, it's crucial to adjust the griddle temperature based on the type of pancake you're preparing. Thin pancakes require a higher temperature for quick cooking, while thick pancakes need a lower temperature to ensure they cook through.
Achieving a fluffy texture and crispy edges also depends on the griddle temperature, so understanding the specific techniques for each type of pancake is essential.
Thin Vs. Thick Pancakes
For thin pancakes, a higher griddle temperature is essential to achieve a quick and even cooking process, while thick pancakes require a lower temperature to ensure thorough cooking without burning the exterior.
When preparing thin pancakes, it's crucial to maintain a consistent batter consistency to ensure the pancakes spread evenly on the griddle. Additionally, mastering the flipping technique is essential to achieve a uniform golden brown color on both sides.
Conversely, when making thick pancakes, a lower griddle temperature prevents the exterior from burning while allowing the inside to cook thoroughly. It's important to pour a thicker batter to achieve the desired thickness and to adjust the cooking time accordingly.
Fluffy Pancake Texture
To achieve the desired fluffy texture in pancakes, adjusting the griddle temperature is crucial, as it directly impacts the cooking process and overall outcome of different pancake types. When aiming for a fluffy texture, it's essential to use a moderate griddle temperature to allow the pancake batter to rise and form air pockets, resulting in a light and airy texture.
Additionally, mastering pancake flipping techniques is key to achieving the perfect flip, ensuring even cooking and maintaining the desired fluffiness.
The choice of cooking oil also plays a significant role in pancake texture. Using oils with a higher smoke point, such as canola or vegetable oil, can contribute to a crispier exterior while maintaining a fluffy interior.
Understanding these factors and making precise adjustments will help in achieving the perfect fluffy pancake texture.
Crispy Edges Technique
Adjusting the griddle temperature is essential for achieving crispy edges on different types of pancakes, allowing for precise control over the texture and browning of the edges. To achieve the perfect crispy texture and edge browning, follow these steps:
- Temperature Adjustment: Set the griddle to a slightly higher temperature than usual, around 375°F to 400°F, to ensure a rapid initial browning without overcooking the center.
- Thinner Batter: Use a thinner batter for your pancakes. This allows the edges to spread out and become crispy while the center cooks evenly.
- Butter Basting: Brush the edges of the pancake with melted butter while cooking to enhance the crispiness and promote even browning.
- Flipping Technique: Flip the pancake only once the edges are golden brown, ensuring that both sides are equally crispy.
Mastering the crispy edges technique requires precision and attention to detail to achieve the perfect balance of texture and flavor.
Tips for Maintaining Consistent Griddle Temp

When it comes to maintaining a consistent griddle temperature, there are a few key points to consider.
We'll discuss heat distribution tips, temperature monitoring tools, and adjusting heat settings to ensure that your griddle stays at the perfect temperature for cooking pancakes.
These tips will help you achieve consistent and delicious results every time you use your griddle.
Heat Distribution Tips
For consistent griddle temperature, it's crucial to evenly distribute heat across the cooking surface. To achieve this, consider the following heat distribution tips:
- Preheat: Ensure the griddle is preheated evenly before cooking to avoid hot spots or uneven cooking.
- Use Proper Utensils: Utilize utensils that conduct heat efficiently to spread it evenly across the griddle surface.
- Manage Heat Zones: Understand the heat distribution zones on your griddle and adjust the cooking position based on the required temperature.
- Rotate and Adjust: Periodically rotate and adjust the position of the food being cooked to ensure even exposure to the griddle surface.
Temperature Monitoring Tools
To ensure consistent griddle temperature, it's essential to monitor and maintain the heat distribution using temperature monitoring tools that complement the heat distribution tips discussed previously.
Temperature control and heat management are crucial for achieving perfect pancakes. One of the most important temperature monitoring tools is a digital thermometer with a probe that can be placed directly on the griddle surface to accurately measure the temperature.
Additionally, infrared thermometers are useful for quickly assessing the temperature of different areas of the griddle. A surface temperature gun can also provide instant readings, allowing for efficient adjustments.
These tools enable precise temperature control, ensuring that the griddle remains at the optimal heat level for cooking pancakes evenly.
Adjusting Heat Settings
We carefully adjust the heat settings on the griddle to maintain a consistent temperature for optimal pancake cooking. Proper heat control is crucial for achieving evenly cooked pancakes.
Here are the key steps for maintaining consistent griddle temperature:
- Preheat the griddle to the desired temperature, typically around 375°F (190°C), and allow it to stabilize before cooking.
- Monitor the temperature using an infrared thermometer or the built-in temperature gauge, making adjustments as needed.
- Adjust the heat settings based on the size and thickness of the pancakes to ensure even cooking.
- Use a consistent cooking time for each side of the pancake, making minor adjustments to the heat settings if necessary to maintain the desired temperature throughout the cooking process.
Common Mistakes and How to Avoid Them
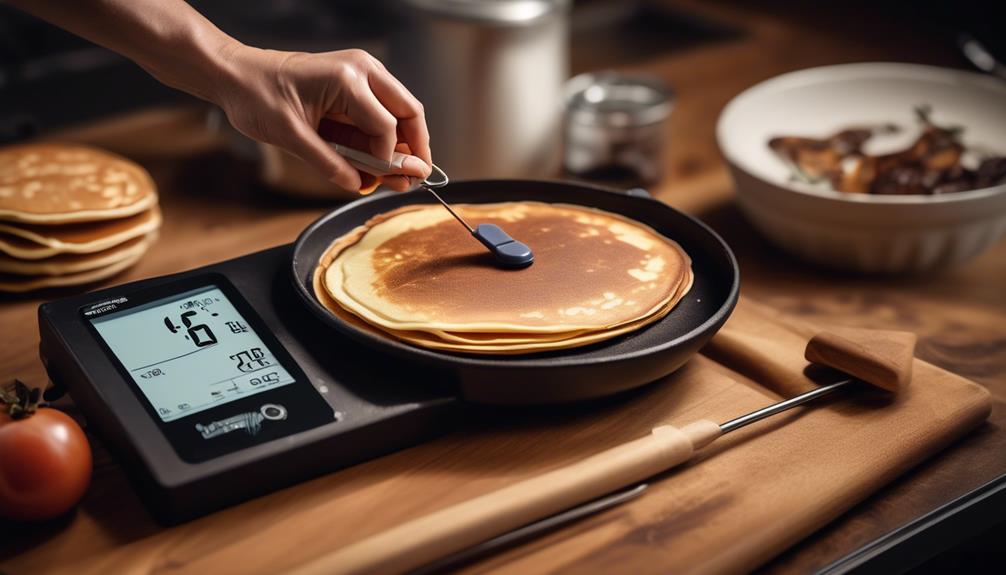
Avoiding common mistakes when using a pancake griddle requires attention to detail and precision in temperature control. One of the most common mistakes is ending up with burnt pancakes. This can happen if the griddle is too hot, causing the pancakes to cook too quickly on the outside while remaining raw on the inside. To avoid this, it's crucial to maintain a consistent and moderate heat level.
Another frequent error is improper flipping technique, which can result in unevenly cooked or misshapen pancakes. To master the art of flipping, use a wide spatula and make sure the pancake is ready to be flipped by checking for bubbles on the surface and a slightly dry edge. When flipping, do so confidently and swiftly, ensuring a smooth transition without disturbing the pancake's shape.
Additionally, avoid repeatedly flipping the pancake, as this can lead to toughening. By paying close attention to temperature control and honing your flipping skills, you can steer clear of these common mistakes and achieve perfectly cooked, golden-brown pancakes every time.
Troubleshooting Uneven Pancake Cooking
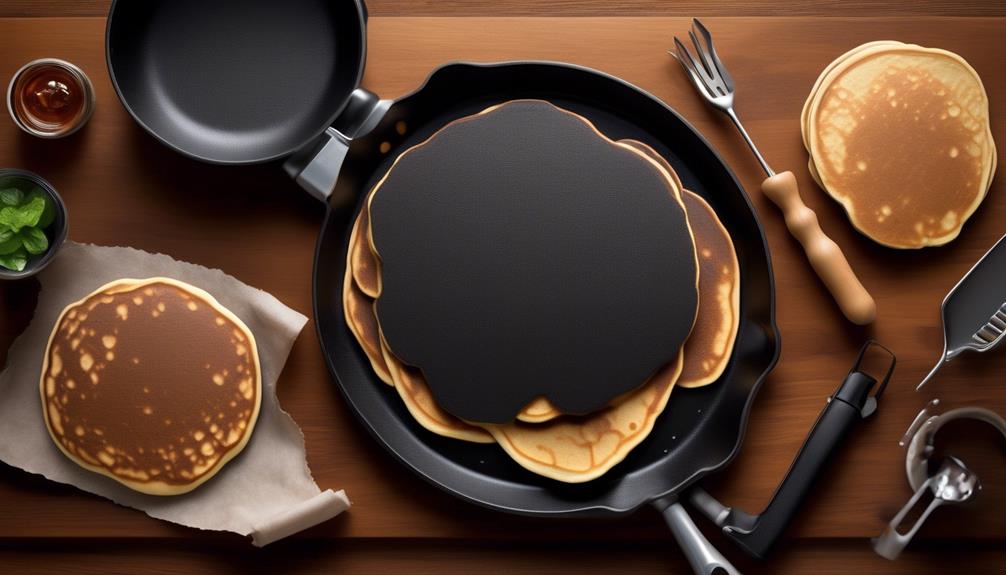
When troubleshooting uneven pancake cooking, ensure that the griddle is evenly preheated to the recommended temperature for optimal and consistent results. Uneven heating can lead to pancakes cooking at different rates, resulting in some being undercooked while others are overcooked. Here are some tips to troubleshoot and improve your pancake cooking:
- Flipping Technique: Master the art of flipping pancakes at the right time to ensure even cooking on both sides. Wait for bubbles to form on the surface, then flip the pancake gently to avoid batter spillage and ensure even browning.
- Batter Consistency: Ensure that the pancake batter is well mixed and has a consistent texture. This will help the pancakes cook evenly without any undercooked spots.
- Using Different Cooking Oils: Experiment with different cooking oils to find the one that best suits your griddle and helps in achieving even browning.
- Flipping Frequency: Avoid flipping the pancakes too often as it can disrupt the cooking process and lead to uneven cooking. Wait for the right time to flip and minimize unnecessary movements.
Frequently Asked Questions
Can I Use a Pancake Griddle Temp for Cooking Other Foods Besides Pancakes?
Yes, a pancake griddle temp is versatile for cooking various foods. It offers precise temperature control for alternative cooking methods.
Griddle temperature is crucial for achieving optimal results when cooking different foods. Its versatility allows us to cook a wide range of dishes such as eggs, bacon, grilled sandwiches, and more.
The temperature control feature ensures that each dish is cooked to perfection, making the griddle a valuable tool in the kitchen.
What Kind of Griddle Should I Use for Making Pancakes?
For making pancakes, the ideal griddle should have a smooth, flat surface to ensure even heat distribution. This is crucial for achieving consistent browning and cooking the pancake batter to the right consistency.
Look for a griddle with a non-stick surface to prevent sticking and aid in flipping the pancakes. Proper heat distribution and a smooth surface are key factors for mastering the art of pancake making.
Can I Use a Regular Frying Pan Instead of a Griddle for Making Pancakes?
Absolutely! Using a regular frying pan for pancakes is totally doable. Just make sure to set the temperature to medium heat to ensure even cooking.
Frying pans can be fantastic alternative cooking surfaces for making pancakes. The even heat distribution and non-stick surface make them perfect for achieving that golden brown perfection.
How Do I Clean and Maintain My Pancake Griddle to Ensure Consistent Temperature?
To maintain temperature consistency, we recommend regularly cleaning your pancake griddle with a non-abrasive cleaner and a soft cloth.
Scrub any residue gently, taking care not to damage the surface.
Use a damp cloth to wipe away the cleaner, and ensure the griddle is completely dry before use.
Regular maintenance will help ensure that your pancake griddle maintains a consistent temperature for perfectly cooked pancakes every time.
What Is the Best Way to Store a Pancake Griddle When Not in Use?
When it comes to storing a pancake griddle, there are a few options to consider. It's important to ensure the griddle is clean and completely dry before storing it.
One option is to store it vertically to save space, while another is to keep it in a protective case or cover.
Regular maintenance tips include checking for any signs of wear and tear and ensuring all parts are in good working condition.
Conclusion
So, as we've learned, maintaining the ideal griddle temperature is crucial for perfect pancakes.
Preheating your griddle, testing the temperature, and adjusting for different pancake types are all key steps in achieving pancake perfection.
But are you ready to take your pancake game to the next level?
With the right temperature and a little practice, you'll be flipping out flawless pancakes every time.
- About the Author
- Latest Posts
Introducing Ron, the home decor aficionado at ByRetreat, whose passion for creating beautiful and inviting spaces is at the heart of his work. With his deep knowledge of home decor and his innate sense of style, Ron brings a wealth of expertise and a keen eye for detail to the ByRetreat team.
Ron’s love for home decor goes beyond aesthetics; he understands that our surroundings play a significant role in our overall well-being and productivity. With this in mind, Ron is dedicated to transforming remote workspaces into havens of comfort, functionality, and beauty.
Appliances
Door Handle Height
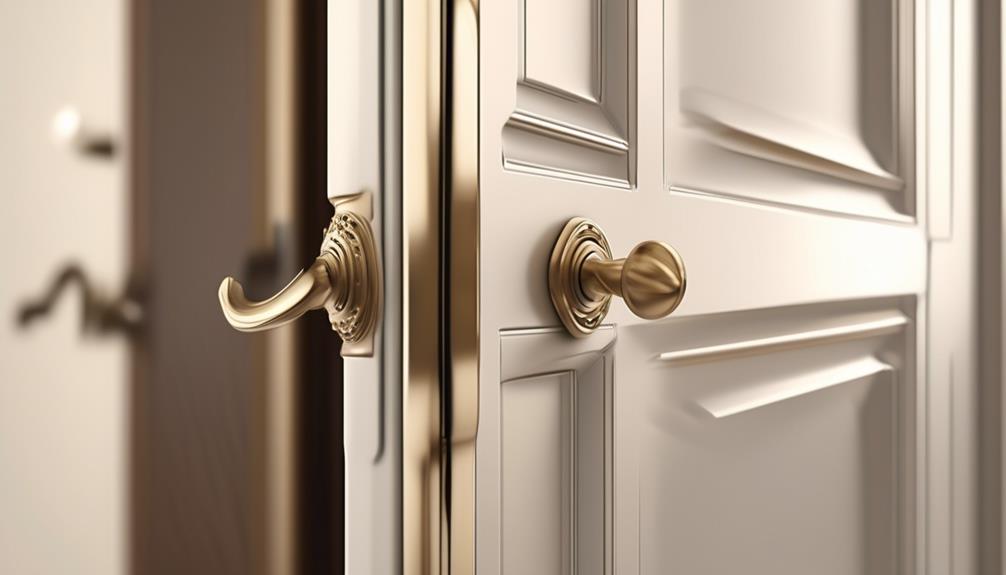
Upon initial inspection, a door handle may appear to be a minor aspect in the overall realm of architecture and design.
However, the height of a door handle can symbolize the broader principles of inclusivity and accessibility within a space.
Have you ever considered the impact that door handle height can have on the comfort and ease of use for individuals of varying ages and abilities?
From the practical implications to the psychological effects, the significance of door handle height extends far beyond mere convenience.
Key Takeaways
- Optimal door handle height ensures accessibility, comfort, and safety.
- Door handle height influences accessibility and convenience.
- Door handle height should consider children's reach, elderly accessibility, and adult ergonomics.
- Ergonomic design and functionality of door handles enhance user experience.
Importance of Optimal Door Handle Height
We believe that setting the optimal door handle height is crucial for ensuring accessibility, comfort, and safety for all individuals who interact with the door. Design aesthetics play a significant role in determining the door handle height. A well-designed handle not only adds to the overall visual appeal of the door but also enhances the user comfort. The handle should be positioned at a height that complements the design of the door while ensuring ease of use for individuals of varying heights and abilities.
Safety concerns are paramount when determining the door handle height. Proper positioning can prevent accidents and injuries by ensuring that the handle is easily reachable without the need for excessive stretching or bending. This is especially important in emergency situations where quick access is critical.
Considering maintenance requirements is also essential. The handle should be placed at a height that reduces the accumulation of dirt and grime, making it easier to clean and maintain. This not only contributes to the door's aesthetic appeal but also ensures its longevity and functionality.
Impact on Accessibility and Convenience

The optimal door handle height not only impacts safety and maintenance but also significantly influences accessibility and convenience for individuals interacting with the door. Design implications arising from the door handle height play a crucial role in ensuring that the door can be easily accessed by a wide range of users, including those with physical limitations.
Functional limitations can be mitigated by carefully considering the placement of the door handle. For instance, a lower door handle can cater to wheelchair users and children, while an ergonomic design can enhance ease of use for all individuals.
Additionally, the convenience of the door handle height is closely tied to the door's overall aesthetic and functionality. A well-placed handle not only enhances the visual appeal of the door but also ensures that it can be effortlessly operated.
Considerations for Different Age Groups
As we consider the door handle height for different age groups, it's crucial to think about children's reach, elderly accessibility, and adult ergonomics.
Ensuring that door handles are at an appropriate height for children can promote independence and safety.
Similarly, adjusting handle height for elderly individuals can enhance accessibility and comfort, while also considering the ergonomic needs of adults for everyday convenience.
Children's Reach
Considering the varying heights at which children can comfortably reach, it's imperative to account for the specific age group when determining the ideal placement of door handles.
For children's safety, accessibility standards should be met to ensure that door handles are easily reachable.
For toddlers and young children, door handles should be placed lower, typically around 28 to 36 inches from the floor, allowing them to access the doors independently.
As children grow, the handle height can be adjusted to accommodate their increasing height and reach.
It's important to consider the ergonomics and aesthetics of the door handle placement, ensuring that it aligns with the overall design while being functional for different age groups.
Elderly Accessibility
Taking into account the varying heights at which children can comfortably reach, we must also consider the accessibility needs of the elderly when determining the ideal placement of door handles.
For elderly comfort, door handles should be positioned at a height that allows for easy and natural access without the need for excessive reaching or bending. Accessibility challenges for the elderly include decreased strength and flexibility, as well as potential mobility issues.
To address these challenges, door handles should be placed at a height that allows for effortless operation, promoting independence and ease of movement. Additionally, the design and aesthetics of the handles should complement the overall environment, providing a sense of elegance while ensuring functionality.
Adult Ergonomics
We carefully consider the ergonomic needs of adults in designing door handle placement, ensuring comfortable and effortless operation for individuals of varying age groups.
In an ergonomic workplace, furniture design plays a crucial role in promoting the well-being of adults.
When designing door handles for adults, we take into account factors such as hand size, grip strength, and range of motion. The handle should be positioned at a height that allows for natural and comfortable use, minimizing strain on the wrist and arm. The shape and texture of the handle are also important, providing a secure grip and tactile feedback.
Additionally, the placement of the handle should facilitate smooth and intuitive operation, enhancing the overall user experience.
Ergonomic Design and User Experience

To enhance the user experience and promote ergonomic design, careful consideration must be given to the placement and functionality of door handles. Ergonomic principles play a crucial role in ensuring user satisfaction when interacting with door handles. The design should accommodate the natural movements of the hand and arm, minimizing strain and discomfort.
Lever-style handles, for instance, are often preferred over traditional doorknobs because they're easier to operate, especially for individuals with limited hand strength or mobility. The height at which the handle is installed also significantly impacts user experience. It should be positioned at a height that allows for effortless operation without requiring excessive bending or reaching.
Additionally, the material and texture of the handle should be carefully chosen to provide a comfortable grip and tactile feedback. Aesthetically, the design of the handle should complement the overall style of the door and its surroundings, creating a cohesive and visually appealing environment.
Ultimately, a well-designed door handle not only enhances the functionality of the door but also contributes to the overall ergonomic and aesthetic experience for the user.
Inclusive Environments and Universal Design

Considering the importance of ergonomic design and user experience, creating inclusive environments and incorporating universal design principles becomes essential for ensuring accessibility and usability for all individuals. Designing for all requires adhering to accessibility standards and considering the diverse needs of people. Universal design is not just about complying with regulations; it's about going beyond to create spaces and products that are functional and aesthetically pleasing for everyone, regardless of age, size, ability, or disability.
| Principles of Universal Design | Description |
|---|---|
| Equitable Use | The design is useful and marketable to people with diverse abilities. |
| Flexibility in Use | The design accommodates a wide range of individual preferences and abilities. |
| Simple and Intuitive Use | Use of the design is easy to understand, regardless of the user's experience, knowledge, language skills, or current concentration level. |
Inclusive environments and universal design principles are about maximizing the usability of spaces and products while minimizing barriers and exclusion. By considering the diverse needs of individuals, we can create environments that are not only accessible but also aesthetically pleasing and practical for everyone.
Factors Influencing Ideal Door Handle Height
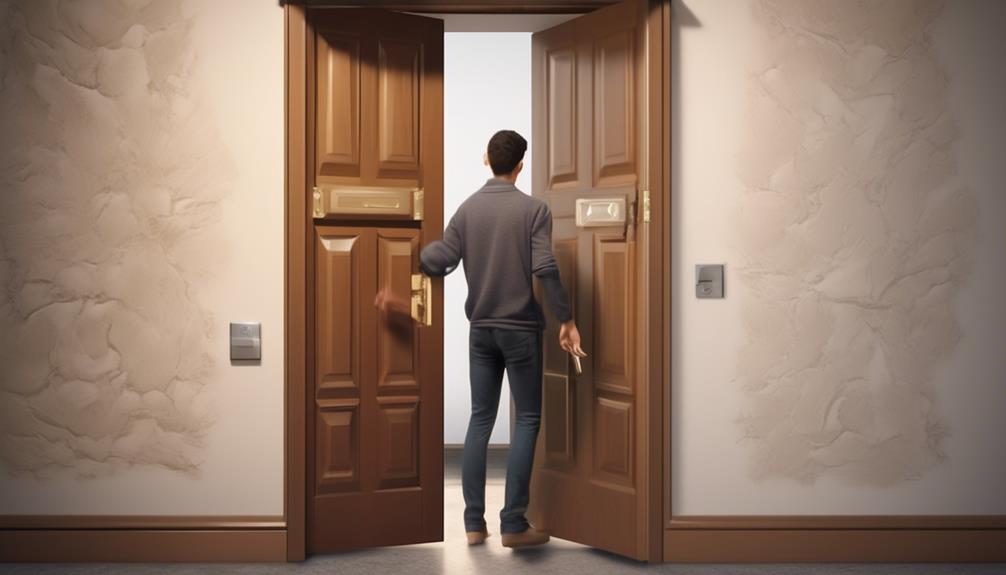
When determining the ideal height for door handles, it's crucial to consider ergonomic factors and the diverse needs of potential users. Factors such as architectural standards and interior design principles play a significant role in determining the best height for door handles.
Architectural standards provide guidelines for door handle height, taking into account factors such as building codes and accessibility requirements. These standards ensure that door handle height meets the needs of individuals with varying abilities and mobility challenges.
In addition to architectural standards, interior design principles also influence the ideal door handle height. Interior design considers the aesthetic appeal and functionality of door handles within a space. The placement of door handles is crucial in maintaining a cohesive design while ensuring ease of use for occupants.
Considering these factors, the ideal height for door handles should align with both architectural standards and interior design principles. This approach ensures that door handles aren't only accessible and functional but also contribute to the overall aesthetic of the space.
Achieving the ideal door handle height involves a thoughtful balance between ergonomic considerations, architectural standards, and interior design principles.
Practical Applications and Installation Considerations

As we explore practical applications and installation considerations for door handles, it's essential to ensure that the chosen height aligns with both architectural standards and interior design principles. When installing door handles, there are various factors to consider, including installation challenges and maintenance requirements. To assist in the decision-making process, we have compiled a table outlining these considerations.
| Consideration | Description |
|---|---|
| Installation Height | The standard height for door handle installation is typically 34 to 48 inches above the finished floor, ensuring accessibility and usability. |
| Hand Orientation | Consider the orientation of the door swing and the user's dominant hand to determine the most practical placement for the handle. |
| Maintenance Needs | Choose durable materials and finishes that can withstand frequent use and exposure to environmental factors, minimizing maintenance requirements. |
Installation challenges may arise from non-standard door sizes, intricate hardware, or specific architectural features. Moreover, maintenance requirements should be considered when selecting materials and finishes to ensure longevity and ease of care. By carefully addressing these practical considerations, the installation of door handles can seamlessly integrate functionality and aesthetic appeal within any space.
Frequently Asked Questions
What Are the Historical Reasons Behind the Standard Door Handle Height and How Has It Evolved Over Time?
We've studied the historical evolution of ergonomic design, tracing the development of standard door handle height over time. This has provided valuable insight into the factors influencing the design and functionality of door handles.
Our research has shed light on the practical and aesthetic considerations that have shaped the standard door handle height, offering a comprehensive understanding of this often-overlooked aspect of interior design.
Are There Any Cultural or Regional Differences in Preferred Door Handle Heights?
Cultural influences can significantly impact design preferences. Ergonomic design, in particular, varies across cultures and regions. Understanding these differences is crucial for creating products that meet diverse needs.
How Does the Material and Texture of the Door Handle Impact Its Usability for Different Individuals?
Material impact and texture usability are crucial factors in door handle design. The choice of material affects the handle's durability and maintenance, while the texture can enhance grip and comfort.
For instance, a smooth metal handle may be sleek but slippery, posing usability issues for some individuals. Conversely, a textured rubber handle could provide better grip and usability, especially for those with mobility challenges.
Considering these aspects ensures a well-designed, functional door handle for all.
Can the Color and Visibility of the Door Handle Affect Its Accessibility for People With Visual Impairments?
Color contrast and visibility are crucial for people with visual impairments. Tactile indicators and ergonomic design enhance accessibility.
Imagine a door handle as a beacon, guiding us through a sea of visual information. We consider color combinations, ensuring high contrast for easy identification.
Tactile indicators provide additional guidance, making the handle easily locatable by touch.
Ergonomic design ensures comfort and ease of use for all.
What Are the Maintenance and Cleaning Considerations for Door Handles at Different Heights?
When it comes to maintenance, durability, and cleaning of door handles at different heights, it's essential to consider accessibility, usability, and visibility.
We prioritize regular inspections for wear and tear, ensuring that all handles are clean and well-maintained.
Durability is key, so we opt for high-quality materials.
Cleaning routines are tailored to each handle's location and use, ensuring both functionality and aesthetic appeal.
Conclusion
After all, who needs a door handle that's actually accessible and convenient? Let's just keep making them at random heights and watch people struggle to open doors.
It's not like different age groups or people with disabilities have different needs, right? Who cares about ergonomic design and user experience anyway?
Let's just stick to the status quo and ignore the importance of inclusive environments and universal design.
It's not like we want everyone to feel welcome and comfortable, right?
- About the Author
- Latest Posts
Introducing Ron, the home decor aficionado at ByRetreat, whose passion for creating beautiful and inviting spaces is at the heart of his work. With his deep knowledge of home decor and his innate sense of style, Ron brings a wealth of expertise and a keen eye for detail to the ByRetreat team.
Ron’s love for home decor goes beyond aesthetics; he understands that our surroundings play a significant role in our overall well-being and productivity. With this in mind, Ron is dedicated to transforming remote workspaces into havens of comfort, functionality, and beauty.
Appliances
How Long Does Carpet Last

As you walk through a house, you can almost feel the softness of the carpet under your feet, imagining the cozy comfort it offers. However, have you ever paused to think about how long that carpet will endure?
It's a question that often lingers in the back of our minds, especially when we start to notice signs of wear and tear. Understanding the factors that contribute to the longevity of carpet can help us make informed decisions about maintenance, replacement, and ultimately, the overall lifespan of this essential home feature.
Key Takeaways
- Regular vacuuming and professional cleaning are essential for maintaining carpet longevity.
- Different carpet fiber types, such as nylon, polyester, polypropylene, and wool, have unique characteristics and maintenance requirements.
- Choosing high-quality, durable materials can enhance the carpet's ability to withstand environmental stressors.
- Maintenance significantly extends the lifespan of carpets by preventing damage and preserving their appearance.
Factors Affecting Carpet Longevity
We have found that regular vacuuming and professional cleaning are essential for maintaining the longevity of carpets.
Additionally, understanding the different carpet fiber types is crucial for ensuring the durability of your flooring. Carpets can be made from various materials such as nylon, polyester, polypropylene, and wool, each with its own unique characteristics and maintenance requirements.
It's important to consider the environmental impact of these different fiber types as well. For instance, wool carpets are biodegradable and renewable, making them a more sustainable choice compared to synthetic fibers.
Moreover, the environmental impact extends beyond just the fiber type. The manufacturing process, transportation, and eventual disposal of carpets all contribute to their overall ecological footprint.
By choosing carpets made from recycled materials or opting for eco-friendly production methods, such as low-energy manufacturing or water conservation practices, we can minimize the environmental impact of carpeting.
Understanding the intricacies of carpet fiber types and their environmental implications empowers us to make informed decisions that not only prolong the lifespan of our carpets but also reduce their ecological footprint.
Carpet Material and Quality

Carpet material and quality play a crucial role in determining the longevity and performance of flooring, with factors such as fiber type, density, and manufacturing processes directly influencing its durability and resilience. The choice of carpet material significantly impacts its longevity. For instance, wool carpets are known for their durability and natural soil resistance, while nylon carpets offer exceptional resilience and stain resistance. Additionally, the quality of the carpet, which encompasses factors such as the density of fibers and the manufacturing processes employed, greatly influences its ability to withstand wear and tear. Carpets with higher density tend to be more durable due to the increased amount of yarn in a given area, providing better support for the carpet pile. Moreover, manufacturing processes that prioritize quality, such as tightly twisting the fibers and applying advanced stain-resistant treatments, contribute to the overall longevity of the carpet.
| Carpet Material | Durability | Quality |
|---|---|---|
| Wool | High | Excellent |
| Nylon | Excellent | Good |
| Polyester | Moderate | Fair |
Impact of Maintenance on Carpet Lifespan
Regular and thorough maintenance significantly extends the lifespan of carpets by preventing the accumulation of dirt and preserving the integrity of the fibers. Regular vacuuming is essential for removing surface dirt, dust, and allergens that can damage carpet fibers over time. It also helps to prevent matting and crushing of the carpet pile, which can make the carpet look worn and tired. Vacuuming should be done at least once a week in low-traffic areas and more frequently in high-traffic areas.
In addition to regular vacuuming, professional deep cleaning is crucial for maintaining the longevity of carpets. Professional cleaning removes embedded dirt, stubborn stains, and allergens that regular vacuuming may not effectively eliminate. This deep cleaning process also helps to rejuvenate the carpet fibers, restoring their texture and appearance. Professional deep cleaning should be performed at least once a year, or more frequently in high-traffic areas or households with pets.
Understanding Carpet Usage Patterns
We must consider the wear and tear that carpets endure over time, as well as the specific traffic patterns within a given space. These usage patterns directly impact the overall lifespan of the carpet and influence the need for maintenance and cleaning.
Understanding the frequency of cleaning required in high-traffic areas is essential for preserving the quality and durability of the carpet.
Wear and Tear
Analyzing the wear and tear on carpet involves observing the distribution of foot traffic and identifying high-traffic areas. This helps in understanding how the carpet is being used and where the most stress is being placed.
Key points to consider when assessing carpet wear and tear:
- Foot traffic patterns: Regularly used pathways and areas where people often stand, such as in front of furniture or entryways, are prone to more wear and tear.
- Furniture placement: Heavy furniture can cause localized stress on the carpet, leading to premature aging and wear.
- Spills and stains: Areas with frequent spills or stains may have hidden damage, such as mold or mildew growth underneath the carpet.
- Sunlight exposure: Carpets in areas with prolonged exposure to sunlight can experience fading and deterioration.
Understanding these usage patterns is crucial for maintaining and extending the lifespan of the carpet.
Traffic Patterns
Understanding carpet usage patterns involves closely observing the distribution of foot traffic and identifying high-traffic areas to determine the impact of usage on the carpet's lifespan. Wear patterns, such as those caused by repetitive footsteps in specific areas, can significantly affect the longevity of the carpet.
High traffic areas, like hallways, entryways, and main living spaces, are particularly prone to wear patterns due to the constant flow of people. These areas often show visible signs of wear, including flattened or frayed carpet fibers.
By monitoring traffic patterns, we can anticipate and address wear and tear more effectively. Implementing preventative measures, such as using rugs or runners in high traffic zones, can help distribute the impact of foot traffic and prolong the life of the carpet.
Understanding and managing traffic patterns is crucial for maximizing the lifespan of your carpet.
Cleaning Frequency
Monitoring traffic patterns allows us to determine the optimal cleaning frequency necessary to maintain the carpet's longevity and appearance. Understanding household habits is crucial in establishing an effective cleaning schedule. Here are key points to consider:
- High Traffic Areas: Identify and focus on cleaning areas that receive the most foot traffic.
- Regular Vacuuming: Implement a routine vacuuming schedule to prevent dirt and debris from settling into the carpet fibers.
- Professional Services: Engage professional cleaning services at least once a year to ensure a thorough deep clean.
- Maintenance Benefits: Regular cleaning not only preserves the carpet's appearance but also extends its lifespan, reducing the need for premature replacement.
Signs of Wear and Tear

As carpets age, they may exhibit visible signs of wear and tear, such as matting, discoloration, and fraying along the edges. Color fading is a common occurrence in carpets, particularly in areas that are exposed to direct sunlight or high foot traffic. Over time, the vibrant hues of the carpet can gradually lose their intensity, resulting in a dull and faded appearance. This can be particularly noticeable in carpets made from natural fibers or those with darker colors.
Additionally, fraying edges are a clear indicator of a carpet's deteriorating condition. This typically occurs in high-traffic areas or places where the carpet meets a hard surface, such as near doorways. The constant friction and pressure can cause the carpet fibers to unravel and fray, leading to a ragged and unkempt appearance.
Furthermore, matting, which is the flattening and compression of carpet fibers, can result from heavy furniture or repetitive foot traffic. Matting can create an uneven and worn-out look, diminishing the overall aesthetic appeal of the carpet.
These visible signs of wear and tear serve as critical indicators of a carpet's age and condition, prompting the need for appropriate maintenance or replacement.
Professional Carpet Cleaning Benefits
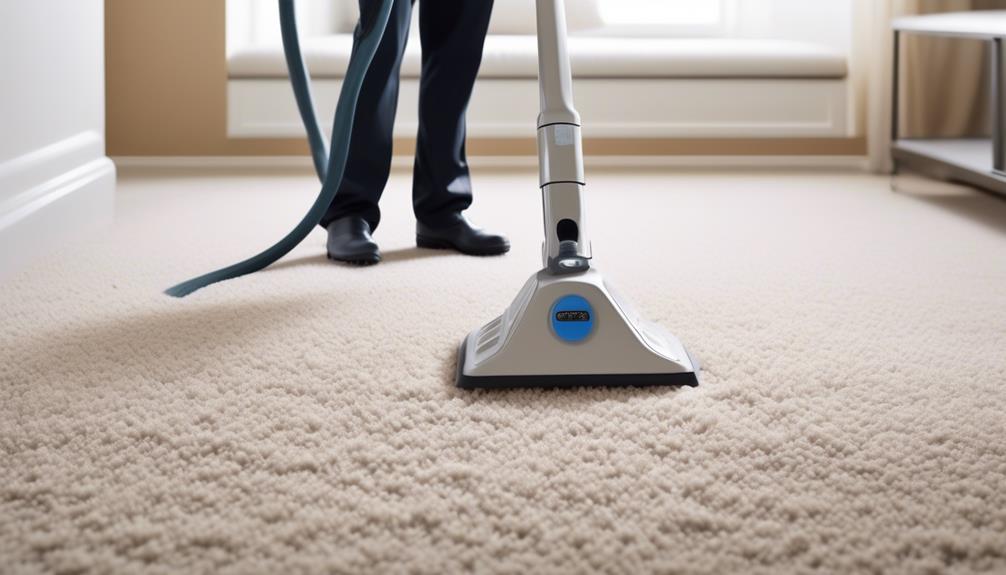
Regular professional carpet cleaning offers multiple benefits for both the longevity of your carpet and the quality of your indoor air.
Firstly, by removing deep-seated dirt, dust, and allergens, professional cleaning helps to maintain the integrity of the carpet fibers. This prevents premature wear and tear, ensuring that your carpet lasts longer.
Secondly, professional cleaning eliminates odors that may be trapped in the carpet fibers. This not only makes your carpet smell fresher but also contributes to a healthier indoor environment by removing any lingering smells that could potentially cause discomfort or allergies.
Lastly, professional cleaning enhances the overall appearance of your carpet. By removing stains and restoring the carpet's original color, it helps to make your carpet look cleaner and more aesthetically pleasing. This, in turn, contributes to a more inviting and enjoyable indoor space.
Extended Carpet Lifespan
To ensure the extended lifespan of your carpet, professional cleaning services provide numerous benefits that contribute to the maintenance and preservation of its quality and appearance. Professional carpet cleaning offers several advantages that significantly impact the longevity and sustainability of your carpets:
- Deep Cleaning: Professional services utilize advanced techniques to remove embedded dirt, allergens, and stains, which regular vacuuming can't effectively address.
- Fiber Protection: Specialized cleaning solutions and treatments help protect carpet fibers from wear and tear, maintaining their resilience and appearance over time.
- Prevention of Mold and Bacteria: Thorough cleaning inhibits the growth of mold, mildew, and bacteria, which can deteriorate carpet fibers and pose health risks.
- Enhanced Air Quality: Clean carpets contribute to improved indoor air quality by reducing the presence of allergens and pollutants, benefiting the overall health and well-being of occupants.
Improved Indoor Air Quality
Our professional carpet cleaning services utilize advanced techniques to thoroughly remove allergens and pollutants, contributing to a noticeable improvement in indoor air quality. By eliminating dust mites, pet dander, pollen, and other allergens that accumulate in carpets over time, our cleaning process significantly reduces the presence of airborne particles that can affect respiratory health.
This allergen reduction leads to improved air circulation within the indoor environment, creating a fresher and healthier atmosphere for inhabitants. Moreover, our meticulous cleaning methods remove trapped pollutants, such as dirt, dust, and insect feces, which can compromise air quality.
With improved indoor air quality, individuals can experience reduced allergy symptoms and respiratory issues, making our professional carpet cleaning an essential element in maintaining a healthy living space.
DIY Carpet Maintenance Tips
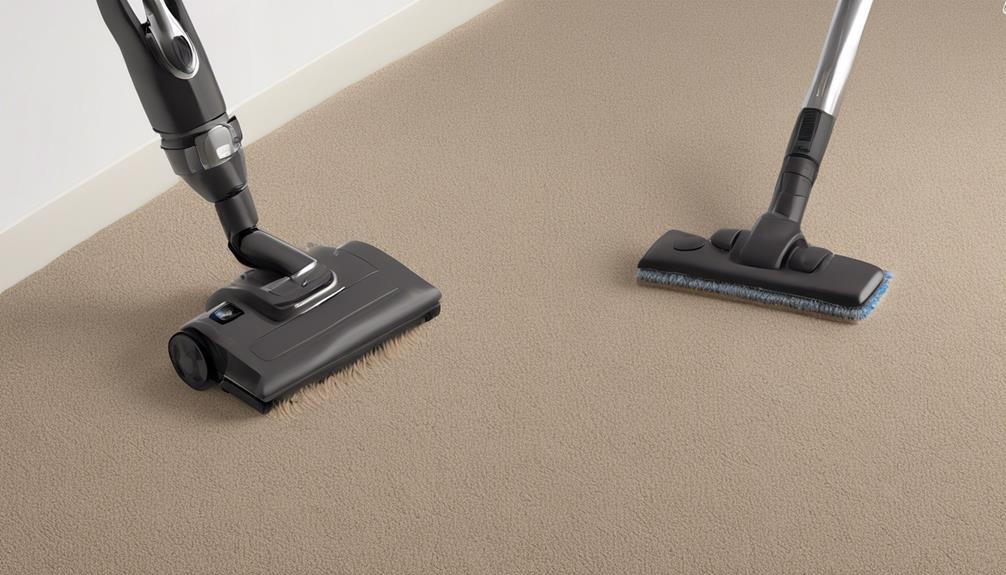
Implementing a routine carpet maintenance plan is essential for prolonging the lifespan of your carpet and preserving its appearance and functionality. To ensure your carpet stays in top condition, consider these DIY carpet maintenance tips:
- Regular Vacuuming: Vacuuming at least once a week helps remove dirt, dust, and debris that can damage carpet fibers and cause discoloration.
- Immediate Stain Removal: Promptly address any spills or stains using a carpet stain remover. Blot the affected area gently to prevent the stain from setting.
- Deep Cleaning: Schedule deep cleaning sessions every 12-18 months to remove embedded dirt and grime. Consider using a carpet cleaning machine or hire professional services for this task.
- Odor Control: Combat carpet odors by sprinkling baking soda before vacuuming. Additionally, ensure proper ventilation and consider using carpet deodorizers sparingly.
Adhering to these maintenance practices won't only extend the life of your carpet but also contribute to a healthier indoor environment. Regular upkeep is key to preventing permanent damage and maintaining the aesthetic appeal of your carpet.
Protective Measures for High-Traffic Areas

In high-traffic areas, it's crucial to employ protective measures that can effectively mitigate wear and tear on the carpet. Rug protection is essential in preserving the lifespan of carpets in such areas. One effective method is the use of area rugs or runners to cover the most heavily trafficked sections. These rugs act as a barrier, absorbing much of the impact and reducing direct contact between foot traffic and the carpet fibers.
Additionally, the strategic placement of entry mats at all entrances can significantly reduce the amount of dirt and debris that reaches the carpet, thus minimizing abrasive damage and soiling.
Furthermore, floor covering maintenance plays a vital role in the preservation of high-traffic carpeted areas. Regular vacuuming is essential to prevent the accumulation of dirt and grit that can accelerate wear. In addition to routine vacuuming, professional cleaning should be scheduled at regular intervals to deep clean and rejuvenate the carpet fibers. This proactive approach not only maintains the carpet's appearance but also extends its overall lifespan.
Environmental Influences on Carpet Longevity

Environmental factors significantly impact the longevity of carpets. Exposure to sunlight, humidity, and air pollutants can deteriorate carpet fibers over time.
Sunlight: Prolonged exposure to sunlight can cause fading and weaken the carpet fibers. Ultraviolet radiation breaks down the chemical bonds in the carpet fibers, leading to color loss and reduced structural integrity.
Humidity: High levels of humidity can promote mold and mildew growth. This not only affects the appearance of the carpet but also weakens the fibers. Additionally, excessive moisture can lead to delamination, where the carpet layers separate, causing irreversible damage.
Air Pollutants: Pollutants such as dust, dirt, and airborne particles can accumulate in the carpet fibers, causing abrasion and fiber damage over time. Chemical pollutants can also react with the carpet materials, accelerating degradation.
Material durability plays a critical role in mitigating the environmental impacts on carpet longevity. Choosing high-quality, durable materials can enhance the carpet's ability to withstand environmental stressors, thus prolonging its lifespan.
Regular maintenance and proper cleaning routines are also essential in combating the detrimental effects of environmental factors on carpet longevity.
Effective Stain Prevention
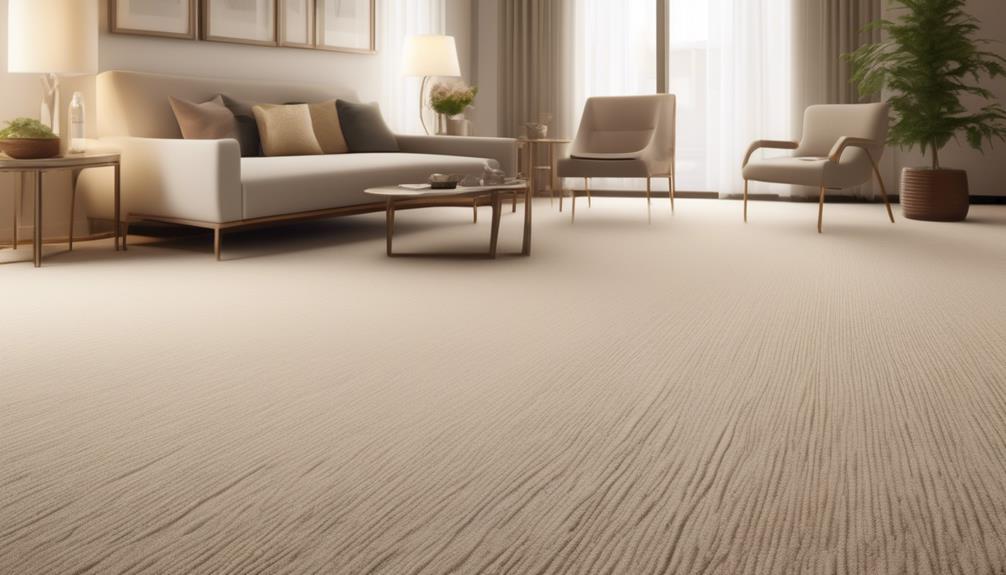
To effectively prevent stains on carpets, it's imperative to apply a quality stain-resistant treatment during the manufacturing process, ensuring a protective barrier against spills and soiling. Stain-resistant treatments, such as fluorocarbon or other protective coatings, can be applied to carpet fibers to repel liquids and prevent them from being absorbed. These treatments form a shield around the fibers, making it easier to clean up spills before they have a chance to set in and become stains.
In addition to stain-resistant treatments, regular vacuuming techniques play a crucial role in preventing stains on carpets. Vacuuming removes dirt and debris that can attract and hold onto stains, preventing them from becoming deeply embedded in the carpet fibers. It's recommended to use a vacuum cleaner with a rotating brush or beater bar to effectively lift and remove debris from the carpet.
Furthermore, vacuuming high-traffic areas and spots where spills are more likely to occur can significantly reduce the risk of stains.
Carpet Replacement Considerations

When considering the lifespan of a carpet, it's crucial to assess various factors that can impact its longevity.
The cost of replacement and the timing for installing new carpet are essential considerations in ensuring a smooth transition.
Understanding these points will help homeowners make informed decisions about when and how to replace their carpet.
Carpet Lifespan Factors
Considering the heavy foot traffic and regular wear and tear, the durability of the carpet heavily influences our replacement considerations. Factors impacting carpet durability include:
- Fiber type: The type of fiber used in the carpet, such as nylon, polyester, or wool, greatly affects its longevity and resilience.
- Maintenance and cleaning: Regular vacuuming, professional cleaning, and prompt stain removal can significantly extend the lifespan of the carpet.
- Padding quality: High-quality padding provides better support for the carpet, reducing wear and tear from foot traffic and furniture.
- Installation: Proper installation, including stretching and securing the carpet correctly, ensures its durability over time.
Understanding these factors is crucial for maximizing the lifespan of the carpet and making informed decisions about replacement.
Cost of Replacement
Exploring the longevity of the carpet, understanding the cost of replacement is a crucial aspect of informed decision-making regarding carpet durability and maintenance. When considering the cost of replacement, it's essential to compare the prices of different carpet types and the associated installation process. Below is a cost comparison table to provide a general overview of the replacement expenses for different carpet types.
| Carpet Type | Cost (per square foot) | Installation Process |
|---|---|---|
| Nylon | $2.50 – $6.00 | Professional installation recommended |
| Polyester | $1.50 – $3.50 | DIY or professional installation options |
| Wool | $5.00 – $10.00 | Professional installation recommended |
Understanding the cost comparison and the installation process can help make an informed decision when replacing your carpet.
Timing for New Carpet
In our experience, timely replacement of carpets is essential for maintaining a fresh and inviting atmosphere in any space. When considering the timing for new carpet, several factors come into play to ensure optimal results:
- Wear and Tear: Regular foot traffic and use can lead to visible signs of wear, such as matting or fraying.
- Stains and Spills: Despite regular cleaning, persistent stains and spills can detract from the overall appearance of the carpet.
- Allergen Accumulation: Over time, carpets can accumulate allergens, dust, and other particles, impacting indoor air quality.
- Style and Design Updates: As interior trends evolve, updating carpets can enhance the aesthetic appeal and overall ambiance of a room.
Understanding these longevity factors is crucial in determining the appropriate timing for carpet replacement.
Prolonging Carpet Lifespan
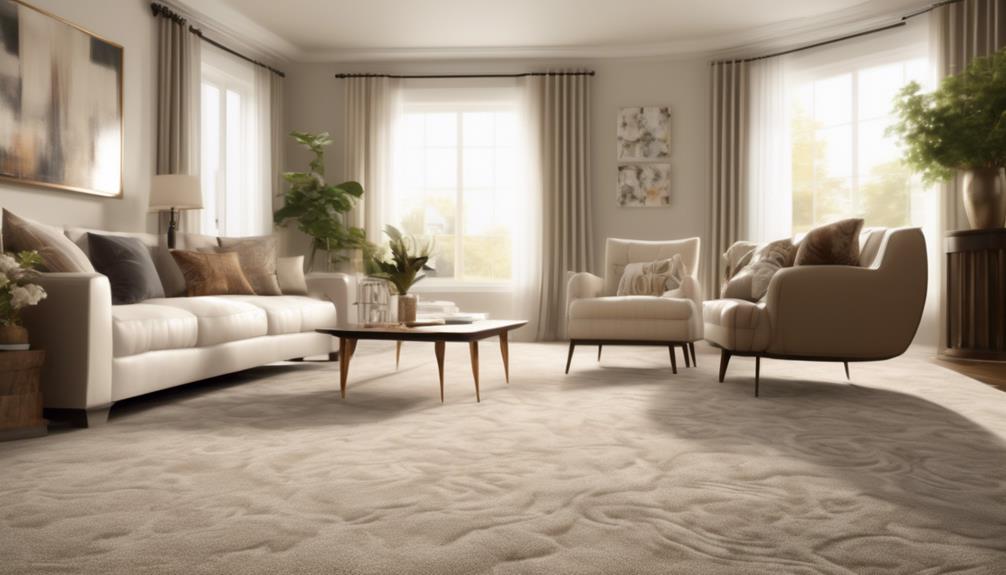
To extend the lifespan of your carpet, it's essential to implement proper maintenance and cleaning techniques. Stain prevention is a crucial aspect of carpet care. Utilize stain-resistant treatments and promptly clean up any spills to prevent them from setting into the fibers. Regular vacuuming is also key to preventing dirt and debris from becoming ground into the carpet, which can lead to staining over time. Additionally, consider placing rugs or mats in high-traffic areas to provide an extra layer of protection for the carpet. High traffic protection can significantly reduce wear and tear.
In addition to regular cleaning and stain prevention, professional carpet cleaning is vital for prolonging its lifespan. Deep cleaning by a professional can remove deeply embedded dirt and allergens that regular vacuuming and cleaning may miss. This not only enhances the appearance of the carpet but also helps maintain its structural integrity.
Furthermore, it's important to follow the manufacturer's guidelines for care and maintenance to ensure that the carpet remains in top condition. By implementing these maintenance and cleaning techniques, you can significantly prolong the lifespan of your carpet and keep it looking fresh for years to come.
Is the Longevity of Carpet Dependent on Replacement Frequency?
The longevity of carpet depends on how often to replace carpet. Frequent replacements can extend its lifespan, ensuring a fresh look and maintaining its quality. Consulting with a professional can help determine the ideal replacement frequency based on usage and foot traffic.
Frequently Asked Questions
Can I Use the Same Carpet in Different Areas of My Home With Varying Levels of Foot Traffic?
We can use the same carpet in different areas of our home with varying levels of foot traffic, but it's important to consider carpet durability and colorfastness.
High traffic areas may require a more resilient and stain-resistant carpet, while low traffic areas can accommodate a softer and more luxurious option.
It's essential to choose a carpet that can withstand the wear and tear of each specific area while maintaining its appearance over time.
Are There Any Specific Carpet Maintenance Techniques for Households With Pets?
When dealing with pet shedding, cleaning becomes a crucial aspect of carpet maintenance. Regular vacuuming with a high-quality vacuum cleaner designed for pet hair removal is essential.
Additionally, using enzymatic cleaners can help control odors and prevent stains caused by pet accidents. It's important to address any accidents promptly to prevent them from seeping into the carpet fibers.
Following these techniques can help maintain a clean and fresh carpet in households with pets.
How Does Humidity and Climate Affect the Longevity of Carpet?
Climate and humidity play significant roles in the durability of carpet. Proper installation and maintenance are crucial to combating the adverse effects of fluctuating moisture levels.
Humidity can lead to mold and mildew, affecting carpet longevity. In high-humidity regions, carpets may experience faster wear and tear.
Understanding the impact of climate and humidity on carpet is essential for ensuring its longevity. It's important to consider these factors when selecting and maintaining carpet in different environments.
Is It Possible to Extend the Lifespan of Older Carpet Through Repairs or Restorations?
We've found that extending the lifespan of older carpet is possible through strategic interventions. Carpet patching and stretching can target specific areas of wear and tear, while professional cleaning and reconditioning can revitalize the entire carpet.
These techniques not only enhance longevity but also improve the overall appearance and functionality. It's like giving an old masterpiece a new frame and a fresh coat of varnish, preserving its beauty for years to come.
What Impact Does Furniture Placement and Rearranging Have on Carpet Wear and Tear?
Furniture placement and rearranging can significantly impact carpet wear and tear. Constant foot traffic and varying levels of humidity in pet households can affect carpet longevity. Maintenance techniques and climate effects play a role in preserving carpets.
Regular rearranging can help distribute wear more evenly. Proper maintenance, like regular cleaning and timely repairs, can extend the lifespan of carpets. Understanding these factors is essential for mastering carpet care.
Conclusion
In conclusion, a carpet's lifespan is like a well-tended garden, requiring careful nurturing and maintenance to thrive.
By understanding the factors that affect longevity, implementing effective maintenance strategies, and being mindful of usage patterns and environmental influences, one can prolong the life of their carpet.
Just as a gardener tends to their plants, we must tend to our carpets to ensure they flourish for years to come.
- About the Author
- Latest Posts
Introducing Ron, the home decor aficionado at ByRetreat, whose passion for creating beautiful and inviting spaces is at the heart of his work. With his deep knowledge of home decor and his innate sense of style, Ron brings a wealth of expertise and a keen eye for detail to the ByRetreat team.
Ron’s love for home decor goes beyond aesthetics; he understands that our surroundings play a significant role in our overall well-being and productivity. With this in mind, Ron is dedicated to transforming remote workspaces into havens of comfort, functionality, and beauty.
-

 Vetted5 days ago
15 Best Printers of 2024: Top Picks and Expert Reviews
-
 Vetted7 days ago
15 Best Tile Sealers for Long-Lasting Protection and Shine
-

 Vetted2 weeks ago
15 Best Smelling Floor Cleaners That Will Leave Your Home Fresh and Inviting
-
 Vetted1 week ago
14 Best Power Scrubbers for Showers That Will Transform Your Cleaning Routine
-

 Vetted2 days ago
15 Best LED Dimmer Switches With No Flicker: Ultimate Guide for a Flicker-Free Lighting Experience
-

 Vetted2 days ago
15 Best Evergreen Plants for Shade Gardens: A Complete Guide
-

 Mardi Gras Decoration4 days ago
What Do the Symbols of Mardi Gras Mean?
-

 Appliances7 days ago
5 Best Energy-Efficient Stainless Steel Fridges 2023


