Decor
10 Stunning White Houses With Brick Accents
Yearning for a timeless and sophisticated exterior design?
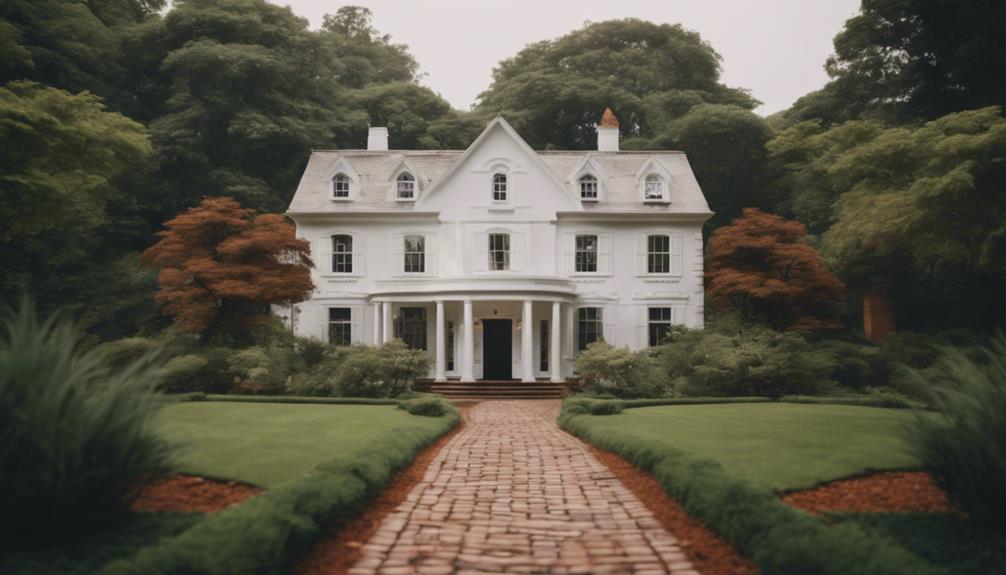
We've curated a collection of stunning white houses that seamlessly integrate brick accents, showcasing a timeless and versatile design aesthetic. From classic colonial revivals to modern farmhouse styles, these homes demonstrate the elegance and sophistication that brick accents can bring to a white exterior. Whether you're drawn to rustic charm, coastal cottage style, or traditional estate homes, these stunning examples highlight the benefits of combining white and brick. With their timeless appeal, low maintenance, and versatility in architectural styles, it's no wonder white houses with brick accents are a popular choice. Explore further to discover the endless possibilities.
Key Takeaways
• White houses with brick accents offer a timeless and sophisticated exterior design that exudes elegance and refinement.
• Strategic use of brick accents adds texture, depth, and visual interest to the exterior, enhancing curb appeal and property value.
• White brick accents complement various architectural styles and color schemes, making them suitable for traditional and contemporary homes.
• Low maintenance and durable, white brick accents provide insulation and energy efficiency, while being resistant to fading and discoloration.
• Popular styles and trends feature white brick accents in farmhouse-inspired, modern minimalist, coastal, industrial-chic, and craftsman-style homes.
Classic White Brick Colonial Revival
As we explore the world of Classic White Brick Colonial Revival homes, we're immediately struck by the timeless charm of these elegant dwellings. The White brick house exterior, painted a crisp white, sets the tone for a sophisticated and refined aesthetic.
Traditional colonial design elements are seamlessly integrated, creating a sense of nostalgia and classic beauty. One of the standout features of these homes is the strategic use of brick accents, which add visual interest to columns, chimneys, and entryways. This clever combination of white and brick creates a striking contrast, elevating the curb appeal of these homes.
The result is an inviting and refined exterior that exudes elegance and sophistication. The White Brick Colonial Revival style has mastered the art of blending classic and modern elements, making it a popular choice for homeowners who value timeless charm and refinement.
With its unique blend of traditional and modern elements, this architectural style continues to captivate and inspire.
Modern Farmhouse With Brick Accents
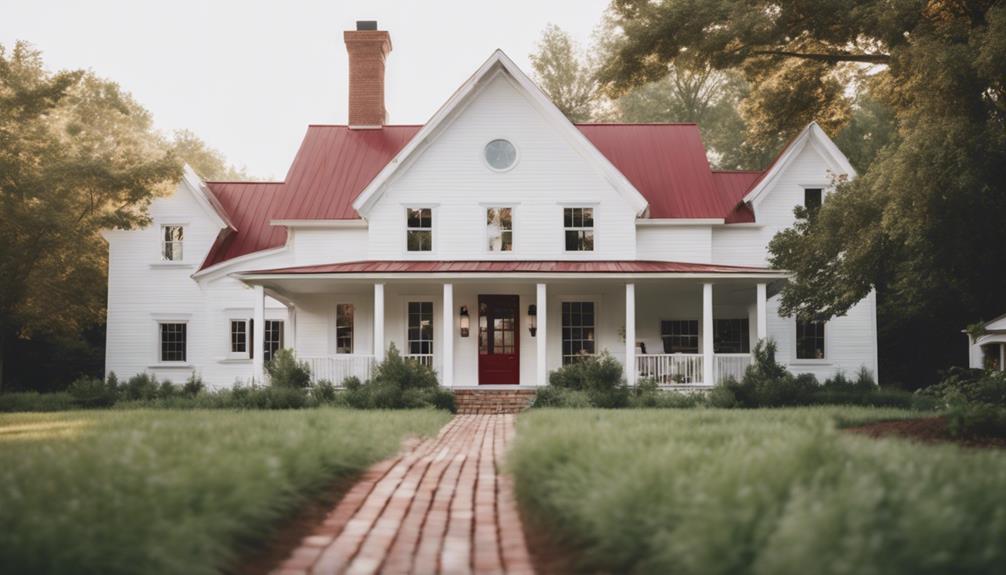
We're drawn to modern farmhouse homes that cleverly incorporate brick accents, blending rustic charm with sleek, contemporary style. The result is a stunning exterior that exudes classic yet modern sophistication. By combining white siding with brick accents, modern farmhouse homes achieve a timeless and inviting aesthetic.
| Feature | Benefit |
|---|---|
| Brick accents | Add texture and visual interest to the exterior |
| White siding | Provides a clean and crisp backdrop for brick accents |
| Contrasting colors | Enhances architectural details and character |
| Blended styles | Combines traditional elements with modern design |
| Timeless appeal | Creates a fresh and stylish exterior |
The brick accents not only add a touch of rustic charm but also create a beautiful contrast with the white siding. This harmonious blend of old and new results in a modern farmhouse design that is both stylish and timeless. As we explore modern farmhouse homes with brick accents, we're struck by the way they effortlessly merge traditional elements with contemporary style, resulting in a truly unique and alluring exterior.
Rustic Charm in White and Brick

As we explore the rustic charm of white houses with brick accents, we're drawn to the harmonious blend of earthy and elegant design elements. We're about to examine the key features that make this aesthetic so mesmerizing, from the juxtaposition of earthy tones and clean lines to the deliberate inclusion of rustic details that add character to the exterior.
Earthy Meets Elegant Design
By blending rustic charm with elegant design, we create a charming exterior that exudes warmth and sophistication. When it comes to brick homes, incorporating white and brick elements adds warmth and character to the exterior. The contrast between white and brick accents enhances the architectural details and creates visual interest.
The earthy tones of brick paired with the crispness of white create a harmonious balance in exterior design. This combination offers a timeless and inviting look, blending modern and rustic elements seamlessly. The rustic charm of white houses with brick accents creates an earthy yet elegant design aesthetic.
We're drawn to the way the brick's natural texture and color complement the clean lines and simplicity of white. As a result, we achieve a look that's both earthy and elegant, perfect for those who crave a sophisticated yet cozy exterior. By combining these elements, we create a stunning exterior that's sure to turn heads.
Exposed Brick Accents
Rustic charm seeps into the exterior design as exposed brick accents add a touch of character to the crisp, white backdrop. We love how the combination of white walls and brick accents creates a visually appealing contrast that stands out.
By featuring exposed brick elements in key areas like the entryway, chimney, or accent walls, we can add texture, warmth, and visual interest to the overall design. The result is a timeless and classic look that blends traditional and modern aesthetics.
Exposed brick accents offer a unique way to add depth and dimension to the exterior of a white house. As we consider the exterior design, it's clear that the use of brick accents adds a level of sophistication and charm.
Rustic Chic Details
We're drawn to rustic chic white houses with brick accents because they seamlessly blend modern elegance and traditional warmth. The harmonious combination of white exteriors and exposed brick elements creates a cozy, inviting aesthetic that's hard to resist.
To enhance the rustic charm, we often incorporate elements like reclaimed wood accents, metal fixtures, and earthy color palettes. These details not only add warmth but also create a sense of history and character. Incorporating barn doors, wooden beams, and farmhouse-inspired decor takes the rustic charm to the next level.
The white and brick combination brings a timeless appeal to these homes, balancing sophistication with a touch of countryside allure. As we explore the rustic chic details, we're reminded that it's the thoughtful blend of modern and traditional elements that makes these homes truly special.
Coastal Cottage With Brick Trim
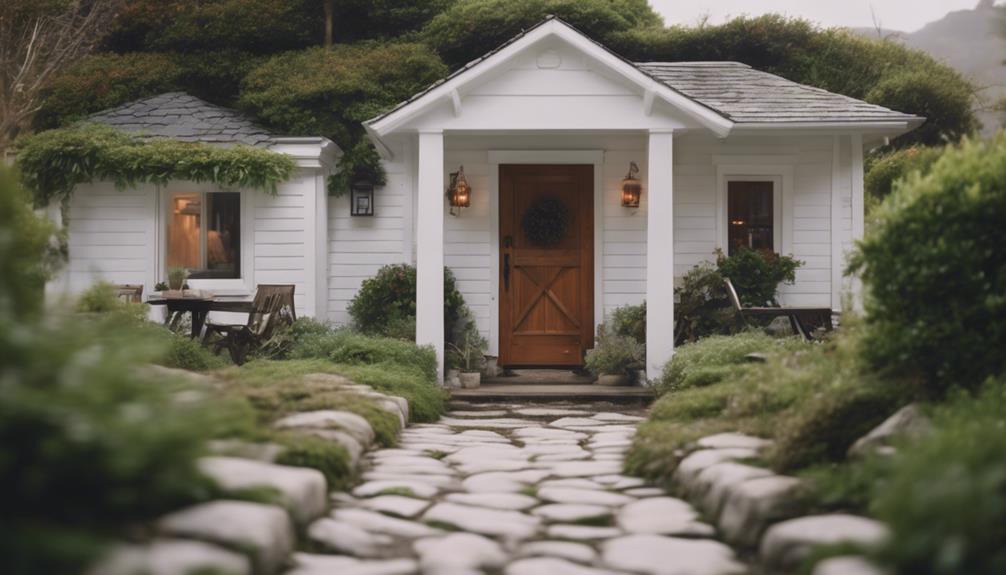
As we stroll along the coastline, we're drawn to a charming coastal cottage that exudes warmth and character, thanks to its beautifully balanced blend of white clapboard siding and striking red brick accents. The brick trim adds a touch of traditional warmth and character to the overall exterior design of the cottage, creating a visually appealing contrast against the white facade.
| Feature | Description | Effect |
|---|---|---|
| White Clapboard Siding | Provides a clean and crisp backdrop | Enhances curb appeal |
| Red Brick Accents | Adds traditional warmth and character | Creates visual contrast |
| Coastal Setting | Complements the seaside location | Evokes a sense of quaintness |
The combination of white siding and brick trim gives the coastal cottage a quaint and welcoming aesthetic that is perfect for coastal living. The brick accents provide a classic and timeless look that complements the seaside setting beautifully. This charming cottage is a perfect example of how white siding and brick accents can come together to create a stunning exterior design.
Traditional White Brick Estate Home
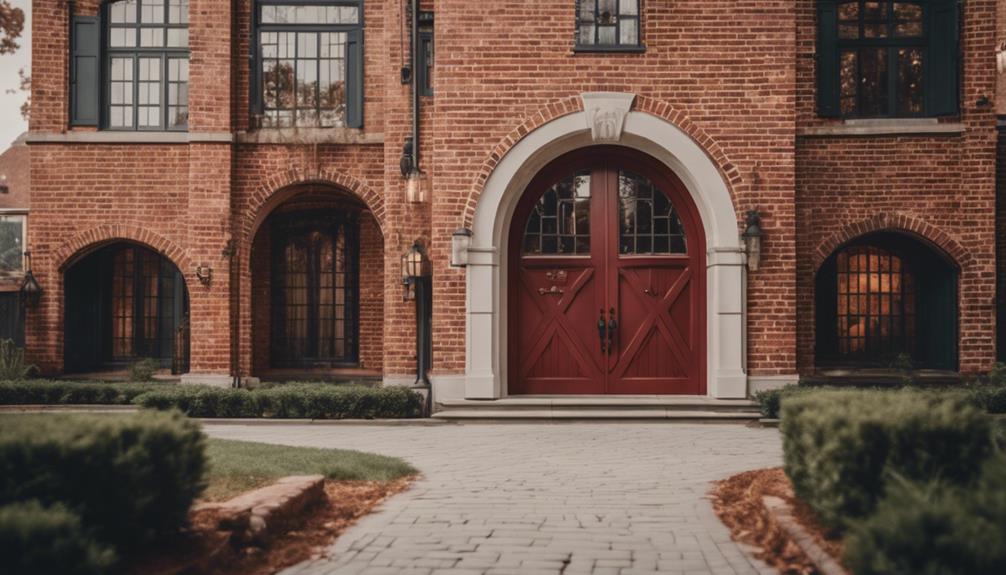
As we explore the traditional white brick estate home, we're struck by the classic Southern charm that permeates its design.
The elegant brick facade is a hallmark of this style, exuding refinement and sophistication.
We'll examine how the combination of white and brick accents creates a timeless look that's both stately and inviting.
Classic Southern Charm
With its elegant brick accents, this traditional white brick estate home embodies classic Southern charm, evoking a sense of timeless beauty and sophistication. The white brick exterior, paired with brick accents, creates a striking contrast that enhances the curb appeal of the home. This classic Southern charm is further amplified by the brick detailing, which adds texture and visual interest to the overall design.
Here are three reasons why this traditional white brick estate home exudes classic Southern charm:
- Timeless beauty: The combination of white and brick elements adds a touch of warmth and character to the exterior of the house, making it a timeless beauty.
- Sophistication: The elegant brick accents and white brick exterior evoke a sense of sophistication, making this home a true showstopper.
- Visual interest: The brick detailing and accents add texture and visual interest to the overall design, making this home a standout in any neighborhood.
Elegant Brick Facade
We're drawn to the elegant brick facade of this traditional white brick estate home, where a striking balance of contrasting elements creates a visually appealing exterior. The white brick accents provide a timeless and elegant look, creating a striking contrast against the white exterior. This classic combination adds character and charm to the home's exterior, making it a standout in its neighborhood.
The brick detailing enhances the architectural features of the home, adding depth and visual interest to the overall design. We notice white brick accents on the exterior walls, columns, or entryways, showcasing a classic and sophisticated aesthetic. The combination of white and brick elements creates a luxurious and inviting appearance, making the home truly exceptional.
The traditional white brick estate home's facade is a masterclass in balancing contrasting elements. The white brick accents add a level of sophistication, while the white exterior provides a clean and crisp backdrop. The result is a stunning exterior that exudes elegance and refinement.
We can't help but be impressed by the seamless blend of classic and modern elements in this beautiful home.
White and Brick Modern Farmhouse
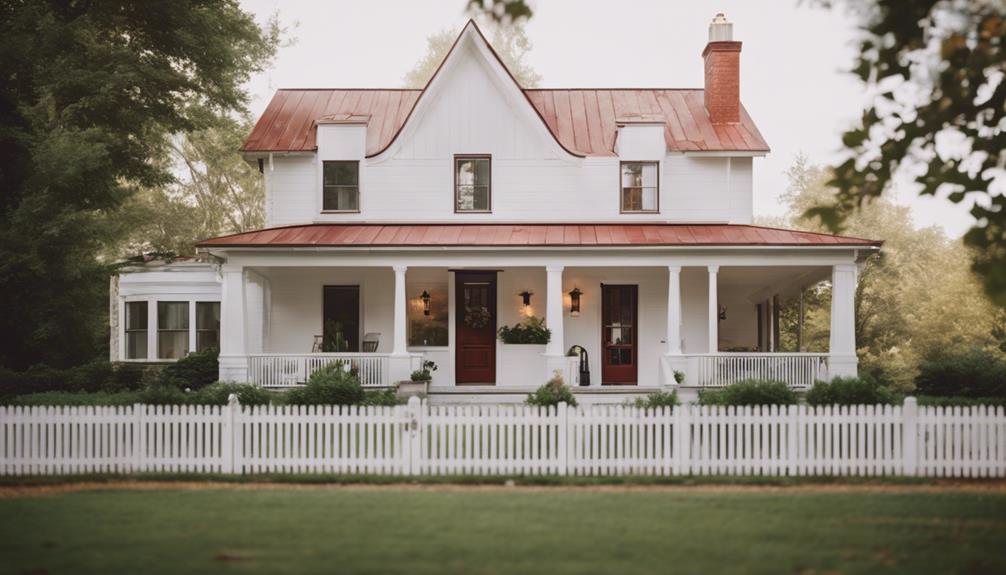
We've fallen for the White and Brick Modern Farmhouse style, which masterfully blends rustic charm and modern sophistication. This design aesthetic combines the best of both worlds, creating a unique and alluring facade. The White and Brick Modern Farmhouse style typically features a white exterior with contrasting brick accents, adding warmth and character to the modern farmhouse.
Here are just a few reasons why we love this style:
- Timeless charm: The combination of white and brick creates a striking visual contrast that enhances the farmhouse charm with a contemporary twist.
- Versatility: This style blends traditional and modern elements for a unique and appealing facade.
- Clean lines: The use of clean lines, large windows, and a mix of white siding and natural brick elements creates a modern yet rustic look.
When choosing a white shade for your farmhouse, consider a soft, warm hue like White Dove. This subtle color provides a beautiful backdrop for the natural brick accents, resulting in a stunning and inviting exterior.
The White and Brick Modern Farmhouse style is a perfect choice for those who want a modern take on the traditional farmhouse design.
Brick Accent Walls in White Homes
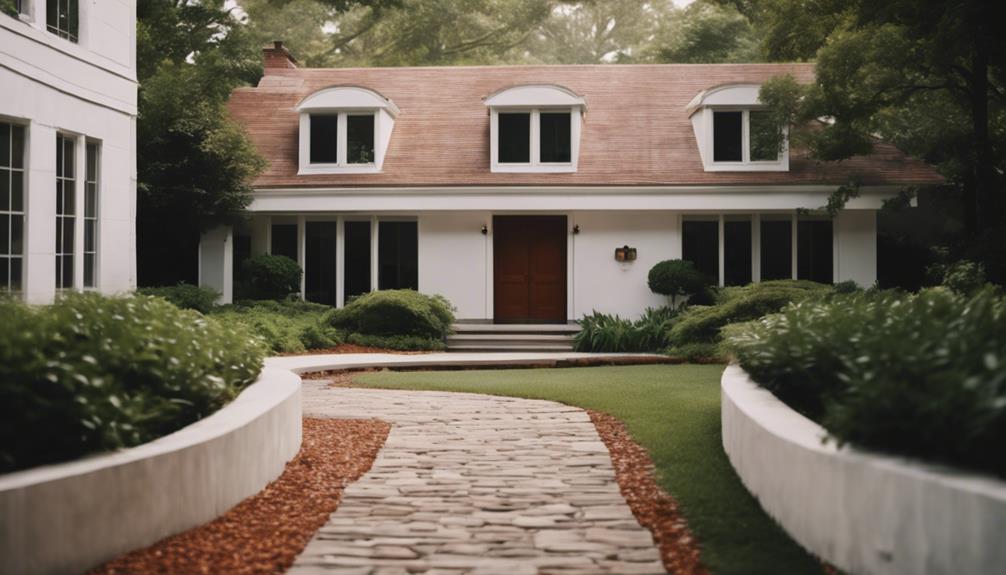
In addition to incorporating brick accent walls into our white home's design, we add a tactile quality and visual depth that elevates the entire exterior. This design element not only adds texture but also creates a striking contrast between the white and brick, drawing attention to the home's architectural details. We can choose to use brick accents sparingly or extensively, depending on the aesthetic we want to achieve. The versatility of this design element is undeniable, as it can complement a wide range of design styles and color schemes.
The classic combination of white and brick is timeless, and the brick accent walls add a level of sophistication to our home's exterior. By incorporating this design element, we can create a unique visual identity that sets our home apart. Additionally, the contrast between the white and brick accent walls creates a visually appealing effect that enhances the overall curb appeal of our home.
Whether we're aiming for a modern, rustic, or traditional look, brick accent walls can help us achieve our desired aesthetic.
Elegant White and Brick Exterior

As we delve into the Elegant White and Brick Exterior, we're considering two key aspects that can make or break the overall look: Brick Accent Placement and the Classic Color Combo.
We'll explore how strategically placing brick accents can enhance the exterior's visual appeal and discuss why the timeless combination of white and brick continues to be a popular choice for homeowners.
Brick Accent Placement
When it comes to creating a stunning exterior, strategically placing brick accents around windows, doors, and entryways is key to drawing attention to these architectural features. By doing so, we can create a visually appealing exterior that exudes elegance and sophistication. Brick accents are particularly effective in highlighting specific areas of the house, creating a focal point that enhances curb appeal.
Here are some tips to keep in mind when it comes to brick accent placement:
- Accentuate entranceways: Use brick accents to create a grand entrance that sets the tone for the rest of the exterior design.
- Highlight windows: Brick accents around windows can add depth and visual interest to the facade.
- Add texture to doors: Brick accents around doors can create a striking contrast that adds character to the exterior design.
Classic Color Combo
We're drawn to the classic color combination of elegant white and brick exteriors because it offers a timeless look that effortlessly blends traditional charm with modern sophistication. This harmonious pairing creates a stunning visual appeal that's hard to resist.
The crisp white exterior provides a clean backdrop for the warm, earthy tone of the brick accents, adding depth and visual interest to the facade. Additionally, the contrast between the two colors creates a beautiful play of light and shadow, making the exterior of the house even more mesmerizing.
The versatility of this color combination is another significant advantage, as it can complement various architectural styles and landscaping choices. Whether you're going for a modern, rustic, or traditional look, the elegant white and brick exterior is sure to impress.
This classic color combo is a popular choice for homeowners who want to create a welcoming and inviting facade that exudes warmth and sophistication.
White and Brick Country Cottage
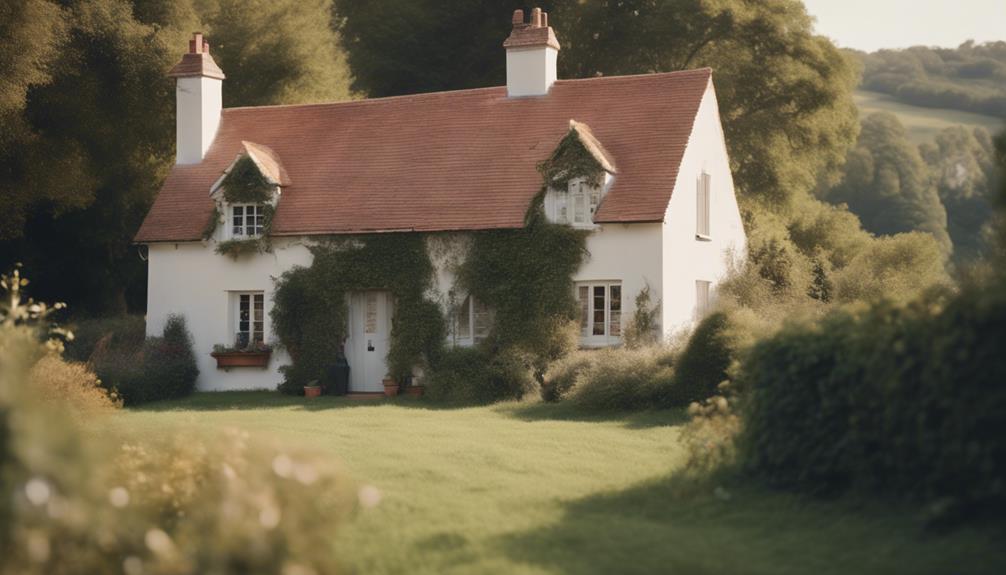
We adore the White and Brick Country Cottage, which masterfully blends rustic charm with a touch of elegance. This charming exterior house style features a delightful combination of white exterior walls and brick accents, creating a warm and inviting look.
The white color scheme brightens up the exterior, while the brick accents add texture and visual interest to the overall design.
Here are some key elements that make this style so appealing:
- Charming facade: The White and Brick Country Cottage boasts a picturesque facade, complete with a front porch, wooden columns, and traditional windows.
- Cozy atmosphere: This style exudes a cozy and welcoming vibe, perfect for those seeking a classic and timeless home design.
- Landscaped surroundings: A well-maintained landscaped front yard can complement the cottage aesthetic, with flowering plants and shrubs enhancing the charming facade.
Sophisticated White Brick Modern Home

In addition, the clean lines and minimalist design elements of this modern home are elevated by strategically placed white brick accents that inject a touch of sophistication and visual interest into the exterior.
We're drawn to how the white brick complements the clean lines and minimalist design elements of the modern architecture, creating a harmonious balance between textures and styles.
The contrasting textures between the smooth white surfaces and the textured white brick create a dynamic and contemporary look that's both visually appealing and modern.
We appreciate how the white brick accents provide a subtle yet impactful contrast against the stark white walls, enhancing the overall aesthetic of the home.
Additionally, the strategic placement of the white brick accents adds depth and dimension to the facade, elevating the visual appeal of the modern design.
The result is a sophisticated and modern home that exudes elegance and refinement, thanks to the thoughtful integration of white brick accents.
Frequently Asked Questions
What Color Looks Best on a House With Brick?
When deciding what color to pair with brick accents, we consider the overall aesthetic we want to achieve. Do we want a bold, contrasting look or a softer, more harmonious one?
Neutral shades like white, cream, or light gray create a clean canvas, while earthy tones like taupe or beige bring warmth.
Bold colors like black or charcoal gray make a statement, while pastel shades add a touch of whimsy.
Ultimately, the right color depends on our personal style and the character we want our house to convey.
Does White Go With Brick?
We find that white and brick form a harmonious combination, as the contrast between the two highlights architectural details and adds visual interest.
White complements the natural warmth and texture of brick, creating a cohesive exterior.
The clean and sophisticated appearance of white paint on brick elevates the overall aesthetic of the house, making it a popular choice for homeowners seeking a timeless, inviting look.
Does Painting Brick White Increase Home Value?
As we weigh the pros and cons of painting brick white, a burning question lingers: does it boost our home's value?
The verdict is in: a fresh coat of white paint can indeed increase our home's perceived value. By creating a clean and inviting facade, white-painted brick accents can make our house appear larger and more contemporary, appealing to potential buyers.
In fact, a well-executed paint job can add significant value to our property, making it a worthwhile investment for homeowners looking to sell.
Is Painting Brick White a Trend?
We've noticed that painting brick white has become increasingly popular in recent years, with many homeowners opting for a fresh, modern look.
As a trend, it's undeniable – the rise of white-painted brick exteriors has been significant, driven by the desire for a clean, updated aesthetic.
With its timeless appeal and versatility, it's no wonder painting brick white has become a go-to choice for homeowners seeking to elevate their home's curb appeal.
Conclusion
As we've explored the intersection of white houses and brick accents, a distinct pattern emerges: the harmony of contrasting textures and hues.
The juxtaposition of clean, crisp white with the earthy, rustic quality of brick creates a visual synergy that elevates each design.
Whether modern and sleek or traditional and ornate, these stunning homes demonstrate the versatility and timeless appeal of this classic combination.
- About the Author
- Latest Posts
Introducing Ron, the home decor aficionado at ByRetreat, whose passion for creating beautiful and inviting spaces is at the heart of his work. With his deep knowledge of home decor and his innate sense of style, Ron brings a wealth of expertise and a keen eye for detail to the ByRetreat team.
Ron’s love for home decor goes beyond aesthetics; he understands that our surroundings play a significant role in our overall well-being and productivity. With this in mind, Ron is dedicated to transforming remote workspaces into havens of comfort, functionality, and beauty.
Decor
How to Include Large Globe Balloons Wedding Decor Diy

As I entered the enchanting world of wedding decorations, I was immediately drawn to the charm of oversized globe balloons. These whimsical floating orbs have become an essential element for couples seeking to infuse their big day with a sprinkle of magic.
In this article, I will guide you through the art of DIY large globe balloon decor, from choosing the right size to adding personalized touches. Get ready to elevate your wedding venue to new heights with these stunning creations.
Key Takeaways
- Consider the overall aesthetic and available space when choosing balloon size
- Customize balloon accessories like tassels and ribbons to match the color scheme
- Use a good quality balloon pump designed for large balloons
- Incorporate personalized wedding favors by attaching tags or labels to each balloon
Choosing the Right Size of Large Globe Balloons
When choosing the right size of large globe balloons for your wedding decor, it’s important to consider the overall aesthetic and space available. Large globe balloons can add a whimsical and dreamy touch to any venue.
But it’s essential to choose the size that complements your wedding theme and venue size. If you have a spacious venue, opt for larger balloons to create a grand and eye-catching display. On the other hand, if you have a smaller venue, consider using smaller-sized balloons to avoid overwhelming the space.
Additionally, keep in mind the height of your venue’s ceiling when selecting the balloon size. To create a visually pleasing arrangement, try grouping balloons of different sizes together or using a mix of small and large balloons throughout the venue.
With these tips in mind, you can create a stunning balloon display that perfectly suits your wedding venue.
Essential Supplies for DIY Large Globe Balloon Decor
When it comes to creating stunning DIY large globe balloon decor, two key factors that can make a big impact are the balloon color options and the hanging techniques.
Choosing the right balloon colors can set the mood and theme of the event, whether it’s a whimsical pastel palette or a bold and vibrant scheme.
Additionally, understanding the different hanging techniques can help ensure that your balloon arrangements are secure and visually appealing. Whether you opt for helium-filled balloons suspended from the ceiling or use clear fishing line to create floating clusters.
Balloon Color Options
Choose from a variety of vibrant colors for your large globe balloons wedding decor. When it comes to balloon arrangements, color is key to creating a visually stunning display. Whether you want to go for a classic white and gold theme or a bold and vibrant mix of colors, the options are endless.
Balloon accessories like tassels and ribbons can also be customized to match your chosen color scheme, adding an extra touch of elegance to your decor. From soft pastels to rich jewel tones, you can find the perfect shades to complement your wedding theme.
Now, let’s move on to the next step: hanging techniques.
Hanging Techniques
To create a beautiful display, consider using different hanging techniques for your balloons. When it comes to hanging balloons, there are various securing methods that can add a touch of elegance and creativity to your decor. Here are five techniques you can try:
-
Ribbon and String: Tie a colorful ribbon or string to the balloon and hang it from the ceiling or a sturdy object.
-
Balloon Clips: Use specially designed balloon clips that securely attach to the balloon and allow you to hang them easily.
-
Fishing Line: Invisible and versatile, fishing line can be used to suspend balloons from above, creating a floating effect.
-
Balloon Arch: Create a stunning balloon arch by attaching balloons to a sturdy frame or using a balloon arch kit.
-
Balloon Nets: For larger displays, consider using balloon nets to create a cluster of balloons that can be hung from the ceiling.
Preparing and Inflating Large Globe Balloons
Inflating large globe balloons for wedding decor is a fun and creative way to add a unique touch to your special day. When it comes to inflating these balloons, there are a few techniques you can use to ensure they look their best.
First, make sure you have a good quality balloon pump that is specifically designed for large balloons. This will make the process much easier and faster.
Start by stretching the balloon gently before inflating to prevent it from popping. As you inflate, be mindful of not overfilling the balloon, as it can burst.
If you encounter any issues, such as a balloon not inflating properly or air leaking out, try using a bit of soapy water to locate the leak and patch it up.
With these inflating techniques and troubleshooting tips, your large globe balloons will be the perfect addition to your wedding decor.
Creative Ideas for Hanging Large Globe Balloons
Get creative with how you hang those big globe balloons to make your wedding venue truly stand out. There are so many unique hanging ideas for outdoor wedding decor that will add a touch of whimsy and elegance to your special day. Here are some ideas to inspire you:
- Suspend the balloons from the branches of tall trees, creating a magical floating effect.
- Hang the balloons in clusters above the dance floor, adding a burst of color and movement.
- Use clear fishing line to hang the balloons at varying heights, creating an ethereal canopy.
- Attach the balloons to a decorative arch or pergola, framing the ceremony or reception area.
- Hang the balloons from shepherd’s hooks or stakes, lining the aisle or pathway.
These hanging ideas will transform your wedding venue into a dreamy and enchanting space that your guests will never forget.
Adding Personalized Touches to Large Globe Balloon Decor
Make your venue truly unique by adding personalized touches to your hanging globe balloon decorations.
One way to do this is by incorporating personalized wedding favors into the design. You can attach small personalized tags or labels to each balloon, showcasing the names of the bride and groom or a special message for your guests.
Another idea is to use unique table centerpieces that complement the hanging globe balloons. For example, you can place personalized photo frames or miniature replicas of famous landmarks on each table, creating a cohesive theme throughout your wedding decor.
These personalized touches will not only add a special touch to your hanging globe balloon decorations but also make your wedding day truly memorable for both you and your guests.
Tips for Arranging Large Globe Balloons in Wedding Venues
Arranging large globe balloons in wedding venues can be made easier by considering the size and layout of the space. As a wedding decorator, I’ve learned a few tips and tricks to ensure that these stunning balloons become the focal point of any wedding venue.
Here are my top tips for arranging large globe balloons:
-
Choose the right size: Large globe balloons come in various sizes, so it’s essential to select ones that will complement the venue’s proportions.
-
Create focal points: Place the balloons strategically to create visual interest and draw attention to key areas, such as the ceremony altar or the entrance.
-
Mix and match colors: Experiment with different color combinations to match the wedding’s theme and color palette.
-
Consider ceiling height: Make sure the balloons don’t obstruct the view or feel cramped. Adjust the height accordingly.
-
Follow wedding balloon trends: Stay up-to-date with the latest trends and incorporate them into your designs to create a modern and stylish atmosphere.
Maintenance and Removal of Large Globe Balloons After the Wedding
Now that the wedding is over and the large globe balloons have brought a touch of magic to the venue, it’s time to think about their maintenance and removal.
After the event, it is important to handle the balloons with care to ensure they can be reused or stored properly. Deflating them can be done by gently releasing the air through the valve.
Once deflated, it’s crucial to clean the balloons using a mild soap and water solution to remove any dirt or residue. After cleaning, allow them to dry completely before storing.
Speaking of storage options, consider using large plastic bins or airtight bags to keep the balloons protected from dust and moisture.
Additionally, don’t limit yourself to just weddings – these large globe balloons can be repurposed for other events or even as unique home decor pieces. Get creative and explore the alternative uses for these stunning balloons to maximize their value and beauty.
Can Large Globe Balloons be Used as Long-lasting Wedding Decorations?
Yes, large globe balloons can be used as long-lasting wedding decorations. Their durability and ability to retain helium for an extended period make them ideal for adorning wedding venues. Gift balloons longevity explained – they can be filled with helium and will maintain their fullness for several days, providing a beautiful and festive atmosphere.
Frequently Asked Questions
What Are Some Alternative Ways to Use Large Globe Balloons Other Than Hanging Them?
Some alternative balloon arrangements for large globe balloons, aside from hanging them, include using them as creative centerpiece ideas. They can be filled with confetti, attached to sticks, or placed in clear vases for a unique and eye-catching wedding decoration.
Are There Any Specific Types of Helium or Gas That Should Be Used to Inflate Large Globe Balloons?
I’ve found that using different gases for inflating large globe balloons can really make a difference in the overall effect. Helium gives them that classic float, while air makes them more grounded and durable.
Can Large Globe Balloons Be Customized With Different Colors or Patterns?
Yes, large globe balloons can be customized with various colors and patterns. They add a whimsical touch to any event, especially when incorporated in DIY balloon garlands of different sizes. Get creative and have fun!
How Long Do Large Globe Balloons Typically Last Before Deflating?
Large globe balloons typically last for several hours before they start to deflate. To make them last longer, ensure they are properly inflated and avoid exposing them to sharp objects or extreme temperatures.
Are There Any Safety Precautions to Consider When Using Large Globe Balloons at a Wedding Venue?
When it comes to wedding venue safety precautions and handling large globe balloons safely, there are a few things to keep in mind. Ensuring proper anchoring, avoiding sharp objects, and monitoring for any signs of deflation are all important steps to take.
Conclusion
As I conclude this guide on DIY large globe balloon wedding decor, I hope you feel inspired and ready to create a magical atmosphere for your special day.
By following the steps outlined, you can easily incorporate these stunning balloons into your wedding venue. Remember to choose the right size, gather the necessary supplies, and unleash your creativity.
Whether you hang them from the ceiling or use them as centerpieces, these balloons will add a touch of whimsy and elegance to your celebration.
So, let your imagination soar and let these balloons transport you and your guests to a world of enchantment.
- About the Author
- Latest Posts
Introducing Charles, the Editor in Chief at ByRetreat, whose passion for interior design and editorial excellence elevates every remote workspace to new heights. With his keen eye for detail, impeccable taste, and expertise in design, Charles brings a wealth of knowledge and creativity to the ByRetreat team.
As the Editor in Chief of a renowned lifestyle blog, Charles has honed his skills in curating captivating content and staying up-to-date with the latest trends in interior design. His deep understanding of aesthetics and the power of storytelling through design enables him to create remote workspaces that are not only visually stunning but also rich in personality and meaning.
Valentine's Day Decoration
What Size Should Balloons Be for a Column?

When it comes to crafting an eye-catching balloon column, the size of the balloons is a key factor that is often overlooked. It’s more than just inflating balloons and stacking them up. The size of the balloons can greatly influence the appearance and stability of the column.
But how do you determine the ideal size for your balloon column? It’s a question that often perplexes many, but fear not, we’re here to shed light on this important aspect of balloon décor.
Join us as we explore the various factors to consider when determining the size of balloons for a column, and how to make the best choice for your specific event or occasion.
Key Takeaways
- Balloon size directly impacts the visual appeal of the column
- Using a mix of sizes creates dimension and texture
- Balloon size should complement the overall aesthetic and venue
- Properly inflated balloons are crucial for stability and appearance
Importance of Balloon Size
Balloon size is a critical factor in creating a visually appealing and structurally sound column decoration. When it comes to event decor, the size of the balloons used can make a significant difference in the overall impact of the design. The visual appeal of a balloon column is directly influenced by the sizes of the balloons used. Larger balloons create a bold and eye-catching display, while smaller balloons can add intricate detail and texture. By strategically combining different balloon sizes, it’s possible to achieve a stunning visual effect that captures the essence of the event.
Moreover, the structural integrity of the column is closely tied to the balloon sizes. Using appropriately sized balloons ensures that the column is sturdy and can withstand the duration of the event without losing its shape or stability. It’s essential to carefully consider the proportions and distribution of balloon sizes to achieve a well-balanced and robust column decoration.
Ultimately, the right combination of balloon sizes contributes to a visually captivating and structurally sound column that enhances the ambiance of any event.
Standard Balloon Sizes

We’ve got a range of standard balloon sizes to consider, and each one can make a big difference in how your column turns out.
As we look at different column heights, we’ll need to think about which size will best fit the space and achieve the desired visual impact.
Plus, don’t forget that color plays a key role in the overall effect, so we’ll be exploring that aspect too.
Balloon Size Options
When considering balloon sizes for a column, it is essential to understand the standard balloon sizes available to achieve the desired effect. We have a range of options to suit various needs, from budget-friendly choices to customizable possibilities. Here’s a quick look at the standard balloon sizes:
Balloon Size Diameter (inches) Common Uses 5″ 5 Balloon animals, small decorations 11″ 11 Most popular size, versatile 36″ 36 Eye-catching displays, large events 16″ 16 Unique designs, personalized messages 24″ 24 Special occasions, grand entrances
Understanding these standard balloon sizes allows for creative and precise column designs that cater to specific preferences and event themes.
Column Height Considerations
Considering the balloon sizes for a column, it’s important to factor in the height considerations to ensure the desired effect is achieved. When determining the balloon size for a column in event decor, the height of the column plays a crucial role.
For standard balloon sizes, columns that are around 5-7 feet tall typically use 11-inch balloons. However, for taller columns reaching 8-10 feet, 16 or 24-inch balloons might be more suitable to maintain proportions and visual impact.
It’s essential to strike a balance between balloon size and column height to create an aesthetically pleasing display. By carefully considering the column height in relation to the appropriate balloon size, event decorators can achieve stunning and harmonious decor that captivates and delights guests.
Color and Visual Impact
To maximize the visual impact of event decor using standard balloon sizes, careful consideration of color selection is paramount. Color coordination plays a pivotal role in enhancing the overall aesthetic appeal of balloon arrangements.
When choosing balloon colors, it’s essential to align them with the event theme to create a cohesive and visually captivating display. Vibrant and complementary colors can infuse energy and excitement, while softer pastel shades can evoke a sense of elegance and tranquility.
The visual impact of balloon arrangements can be heightened by strategically incorporating contrasting hues or creating eye-catching patterns. By thoughtfully selecting balloon colors that harmonize with the event’s theme, one can elevate the atmosphere and create a truly captivating visual spectacle.
Large Balloon Options

Among the large balloon options available for creating a striking column, the 36-inch balloons offer a bold and impactful choice for adding visual appeal. When inflated, these larger-than-life balloons command attention and create a sense of grandeur.
Here are three reasons why 36-inch balloons are an excellent choice for column decorations:
- Balloon Inflation: The 36-inch balloons, when fully inflated, create a dramatic statement with their impressive size. They fill out the column beautifully and make a strong visual impact, setting the tone for the entire event.
- Decorative Elements: These large balloons provide a versatile canvas for incorporating decorative elements. Whether it’s tassels, garlands, or floral arrangements, the ample surface area of the 36-inch balloons allows for creative customization, adding a personalized touch to the column.
- Visual Impact: The sheer size of the 36-inch balloons ensures that the column stands out and becomes a focal point of the décor. Their presence adds a sense of festivity and celebration, elevating the ambiance of the space.
Utilizing 36-inch balloons for a column guarantees a captivating display that captivates the audience and sets the stage for a memorable event.
Small Balloon Options

After highlighting the impact of 36-inch balloons on column decorations, we can now explore the versatility and charm of smaller balloon options for creating visually captivating columns. Small balloon options offer a wide range of possibilities for creating stunning balloon columns. Let’s take a look at some popular small balloon options and their potential for creating beautiful columns.
Balloon Size Diameter (inches) Best Use Case 5-inch 5 Adding texture and filling in gaps 9-inch 9 Creating intricate designs 12-inch 12 Building the main structure of columns
Small balloon options, such as 5-inch, 9-inch, and 12-inch balloons, provide versatility in creating visually captivating columns. The 5-inch balloons are perfect for adding texture and filling in gaps between larger balloons, while the 9-inch balloons are ideal for creating intricate designs within the column. The 12-inch balloons serve as the main building blocks for the column structure, providing a solid foundation for the overall design. By using a combination of these balloon size alternatives, it’s possible to create columns that are not only visually stunning but also unique and eye-catching.
Choosing the Right Size

Selecting the appropriate size of balloons is crucial for achieving the desired visual impact in column decorations. When considering the right size for your balloon column, there are a few key factors to keep in mind:
- Size Variations: Balloons come in a variety of sizes, from small to large. Choosing the right size depends on the overall look you want to achieve. Larger balloons can create a bold and eye-catching effect, while smaller ones can add depth and intricacy to your design.
- Visual Impact: The size of the balloons directly impacts the visual appeal of your column. Larger balloons draw attention and can serve as focal points, especially in larger spaces. On the other hand, using a mix of sizes can create dimension and texture, making the column visually engaging from every angle.
- Theme and Venue: Consider the theme of your event and the venue where the balloon column will be displayed. The size of the balloons should complement the overall aesthetic and fit harmoniously within the space.
Carefully considering these aspects will help you choose the right balloon sizes to create a stunning and impactful column display.
Balloon Size Considerations

Considering the visual impact and theme of your event, we carefully evaluate the balloon sizes to ensure a stunning and harmonious display within the venue. Balloon size trends are constantly evolving, and it’s important to stay updated to create a modern and captivating look. Typically, for a column, we often opt for a variety of balloon sizes to add depth and visual interest. Larger balloons at the base provide stability and a grand foundation, while smaller balloons towards the top add delicacy and flair.
Inflation techniques also play a crucial role in determining the final size and look of the balloons. Using air provides a more controlled and consistent size, ideal for creating uniformity in the column. On the other hand, helium inflation allows for a floaty, ethereal appearance, adding a touch of whimsy to the arrangement.
Ultimately, the choice of balloon sizes and inflation techniques should align with the overall aesthetic and ambiance of the event. By carefully considering these factors, we ensure that the balloon column becomes a captivating focal point that seamlessly integrates with the event’s theme and decor.
Tips for Balloon Sizing

When it comes to balloon sizing, we’ve learned that there are a few key considerations to keep in mind.
We’ll be sharing some recommended balloon sizes to help you create stunning columns for any occasion.
Let’s dive into these essential tips and tricks for getting the perfect balloon sizes for your next event!
Balloon Size Considerations
Understanding the dynamics of balloon sizes is essential for creating visually appealing and structurally sound columns. When considering balloon size for a column, several important factors come into play:
- Balloon Inflation: Properly inflated balloons are crucial for achieving the desired look and stability of the column. Over-inflated balloons can lead to a column that looks overstretched and may be at risk of popping, while under-inflated balloons can result in a saggy and unappealing appearance.
- Balloon Size Impact: The size of the balloons directly impacts the overall look and feel of the column. Different sizes can create varying textures and visual interest, so it’s essential to consider the aesthetic effect desired for the specific event or space.
- Structural Integrity: Choosing the right balloon size is vital for ensuring the structural integrity of the column. Larger balloons might provide a more stable base, while smaller balloons could be used for intricate designs or to add detail.
Understanding these considerations will help in creating visually stunning and structurally sound balloon columns that leave a lasting impression.
Recommended Balloon Sizes
To achieve the desired visual impact and structural stability of a balloon column, it’s crucial to carefully consider recommended balloon sizes and their respective applications. Balloon size variations play a significant role in determining the overall look and feel of the column.
Larger balloons are ideal for creating a bold and eye-catching centerpiece, while smaller balloons work well for adding intricate details and patterns. When considering balloon size impact, event themes should also be taken into account.
For example, a whimsical and playful theme may call for a mix of different sized balloons to create an eclectic and dynamic column. Understanding the relationship between balloon size and decorating techniques is essential for achieving the perfect column that complements the event theme and captures attention.
Frequently Asked Questions
Can I Mix Different Sizes of Balloons in a Column?
Yes, mixing sizes of balloons in a column can create a stunning visual impact. By combining different sizes, we can add depth and dimension to the design, making it more visually appealing.
The variation in sizes adds interest and draws attention to the column. It’s a creative way to enhance the overall look and feel of the display, capturing the audience’s attention and making a statement.
Are There Any Safety Considerations When Using Different Balloon Sizes in a Column?
When using different balloon sizes in a column, safety considerations are crucial. We need to ensure structural stability, especially if incorporating larger and smaller balloons. The key is to evenly distribute the weight and maintain a secure base.
Additionally, securing the balloons properly prevents potential hazards. It’s important to consider these factors to ensure a safe and visually appealing balloon column.
How Do Outdoor Conditions, Such as Wind, Affect the Balloon Size Choice for a Column?
When considering outdoor conditions, such as wind, for our balloon columns, the impact of wind on balloon size is crucial. The right balloon size ensures stability and longevity.
Outdoor conditions play a pivotal role in our column design, prompting us to carefully select balloon sizes that can withstand various weather elements. Wind impact directly affects the balloon size choice, highlighting the importance of considering outdoor conditions when creating our stunning balloon columns.
What Are the Best Balloon Sizes for Creating a Spiral or Twisted Column Design?
When it comes to creating a spiral or twisted column design, color combinations and balloon arrangement are key. Design aesthetics and balloon inflation play a big role in achieving the desired look.
For a visually appealing column, consider using a variety of sizes and colors to create depth and visual interest. Experimenting with different balloon sizes and arrangements can help achieve a unique and eye-catching design.
Can I Use Non-Standard Balloon Sizes for a Column, and How Do I Determine the Best Size?
Sure, we can definitely use custom balloon sizes for a column. It’s a great way to add a unique design to our event. Get creative and consider unconventional materials for a truly one-of-a-kind look.
When determining the best size, consider the overall aesthetic and the intended impact. Custom sizes open up a world of possibilities, allowing us to craft columns that are truly unique and eye-catching.
Conclusion
In conclusion, the size of balloons for a column is an important factor to consider when creating balloon decor. It’s essential to choose the right size to achieve the desired look and effect.
By investigating different balloon sizes and considering important factors, such as the venue size and theme, you can ensure that your balloon columns make a big impact.
So, remember to choose your balloon sizes wisely to elevate your event decor to new heights!
- About the Author
- Latest Posts
Introducing Ron, the home decor aficionado at ByRetreat, whose passion for creating beautiful and inviting spaces is at the heart of his work. With his deep knowledge of home decor and his innate sense of style, Ron brings a wealth of expertise and a keen eye for detail to the ByRetreat team.
Ron’s love for home decor goes beyond aesthetics; he understands that our surroundings play a significant role in our overall well-being and productivity. With this in mind, Ron is dedicated to transforming remote workspaces into havens of comfort, functionality, and beauty.
Mardi Gras Decoration
How Do You Find Out What the Theme Nights Are on Royal Caribbean?

When it comes to theme nights on Royal Caribbean, it pays to plan ahead. We all want to maximize our cruise experience, and knowing about the theme nights in advance can enhance our trip with extra excitement.
There are several avenues to explore in order to uncover the upcoming themes, and some may surprise you. From the official Royal Caribbean website to insider tips from previous passengers, there are numerous ways to stay ahead of the game.
Let's explore the strategies and sources that can help us unlock the secrets of Royal Caribbean's theme nights.
Key Takeaways
- The Royal Caribbean website and app provide access to information about theme nights and the pre-cruise planner.
- The Cruise Compass and Daily Schedule are important sources for finding the schedule and details of theme nights.
- Social media platforms, online forums, and travel agents are additional sources of information and engagement regarding theme nights.
- Specialty restaurants collaborate with the cruise director to enhance theme night experiences and provide diverse dining options.
Royal Caribbean Website
When visiting the Royal Caribbean website, travelers can easily explore the wide array of theme nights offered on their cruises, providing an exciting glimpse into the diverse entertainment options available.
The website's pre-cruise planner is a valuable tool for guests to plan and prepare for their upcoming voyage. By simply logging into their account, travelers can access detailed information about the theme nights scheduled for their specific cruise.
The website offers an interactive experience, allowing users to browse through the various themes, from 70s disco parties to elegant formal nights, and select the ones that pique their interest. Additionally, the website provides insights into recommended attire for each theme night, ensuring that guests are well-informed and adequately prepared to participate in the festivities.
The user-friendly interface and comprehensive details make the Royal Caribbean website an indispensable resource for travelers seeking to immerse themselves in the onboard entertainment. It's a thoughtful touch that showcases Royal Caribbean's commitment to enhancing the guest experience and ensuring that everyone can fully enjoy the themed events during their cruise.
Pre-Cruise Planner

Upon exploring the diverse entertainment options available on the Royal Caribbean website, we can now turn our attention to the invaluable resource known as the Pre-Cruise Planner. This tool is a game-changer when it comes to maximizing your cruise experience.
The Pre-Cruise Planner allows us to delve into the array of cruise activities and entertainment options available on our upcoming Royal Caribbean adventure.
One of the key benefits of the Pre-Cruise Planner is the ability to secure reservations for popular entertainment options onboard. Whether it's securing a spot for a Broadway-style show, a thrilling aqua theater performance, or a comedy act, the planner ensures that we've access to the entertainment that excites us the most.
Moreover, the planner offers the opportunity to book cruise activities such as specialty dining, spa treatments, and shore excursions in advance. This not only saves time and hassle during the cruise but also allows us to secure spots for activities that tend to fill up quickly.
Cruise Compass
As we explore the world of theme nights on Royal Caribbean, it's crucial to understand the role of the Cruise Compass. This essential tool is our guide to the ship's daily activities, including the schedule for theme nights.
From locating the latest information on pirate or 70s disco nights to planning our evening entertainment, the Cruise Compass is our go-to resource for an unforgettable cruise experience.
Accessing Cruise Compass
To access the Cruise Compass on Royal Caribbean, simply navigate to the Royal Caribbean app on your mobile device and tap on the 'Cruise Compass' section to view the daily activities and events onboard.
The Cruise Compass is your go-to guide for interactive activities and onboard entertainment during your cruise. It provides a comprehensive schedule of everything happening on the ship, from live shows and themed parties to fitness classes and culinary demonstrations.
The app allows you to personalize your experience by setting reminders for activities you don't want to miss and exploring different categories such as family-friendly events, nightlife, and enrichment programs. With real-time updates, you can stay informed about any schedule changes or additional activities that may be added.
Accessing the Cruise Compass through the Royal Caribbean app ensures that you make the most of your cruise experience.
Theme Night Schedule
Navigating the Royal Caribbean app to access the Cruise Compass not only provides a comprehensive schedule of daily activities and events onboard but also offers valuable insights into the theme night schedule, ensuring an engaging and immersive cruise experience.
The theme night attire and activities are outlined in the Cruise Compass, allowing guests to plan and prepare for the themed evenings. From tropical nights requiring Hawaiian shirts and leis to formal nights with elegant attire, the schedule ensures that everyone can participate in the themed events.
In addition to dress codes, the Cruise Compass details the various theme night activities such as deck parties, live music, dance performances, and special dining experiences tailored to the theme. This comprehensive schedule ensures that guests can fully engage in the themed experiences and make the most of their Royal Caribbean cruise.
Finding Theme Nights
The Cruise Compass offers a convenient and comprehensive guide to locating the theme nights on Royal Caribbean cruises. When looking for the theme nights, consider the following tips:
- Check the Daily Schedule: The Cruise Compass outlines each day's activities and theme nights, making it easy to plan ahead.
- Consult Guest Services: The friendly staff at Guest Services can provide information about upcoming theme nights and help with any related inquiries.
- Review the Royal Caribbean App: Access the Cruise Compass through the Royal Caribbean app for quick and easy navigation to the theme night schedule.
- Participate in Trivia or Game Shows: Sometimes, theme nights are announced during onboard activities, so joining in on trivia or game shows can be a fun way to stay informed.
With these tips, you'll be well-prepared to make the most of the exciting theme nights during your Royal Caribbean cruise.
Mobile App

The Royal Caribbean mobile app enhances the guest experience by providing convenient access to onboard activities, dining options, and entertainment schedules. The app features a user-friendly interface and intuitive navigation, making it easy for guests to explore and plan their cruise experience.
One of the key benefits of the app is the notifications feature, which keeps guests informed about upcoming events, special offers, and important announcements. By enabling push notifications, guests can stay updated on theme nights and other onboard activities without having to actively seek out information.
The app's user interface is designed to be visually appealing and easy to navigate, allowing guests to effortlessly browse through theme night details, view dining menus, and explore entertainment options. Through the app, guests can also make reservations for specialty dining and activities, ensuring a seamless experience onboard.
Notifications play a crucial role in keeping guests informed about theme nights, allowing them to fully immerse themselves in the unique experiences offered during their cruise.
Social Media

Engaging with guests through various social media platforms, Royal Caribbean creates an interactive and dynamic community for sharing cruise experiences and providing real-time updates on theme nights and onboard activities. We understand the importance of social media engagement and community involvement in enhancing the overall cruise experience.
Here's how Royal Caribbean leverages social media to keep guests informed and engaged:
- Real-time Updates: Through platforms like Facebook, Instagram, and Twitter, we provide real-time updates on theme nights, special events, and onboard activities, allowing guests to plan and make the most of their cruise experience.
- Influencer Partnerships: We collaborate with influencers and content creators to showcase the unique experiences and theme nights offered by Royal Caribbean, providing an authentic and engaging glimpse into life on board.
- Brand Collaborations: By partnering with brands and local businesses, we create exclusive theme night experiences, bringing a touch of local culture and excitement to our cruises.
- Guest Interaction: Our social media channels serve as a space for guests to share their experiences, ask questions, and connect with fellow cruisers, fostering a sense of community and camaraderie both before and after the cruise.
Our commitment to social media engagement ensures that guests are well-informed and excited about the theme nights and activities awaiting them on their Royal Caribbean cruise.
Online Forums

Utilizing online forums as a platform for continued interaction and shared experiences, we aim to foster a vibrant community of cruisers who can exchange cruise tips, packing advice, stories, and excitement about upcoming theme nights and onboard activities.
Online forums provide an excellent space for cruisers to connect, ask questions, and share valuable insights based on their experiences. When seeking theme night information, these forums can be a treasure trove of firsthand knowledge. Members often discuss not only the themes themselves but also the best ways to prepare and make the most of these special evenings at sea.
For those seeking packing advice for theme nights, online forums are an invaluable resource. Here, fellow cruisers can offer tips on what to pack for specific themes, ensuring you have everything you need to fully participate and enjoy the festivities. Whether it's a tropical night, 80s party, or formal evening, the collective wisdom of the forum can help ensure you're well-prepared for a fantastic time onboard.
Engaging with these forums not only enriches your pre-cruise preparations but also allows you to contribute to the community by sharing your own experiences and insights.
Travel Agent

Frequently, our interactions with a travel agent have proven to be invaluable for securing the best deals and gaining insider insights into Royal Caribbean's theme nights and onboard activities. When it comes to planning a Royal Caribbean cruise, a travel agent can be an invaluable resource.
Here's why:
- Expert Advice: A travel agent with experience in booking Royal Caribbean cruises can provide expert advice on the best ships, itineraries, and onboard experiences tailored to your preferences.
- Exclusive Deals: Travel agents often have access to exclusive deals and promotions that may not be available through online booking platforms.
- Personalized Service: By working with a travel agent, you can enjoy personalized service, including assistance with special requests, dining reservations, and onboard activities.
- Streamlined Booking Process: A travel agent can simplify the booking process, handling all the details from selecting the right cabin to arranging transportation to the port, saving you time and hassle.
Customer Service

When planning a Royal Caribbean cruise, our team prioritizes exceptional customer service to ensure a seamless and enjoyable experience for all our guests. We are committed to continuously improving our services based on customer feedback. By listening to our guests, we have implemented various service improvements to enhance their overall satisfaction. Here's a glimpse of our customer service approach:
| Service Improvements | Customer Feedback |
|---|---|
| Enhanced dining experiences | "The variety and quality of food exceeded my expectations." |
| Streamlined embarkation process | "The embarkation process was smooth and efficient, making the start of the cruise stress-free." |
| Personalized onboard activities | "I appreciated the personalized recommendations for onboard activities based on my preferences." |
Our dedicated team understands the value of exceptional customer service and actively seeks ways to improve the overall experience for our guests. We continually strive to exceed expectations and create unforgettable memories for every individual aboard our Royal Caribbean cruises.
Onboard Announcement

As we explore the exciting world of theme nights on Royal Caribbean, we turn our attention to the crucial element of onboard announcements.
The theme night schedule, information sources, and communication methods all play a vital role in ensuring that guests are fully informed and able to make the most of the themed experiences onboard.
Let's delve into the various aspects of onboard announcements to understand how Royal Caribbean keeps its guests engaged and informed throughout their cruise.
Theme Night Schedule
Upon embarking on a Royal Caribbean cruise, guests eagerly anticipate the onboard announcement of the exhilarating theme night schedule, which promises an enchanting array of entertainment and activities. Here are some essential tips to make the most of the theme night excitement:
- Stay Informed: Keep an eye out for announcements in the ship's daily newsletter or on digital screens throughout the ship for the latest theme night schedule.
- Pack Accordingly: Plan your wardrobe to align with the different theme nights. From elegant formal nights to tropical Hawaiian luaus, having the right attire adds to the fun.
- Participate Wholeheartedly: Dive into the spirit of each theme night by fully engaging in the activities, whether it's dancing at a 70s disco party or showing off your best pirate costume.
- Capture Memories: Take plenty of photos to preserve the memorable moments of each theme night for a lifetime.
Information Sources
Navigating the excitement of theme nights on a Royal Caribbean cruise begins with seeking out the onboard announcements that unveil the captivating array of entertainment and activities. You can stay informed by checking the daily cruise compass, a newsletter delivered to your stateroom each evening, or by listening to announcements made by the cruise director and staff throughout the day.
When it comes to theme night etiquette, it's essential to embrace the spirit of the theme while being respectful to fellow guests. As for dress code suggestions, each theme night typically comes with recommended attire to enhance the experience, such as tropical wear for a Caribbean night or elegant attire for a formal night.
Communication Methods
Checking the daily cruise compass and listening to announcements by the cruise director and staff throughout the day are essential methods for staying informed about the theme nights on a Royal Caribbean cruise. Effective communication is key to ensuring guests are engaged and aware of the exciting theme nights onboard.
Here are four communication methods used to keep guests informed:
- Daily Cruise Compass: This detailed schedule is delivered to your stateroom each evening, outlining the next day's events and theme night details.
- Public Address Announcements: The cruise director and staff make regular announcements throughout the ship, including important information about upcoming theme nights.
- Digital Displays: Look for digital screens located throughout the ship, providing updates on theme night details and activities.
- Interactive Activities: Engage in onboard activities and games that are themed around the upcoming theme nights, providing subtle hints and clues about the next evening's festivities.
Engaging guests through effective communication ensures everyone can fully participate and enjoy the themed experiences.
Interactive TV

Exploring the interactive TV options aboard Royal Caribbean ships enhances the guest experience by providing a wide range of entertainment and information at your fingertips. The interactive TV features on Royal Caribbean offer a seamless user experience, allowing guests to easily access onboard entertainment options and activity schedules. With just a few clicks on the remote, guests can explore the day's events, browse through dining options, book shore excursions, and even check their onboard account.
The user-friendly interface makes it simple to navigate through the various entertainment choices available on the ship. Guests can catch up on the latest blockbuster movies, watch live performances, or tune in to informative lectures, all from the comfort of their stateroom. The interactive TV also serves as a valuable tool for staying updated on the ship's activity schedule, ensuring that guests never miss out on the exciting events and experiences happening onboard.
Cruise Director

As we immerse ourselves in the onboard entertainment options and activity schedules accessible through the interactive TV, the pivotal figure orchestrating and energizing these experiences is the Cruise Director. This dynamic individual plays a crucial role in shaping the atmosphere and ensuring that every guest is engaged and entertained throughout their cruise experience.
Here are four key aspects of the Cruise Director's role:
- Entertainment Coordination: The Cruise Director is responsible for overseeing the diverse range of entertainment options available onboard, from live shows and musical performances to theme nights and interactive activities.
- Activity Planning: From dance classes to trivia nights and poolside games, the Cruise Director and their team work tirelessly to organize a varied lineup of activities to cater to the diverse interests of guests.
- Specialty Restaurants Promotion: The Cruise Director often collaborates with the ship's specialty restaurants to promote unique dining experiences, ensuring that guests are aware of the diverse dining options available.
- Guest Engagement: One of the most vital roles of the Cruise Director is to foster a sense of community and excitement among guests, encouraging participation in onboard events and creating memorable experiences for all.
Daily Newsletter

The Daily Newsletter provides guests with a comprehensive overview of the day's events, activities, and special offerings aboard the ship, ensuring that everyone can make the most of their cruise experience. This essential resource is delivered to your stateroom each evening, giving you a preview of the exciting theme nights to come. It's the perfect place to find Theme Night tips, such as costume suggestions or recommended activities to fully immerse yourself in the evening's festivities.
The newsletter also builds anticipation and excitement for the upcoming theme nights, providing a glimpse into the unique and vibrant atmosphere that each one promises to offer.
Reading through the Daily Newsletter each evening is like unwrapping a present, as it reveals the delightful surprises and experiences that await you the following day. It's a valuable tool for planning your activities and ensuring that you don't miss out on any of the Theme Night excitement. From themed dinners to dance parties and special performances, the newsletter gives you a sneak peek into the enchanting world of theme nights, allowing you to prepare and participate in the fun-filled events with enthusiasm and anticipation.
Specialty Restaurants

When it comes to specialty restaurants on Royal Caribbean, we have a wealth of options to choose from, each offering its own unique dining experience.
From upscale steakhouses to exotic Asian fusion, there's something to suit every palate.
We'll also cover the reservation process, ensuring you have all the insider tips for securing a table at these popular dining venues.
Restaurant Options
Several specialty restaurants on Royal Caribbean offer a diverse range of culinary experiences, providing guests with an opportunity to indulge in exquisite flavors and unique dining atmospheres. When it comes to restaurant preferences, Royal Caribbean caters to a variety of tastes, ensuring there's something for everyone. Whether you have dietary restrictions or are looking for a particular type of cuisine, the specialty restaurants onboard Royal Caribbean ships have you covered.
Here are the top restaurant options to consider:
- Chops Grille: Indulge in premium steaks and seafood in an elegant setting.
- Izumi: Savor fresh sushi and Asian-inspired dishes with a modern twist.
- Jamie's Italian: Enjoy rustic Italian fare crafted by celebrity chef Jamie Oliver.
- Wonderland: Immerse yourself in a whimsical dining experience with innovative cuisine.
No matter your culinary desires, these specialty restaurants offer an unforgettable dining experience.
Reservation Process
Exploring the diverse culinary experiences available on Royal Caribbean, it's essential to understand the reservation process for the specialty restaurants, ensuring a seamless and enjoyable dining experience.
To secure a table at one of the specialty restaurants, guests can make reservations through various communication methods. The most convenient way is through the Royal Caribbean website or mobile app, where guests can easily view restaurant availability and make their reservation with just a few clicks.
Alternatively, guests can also contact the dining reservations desk onboard the ship to make their bookings. It's important to note that popular specialty restaurants tend to fill up quickly, so we recommend making reservations as early as possible to secure your desired dining experience.
Previous Passenger Experiences

From our personal experiences, theme nights on Royal Caribbean have consistently added an extra layer of excitement and enjoyment to our cruises. Here's what we've learned from our encounters and the feedback from fellow passengers:
- Passenger Feedback: We've noticed that theme nights are among the most memorable aspects of the onboard experience for many guests. The vibrant and immersive themes have consistently garnered positive reviews and have become a highlight for numerous passengers.
- Theme Night Memories: The memories created during these events are truly unforgettable. From elaborate costumes to lively music and themed cuisine, these nights foster a sense of camaraderie and fun that stays with guests long after the cruise has ended.
- Guest Participation: One of the most delightful aspects of theme nights is the high level of guest participation. It's truly heartwarming to see passengers of all ages enthusiastically joining in the festivities, creating a lively and inclusive atmosphere.
- Enhanced Cruising Experience: Overall, the consensus among passengers is that theme nights greatly enhance the cruising experience, adding an extra layer of enjoyment and fostering a strong sense of community among guests.
Frequently Asked Questions
Can I Request a Specific Theme Night for My Cruise?
Certainly!
We do offer the option to request specific theme nights for your cruise. We understand the importance of creating memorable experiences, and we love when guests bring their own ideas to the table.
Whether it's a special occasion or a unique costume theme, our team is here to accommodate your requests.
Feel free to reach out to our customer service team for more information on custom costumes and requesting specific theme nights.
Are the Theme Nights the Same on Every Royal Caribbean Ship?
Theme night variations do exist across Royal Caribbean ships. The specific themes can differ based on the ship's itinerary, length of the cruise, and overall demographic of passengers. While some themes are consistent, such as formal night or 70s night, others may vary.
It's always a good idea to check with your cruise line or travel agent for the specific theme nights on your chosen ship and itinerary to ensure you're prepared for the fun!
Are There Any Additional Fees for Participating in Theme Night Activities or Dining?
Theme night charges and dining fees on Royal Caribbean vary by ship and event. Some theme nights may have an additional cost for participating, while others are included in the cruise fare.
Dining fees for specialty restaurants apply, but the main dining options are typically covered.
Additionally, costume allowances and age limits for theme night activities are worth considering when planning your onboard experience.
Our expertise ensures a seamless and enjoyable cruise for all guests.
Are There Any Age Restrictions for Participating in Theme Night Activities?
Age restrictions for participating in theme night activities vary based on the specific theme and the nature of the event. However, Royal Caribbean aims to provide inclusive and enjoyable experiences for all guests. Participation rules are typically designed to ensure that everyone can fully engage in the themed activities and dining options, regardless of age.
Guests can always inquire about age restrictions when exploring the various theme night options to accommodate their personal preferences.
Can I Bring My Own Costumes or Decorations for Theme Nights?
Bringing costumes and decorations for theme nights on Royal Caribbean is a fun way to enhance the experience. We encourage guests to express their creativity and fully participate in the themed activities.
When packing, ensure your costumes and decorations comply with safety guidelines and are appropriate for the event. Feel free to reach out to our crew for any specific guidelines or suggestions to make the most of the themed nights on board.
Conclusion
In conclusion, there are numerous ways to find out about the theme nights on Royal Caribbean. From checking the website and pre-cruise planner to following social media and speaking with the cruise director, the options are endless.
It's like uncovering hidden treasures on the high seas, each theme night adding a splash of excitement to your cruise experience.
So, get ready to immerse yourself in the fun and festivities of Royal Caribbean's theme nights!
- About the Author
- Latest Posts
Introducing Ron, the home decor aficionado at ByRetreat, whose passion for creating beautiful and inviting spaces is at the heart of his work. With his deep knowledge of home decor and his innate sense of style, Ron brings a wealth of expertise and a keen eye for detail to the ByRetreat team.
Ron’s love for home decor goes beyond aesthetics; he understands that our surroundings play a significant role in our overall well-being and productivity. With this in mind, Ron is dedicated to transforming remote workspaces into havens of comfort, functionality, and beauty.
-

 Vetted1 hour ago
15 Best Silver Polish Brands to Make Your Silver Shine Like New
-

 Vetted5 days ago
15 Best Fillers for Concrete Cracks – Expert Recommendations and Reviews
-

 Vetted1 week ago
15 Best Plants for Large Pots to Transform Your Outdoor Space
-

 Vetted6 days ago
15 Best Fairy Lights to Transform Your Space With Magical Illumination
-

 Vetted1 week ago
15 Best Folding Beds for Small Spaces – Space-Saving Solutions for Comfort and Convenience
-

 Vetted1 week ago
15 Best Waterproof Flooring Options for Your Bathroom – Ultimate Guide & Reviews
-

 Vetted2 weeks ago
15 Best Grocery Carts to Make Shopping a Breeze
-

 Vetted1 day ago
15 Best Subfloor Options for Your Basement Renovation – Ultimate Guide


