Appliances
When an Outlet Box Is Used to Support a Ceiling Fan How Is It Marked?
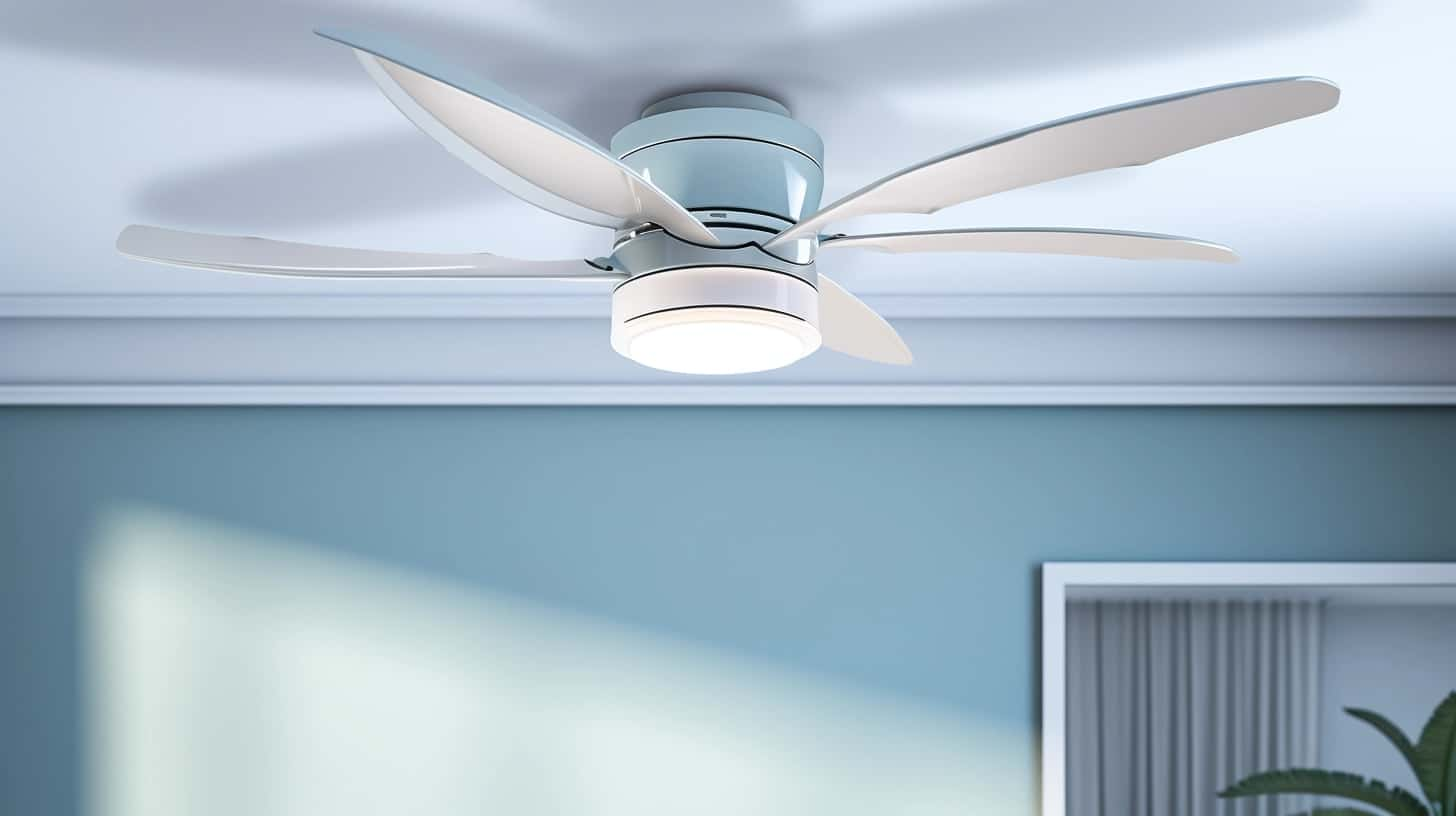
We recognize that safety is a paramount concern during the installation of a ceiling fan. A frequent inquiry pertains to the identification of an outlet box designated for supporting a ceiling fan.
In this article, we will address this important topic in a professional manner, providing you with the information you need to ensure a secure installation. We will discuss the various types of markings you may encounter, such as weight capacity and movement compatibility markings, for both retrofitting and new construction.

Additionally, we will highlight common misinterpretations of outlet box markings, emphasizing the importance of consulting an electrician for a thorough evaluation.
By the end of this article, you will have a clear understanding of how an outlet box is marked when used to support a ceiling fan.
Key Takeaways
- Outlet box markings ensure safety and proper installation of ceiling fans.
- Markings provide information about weight and load capacity.
- Different types of ceiling fans have specific requirements for outlet box support.
- UL Listing and NEMA ratings indicate safety certification and protection against environmental factors.
Importance of Outlet Box Markings
Outlet box markings are crucial for ensuring the safety and proper installation of ceiling fans. These markings provide important information about the maximum weight and load capacity that the outlet box can support. This is vital for ensuring that the ceiling fan is securely mounted and won’t pose a risk of falling or causing damage.
When installing a ceiling fan, it’s essential to choose an outlet box that’s specifically designed and labeled for fan support. Outlet boxes that aren’t designed for this purpose may not have the necessary strength and stability to safely support the weight of a ceiling fan. Using an improper outlet box can lead to the fan becoming loose or falling, posing a serious safety hazard.
To ensure proper installation, it’s important to carefully read and follow the manufacturer’s instructions for both the ceiling fan and the outlet box. These instructions will provide guidance on the specific requirements for installation, including any necessary markings or labels on the outlet box.
Understanding Outlet Box Safety
When it comes to supporting ceiling fans with outlet boxes, understanding outlet box safety is crucial.
It’s important to comply with the code requirements for support and to ensure proper installation of the outlet box. By doing so, we can ensure the safety of the ceiling fan and prevent any potential hazards or accidents.
Code Requirements for Support
To ensure the safety and stability of ceiling fans, it’s crucial to adhere to the code requirements for supporting outlet boxes.
Proper support is of utmost importance when installing ceiling fans, as it prevents accidents and ensures the longevity of the fan.
The code requirements dictate that outlet boxes used to support ceiling fans must be listed and labeled for fan support. These boxes are specifically designed to withstand the weight and movement of the fan.
There are different types of ceiling fans, such as standard and heavy-duty fans, and the code requirements take into account the specific needs of each type.

It’s essential to choose the appropriate outlet box that meets the code requirements to provide the necessary support for the ceiling fan.
Importance of Proper Installation
Proper installation of outlet boxes is essential for ensuring the safety and stability of ceiling fans. When it comes to outlet box installation for ceiling fan support, there are a few important tips to keep in mind.
Firstly, it’s crucial to choose an outlet box that’s specifically designed and labeled for ceiling fan installation. These boxes are constructed with extra strength and support to handle the weight and movement of the fan.
Secondly, it’s important to follow proper fan mounting techniques. This includes securely mounting the fan bracket to the outlet box and ensuring that all screws and connections are tightened correctly. Additionally, it’s recommended to use lock washers or thread-locking adhesive to prevent loosening over time.
Types of Outlet Box Markings
Let’s talk about the required markings for outlet boxes and the importance of ensuring proper marking.
These markings play a crucial role in supporting ceiling fans and ensuring safety. By understanding the different types of markings, we can ensure that the outlet boxes we use are suitable for the task at hand and meet the necessary requirements.

Required Markings for Support
Outlet boxes used to support ceiling fans are required to have specific markings indicating their suitability for this purpose. These markings are important because they ensure that the outlet box can safely and securely hold the weight and movement of the ceiling fan. The markings provide information about the box’s load capacity, which is crucial for proper support.
The National Electrical Code (NEC) requires that outlet boxes labeled for fan support must have a minimum weight rating of 35 pounds. Additionally, the box must be marked with the phrase ‘acceptable for fan support’ or a similar designation. These markings help electricians and homeowners identify the appropriate outlet box to use when installing a ceiling fan, ensuring that it’s properly supported and minimizing the risk of accidents or damage.
Importance of Proper Marking
Ensuring the appropriate markings on outlet boxes is crucial for the safe and secure support of ceiling fans. Proper marking provides important information about the box’s capabilities and suitability for use with a ceiling fan.
Two types of markings that are particularly important to look for are UL Listing and NEMA ratings.
UL Listing:
- UL stands for Underwriters Laboratories, an independent organization that tests and certifies products for safety.
- The UL Listing mark indicates that the outlet box has met specific safety requirements and has been tested by UL.
- Look for the UL Listing mark on the outlet box to ensure it’s suitable for supporting a ceiling fan.
NEMA Ratings:
- NEMA stands for National Electrical Manufacturers Association, a trade association that sets standards for electrical products.
- NEMA ratings indicate the level of protection provided by the outlet box against environmental factors.
- Look for the appropriate NEMA rating on the outlet box to ensure it’s suitable for the intended installation location of the ceiling fan.
Weight Capacity Markings
Weight capacity markings provide crucial information regarding the maximum weight that an outlet box can support when installing a ceiling fan. These markings are necessary to ensure the safety and stability of the fan installation.
To determine the weight capacity of an outlet box, manufacturers conduct rigorous weight capacity testing, which involves subjecting the box to various loads and measuring its load bearing capacity.
During weight capacity testing, the outlet box is subjected to different weights and forces that simulate the weight and movement of a ceiling fan. The box’s load bearing capacity is then determined based on its ability to support these loads without any signs of failure or damage.
Once the weight capacity has been established, it’s marked on the outlet box using clear and visible markings.
The weight capacity markings typically include the maximum weight that the outlet box can safely support, along with any additional information or warnings that may be relevant. These markings are essential for electricians and installers to determine whether the outlet box is suitable for supporting a particular ceiling fan.
It’s crucial to adhere to these weight capacity markings to prevent any potential accidents or damage that may occur due to overloading the outlet box.
Movement Compatibility Markings
When it comes to ceiling fans, understanding movement compatibility is crucial for a safe and effective installation.
Movement compatibility markings provide important criteria for selecting the right fan for an outlet box. These markings indicate the maximum amount of movement the box can support, ensuring that the fan is properly supported and doesn’t pose a safety risk.
Meeting code requirements for installation is essential to ensure the fan operates smoothly and securely.

Compatibility Criteria for Fans
To determine the compatibility criteria for fans, one must carefully examine the movement compatibility markings. These markings provide essential information about the fan’s weight capacity and its suitability for different types of mounting systems. When considering the compatibility criteria, it’s crucial to pay attention to the following factors:
- Weight Capacity:
The fan’s weight capacity determines the maximum weight it can support without compromising safety. This information is usually indicated on the movement compatibility markings and should be matched with the weight of the fan to ensure a proper installation.
- Mounting System Compatibility:
The movement compatibility markings may also indicate the types of mounting systems that are suitable for the fan. It’s important to select a mounting system that’s compatible with the fan’s movement compatibility markings to ensure secure installation and optimal performance.
Importance of Proper Marking
Moving on to the importance of proper marking, it’s crucial to understand the significance of movement compatibility markings when installing ceiling fans with outlet boxes. Outlet box marking standards and proper labeling requirements ensure the safe and efficient installation of ceiling fans.
These markings indicate the maximum allowable weight and movement capacity that the outlet box can support. By adhering to these markings, installers can ensure that the fan is securely attached to the ceiling and won’t cause any structural or electrical issues.
Additionally, movement compatibility markings help installers select the appropriate outlet box for the specific ceiling fan being installed, ensuring compatibility and preventing any potential hazards.
Following the outlet box marking standards and proper labeling requirements is essential for a successful and safe ceiling fan installation.
Code Requirements for Installation
We must adhere to specific code requirements for the installation of ceiling fans with outlet boxes, specifically regarding movement compatibility markings. These markings play a crucial role in ensuring the safety and proper functioning of the ceiling fan.
The importance of proper marking can’t be overstated, as it helps to identify the weight capacity requirements of the outlet box. This information is vital for choosing the correct box that can support the weight of the ceiling fan and prevent any potential accidents or damage.
When it comes to movement compatibility markings, there are two key factors to consider:
- Maximum Weight Capacity: The marking should indicate the maximum weight that the outlet box can safely support. It’s essential to select a box that can handle the weight of the ceiling fan to avoid any structural issues.
- Dynamic Load Rating: This marking indicates the box’s ability to withstand the movement and vibrations caused by the ceiling fan’s operation. It’s crucial to choose a box that can handle the fan’s movement to ensure its stability and longevity.
Following these code requirements and paying attention to the movement compatibility markings will ensure a safe and reliable installation of a ceiling fan with an outlet box.
UL Listing and Certification
UL Listing and Certification ensures that ceiling fans are tested and meet strict safety standards. UL, or Underwriters Laboratories, is an independent organization that evaluates the safety of various products, including ceiling fans. When a ceiling fan is UL Listed, it means that it has undergone rigorous testing and meets the safety requirements set by UL.
To obtain UL certification, ceiling fans must undergo testing for electrical safety, mechanical construction, and fire resistance. This ensures that the fan won’t pose a risk of electric shock, that it’s constructed with durable and reliable materials, and that it can withstand exposure to high temperatures without catching fire.
When a ceiling fan is UL Listed, it’s marked with the UL logo and a unique certification number. This marking can usually be found on the fan’s packaging or on the fan itself. Consumers can verify the UL certification by checking the UL database or looking for the UL logo and certification number.
UL Listing and Certification provide consumers with confidence that the ceiling fan they’re purchasing has been thoroughly tested and meets stringent safety standards. It’s important to always choose a UL Listed ceiling fan to ensure the safety of your home and family.
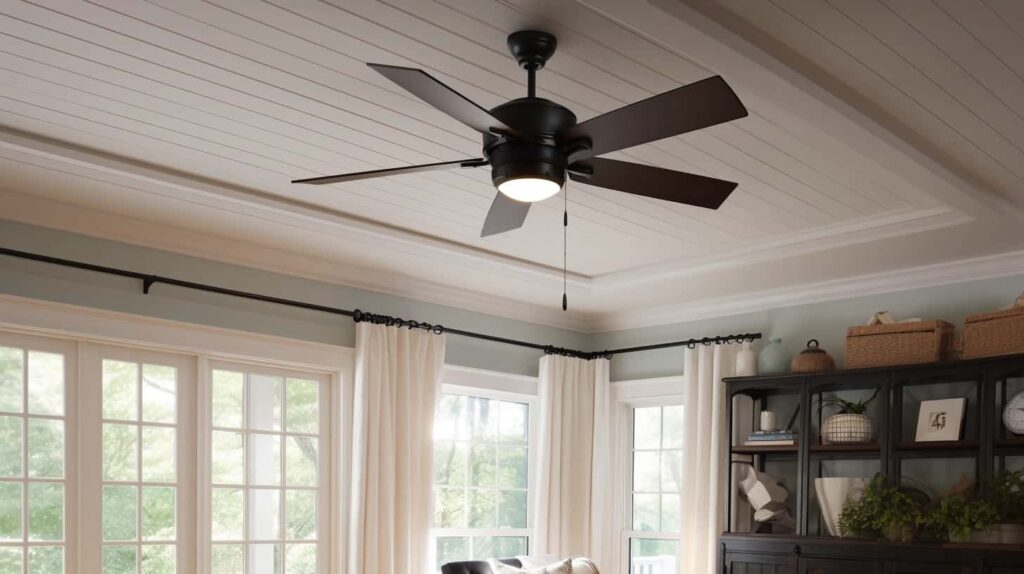
NEMA Ratings for Outlet Boxes
To ensure the safety and reliability of outlet boxes, it’s important to consider their NEMA ratings. The National Electrical Manufacturers Association (NEMA) has established a rating system that helps identify the level of protection an outlet box can provide in different environments. These ratings are crucial in determining the suitability of an outlet box for specific applications, especially when it comes to supporting ceiling fans.
Here are two key points to understand about NEMA ratings for outlet boxes:
- NEMA ratings classify outlet boxes based on their ability to protect against different environmental factors. This includes protection against dust, water, corrosion, and impact. The higher the NEMA rating, the more robust the outlet box’s protection capabilities.
- For example, a NEMA 1 rating indicates limited protection against dust and no protection against water. On the other hand, a NEMA 4X rating provides complete protection against dust, water, and corrosion.
When selecting an outlet box to support a ceiling fan, it’s important to choose a box with a NEMA rating suitable for the installation location. Ceiling fans are often installed in areas prone to moisture, such as bathrooms or outdoor spaces. In such cases, it’s recommended to use a NEMA-rated outlet box that provides adequate protection against water and moisture ingress.

NEC Requirements for Ceiling Fan Installation
When installing a ceiling fan, it’s important to adhere to the NEC requirements for proper installation. These requirements ensure the safety and functionality of the ceiling fan. The NEC, or National Electrical Code, sets forth guidelines for electrical installations to prevent electrical hazards and ensure the protection of individuals and property.
First and foremost, the NEC requires that a ceiling fan be supported by an approved outlet box specifically designed for ceiling fan installations. This outlet box should be securely anchored to the structure of the building to withstand the weight and movement of the fan. The box must also be properly rated to support the weight of the fan and any additional accessories, such as light fixtures.
Furthermore, the NEC mandates that the electrical connections for the ceiling fan be made in a safe and secure manner. This includes using appropriate wiring methods, such as conduit or armored cable, to protect the electrical conductors from damage. It’s also important to ensure that the electrical circuit supplying power to the fan is properly sized and protected by a circuit breaker or fuse.
In addition to these requirements, the NEC also provides guidelines for the installation of fan controls, such as switches and dimmers. These controls must be properly wired and installed in accordance with the manufacturer’s instructions and the NEC guidelines.
Checking Outlet Box Markings
To ensure compliance with safety regulations, it’s essential to carefully inspect the markings on the outlet box before installing a ceiling fan. The UL (Underwriters Laboratories) marking requirements provide guidelines for proper labeling techniques, ensuring that the outlet box is suitable for supporting a ceiling fan.
Here are some key points to consider when checking outlet box markings:
- UL Listing Mark: Look for the UL Listing Mark on the outlet box, which indicates that it has been tested and certified by UL. This mark assures that the outlet box meets specific safety standards.
- Weight Rating: Check for the weight rating on the outlet box. The marking should indicate the maximum weight that the box can support. It’s crucial to ensure that the weight rating is appropriate for the ceiling fan you’re installing.
- Fan Support Box: Look for the specific marking that indicates the outlet box is designed for supporting a ceiling fan. This marking ensures that the box has the necessary structural integrity and strength to handle the fan’s vibrations and weight.
- Installation Instructions: The outlet box should come with clear installation instructions. Properly follow these instructions to ensure a safe and secure installation.
Inspecting Existing Outlet Boxes
Inspecting the existing outlet boxes is a crucial step in ensuring their suitability for supporting a ceiling fan. It is important to thoroughly examine the condition of the outlet boxes to determine whether they can handle the weight and vibration of a ceiling fan. In some cases, it may be necessary to replace unsuitable outlet boxes with ones that are specifically designed to support ceiling fans.
To assist you in inspecting the existing outlet boxes, below is a table that outlines the key factors to consider:
Factors to Consider Inspection Guidelines Action Required Box Material Ensure the box is made of durable materials such as metal or reinforced plastic. Replace if made of weak or flimsy materials. Box Mounting Check if the box is securely mounted to the ceiling joist or support bracket. Reinforce mounting or replace if not securely mounted. Weight Capacity Verify that the box is rated to support the weight of a ceiling fan. Replace if weight capacity is insufficient.
Replacing Unsuitable Outlet Boxes
When it comes to replacing unsuitable outlet boxes, there are a few key points to consider.
First, it’s important to identify and address any inadequate outlet box alternatives that may be present.
Secondly, upgrading the outlet box to one that’s specifically designed to support a ceiling fan is essential for ensuring safety and stability.
Inadequate Outlet Box Alternatives
We often encounter outlet boxes that are unsuitable for supporting ceiling fans, necessitating their replacement. Using an inadequate outlet box for a ceiling fan can lead to safety concerns and potential hazards. When replacing an unsuitable outlet box, it’s important to choose alternatives that provide adequate support and ensure the safety of the ceiling fan installation.

Here are two alternative options to consider:
- Retrofit Outlet Box: This type of outlet box is designed specifically for ceiling fan installations. It provides a secure mounting surface that can safely support the weight and movement of a ceiling fan.
- Fan Brace: A fan brace is an adjustable metal brace that can be installed between ceiling joists or wall studs. It provides additional support for ceiling fans and helps distribute their weight more evenly.
Upgrading for Fan Support
To ensure the safe installation of a ceiling fan, it is crucial to replace any unsuitable outlet boxes with alternatives that offer proper support. Upgrading techniques and safety precautions should be followed to ensure a secure and stable installation. Here are some important considerations when upgrading outlet boxes for fan support:
Upgrading Techniques Safety Precautions Use a fan-rated box Turn off power Check weight capacity Use proper tools Reinforce ceiling joists Follow manufacturer’s instructions Install support brackets Securely fasten all connections
When selecting a fan-rated box, verify its weight capacity to ensure it can support the weight of the ceiling fan. It is also important to reinforce the ceiling joists to provide additional support. Installing support brackets will further enhance stability. Before starting any work, always turn off the power and use proper tools for a safe installation. Finally, follow the manufacturer’s instructions carefully to ensure proper installation and avoid any potential hazards. By following these upgrading techniques and safety precautions, you can confidently install a ceiling fan with the proper support it needs.

Ensuring Safety and Stability
In order to ensure the safety and stability of a ceiling fan installation, it’s imperative to replace any unsuitable outlet boxes with alternatives that provide proper support. Using inadequate outlet boxes can lead to potential hazards such as electrical fires, structural damage, and personal injury.
To emphasize the importance of ensuring stability and electrical safety, consider the following points:
- Choose outlet boxes specifically designed and rated for ceiling fan installations. These boxes are typically labeled as ‘fan-rated’ or ‘heavy-duty’ and are designed to withstand the weight and vibrations associated with ceiling fans. They’re constructed with reinforced materials and have additional support brackets to ensure stability and prevent wobbling.
- Avoid using standard plastic or lightweight metal boxes, as they aren’t designed to support the weight and motion of a ceiling fan. These boxes may crack or break under the stress of a fan, putting both the fan and the surrounding structure at risk.
Outlet Box Markings for Retrofitting
When retrofitting ceiling fans, it’s important to carefully consider the markings on the outlet box. Outlet box markings play a crucial role in evaluating safety and ensuring proper installation. These markings provide valuable information about the box’s suitability for supporting a ceiling fan.
When assessing an outlet box for retrofitting, look for markings indicating its weight rating. The weight rating signifies the maximum load the box can safely support. It’s essential to choose an outlet box with a weight rating that exceeds the weight of the ceiling fan being installed. This ensures the box can adequately support the fan’s weight without compromising safety.

Additionally, check for markings indicating the box’s compatibility with fan support brackets. Some outlet boxes are specifically designed to accommodate fan support brackets, providing enhanced stability and security. These markings may include phrases such as ‘approved for fan support’ or ‘compatible with fan bracket.’
Furthermore, consider markings indicating the box’s compatibility with electrical wiring. Look for symbols or labels that indicate the box’s compatibility with specific wire gauges and connection types. This information ensures proper electrical connections and reduces the risk of electrical hazards.

Outlet Box Markings for New Construction
Continuing our exploration of outlet box markings, we now turn our attention to the specific considerations for outlet boxes in new construction projects. When it comes to new construction, outlet boxes used to support ceiling fans must meet certain UL listing requirements and be installed using proper support methods.
To ensure compliance with UL listing requirements, outlet boxes for new construction must be marked with the appropriate UL symbol. This symbol indicates that the box has undergone rigorous testing and meets the safety standards set by Underwriters Laboratories.
Proper support methods are crucial for the safe installation of outlet boxes in new construction. Here are two key points to keep in mind:
- Mounting: The outlet box should be securely fastened to a structural member, such as a ceiling joist or a support bracket specifically designed for fan installations. This ensures that the box can support the weight and movement of the ceiling fan without risk of detachment.
- Weight Capacity: The outlet box should be rated to support the weight of the ceiling fan and any additional accessories, such as light kits or remote controls. It’s essential to consult the manufacturer’s instructions and adhere to their recommended weight limits to prevent accidents or damage.
Common Misinterpretations of Outlet Box Markings

One common misinterpretation of outlet box markings is the assumption that all UL-listed boxes are suitable for supporting ceiling fans. However, this is a common misconception that can have serious consequences. The importance of proper labeling can’t be overstated when it comes to ensuring the safety and functionality of a ceiling fan installation.
UL, or Underwriters Laboratories, is a widely recognized organization that certifies the safety and performance of various products, including outlet boxes. While UL listing does indicate that a box meets certain safety standards, it doesn’t guarantee that it’s suitable for supporting a ceiling fan.
Ceiling fans exert a significant amount of force and require a secure support structure to prevent accidents and damage. The weight and motion of a fan can put strain on an outlet box, potentially causing it to detach from the ceiling. This can lead to serious injuries or damage to the fan, as well as the surrounding area.
To ensure the safe installation of a ceiling fan, it’s essential to look for outlet boxes specifically labeled as ‘fan-rated’ or ‘approved for ceiling fan support.’ These boxes are designed with reinforced structures and mounting brackets to withstand the unique demands of a ceiling fan installation.

Consulting an Electrician for Outlet Box Evaluation
After understanding the importance of outlet box markings in determining their suitability for supporting ceiling fans, it’s advisable to consult with a qualified electrician for an evaluation of the existing outlet boxes.
An electrician evaluation is crucial because it ensures the safety and proper installation of the ceiling fan. Here are the reasons why consulting an electrician is essential for outlet box evaluation:
- Knowledge and Expertise: Electricians have in-depth knowledge and expertise in electrical systems. They’re familiar with local building codes and regulations, which are crucial in determining the suitability of an outlet box for supporting a ceiling fan.
- Evaluation of Box Support: Electricians will assess the outlet box’s structural integrity, ensuring it can safely support the weight and movement of the ceiling fan. They’ll examine the box’s mounting method, its attachment to the ceiling joist, and any additional support measures required.
- Identification of Hazards: Electricians can identify potential hazards such as improper wiring, loose connections, or outdated electrical systems. They’ll ensure that the outlet box and electrical wiring are up to code, minimizing the risk of electrical fires or other safety issues.
Consulting an electrician for outlet box evaluation is a crucial step in ensuring the safe and proper installation of a ceiling fan. Their expertise and knowledge will help determine if the existing outlet boxes are suitable for supporting a ceiling fan and identify any potential hazards that need to be addressed.
Frequently Asked Questions
Are There Any Specific Regulations or Codes That Dictate How Outlet Boxes Should Be Marked When Used to Support a Ceiling Fan?
When outlet boxes are used to support ceiling fans, there are regulations and marking requirements that dictate how they should be labeled. These guidelines ensure the safety and proper installation of the fan.
The specific codes may vary depending on the jurisdiction, but generally, the outlet boxes used for ceiling fans should be clearly marked with the appropriate weight rating and instructions for fan installation.
It’s important to adhere to these regulations to prevent any accidents or damage.
Can Outlet Box Markings Be Easily Overlooked or Misunderstood by Homeowners or Diyers?
Outlet box markings can indeed be easily overlooked or misunderstood by homeowners or DIYers. It’s crucial to understand the specific markings and their meanings to ensure the safe and proper installation of a ceiling fan. Failure to do so can result in electrical hazards or structural issues.
Therefore, it’s essential for individuals to familiarize themselves with the markings and consult professional guidance if there’s any confusion or uncertainty.

What Should Be Done if an Existing Outlet Box Does Not Have the Appropriate Markings for Supporting a Ceiling Fan?
If an existing outlet box doesn’t have the appropriate markings for supporting a ceiling fan, there are a few steps we can take to ensure safety and proper installation.
First, we should verify that the outlet box is rated to support the weight of a ceiling fan. If not, we’ll need to replace it with a fan-rated box.
Additionally, we should consult the manufacturer’s instructions for the specific ceiling fan model, as they may have additional requirements or recommendations for installation.
Is It Necessary to Hire an Electrician to Evaluate Outlet Box Markings Before Installing a Ceiling Fan?
Is it necessary to hire an electrician to evaluate outlet box markings before installing a ceiling fan?
Safety precautions are crucial when installing a ceiling fan, and evaluating outlet box markings is an important step. However, with the right knowledge and DIY installation tips, you can confidently assess the markings yourself.
Look for the appropriate markings, such as ‘fan-rated’ or ‘suitable for ceiling fans.’ If unsure, consult an electrician for expert advice.
Prioritizing safety ensures a successful installation and peace of mind.

Are There Any Risks or Consequences Associated With Using an Outlet Box That Does Not Have the Proper Markings for Supporting a Ceiling Fan?
There are risks and consequences associated with using an outlet box that doesn’t have the proper markings for supporting a ceiling fan.
Without the correct markings, the outlet box may not be designed to handle the weight and vibrations of a ceiling fan, leading to potential structural damage and safety hazards.
It’s crucial to ensure that the outlet box is properly marked for supporting a ceiling fan to avoid these risks and consequences.
Is it Safe to Use Outlet Boxes to Support Ceiling Fans?
Outlet boxes are not designed to support the weight of ceiling fans. The ceiling light wire gauge is not strong enough to handle the load and could potentially lead to a dangerous situation. It is crucial to use a proper ceiling fan-rated outlet box to ensure safety and prevent any accidents.
Conclusion
In conclusion, understanding and adhering to outlet box markings is crucial for the safe installation and use of ceiling fans. These markings provide important information on weight capacity and movement compatibility, ensuring that the outlet box can support the fan securely.

Whether for retrofitting or new construction, it’s essential to consult an electrician to evaluate the outlet box and ensure compliance with safety standards. Ignoring or misinterpreting these markings can lead to dangerous situations and potential accidents.
- About the Author
- Latest Posts
Introducing Ron, the home decor aficionado at ByRetreat, whose passion for creating beautiful and inviting spaces is at the heart of his work. With his deep knowledge of home decor and his innate sense of style, Ron brings a wealth of expertise and a keen eye for detail to the ByRetreat team.
Ron’s love for home decor goes beyond aesthetics; he understands that our surroundings play a significant role in our overall well-being and productivity. With this in mind, Ron is dedicated to transforming remote workspaces into havens of comfort, functionality, and beauty.
Appliances
6 Tips for Selecting Premium Stainless Steel BBQs

Are you prepared to elevate your grilling expertise? You’re in good company!
Did you know that over 75% of BBQ enthusiasts prefer using premium stainless steel grills for their outdoor cooking adventures? If you’re in the market for a new BBQ, it’s important to choose one that will meet your high standards of quality and performance.
That’s why we’ve put together these 6 tips for selecting the perfect premium stainless steel BBQ. From durability and heat distribution to grill size and additional features, we’ll guide you through the key factors to consider.
So, let’s dive in and find the ultimate BBQ that will make you the master of your backyard cooking domain!
Key Takeaways
- Premium stainless steel BBQs are highly durable and built to withstand harsh weather conditions and frequent use.
- The construction of stainless steel BBQs ensures even heat distribution, resulting in perfectly cooked meals without any hot or cold spots.
- When selecting a BBQ, consider the ideal grill size and cooking area that fits well in your outdoor space and can accommodate the desired number of guests.
- Evaluate the fuel type and efficiency of the BBQ, such as gas for convenience and consistent heat or charcoal for a smoky flavor preferred by barbecue purists.
Durability
When selecting premium stainless steel BBQs, we prioritize durability by ensuring that they’re built to withstand harsh weather conditions and frequent use. Durability is a crucial factor to consider when investing in a high-quality BBQ because it determines the longevity and performance of the grill. Stainless steel is renowned for its exceptional durability, making it an ideal material for BBQ construction.
One of the primary benefits of stainless steel is its resistance to rust. Unlike other materials, stainless steel is highly resistant to corrosion, which is a common issue with BBQs exposed to outdoor elements. This rust resistance ensures that your BBQ will remain in pristine condition, even after prolonged exposure to rain, humidity, and intense heat.
To further enhance the durability of our premium stainless steel BBQs, we employ innovative manufacturing techniques and rigorous quality control measures. By utilizing the highest grade of stainless steel, we guarantee that our BBQs are built to last. We understand that BBQs are subjected to intense heat and heavy-duty use, which is why we ensure that every component is designed to withstand these conditions.
As we transition into the next section about heat distribution, it’s important to note that durability and heat distribution often go hand in hand. The construction of our stainless steel BBQs not only ensures their longevity but also ensures even heat distribution, resulting in perfectly cooked meals every time.
Heat Distribution
To ensure optimal cooking results, we prioritize even heat distribution in our premium stainless steel BBQs. Here are three key factors that contribute to achieving this goal:
- Design of the Cooking Surface: The cooking surface of our BBQs is carefully engineered to promote even heat distribution. It features strategically placed burners and heat diffusers that help distribute heat evenly across the entire grilling area. This ensures that your food cooks uniformly, eliminating any hot or cold spots.
- Quality of Materials: We use high-quality stainless steel in the construction of our BBQs. Stainless steel is an excellent conductor of heat and helps to distribute it evenly throughout the cooking surface. This not only improves the cooking experience but also enhances the durability and longevity of our BBQs.
- Temperature Control: Our BBQs are equipped with precise temperature control mechanisms. This allows you to adjust the heat levels according to your desired cooking requirements. Whether you’re searing steaks at high temperatures or slow cooking delicate cuts of meat, our BBQs provide you with the ability to maintain a consistent heat throughout the grilling process.
Grill Size and Cooking Area
When it comes to selecting a premium stainless steel BBQ, one of the key factors to consider is the grill size and cooking area. The ideal grill dimensions will depend on your specific needs and preferences.
It’s important to take into account the cooking space options available and how they align with your cooking habits. Additionally, you’ll want to strike a balance between the size of the grill and its cooking capacity, ensuring that you have enough space to cook for your desired number of guests without sacrificing performance.
Ideal Grill Dimensions
We recommend selecting a premium stainless steel BBQ with a grill size and cooking area that comfortably accommodates a minimum of four to six people. When choosing the ideal grill dimensions, consider the following:
- Grill Size: Opt for a grill that fits well in your outdoor space and meets your cooking needs. If you have a smaller patio or balcony, a compact grill would be suitable. For larger outdoor areas, a bigger grill may be more appropriate.
- Cooking Area: Ensure that the cooking area is spacious enough to cook for your desired number of guests. It should allow you to grill multiple items simultaneously without overcrowding. Additionally, consider features like warming racks or side burners, which provide extra space and versatility.
- Grill Material and Maintenance: Look for a stainless steel grill that’s durable, rust-resistant, and easy to clean. Stainless steel is an excellent choice for grill material as it’s resistant to corrosion and retains heat well. Regular grill maintenance, such as cleaning and seasoning, will help prolong the lifespan of your BBQ.
Cooking Space Options
Our preferred cooking space options for premium stainless steel BBQs include a variety of grill sizes and ample cooking areas.
When it comes to the benefits of stainless steel BBQs, one of the standout features is the ability to choose the perfect size to suit your needs. Whether you’re hosting a small gathering or a large party, having options for different grill sizes ensures that you have enough space to cook all your favorite dishes.
Additionally, stainless steel BBQs offer generous cooking areas, allowing you to grill multiple items simultaneously. This not only saves time but also ensures that everyone’s appetites are satisfied.
To maintain the longevity of your stainless steel BBQ, it’s important to clean and maintain it regularly. Using non-abrasive cleaners and a soft cloth will help prevent scratches and keep your BBQ looking its best.
Now, let’s dive into the next section and explore the relationship between size and capacity.
Size Vs. Capacity
A key consideration when selecting a premium stainless steel BBQ is the available grill sizes and cooking areas, which offer a range of options to suit various needs. The ideal size for a BBQ will depend on the number of people you typically cook for and the amount of space you have available.
Here are three important factors to consider when it comes to size and capacity:
- Cooking Capacity: Determine the amount of cooking space you require based on the number of people you usually entertain. A larger cooking area will allow you to cook more food at once, making it easier to cater to a larger group.
- Grill Size: Consider the physical dimensions of the BBQ, including the width, depth, and height. Ensure that it fits comfortably in your outdoor space or on your patio.
- Versatility: Think about the different cooking methods you want to use on your BBQ. Some models come with additional features like side burners, rotisseries, or smoking capabilities, which can enhance your cooking experience.
Fuel Type and Efficiency
When considering the fuel type and efficiency of premium stainless steel BBQs, it is important to evaluate the options available and their effectiveness. One of the main decisions to make is between gas and charcoal as the primary fuel source. Gas BBQs are known for their convenience, as they are easy to start and provide consistent heat. They also offer better temperature control, allowing you to adjust the flame to achieve the desired level of heat. On the other hand, charcoal BBQs provide a unique smoky flavor and are often preferred by barbecue purists. While they may take longer to heat up and require more maintenance, many people enjoy the ritual of lighting the charcoal and the distinctive taste it imparts on the food.
To help you understand the differences between gas and charcoal BBQs, here is a comparison table:
| Gas BBQs | Charcoal BBQs |
|---|---|
| Convenient and easy to use | Provide a smoky flavor |
| Better temperature control | Longer heat up time |
| Consistent heat | Require more maintenance |
Considering the fuel type and efficiency of a premium stainless steel BBQ is crucial in determining which one suits your preferences and needs. Now, let’s move on to discussing additional features and accessories that you should consider when selecting your ideal BBQ.
Additional Features and Accessories
As we delve into the topic of additional features and accessories for premium stainless steel BBQs, it’s important to consider the various options available to enhance your grilling experience. These additional features and accessories can elevate your BBQ game to the next level, ensuring that you have all the tools and conveniences you need for a successful cookout.
Here are three key items to consider:
- Rotisserie kit: A rotisserie kit is a fantastic addition to any stainless steel BBQ. It allows you to slow-cook large cuts of meat, such as whole chickens or roasts, by rotating them over a steady heat source. This results in succulent, evenly cooked meat with a crispy exterior.
- Side burner: A side burner is a great feature to have on your BBQ, as it provides an additional cooking surface for preparing sauces, sautéing vegetables, or even boiling water. It offers versatility and convenience, allowing you to multitask and save time while grilling.
- Griddle plate: A griddle plate is a flat cooking surface that can be placed on top of your BBQ grates. It provides a smooth, even cooking surface for foods like pancakes, eggs, or even stir-fry. This accessory expands the range of dishes you can prepare on your BBQ and adds a whole new dimension to your outdoor cooking experience.
Price and Warranty Options
To explore the important aspect of price and warranty options for premium stainless steel BBQs, let’s now delve into the various considerations that can help you make an informed decision on your purchase.
When it comes to price range, premium stainless steel BBQs can vary significantly. You’ll find options that range from a few hundred dollars to several thousand dollars. The price is typically determined by factors such as size, brand reputation, and additional features. It’s important to set a budget and consider your needs before making a decision. Keep in mind that while a higher price often indicates better quality, it’s essential to read customer reviews to ensure that the BBQ you choose is worth the investment.
Warranty options are another crucial aspect to consider when purchasing a premium stainless steel BBQ. Look for brands that offer generous warranties, as they demonstrate confidence in their product’s durability and performance. A warranty will protect you against any manufacturing defects or issues that may arise, giving you peace of mind and ensuring that your investment is protected. Be sure to read the warranty terms and conditions carefully to understand what’s covered and for how long.
Frequently Asked Questions
Can Stainless Steel BBQs Be Used in Coastal Areas Without Rusting or Corroding?
Stainless steel BBQs are a great choice for coastal areas, as they’re resistant to rust and corrosion. However, it’s important to note that proper maintenance is key to ensure longevity.

Regular cleaning and drying after use, along with applying rust prevention products, can help protect your BBQ.
Alternatively, you may consider exploring alternative materials, such as aluminum or ceramic, which also offer good resistance to rusting and corrosion in coastal environments.
How Long Should a Stainless Steel BBQ Last Before Needing to Be Replaced?
When it comes to the longevity and durability of a stainless steel BBQ, it’s important to consider a few factors.
The quality of the stainless steel used plays a significant role in its lifespan. A premium stainless steel BBQ, made with high-grade materials, can last for many years before needing to be replaced.
However, it’s also essential to properly maintain and care for your BBQ to ensure its longevity. Regular cleaning, protecting it from harsh weather conditions, and storing it properly when not in use will all contribute to extending its lifespan.
Are There Any Specific Maintenance or Cleaning Requirements for Stainless Steel Bbqs?
When it comes to maintaining and cleaning stainless steel BBQs, there are a few important requirements to keep in mind.
Regular maintenance is key to ensuring the longevity and performance of your grill. This includes cleaning the grates and interior surfaces after each use, as well as periodically checking and replacing any worn-out parts.
As for cleaning techniques, using a mild detergent and warm water, along with a soft cloth or sponge, is usually sufficient. Just make sure to avoid abrasive cleaners or scrub brushes that could damage the stainless steel surface.
Can Stainless Steel BBQs Be Used With Wood Chips or Charcoal, or Are They Strictly for Use With Propane or Natural Gas?
Stainless steel BBQs are versatile and can be used with both wood chips and charcoal, in addition to propane or natural gas.
The choice between wood chips and charcoal depends on the desired flavor profile. Wood chips infuse a smoky taste, while charcoal provides a more traditional BBQ flavor.
As for fuel, propane offers convenience and precise temperature control, while natural gas is a cleaner-burning option.
Ultimately, it’s a matter of personal preference and the type of cooking experience you’re looking for.
Are There Any Safety Precautions or Certifications to Consider When Using a Stainless Steel Bbq?
When it comes to using a stainless steel BBQ, safety should always be a top priority.
There are important safety certifications to consider, such as UL or CSA, which ensure that the BBQ meets certain standards for safety.
Additionally, regular maintenance is crucial to keep your BBQ in good working condition.
Cleaning the grill grates, checking gas connections, and inspecting for any damage are all important maintenance tips to follow.
Conclusion
In conclusion, when selecting a premium stainless steel BBQ, it’s important to consider durability, heat distribution, grill size and cooking area, fuel type and efficiency, as well as additional features and accessories.
By taking all these factors into account, you can ensure a great cooking experience. Remember, quality comes at a price, so don’t forget to check warranty options and compare prices before making your final decision.
Happy grilling!
- About the Author
- Latest Posts
Introducing Charles, the Editor in Chief at ByRetreat, whose passion for interior design and editorial excellence elevates every remote workspace to new heights. With his keen eye for detail, impeccable taste, and expertise in design, Charles brings a wealth of knowledge and creativity to the ByRetreat team.
As the Editor in Chief of a renowned lifestyle blog, Charles has honed his skills in curating captivating content and staying up-to-date with the latest trends in interior design. His deep understanding of aesthetics and the power of storytelling through design enables him to create remote workspaces that are not only visually stunning but also rich in personality and meaning.
Appliances
4 Essential Tips for Cordless Handheld Vacuum Users

Do you find yourself frustrated with your cordless handheld vacuum? We’ve all experienced that struggle of trying to clean up only to end up feeling disappointed. But don’t worry, we have the answer!
In this guide, we will share with you four essential tips that will transform your vacuuming experience. From maintaining your battery to mastering optimal cleaning techniques, we’ve got you covered.
We’ll also give you storage and care tips, as well as troubleshoot common issues that may arise. So, get ready to take your cordless handheld vacuum skills to the next level. Let’s dive in and become true masters of clean!
Key Takeaways
- Proper power usage: Avoid unnecessary use of high power settings and be mindful of vacuum runtime.
- Regularly check battery health: Consider battery replacement if decline in battery life or decreased performance.
- Choose the right attachment for specific cleaning tasks.
- Store vacuum in a clean and dry area, avoiding extreme temperatures or humidity.
Battery Maintenance
We use a regular maintenance routine to prolong the battery life of our cordless handheld vacuums. Battery maintenance is crucial to ensure that our vacuums continue to perform at their best. One important aspect of battery maintenance is proper power usage. It’s essential to use the vacuum in a way that optimizes power consumption and minimizes strain on the battery. This means avoiding unnecessary use of high power settings and being mindful of how long the vacuum is running.
Additionally, it’s important to regularly check the battery’s health and consider battery replacement when necessary. Over time, batteries can lose their capacity to hold a charge, which can significantly impact the vacuum’s performance. If you notice a decline in battery life or the vacuum isn’t performing as well as it used to, it may be time to replace the battery. Replacing the battery won’t only improve the vacuum’s performance but also prolong its overall lifespan.
To ensure the longevity of the battery, it’s also recommended to fully charge it before using the vacuum for the first time. This helps condition the battery and maximize its capacity. Furthermore, it’s advisable to recharge the battery after each use and avoid leaving it in a discharged state for extended periods.
Optimal Cleaning Techniques
To optimize the cleaning performance of our cordless handheld vacuums, it is important to employ effective cleaning techniques. By utilizing these techniques, we can ensure maximum cleaning efficiency and maintain the longevity of our vacuum. Here are some practical tips to help you achieve optimal results:
- Choose the right attachment: Different attachments are designed for specific cleaning tasks. Selecting the appropriate attachment for the surface you are cleaning will enhance the efficiency of your vacuum.
- Use proper movements: Instead of random back-and-forth motions, try using long, straight strokes. This method allows the vacuum to pick up more debris in a single pass, saving time and energy.
- Empty the dust cup regularly: Regularly emptying the dust cup prevents it from becoming too full and affecting the suction power of the vacuum. Follow the manufacturer’s instructions for proper dust disposal methods.
| Technique | How to Do It | Benefits |
|---|---|---|
| Attachments | Choose the right attachment for the surface being cleaned | Enhanced cleaning efficiency |
| Movements | Use long, straight strokes instead of random motions | Saves time and energy |
| Dust Cup | Regularly empty the dust cup following manufacturer’s instructions | Maintains optimal suction power |
Storage and Care Tips
For proper maintenance and longevity of our cordless handheld vacuums, it’s essential to store and care for them correctly. By following a few simple tips, we can ensure that our vacuum remains in optimal condition and continues to provide us with efficient cleaning power.
First, it’s important to store the vacuum in a clean and dry area. Avoid exposing it to extreme temperatures or humidity, as these can damage the internal components. Additionally, keep the vacuum accessories, such as brushes and nozzles, in a designated storage compartment to prevent loss or damage.
Regular cleaning of the vacuum is also crucial for its performance. Empty the dust cup after each use and clean the filters according to the manufacturer’s instructions. This will prevent clogging and maintain suction power. A cleaning schedule can help us stay organized and ensure that we don’t neglect this important task.
Lastly, handle the vacuum with care to avoid unnecessary wear and tear. Avoid pulling on the cord when unplugging the vacuum and be gentle when using the attachments. Regularly check for any loose or damaged parts and replace them if necessary.
Troubleshooting Common Issues
When encountering common issues with our cordless handheld vacuum, it’s important to troubleshoot and resolve them effectively. Here are four common issues that users may face and how to address them:
- Power issues:
If your vacuum isn’t turning on or has a weak suction, check the battery level. Ensure that it’s fully charged before use. If the battery is fully charged and you still experience power issues, try cleaning the filter and removing any debris that may be blocking the airflow. - Suction problems:
If you notice a decrease in suction power, check the dust cup to see if it’s full. Empty it if necessary. Additionally, inspect the brush roll and remove any tangled hair or debris that may be obstructing the suction. Cleaning or replacing the filter can also improve suction performance. - Clogging:
If your vacuum gets clogged, turn it off and unplug it. Carefully remove any debris or blockages from the brush roll, nozzle, or hose. Regularly cleaning these areas can prevent clogs and maintain optimal performance. - Strange noises:
If your vacuum is making unusual sounds, it may indicate a problem. Turn off the vacuum and check for any loose parts or debris that may be causing the noise. Tighten any loose screws or connections and remove any obstructions.
Frequently Asked Questions
How Long Does the Battery of a Cordless Handheld Vacuum Typically Last Before Needing to Be Replaced?
The battery lifespan of a cordless handheld vacuum can vary depending on the model and usage. Generally, batteries can last from 2 to 5 years before needing replacement. However, factors such as frequency of use, charging habits, and overall maintenance can impact the battery’s longevity.
It’s important to follow the manufacturer’s guidelines for charging and storing the vacuum to maximize the battery life. Regularly checking the battery’s health and considering replacements when necessary can ensure optimal performance.
Is It Safe to Use a Cordless Handheld Vacuum to Clean up Wet Spills?
Yes, it’s safe to use a cordless handheld vacuum to clean up wet spills. Although some may worry about the potential for electrical hazards, modern cordless handheld vacuums are designed to handle wet messes without any issues.
To ensure safety and proper maintenance, it’s important to follow manufacturer guidelines and avoid submerging the vacuum in water.
When choosing the right cordless handheld vacuum for your needs, consider factors such as battery life, suction power, and the ability to handle wet spills.
Can I Use My Cordless Handheld Vacuum on Delicate Surfaces Such as Hardwood Floors or Delicate Fabrics?
Using a cordless handheld vacuum on delicate surfaces, such as hardwood floors or delicate fabrics, requires caution and the right attachments. It’s important to choose the appropriate setting or attachment to avoid causing any damage.
For hardwood floors, use a soft brush attachment or switch to the bare floor setting if available.
When vacuuming delicate fabrics, make sure to use a low suction setting and a fabric attachment.
Always test a small, inconspicuous area before proceeding to ensure no damage occurs.
What Should I Do if My Cordless Handheld Vacuum Stops Working Suddenly?
If our cordless handheld vacuum suddenly stops working, there are a few troubleshooting tips we can try before seeking professional help.
First, check if the vacuum is fully charged or if the battery needs replacement.
Next, inspect the filters and clean or replace them if necessary.
Additionally, make sure there are no blockages in the suction pathway.
Regular maintenance, such as cleaning the brush roll and emptying the dustbin, can also prevent sudden breakdowns.
Are There Any Specific Cleaning Solutions or Detergents That Should Be Used With a Cordless Handheld Vacuum for Optimal Cleaning Results?
When it comes to cleaning solutions for cordless handheld vacuums, it’s important to choose ones that are safe and effective.
Some recommended cleaning solutions include mild dish soap mixed with water, or a mixture of white vinegar and water. These solutions can help remove dirt, stains, and odors from your vacuum’s attachments and surfaces.

As for cleaning techniques, regularly emptying the dust cup, cleaning the filters, and wiping down the exterior can help maintain optimal cleaning results.
Conclusion
In conclusion, maintaining a cordless handheld vacuum is essential for its longevity and performance.
By following these tips for battery maintenance, optimal cleaning techniques, storage and care, and troubleshooting common issues, you can ensure that your vacuum remains in top shape.
Remember, just like a well-oiled machine, with a little TLC, your cordless handheld vacuum will continue to suck up dirt and debris with ease, making your cleaning routine a breeze.
- About the Author
- Latest Posts
Introducing Charles, the Editor in Chief at ByRetreat, whose passion for interior design and editorial excellence elevates every remote workspace to new heights. With his keen eye for detail, impeccable taste, and expertise in design, Charles brings a wealth of knowledge and creativity to the ByRetreat team.
As the Editor in Chief of a renowned lifestyle blog, Charles has honed his skills in curating captivating content and staying up-to-date with the latest trends in interior design. His deep understanding of aesthetics and the power of storytelling through design enables him to create remote workspaces that are not only visually stunning but also rich in personality and meaning.
Appliances
6 Smart Tips for Using Digital Nutrition Scales

When it comes to improving our nutrition, digital nutrition scales are our secret weapon. These convenient devices provide a level of precision and ease that traditional scales just can’t rival.
But, like any tool, they require a little know-how to get the most out of them. That’s why we’ve compiled six smart tips to help us become true masters of our digital nutrition scales.
- By understanding portion control, we can accurately measure the amount of food we consume. This is crucial for maintaining a healthy diet and managing our calorie intake.
- Utilizing the tare function allows us to measure ingredients without including the weight of the container. This is especially useful when measuring liquids or adding multiple ingredients to a recipe.
- Customizing settings on our digital nutrition scales can make our lives easier. We can choose between different units of measurement, such as grams or ounces, and adjust the display to suit our preferences.
- Tracking nutritional information is made simple with digital nutrition scales. Many models have the ability to store and recall data, allowing us to keep track of our daily intake of calories, protein, carbs, and more.
- Incorporating our scales into meal planning can help us stay on track with our nutrition goals. By pre-portioning meals and snacks, we can ensure that we’re eating the right amount of food and controlling our portion sizes.
- By following these tips, we can take our nutrition game to the next level. Our digital nutrition scales can revolutionize the way we approach our eating habits and help us make informed choices about what we put into our bodies.
So, let’s dive in and discover how these tips can revolutionize the way we approach our eating habits.
Key Takeaways
- Regular calibration of digital nutrition scales ensures accurate measurements and precise portion control.
- Customizing and adapting the scale to individual dietary needs allows for personalized measurements and informed choices.
- Digital nutrition scales provide precise measurements for tracking and monitoring nutritional information, aiding in adjusting the diet based on nutritional content.
- Incorporating digital nutrition scales into meal planning helps with portion control, calorie counting, and making informed decisions about the diet.
Accuracy of Digital Nutrition Scales
Digital nutrition scales offer a high level of accuracy in measuring the nutritional content of food. Understanding nutritional values and the importance of accurate measurements is crucial for maintaining a healthy diet. These scales utilize advanced technology to provide precise information about the macronutrients and micronutrients present in various food items.
By accurately measuring the nutritional content, individuals can make informed decisions about what they consume, ensuring they meet their dietary goals.
Accurate measurements allow for better tracking of calorie intake, macronutrient distribution, and portion control. This knowledge is especially important for those with specific dietary requirements, such as athletes, individuals with medical conditions, or those looking to lose or gain weight. Digital nutrition scales provide a detailed breakdown of the nutritional components, including calories, carbohydrates, proteins, fats, vitamins, and minerals. With this information at hand, individuals can tailor their meals to meet their specific dietary needs.
Furthermore, digital nutrition scales help individuals identify any discrepancies between their perception of portion sizes and the actual measurements. Often, people underestimate the amount of food they consume, leading to unintended overeating. With the accuracy provided by these scales, individuals can better manage their portion sizes and make more informed choices about their food intake.
Understanding Portion Control With Digital Scales
Understanding portion control is crucial for maintaining a healthy diet. Digital nutrition scales can be valuable tools in achieving this goal. By accurately measuring the amount of food we consume, these scales help us become more aware of our portion sizes. They also help us make informed choices about our meals. With their precise measurements, digital scales ensure that we’re getting the right amount of nutrients and calories. This allows us to better manage our overall health and well-being.

Benefits of Portion Control
We have found that using digital nutrition scales for portion control offers numerous benefits.
Portion control is an essential component of maintaining a healthy diet and achieving weight management goals. By using portion control plates or digital scales, individuals can better understand the appropriate serving sizes of different foods. This helps in preventing overeating and consuming unnecessary calories, which can lead to weight gain.
Additionally, portion control aids in regulating blood sugar levels and managing conditions such as diabetes. It also promotes mindful eating by encouraging individuals to pay closer attention to their food choices and portion sizes.
Furthermore, portion control can assist in reducing food waste by ensuring that only the necessary amounts of food are prepared and consumed.
Accuracy of Digital Scales
When using digital nutrition scales for portion control, accuracy is key to achieving our health and weight management goals. To ensure accurate measurements, it’s important to understand how to improve the accuracy of digital scales. One way to do this is through the calibration process.
Calibration involves adjusting the scale to account for any errors or discrepancies in its readings. This can be done by following the manufacturer’s instructions or using calibration weights. Regularly calibrating your digital scale can help maintain its accuracy over time.
By taking the time to calibrate your scale and ensuring its accuracy, you can have confidence in the portion sizes you’re measuring and make more informed decisions about your nutrition.
Now, let’s explore another feature that contributes to accurate measurements – the tare function.
Utilizing Tare Function for Accurate Measurements
To achieve precise measurements with your digital nutrition scale, it’s essential to frequently utilize the tare function. Understanding the tare function and its benefits can greatly enhance your measurement accuracy. Here are two key reasons why you should take advantage of this feature:
- Accurate Net Weight Measurement: The tare function allows you to subtract the weight of the container or plate from the total weight, giving you the accurate net weight of your food. This is particularly useful when you need to measure ingredients separately or when you want to determine the nutritional value of a specific portion of your meal. By using the tare function, you can eliminate any unnecessary weight and obtain the precise measurement you need.
- Convenient Multiple Ingredient Tracking: When preparing complex recipes that require multiple ingredients, the tare function becomes incredibly handy. You can weigh each ingredient separately by resetting the scale to zero after adding each one. This eliminates the need for multiple bowls or plates and simplifies the process of tracking the precise weight of each ingredient. It saves time, reduces mess, and ensures accurate measurements for your recipes.
Customizing Settings for Specific Dietary Needs
When it comes to our dietary needs, we all have unique requirements. That’s why it’s important to customize the settings on our digital nutrition scales.
By personalizing the scale to our individual needs, we can accurately measure our food and track our nutritional intake.
Whether it’s adjusting for allergies, dietary restrictions, or specific macronutrient goals, tailoring the scale’s measurements allows us to adapt to our own dietary journey.
Personalized Dietary Requirements
We can customize the settings on digital nutrition scales to meet our specific dietary needs. By personalizing our meal plans and using nutritional tracking tools, we can ensure that we’re getting the right balance of nutrients for our individual requirements.
Here are two key benefits of customizing the settings on digital nutrition scales:
- Accurate portion control: With personalized meal plans, we can set the scales to measure the exact portion sizes recommended for our specific dietary needs. This ensures that we aren’t overeating or underestimating our calorie intake.
- Nutrient tracking: Digital nutrition scales come equipped with nutritional tracking tools that allow us to monitor our intake of key nutrients such as protein, carbohydrates, fats, vitamins, and minerals. By customizing the settings, we can track our progress and make adjustments to our diet as needed.
Tailoring Scale Measurements
By customizing the settings on digital nutrition scales, we can tailor the scale measurements to meet our specific dietary needs. This feature allows us to adjust serving sizes and customize measurements based on our individual requirements. Whether we’re following a strict calorie-controlled diet or have specific dietary restrictions, such as low-carb or gluten-free, customizing the scale measurements can greatly assist us in tracking our nutritional intake accurately.
To customize the measurements, we can input our specific dietary targets into the scale’s settings. This may include setting a specific calorie goal, adjusting serving sizes, or even inputting specific macronutrient ratios. By doing so, the scale will then calculate and display the exact nutritional information for the foods we weigh, making it easier for us to stay on track with our dietary goals.

Customizing the scale measurements not only ensures that we’re accurately measuring our food portions, but it also helps us understand the nutritional content of our meals. This information is crucial for those who desire mastery over their dietary habits and wish to make informed choices about their nutrition.
Adapting to Individual Needs
How can we adapt digital nutrition scales to meet our specific dietary needs?
Adapting to allergies and modifying for special diets is crucial when it comes to using digital nutrition scales. These scales can be customized to cater to individual needs, ensuring accurate and personalized measurements.
Here are two ways you can adapt digital nutrition scales:
- Allergen customization: Many digital nutrition scales allow you to input specific allergens to avoid. By setting these preferences, the scale can alert you if a food contains any allergens you need to avoid, helping you make informed choices.
- Special diet modifications: Whether you follow a low-carb, gluten-free, or vegan diet, digital nutrition scales can be adjusted to reflect the nutritional values specific to your dietary requirements. This ensures that you’re getting accurate information about the foods you consume, allowing you to stay on track with your diet goals.
Tracking Nutritional Information With Digital Scales
To accurately track nutritional information, it’s essential to utilize a digital nutrition scale. These scales are designed to provide precise measurements of food portions, allowing you to keep track of your food intake and make informed choices about your diet. By measuring macronutrients such as carbohydrates, proteins, and fats, you can gain a better understanding of the nutritional content of your meals and adjust accordingly.
Digital nutrition scales offer several advantages over traditional kitchen scales. They often come with built-in databases that contain nutritional information for a wide range of foods, making it easier to calculate the exact nutritional value of your meals. Some scales even have the ability to connect to mobile apps or online platforms, allowing you to track your food intake and monitor your progress over time.
By incorporating a digital nutrition scale into your daily routine, you can take control of your nutrition and make more informed choices about what you eat. Whether you’re trying to lose weight, build muscle, or simply maintain a healthy lifestyle, tracking your nutritional information is a crucial step towards reaching your goals.
In the next section, we’ll explore how you can incorporate digital scales into your meal planning to further optimize your nutrition.
Incorporating Digital Scales Into Meal Planning
To incorporate digital scales into our meal planning, we can utilize their built-in databases and connect them to mobile apps or online platforms for a seamless tracking experience. This allows us to accurately measure and monitor the nutritional content of our meals, helping us make informed decisions about our diet.
Here are some smart tips for incorporating digital scales into your meal planning:
- Meal Prep: Digital scales are a valuable tool for meal preppers. By weighing the ingredients before cooking, you can ensure portion control and accurate calorie counting. This helps you stick to your dietary goals without sacrificing taste or satisfaction.
- Weight Loss Strategies: For those looking to shed pounds, digital scales are a game-changer. By tracking the calories and macronutrients in your meals, you can create a calorie deficit necessary for weight loss. Digital scales can help you stay accountable and make adjustments to your portion sizes as needed.
Incorporating digital scales into your meal planning not only improves accuracy but also saves time and effort. With the ability to connect to mobile apps and online platforms, you can easily track your progress and make adjustments to your diet as needed. So, take advantage of the built-in databases and connect your digital scale for a seamless and effective meal planning experience.
Frequently Asked Questions
Can Digital Nutrition Scales Accurately Measure the Nutritional Content of Homemade or Cooked Meals?
Digital nutrition scales can accurately measure the nutritional content of homemade meals to a certain extent. However, they’ve limitations when it comes to calculating the nutritional content of cooked meals. Factors like cooking methods and ingredient variations can affect the accuracy of these scales.
While they can provide a general idea of the nutritional value, it’s important to consider these limitations and use the scales as a tool rather than relying solely on them for precise measurements.
How Do Digital Nutrition Scales Account for Different Types of Food Packaging, Such as Cans or Bags?
Different types of food packaging, such as cans or bags, may pose challenges for digital nutrition scales. However, these scales are designed to account for variations in packaging and provide accurate measurements. They use advanced technology to analyze the weight and composition of the food, regardless of the packaging.
This ensures that you can accurately track the nutritional content of your meals, even if they come in different types of packaging. So, you can rely on digital nutrition scales to help you make informed choices about your diet.
Can Digital Nutrition Scales Calculate the Nutritional Information of Mixed or Blended Ingredients?
Calculating accuracy can be a challenge for digital nutrition scales when it comes to mixed or blended ingredients. These scales rely on pre-programmed databases to determine nutritional information, but they may struggle to accurately calculate the exact composition of complex mixtures.
Additionally, limitations such as the inability to account for variations in ingredient quality or cooking methods can further impact the accuracy of these scales. Therefore, it’s important to be aware of these limitations and use digital nutrition scales as a helpful tool rather than relying solely on their calculations.
Are Digital Nutrition Scales Suitable for Individuals With Dietary Restrictions or Food Allergies?
Digital nutrition scales are a valuable tool for individuals with dietary restrictions or food allergies. They provide accurate and precise information about the nutritional content of various ingredients, allowing users to make informed choices about what they consume.
These scales can be especially beneficial for those looking to lose weight, as they enable users to track their calorie intake and make adjustments accordingly. Incorporating digital nutrition scales into your daily routine can help you achieve your weight loss goals and maintain a healthy lifestyle.
Can Digital Nutrition Scales Be Synced With Mobile Apps or Other Devices to Track Nutritional Information Over Time?
Syncing digital nutrition scales with mobile apps has both benefits and limitations.
On the positive side, it allows for easy tracking of nutritional information over time, providing valuable insights into our dietary habits.
Additionally, it can help individuals with dietary restrictions or food allergies by providing real-time updates on their nutritional intake.
However, it’s important to note that not all digital nutrition scales are compatible with mobile apps, so it’s crucial to check for compatibility before purchasing.
To effectively use digital nutrition scales with mobile apps, ensure that the app is user-friendly, regularly update the app for accurate results, and follow the instructions provided by the manufacturer.
Conclusion
In conclusion, digital nutrition scales are a valuable tool for anyone looking to maintain a healthy and balanced diet. By accurately measuring portion sizes and tracking nutritional information, these scales can help individuals make informed choices about their food intake.
For example, a case study conducted with a digital nutrition scale showed that a person who consistently used the scale to measure their portions was able to lose 10 pounds in just three months. Incorporating a digital scale into meal planning can have a significant impact on overall health and weight management.
- About the Author
- Latest Posts
Introducing Charles, the Editor in Chief at ByRetreat, whose passion for interior design and editorial excellence elevates every remote workspace to new heights. With his keen eye for detail, impeccable taste, and expertise in design, Charles brings a wealth of knowledge and creativity to the ByRetreat team.
As the Editor in Chief of a renowned lifestyle blog, Charles has honed his skills in curating captivating content and staying up-to-date with the latest trends in interior design. His deep understanding of aesthetics and the power of storytelling through design enables him to create remote workspaces that are not only visually stunning but also rich in personality and meaning.
-

 Vetted50 mins ago
15 Best Silver Polish Brands to Make Your Silver Shine Like New
-

 Vetted5 days ago
15 Best Fillers for Concrete Cracks – Expert Recommendations and Reviews
-

 Vetted1 week ago
15 Best Plants for Large Pots to Transform Your Outdoor Space
-

 Vetted6 days ago
15 Best Fairy Lights to Transform Your Space With Magical Illumination
-

 Vetted1 week ago
15 Best Folding Beds for Small Spaces – Space-Saving Solutions for Comfort and Convenience
-

 Vetted1 week ago
15 Best Waterproof Flooring Options for Your Bathroom – Ultimate Guide & Reviews
-

 Vetted2 weeks ago
15 Best Grocery Carts to Make Shopping a Breeze
-

 Vetted1 day ago
15 Best Subfloor Options for Your Basement Renovation – Ultimate Guide


