Appliances
What Wire for Ceiling Fan With Light
2025
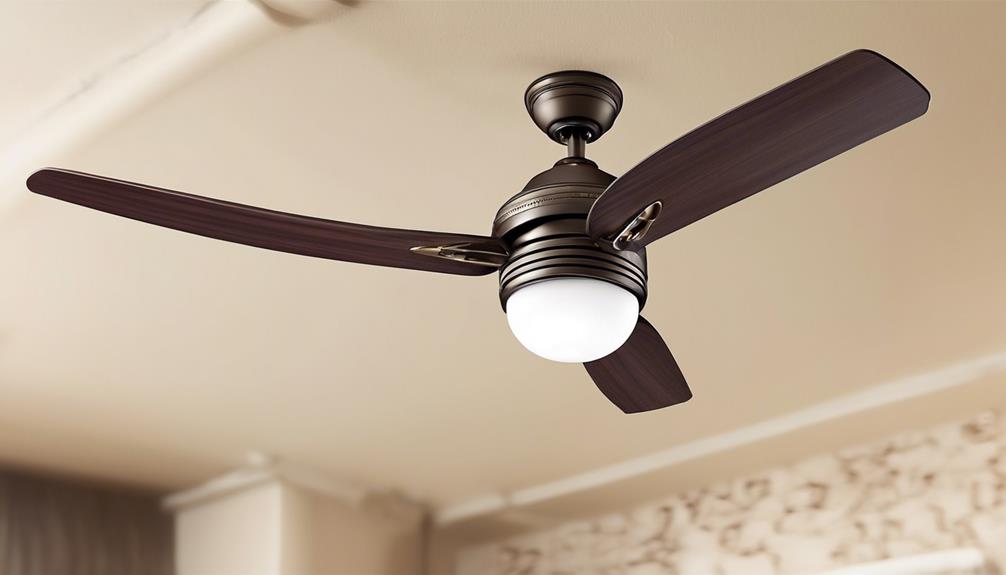
In the task of installing a ceiling fan that includes a light, it’s often said, ‘The key is in the correct wire.’ Being professional writers, we recognize the significance of delivering precise and trustworthy details.
In this guide, we will explore the various types of wire suitable for your ceiling fan with a light fixture. From understanding wire basics to choosing the correct wire gauge and ampacity, we'll cover it all.
We'll also discuss common wire options for installation and provide a step-by-step guide to help you wire your ceiling fan with ease. Additionally, we'll share safety tips and considerations for troubleshooting common wiring issues.
So, let's dive in and find the perfect wire for your ceiling fan with a light.
Key Takeaways
- Understanding electrical wire basics, including color coding for hot/live wires (typically black), neutral wires (white), and grounding wires (green or bare copper) is important for proper installation and to prevent electrical hazards.
- Knowledge of electrical circuits, including how the wires in a ceiling fan connect to the circuit, is vital for proper installation and troubleshooting issues.
- Selecting the appropriate wire gauge and insulation is crucial to ensure proper installation and functionality of the ceiling fan and light, taking into consideration power requirements and distance from the power source.
- Compatibility with the switch is important, whether using a three-wire setup for separate control of fan and light functions or a two-wire setup where they are controlled together. Consultation with a professional electrician is recommended to ensure proper installation and switch compatibility.
Understanding Electrical Wire Basics
Understanding electrical wire basics is essential for anyone working with ceiling fans. The proper selection and installation of wires is crucial to ensure the safe and efficient operation of your ceiling fan.
One important aspect of wire basics is understanding wire color coding. Electrical wires are color-coded to indicate their specific function and purpose. For example, black wires are typically used for hot or live wires, while white wires are used for neutral wires. Green or bare copper wires are used for grounding purposes. It's important to follow the color coding guidelines to prevent any potential electrical hazards.
Another aspect of electrical wire basics is understanding electrical circuits. An electrical circuit is a closed loop through which electricity flows. It consists of a power source, wires, switches, and loads. Ceiling fans are typically connected to a circuit that includes a switch and a power source.
Understanding how the wires in a ceiling fan connect to the electrical circuit is vital for proper installation. Each wire must be connected to its respective terminal for the ceiling fan to function correctly. By having a solid understanding of electrical circuits, you can troubleshoot any issues that may arise during installation or operation.
Types of Wire for Ceiling Fan With Light

When selecting wire for a ceiling fan with light, there are several important points to consider.
First, you need to choose the right wire gauge to ensure the fan and light function properly and safely.
Additionally, it's crucial to select wire with suitable insulation to protect against electrical hazards.
Lastly, you must ensure that the wire is compatible with the switch you plan to use.
Wire Gauge Options
To ensure proper installation and functionality of your ceiling fan with light, it is crucial to select the appropriate wire gauge for the electrical connections. The wire gauge selection depends on the power requirements of your ceiling fan and light, as well as the distance between the fan and the power source. Using an improper wire gauge can result in voltage drop, overheating, and potential damage to your electrical system. To help you choose the right wire gauge for your ceiling fan with light, refer to the table below:
| Wire Gauge | Amperage Rating | Maximum Distance |
|---|---|---|
| 14 | 15 | 60 feet |
| 12 | 20 | 80 feet |
| 10 | 30 | 100 feet |
| 8 | 40 | 150 feet |
| 6 | 55 | 200 feet |
Suitable Wire Insulation
We recommend selecting wire insulation that meets the safety standards and requirements for a ceiling fan with light installation. Choosing the right wire insulation is crucial to ensure the proper functioning and longevity of your ceiling fan.
Here are three key factors to consider when selecting suitable wire insulation:
- Insulation Types:
- PVC (Polyvinyl Chloride): PVC insulation is commonly used for residential electrical wiring due to its affordability and durability.
- THHN (Thermoplastic High Heat-resistant Nylon): THHN insulation is heat and moisture resistant, making it suitable for areas with high temperatures or humidity levels.
- FEP (Fluorinated Ethylene Propylene): FEP insulation provides excellent resistance to chemicals, oils, and extreme temperatures, making it ideal for commercial or industrial applications.
- Suitable Wire Gauge:
- The wire gauge refers to the thickness of the wire. It's essential to choose a wire with the appropriate gauge to handle the electrical load of your ceiling fan with light. Consult the manufacturer's guidelines or a licensed electrician to determine the suitable wire gauge for your specific installation.
- Safety Standards:
- Ensure that the wire insulation you choose meets the safety standards and regulations set by local electrical codes. This will guarantee the safe and reliable operation of your ceiling fan with light.
Compatibility With Switch
For optimal compatibility with the switch, it's important to select the appropriate types of wire for your ceiling fan with light installation.
When it comes to switch compatibility, you need to consider the wiring techniques employed. The switch is responsible for controlling the fan and light functions, so it's crucial to ensure a seamless integration with the wiring.
One common wiring technique is the use of a three-wire setup, which includes a hot wire, a neutral wire, and a ground wire. This setup allows for separate control of the fan and light functions.
Another option is a two-wire setup, where the fan and light are controlled together.
Whichever wiring technique you choose, it's essential to consult with a professional electrician to ensure proper installation and switch compatibility.
Wire Gauge and Ampacity
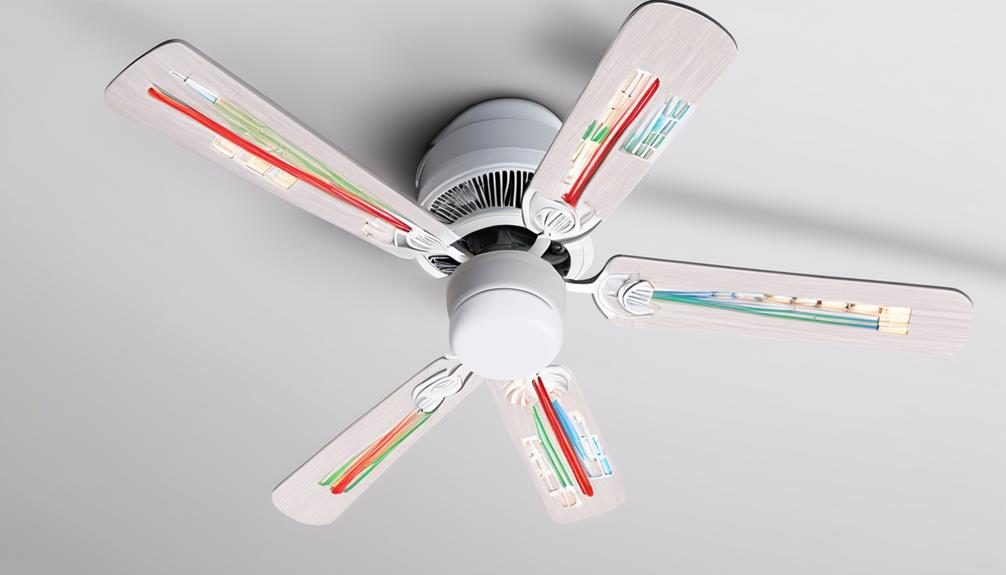
Wire gauge and ampacity play a crucial role in ensuring the safe and efficient operation of ceiling fans. Proper wire gauge selection is essential to prevent overheating and electrical hazards. Ampacity calculation determines the maximum current that a wire can safely carry. Here are three key points to consider:
- Wire gauge selection:
- Choose a wire gauge based on the fan's power requirements and the length of the wire run.
- Use a wire gauge that meets or exceeds the minimum requirements specified by the fan manufacturer.
- Consider factors such as voltage drop and ambient temperature when selecting the wire gauge.
- Ampacity calculation:
- Calculate the ampacity required for the ceiling fan by adding the current draw of the fan and any attached lights.
- Ensure that the wire chosen has an ampacity rating higher than the calculated value to allow for a safety margin.
- Refer to the National Electrical Code (NEC) for ampacity tables that provide guidelines for wire ampacity based on wire size and insulation type.
- Consult a professional:
- If you're unsure about wire gauge selection or ampacity calculation, it's recommended to consult a qualified electrician.
- A professional can assess your specific installation requirements and ensure compliance with electrical codes and regulations.
Choosing the Right Wire for Your Ceiling Fan With Light
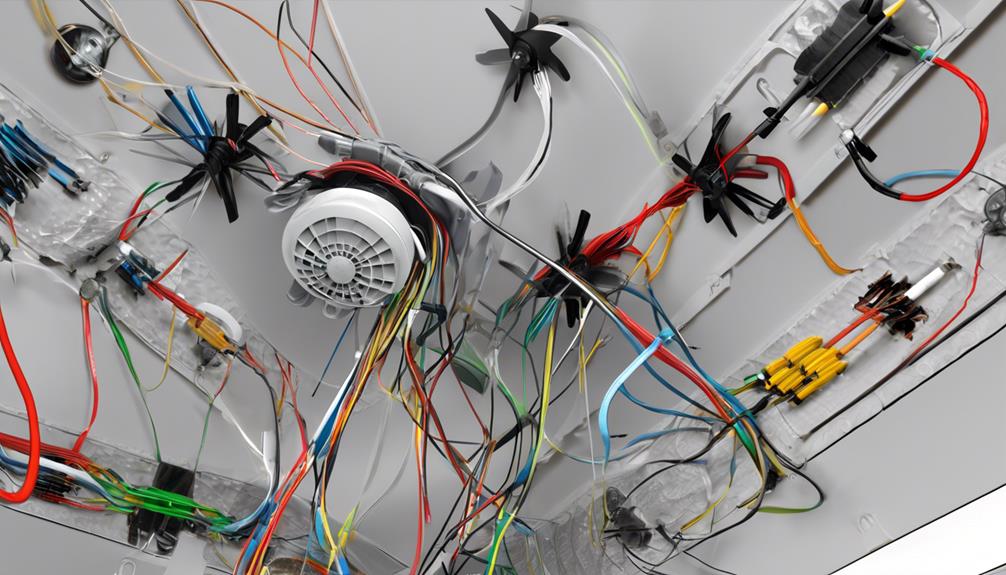
When it comes to choosing the right wire for your ceiling fan with light, there are a few key points to consider.
First, wire gauge selection is crucial to ensure the proper flow of electricity and prevent overheating.
Additionally, it's important to ensure the wire is compatible with the fan's voltage requirements and can handle the load of both the fan and the light.
Lastly, safety considerations should be taken into account to ensure the wire is installed correctly and meets all necessary codes and standards.
Wire Gauge Selection
Our choice of wire gauge is crucial when selecting the appropriate wiring for our ceiling fan with light. The wire gauge refers to the thickness of the wire, and it plays a significant role in ensuring the safety and efficiency of our ceiling fan installation.
Here are some important points to consider when it comes to wire gauge selection:
- Wire gauge importance:
- The wire gauge determines the amount of current that can safely flow through the wire.
- Choosing the wrong wire gauge can result in overheating, which can lead to electrical hazards and potential damage to the fan or light.
- Proper wire gauge selection ensures that the fan and light function optimally and that their performance isn't compromised.
- Wire gauge selection tips:
- Consult the manufacturer's guidelines or the National Electrical Code (NEC) to determine the recommended wire gauge for our specific ceiling fan with light.
- Consider the length of the wire run and the amount of current the fan and light will draw to select an appropriate wire gauge.
- It's generally recommended to use a thicker wire gauge for longer wire runs and higher current loads.
Compatibility With Fan
To ensure compatibility with your ceiling fan, it's essential to choose the appropriate wire for your ceiling fan with light. Remote-controlled ceiling fans often require a specific type of wire that can support the communication between the fan and the remote control receiver. This wire needs to be able to transmit signals reliably without interference. When considering compatibility with a remote control, it's crucial to select a wire that can handle the additional electrical load.
Additionally, if you plan to install a dual switch for your ceiling fan with light, you must choose a wire that can accommodate the wiring requirements for this setup. It's important to consult the fan's installation manual or a professional electrician to determine the correct wire type and gauge for your ceiling fan with light to ensure optimal compatibility.
Safety Considerations
For optimal safety, it's crucial to select the appropriate wire for your ceiling fan with light. Using suitable wiring materials is essential to avoid potential hazards and ensure the longevity of your ceiling fan with light.
Here are three key considerations to keep in mind when it comes to safety:
- Wire gauge: Choose a wire with the proper gauge to handle the electrical load of your ceiling fan with light. Using a wire with a gauge that's too small can lead to overheating and potentially cause a fire.
- Insulation: Make sure the wire you select has sufficient insulation to prevent any exposed wires or contact with other conductive materials. This will minimize the risk of electrical shocks or short circuits.
- Compatibility: Ensure that the wire is compatible with the voltage and current requirements of your ceiling fan with light. Using the wrong wire can result in malfunctions or damage to the fan.
Common Wire Options for Ceiling Fan With Light Installation
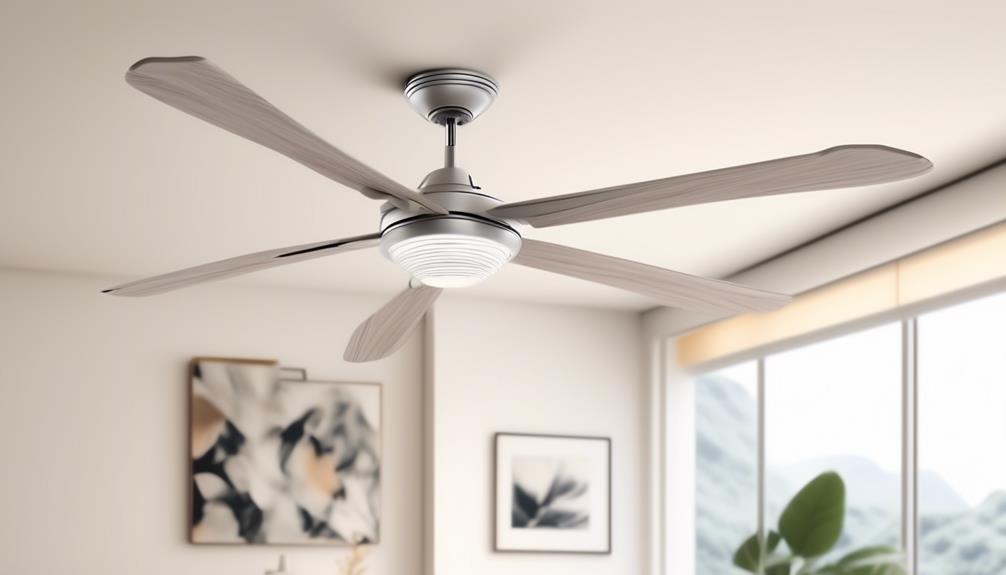
When installing a ceiling fan with a light, it is important to consider the common wire options available. Proper wire gauge selection and safety considerations are essential for a successful installation.
To help you understand the different wire options, let's take a look at the following table:
| Wire Option | Description | Recommended Use |
|---|---|---|
| 14/2 | This wire consists of two 14-gauge conductors and a grounding wire. It is commonly used for residential ceiling fan installations. | Suitable for most ceiling fan with light installations in homes. |
| 12/2 | This wire contains two 12-gauge conductors and a grounding wire. It is thicker than 14/2 wire and can handle more electrical load. | Recommended for ceiling fans with heavy-duty motors or if the fan is located in a larger room. |
| 14/3 | This wire has three 14-gauge conductors and a grounding wire. It is commonly used when separate switches are desired for the fan and the light. | Ideal if you want independent control over the fan and light functions. |
When selecting the appropriate wire gauge, always consider the power requirements of your ceiling fan and light. A higher gauge wire can handle more electrical load, ensuring safe and efficient operation. Additionally, it is crucial to follow safety guidelines and consult a professional if you are unsure about the installation process. By choosing the right wire and prioritizing safety, you can enjoy a well-functioning ceiling fan with light in your home.
Importance of Grounding Wire in Ceiling Fan With Light
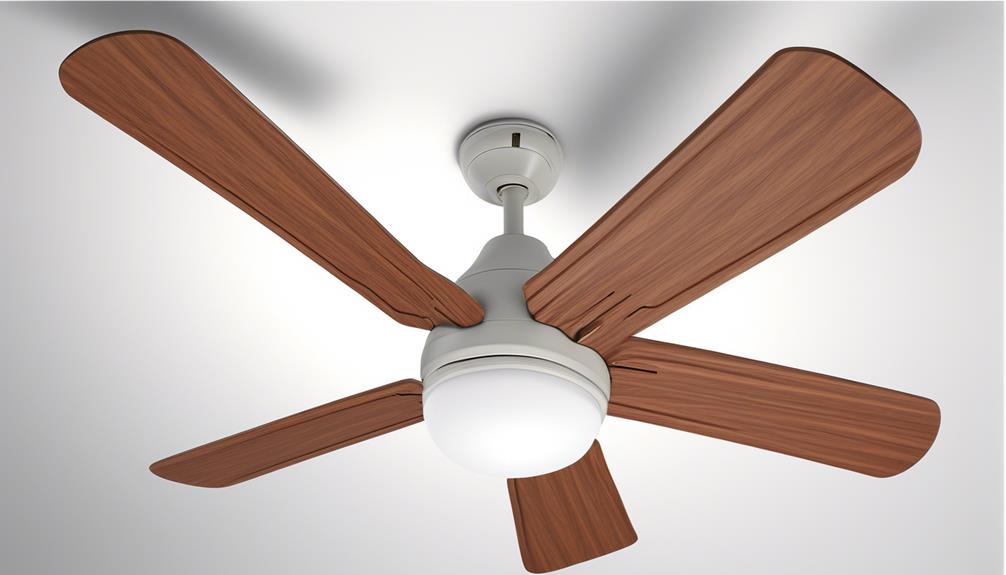
The grounding wire plays a vital role in ensuring the safety and proper functioning of a ceiling fan with a light. It's an essential component of the electrical system that provides a path for stray electrical currents to safely dissipate into the ground.
Here are some key benefits of the grounding wire in a ceiling fan with a light:
- Electrical Safety:
- The grounding wire helps to prevent electrical shocks by redirecting any stray electrical current away from the user.
- It acts as a safeguard against electrical malfunctions, such as short circuits or electrical surges, by providing a low-resistance path for the excess electrical energy to flow.
- It reduces the risk of fires caused by electrical faults, as the grounding wire helps to dissipate any potential overloads or faults.
- Proper Functioning:
- The grounding wire helps to stabilize the electrical system of the ceiling fan with a light, ensuring that it operates efficiently and without any disruptions.
- It helps to prevent electrical noise or interference that can affect the performance of the fan or light, ensuring a smooth and reliable operation.
- Compliance with Electrical Codes:
- The inclusion of a grounding wire in a ceiling fan with a light installation is required by electrical codes and regulations to ensure the safety of the occupants and the integrity of the electrical system.
Wiring Diagram for Ceiling Fan With Light
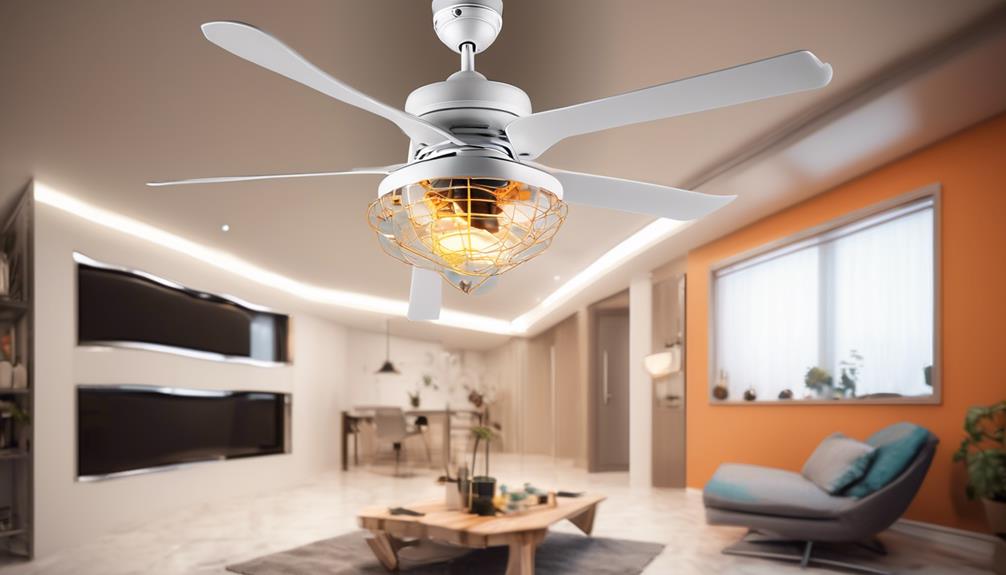
After understanding the importance of the grounding wire in a ceiling fan with a light, it is crucial to examine the wiring diagram for proper installation. The wiring diagram provides a visual representation of how the various components of the ceiling fan and light are connected. It serves as a guide to ensure that the wiring techniques and installation guidelines are followed correctly.
To convey a deeper understanding, let's take a look at a simple 2 column and 3 row table that outlines the wiring diagram for a typical ceiling fan with a light:
| Wire Color | Connection |
|---|---|
| Black | Connects to the live/hot wire from the electrical supply. |
| White | Connects to the neutral wire from the electrical supply. |
| Green | Connects to the grounding wire from the electrical supply. |
Step-by-Step Guide to Wiring Your Ceiling Fan With Light

To begin wiring your ceiling fan with light, we'll first need to gather all the necessary tools and materials. Once you have everything ready, follow these step-by-step instructions to ensure a successful installation:
- Turn off the power: Before starting any electrical work, make sure to turn off the power to the circuit at the breaker box. This will prevent any accidents or electric shocks.
- Identify wire color coding: Familiarize yourself with the wire color coding system. In most cases, the black wire is for the fan motor, the blue wire is for the light fixture, the white wire is the neutral wire, and the green or copper wire is the ground wire.
- Make proper wire connections: Use wire connectors to connect the wires together. Twist the same colored wires together, ensuring a secure connection. For example, twist the black wire from the fan with the black wire from the ceiling, and so on.
- Secure the connections: Once the wires are connected, use electrical tape to secure the wire connectors and prevent any accidental disconnections.
- Mount the ceiling fan: Follow the manufacturer's instructions to properly mount the ceiling fan and light fixture.
Safety Tips for Wiring a Ceiling Fan With Light
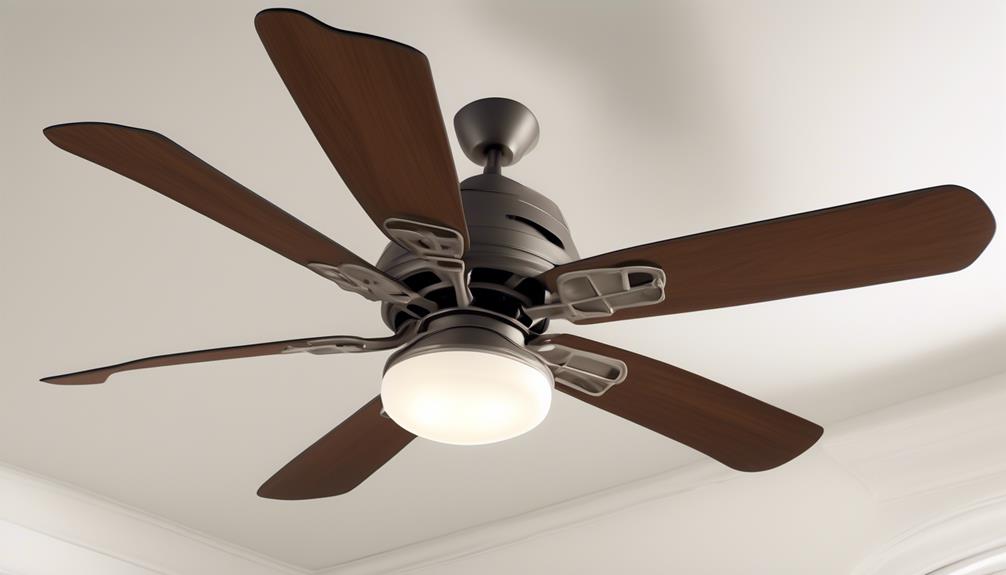
Now let's discuss some important safety tips for wiring a ceiling fan with light.
Firstly, it's crucial to choose the appropriate wire gauge to ensure proper electrical capacity and prevent overheating.
Secondly, proper grounding techniques must be followed to minimize the risk of electrical shock.
Lastly, the installation of a junction box is essential for secure and stable electrical connections.
Wire Gauge Requirements
For optimal safety when wiring a ceiling fan with light, it's crucial to carefully consider the wire gauge requirements. Proper wire gauge selection ensures that the electrical current flowing through the wires is safely and efficiently managed.
Here are some important safety considerations regarding wire gauge selection:
- Ampacity: The wire gauge should be chosen based on the maximum current the circuit can handle. This is known as the ampacity rating of the wire.
- Length of the circuit: Longer circuits require thicker wires to minimize voltage drop and ensure adequate current flow.
- Type of wire: Different types of wires have different ampacity ratings. It's important to choose the appropriate wire type based on the specific requirements of the ceiling fan with light installation.
Proper Grounding Techniques
Continuing our discussion on ceiling fan wire selection, it is essential to understand proper grounding techniques when wiring a ceiling fan with light. Proper grounding ensures the safety of the electrical system and protects against electrical shock. When installing a ceiling fan with light, there are specific guidelines to follow for proper grounding.
One important aspect is selecting the appropriate wire gauge and ampacity. The wire gauge refers to the thickness of the wire, while ampacity refers to the maximum amount of electrical current the wire can safely carry. It is crucial to choose the correct wire gauge and ampacity for the ceiling fan with light to prevent overheating and potential fire hazards.
To provide a clear understanding, here is a table illustrating the recommended wire gauge and ampacity for typical ceiling fan installations:
| Wire Gauge (AWG) | Ampacity (A) | Recommended Use |
|---|---|---|
| 14 | 15 | General lighting and fan motors |
| 12 | 20 | Ceiling fans with lights |
| 10 | 30 | Heavy-duty ceiling fans with lights |
Installation of Junction Box
To ensure a safe and secure installation, it's essential to properly install a junction box when wiring a ceiling fan with light. The junction box serves as a protective enclosure for electrical connections, providing insulation and preventing accidental contact with live wires.
Here are some important considerations for junction box installation:
- Choose a suitable location: The junction box should be installed in a convenient and accessible location, preferably near the ceiling fan.
- Mount the box securely: Use appropriate screws or fasteners to secure the junction box to a stud or support structure to ensure stability.
- Ensure wire insulation suitability: Before connecting the wires, check that the insulation is intact and suitable for the voltage and current ratings of the ceiling fan and light.
Hiring a Professional Electrician Vs. DIY Installation
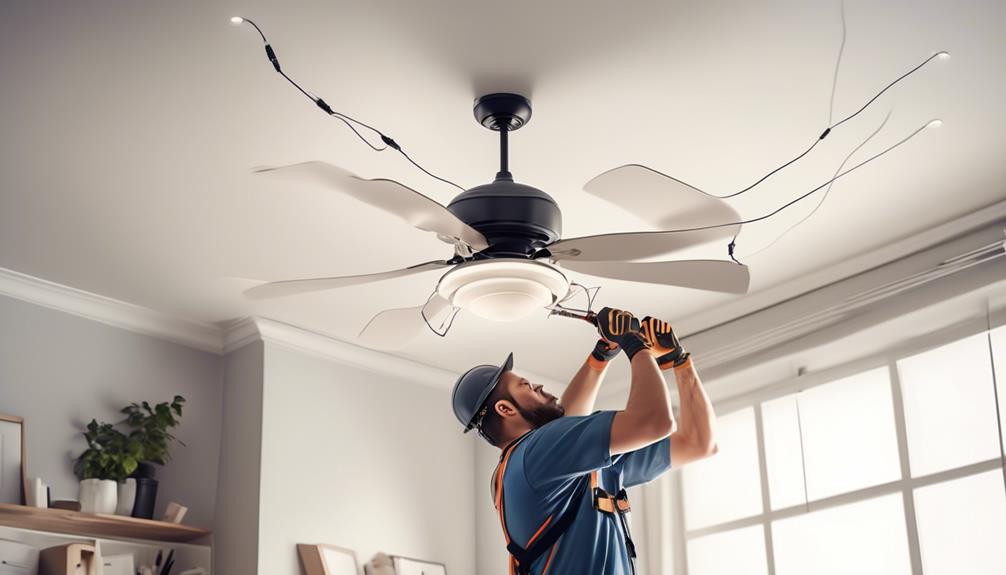
When considering the installation of a ceiling fan, it's important to weigh the benefits of hiring a professional electrician against the option of DIY installation. While DIY installation may seem like a cost-effective choice, it comes with certain risks.
One of the main risks of DIY installation is the potential for electrical accidents or damage to the fan or wiring. Without proper knowledge and experience, there's a higher chance of making mistakes that could lead to short circuits, electrical shocks, or even fires. Additionally, improper installation may void the warranty of the ceiling fan, leaving you responsible for any repairs or replacements.
On the other hand, hiring a professional electrician offers several benefits. Firstly, electricians have the necessary expertise and knowledge to ensure a safe and efficient installation. They're trained to handle electrical systems and understand the specific requirements for installing ceiling fans. By hiring an electrician, you can have peace of mind knowing that the installation will be done correctly, minimizing the risks of electrical hazards.
Moreover, professional electricians have the proper tools and equipment to perform the installation accurately and efficiently. They'll also have the necessary permits and knowledge of local building codes, ensuring that the installation complies with safety regulations. Additionally, if any issues arise during or after the installation, a professional electrician can provide prompt assistance and troubleshooting.
Troubleshooting Common Wiring Issues for Ceiling Fan With Light
After considering the benefits of hiring a professional electrician for ceiling fan installation, it's important to address any potential wiring issues that may arise when troubleshooting a ceiling fan with a light.
Troubleshooting electrical issues can be a challenging task, but with the right knowledge and tools, it can be done effectively. Here are some common installation mistakes and troubleshooting tips to help you resolve any wiring issues:
- Incorrect wiring connections: One of the most common mistakes is misconnecting the wires. Ensure that the wires are properly matched and connected according to the manufacturer's instructions.
- Loose or faulty connections: Loose or faulty connections can cause the fan or light to malfunction. Check all wire connections and tighten them if necessary, ensuring a secure and stable connection.
- Faulty switches or controls: Sometimes, the issue may not lie in the wiring itself but in the switches or controls. Test the switches and controls to ensure they're functioning correctly and replace any faulty ones.
Frequently Asked Questions
Can I Use the Same Wire for My Ceiling Fan and Light Fixture?
Yes, you can use the same wire for your ceiling fan and light fixture.
However, it's important to consider the wire gauge and wire color.
The wire gauge should be suitable for both the fan and the light fixture, ensuring that it can handle the electrical load.
Additionally, using wire of the same color can help with organization and identification during installation.
It's recommended to consult a professional electrician to ensure proper wiring and safety.
What Is the Maximum Length of Wire I Can Use for My Ceiling Fan With Light Installation?
When it comes to the maximum wire length for your ceiling fan with light installation, selecting the right wire gauge is crucial.
Now, we know you might be tempted to go for the longest wire possible, but hold on! It's important to consider factors like voltage drop and safety.
So, make sure to consult the manufacturer's guidelines and electrical code requirements to determine the appropriate wire length.
How Do I Determine the Correct Wire Size for My Ceiling Fan With Light?
To determine the correct wire size for your ceiling fan with light, it's crucial to properly calculate the wire gauge.
This involves considering factors such as the distance between the fan and the power source, the current rating of the fan, and the voltage it operates on.
Can I Use a Wire With a Lower Ampacity for My Ceiling Fan With Light?
Using a wire with a lower ampacity for a ceiling fan with light can pose safety risks. It's important to consider the wire gauge for the installation to ensure proper functioning and avoid overheating.
Lower ampacity wires may not be able to handle the electrical load required by the fan and light, leading to potential fire hazards. Therefore, it's recommended to use wires with the appropriate ampacity to ensure the safety and efficiency of your ceiling fan with light installation.
What Type of Wire Should I Use for an Outdoor Ceiling Fan With Light?
For an outdoor ceiling fan installation, it's crucial to use the appropriate wiring for a ceiling fan with light. The type of wire recommended for this purpose is usually a 14-gauge wire, which can handle the electrical load of both the fan and the light.
This ensures safe and efficient operation of the ceiling fan and light combination. Using the correct wire gauge is essential to prevent any potential electrical hazards and to ensure a successful installation.
Conclusion
In conclusion, choosing the right wire for your ceiling fan with light installation is crucial for ensuring a safe and efficient electrical connection.
Just like the threads of a well-woven tapestry, the right wire weaves together the power and functionality of your ceiling fan, creating a harmonious atmosphere in your space.
Whether you decide to hire a professional electrician or tackle the installation yourself, always prioritize safety and follow the step-by-step wiring guide to avoid any common issues.
- About the Author
- Latest Posts
Introducing Ron, the home decor aficionado at ByRetreat, whose passion for creating beautiful and inviting spaces is at the heart of his work. With his deep knowledge of home decor and his innate sense of style, Ron brings a wealth of expertise and a keen eye for detail to the ByRetreat team.
Ron’s love for home decor goes beyond aesthetics; he understands that our surroundings play a significant role in our overall well-being and productivity. With this in mind, Ron is dedicated to transforming remote workspaces into havens of comfort, functionality, and beauty.
Garage Door Opener
Finding the Ideal Garage Door Opener Outlet Location
Get ready to discover the crucial factors determining the perfect placement for your garage door opener outlet.

When determining the best spot for a garage door opener socket, think of it as finding the missing piece to make your garage convenient and functional.
The placement of this outlet can significantly impact the ease of use and safety of your garage door opener system. So, where should it be positioned for optimal performance?
Let's explore the key factors that come into play to ensure a seamless experience with your garage door opener.
Key Takeaways
- Place the outlet around 9 feet above the door for optimal accessibility and functionality.
- Position the outlet slightly off-center to avoid interference with future insulation and maintenance.
- Ensure safety by locating the receptacle 3 feet back and 10 feet from the outside wall.
- Consult with professionals to guarantee proper placement and enhance usability.
Importance of Outlet Placement
Why is the placement of the outlet for your garage door opener crucial for optimal functionality and safety?
When it comes to the garage door opener, the electrical outlet placement plays a significant role in ensuring smooth operation and safety. By strategically locating the outlet around 9 feet above the door, slightly off-center, accessibility is enhanced without impeding future insulation or drywall modifications. This positioning also minimizes the risk of interference with the garage door opener's mechanisms, promoting seamless functionality.
Moreover, considering factors like ease of access, safety, and compliance with electrical regulations is essential for a secure and efficient garage door opener setup. Therefore, choosing the right spot for the outlet is paramount to guaranteeing the proper functioning and safety of your garage door opener.
It's not just about convenience; it's about ensuring that your garage door opener operates optimally while meeting essential safety standards and regulatory requirements.
Factors Affecting Outlet Location

Considering the layout and structure of your garage, several key factors influence the optimal placement of the outlet for your garage door opener. The door height plays a crucial role, with the ideal outlet location typically around 9 feet above the door for convenient access.
It's essential to position the outlet slightly to the side to avoid interference with future insulation and drywall work. Communicating with builders before installation can ensure the proper placement and prevent common mistakes that might arise.
Be cautious not to place the receptacle too far from the door as this could lead to issues with the opener cord reaching comfortably. Ensuring that the outlet location allows for smooth operation and easy maintenance is crucial for long-term convenience.
Safety Considerations for Outlet Placement
For optimal safety and convenience in outlet placement for your garage door opener, it's essential to position the receptacle 3 feet back from the end of the open garage door and approximately 10 feet from the outside wall. Placing the outlet in this specific location helps prevent any potential hazards that could arise from the door mechanisms or the opener's cord. By ensuring the receptacle is behind the opener, you maintain a clear pathway when the door is fully open, decreasing the risk of tripping or entanglement.
To further enhance safety, it's crucial to confirm that the cord length of the opener, typically between 3 to 4 feet, comfortably reaches the receptacle without any stretching or strain. If needed, use lumber to frame out a lower place to secure the cord of the opener to the receptacle adequately. Additionally, prioritize installing a Ground Fault Circuit Interrupter (GFCI) protected receptacle to add an extra layer of safety measures to your garage.
Convenience and Accessibility of Outlets

To ensure optimal convenience and accessibility for your garage door opener outlet, positioning it approximately 9 feet above the door allows for easy access during operation. This placement ensures that the outlet is within reach of the opener cord, reducing the risk of any operational issues. Additionally, consider situating the outlet slightly off-center to accommodate future insulation and drywall work, providing flexibility for any renovations.
When communicating with builders about the placement of the garage door opener outlet, make sure to convey the importance of having it positioned at the right height and distance from the door. Common mistakes, such as placing the receptacle too far from the door, can hinder optimal accessibility and convenience. By discussing the outlet location with builders beforehand, you can ensure that it is installed in a way that meets your needs and maximizes usability.
To illustrate further, here is a table outlining the key considerations for positioning your garage door opener outlet:
| Consideration | Description |
|---|---|
| Height Above Door | Approximately 9 feet for easy access during operation. |
| Distance from Opener Cord | Within reach to prevent operational issues. |
| Off-Center Placement | Slightly off-center to accommodate future insulation and drywall work. |
| Communication with Builders | Discuss with builders to determine the best outlet placement before installation. |
| Avoiding Common Mistakes | Ensure the receptacle is not placed too far from the door for optimal accessibility. |
Tips for Optimal Garage Door Opener Outlet Location
When determining the ideal location for your garage door opener outlet, prioritize accessibility and functionality by placing it at a height of around 9 feet above the door. This placement ensures easy reach and connection to the opener cord, facilitating seamless operation.
To optimize your garage door opener outlet location, consider the following tips:
- Positioning: Place the outlet slightly to the side to avoid interference with future insulation and drywall work.
- Consultation: Communicate with builders or professionals before installation to ensure proper placement and avoid common mistakes.
- Reachability: Avoid placing the receptacle too far from the door to prevent issues with the opener cord reaching the power source.
- Functionality: Ensure the outlet location allows for easy access and connection to maintain a smooth and efficient operation of your garage door opener.
Frequently Asked Questions
Where Should a Garage Door Opener Outlet Be Placed?
We recommend placing a garage door opener outlet near the ceiling, around 9 feet above the door for easy access. Positioning it slightly to the side can prevent interference and future issues with insulation or drywall.
Opt for a location a few feet above the door height and off-center for practical accessibility. Avoid surface mounting and ensure it's within reach of the opener cord.
Consult professionals for proper placement to avoid common mistakes.
Where Should Outlets Be Placed in a Garage?
When outfitting a garage with outlets, strategic placement is key. Consider functionality and convenience. Ensure outlets are accessible and comply with safety standards to avoid interference with garage door openers.
Optimal positioning is crucial for smooth operation. By placing outlets thoughtfully, we guarantee efficiency and ease of access. Properly spaced outlets contribute to a well-organized, functional workspace.
Take care in positioning outlets for a seamless garage experience.
Can the Garage Door Opener Be on Same Circuit as Garage Receptacles?
Yes, the garage door opener can be on the same circuit as the garage receptacles. This setup is convenient for installation and operation, simplifying wiring and electrical planning.
It's a common practice in residential settings to share the circuit between the garage door opener and receptacles. However, it's crucial to consult with an electrician to ensure the circuit can handle the combined load of both devices effectively.
How Do I Program My Garage Door Opener Outlet?
We've programmed many garage door opener outlets! Locate the 'Learn' button on the unit. Press and release it, then quickly hit the remote's button to program it.
Wait for the light to flash, showing successful programming. Test the remote for proper operation.
Always follow the manufacturer's instructions for specific steps. It's as easy as that to program your garage door opener outlet.
Conclusion
In conclusion, finding the ideal location for your garage door opener outlet is like finding the perfect key for a locked door – it unlocks convenience and safety.
By considering factors such as placement, safety measures, and accessibility, you can ensure smooth operation and peace of mind.
Remember, consulting with a professional and following best practices can guarantee a seamless experience every time you open your garage door.
- About the Author
- Latest Posts
Introducing Ron, the home decor aficionado at ByRetreat, whose passion for creating beautiful and inviting spaces is at the heart of his work. With his deep knowledge of home decor and his innate sense of style, Ron brings a wealth of expertise and a keen eye for detail to the ByRetreat team.
Ron’s love for home decor goes beyond aesthetics; he understands that our surroundings play a significant role in our overall well-being and productivity. With this in mind, Ron is dedicated to transforming remote workspaces into havens of comfort, functionality, and beauty.

Are you prepared to elevate your dental health? Check out our 12 tips for utilizing Bluetooth dental health gadgets!
These cutting-edge devices combine the power of technology with the importance of oral hygiene. We, as a team of experts, have compiled this comprehensive guide to help you master the world of Bluetooth dental tools.
From choosing the right gadget to maximizing its effectiveness, we’ve got you covered. Say goodbye to traditional dental care methods and embrace the future of oral health.
With our tips, you’ll be able to seamlessly integrate Bluetooth dental gadgets into your daily routine and enhance communication with your dentist. Get ready to achieve the smile of your dreams with the help of these innovative devices.
Key Takeaways
- Improved oral hygiene
- Real-time feedback and guidance
- Personalized recommendations for optimal brushing technique
- Enhanced portability for on-the-go use
Benefits of Bluetooth Dental Health Gadgets
The benefits of Bluetooth dental health gadgets include improved oral hygiene and enhanced monitoring of dental health. These gadgets are designed to help individuals in improving their brushing techniques and maintaining good oral health. By connecting to a smartphone or a tablet, Bluetooth dental health gadgets provide real-time feedback and guidance, ensuring that users are brushing their teeth effectively.
One of the main advantages of these gadgets is the ability to improve brushing techniques. Many people are unaware of the correct way to brush their teeth, leading to ineffective cleaning and potential oral health issues. Bluetooth dental health gadgets can track the movement and pressure applied during brushing, offering personalized recommendations for optimal brushing technique. This helps users to develop better brushing habits and achieve more thorough cleaning.
Another significant benefit is the remote dental monitoring feature offered by these gadgets. Dental health professionals can remotely monitor the brushing habits of their patients through a connected app. This allows for personalized advice and recommendations to be provided, ensuring that patients are maintaining good oral hygiene practices between dental visits.
How to Choose the Right Bluetooth Dental Tool
When choosing a Bluetooth dental tool, there are two important factors to consider: compatibility with your devices and ease of use.
It’s crucial to ensure that the tool you choose is compatible with your smartphone or other devices, so that you can easily connect and use it.
Additionally, opting for a tool that’s user-friendly and easy to navigate will help maximize its effectiveness and make your dental routine more efficient.
Compatibility With Devices
We found that researching the compatibility of Bluetooth dental tools with our devices was crucial in selecting the right tool for our dental health needs.
Bluetooth compatibility is an essential factor to consider when choosing a dental gadget, as it ensures seamless communication between the tool and our devices. It allows us to track our dental health progress, receive real-time feedback, and access personalized recommendations for improving our oral care routine.

However, it’s important to note that compatibility issues may arise, leading to troubleshooting problems. To avoid such issues, it’s recommended to check the compatibility requirements of the dental tool with our devices before making a purchase. This will help us ensure a smooth and hassle-free experience with our Bluetooth dental health gadget.
Moving forward, let’s explore the next important aspect of these tools – their ease of use.
Ease of Use
To ensure a user-friendly experience, it’s important to consider the ease of use when selecting the right Bluetooth dental tool for our needs.
When it comes to improving accessibility and usability, choosing a dental tool with a user-friendly design is crucial. Look for devices that have intuitive interfaces and easy-to-use controls. Consider tools that offer clear and concise instructions, making it easy for users to understand and operate them effectively.
Additionally, opt for devices with ergonomic designs that are comfortable to hold and use for extended periods. This will help minimize user fatigue and increase overall satisfaction with the tool.
Understanding the Importance of Bluetooth Connectivity
Understanding the importance of Bluetooth connectivity is crucial when it comes to dental health gadgets. By utilizing Bluetooth technology, these devices offer enhanced dental care by providing real-time data and personalized feedback.
This wireless convenience allows for easy usage and seamless integration with smartphones and other devices, making it a convenient and user-friendly option for monitoring and tracking oral health.
Enhanced Dental Care
Bluetooth connectivity is crucial for improving dental care through the use of innovative gadgets. By integrating wireless technology into dental health devices, we can enhance oral hygiene practices and ensure better dental care.
The benefits of wireless technology in dental gadgets are manifold. Firstly, it allows for real-time monitoring and tracking of oral health, providing accurate data that can be analyzed by dental professionals.
Secondly, Bluetooth connectivity enables seamless communication between devices, allowing for personalized feedback and guidance on oral hygiene routines. This promotes a more effective and targeted approach to dental care.
Additionally, wireless technology facilitates the integration of dental gadgets with smartphone applications, making it easier for users to track and manage their oral health.
Wireless Convenience Benefits
How can Bluetooth connectivity enhance our dental health gadgets?
Bluetooth connectivity offers a range of wireless connectivity advantages that greatly contribute to the convenience of Bluetooth gadgets. Here are five key benefits of Bluetooth connectivity for dental health gadgets:
- Seamless syncing: Bluetooth allows for effortless synchronization between your dental health gadget and your smartphone or other devices, ensuring that your data is always up to date.
- Hands-free operation: With Bluetooth connectivity, you can control your dental health gadget without the need for physical buttons or touchscreens, allowing for a more hygienic and convenient experience.
- Remote monitoring: Bluetooth-enabled dental health gadgets can transmit data in real-time to your smartphone or computer, allowing you to track your oral health progress even when you’re not near your gadget.
- Enhanced portability: Bluetooth gadgets are typically compact and lightweight, making them easy to carry and use on the go.
- Multi-device compatibility: Bluetooth connectivity enables your dental health gadget to connect with multiple devices simultaneously, providing flexibility and convenience for users with multiple devices.
With these wireless convenience benefits, Bluetooth connectivity significantly enhances the overall user experience of dental health gadgets.
Improved Data Tracking
We have seen a significant improvement in data tracking with the introduction of Bluetooth connectivity in dental health gadgets. This technology has revolutionized the way we monitor our oral health. With improved accuracy and real-time monitoring, Bluetooth dental gadgets allow us to track our dental hygiene habits more effectively.
By connecting these gadgets to our smartphones or other devices, we can easily access and analyze the data collected from our brushing habits, gum health, and more. This level of data tracking provides valuable insights into our oral health, helping us identify areas for improvement and track progress over time.
Now, let’s explore the top features to look for in Bluetooth dental gadgets to make the most of this advanced data tracking capability.
Top Features to Look for in Bluetooth Dental Gadgets
When choosing Bluetooth dental health gadgets, it’s important to consider the top features that will enhance our oral care routine. Here are some key features to look for:
- Bluetooth Connectivity: Bluetooth-enabled dental gadgets offer the benefits of wireless connectivity, allowing us to easily sync our device with our smartphones or tablets. This enables us to access real-time data and receive notifications for reminders and updates.
- Data Tracking: The importance of data tracking can’t be overstated. Look for gadgets that can track and store essential dental health information such as brushing time, pressure applied, and areas of the mouth that need more attention. This data can provide valuable insights into our brushing habits and help us make improvements.
- Interactive Apps: Choose gadgets that come with interactive mobile applications. These apps provide personalized guidance, oral care tips, and progress tracking, making our oral care routine more engaging and effective.
- Timers and Reminders: Look for gadgets that have built-in timers and reminders to ensure we brush for the recommended two minutes and replace our brush heads regularly. These features help us maintain good oral hygiene habits.
- Compatibility with Multiple Users: If sharing the gadget with family members, opt for devices that can track and store data for multiple users. This ensures that each user can have their own personalized oral care routine.
Considering these top features will help us choose Bluetooth dental health gadgets that optimize our oral care routine.
Now, let’s explore some tips for using these gadgets effectively.
Tips for Using Bluetooth Dental Health Gadgets Effectively
To effectively utilize Bluetooth dental health gadgets, it’s crucial to ensure proper syncing and calibration of the device. This ensures accurate and reliable data collection, allowing you to track and improve your dental habits effectively.
To maximize device performance, start by syncing your gadget with a compatible mobile app or software. Follow the manufacturer’s instructions carefully to ensure a successful connection.
Once synced, calibrate the device according to your specific dental needs. This may involve setting personalized targets for brushing time, pressure, or technique.
Regularly check for firmware updates to ensure your device is running the latest software, which can enhance its performance and functionality.
It’s also important to clean and maintain your gadget regularly to avoid any performance issues. Refer to the manufacturer’s guidelines for cleaning instructions and best practices.
Common Misconceptions About Bluetooth Dental Tools
There are several common misconceptions about Bluetooth dental tools that we need to address.
First, it’s important to understand that Bluetooth technology can actually improve oral hygiene by allowing for seamless communication between dental devices and smartphone apps.
Secondly, wireless technology enhances dental care by providing real-time data and personalized feedback to users.
Lastly, we’ll debunk some of the myths surrounding dental gadgets to ensure that users have accurate information about their benefits and limitations.
Bluetooth Improves Oral Hygiene
Although there are common misconceptions about Bluetooth dental tools, we’ve found that they significantly improve oral hygiene. Here are five reasons why Bluetooth dental tools are beneficial for your oral health:
- Improved brushing techniques: Bluetooth dental tools provide real-time feedback on your brushing technique, helping you achieve a more thorough clean.
- Oral health tracking: These tools can track your brushing habits and provide data on your oral health, allowing you to make informed decisions about your dental care routine.
- Timely reminders: Bluetooth dental tools can send reminders to brush, floss, and rinse, ensuring that you maintain a consistent oral hygiene routine.
- Personalized recommendations: Based on your brushing data, these tools can provide personalized recommendations for toothpaste, toothbrushes, and other oral care products.
- Motivation and accountability: Bluetooth dental tools can gamify oral hygiene, making it more enjoyable and encouraging you to maintain good oral health habits.
Wireless Technology Enhances Dental Care
We have encountered several misconceptions about Bluetooth dental tools that hinder their recognition as a valuable wireless technology for enhancing dental care.
One common misconception is that wireless toothbrushes are just a gimmick. However, these toothbrushes use Bluetooth technology to connect to a smartphone app, providing real-time feedback on brushing habits and helping users improve their oral hygiene.
Another misconception is that a Bluetooth toothpaste dispenser is unnecessary. In reality, this device ensures that the right amount of toothpaste is dispensed, reducing waste and promoting proper dental hygiene. It also helps users track their toothpaste usage, ensuring they never run out.
Myths About Dental Gadgets
Our experience with Bluetooth dental tools has revealed common misconceptions surrounding their effectiveness. Let’s debunk these myths and shed light on the benefits of using Bluetooth in dental care:
- Bluetooth dental gadgets aren’t just a fad; they provide real-time data and accurate measurements for better dental health monitoring.
- Contrary to popular belief, Bluetooth dental tools are easy to use and integrate seamlessly into your oral care routine.
- Some people think that Bluetooth dental gadgets are expensive, but they offer long-term cost savings by enabling early detection and prevention of dental issues.
- Another misconception is that Bluetooth dental tools are only for professionals. In reality, they empower individuals to take control of their oral health and make informed decisions.
- Lastly, some may worry about the security and privacy of Bluetooth dental gadgets. However, manufacturers prioritize data protection, ensuring that your information remains confidential.
Troubleshooting Common Issues With Bluetooth Dental Gadgets
Identifying and resolving common issues with Bluetooth dental gadgets can significantly improve their functionality and user experience. Troubleshooting connection issues and optimizing battery life are two key areas to focus on when encountering problems with these devices. Here are some tips to help you troubleshoot and overcome these issues:
| Common Issues | Possible Solutions |
|---|---|
| Connection drops frequently | Ensure that the Bluetooth device is within range and there are no obstructions interfering with the signal. Try reconnecting the device or resetting the Bluetooth settings. |
| Poor sound quality during calls | Check if the microphone and speaker are properly aligned. Adjust the volume settings on both the device and the dental gadget. If the problem persists, try restarting both devices. |
| Short battery life | Reduce the usage of power-intensive features such as continuous monitoring or high volume settings. Disconnect the Bluetooth connection when not in use. Consider replacing the battery if it is old or not holding a charge effectively. |
How Bluetooth Technology Enhances Dental Health Monitoring
When it comes to enhancing dental health monitoring, Bluetooth technology plays a crucial role. Bluetooth dental technology has revolutionized the way dentists and patients can monitor oral health. Here are five ways Bluetooth technology enhances dental health monitoring:
- Real-time data: Bluetooth dental devices can transmit real-time data to a connected smartphone or computer, allowing dentists to monitor patients’ oral health instantly.
- Remote monitoring: With Bluetooth dental monitoring, dentists can remotely monitor patients’ oral health without the need for in-person visits, making it more convenient for both parties.
- Continuous tracking: Bluetooth dental devices can continuously track various parameters such as brushing habits, pressure applied during brushing, and even the presence of harmful bacteria, providing a comprehensive picture of oral health.
- Personalized feedback: Bluetooth dental technology enables dentists to provide personalized feedback and recommendations based on the data gathered, helping patients improve their oral hygiene practices.
- Early detection: By monitoring oral health in real-time, Bluetooth dental monitoring devices can help dentists detect potential issues early on, allowing for prompt intervention and treatment.
Bluetooth dental technology has transformed the way we monitor dental health, providing dentists with valuable insights and patients with convenient and personalized care. With its ability to transmit real-time data, enable remote monitoring, and provide continuous tracking, Bluetooth technology is undoubtedly a game-changer in dental health monitoring.
The Future of Bluetooth-Enabled Dental Health Gadgets
As we look ahead to the future of Bluetooth-enabled dental health gadgets, it’s clear that these innovative devices will continue to revolutionize the way we monitor and maintain oral health. With ongoing advancements in technology, we can expect exciting developments in the field of dental health monitoring.
One potential future advancement is the integration of artificial intelligence (AI) into Bluetooth-enabled dental health gadgets. AI algorithms could analyze data collected by these devices and provide personalized recommendations for improving oral hygiene. This could help individuals optimize their dental care routines and prevent future oral health issues.
Another area of future advancement is the incorporation of augmented reality (AR) technology. AR could enhance the user experience by providing real-time visual feedback during brushing or flossing, ensuring that individuals are maintaining proper technique. This could be particularly beneficial for children or people with limited dexterity.
While the future of Bluetooth-enabled dental health gadgets appears promising, there are also potential drawbacks to consider. Privacy and security concerns may arise as these devices collect and transmit personal health data. It will be crucial for manufacturers to prioritize data protection and ensure robust security measures are in place.
Bluetooth Dental Gadgets for Children’s Oral Care
In our exploration of the future of Bluetooth-enabled dental health gadgets, we can now turn our attention to the specific application of these devices for children’s oral care. Bluetooth dental gadgets aren’t only designed for adults but also cater to the needs of children, ensuring their oral health is taken care of in a fun and engaging way.
Here are some key features of Bluetooth dental gadgets for children:
- Interactive brushing experience: These gadgets use Bluetooth toothbrush technology to connect to a mobile app, transforming brushing into a game or adventure, making it more enjoyable for children.
- Tracking and monitoring: Parents can track their child’s brushing habits and receive real-time updates on their progress through the app. This helps in ensuring that children brush for the recommended duration and reach all areas of their mouth.
- Rewards and incentives: Some Bluetooth dental gadgets have built-in reward systems, where children earn points or badges for brushing correctly. This motivates them to maintain good oral hygiene habits.
- Educational content: The mobile apps accompanying these gadgets often include educational videos and tips, teaching children about the importance of oral hygiene and proper brushing techniques.
- Parental control: Parents can have control over the settings and features of the Bluetooth dental gadgets, ensuring that the devices are safe and appropriate for their children’s age.
Bluetooth dental gadgets for children provide an innovative and effective way to instill good oral hygiene habits from a young age, making dental care a positive experience for children.
Integrating Bluetooth Dental Gadgets Into Your Daily Routine
To seamlessly incorporate Bluetooth dental gadgets into our daily routine, we can actively engage with their features and make oral care a priority for our whole family. Bluetooth toothbrushes, in particular, offer numerous benefits that can enhance our wellness routine.
These gadgets connect to our smartphones or other devices, allowing us to track our brushing habits and receive real-time feedback on our technique. By incorporating these gadgets into our daily routine, we can ensure that we’re brushing for the recommended two minutes and reaching all areas of our mouth effectively. Additionally, Bluetooth toothbrushes often come with built-in timers and reminders, making it easier for us to stay consistent with our oral care routine.
By involving our whole family in this process, we can create a positive and supportive environment that encourages good dental habits for everyone. Involving our children in the use of Bluetooth dental gadgets can make oral care more engaging and fun, helping them develop good oral hygiene habits from an early age.
Enhancing Communication With Your Dentist Using Bluetooth Tools
One important way to enhance communication with our dentist is by utilizing Bluetooth tools. These innovative devices can greatly improve dental appointments and facilitate remote dental consultations. Here are five ways Bluetooth tools can enhance communication with your dentist:
- Real-time communication: Bluetooth tools allow for seamless and instant communication between patients and dentists. Whether it’s sending images of your teeth or discussing concerns, Bluetooth tools enable quick and efficient communication.
- Remote consultations: With Bluetooth tools, you can have virtual consultations with your dentist without having to physically visit the dental clinic. This saves time and allows for more convenient appointments.
- Monitoring oral health: Bluetooth-enabled devices can monitor and track your oral health, providing valuable data to your dentist. This information helps them identify any potential issues and provide personalized advice during your appointments.
- Sharing dental records: Bluetooth tools make it easy to share dental records and X-rays with your dentist. This ensures that your dentist has access to accurate and up-to-date information, enabling them to provide better care.
- Treatment reminders: Bluetooth tools can send reminders for dental appointments and medication schedules. This helps ensure that you never miss an important dental visit or forget to take necessary medication.
Are Bluetooth Dental Health Gadgets Effective for Allergy Sufferers?
Bluetooth dental health gadgets may not directly impact allergy sufferers, but using a top HEPA vacuum can help eliminate allergens in the environment. Keeping the home clean with one of the top HEPA vacuums for allergy sufferers can reduce exposure to allergens and improve overall dental health.
Frequently Asked Questions
Can Bluetooth Dental Health Gadgets Be Used by Individuals With Braces or Other Orthodontic Appliances?
Bluetooth dental health gadgets can be used by individuals with braces or other orthodontic appliances, but their effectiveness may be limited. These gadgets can help monitor oral hygiene habits and provide feedback, but they may not be able to accurately track certain areas around the braces. Additionally, there’s a risk of damaging the gadgets or braces if they come into contact.
It’s important to consult with your orthodontist before using these gadgets to ensure they’re safe and appropriate for your specific situation.
Are There Any Specific Precautions or Guidelines to Follow When Using Bluetooth Dental Health Gadgets?
When using Bluetooth dental health gadgets, there are important precautions and guidelines to follow. To ensure optimal usage, it’s crucial to adhere to these recommendations.
By taking these precautions, you can maximize the benefits of these gadgets while minimizing any potential risks. Following the guidelines will help you maintain good oral hygiene and achieve better dental health.

Do Bluetooth Dental Health Gadgets Require a Separate App or Software to Function?
Bluetooth dental health gadgets don’t require a separate app or software to function. These devices utilize Bluetooth technology to connect directly to your smartphone or other compatible device.
Once connected, you can easily track and monitor your dental health using the dedicated app provided by the manufacturer. This app allows you to view real-time data, set reminders, and access personalized recommendations for improving your oral hygiene.
It’s a convenient and efficient way to take control of your dental health.
Can Bluetooth Dental Health Gadgets Be Used by Individuals With Dental Implants or Other Dental Prosthetics?
Bluetooth dental health gadgets can indeed be used by individuals with dental implants or other dental prosthetics. These gadgets have the potential to greatly improve oral hygiene by providing real-time feedback and personalized recommendations.
However, there are some advantages and disadvantages to consider. On one hand, Bluetooth dental health gadgets can help individuals with dental implants maintain proper oral care.
On the other hand, the gadgets may not be as effective in detecting plaque or other dental issues in hard-to-reach areas around the implants.
Are Bluetooth Dental Health Gadgets Compatible With All Types of Smartphones and Devices?
Bluetooth dental health gadgets are compatible with a wide range of smartphones and devices, making them versatile and convenient to use. They can also be used with non-smartphone devices, allowing more people to benefit from their features.
The benefits of using these gadgets include real-time feedback on brushing techniques, tracking of brushing habits, and reminders for regular dental check-ups. Incorporating Bluetooth technology into dental health gadgets enhances their functionality and improves oral hygiene practices.
Conclusion
In conclusion, with the help of Bluetooth dental health gadgets, achieving a dazzling smile has never been easier. These innovative tools not only provide numerous benefits and features but also enhance communication with your dentist.
So, why not dive into the world of Bluetooth dental gadgets and let them take your oral care routine to new heights? It’s like having a personal dental assistant right at your fingertips, guiding you towards a healthier, happier mouth.
Say goodbye to dental woes and hello to a brighter future!
- About the Author
- Latest Posts
Introducing Charles, the Editor in Chief at ByRetreat, whose passion for interior design and editorial excellence elevates every remote workspace to new heights. With his keen eye for detail, impeccable taste, and expertise in design, Charles brings a wealth of knowledge and creativity to the ByRetreat team.
As the Editor in Chief of a renowned lifestyle blog, Charles has honed his skills in curating captivating content and staying up-to-date with the latest trends in interior design. His deep understanding of aesthetics and the power of storytelling through design enables him to create remote workspaces that are not only visually stunning but also rich in personality and meaning.
Garage Door Opener
Programming Your Precision Garage Door Opener Remote Easily
Breeze through programming your Precision Garage Door Opener remote with a crucial tip for effortless operation – find out what it is!

Setting up your Precision Garage Door Opener remote is generally considered user-friendly. However, it is important not to overlook a crucial step that could cause problems in the future.
Understanding this key detail will not only simplify the programming process but also ensure smooth operation of your garage door.
Stay tuned to discover the essential tip that will make programming your remote a breeze.
Key Takeaways
- Clear previous opener codes by holding the Learn button for 6 seconds.
- Set a new code by pressing a random sequence of switches for enhanced security.
- Sync remotes and keypads by entering new codes within 30 seconds of pressing the Learn button.
- Test functionality of each device to ensure proper operation and troubleshoot if needed.
Clear Previous Opener Code
To reset the garage door opener code, locate and press the Learn button on the overhead motor unit for 6 seconds. This action initiates the clearing process, allowing you to remove the previous opener code from the system. If necessary, remove the lens cover to access the Learn button easily. By pressing and holding the Learn button, you ensure that the previous opener code is completely cleared. This step is crucial before proceeding to input a new code for your garage door opener remote.
Make sure to press and hold the Enter button as well, until you observe lights flashing or listen for clicks if lights aren't visible. Confirm that the previous opener code has been successfully removed before attempting to program the new remote control. By following these simple steps, you can effectively clear the previous opener code from your garage door opener system and prepare it for the setup of a new remote.
Input New Opener Code

After successfully clearing the previous opener code from your garage door opener system, the next step is to input a new code by locating the numbered switches on the back of the motor unit.
These switches are essential for setting up a secure code for your Precision Garage Door opener. To ensure optimal security, it's recommended to press a mix of switches in a random sequence.
When inputting the new code, make sure to include a combination of both top and bottom switches. Avoid using only top or bottom switches to prevent code duplication and enhance the security of your garage door opener.
Program Remote and Keypad
When programming your garage door opener remote and keypad, press the 'Learn' button on the garage door opener motor to begin the setup process efficiently.
With the remote in hand, locate the 'Learn' button on the motor unit, typically found near the hanging antenna wire. Once you press the 'Learn' button, an indicator light will illuminate, signaling that the motor is ready to learn new devices.
Quickly enter a new code on the keypad within 30 seconds to sync it with the opener. Repeat this process for each additional remote or keypad you wish to program, ensuring that each one flashes or beeps to confirm successful programming.
It's essential to test the functionality of each programmed device to guarantee they're operating correctly. If you encounter any issues during programming, consider consulting certified technicians for assistance in troubleshooting and completing the setup process seamlessly.
Test Remote Functionality

Check the garage door's response by pressing the button on the remote to verify its functionality. It's essential to ensure that the remote is working correctly to operate your garage door efficiently. Here are some steps to test the remote:
- Look for a flashing light on the motor unit to confirm the signal reception.
- Operate the garage door using the remote and check for any delays or issues in its functioning.
- Test the remote from various distances to evaluate the range of operation it provides.
- If the remote fails to work, troubleshoot by checking the battery levels and consider reprogramming if necessary.
Testing the remote's functionality is crucial to maintaining seamless access to your garage. By following these steps and troubleshooting any issues promptly, you can ensure that your garage door opener remote operates smoothly and reliably.
Contact Precision Door Support
For prompt assistance with your garage door needs, reach out to Precision Door Support at 800-DOOR-REPAIR. As a subsidiary of Foris Solutions, LLC, Precision Garage Door of Southeast Michigan offers expert help for all your garage door requirements.
Easily schedule services through the provided link to ensure prompt support for your garage door and opener issues. With certified technicians on hand, you can rely on Precision Door Support for setting changes, programming support, and any repair services you may need.
Whether you're facing difficulties with programming your garage door opener remote or require maintenance services, contacting Precision Door Support at 800-DOOR-REPAIR is the first step towards resolving your garage door concerns efficiently. Trust in the expertise of Precision Garage Door to provide you with the assistance and guidance necessary to keep your garage door functioning optimally.
Frequently Asked Questions
How Do I Program My Precision Garage Door Remote?
To program your Precision garage door remote, follow these steps:
- Locate the 'Learn' button on the opener motor.
- Press and release the 'Learn' button to enter programming mode.
- Press the desired button on your remote within 30 seconds.
- Wait for the opener's lights to flash or hear a click to confirm success.
- Test the remote to ensure it works.
This simple process ensures your remote is synced and ready to use with your garage door opener.
Why Is My Precision Garage Door Opener Remote Not Working?
We should first check the battery life and ensure there's no electronic interference affecting the signal of the Precision garage door opener remote.
If the issue persists, we must verify the correct programming by syncing it with the opener according to the manufacturer's instructions.
Inspect for physical damage that could be causing malfunctions.
If problems persist, contacting Precision Door for troubleshooting assistance is recommended to address the remote not working properly.
How Do I Reprogram My Garage Door Opener Remote?
We've got this covered!
To reprogram your garage door opener remote, simply press the 'Learn' button on the motor unit. Hold down the remote button within 30 seconds to sync it with the opener. Watch for confirmation lights or listen for clicks to confirm success. Repeat this process for any additional remotes to keep them all in sync.
Don't forget to reset keypad codes by entering a new 4-digit PIN and hitting enter.
Can You Program a Garage Remote Yourself?
Yes, we can program a garage remote ourselves.
It's a simple process that empowers us to control our garage door opener conveniently. By locating the Learn button on the motor unit and following easy steps, we can add or remove remotes as needed. DIY programming saves time and money, offering flexibility and convenience.
Conclusion
So there you have it, programming your Precision Garage Door Opener remote is as easy as pie. Just follow the simple steps, and you'll be opening and closing your garage door with ease.
It's almost too easy, you might even start to miss the days of struggling with a manual door. But hey, at least now you can impress your friends with your high-tech garage door skills.
- About the Author
- Latest Posts
Introducing Ron, the home decor aficionado at ByRetreat, whose passion for creating beautiful and inviting spaces is at the heart of his work. With his deep knowledge of home decor and his innate sense of style, Ron brings a wealth of expertise and a keen eye for detail to the ByRetreat team.
Ron’s love for home decor goes beyond aesthetics; he understands that our surroundings play a significant role in our overall well-being and productivity. With this in mind, Ron is dedicated to transforming remote workspaces into havens of comfort, functionality, and beauty.
-

 Decor1 week ago
Maximalist Decor Explained: Embrace More Style
-

 Vetted4 weeks ago
15 Best Drip Irrigation Systems to Keep Your Garden Thriving
-

 Vetted2 weeks ago
15 Best Foot Massagers for Neuropathy to Soothe Your Feet and Relieve Discomfort
-

 Vetted3 weeks ago
15 Best Sports Laundry Detergents for Keeping Your Activewear Fresh and Clean
-

 Vetted3 weeks ago
15 Best Tall Toilets for Seniors That Combine Comfort and Safety
-

 Vetted4 weeks ago
15 Best Dish Scrubbers to Keep Your Kitchen Sparkling Clean
-

 Vetted19 hours ago
15 Best Cleaners for Fiberglass Showers to Keep Your Bathroom Sparkling Clean
-

 Decor4 weeks ago
What Is Eclectic Home Decor


