Appliances
What Is a Good Airflow Rating for a Ceiling Fan?
2025
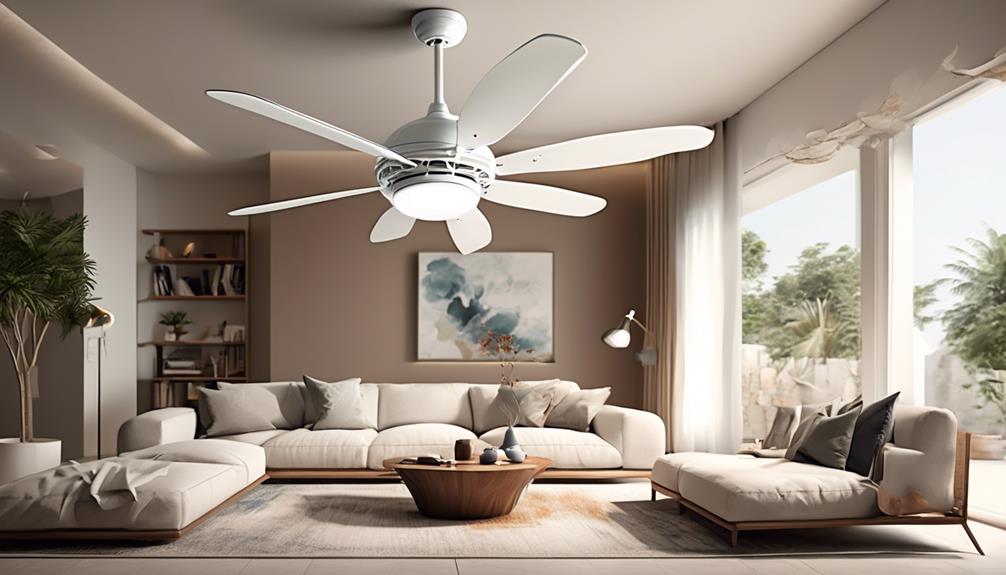
In our quest for the ideal ceiling fan, we desire that amazing air movement that envelops us in what feels like a cool, refreshing gust. However, what constitutes a solid airflow rating for a ceiling fan?
In this article, we will explore the factors that determine the airflow performance of a ceiling fan and how to find the right balance between airflow and noise level. We will also delve into the impact of blade size and fan speed settings on the airflow rating.
Whether you're looking for a ceiling fan for your indoor or outdoor space, understanding what constitutes a good airflow rating will help you make an informed decision.
Key Takeaways
- Factors affecting airflow performance include the size and pitch of fan blades, motor power and efficiency, blade shape and design, and motor power and speed.
- High airflow ratings of ceiling fans result in improved air circulation, efficient room cooling, energy cost savings, odor dissipation, and maintenance of air quality.
- Airflow is an important factor in ceiling fans as it determines air movement efficiency, helps in choosing the most suitable fan, analyzes energy consumption, and determines performance and effectiveness.
- Factors affecting airflow ratings include room layout, size, shape, furniture placement, number of blades, ceiling height, presence of obstacles, fan size, blade size and shape, and motor power.
Understanding Airflow Ratings
Understanding airflow ratings is crucial when evaluating the performance and efficiency of ceiling fans. Airflow ratings are a measure of the amount of air that a fan can move, typically measured in cubic feet per minute (CFM). Several factors contribute to the airflow rating of a ceiling fan.
The first factor is the size of the fan blades. Larger blades have a greater surface area and can move more air. Similarly, the pitch or angle of the blades also affects the airflow rating. Steeper blade angles can generate more airflow, but they may also require more power to operate.
Another important factor is the motor power of the fan. A more powerful motor can rotate the blades faster, resulting in higher airflow ratings. Additionally, the design and efficiency of the motor can impact the overall performance of the fan.
High airflow ratings offer several benefits. Firstly, they ensure better air circulation in a room, leading to improved comfort. High airflow also helps in cooling the room more efficiently, reducing the reliance on air conditioning and saving energy costs. Moreover, increased airflow can also help in dissipating odors and maintaining air quality.
Importance of Airflow in Ceiling Fans

When it comes to ceiling fans, understanding the importance of airflow is crucial. Air movement efficiency is one of the key factors to consider, as it determines how effectively the fan can circulate air in a room.
Additionally, comparing the cooling power of different fans can help in choosing the most suitable option for specific needs.
Lastly, analyzing energy consumption is essential to ensure that the fan operates efficiently and doesn't contribute to unnecessary energy wastage.
Air Movement Efficiency
To ensure optimal air movement efficiency, it's crucial to consider the airflow rating of a ceiling fan. Airflow rating refers to the amount of air circulation provided by the fan, which directly affects its performance and effectiveness. The higher the airflow rating, the more efficiently the fan can circulate air within a given space.
Fan efficiency is a measure of how well the fan converts electrical energy into kinetic energy to move air. It's determined by factors such as motor design, blade shape, and the overall design of the fan.
A ceiling fan with a high airflow rating and efficient design can effectively cool a room by creating a breeze and promoting air circulation. Therefore, when selecting a ceiling fan, it's essential to consider both the airflow rating and the fan's efficiency to ensure optimal air movement efficiency.
Cooling Power Comparison
Comparing the cooling power of ceiling fans emphasizes the crucial role of airflow in determining their effectiveness. The cooling efficiency of a ceiling fan is directly related to the amount of airflow it can generate. A higher airflow rating means that the fan can move more air, resulting in better cooling performance.
When comparing ceiling fans, it's important to consider their airflow ratings, which are measured in cubic feet per minute (CFM). A fan with a higher CFM rating will provide better cooling and help create a more comfortable environment.
Additionally, energy-saving options such as fans with variable speed settings or DC motors can further enhance cooling efficiency while reducing energy consumption. By choosing a ceiling fan with a high airflow rating and energy-saving features, you can optimize cooling power and save on energy costs.
Energy Consumption Analysis
The airflow ratings of ceiling fans play a crucial role in not only determining their cooling power but also in analyzing their energy consumption efficiency.
When it comes to energy consumption analysis, it's important to consider the energy saving features of a ceiling fan. Some fans come with built-in timers and sensors that can automatically adjust the speed or turn off the fan when not in use. Additionally, fans with energy-efficient motors can significantly reduce electricity consumption.
Conducting a cost-effectiveness comparison is another essential step in analyzing energy consumption. This involves evaluating the initial cost of the fan, as well as the long-term savings in energy bills.
What Is CFM and How Does It Affect Airflow?
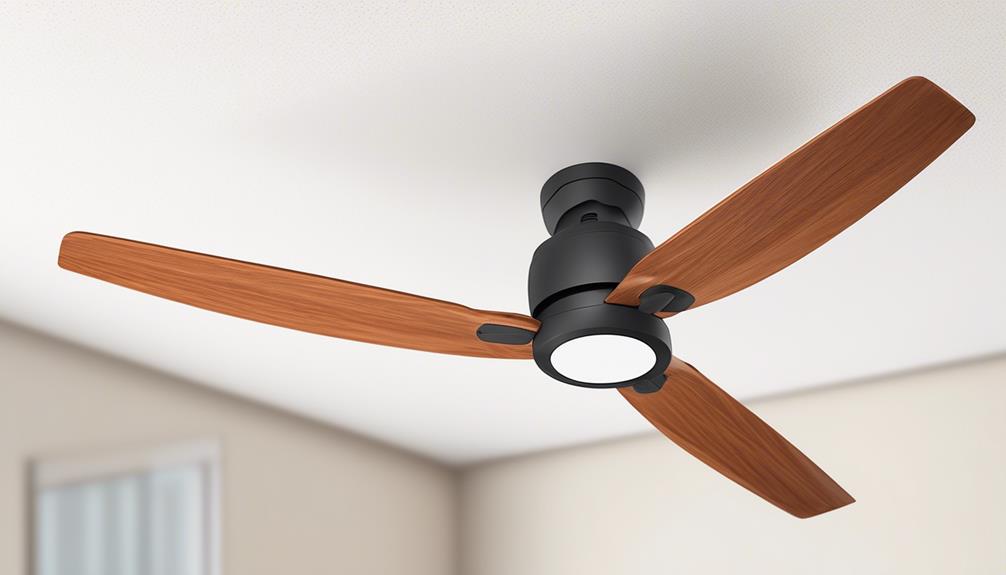
CFM, or cubic feet per minute, is a measurement used to quantify the amount of air a ceiling fan can move in one minute. It's an important metric to consider when choosing a ceiling fan as it directly affects the airflow in a room. CFM measurement techniques vary, but the most common method involves using a specialized device called an anemometer. This device measures the velocity of the air being moved by the fan and calculates the CFM based on the fan's diameter and the speed at which it's rotating.
However, there are factors that can affect the accuracy of CFM measurements. One such factor is the presence of obstacles in the path of the airflow, such as furniture or walls. These obstacles can disrupt the flow of air and reduce the effectiveness of the fan.
Additionally, the shape and design of the fan blades can also impact the CFM rating. Fans with wider blades or a more aerodynamic design tend to have higher CFM ratings.
Average Airflow Ratings for Residential Ceiling Fans

When considering average airflow ratings for residential ceiling fans, it's important to understand the airflow requirements for comfort. Factors such as room size, ceiling height, and the number of occupants can affect the performance of a ceiling fan.
Choosing the right fan size based on these factors is crucial in achieving optimal airflow and ensuring a comfortable living environment.
Airflow Requirements for Comfort
To ensure optimal comfort, it's important to consider the average airflow ratings for residential ceiling fans. Understanding comfort and the impact of temperature on it's crucial when selecting a ceiling fan. Here are some key factors to consider:
- Airflow Efficiency: Look for fans with a high airflow efficiency rating, measured in cubic feet per minute (CFM). Higher CFM ratings indicate better airflow and circulation in the room.
- Blade Span: Consider the size of the room when choosing a ceiling fan. Larger rooms require fans with a larger blade span to effectively circulate air throughout the space.
- Number of Blades: The number of blades can affect the airflow produced by a fan. Fans with more blades may provide a smoother, more consistent airflow.
- Fan Speeds: Ceiling fans with multiple speed settings allow you to adjust the airflow to your preference, providing customized comfort.
Factors Affecting Airflow Performance
Considering the various factors that impact the airflow performance of residential ceiling fans is crucial in selecting the most suitable option for optimal comfort. Ceiling fan airflow efficiency is influenced by several key factors, including blade pitch, blade length, and motor power.
| Factors | Impact on Airflow Performance |
|---|---|
| Blade Pitch | A steeper pitch can generate a higher airflow, as it allows the blades to move more air with each rotation. |
| Blade Length | Longer blades can move more air compared to shorter blades, resulting in increased airflow. |
| Motor Power | A more powerful motor can drive the blades to rotate at higher speeds, creating stronger airflow. |
Choosing the Right Fan Size
In selecting the appropriate residential ceiling fan size, it's important to consider the average airflow ratings. The size of the fan plays a crucial role in optimizing air movement within a space.
Here are some key points to keep in mind when matching fan size to the room:
- Room size: Larger rooms require fans with higher airflow ratings to effectively circulate air.
- Blade length: Longer blades generally provide better air movement, but it's essential to match them with the appropriate motor power to ensure optimal performance.
- Ceiling height: For higher ceilings, consider using fans with downrods to lower the fan closer to the occupants, maximizing air movement efficiency.
- Number of blades: The number of blades doesn't significantly impact airflow performance, so choose a fan design that complements your aesthetic preferences.
Factors That Influence Airflow Performance
Multiple factors can significantly impact the performance of a ceiling fan's airflow. Understanding these factors is crucial in selecting the right fan for your space. One of the main factors influencing airflow performance is the room layout. The size, shape, and furniture placement in a room can create obstacles that disrupt the smooth flow of air. For example, a small room with a lot of furniture may hinder the circulation of air, resulting in poor airflow. On the other hand, a large, open-concept space allows for better air movement.
To help you visualize the impact of room layout on airflow, here is a table outlining three different scenarios:
| Room Layout | Airflow Performance |
|---|---|
| Small and cluttered | Poor |
| Large and open-concept | Good |
| Medium-sized with balanced furniture placement | Moderate |
Matching Airflow Rating With Room Size
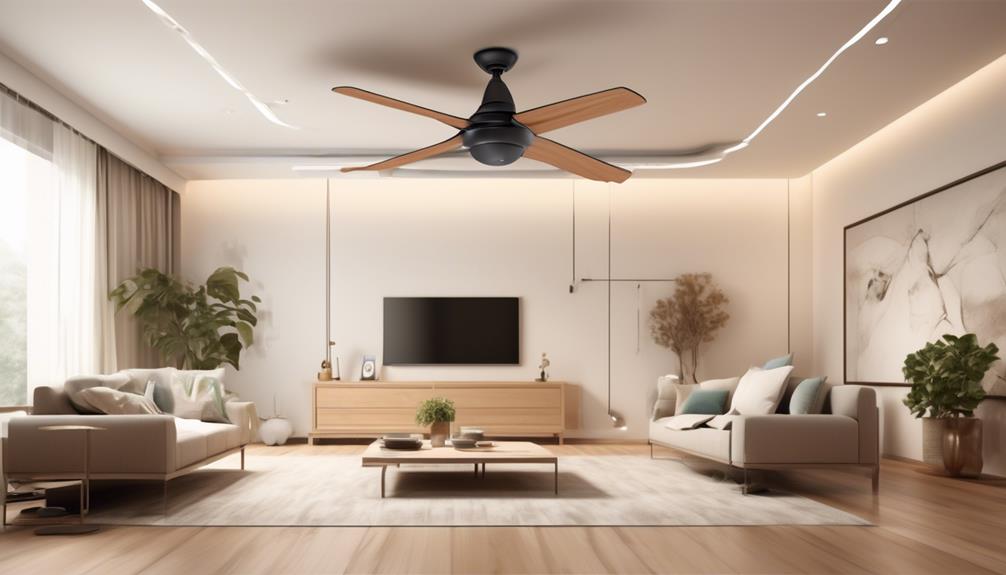
To ensure optimal airflow in a room, it's important to match the airflow rating of a ceiling fan with the size of the space. This ensures that the fan can effectively circulate air and provide the desired level of comfort. Matching airflow rating with room size is crucial for several reasons:
- Efficient air circulation: A fan with a high airflow rating can effectively move air throughout the room, ensuring better cooling or ventilation. This is especially important in larger spaces where air circulation may be a challenge.
- Noise reduction: A fan with a higher airflow rating can achieve the desired airflow with lower fan speeds. This reduces noise levels, making the room quieter and more comfortable.
- Improved comfort: A ceiling fan with a higher airflow rating can create a stronger breeze, providing better cooling in hot weather. It can also help distribute heated air more effectively in colder months.
- Energy savings: A fan with a high airflow rating can help reduce reliance on air conditioning or heating systems, leading to potential energy savings.
The Right Airflow Rating for High Ceilings

Matching the airflow rating with the size of a room is crucial for optimal air circulation and comfort. This is especially important when considering the right airflow rating for high ceilings. High ceilings offer several benefits, such as a spacious and open feel, enhanced aesthetics, and better natural light distribution. However, they also present challenges when it comes to maximizing airflow efficiency.
In rooms with high ceilings, it's important to choose a ceiling fan with a higher airflow rating to effectively circulate air throughout the space. The increased height of the room requires the fan to move air at a greater distance, overcoming the natural tendency for warm air to rise and accumulate near the ceiling.
To maximize airflow efficiency in rooms with high ceilings, look for ceiling fans with a higher CFM (cubic feet per minute) rating. CFM measures the volume of air that the fan can move per minute. A higher CFM rating indicates a more powerful fan that can move more air effectively.
Additionally, consider choosing a ceiling fan with a larger blade span. The larger blade span creates a wider airflow pattern, distributing the air more evenly throughout the space. This helps to combat the tendency for stagnant air pockets near the ceiling.
Airflow Rating and Energy Efficiency
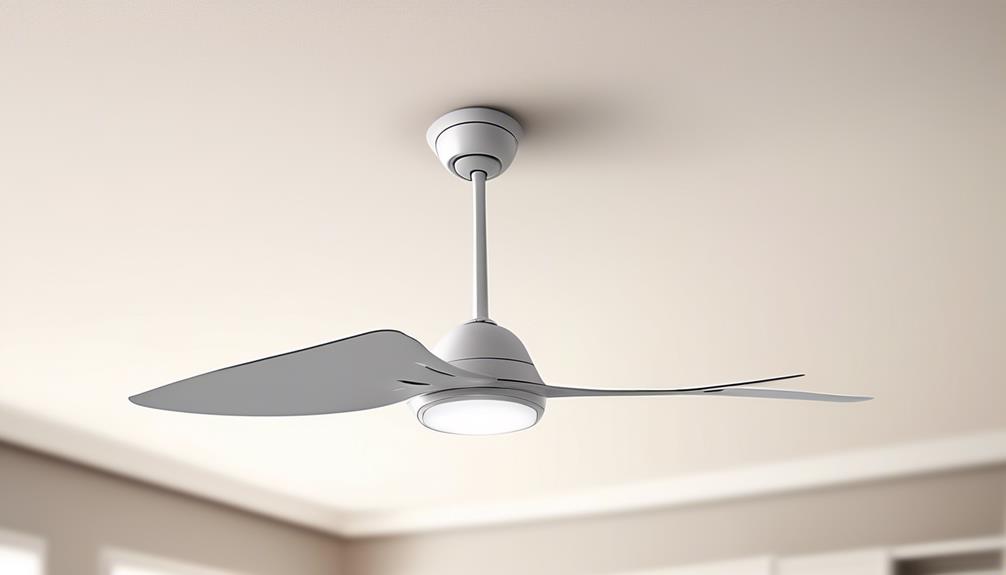
Considering the importance of energy efficiency, it's crucial to understand the relationship between airflow rating and energy consumption in ceiling fans.
The airflow rating of a ceiling fan refers to the volume of air it can move, typically measured in cubic feet per minute (CFM). The energy consumption, on the other hand, refers to the amount of electrical energy consumed by the fan during operation.
Here are some key points to understand about the relationship between airflow rating and energy consumption:
- A higher airflow rating generally results in greater energy consumption. This is because more air movement requires more energy to power the fan's motor.
- However, it's important to note that a high airflow rating doesn't necessarily mean high energy consumption. Technological advancements in motor efficiency and fan design have allowed for more energy-efficient ceiling fans with high airflow ratings.
- Ceiling fans with high airflow ratings offer several benefits, including improved air circulation, enhanced cooling effect, and more efficient air conditioning. This can lead to energy savings by reducing the reliance on air conditioning systems.
- It's recommended to choose a ceiling fan with an airflow rating that suits the size of the room. This ensures optimum air circulation without excessive energy consumption.
Understanding the relationship between airflow rating and energy consumption is essential for making informed decisions when selecting a ceiling fan. By choosing a fan with an appropriate airflow rating, you can enjoy the benefits of improved air circulation and energy efficiency.
How to Measure the Airflow Rating of a Ceiling Fan
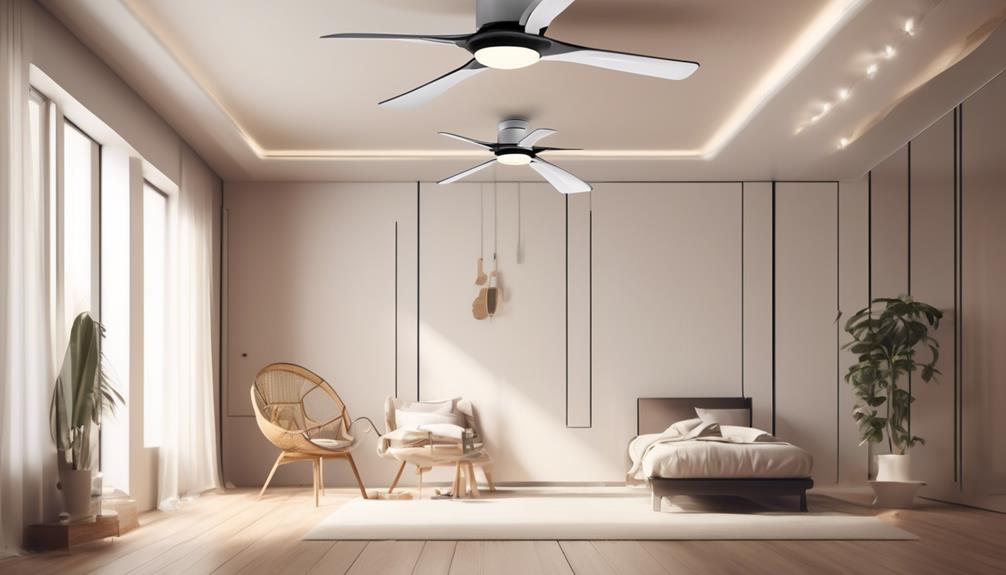
When it comes to measuring the airflow rating of a ceiling fan, there are several techniques that can be used. These techniques involve measuring the air velocity and flow rate produced by the fan.
Factors such as the size and shape of the fan blades, the motor power, and the distance from the fan also affect the airflow rating.
The ideal airflow range for a ceiling fan is typically between 4,000 and 6,000 cubic feet per minute (CFM), as this provides optimal air circulation and cooling effect in a room.
Measurement Techniques
To accurately determine the airflow rating of a ceiling fan, a precise measurement technique must be employed. Measurement accuracy is crucial when assessing the performance of a ceiling fan. Here are some common airflow testing methods used to measure the airflow rating:
- Using an anemometer: An anemometer measures the velocity of air. By placing it in the airflow generated by the ceiling fan, the airflow rate can be calculated accurately.
- Utilizing a flow grid: A flow grid consists of evenly spaced holes that measure the pressure difference across the fan. This data can then be used to calculate the airflow rate.
- Employing a hot wire anemometer: This device measures the air velocity by sensing the changes in temperature caused by the moving air. It's a highly accurate method for determining airflow rate.
- Conducting a pitot tube measurement: A pitot tube measures the dynamic pressure of the air, providing an accurate measurement of the airflow rate.
Factors Affecting Airflow
We can assess the airflow rating of a ceiling fan by taking into account various factors that affect its performance. Factors influencing airflow performance include the fan blade design, motor power, and the angle at which the blades are pitched. Maximizing airflow efficiency involves optimizing these factors to ensure the fan moves a large volume of air while consuming minimal energy.
| Factors | Explanation |
|---|---|
| Blade Design | The shape and size of the fan blades impact the airflow generated. Curved blades tend to be more efficient in moving air compared to flat blades. |
| Motor Power | The motor power determines the speed at which the blades rotate. A higher motor power generally results in greater airflow. |
| Blade Pitch | The angle at which the blades are pitched affects how effectively they move air. A steeper blade pitch can generate a stronger airflow. |
| Fan Size | The size of the fan also plays a role in airflow performance. Larger fans typically move more air compared to smaller ones. |
Ideal Airflow Range
The measurement of the airflow rating of a ceiling fan can be determined by assessing its effectiveness in moving a suitable volume of air while consuming minimal energy. To determine the ideal airflow range for a ceiling fan, it's important to consider the specific airflow requirements of the room or space.
Here are some key factors to consider when determining the ideal airflow range:
- Room size: Larger rooms generally require ceiling fans with higher airflow ratings to effectively circulate air.
- Ceiling height: Higher ceilings may require ceiling fans with greater airflow capacity to ensure proper air movement throughout the space.
- Number of blades: Ceiling fans with more blades tend to have higher airflow ratings, resulting in increased airflow.
- Motor power: Ceiling fans with more powerful motors are capable of producing higher airflow ratings, making them suitable for rooms with higher airflow requirements.
Comparing Airflow Ratings Among Different Fan Models
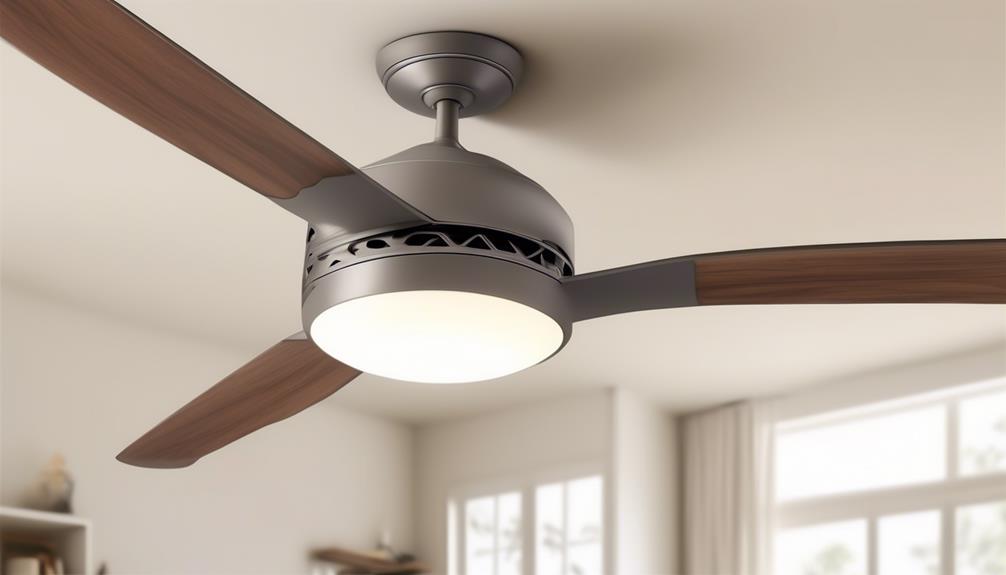
Airflow ratings among different fan models can be compared to determine their effectiveness in circulating air. When comparing the airflow ratings, it's important to consider the airflow rating comparison and energy efficiency analysis.
The airflow rating comparison refers to the measurement of the amount of airflow a fan can generate, typically expressed in cubic feet per minute (CFM). This rating provides an indication of how much air the fan can move, which directly impacts its ability to cool a room effectively.
To compare airflow ratings among different fan models, it's essential to look at the CFM values provided by the manufacturers. A higher CFM indicates a more powerful fan that can move a greater volume of air. However, it's important to balance the airflow rating with energy efficiency. Some fans with high CFM ratings may consume more energy, resulting in higher electricity bills.
To perform an energy efficiency analysis, it's recommended to compare the CFM ratings with the wattage consumption of each fan model. This will help determine the airflow to energy consumption ratio, which can be used to identify the most efficient fan models.
Airflow Rating and Noise Level: Finding the Right Balance
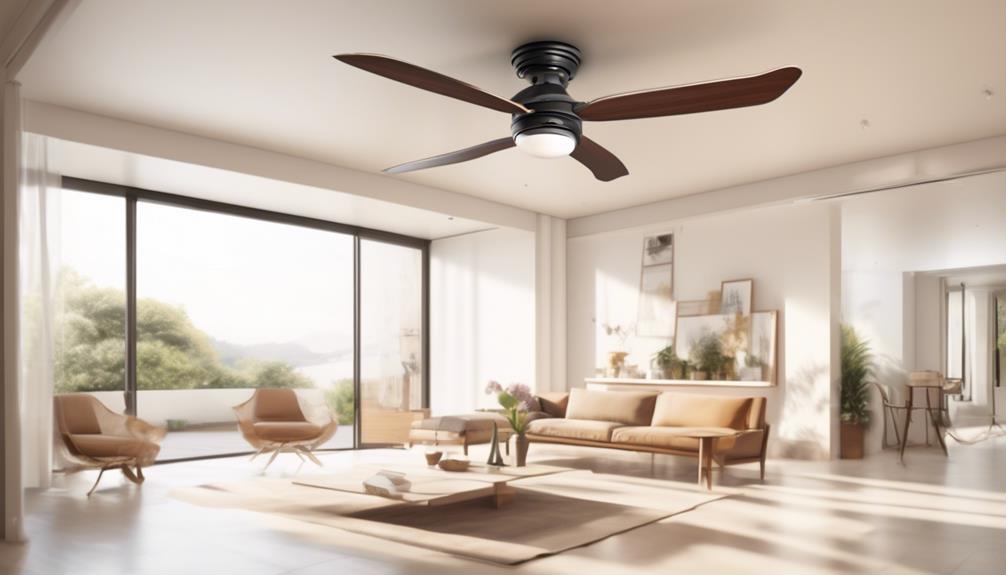
When considering the effectiveness of different fan models in circulating air, it's crucial to strike a balance between the airflow rating and noise level. While a high airflow rating is desirable for optimal air circulation and temperature control in a room, it's equally important to ensure that the noise level of the fan isn't intrusive or disruptive.
Finding the right balance between airflow rating and noise level can greatly impact the comfort and functionality of a ceiling fan. Here are some key points to consider:
- Airflow rating: An airflow rating is a measure of the volume of air that a fan can move in a given time. A higher airflow rating indicates better air circulation and cooling effect in a room.
- Noise level: The noise level of a fan is measured in decibels (dB). Lower noise levels are generally preferred for a peaceful and quiet environment.
- Impact on room temperature control: The airflow rating of a fan directly affects its ability to control room temperature. A fan with a higher airflow rating can effectively circulate air, leading to better temperature regulation and comfort.
- Balancing airflow rating and noise level: It's important to find a fan that strikes the right balance between airflow rating and noise level. Opting for a fan with a moderate airflow rating and low noise level can provide optimal air circulation without causing disturbance.
Does Blade Size Affect Airflow Rating?
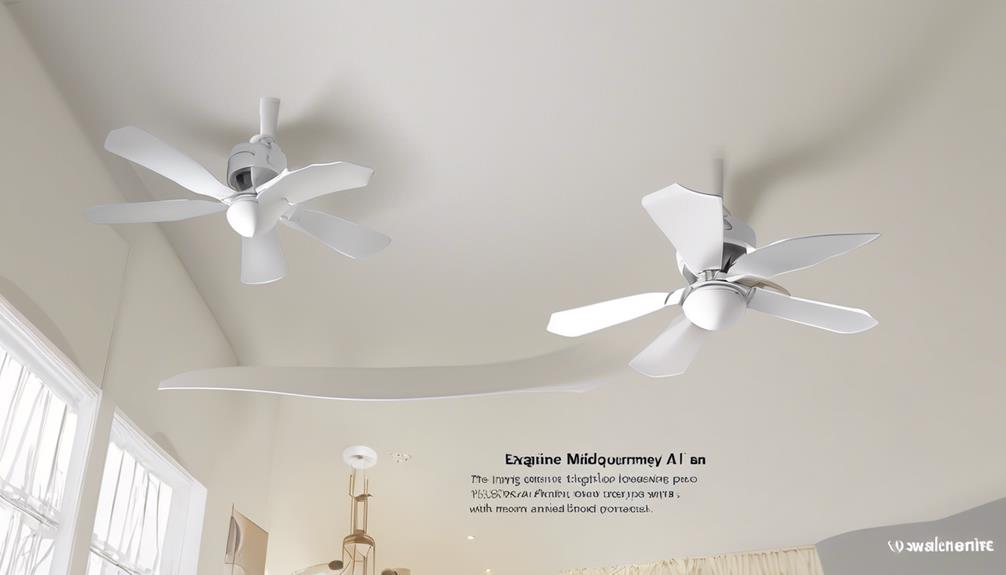
When considering the impact of blade size on airflow rating, there are several points to consider.
Firstly, does blade size actually have an effect on the airflow rating of a ceiling fan?
Secondly, is there a correlation between blade size and airflow rating, and if so, what's the nature of this correlation?
Lastly, is there an optimal blade size that maximizes airflow rating, and if so, what factors should be taken into account in determining this size?
These are the key questions that we'll explore in this discussion.
Blade Size Impact?
The size of the blades on a ceiling fan has a significant impact on its airflow rating. Blade size affects the amount of air the fan can move, which is measured in cubic feet per minute (CFM). Here are some key points to consider regarding the blade size impact on airflow rating:
- Blade length: Longer blades generally move more air than shorter blades.
- Blade width: Wider blades can generate higher airflow compared to narrower blades.
- Blade pitch: The angle of the blades also affects airflow. Blades with a steeper pitch tend to move more air.
- Blade material: Different materials, such as wood or metal, can impact the efficiency and airflow of the fan.
To achieve optimal airflow rating, it's important to choose the right blade size that matches the room size and ceiling height. A fan with blades that are too small may not provide adequate airflow, while blades that are too large may create excessive noise and strain on the motor.
Airflow Rating Correlation?
Blade size has a direct correlation with the airflow rating of a ceiling fan. The size and shape of the blades play a crucial role in determining the amount of air that the fan can circulate in a room. Larger blades generally create a higher airflow rating, resulting in better cooling efficiency. This is because larger blades are able to move more air with each rotation, providing a more powerful breeze and better ventilation. Conversely, smaller blades may have a lower airflow rating, making them less effective in cooling a room.
To further illustrate the impact of blade size on airflow rating, consider the following table:
| Blade Size | Airflow Rating |
|---|---|
| 36 inches | Low |
| 52 inches | Medium |
| 60 inches | High |
| 72 inches | Very High |
As seen in the table, larger blade sizes are associated with higher airflow ratings, resulting in better cooling efficiency. This correlation between airflow and cooling efficiency underscores the importance of selecting the right blade size for optimum comfort and temperature control in a room.
Optimal Blade Size?
Moving on to the topic of optimal blade size and its effect on airflow rating, it's important to consider how the size of the blades directly impacts the cooling efficiency of a ceiling fan. The blade size plays a crucial role in determining the amount of air that the fan can circulate in a given space.
Here are some key points to consider regarding optimal blade design and airflow direction control:
- Larger blades generally move more air and provide better cooling performance.
- However, bigger blades may also require a more powerful motor to operate effectively.
- Blade shape and pitch also influence airflow, with curved blades and steeper pitches often resulting in better air movement.
- It's important to strike a balance between blade size, motor power, and overall design to achieve optimal airflow efficiency.
Airflow Rating and Fan Speed Settings
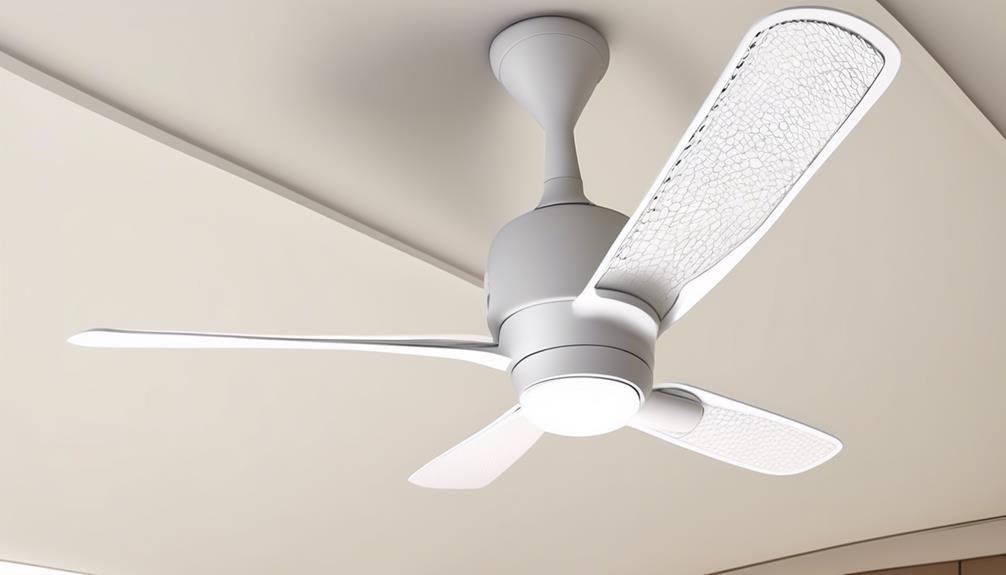
To optimize the performance of your ceiling fan, it's important to understand the relationship between airflow rating and fan speed settings.
The airflow rating of a ceiling fan determines the amount of air it can move, measured in cubic feet per minute (CFM). Fan speed settings, on the other hand, control the rotation speed of the fan blades, which directly affects the airflow produced.
Understanding fan speed is crucial in achieving the desired level of comfort. Most ceiling fans come with multiple speed settings, typically ranging from low to high. The higher the speed setting, the faster the fan blades rotate, resulting in increased airflow. However, it's important to note that higher fan speeds may also generate more noise. Therefore, it's essential to strike a balance between airflow and noise levels based on personal preferences.
When selecting a ceiling fan, it's advisable to consider the airflow rating in relation to the fan speed settings. A fan with a higher airflow rating will generally provide better cooling and ventilation. However, it's important to ensure that the noise levels at higher speeds are within acceptable limits for your comfort.
Considerations for Outdoor Ceiling Fans With Good Airflow

When selecting an outdoor ceiling fan with good airflow, it's important to consider various factors to ensure optimal performance and comfort. Outdoor fan durability, airflow rating, and weather resistance are crucial considerations.
Outdoor Fan Durability: Outdoor ceiling fans are exposed to different weather conditions, including rain, wind, and extreme temperatures. It's essential to choose a fan that's specifically designed for outdoor use and constructed with durable materials that can withstand these elements. Look for fans with corrosion-resistant finishes and robust motor housings to ensure longevity.
Airflow Rating: The airflow rating of a ceiling fan is measured in cubic feet per minute (CFM). Higher CFM ratings indicate greater airflow, which is important for outdoor spaces where air movement is often necessary to combat heat and humidity. Look for fans with higher CFM ratings to ensure effective cooling and ventilation in your outdoor area.
Weather Resistance: Outdoor ceiling fans should have weather-resistant features to withstand exposure to moisture and humidity. Look for fans with blades and motor housings made from materials that are resistant to warping, rusting, or fading. Additionally, consider fans with wet or damp ratings, indicating their suitability for different outdoor environments.
Mounting Options: Outdoor ceiling fans should be properly mounted to ensure stability and safety. Consider the available mounting options, such as downrods or flush mounts, and choose the one that best suits your outdoor space and ceiling height.
Frequently Asked Questions
Can I Use a Ceiling Fan With a Lower Airflow Rating in a Larger Room?
Yes, we can use a ceiling fan with a lower airflow rating in a larger room. However, it may not provide the same level of comfort and cooling as a fan with a higher airflow rating. Proper ceiling fan placement is crucial for optimal airflow distribution.
The benefits of a higher airflow rating include better air circulation, increased cooling effect, and improved energy efficiency. Therefore, it's recommended to choose a ceiling fan with a higher airflow rating for larger rooms.
How Do I Determine the Right Airflow Rating for a Room With Low Ceilings?
When determining airflow needs for a room with low ceilings, it's important to consider the benefits of low airflow ceiling fans. These fans are designed to circulate air efficiently in smaller spaces, ensuring maximum comfort without creating a draft.
Do Ceiling Fans With Higher Airflow Ratings Consume More Energy?
Ceiling fans with higher airflow ratings may consume more energy, but they also offer significant benefits in terms of cooling and ventilation.
The increased airflow allows for better circulation and can help to create a more comfortable living environment.
Additionally, high airflow ceiling fans can help to reduce reliance on air conditioning, leading to potential energy savings.
It's important to consider both the energy efficiency and the desired level of airflow when selecting a ceiling fan for your space.
Are There Any Specific Methods to Measure the Airflow Rating of a Ceiling Fan Accurately?
When measuring the airflow rating of a ceiling fan, there are several methods available to ensure accuracy.
One commonly used method is the CFM (cubic feet per minute) measurement, which calculates the volume of air moved by the fan in one minute.
Another method is the wind speed measurement, which determines the velocity of the air produced by the fan.
Both these methods provide accurate results and can help in determining the effectiveness of a ceiling fan's airflow.
What Factors Should I Consider When Choosing an Outdoor Ceiling Fan With Good Airflow?
When choosing an outdoor ceiling fan with good airflow, durability and noise level are important factors to consider.
Outdoor fans need to withstand the elements, so look for ones made with weather-resistant materials.
Additionally, consider the noise level of the fan, as you don't want it to be disruptive when enjoying your outdoor space.
Does the Speed of a Ceiling Fan Impact Its Airflow Rating?
The average speed of ceiling fan can significantly impact its airflow rating. At higher speeds, the fan is able to move more air, creating a greater cooling effect in the room. However, it’s important to find a balance, as excessive speed can also create discomfort and unnecessary noise.
Conclusion
In conclusion, when selecting a ceiling fan, it's important to consider its airflow rating. A good airflow rating ensures that the fan effectively circulates air in the room, providing a comfortable and cooling environment.
While noise level and blade size can influence the airflow rating, finding the right balance is crucial. By understanding the CFM and considering factors like fan speed settings, homeowners can choose a ceiling fan with optimal airflow for their specific needs.
- About the Author
- Latest Posts
Introducing Ron, the home decor aficionado at ByRetreat, whose passion for creating beautiful and inviting spaces is at the heart of his work. With his deep knowledge of home decor and his innate sense of style, Ron brings a wealth of expertise and a keen eye for detail to the ByRetreat team.
Ron’s love for home decor goes beyond aesthetics; he understands that our surroundings play a significant role in our overall well-being and productivity. With this in mind, Ron is dedicated to transforming remote workspaces into havens of comfort, functionality, and beauty.
Garage Door Opener
How Much a LiftMaster Garage Door Opener Costs
Unravel the enigmatic world of LiftMaster garage door opener costs, where affordability meets intricate functionality in surprising ways – a revelation awaits beyond.

When exploring the complex balance between cost and quality in the world of LiftMaster garage door openers, individuals may find themselves wading through a variety of choices, each with its own specific price point. The fascinating aspect is uncovering the detailed factors that influence these differing costs, revealing the elements that ultimately impact the financial commitment required.
So, as we embark on unraveling the mystery behind how much a LiftMaster garage door opener truly costs, prepare to uncover a world where functionality meets affordability in unexpected ways.
Key Takeaways
- LiftMaster garage door openers range from $200-$600, with most models priced between $250-$475.
- Features include WiFi connectivity, AC/DC motor options, battery backup, and automatic door locks.
- LiftMaster openers excel in functionality, convenience, and security, offering reliable quality.
- Consider drive mechanism, horsepower, smart capabilities, and installation costs when selecting a LiftMaster opener.
LiftMaster Chain Drive Opener Prices
LiftMaster chain drive garage door openers offer a range of prices, typically spanning from $200 to over $600, with most models priced between $250-$475, catering to various budgets and garage door needs. These openers come equipped with advanced features like WiFi and Smart technology, ensuring seamless integration with modern smart home setups. Customers can choose between models with AC and DC motors, providing options based on power and efficiency requirements. Additionally, the inclusion of battery backup in all 11 chain drive models ensures operation during power outages, adding an extra layer of convenience and security.
The affordability of LiftMaster chain drive openers doesn't compromise on performance. Despite the varying price points, each model is designed to deliver reliable functionality and durability. Factors like horsepower and security features contribute to the overall cost but ensure that customers receive a high-quality product tailored to their specific garage door demands. Noise reduction capabilities further enhance the user experience, making LiftMaster chain drive openers a practical and efficient choice for homeowners seeking a balance between cost and performance.
LiftMaster Belt Drive Opener Costs

Belt drive garage door openers from LiftMaster typically fall within the price range of $300 to $600, offering a balance between cost and performance for homeowners seeking a quieter operation. These openers are known for their smooth operation, making them a popular choice for those looking to reduce noise levels in their garage. Some key features of LiftMaster belt drive openers include rubber belts reinforced with steel, ensuring durability and reliability. Additionally, these models come with extension kits suitable for 8 or 10-foot doors, providing versatility for different garage configurations.
Key Points:
- Quiet Operation: LiftMaster belt drive openers offer a quieter alternative to chain drive models, making them ideal for homes where noise is a concern.
- Smooth Performance: The rubber belt design, reinforced with steel, ensures smooth operation, reducing friction and wear.
- Mid-Range Cost: Priced between $300 and $600, these openers strike a balance between affordability and performance, appealing to homeowners looking for quality at a reasonable price.
LiftMaster Wall-Mount Opener Prices
When considering garage door opener options for your home, wall-mount models from LiftMaster are priced between $500 to $600, offering a space-saving solution designed for high or irregular ceilings. These openers come equipped with features like direct drive operation, WiFi connectivity, and Smart technology, making them a convenient and secure investment for your household. The automatic door lock feature adds an extra layer of security to your garage. Below is a breakdown of LiftMaster wall-mount opener prices:
| Features | Description | Price Range |
|---|---|---|
| Direct Drive | Smooth and quiet operation | $500 – $600 |
| WiFi Connectivity | Control your garage door remotely | $500 – $600 |
| Smart Technology | Integration with smart home systems | $500 – $600 |
| Auto Door Lock | Enhanced security feature | $500 – $600 |
| Space-Saving | Ideal for high ceilings and irregular spaces | $500 – $600 |
LiftMaster Opener Features Breakdown

After exploring the pricing details of the LiftMaster wall-mount opener options, we'll now analyze the specific features that make these garage door openers stand out in the market.
LiftMaster Opener Features Breakdown:
- Smart Technology Integration
LiftMaster garage door openers come equipped with WiFi connectivity, allowing users to operate their doors remotely through smartphones or other smart devices.
- Motor Options
LiftMaster offers a choice between AC and DC motors in their openers, providing users with flexibility based on their specific needs and preferences.
- Enhanced Convenience Features
Features like battery backup ensure that your garage door can still be operated during power outages, while automatic door locks provide added security and peace of mind.
These features set LiftMaster openers apart in terms of functionality, convenience, and security, making them a reliable choice for homeowners looking for a high-quality garage door opener.
Garage Door Opener Buying Guide
What key factors should be considered when selecting a LiftMaster garage door opener? When choosing a LiftMaster garage door opener, several crucial factors should guide your decision-making process. Consider the type of drive mechanism, horsepower, smart capabilities, and installation costs to ensure you select the best opener for your needs. Below is a breakdown of key considerations when purchasing a LiftMaster garage door opener:
| Factors to Consider | Details |
|---|---|
| Drive Mechanism | Choose between chain drive models for affordability or quieter operation with belt drives. |
| Horsepower | Select the right horsepower based on the size and weight of your garage door for optimal performance. |
| Smart Capabilities | Opt for smart garage door openers with built-in Wi-Fi for remote access and integration with your smart home system. |
| Installation Costs | Factor in installation costs, especially for wall-mounted models, to stay within your budget. |
Frequently Asked Questions
What Is the Best Liftmaster Garage Door Opener for 2023?
We recommend the LiftMaster 8550WLB for 2023, known for its quiet operation and advanced features.
It boasts a powerful DC motor, battery backup, and WiFi connectivity for remote control.
With MyQ technology, smartphone integration is seamless, enhancing convenience and security.
This model offers a lifetime warranty on the motor and belt, ensuring durability and peace of mind.
Homeowners seeking a reliable, high-performance garage door opener in 2023 should consider the LiftMaster 8550WLB.
What Is the Average Life of a Liftmaster Garage Door Opener?
We can expect a LiftMaster garage door opener to last about 10-15 years on average. These openers are renowned for their durability and long-lasting performance. Factors like regular maintenance and proper installation can help extend their lifespan.
LiftMaster models are designed to be reliable and robust, capable of handling frequent use over many years. Understanding this average lifespan can assist in planning for future maintenance or replacement needs.
Is Liftmaster a Good Garage Door Opener?
Yes, LiftMaster is a reliable choice for a garage door opener. Its enhanced security features, durable construction, noise reduction technology, and convenient remote operation make it a top contender.
The ability to control it through a mobile app like LiftMaster MyQ adds further convenience. Various models cater to different garage types, ensuring a suitable option for all needs.
Professional installation is recommended for optimal performance, and regular maintenance ensures longevity.
How Much Does It Cost to Install Liftmaster 8500w?
When considering the installation of a LiftMaster 8500W garage door opener, various factors like location, complexity, and additional services can influence costs. It's prudent to seek quotes from different installers to compare prices and service offerings.
Costs typically range from $150 to $350 for professional installation, although DIY installation is an option. However, improper DIY installation might void the warranty. Some professionals include installation costs in the overall opener price.
Conclusion
In conclusion, the cost of a LiftMaster garage door opener can vary depending on the model and features selected.
Like a well-oiled machine, these openers offer a range of options to suit different budgets and needs, from chain drive models to smart technology.
With prices ranging from $200 to $1,000, there's a LiftMaster opener for every garage door, ensuring smooth and reliable operation for years to come.
- About the Author
- Latest Posts
Introducing Ron, the home decor aficionado at ByRetreat, whose passion for creating beautiful and inviting spaces is at the heart of his work. With his deep knowledge of home decor and his innate sense of style, Ron brings a wealth of expertise and a keen eye for detail to the ByRetreat team.
Ron’s love for home decor goes beyond aesthetics; he understands that our surroundings play a significant role in our overall well-being and productivity. With this in mind, Ron is dedicated to transforming remote workspaces into havens of comfort, functionality, and beauty.
Garage Door Opener
10 Easy Steps to Wire Your Liftmaster Garage Door Opener
Unveil the secrets to wiring your Liftmaster garage door opener effortlessly in 10 simple steps – are you ready to upgrade your garage door experience?

On average, a garage door opener typically lasts between 10 and 15 years before it needs to be replaced.
Now, when it comes to wiring your Liftmaster garage door opener, following 10 straightforward steps can make the process seamless and hassle-free.
From gathering the necessary tools to testing the opener's functionality, each step plays a crucial role in ensuring your garage door operates smoothly and securely.
So, are you ready to learn how to wire your Liftmaster garage door opener like a pro?
Key Takeaways
- Safely connect control terminals to your Liftmaster garage door opener for proper functionality.
- Securely wire and test the connections to ensure smooth operation.
- Manage wires using zip ties for a neat appearance and avoid damage.
- Verify safety measures and test the opener thoroughly for safe and efficient use.
Gather Necessary Tools and Materials
To begin the wiring process for your Liftmaster garage door opener, we need to gather the essential tools and materials required for the installation. You'll need a screwdriver to release push-type terminals on the garage door opener. Ensure you have hookup wire with stripped ends ready to connect the opener to external devices.
It's crucial to check the compatibility of your Liftmaster garage door opener with the external device to ensure proper wiring. Have zip ties or cable trunkings on hand to secure and organize the wires for a clean and professional installation. Consider using a small flat-head screwdriver to tighten the wire connections securely at the screw terminals for reliable operation.
Additionally, make sure you have the wall button that comes with the garage door opener, as this will be essential for the wiring process. By having these tools and materials ready, you can proceed with confidence to wire your Liftmaster garage door opener efficiently and effectively.
Turn Off Power to the Garage Door Opener

Let's cut the power to the garage door opener for safety before proceeding with any wiring tasks. To ensure a secure environment, it's essential to close off the power source to the garage door opener. This action prevents accidental activation of the door during the wiring process and mitigates the risk of electric shock or harm to the opener components.
To disconnect the power, either locate the power source and switch it off or unplug the garage door opener entirely. Before commencing any wiring work, it's crucial to confirm that the power is successfully turned off. This can be done by testing the garage door opener to ensure it doesn't respond to any commands.
Identify the Control Terminal on the Opener
Identifying the control terminal on the opener involves locating specific labeled terminals or following the wire path from the wall-mounted button to the motor unit. To find the correct terminal on your LiftMaster garage door opener, follow these steps:
- Check for Labeled Terminals: Older LiftMaster openers may have terminals labeled 1 and 2 for connecting control wires. On Chamberlain, Craftsman, and newer LiftMaster models, look for the left-most red and white terminals.
- Look for BWC Terminals: Some openers may have terminals labeled BWC for connecting control wires. These terminals are also used for controlling the open and close functions of the garage door.
- Follow the Wire Path: Trace the wire from the wall-mounted button to the motor unit. The terminals at the motor end of this wire are likely the control terminals that handle the signal to open and close the garage door.
- Ensure Proper Functionality: Make sure to connect the control wires to the terminals that receive signals from the wall button to ensure the garage door opens and closes correctly.
Connect the Control Wires to the Opener

Begin by securely connecting the control wires to the identified terminals on your LiftMaster opener using a screwdriver. First, release the terminals using the screwdriver to ensure a proper connection.
Strip the ends of the control wires and insert them into the designated terminals. Tighten the terminals to secure the wires in place, preventing any loose connections during operation.
It's crucial to check the wire connections thoroughly to guarantee proper functionality before closing the opener. By following these steps diligently, you'll successfully wire your LiftMaster garage door opener for seamless operation.
Locate the Wall Control Button Wires
To locate the wall control button wires, trace them from the wall-mounted button to the garage door motor unit. It's essential to follow these steps:
- Identify the Wall Button: Start by locating the wall-mounted button that operates the garage door opener. This button is typically placed near the entrance to the house or in the garage itself.
- Follow the Wires: Trace the wires from the wall button towards the garage door motor unit. These wires are crucial for transmitting the signal from the wall button to the opener.
- Check for Terminals: Look for terminals on the garage door motor unit that are designated for connecting the wall control button wires. These terminals can vary based on the opener model.
- Verify the Connection: Once you have located the terminals, visually inspect the wires to ensure they align correctly with the designated terminals on the garage door motor unit. This verification step is crucial for a successful wiring process.
Connect the Wall Control Button Wires

Let's securely connect the wall control button wires to the designated terminals on the garage door opener using a screwdriver. To ensure a proper connection, follow these steps:
- Identify Terminals: Locate the push-type terminals on the garage door motor unit. These are where the wall control button wires will be connected.
- Release Wires: Use the screwdriver to release the terminals. Insert the wires from the wall button into the designated terminals on the opener.
- Secure Connection: Twist the wires together securely before inserting them into the terminals. This ensures proper contact and prevents loose connections.
- Double-Check: Verify that the wires are correctly connected to the terminals. Check for any loose connections or exposed wires.
| Terminal Label | Wire Color | Wall Control Button Wire |
|---|---|---|
| 1 | Red | Red |
| 2 | White | White |
| 3 | Black | Black |
| 4 | Blue | Blue |
Test the Garage Door Opener

Let's make sure the garage door opener functions properly by testing it with the wall button and remote control. Check for any delays or malfunctions in the opener's response to commands.
Additionally, ensure the safety sensors are working correctly by testing their ability to reverse the door when an object is in the way.
Functionality Check
Perform a functionality check on the Liftmaster garage door opener by testing its operation through various methods:
- Press the wall button to ensure smooth opening and closing of the door.
- Test the responsiveness of the opener to remote control signals for consistent operation.
- Verify the proper functioning of the safety sensors by obstructing the door's path to trigger a reversal.
- Listen for any unusual noises or jerky movements during the door's operation to detect potential issues.
Safety Sensor Test
To ensure the safety and proper functioning of the garage door opener, conduct a safety sensor test by obstructing the door's path and verifying immediate reversal upon contact.
Place an object in the door's path and close the garage door. The door should stop and reverse direction as soon as it touches the obstruction. Test both sensor units separately to ensure they function correctly. If the door doesn't reverse upon contact, adjust the sensor alignment.
Keep the sensors clean and free from any debris for accurate testing. Regularly perform this safety sensor test to guarantee that your garage door opener functions safely and effectively.
Secure and Organize the Wires

Let's ensure a tidy wiring setup by using mounting brackets for secure wire guidance. Avoid staples to prevent wire damage and interference, opting for zip ties or cable trunkings for organized management.
For clarity, consider labeling wires and including the power adapter wire in the cable management plan for a neat installation.
Wire Management Tips
For a tidy and efficient wiring setup, utilize mounting brackets to guide the wires down to the motor unit of your Liftmaster garage door opener. Here are some wire management tips to ensure a clean installation:
- Secure wires using zip ties or cable trunkings to prevent interference with the garage door's operation.
- Avoid using staples to secure wires, as they can damage the wires or pose safety hazards.
- Include the power adapter wire in your cable management plans for a tidy setup.
- Ensure all wires are securely fastened and hidden to maintain a clean and professional look in your garage.
Cable Tie Solutions
We secure and organize the wires along the garage door mounting bracket using cable ties for a neat and interference-free wiring setup. Start by gathering all the wires and aligning them neatly along the bracket.
Use cable ties to fasten the wires securely to the bracket at regular intervals, ensuring they aren't too tight to avoid damaging the insulation. By keeping the wires organized and away from moving parts, you prevent interference with the garage door's operation.
Avoid using staples, as they can harm the wires and lead to short circuits. Consider using cable trunkings for added protection and a clean finish. Remember to include the power adapter wire in your cable management plan for a comprehensive and tidy installation.
Labeling for Clarity
To ensure clear identification and organization of wires, label them distinctly with tags or colored tape before securing them along the garage door opener rail or ceiling.
- Attach labels to each wire indicating its specific function or connection point.
- Utilize different colors for wires serving different purposes for easy visual reference.
- Ensure wires are securely fastened using cable clips or adhesive mounts to prevent tangling.
- Keep wires organized and away from moving parts to avoid interference with the door's operation.
Power On the Garage Door Opener

Before proceeding with powering on the garage door opener, ensure that the unit is unplugged and all power sources are switched off to prevent electrical accidents. Here are the steps to follow:
| Step | Action |
|---|---|
| 1. | Unplug the garage door opener from the power source. |
| 2. | Double-check that all switches controlling power to the opener are off. |
| 3. | Disconnect the power cord from the outlet to avoid any potential shocks. |
| 4. | Use a voltage detector to confirm there is no electrical current present. |
Test the Opener's Functionality

After confirming the power source is disconnected, proceed to test the opener's functionality by pressing the wall-mounted button.
- Check for Smooth Operation: Press the wall-mounted button to observe if the garage door opens and closes smoothly without any unusual noises.
- Verify Safety Sensors: Test the safety sensors by obstructing the door's path during closure to ensure they halt the door's movement.
- Inspect for Error Codes: Look for any error codes or blinking lights on the opener that may indicate underlying issues with the system.
- Test Remote Controls: Confirm that the remote controls and keypad entry are functioning correctly with the opener by opening and closing the door using these devices.
Frequently Asked Questions
How Do I Connect My Liftmaster Garage Door Opener?
To connect your LiftMaster garage door opener, follow these steps:
Identify the red and white terminals on the opener. Use a screwdriver to release the tabs and insert the stripped ends of the wires. Connect the wall button wires to the same terminals as the Garadget device. Twist and secure the wires tightly for a secure connection. Double-check the wiring and test the door before finalizing the installation.
It's crucial to follow these steps carefully for a successful setup.
How Many Wires Do You Need for a Garage Door Opener?
We need two wires for a standard garage door opener installation. One wire is for the 'push' or 'close' signal, and the other is for the 'release' or 'open' signal. These wires transmit control signals from the wall button or remote to the garage door opener motor unit.
Understanding the function of each wire is key for effective control system setup. Connecting these wires properly ensures smooth and reliable operation of your LiftMaster garage door opener.
How Do You Wire a Garage Door Opener Button?
We wire a garage door opener button by identifying the appropriate terminals on the opener. Locate and release push-type terminals using a screwdriver. Twist stripped wire ends together for a secure connection. Insert wires into the designated terminals, ensuring a tight fit.
Follow these steps to successfully wire your garage door opener button for seamless operation.
Can You Hardwire a Garage Door Opener?
Yes, we can hardwire a garage door opener by connecting the necessary wires to the designated terminals on the opener. Hardwiring offers a more direct and reliable connection for controlling the garage door opener.
It allows for seamless integration of accessories like keypads, remotes, or smart home systems. Following the manufacturer's guidelines and wiring instructions is crucial for safety and proper functionality.
Hardwiring provides a permanent solution without relying on batteries or wireless signals.
Conclusion
In conclusion, wiring your Liftmaster garage door opener is a simple process that can be completed in just 10 easy steps.
Did you know that properly maintaining your garage door opener can increase the lifespan of the system by up to 50%?
By following these steps and ensuring proper installation, you can enjoy a smooth-functioning garage door opener for years to come.
Happy wiring!
- About the Author
- Latest Posts
Introducing Ron, the home decor aficionado at ByRetreat, whose passion for creating beautiful and inviting spaces is at the heart of his work. With his deep knowledge of home decor and his innate sense of style, Ron brings a wealth of expertise and a keen eye for detail to the ByRetreat team.
Ron’s love for home decor goes beyond aesthetics; he understands that our surroundings play a significant role in our overall well-being and productivity. With this in mind, Ron is dedicated to transforming remote workspaces into havens of comfort, functionality, and beauty.

Are you exhausted from feeling trapped by your energy expenses? Envision a world where your home is a stronghold, protecting you from the unpredictable elements outside.
Well, with these 11 smart choices for energy-efficient climate control, that world can be your reality. We have researched, analyzed, and compiled a comprehensive list of strategies that will empower you to take full control of your home’s climate while minimizing your energy consumption.
From programmable thermostats that adapt to your schedule, to solar-powered heating systems harnessing the sun’s energy, we have uncovered the secrets to achieving optimal comfort and efficiency.
So, join us on this journey to master your home’s climate control and unlock the potential for substantial energy savings.
Key Takeaways
- High-efficiency HVAC systems reduce energy consumption and lower utility bills.
- Upgrading to a high-efficiency HVAC system can result in significant cost savings.
- High-efficiency HVAC systems maximize energy efficiency and reduce waste.
- High-efficiency HVAC systems contribute to improved air quality and personalized comfort.
Programmable Thermostats
One of the most effective ways to save energy and reduce utility costs is by using programmable thermostats. These innovative devices offer a range of features that can help optimize your home’s climate control.
Programmable thermostats allow you to set different temperature levels for different times of the day, ensuring that your heating or cooling system is only running when needed. This feature alone can lead to significant energy savings.
Energy-saving thermostat settings are another key benefit of programmable thermostats. These settings allow you to customize your heating and cooling schedule based on your daily routine. For example, you can program the thermostat to lower the temperature while you’re at work and raise it just before you return home, ensuring that you don’t waste energy cooling or heating an empty house.
Additionally, programmable thermostats often come with advanced features such as Wi-Fi connectivity, allowing you to control your home’s climate remotely through a smartphone app. This feature isn’t only convenient but also enables you to make adjustments on the go, ensuring a comfortable environment while minimizing energy consumption.
High-Efficiency HVAC Systems
When it comes to high-efficiency HVAC systems, there are several key points to consider.
Firstly, these systems offer cost-saving benefits by reducing energy consumption and lowering utility bills.
Secondly, they have a positive environmental impact by reducing greenhouse gas emissions and promoting sustainability.
Lastly, high-efficiency HVAC systems provide improved indoor comfort, ensuring that your home or office remains at a comfortable temperature all year round.

Cost-Saving Benefits
Installing high-efficiency HVAC systems can lead to significant cost savings. By upgrading to a system with better energy efficiency, you can reduce your monthly utility bills and save money in the long run. Additionally, high-efficiency HVAC systems often come with advanced features such as programmable thermostats and zoning capabilities, allowing for more precise control over temperature settings and further reducing energy consumption.
To give you a better idea of the potential cost savings, here’s a table highlighting the average annual savings achieved by installing high-efficiency HVAC systems compared to standard systems:
| System Type | Average Annual Savings |
|---|---|
| Standard | $300 |
| High-efficiency | $500 |
In addition to installing high-efficiency HVAC systems, other cost-effective measures to consider are investing in quality insulation and energy-saving window treatments. These can further enhance the energy efficiency of your home and contribute to significant savings on your energy bills.
Environmental Impact Reduction
To reduce our environmental impact, we can make smart choices and opt for high-efficiency HVAC systems. These systems are designed to maximize energy efficiency and minimize waste, resulting in reduced carbon emissions and a smaller carbon footprint.
Here are four key ways in which high-efficiency HVAC systems contribute to environmental sustainability and carbon footprint reduction:
- Energy Efficiency: High-efficiency HVAC systems use advanced technologies to consume less energy, leading to significant energy savings and reduced greenhouse gas emissions.
- Renewable Energy Integration: These systems can be easily integrated with renewable energy sources like solar panels or geothermal systems, further reducing reliance on fossil fuels.
- Smart Controls: High-efficiency HVAC systems often come with smart thermostats and advanced control systems that optimize energy usage, ensuring efficient operation and minimizing energy waste.
- Proper Maintenance: Regular maintenance of high-efficiency HVAC systems ensures optimal performance, preventing energy inefficiencies and reducing environmental impact.
By choosing high-efficiency HVAC systems, we can actively contribute to environmental sustainability and carbon footprint reduction.
Transitioning into the subsequent section about ‘improved indoor comfort’, it’s important to note that these systems also provide superior comfort and air quality for a healthier and more comfortable indoor environment.
Improved Indoor Comfort
Maximizing indoor comfort is achieved through the use of high-efficiency HVAC systems. These systems not only provide effective temperature control but also contribute to improved air quality and personalized comfort.
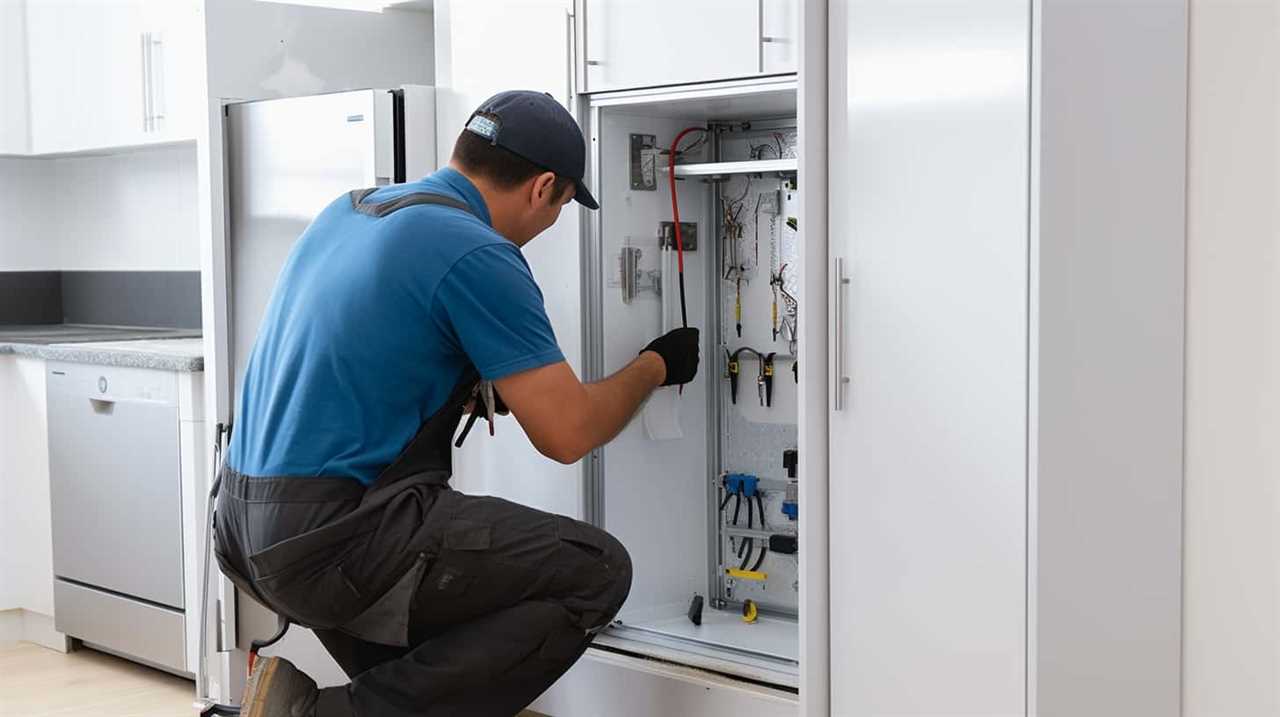
High-efficiency HVAC systems are designed to filter out pollutants, allergens, and dust particles from the air, leading to a healthier indoor environment. With advanced technology and precise control, these systems can adjust temperature, humidity, and airflow to meet individual preferences, ensuring personalized comfort for occupants.
Energy Star Certified Appliances
When it comes to energy-efficient climate control, one important consideration is the use of Energy Star certified appliances.
These appliances offer cost-effective energy savings and provide environmental benefits through their certification.
Cost-Effective Energy Savings
We found that using energy-efficient appliances, such as those certified by Energy Star, can lead to significant cost savings. Here are four cost-saving techniques to consider:
- Energy-efficient appliances consume less electricity, resulting in lower utility bills.
- These appliances often have advanced features like smart thermostats or automatic shut-off, optimizing energy usage and reducing waste.
- Energy Star certified appliances may qualify for tax incentives or rebates, allowing you to recoup some of the initial investment.
- Over time, the cost savings from using energy-efficient appliances can outweigh the higher upfront costs.
By implementing these cost-saving techniques and investing in energy-efficient appliances, you can reduce your energy consumption and save money on your monthly bills.
Now let’s explore the environmental benefits of certification.
Environmental Benefits of Certification
Energy Star certified appliances offer significant environmental benefits. These appliances undergo rigorous testing and meet strict standards set by the Environmental Protection Agency (EPA). By choosing Energy Star certified appliances, consumers can contribute to reducing greenhouse gas emissions and protecting the environment.
These appliances are designed to be more energy-efficient, resulting in lower energy consumption and reduced carbon footprint. The certification benefits extend beyond energy savings, as these appliances also help conserve water and reduce waste. Energy Star certified appliances are a part of energy-saving solutions that promote sustainability and environmental responsibility.
Solar Powered Heating Systems
Solar powered heating systems are increasingly becoming more popular as they provide a cost-effective and environmentally friendly way to heat our homes. Here are four key reasons why solar powered heating systems are a smart choice:
- Increased solar panel efficiency: Solar panel technology has advanced significantly in recent years, leading to increased efficiency and power generation. This means that solar powered heating systems can effectively harness the energy from the sun and convert it into heat for our homes.
- Utilization of solar thermal technology: Solar thermal technology allows solar powered heating systems to directly convert sunlight into heat energy. This technology uses solar collectors to absorb the sun’s rays and transfer the heat to a fluid, which can then be used to warm our homes.
- Reduction in energy costs: By using solar power to heat our homes, we can significantly reduce our reliance on traditional heating systems that rely on fossil fuels. This leads to lower energy bills and long-term cost savings.
- Environmental benefits: Solar powered heating systems produce clean and renewable energy, which helps reduce greenhouse gas emissions and combat climate change. By choosing solar power for heating, we can make a positive impact on the environment.
Transition: While solar powered heating systems offer many benefits, another energy-efficient option to consider is geothermal heat pumps. Let’s explore how geothermal heat pumps can provide efficient and sustainable heating for our homes.
Geothermal Heat Pumps
Geothermal heat pumps are a cost-effective heating solution that offer an environmentally friendly alternative to traditional heating systems. By harnessing the natural heat from the ground, these pumps can provide consistent temperature control throughout the year.
They’re an efficient and sustainable option for homeowners looking to reduce their energy consumption and lower their utility bills.
Cost-Effective Heating Solution
After researching various heating options, we found that using geothermal heat pumps is a cost-effective solution for efficient climate control. Here are four reasons why geothermal heat pumps are a great choice:
- Energy Efficiency: Geothermal heat pumps utilize the constant temperature of the earth to heat your home, making them highly efficient compared to traditional heating systems.
- Long-Term Savings: While the upfront cost of installing a geothermal heat pump may be higher, the long-term savings on energy bills can make it a cost-effective choice in the long run.
- Reduced Need for Insulation: Geothermal heat pumps rely less on insulation compared to other heating options, reducing the need for costly insulation upgrades.
- Compatible with Energy-Efficient Windows: Geothermal heat pumps work well with energy-efficient windows, maximizing their benefits and further reducing energy consumption.
Environmentally Friendly Alternative
One of the most environmentally friendly alternatives for efficient climate control is the use of geothermal heat pumps. These innovative systems harness the Earth’s natural heat to provide both heating and cooling options, making them a sustainable choice for climate control. Geothermal heat pumps work by transferring heat between the ground and a building, using the constant temperature of the Earth to provide efficient cooling.
To illustrate the benefits of geothermal heat pumps, consider the following table:
| Benefits of Geothermal Heat Pumps | ||
|---|---|---|
| Energy Efficiency | Lower Energy Bills | Reduced Carbon Emissions |
| Long Lifespan | Consistent Comfort | Low Maintenance Requirements |
| Renewable Energy Source | Quiet Operation | Minimal Environmental Impact |
Consistent Temperature Control
To maintain a consistent temperature throughout our homes, we rely on the efficient operation of geothermal heat pumps. These systems use the constant temperature of the earth to heat and cool our homes, providing energy-efficient zoning and precise temperature control. Here are four key aspects of geothermal heat pumps that contribute to their effectiveness:
- Ground loops: Geothermal systems use underground pipes filled with a mixture of water and antifreeze to transfer heat between the earth and the home. This closed-loop system ensures a stable and consistent source of heating and cooling.
- Energy efficiency: Geothermal heat pumps are highly efficient, using a small amount of electricity to move heat rather than generating it. This reduces energy consumption and lowers utility bills.
- Zoning capabilities: Geothermal systems can be designed to provide temperature control in specific areas or zones of the home. This allows for personalized comfort and energy savings by only heating or cooling occupied spaces.
- Consistent temperature control: By utilizing the earth’s constant temperature, geothermal heat pumps can maintain a consistent indoor temperature year-round, regardless of external weather conditions. This ensures a comfortable and pleasant environment inside our homes.
Radiant Floor Heating
We have found that using a highly efficient radiant floor heating system significantly reduces energy consumption and provides optimal comfort. Radiant floor heating works by heating the floor directly, which then radiates heat upward, warming the entire room evenly. This method of heating isn’t only cost-effective to install but also offers a range of health benefits.
One of the main advantages of radiant floor heating is its energy efficiency. Unlike traditional heating systems that rely on forced air, radiant floor heating operates at lower temperatures, resulting in less energy usage. This can lead to significant cost savings on your energy bills over time. Additionally, radiant floor heating eliminates the need for ductwork, which can be a breeding ground for dust, allergens, and other pollutants. This can greatly improve indoor air quality, making it an ideal choice for individuals with respiratory conditions or allergies.
Ductless Mini-Split Systems
Let’s explore the benefits of ductless mini-split systems for energy-efficient climate control. These systems offer a number of advantages over traditional cooling solutions.
Here are four reasons why ductless mini-split systems are a smart choice for energy efficiency:
- Easy Installation: Ductless mini-split systems are easier to install compared to traditional HVAC systems. With no ductwork required, installation is quicker and less invasive. This means less disruption to your home and a faster installation process.
- Zoned Cooling: Ductless mini-split systems allow for zoned cooling, meaning you can control the temperature in different areas of your home independently. This helps to optimize energy usage by only cooling the rooms that are in use, saving energy and reducing costs.
- Energy Efficiency: Ductless mini-split systems are designed to be highly energy-efficient. They use advanced technology, such as inverter-driven compressors, to adjust the cooling capacity according to the needs of the room. This results in reduced energy consumption and lower utility bills.
- Improved Indoor Air Quality: With no ductwork, ductless mini-split systems eliminate the risk of dust, allergens, and other pollutants being circulated throughout your home. These systems often come with built-in air purifiers and filters, ensuring clean and healthy indoor air.
In conclusion, ductless mini-split systems offer a range of benefits for energy-efficient cooling solutions.
Now, let’s move on to the next topic: insulation and air sealing, which plays a crucial role in maintaining energy efficiency in your home.
Insulation and Air Sealing
Moving on from the benefits of ductless mini-split systems, another important aspect of energy-efficient climate control is insulation and air sealing.
Proper insulation and air sealing are essential for reducing energy waste and maintaining a comfortable indoor environment. When it comes to insulation, there are various types available, such as fiberglass, cellulose, and spray foam. Each type has its own advantages and disadvantages, so it’s important to choose the one that best suits your needs.
Insulation helps to trap heat during the winter and prevent it from escaping, and it also keeps the cool air inside during the summer. This reduces the need for excessive heating or cooling and helps to lower energy bills. Additionally, insulation also helps to reduce noise transmission between rooms and floors, creating a more peaceful and comfortable living space.
Air leakage detection is another crucial step in achieving energy efficiency. Even with the best insulation, air leaks can still occur, allowing heated or cooled air to escape and outside air to enter. This can significantly impact the efficiency of your HVAC system.
To detect air leaks, professionals use various methods such as blower door tests and thermal imaging. Once identified, these leaks can be sealed using caulk, weatherstripping, or spray foam.
Smart Home Automation
How can smart home automation enhance energy-efficient climate control?
- Remote Control: With smart home automation, you can easily control your climate control system from anywhere using your smartphone or tablet. This means you can adjust the temperature even when you’re not at home, ensuring that you’re not wasting energy when you don’t need it.
- Smart Thermostats: Smart thermostats are equipped with advanced sensors and algorithms that learn your temperature preferences and adjust accordingly. They can also detect when you’re away from home and automatically adjust the temperature to save energy. Some models even have features like geofencing, which can detect when you’re close to home and start adjusting the temperature accordingly.
- Energy Monitoring: Smart home automation systems often come with energy monitoring features that allow you to track and analyze your energy usage. By monitoring your energy consumption, you can identify areas where you can make adjustments to save energy and reduce your carbon footprint.
- Smart Home Security Integration: Smart home automation systems can also integrate with your home security system, providing an added layer of convenience and energy efficiency. For example, when you arm your security system, the automation system can automatically adjust the temperature to an energy-saving mode.
Energy-Efficient Ventilation
Continuing from our discussion on smart home automation, one effective way to achieve energy-efficient climate control is through the implementation of energy-efficient ventilation systems. Ventilation plays a crucial role in maintaining indoor air quality and comfort while also reducing energy consumption. Energy-efficient ventilation systems are designed to minimize the amount of energy required to heat or cool the air that’s supplied to a building.
One key aspect of energy-efficient ventilation is the use of energy-efficient windows. These windows are designed to minimize heat transfer between the interior and exterior of a building, helping to keep the indoor temperature stable and reducing the need for additional heating or cooling. By preventing heat loss during the winter and heat gain during the summer, energy-efficient windows contribute to overall energy savings.
Another strategy for energy-efficient ventilation is the use of natural ventilation. This involves harnessing natural airflow through windows, doors, and vents to ventilate a space. By taking advantage of natural breezes and temperature differences, natural ventilation can help reduce the reliance on mechanical cooling or heating systems, resulting in energy savings.
Energy Audit and Maintenance
To ensure optimal energy efficiency in climate control systems, we must conduct regular energy audits and perform proactive maintenance. Energy audits are essential for identifying areas of improvement and maximizing energy savings. Here are some benefits of conducting energy audits: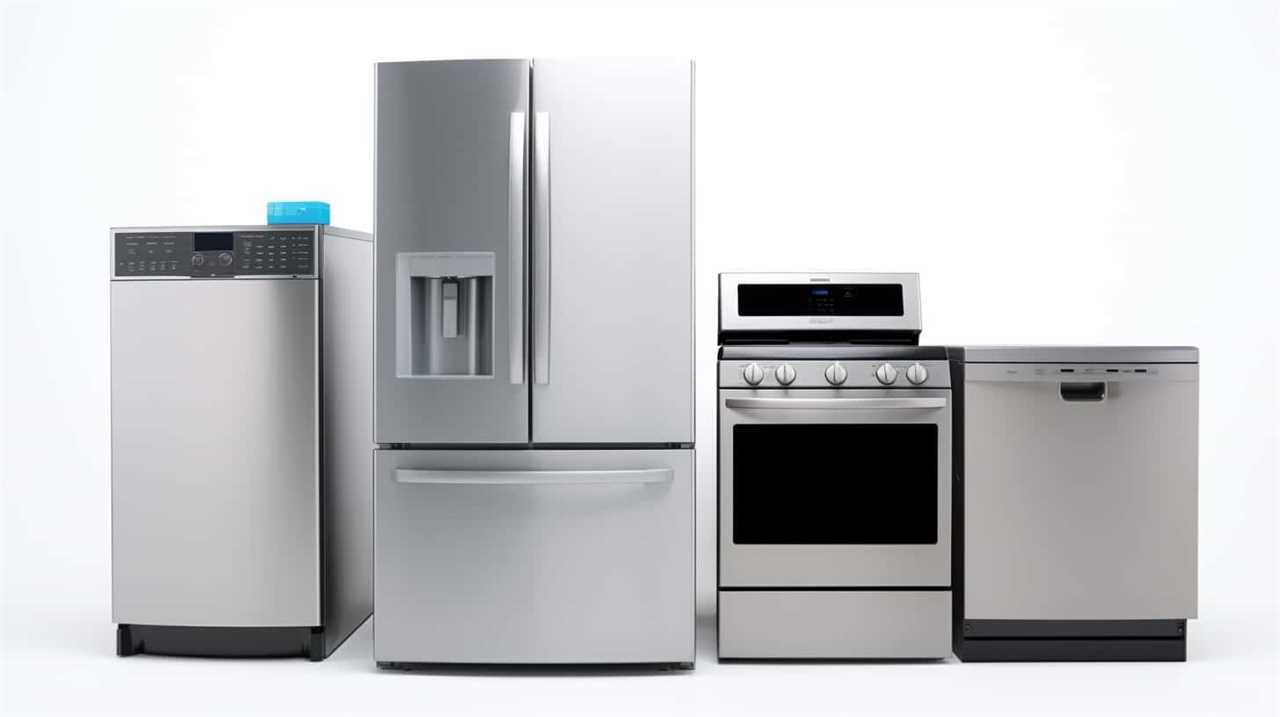
- Increased Energy Efficiency: Energy audits help identify energy wastage and inefficiencies in climate control systems. By addressing these issues, you can optimize energy usage and reduce utility costs.
- Improved Comfort: Energy audits not only focus on energy savings but also on enhancing comfort levels. By identifying factors that affect indoor temperature and air quality, you can make adjustments that result in a more comfortable environment.
- Extended Equipment Lifespan: Regular maintenance is crucial for the longevity of climate control systems. By conducting routine inspections, cleaning, and component replacements, you can prevent breakdowns and extend the lifespan of your equipment.
- Reduced Carbon Footprint: Energy audits contribute to a more sustainable future by reducing carbon emissions. By identifying energy-saving opportunities and implementing them, you can minimize your environmental impact.
To maintain energy efficiency in your climate control systems, consider the following maintenance tips:
- Regularly clean and replace air filters to ensure proper airflow and prevent dirt buildup.
- Schedule routine inspections by HVAC professionals to identify and address any potential issues.
- Calibrate thermostats and sensors to ensure accurate temperature readings and efficient operation.
- Implement a preventive maintenance plan that includes regular cleaning, lubrication, and testing of system components.
Frequently Asked Questions
What Are the Benefits of Using a Programmable Thermostat Over a Traditional Thermostat?
Using a programmable thermostat has several benefits over a traditional one. It offers energy-saving features that allow you to customize temperature settings based on your schedule, which can significantly reduce energy consumption.
This, in turn, leads to cost effectiveness as you save on utility bills. By programming temperature adjustments, you can ensure optimal comfort when you’re home and energy efficiency when you’re away.
These features make a programmable thermostat a smart choice for energy-efficient climate control.
How Do High-Efficiency HVAC Systems Help Save on Energy Costs?
High-efficiency HVAC systems help save on energy costs by reducing the amount of energy needed to heat or cool a space. According to a study, these systems can save up to 20% on energy bills compared to traditional systems.
This is achieved through advanced technologies, such as variable-speed motors and smart thermostats, which optimize energy consumption.
Additionally, benefits of insulation and regular HVAC maintenance further enhance energy efficiency, ensuring that the system operates at its peak performance and minimizes energy waste.
What Criteria Does an Appliance Need to Meet in Order to Be Energy Star Certified?
When it comes to energy-efficient appliances, one important certification to look for is Energy Star. To be Energy Star certified, an appliance needs to meet specific criteria set by the Environmental Protection Agency (EPA).
These criteria focus on energy efficiency, ensuring that the appliance uses less energy and helps save on electricity costs. By choosing Energy Star certified appliances, we can make smart choices for our climate control needs while also reducing our environmental impact.
Can Solar Powered Heating Systems Be Used in All Climates?
Yes, solar powered heating systems can be used in all climates. They’re a great energy efficient heating option that can provide warmth even in colder regions.
By harnessing the power of the sun, these systems can convert solar energy into heat, reducing the reliance on traditional heating methods.
While the effectiveness may vary depending on the climate, advancements in technology have made solar powered cooling systems a viable choice for climate control in a wide range of environments.

How Do Geothermal Heat Pumps Work and What Makes Them a Sustainable Heating Option?
Geothermal heat pumps are an energy-efficient and sustainable option for heating. They work by harnessing the constant temperature of the earth to provide heating in the winter and cooling in the summer.
These systems use a series of pipes buried underground to transfer heat to or from the earth, depending on the season. This makes them a reliable and environmentally-friendly choice for sustainable heating, as they reduce the need for traditional heating methods that rely on fossil fuels.
How Can Smart Thermostat Technology Help in Achieving Energy-Efficient Climate Control?
Smart thermostat technology, also known as home heat optimization technology, can help in achieving energy-efficient climate control by automatically regulating the temperature based on occupant behavior, weather conditions, and other factors. This technology can reduce energy waste and costs while ensuring comfort and convenience for homeowners.
– Are Stainless Steel Refrigerators the Most Energy-Efficient Option for Climate Control?
Stainless steel refrigerators are known for their durability and sleek design, but are they the top energysaving refrigerators for climate control? With their advanced insulation and high-quality compressors, stainless steel refrigerators are indeed one of the most energy-efficient options on the market, making them a great choice for eco-conscious consumers.
Will Energy-Efficient Climate Control Help Reduce Noise in My Kitchen?
Energy-efficient climate control can help reduce noise in the kitchen by minimizing the use of appliances. Additionally, installing quiet garbage disposal options can further contribute to a peaceful kitchen environment. Choosing these options can lead to a quieter and more relaxing space for cooking and entertaining.
Conclusion
In conclusion, making smart choices for energy-efficient climate control can have a significant impact on reducing energy consumption and saving costs.
According to a study conducted by the U.S. Department of Energy, implementing energy-efficient HVAC systems and insulation can lead to a 20-30% reduction in energy usage.
By adopting these measures, not only can we create a more comfortable living environment, but also contribute towards a sustainable future.
- About the Author
- Latest Posts
Introducing Charles, the Editor in Chief at ByRetreat, whose passion for interior design and editorial excellence elevates every remote workspace to new heights. With his keen eye for detail, impeccable taste, and expertise in design, Charles brings a wealth of knowledge and creativity to the ByRetreat team.
As the Editor in Chief of a renowned lifestyle blog, Charles has honed his skills in curating captivating content and staying up-to-date with the latest trends in interior design. His deep understanding of aesthetics and the power of storytelling through design enables him to create remote workspaces that are not only visually stunning but also rich in personality and meaning.
-

 Decor5 days ago
Maximalist Decor Explained: Embrace More Style
-

 Vetted4 weeks ago
15 Best Drip Irrigation Systems to Keep Your Garden Thriving
-

 Vetted1 week ago
15 Best Foot Massagers for Neuropathy to Soothe Your Feet and Relieve Discomfort
-

 Vetted2 weeks ago
15 Best Sports Laundry Detergents for Keeping Your Activewear Fresh and Clean
-

 Vetted3 weeks ago
15 Best Tall Toilets for Seniors That Combine Comfort and Safety
-

 Vetted3 weeks ago
15 Best Dish Scrubbers to Keep Your Kitchen Sparkling Clean
-

 Decor3 weeks ago
What Is Eclectic Home Decor
-

 Vetted2 days ago
15 Best Organic Pest Control Solutions for a Naturally Pest-Free Home


