Decor
Creative DIY Ideas for Repurposing Your Dresser
Discover how to transform your dresser into stylish and practical pieces for your home with these creative DIY ideas that will leave you inspired.
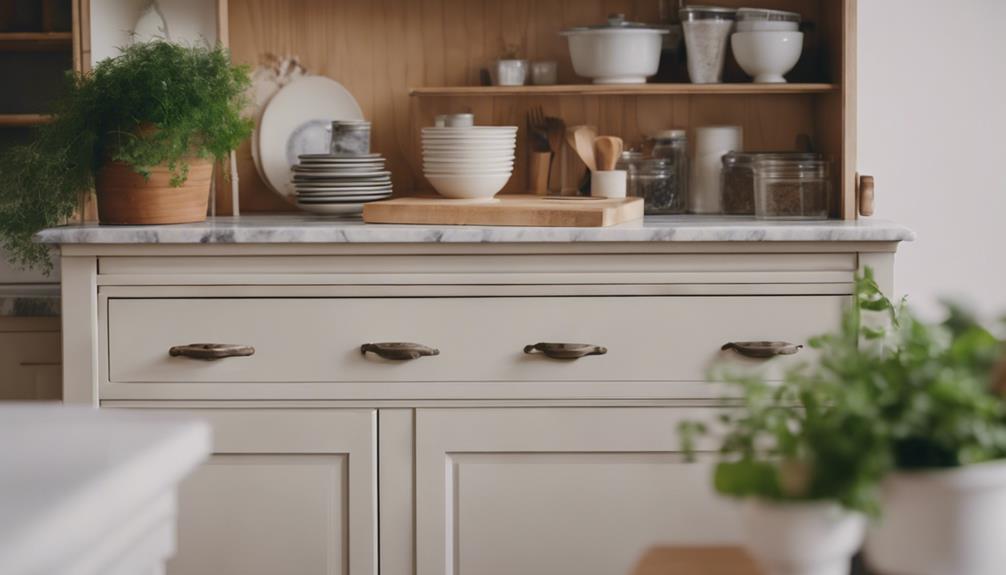
Unlock your dresser's potential with unique and practical pieces for your home through creative DIY projects like pet beds, buffet tables, and craft tables. Repurpose your dresser to showcase your craftiness and solve everyday needs. Explore innovative ideas such as dog food stations, cushioned benches, and window box makeovers. Discover endless possibilities for repurposing your dresser that not only add a personal touch to your space but also offer functional solutions. Ignite your creativity and reimagine your dresser into something extraordinary!
Key Takeaways
- Transform dresser into a pet bed with footstool legs for elevation.
- Convert dresser into a stylish buffet table by removing drawers.
- Repurpose dresser into a dog food station with modern updates.
- Create a cushioned bench from a dresser for comfort.
- Turn old dresser drawers into vibrant window boxes for gardening.
Pet Bed Transformation
When repurposing your dresser, one creative idea worth exploring is transforming the drawers into unique pet beds using footstool legs. This innovative pet bed transformation breathes new life into an old dresser, providing your furry friend with a cozy and stylish sleeping space.
Antonia from Voodoo Molly Vintage showcased her craftsmanship by repurposing dresser drawers into a charming pet bed that exudes character and charm. The addition of footstool legs elevates the pet bed, both aesthetically and practically, ensuring your pet sleeps comfortably off the ground.
The finished piece not only serves a functional purpose but also becomes a statement furniture item in your home. By upcycling dresser drawers in this manner, you can create a personalized space for your pet while adding a touch of creativity to your decor.
Detailed photos of this pet bed transformation are available for inspiration, showcasing the endless possibilities of repurposing furniture to cater to your pet's needs. For more repurposed pet bed ideas, explore the Upcycled Pet Bed website.
Buffet Table Conversion
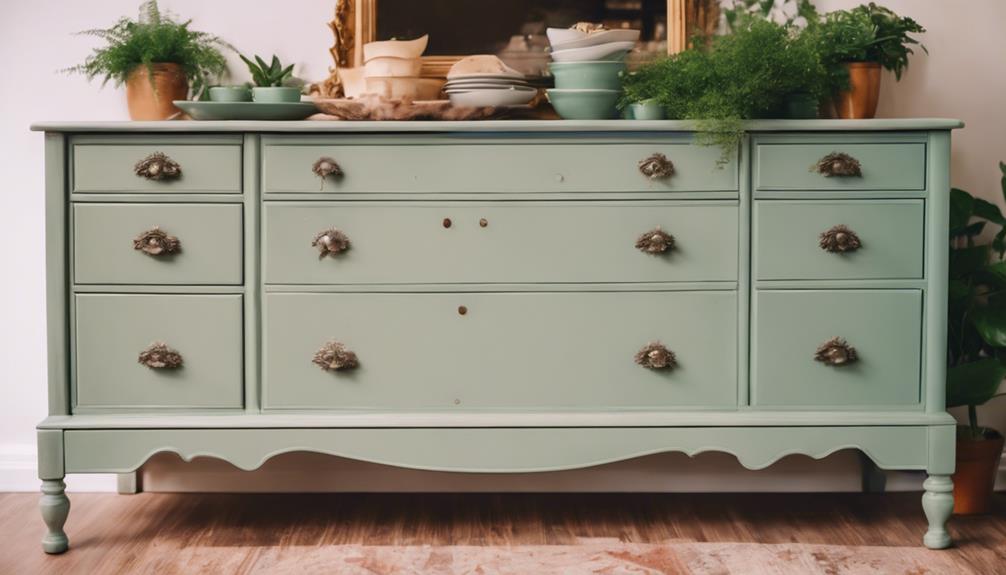
Transforming an old dresser into a buffet table involves repurposing the piece with a fresh coat of paint and new hardware. By repurposing an old dresser, you can create a stylish buffet table that offers both storage and functionality.
The conversion process typically includes removing drawers to make space for shelves or wine racks, as well as refinishing the top surface to guarantee a polished look. These repurposed buffet tables from dressers provide a creative and cost-effective storage solution for dining rooms or kitchens.
They offer a unique opportunity for customization, allowing DIY enthusiasts to choose different colors, finishes, and decorative elements that match their existing decor. The buffet table made from an old dresser can store dining essentials like dishes, linens, and serving pieces in a trendy and organized manner.
This DIY project not only adds a touch of creativity to your space but also serves a practical purpose in your home.
Dog Food Station Repurpose
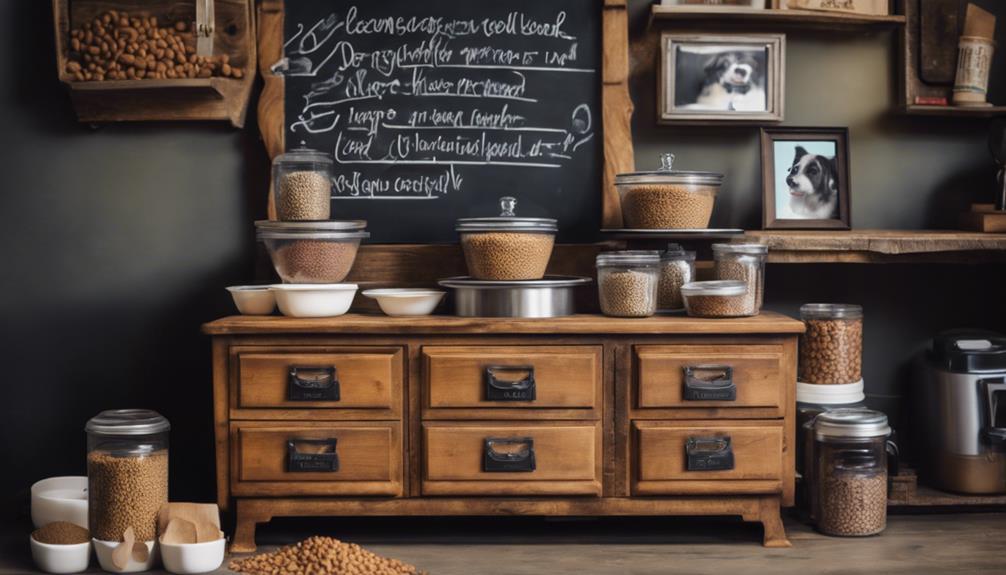
We repurposed an old dresser into a stylish and practical dog food station, featuring light blue paint and stainless-steel bowl holders. This transformation, crafted by Kaylor from Fishermans Wife Furniture, showcases a unique and functional pet feeding area. The dresser has been updated with fresh knobs, adding a touch of modernity to the organized pet care space. The old wood cabinet now serves as a chic dog food station, demonstrating the potential of repurposing furniture for new uses.
To provide a visual representation of this repurposed dresser, we have created a table detailing the key elements of the dog food station:
| Feature | Description |
|---|---|
| Color | Light blue paint |
| Bowl Holders | Stainless-steel holders for pet food and water |
| Knobs | Updated knobs for a fresh look |
| Functionality | Organized space for pet feeding |
| Creator | Crafted by Kaylor from Fishermans Wife Furniture |
Through this repurposing project, a simple dresser has been transformed into a practical and aesthetically pleasing dog food station.
Cushioned Bench Creation
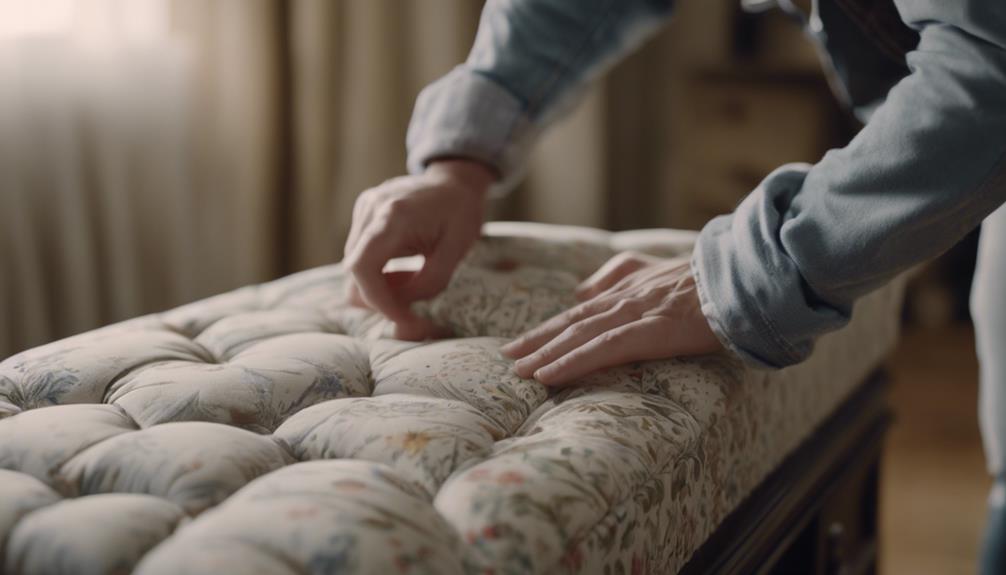
When repurposing a dresser into a cushioned bench, we can explore various seat cushion options that offer both comfort and style.
Additionally, considering the design of the bench frame is essential to guarantee stability and aesthetic appeal.
Seat Cushion Options
Consider selecting a plush cushion or a memory foam pad to enhance the comfort of your repurposed dresser turned cushioned bench. By choosing the right seat cushion, you can transform your old dresser into a cozy and stylish seating option. To help you make an informed decision, here is a comparison table showcasing different seat cushion options:
| Cushion Type | Description | Benefits |
|---|---|---|
| Plush Cushion | Soft and comfortable material | Provides a cozy seating experience |
| Memory Foam Pad | Contours to your body for extra support | Offers enhanced comfort and pressure relief |
| Bench Cushion | Customizable size and design options | Matches your decor style and adds a personalized touch |
Each cushion type offers unique advantages, so consider your preferences and the overall look you want to achieve when repurposing your dresser into a cushioned bench. Choose a cushion that not only provides comfort but also complements your space aesthetically.
Bench Frame Design
To create a cushioned bench from your repurposed dresser, focus on designing a sturdy and visually appealing frame that complements your space. Here are three key steps to ponder when repurposing a dresser into a cushioned bench:
- Remove the Drawers: Start by taking out the drawers from the dresser to create an open space for seating. This step is crucial to repurpose the dresser into a functional bench that can accommodate a cushioned seat.
- Utilize the Existing Structure: Make use of the existing structure of the dresser to build a strong foundation for your bench. The frame of the dresser can provide the necessary support for the cushion and ensure the durability of the bench.
- Customize the Design: Personalize your bench by painting or staining the dresser frame to match your decor style. This customization adds a unique touch to your repurposed dresser bench, making it a seamless addition to your living space.
Window Box Makeover
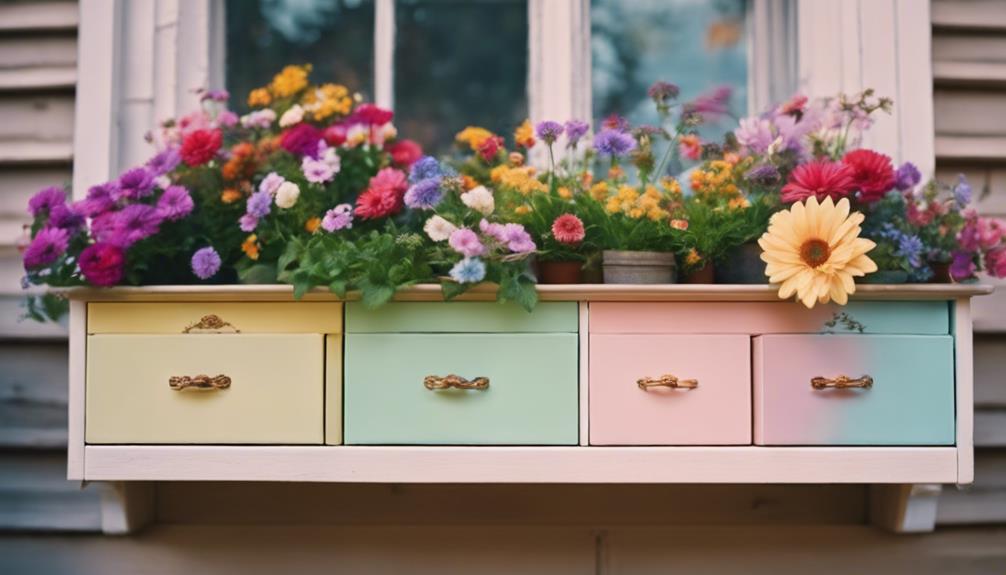
Let's transform those old dresser drawers into eye-catching window boxes for a delightful garden upgrade.
Repurposing an old chest of drawers into a functional and aesthetic window box offers a creative way to breathe new life into unused furniture. By repurposing these storage units, you can explore your creative ideas to enhance your outdoor space.
To start, consider painting the drawer fronts in a vibrant hue to add a pop of color and elevate the visual appeal of your window boxes. To ensure practicality, use plastic window-box liners and saucers within the drawers to create a suitable planting space. For a personalized touch, explore stencil designs and protective paints to customize the window boxes to your liking.
Embrace the opportunity to infuse your garden with unique elements by repurposing old dresser drawers into charming window boxes. This innovative idea not only adds character to your outdoor space but also contributes to a sustainable and eco-friendly approach to gardening.
Home-Office Desk Revamp
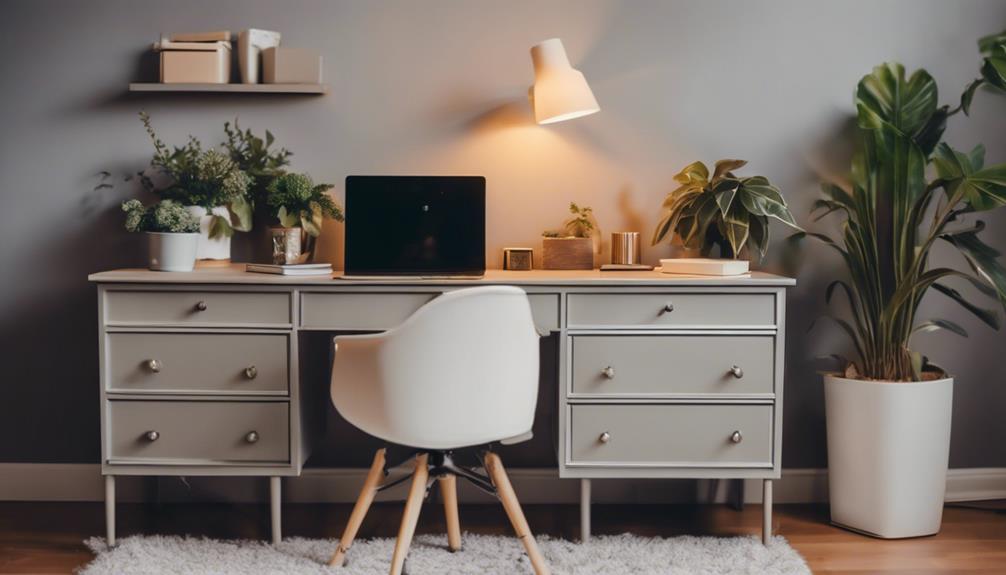
Transforming an old dresser into a functional home-office desk can be a budget-friendly and personalized solution for revamping your workspace. Repurposing a dresser not only saves money but also adds a unique touch to your home office setup.
Here are three key points to bear in mind when undertaking this DIY project:
- Cost-Effective Makeover: By converting a dated dresser into a desk, you can achieve a stylish and practical workspace without breaking the bank. Removing drawers to create legroom and adding a spacious wooden top can be carried out at a fraction of the cost of buying a new desk.
- Personalized Workspace: Repurposing a dresser allows you to customize your desk to fit your specific needs and style preferences. You can choose the finish, size, and features that best suit your home office requirements, resulting in a workspace tailored to your liking.
- Creative Solution: Embracing the challenge of repurposing a dresser into a desk opens up a world of creative possibilities. It encourages you to think outside the box and transform an ordinary piece of furniture into a functional and aesthetically pleasing home-office essential.
Bookshelf Redesign
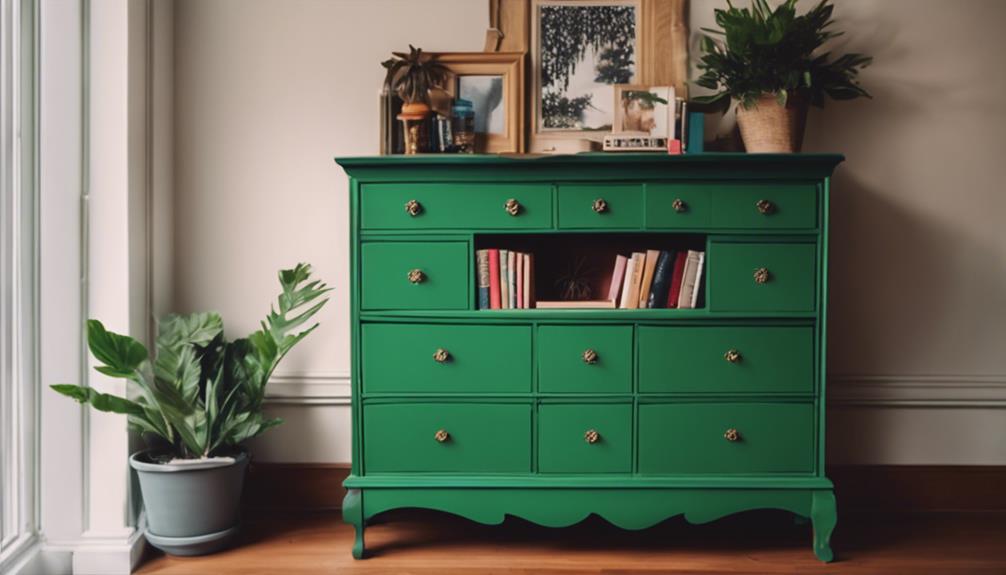
When repurposing a dresser into a bookshelf, considering shelf placement options and decorative backing ideas can elevate the overall look and functionality of the piece.
By strategically placing shelves within the dresser drawers, you can optimize storage space for books and decorative items.
Additionally, incorporating a decorative backing, such as wallpaper or paint, can add visual interest and tie the bookshelf into your existing decor seamlessly.
Shelf Placement Options
Placing shelves at varying heights within the repurposed dresser allows for a more dynamic and visually appealing bookshelf redesign. By strategically positioning the shelves, you can create a sense of balance and interest in your storage solution.
Here are some key considerations for shelf placement options:
- Maximizing Vertical Space: Utilize the full height of the dresser to maximize storage capacity. Placing shelves at different levels allows you to store items of various heights efficiently.
- Creating Visual Interest: Incorporating shelves at varying heights not only enhances the aesthetic appeal of the bookshelf but also provides a more visually interesting display for your books and decor.
- Functional Organization: Arrange the shelves to cater to your specific storage needs. Consider placing taller items on taller shelves and smaller items on shorter shelves for easy access and organization.
With these shelf placement options, you can transform your dresser into a functional and stylish bookshelf that adds character to your space.
Decorative Backing Ideas
To enhance the visual appeal of a bookshelf redesign, consider adding decorative wallpaper or fabric to the backing for a stylish touch. Adhesive contact paper with intricate patterns can also be used to transform the back panel of the bookshelf, giving it a unique and personalized look. Another option is to paint the backing with a contrasting color, creating a striking visual effect that will make your bookshelf stand out. Adding decorative trim or molding along the edges of the bookshelf backing can provide a refined and elegant finish to the overall design. For those looking to add a touch of glamour and sophistication, incorporating a mirrored or metallic finish on the back panel can achieve a luxurious look. Experiment with these different decorative backing ideas to elevate the aesthetic appeal of your bookshelf redesign.
| Decorative Wallpaper | Adhesive Contact Paper | Paint |
|---|---|---|
| Stylish patterns | Intricate designs | Contrast colors |
| Personalized look | Transformation | Striking visual effect |
| Unique appearance | Customization | Standout design |
LEGO Table Innovation
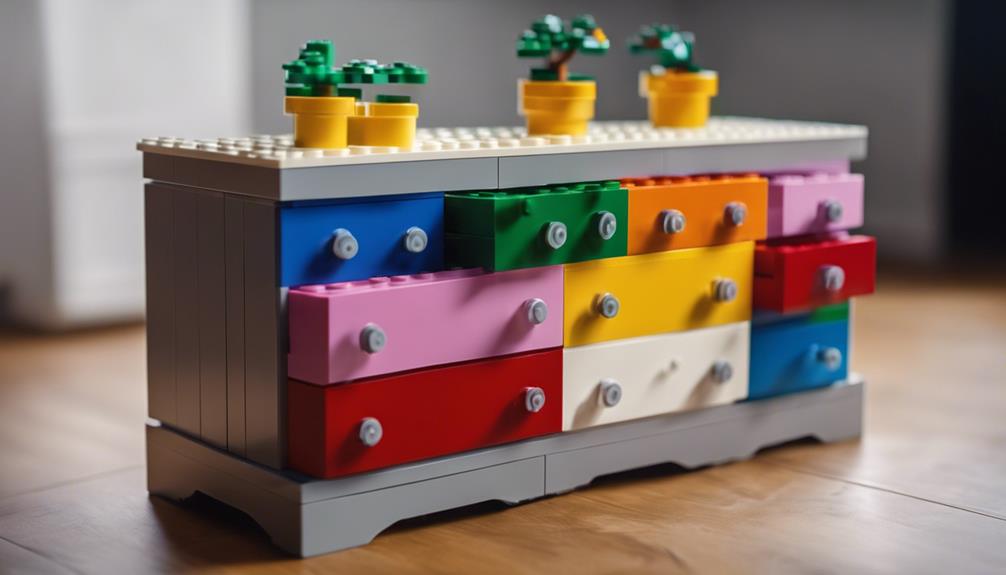
Let's transform an old dresser into a fun LEGO table with clever storage solutions. Repurposing a dresser into a LEGO-themed table provides an innovative way to enjoy building and playing while keeping bricks organized.
Here's how to do it:
- Utilize the Dresser Top: Begin by repurposing the dresser top as the main surface for the LEGO table. This provides a spacious area for building and playing.
- Create Seats from Drawers: Use the extra drawers from the dresser to create seats around the table. This not only maximizes space but also adds a practical seating solution for kids.
- Incorporate Hidden Storage Compartments: Transform some of the dresser drawers into hidden storage compartments for keeping LEGO bricks neatly stored. This guarantees easy access to bricks while maintaining a clutter-free play area.
Media Center Upgrade
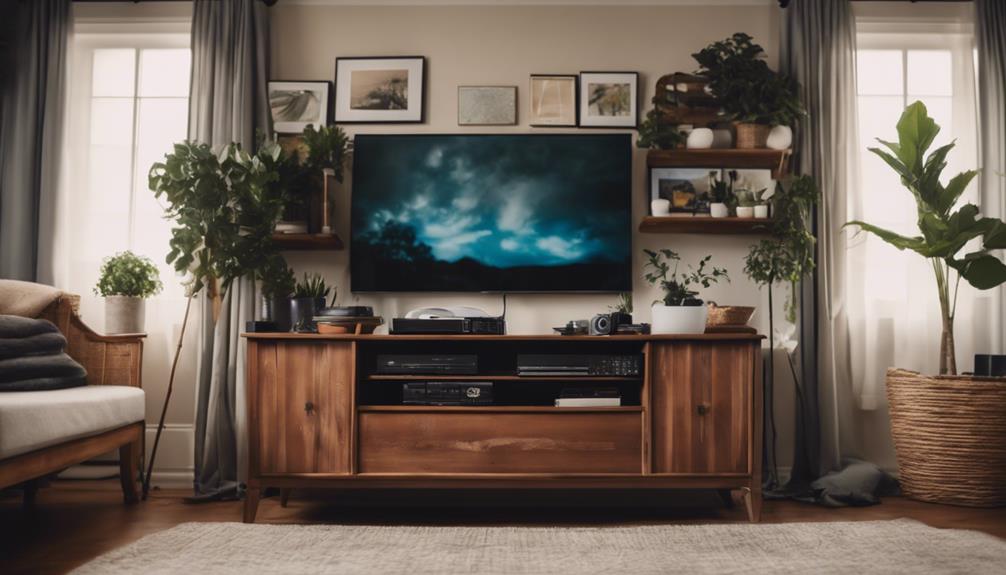
We transformed a vintage dresser into a stylish media center by repurposing it and removing the drawers for equipment storage.
The creative DIY ideas implemented in this media center upgrade included painting it in a cheery yellow hue to add a vibrant touch to the room.
Step-by-step instructions were provided to guide individuals on how to successfully convert an old dresser into a functional media center.
To enhance the aesthetics and functionality of the repurposed dresser, reclaimed wood was used for the shelf backing, and a soda-bottle crate was ingeniously repurposed as a wine rack.
The before-and-after photos showcased the transformation, highlighting the impressive results of this project.
This project not only breathed new life into old furniture but also demonstrated the potential for imaginative and resourceful use of items that might've otherwise been discarded.
Craft Table Reimagination

Considering repurposing your dresser into a craft table involves transforming its structure to accommodate a spacious workspace for your creative endeavors. By repurposing the dresser, you can create a functional craft table that fits your needs perfectly.
Here are three key aspects to keep in mind for this project:
- Maximize Workspace: Remove the drawers and add a sturdy countertop to provide ample space for your crafting activities. This step is crucial to guarantee you have enough room to work on various projects comfortably.
- Enhance Storage Space: Utilize the dresser's existing structure to incorporate storage solutions for your craft supplies and tools. By optimizing the storage space, you can keep your workspace organized and clutter-free, allowing for a more productive crafting experience.
- Personalize Your Craft Table: Customize the craft table by painting or refinishing the dresser to match your creative space. Adding a personal touch to the table can enhance the overall aesthetics of your crafting area and make it more inspiring for your projects.
Frequently Asked Questions
How Can I Repurpose an Old Dresser?
Repurposing old dressers offers versatile options. From storage benches to shelves, hidden workspaces, and even dollhouses, the possibilities are vast.
Transforming them into functional pieces like bathroom vanities, TV stands, or pet feeding stations showcases their adaptability.
For kids, dressers can turn into twin beds, changing tables, or dress-up closets.
The creative DIY potential of repurposed dressers is endless, spanning from planters and garden benches to kitchen islands and media centers.
What to Put in a Dresser Besides Clothes?
When considering items to put in a dresser besides clothes, we can explore various practical options. Linens, towels, bedding, and seasonal accessories like hats, gloves, and scarves are excellent choices for bedrooms.
Crafting supplies, wrapping paper, stationery, and everyday essentials such as keys, mail, and wallets find a home in offices or entryways.
In children's spaces, dressers are ideal for storing toys, games, and books.
The versatility of a dresser allows for efficient organization in various settings.
How to Refurbish a Cheap Dresser?
Refurbishing a cheap dresser involves cleaning the surface thoroughly to remove dirt and grime, followed by sanding to create a smooth surface for painting or staining.
Applying a primer before painting is essential for better paint adhesion and a durable finish. Opting for high-quality paint or stain can elevate the dresser's appearance.
Updating hardware, like knobs or handles, can provide a fresh look. These steps can transform a budget-friendly dresser into a stylish piece of furniture.
What to Make With Dresser Drawers?
When repurposing dresser drawers, consider versatile options like transforming them into pet beds, cushioned benches, or window boxes for added creativity in your living space.
These drawers can also serve as functional storage solutions, such as bookshelves, LEGO tables, or entryway tables, offering organization and practicality.
Explore turning them into furniture pieces like home-office desks, media centers, or craft tables for multifunctional use.
Additionally, stylish additions like wine racks, serving bars, or kitchen cupboards can be crafted from dresser drawers for a personalized touch.
Conclusion
To sum up, repurposing your dresser can breathe new life into old furniture and add a touch of creativity to your home decor.
With a little imagination and a few simple DIY techniques, you can transform your dresser into a pet bed, buffet table, or even a LEGO table.
So why not get started on your next project today? Who knows, the possibilities are as endless as your imagination.
- About the Author
- Latest Posts
Introducing Ron, the home decor aficionado at ByRetreat, whose passion for creating beautiful and inviting spaces is at the heart of his work. With his deep knowledge of home decor and his innate sense of style, Ron brings a wealth of expertise and a keen eye for detail to the ByRetreat team.
Ron’s love for home decor goes beyond aesthetics; he understands that our surroundings play a significant role in our overall well-being and productivity. With this in mind, Ron is dedicated to transforming remote workspaces into havens of comfort, functionality, and beauty.

Hello there, everyone! Interested in purchasing some Americana Decor Maxx Gloss paint? You’re in the right spot!
In this article, I’ll be your trusty guide, sharing all the insider knowledge on where you can find this fantastic paint.
From local craft stores to online retailers, I’ve got you covered.
So sit back, relax, and let’s embark on a colorful journey to find your perfect Americana Decor Maxx Gloss paint.
Let’s get started!
Key Takeaways
- Local craft stores, home improvement stores, online retailers, and specialty paint stores are all potential places to buy Americana Decor Maxx Gloss Paint.
- Americana Decor Maxx Gloss Paint is suitable for DIY projects and comes in a wide range of colors, providing a glossy finish and long-lasting results.
- When shopping for Americana Decor Maxx Gloss Paint, it is important to consider comparison shopping for pricing and discounts, as well as seasonal promotions that may be available at different retailers.
- The Americana Decor website offers a wide range of products, a convenient shopping experience, and customer reviews that can help inform purchasing decisions.
Local Craft Stores
You can find Americana Decor Maxx Gloss paint at local craft stores. It is a fantastic option for all your DIY projects and offers a wide range of paint color options. Whether you’re looking to spruce up your furniture, revamp your home decor, or add a pop of color to a craft project, Americana Decor Maxx Gloss paint has got you covered.
This high-quality paint provides a glossy finish that adds a touch of elegance to any project. With its durable formula, it ensures long-lasting results that can withstand wear and tear. From vibrant hues to subtle shades, you’ll find a variety of colors to suit your style and creative vision.
Home Improvement Stores
Head to your nearest home improvement store for a wide selection of painting supplies and products. Whether you’re a seasoned DIY enthusiast or just starting out, these stores have everything you need to tackle your next painting project.
From brushes and rollers to drop cloths and paint trays, you’ll find everything necessary to get the job done right. Looking for some DIY project ideas? Home improvement stores often have displays and inspiration boards showcasing different painting techniques and projects you can try at home.
Plus, they have knowledgeable staff members who can offer advice and guidance on color selection and application. Speaking of colors, home improvement stores typically carry a variety of popular paint colors, from neutrals to bold statement shades.
Online Retailers
Online retailers offer a convenient and wide-ranging selection of painting supplies and products for all your DIY needs. With the rise of e-commerce, the online marketplace has become a go-to destination for those in search of painting supplies, including specialty paint like Americana Decor Maxx Gloss paint.
These online retailers provide a one-stop-shop for all your painting needs, allowing you to browse and compare various brands and colors from the comfort of your own home. One of the advantages of shopping online is the ability to read customer reviews, which can help you make an informed decision before making a purchase.
Whether you’re a professional painter or a DIY enthusiast, online retailers offer a vast array of options to suit your specific requirements. However, if you prefer a more personalized shopping experience, specialty paint stores might be the better choice.
Specialty Paint Stores
When it comes to finding specialty paint stores that carry Americana Decor Maxx Gloss Paint, there are a few key points to consider.
First, it’s important to check the store availability map to see which stores near you carry this specific paint.
Additionally, some specialty paint stores also offer online ordering options, which can be convenient if you prefer to shop from the comfort of your own home.
Store Availability Map
To find out which stores near you carry Americana Decor Maxx Gloss paint, simply check out the store availability map. It’s a convenient tool that allows you to see the locations where this high-quality paint is available.
Here are three reasons why you should use the store availability map:
-
Paint quality comparison: The map provides you with a list of stores that carry Americana Decor Maxx Gloss paint, allowing you to compare the quality and selection of paint available at different locations.
-
Customer reviews and testimonials: The map also includes customer reviews and testimonials, giving you valuable insights into the experiences of others who have purchased and used this paint. This can help you make an informed decision before making your purchase.
-
Convenient and time-saving: Instead of driving around town searching for stores that carry this specific paint, the store availability map saves you time and effort by providing a comprehensive list of locations in one place.
Online Ordering Options
Check out the various options available for ordering online and simplify the process of getting the paint you need for your project.
When it comes to purchasing Americana Decor Maxx Gloss Paint, there are several online platforms that offer a convenient and hassle-free experience. One popular option is to order directly from the manufacturer’s website. They provide a wide range of colors and sizes to choose from, and they often offer different shipping options to suit your needs.
Another option is to visit online retailers such as Amazon or Home Depot, where you can find customer reviews to help you make an informed decision. These platforms usually offer competitive prices and fast shipping, ensuring that you receive your paint in a timely manner.
Pricing and Discounts
There are various online platforms where you can find competitive prices and discounts on Americana Decor Maxx Gloss Paint. If you’re looking to buy this popular paint in bulk, these platforms offer great deals and savings.
Here are three reasons why you should consider purchasing from these online retailers:
-
Competitive Prices: These platforms offer some of the best prices for Americana Decor Maxx Gloss Paint. You can find discounts and deals that are not available in physical stores.
-
Bulk Orders: If you need a large quantity of paint for a project, these online platforms allow you to place bulk orders. This saves you both time and money.
-
Customer Reviews: Before making a purchase, you can read customer reviews to get a better understanding of the quality and performance of the paint. This helps you make an informed decision.
Overall, buying Americana Decor Maxx Gloss Paint online offers competitive prices, the option for bulk orders, and the ability to read customer reviews. It’s a convenient and cost-effective way to get the paint you need.
Art Supply Stores
When it comes to shopping for art supplies, online availability options, pricing, and discounts play a crucial role.
As an artist, I have found that online art supply stores offer a wide range of products that are not always available at local stores.
Additionally, online stores often have competitive pricing and frequent discounts that can help save money on art supplies.
Online Availability Options
You can find Americana Decor Maxx Gloss paint available online. It’s a popular choice among DIY enthusiasts and professional painters alike. Here are three reasons why you should consider purchasing it online:
-
Wide Range of Colors: Online retailers offer a vast selection of Americana Decor Maxx Gloss paint colors, allowing you to find the perfect shade for your project.
-
Easy Access to Online Tutorials: When buying online, you’ll have access to a wealth of online tutorials and guides that can help you achieve the best results with your paint.
-
Customer Reviews: Online platforms provide customer reviews and ratings, giving you valuable insights into the quality and performance of the paint before making a purchase.
Now that you know where to find Americana Decor Maxx Gloss paint online and the benefits it offers, let’s explore the pricing and discounts available.
Pricing and Discounts
Now that we’ve covered the availability options, let’s delve into the pricing and discounts for Americana Decor Maxx Gloss paint. When it comes to purchasing this high-quality paint, comparison shopping is key. Different retailers may offer varying prices and promotions, so it’s important to do some research before making a purchase. One way to save money is by taking advantage of seasonal promotions. Many retailers offer discounts or special deals during certain times of the year, such as holidays or sales events. By keeping an eye out for these promotions, you can find great deals on Americana Decor Maxx Gloss paint. To give you an idea of the potential savings, here’s a table showcasing the pricing and discounts at three popular retailers:
| Retailer | Regular Price | Seasonal Promotion |
|---|---|---|
| Store A | $10.99 | 20% off |
| Store B | $12.99 | Buy one, get one |
| Store C | $11.99 | $5 off $25 purchase |
Comparison shopping and keeping an eye out for seasonal promotions can help you get the best value for your money when buying Americana Decor Maxx Gloss paint.
Is Americana Decor Maxx Gloss Paint Available in Galesburg, IL?
Yes, Americana Decor Maxx Gloss Paint is available in Galesburg, IL. You can find it at various retailers that specialize in home improvement and alpaca decor near Galesburg, IL. It’s a popular choice for adding a vibrant and durable finish to your projects.
Americana Decor Website
If you’re looking to buy Americana Decor Maxx Gloss paint, the website is a great place to find it. Here are three reasons why you should consider purchasing through the Americana Decor website:
-
Wide range of Americana Decor products: The website offers a comprehensive collection of Americana Decor products, including their popular Maxx Gloss paint. You can easily browse through the different color options and find the perfect shade for your project.
-
Convenient shopping experience: The website is designed to provide a seamless and user-friendly shopping experience. You can easily navigate through the different categories, add products to your cart, and proceed to checkout with just a few clicks.
-
Customer reviews: The website features customer reviews for each product, allowing you to gain insights from others who have already used the Maxx Gloss paint. This can be incredibly helpful in making an informed purchasing decision.
Overall, the Americana Decor website is a reliable source for purchasing their Maxx Gloss paint and other products.
Frequently Asked Questions
Are There Any Specific Color Options Available for the Americana Decor Maxx Gloss Paint?
There are various color options available for Americana Decor Maxx Gloss Paint. It comes in a range of finishes like matte, satin, and high gloss. To properly clean and maintain surfaces painted with this paint, use a mild soap and water solution.
Can the Americana Decor Maxx Gloss Paint Be Used on Both Indoor and Outdoor Surfaces?
Yes, Americana Decor Maxx Gloss Paint is suitable for both indoor and outdoor surfaces. It offers a durable and glossy finish that can withstand various weather conditions. For indoor surfaces, apply thin coats and sand between layers for a smooth, professional look.
What Is the Average Drying Time for the Americana Decor Maxx Gloss Paint?
The average drying time for Americana Decor Maxx Gloss Paint is about 2 hours. It is recommended for use on various surfaces such as wood, metal, and ceramics.
Is the Americana Decor Maxx Gloss Paint Suitable for Use on Wood Surfaces?
Yes, the Americana Decor Maxx Gloss Paint can be used on wood surfaces. It provides a durable and glossy finish. For best results, it is recommended to use a primer before applying the paint.
Are There Any Specific Instructions or Precautions to Follow When Using the Americana Decor Maxx Gloss Paint?
When using Americana Decor Maxx Gloss Paint, it is important to take certain precautions. Make sure to prepare the surface properly, apply thin coats, and allow sufficient drying time between coats for a smooth finish.
Conclusion
After conducting thorough research, it’s clear that there are various options for purchasing Americana Decor Maxx Gloss paint.
Local craft stores, home improvement stores, online retailers, specialty paint stores, and even art supply stores are all potential sources.
Additionally, the Americana Decor website itself offers a convenient option for buying this particular paint.
Whether you prefer to browse in person or shop online, there are plenty of avenues to explore in order to find the perfect place to purchase Americana Decor Maxx Gloss paint.
- About the Author
- Latest Posts
Meet Bethia, the visionary designer at ByRetreat who brings a touch of magic to every remote workspace she creates. With a boundless imagination and an eye for beauty, Bethia is passionate about transforming ordinary spaces into extraordinary havens of creativity and comfort.
Bethia possesses a unique talent for envisioning the perfect combination of furniture, colors, and textures that harmonize seamlessly in a room. She understands that selecting furniture goes beyond mere functionality; it’s about curating pieces that evoke a sense of style and sophistication while enhancing the overall ambiance.
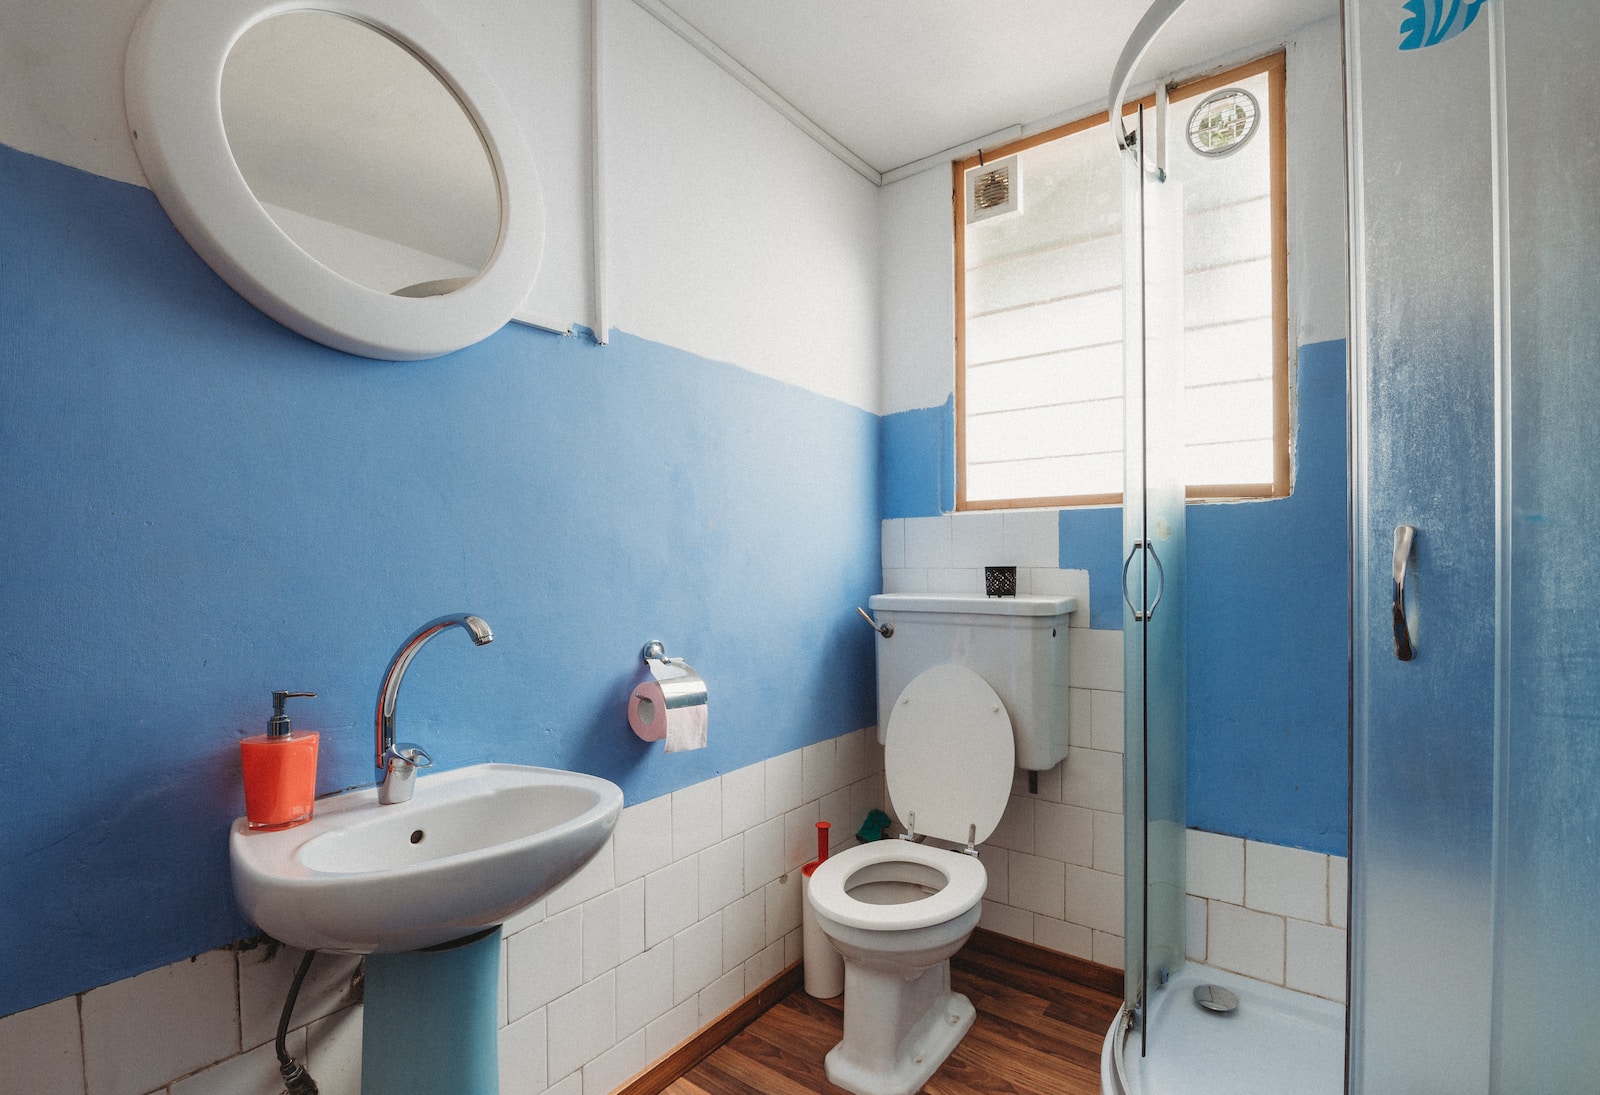
Are you feeling frustrated with your small and boring bathroom? Do not worry, help is here!
In this article, I will guide you through the process of transforming your small bathroom into a stylish and functional space.
With space-saving storage solutions, eye-catching color schemes, and creative lighting ideas, you’ll be amazed at how much potential your bathroom has.
So, roll up your sleeves and get ready to make your bathroom the envy of all your friends!
Key Takeaways
- Install shelves and utilize baskets/hooks for storage
- Use light and neutral colors with strategic accent colors
- Incorporate creative lighting fixtures for ambiance
- Choose functional and stylish fixtures and decorative accents
Space-Saving Storage Solutions
You can maximize your small bathroom’s storage by installing shelves and utilizing baskets and hooks. When it comes to small spaces, utilizing every inch becomes crucial.
One effective way to do this is by maximizing vertical space. Install shelves above the toilet or on empty walls to store towels, toiletries, and other bathroom essentials.
Another clever storage solution is to use baskets and hooks. Hang hooks on the back of the door or on the walls to hang towels and robes. Baskets can be placed on shelves or under the sink to hide toiletries and cleaning supplies. These hidden storage options not only save space but also keep your bathroom neat and organized.
Speaking of organization, let’s now explore the perfect color schemes for small bathrooms.
Color Schemes for Small Bathrooms
When choosing color schemes for your compact restroom, consider using light and neutral shades to create a sense of openness and brightness. Neutral tones like white, beige, and light gray can make a small bathroom appear larger and more inviting. To add depth and interest to the space, incorporate bold accent colors strategically.
Here are three ideas to inspire you:
- Use a vibrant pop of color on a single wall to create a focal point and draw the eye away from the size of the room.
- Bring in colorful accessories such as towels, shower curtains, or artwork to inject personality and style.
- Consider using a bold color for the vanity or cabinets to make a statement and add a touch of luxury.
By combining neutral tones with bold accent colors, you can transform your small bathroom into a visually stunning and inviting space.
Now, let’s explore some creative lighting ideas to further enhance the ambiance of your restroom.
Creative Lighting Ideas
To create a cozy and inviting ambiance, consider using warm and dimmable lighting fixtures in your compact restroom. Unique light fixtures can add a touch of personality and style to your small bathroom, making it a unique and pleasant space. If you’re feeling crafty, there are also plenty of DIY lighting projects that you can undertake to create a one-of-a-kind lighting solution. Check out the table below for some creative lighting ideas:
| Idea | Description |
|---|---|
| Mason jar lights | Repurpose old mason jars into charming light fixtures. |
| Rope pendant | Create a rustic and nautical vibe with a rope pendant light. |
| Fairy lights | Add a magical touch with delicate fairy lights. |
These lighting ideas will not only illuminate your space but also enhance the overall atmosphere. Now, let’s explore some functional and stylish bathroom fixtures that will elevate your small bathroom to the next level.
Functional and Stylish Bathroom Fixtures
There are various functional and stylish fixtures available that can elevate the overall look of your compact restroom. When choosing fixtures for a small bathroom, it is important to consider both functionality and style. Here are four options to enhance your space:
-
Water-saving fixtures: Opt for faucets, showerheads, and toilets that are designed to conserve water. Not only will this help the environment, but it will also lower your water bill.
-
Accessibility options: Install grab bars, adjustable shower heads, and raised toilets to make your bathroom more accessible for people with mobility issues. These fixtures can provide added safety and convenience.
-
Space-saving vanity: Choose a vanity that offers storage solutions without taking up too much space. Look for options with built-in shelves or drawers to keep your bathroom essentials organized.
-
Multi-functional shower: Consider installing a shower system that includes a handheld showerhead and body jets. This will allow you to customize your shower experience and maximize the use of space.
By incorporating these fixtures into your small bathroom, you can create a functional and stylish space that meets your needs.
Now, let’s explore how adding decorative accents and accessories can further enhance your bathroom’s aesthetic appeal.
What are some creative ways to incorporate seashells into small bathroom decor?
Incorporating seashells into bathroom decor can be a fun and creative way to add a coastal touch. Use seashells as drawer pulls, display them in a shadow box, or create a unique seashell mirror. For a simple touch, place a few seashells in a decorative bowl as a centerpiece for bathroom decor with seashells.
Adding Decorative Accents and Accessories
Now, let’s discuss how you can enhance the aesthetic appeal of your compact restroom by adding decorative accents and accessories.
When it comes to small bathrooms, every detail matters. One way to elevate the look of your space is by incorporating wall art options. Consider hanging a piece of artwork that complements your bathroom’s color scheme and adds a pop of visual interest.
You can also opt for unique mirror designs to make a statement. Mirrors not only serve a functional purpose but can also act as a decorative focal point. Look for mirrors with interesting shapes or frames that add a touch of elegance or uniqueness to your bathroom.
Frequently Asked Questions
What Are Some Common Mistakes to Avoid When Choosing Space-Saving Storage Solutions for a Small Bathroom?
Common mistakes in choosing space-saving storage for a small bathroom include overlooking the importance of maximizing vertical space, neglecting to measure accurately, and failing to consider the durability and functionality of the storage solutions.
Are There Any Color Schemes That Work Particularly Well for Small Bathrooms With Limited Natural Light?
Effective color palettes for small bathrooms with limited natural light can make a big difference. Soft, light colors like pastels or neutrals create an illusion of more space and brightness. Additionally, creative ways to enhance natural light, like adding a mirror or using sheer curtains, can also help brighten up the room.
How Can I Incorporate Unique Lighting Fixtures Into My Small Bathroom Without Overwhelming the Space?
To incorporate unique lighting fixtures in my small bathroom without overwhelming the space, I carefully choose fixtures that are sleek and compact. This way, I can maximize the space while still adding a touch of personality and style to the room.
What Are Some Functional and Stylish Bathroom Fixtures That Can Maximize Space in a Small Bathroom?
To maximize space in a small bathroom, I recommend incorporating space-saving storage solutions like floating shelves and built-in cabinets. For stylish and functional lighting, consider wall sconces or recessed lighting to create a cozy yet well-lit atmosphere.
Can You Provide Some Tips for Selecting Decorative Accents and Accessories That Won’t Clutter a Small Bathroom?
When it comes to selecting decorative accents and accessories for a small bathroom, I have some handy tips. From organizing toiletries to creating the illusion of space, I can help you avoid clutter and make your bathroom stylish.
Conclusion
In conclusion, when it comes to decorating a small bathroom, strategic storage solutions, captivating color schemes, captivating lighting ideas, functional fixtures, and delightful decorative accents are key.
By utilizing space-saving shelves and cabinets, incorporating harmonious hues, experimenting with innovative illumination, selecting practical yet stylish fixtures, and adding charming accessories, you can transform your compact bathroom into a captivating oasis.
With these tips, your petite powder room will become a paradise of perfection, pleasing both the eye and the soul.
So go forth and let your small bathroom shine with style and substance!
- About the Author
- Latest Posts
Meet Katherine, the creative enthusiast at ByRetreat who infuses her boundless passion for design into every remote workspace she crafts. With an innate sense of creativity and an eye for unconventional beauty, Katherine brings a unique and inspiring perspective to the team.
Katherine’s love for design is infectious, and her ability to think outside the box sets her apart. She believes that true artistry lies in embracing a variety of styles and mixing them harmoniously to create captivating spaces. By combining different textures, colors, and patterns, Katherine weaves a tapestry of creativity that breathes life into each remote workspace.
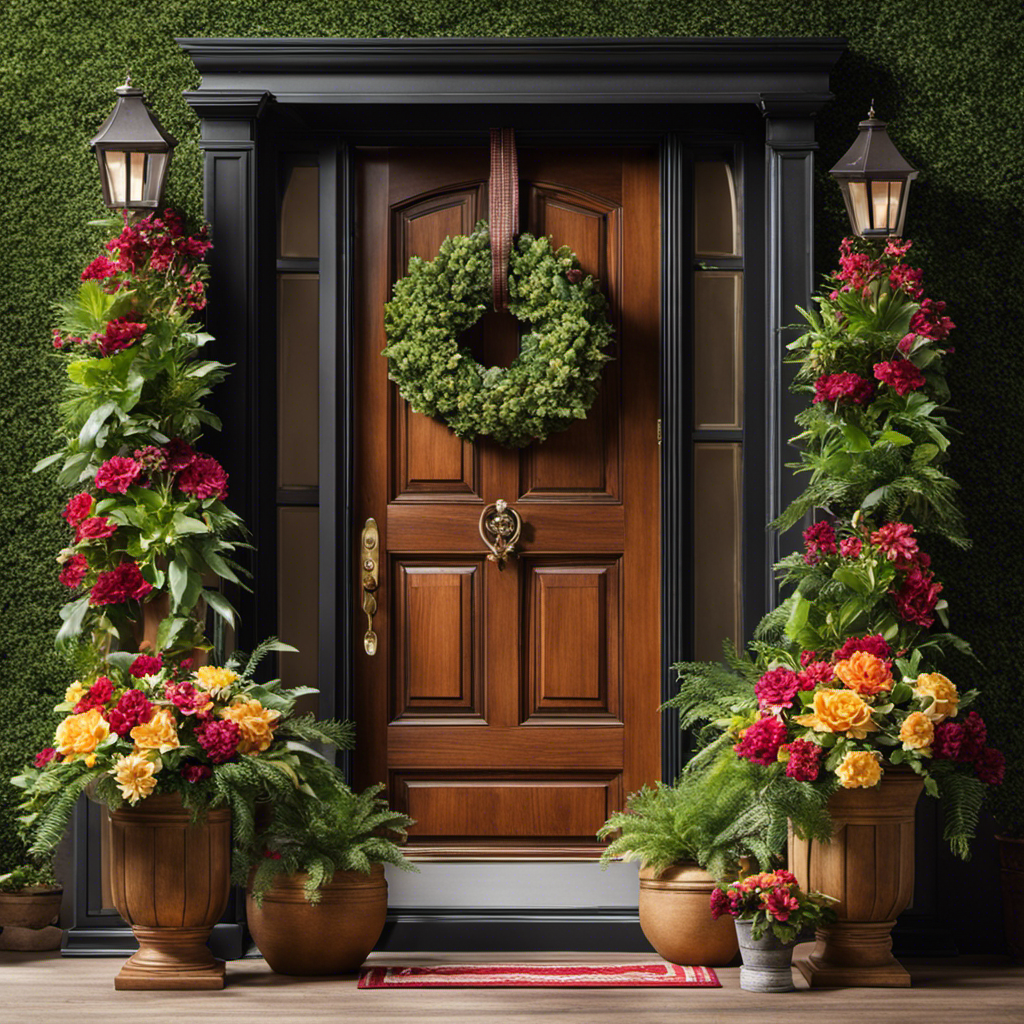
Standing at my front door fills me with pride and excitement. This door is more than just an entrance, it represents my unique personality and style.
With a little creativity and some DIY know-how, I have transformed my front door into a stunning piece of decor that welcomes guests with warmth and charm.
In this article, I will share with you my secrets on how to build front door decor that will leave a lasting impression.
Get ready to unleash your inner designer and make your front door the envy of the neighborhood.
Key Takeaways
- Consider durability and weather resistance when choosing materials for front door decor.
- Coordinate the front door color with the house’s exterior and style.
- Clean the surface thoroughly before sanding, priming, and painting.
- Regularly inspect and maintain the weatherproofing to ensure effectiveness.
Choosing the Right Materials
When choosing the right materials for your front door decor, it’s important to consider durability and weather resistance. One option for adding color to your front door decor is to choose paint colors that complement your exterior. Vibrant hues like red or yellow can create a welcoming and eye-catching entrance, while neutral shades like gray or black give a more sophisticated look.
However, if you prefer a more natural and organic feel, using natural materials such as wood or stone can be a great choice. Not only do they add a rustic charm to your front door decor, but they also offer the benefits of being sturdy and long-lasting.
So, whether you opt for a bold paint color or the timeless beauty of natural materials, make sure to choose materials that can withstand the elements and enhance the overall appeal of your front door decor.
This consideration of materials sets the foundation for the subsequent section about measuring and planning.
Measuring and Planning
To get started, make sure you’ve got all the necessary measurements and a clear plan in mind. Measuring accuracy is crucial for a successful front door decor project. Here are some tips to help you along the way:
- Measure the dimensions of your front door accurately to ensure a perfect fit.
- Take into account any existing hardware or architectural features that may impact your design.
- Consider the height and width of your door when selecting materials and creating your design.
- Look for design inspiration in magazines, online platforms, or even in nature to spark your creativity.
- Sketch out your ideas and make notes of the colors, textures, and elements you want to incorporate in your decor.
With your measurements and design inspiration in hand, you can now move on to preparing the surface of your front door without wasting any time.
Preparing the Surface
Now that you have all your measurements and design inspiration, it’s time to prepare the surface for your front door project.
Before diving into the fun part of painting, it’s important to ensure that the surface is clean and ready to be transformed.
First, gather all the necessary tools such as sandpaper, a paint scraper, and a bucket of soapy water. Carefully remove any existing paint or varnish using the scraper, making sure to get rid of any peeling or chipped areas.
Once the surface is smooth and clean, it’s time to choose the right paint. Consider the weather conditions in your area and opt for a paint that is durable and suitable for exterior use.
With the surface prepared and the paint chosen, you’re now ready to move onto sanding and priming for a flawless finish.
Sanding and Priming
When it comes to painting, there are a few key steps that can make all the difference in achieving a smooth and professional finish.
The first step is sanding, which is crucial for creating a smooth surface and ensuring proper adhesion of the paint.
Next, it’s important to choose the right primer, as this will provide a proper base for the paint to adhere to and can help improve durability and coverage.
Importance of Sanding
Sanding is essential for achieving a smooth surface on your front door decor. It not only helps in removing any imperfections but also provides a better adhesion for the primer and paint.
Here are some tips for achieving a smooth surface through sanding:
- Start with a coarse-grit sandpaper and gradually move to finer grits to ensure a smooth finish.
- Sand in the direction of the wood grain to avoid any visible scratches.
- Use a sanding block or a sanding sponge for even pressure and better control.
- Pay extra attention to the edges and corners to avoid any rough spots.
- After sanding, make sure to clean the surface thoroughly to remove any dust or debris.
By following these tips, you’ll be on your way to achieving a beautifully smooth surface on your front door decor.
Now, let’s move on to the next step, which is choosing the right primer.
Choosing the Right Primer
To achieve the best results, you should consider the type of surface you are working with before selecting the appropriate primer. Choosing the right primer is crucial as it sets the foundation for a successful paint job.
Primers are available in a variety of types, each with its own benefits and drawbacks. For example, there are oil-based primers that provide excellent adhesion and stain-blocking properties, but they can have a strong odor and require longer drying times. On the other hand, water-based primers are easy to clean up and have a quick drying time, but may not be as effective in blocking stains.
Understanding the characteristics of each primer type will help you make an informed decision.
Now that you have chosen the right primer, let’s move on to the proper application techniques for a flawless finish.
Proper Application Techniques
Start by applying the primer evenly to the surface using a roller or brush. This step is crucial in ensuring a smooth and long-lasting finish for your front door decor.
Here are some application tips to help you achieve the best results:
- Make sure the surface is clean and free of any dirt or dust before applying the primer.
- Use a high-quality primer that is suitable for the material of your front door.
- Apply the primer in thin, even coats, allowing each coat to dry completely before applying the next.
- Pay extra attention to corners and edges to ensure proper coverage.
- Avoid applying too much primer, as it can lead to dripping or cracking.
By following these application tips, you can avoid some common mistakes such as uneven coverage or visible brush strokes.
Now that the primer is applied, let’s move on to the next section to explore different painting techniques for your front door decor.
Painting Techniques
When it comes to painting, color selection is key in creating the desired look and atmosphere. As a seasoned painter, I’ve learned a few tips along the way to help make the process easier.
From considering the room’s lighting to testing paint samples on the walls, I’ll share my expertise on how to choose the perfect color for your project.
Additionally, the debate between using a brush or a roller is a common one among painters. I’ll weigh in on the pros and cons of each technique, discussing factors such as the type of surface, desired finish, and efficiency to help you make an informed decision.
Color Selection Tips
Choosing the right colors for your front door decor can make a big difference in the overall look and feel of your home. When it comes to color selection, there are a few tips that can help you create a cohesive and visually pleasing design.
-
Choose complementary colors: Look for colors that are opposite each other on the color wheel. This will create a harmonious and balanced look.
-
Coordinate with the house’s exterior: Take into consideration the color of your house’s exterior when choosing your front door color. Aim for colors that complement and enhance the overall aesthetic.
-
Consider the style of your home: Different color palettes work better with different architectural styles. For example, a vibrant red door may be more suitable for a traditional or colonial-style home, while a sleek black door may be perfect for a modern or contemporary home.
-
Think about the surroundings: Take a look at the colors of the surrounding landscape, such as your garden or the neighboring houses. This will help you choose colors that blend well with the environment.
-
Don’t be afraid to experiment: Ultimately, the choice of colors is a personal one. Don’t be afraid to step outside of your comfort zone and try something unique and unexpected.
Now that you have chosen the perfect colors for your front door decor, it’s time to move on to the next step: brush vs. roller.
Brush Vs. Roller
To achieve a smooth and even finish on your front door, it’s recommended to use a roller instead of a brush. While brushes have their advantages in certain situations, using a roller for painting a front door ensures better coverage and a more professional-looking result.
The key is to choose the right roller and handle for the job. A foam roller is ideal for smooth surfaces, while a nap roller is better for textured doors. Make sure to clean and maintain your roller properly to prolong its lifespan. After each use, rinse it thoroughly with water and let it dry completely before storing. Avoid leaving it soaking in solvents, as this can damage the roller.
Now that you have a smooth base, let’s move on to adding decorative elements to your front door.
Adding Decorative Elements
Adding decorative elements to your front door is a simple way to enhance its appearance. There are countless options for incorporating decorative accents and creative embellishments that can truly make your front door stand out. Here are a few ideas to get you started:
- Wreaths: Hang a seasonal wreath on your front door to add a pop of color and personality.
- Door mats: Choose a welcome mat that reflects your personal style and sets the tone for your home.
- Door knockers: Swap out your standard door knocker for a unique and eye-catching design.
- House numbers: Upgrade your house numbers with stylish and modern options.
- Planters: Add some greenery to your entryway with beautiful planters filled with flowers or foliage.
By adding these decorative elements, you can instantly transform your front door into a welcoming and visually appealing focal point.
Now, let’s move on to installing hooks or hangers for additional functionality.
Installing Hooks or Hangers
Now that you’ve added decorative elements to your front door, it’s time to consider installing hooks or hangers for added functionality. These hooks or hangers will provide a practical way to hang wreaths, signs, or other decorations. To ensure a secure installation, you’ll need to gather a few tools and materials, including screws and hanging hardware.
Here’s a helpful table to guide you through the process:
| Material/Tool | Quantity |
|---|---|
| Hooks or Hangers | 2 |
| Screws | 4 |
| Screwdriver | 1 |
To begin, choose the desired location on your door for the hooks or hangers. Make sure to select a spot that will allow your decorations to be easily seen. Hold the hook or hanger against the door and mark the screw holes. Then, using a screwdriver, attach the hooks or hangers to the door using the screws. Once securely in place, you’re ready to move on to choosing the right wreath or sign that will perfectly complement your front door decor.
Choosing the Right Wreath or Sign
When selecting the perfect wreath or sign, consider the color scheme and overall aesthetic of your front door. This will ensure that your decor complements the existing design elements and creates a cohesive look. Here are some factors to consider when choosing your wreath or sign:
-
Size: Determine the appropriate size based on the dimensions of your door. A wreath that is too small may get lost, while one that is too large could overwhelm the space.
-
Material: Choose a wreath made from durable materials that can withstand outdoor conditions. Look for signs that are weather-resistant and can withstand sun exposure.
-
Style: Consider the overall style of your home and select a wreath or sign that complements it. Whether you prefer a rustic, modern, or traditional look, there are options available to suit your taste.
-
Wreath Placement: Decide whether you want to hang your wreath directly on the front door or use a wreath hanger. Consider the visibility and accessibility of the wreath from the street.
-
Sign Design: If you choose to display a sign, think about the message or design you want to convey. Whether it’s a welcoming greeting or a seasonal motif, make sure it reflects your personality and adds a touch of charm to your front door.
Now that you have chosen the perfect wreath or sign for your front door, let’s move on to the next step: mounting and hanging the decor.
Mounting and Hanging the Decor
To properly mount and hang your chosen wreath or sign, start by selecting the appropriate hardware for your mounting surface. Different mounting techniques require different types of hangers and fasteners. Here are some common options for hanging front door decor:
| Mounting Surface | Hardware |
|---|---|
| Wood | Screws |
| Metal | Magnetic hooks |
| Glass | Suction cups |
| Brick or stone | Adhesive hooks |
When mounting on wood, use screws for a secure hold. For metal surfaces, magnetic hooks are a convenient choice. Glass doors can be decorated using suction cups that adhere firmly. Brick or stone surfaces can be tricky, but adhesive hooks are a reliable option. If you prefer alternative hanging methods, consider over-the-door wreath hangers or decorative ribbons tied around the top of the door.
Now that your decor is securely mounted, let’s move on to the next section about maintenance and protection without missing a beat.
Maintenance and Protection
When it comes to maintaining the longevity of your outdoor decor, there are a few key points to keep in mind.
First and foremost, regular cleaning is essential. I’ll share some helpful tips on how to clean your decor to keep it looking fresh and vibrant.
Additionally, weatherproofing and sealing techniques are crucial to protect your decor from the elements and ensure its durability over time. I’ll provide some expert advice on how to weatherproof and seal your decor effectively, so you can enjoy it for years to come.
Cleaning Tips for Longevity
One way you can ensure the longevity of your front door decor is by regularly cleaning it. Taking the time to clean your decor not only removes dirt and grime but also helps to preserve the finishes and keep them looking fresh.
Here are some cleaning techniques I recommend:
- Gently wipe down the decor with a soft cloth or sponge.
- Use a mild soap or detergent mixed with water to clean any stubborn stains.
- Avoid using harsh chemicals or abrasive cleaners that may damage the finishes.
- Dry the decor thoroughly after cleaning to prevent water spots.
- Apply a protective coating, such as a clear sealant, to maintain the decor’s appearance and protect it from the elements.
By following these cleaning techniques, you can keep your front door decor looking beautiful for years to come.
Now, let’s move on to weatherproofing and sealing techniques to further enhance its longevity.
Weatherproofing and Sealing Techniques
After thoroughly cleaning my front door, I knew it was time to weatherproof and seal it to protect it from the elements.
Weatherproofing techniques are crucial for ensuring the longevity and durability of your front door decor. One effective method is to apply a weatherproofing sealant, such as polyurethane or varnish, to the surface of the door. This creates a protective barrier against moisture, UV rays, and temperature fluctuations.
Additionally, I decided to install weatherstripping around the edges of the door to prevent drafts and improve energy efficiency. It’s important to carefully follow the manufacturer’s instructions when applying these sealing methods to achieve the best results.
With my front door now properly weatherproofed and sealed, it was time to move on to showcasing my front door decor in all its glory.
-Can I Use the Same Techniques for Wedding Car Decor for Front Door Decor?
Yes, you can use the same techniques for wedding car decor for front door decor. With the help of a wedding car decor tutorial, you can easily adapt the same flowers, ribbons, and signage to create a beautiful and cohesive look for both the wedding car and the front door of the venue.
Showcasing Your Front Door Decor
To showcase your front door decor, you can use a wreath or a personalized welcome sign.
Wreaths are a classic choice and can be customized to match any season or theme. From lush greenery to vibrant flowers, there are endless options for showcasing wreath designs that will catch the eye of anyone who passes by.
Another way to add a personal touch to your front door is by creating a DIY front door mat. With a few simple materials and some creativity, you can design a unique and welcoming entrance for your home. Consider incorporating patterns, colors, or even your family’s initials to make it truly one-of-a-kind.
The possibilities are endless when it comes to showcasing your front door decor, so let your imagination run wild!
Frequently Asked Questions
How Do I Choose the Right Color for My Front Door Decor?
When choosing the right color for my front door decor, I consider factors like the style of my home, the surrounding colors, and my personal preferences. It’s important to find a color that complements the overall aesthetic and adds a touch of personality.
What Types of Weather Conditions Should I Consider When Selecting Materials for My Front Door Decor?
When selecting materials for front door decor, I consider outdoor durability and maintenance requirements. It’s important to choose materials that can withstand various weather conditions and require minimal upkeep.
Can I Use a Wreath or Sign That Is Not Specifically Designed for Outdoor Use?
I wouldn’t recommend using a wreath or sign that isn’t specifically designed for outdoor use. There are alternative materials and DIY options that can withstand the elements and keep your front door decor looking great.
How Often Should I Clean and Maintain My Front Door Decor?
I clean and maintain my front door decor regularly to keep it looking fresh. I use gentle cleaning products and wipe away any dirt or dust. It’s important to keep up with cleaning to ensure it stays in great condition.
Are There Any Specific Regulations or Restrictions for Front Door Decor in My Neighborhood or Community?
In my neighborhood, there are specific regulations and community restrictions when it comes to front door decor. It’s important to familiarize yourself with these guidelines to ensure you’re in compliance and avoid any potential issues.
Conclusion
In conclusion, building front door decor is a fun and creative way to showcase your personal style and add a welcoming touch to your home. By following the steps outlined in this article, you can create a beautiful and unique piece that will make your front door stand out.
While some may argue that building front door decor is time-consuming, the end result is well worth the effort. So why not turn your front door into a stunning focal point that will impress your guests and neighbors?
Get started today and let your creativity shine!
- About the Author
- Latest Posts
Meet Bethia, the visionary designer at ByRetreat who brings a touch of magic to every remote workspace she creates. With a boundless imagination and an eye for beauty, Bethia is passionate about transforming ordinary spaces into extraordinary havens of creativity and comfort.
Bethia possesses a unique talent for envisioning the perfect combination of furniture, colors, and textures that harmonize seamlessly in a room. She understands that selecting furniture goes beyond mere functionality; it’s about curating pieces that evoke a sense of style and sophistication while enhancing the overall ambiance.
-

 Decor1 week ago
Maximalist Decor Explained: Embrace More Style
-

 Vetted4 weeks ago
15 Best Drip Irrigation Systems to Keep Your Garden Thriving
-

 Vetted2 weeks ago
15 Best Foot Massagers for Neuropathy to Soothe Your Feet and Relieve Discomfort
-

 Vetted3 weeks ago
15 Best Sports Laundry Detergents for Keeping Your Activewear Fresh and Clean
-

 Vetted3 weeks ago
15 Best Tall Toilets for Seniors That Combine Comfort and Safety
-

 Vetted3 weeks ago
15 Best Dish Scrubbers to Keep Your Kitchen Sparkling Clean
-

 Decor3 weeks ago
What Is Eclectic Home Decor
-

 Vetted4 days ago
15 Best Organic Pest Control Solutions for a Naturally Pest-Free Home


