Appliances
Repair Guide: Fix Ceiling Fan Regulator Easily
2025

Are you trapped in a hot and uncomfortable room, wishing for a refreshing gust of wind? Your ceiling fan controller could be the solution. If it’s not working correctly, it can leave you feeling sweaty and uneasy.
But fear not, because fixing a ceiling fan regulator is not as daunting as it may seem. With a little guidance and patience, you can get your fan back to its efficient, air-circulating self.
In this guide, we will walk you through the steps to troubleshoot and repair common issues, such as power supply problems, speed control adjustments, and even replacing faulty components.
So, let’s dive in and get that refreshing breeze flowing again.
Key Takeaways
- Understanding the different parts of a ceiling fan regulator, including the speed control mechanism, capacitor, motor winding, and reversing switch.
- Checking for power supply issues by inspecting the circuit breaker, wiring, and testing voltage.
- Performing voltage testing to ensure the reading is within the expected range, indicating proper power supply.
- Adjusting and troubleshooting the speed control by checking wiring connections, inspecting the capacitor, cleaning the switch, and replacing faulty components.
Understanding the Different Parts of a Ceiling Fan Regulator
To understand the different parts of a ceiling fan regulator, you need to familiarize yourself with its key components. A ceiling fan regulator is responsible for controlling the speed and direction of the fan blades. It consists of several important parts that work together to ensure smooth operation.
The first component is the speed control mechanism, which allows you to adjust the fan’s speed according to your preference. It’s usually a rotary switch or a series of buttons that provide different speed options.
Next, we’ve the capacitor, which plays a crucial role in controlling the fan’s speed. It stores and releases electrical energy to regulate the motor’s speed.
The third component is the motor winding, which is responsible for converting electrical energy into mechanical energy. It consists of coils of wire that generate a magnetic field, causing the motor to rotate.
Lastly, we’ve the reversing switch, which allows you to change the direction of the fan blades. This is useful for both cooling and circulating air in different seasons.
Understanding these key components will help you troubleshoot and fix common regulator problems. Regular maintenance is also important to ensure proper functioning of your ceiling fan regulator. Cleaning the fan blades and lubricating the motor bearings are some maintenance tips for ceiling fan regulators.
Checking for Power Supply Issues

To begin checking for power supply issues in your ceiling fan regulator, you’ll need to perform a power supply check, voltage testing, and electrical connection inspection.
Start by ensuring that the power supply to the fan is turned off and disconnected.
Then, use a multimeter to test the voltage output of the power supply.
Power Supply Check

Check the power supply of your ceiling fan regulator to ensure it is receiving the necessary electricity for proper operation. Voltage fluctuations can lead to issues with your ceiling fan, such as slow or erratic speed, or complete failure to function. To troubleshoot power supply problems, follow these steps:
- Check the circuit breaker: Make sure the circuit breaker for your ceiling fan is in the “on” position. If it has tripped, reset it and see if the fan starts working again.
- Inspect the wiring: Look for any loose or disconnected wires in the power supply line. Ensure that all connections are secure and properly insulated.
- Test the voltage: Use a multimeter to measure the voltage at the power supply terminals. The voltage should match the rated voltage of your ceiling fan regulator.
| Troubleshooting Methods | Description |
|---|---|
| Check the circuit breaker | Ensure it is in the “on” position and reset if necessary. |
| Inspect the wiring | Look for loose or disconnected wires. Secure all connections. |
| Test the voltage | Measure the voltage using a multimeter. Compare to the rated voltage. |
Voltage Testing

Now that you have ensured the power supply of your ceiling fan regulator is properly connected and receiving the necessary electricity, it’s time to move on to the next step: voltage testing to check for any power supply issues.
Voltage measurement is crucial in troubleshooting techniques for fixing ceiling fan regulators. To begin, switch off the power to the fan at the circuit breaker.
Next, locate the regulator’s wire connections and disconnect them. Using a multimeter set to the AC voltage mode, place the probes on the wires’ exposed metal ends.
Turn on the circuit breaker and switch on the fan. The multimeter should display a voltage reading within the expected range, typically 110-120 volts.
If the reading is significantly lower or higher, it indicates a power supply issue that needs further investigation.
Electrical Connection Inspection

Begin by inspecting the electrical connections to identify any potential power supply issues. Start by checking the power socket. Ensure that it’s functioning properly by plugging in another device to see if it works. If the socket is faulty, you may need to call an electrician to fix it.
Next, examine the wire connections of the ceiling fan regulator. Make sure that all the wires are securely connected. Look for any loose or frayed wires and tighten or replace them accordingly. Additionally, check for any signs of damage or burn marks on the wires. If any issues are found, troubleshoot and repair the wire connections as needed.
Adjusting and Troubleshooting the Speed Control

To troubleshoot the speed control on your ceiling fan, start by checking if the fan is running at its highest speed. If it’s not, adjust the speed control switch to the highest setting.
Next, observe if the fan speeds up or remains the same. If it speeds up, the speed control is functioning properly.
If it remains the same, there may be an issue with the speed control switch or the wiring.
Speed Control Troubleshooting

If you’re experiencing issues with the speed control of your ceiling fan regulator, there are troubleshooting steps you can take to address the problem. Here are some common speed control problems and techniques to troubleshoot them:
- Check the wiring connections: Ensure that the wires connecting the regulator to the fan motor are securely connected. Loose or faulty connections can affect the speed control.
- Inspect the capacitor: The capacitor is responsible for regulating the speed of the fan. Check for any signs of damage or leakage. If necessary, replace the capacitor with a new one.
- Clean the speed control switch: Over time, dirt and debris can accumulate on the speed control switch, causing it to malfunction. Use a soft cloth and a mild cleaning solution to carefully clean the switch.
Adjusting Fan Speed

To adjust the fan speed and troubleshoot any issues with the speed control, follow these step-by-step instructions.
First, check for any loose connections or damaged wiring. If everything looks good, proceed to the speed control switch.
Turn the switch to the maximum setting and listen for any unusual noises. If you hear grinding or scraping sounds, it could indicate a problem with the motor or bearings. In this case, you may need to replace these components.
Next, check the power consumption of the fan. If it seems to be consuming more power than usual, it could be due to a faulty speed control. Consider replacing the speed control with a new one to resolve the issue.
Fixing a Ceiling Fan Regulator That Is Stuck or Jammed

Check if the ceiling fan regulator is stuck or jammed by following these simple steps.
- Begin by turning off the power to the ceiling fan at the circuit breaker to ensure safety.
- Remove the fan blades by unscrewing them from the motor hub. This will give you better access to the regulator.
- Inspect the regulator for any visible signs of damage or obstruction. Look for loose wires, bent or broken components, or debris that may be preventing smooth operation.
If you find any loose wires, tighten them securely. If there are bent or broken components, you may need to replace them with new ones. In case of debris, carefully remove it with a soft brush or compressed air.
- After inspecting and addressing any visible issues, try gently moving the regulator dial or switch to see if it moves freely. If it’s still stuck or jammed, you may need to lubricate the internal mechanism.
Use a silicone-based lubricant or a light machine oil to lubricate the moving parts of the regulator. Be cautious not to over-lubricate, as excess lubrication can attract dust and cause further issues.
Replacing a Faulty Capacitor in the Regulator

After addressing any visible issues with the stuck or jammed ceiling fan regulator, the next step is to replace a faulty capacitor in the regulator.
A faulty capacitor can often be the cause of speed control issues in the ceiling fan. To troubleshoot the speed control, start by turning off the power to the fan at the circuit breaker.
Use a screwdriver to remove the screws holding the regulator in place, and carefully disconnect the wires from the capacitor. Take note of the color coding on the wires for reconnection later.
Next, remove the faulty capacitor by unscrewing it from the regulator. Replace it with a new capacitor of the same specifications, ensuring it’s securely fastened.
Reconnect the wires to the new capacitor, following the color coding noted earlier. Once the wires are securely connected, reattach the regulator to the ceiling fan using the screws.
Repairing a Ceiling Fan Regulator That Is Making Noise

If your ceiling fan regulator is making noise, there are a few steps you can take to repair it. Here are some common ceiling fan regulator problems and how to fix them:
- Loose screws: Check if any screws in the regulator are loose. Use a screwdriver to tighten them securely. This can often solve the noise issue caused by loose parts.
- Lubrication: Lack of lubrication can cause friction and noise in the regulator. Apply a few drops of lubricating oil to the bearings and moving parts of the regulator. Be sure to use a lubricant specifically designed for ceiling fans.
- Misalignment: Sometimes, the regulator can become misaligned, causing it to make noise. To fix this, turn off the fan and carefully adjust the position of the blades. Make sure they’re evenly spaced and aligned with the regulator housing.
Seeking Professional Help for Complex Ceiling Fan Regulator Issues

For complex ceiling fan regulator issues that can’t be resolved through basic troubleshooting and DIY repairs, it’s highly recommended to seek professional assistance. While some problems can be easily fixed by following simple steps, there are instances where the issue may be more complex and require the expertise of a professional. Seeking professional advice ensures that the problem is correctly diagnosed and addressed, preventing further damage to the ceiling fan regulator.
Common regulator problems that may necessitate professional help include issues with the wiring, faulty components, or problems with the motor. These problems can be difficult to identify and resolve without the necessary knowledge and experience. A professional electrician or technician will have the expertise to troubleshoot and repair these complex issues, ensuring that the ceiling fan regulator is functioning properly.
When seeking professional help, it’s important to choose a reputable and licensed electrician or technician who specializes in ceiling fan repairs. They’ll have the necessary tools and equipment to diagnose and fix the problem efficiently and safely.
Frequently Asked Questions
Can I Use a Ceiling Fan Regulator With Any Type of Ceiling Fan?
Can you use a ceiling fan regulator with any type of ceiling fan?
Well, different types of ceiling fans have different requirements and compatibility with regulators. It’s important to consider the voltage, speed control options, and wiring compatibility.
While using a regulator can offer advantages like energy savings and customized airflow, it may not be suitable for all ceiling fans.
Understanding the advantages and disadvantages of using a regulator with different types of ceiling fans will help you make an informed decision.
How Often Should I Clean and Maintain My Ceiling Fan Regulator?
To maintain optimal performance, it’s important to regularly clean and maintain your ceiling fan regulator.
Cleaning the regulator helps prevent dust buildup, which can impede its functionality.
A simple step-by-step process can be followed to ensure proper maintenance.
Start by turning off the power to the fan.
Then, remove the regulator cover and gently wipe away any dust or debris using a soft cloth or brush.
Are There Any Safety Precautions I Need to Take When Working on a Ceiling Fan Regulator?
When working on a ceiling fan regulator, it’s important to prioritize safety. To ensure a successful repair, begin by gathering the proper tools for the job.
Next, follow these steps to safely disconnect and reconnect the regulator:
1) Turn off the power at the circuit breaker.
2) Remove the cover plate and disconnect the wires.
3) Replace the faulty regulator and reconnect the wires.
4) Finally, test the fan to ensure it’s functioning properly before restoring power.
Can I Replace a Ceiling Fan Regulator Myself, or Should I Hire a Professional?
You can replace a ceiling fan regulator yourself or hire a professional. Hiring a professional may increase replacement cost, but ensures the job is done correctly.
If you choose to do it yourself, follow these troubleshooting tips.
First, turn off the power to the fan.
Next, remove the old regulator and disconnect the wires.
Install the new regulator, connecting the wires according to the instructions.
What Are Some Common Signs That Indicate a Faulty Ceiling Fan Regulator?
Experiencing issues with your ceiling fan regulator? Identifying common signs of a faulty regulator is crucial. Look out for irregular speed variations, unresponsive controls, or flickering lights.
Troubleshooting tips can help you pinpoint the problem. Don’t worry, fixing it yourself is possible! With a few simple steps, you’ll be able to resolve the issue and enjoy a smoothly functioning ceiling fan once again.
Let’s dive into the details and master the art of fixing ceiling fan regulators.
Does Identifying My Fan Model Help in Easily Fixing the Ceiling Fan Regulator?
When it comes to fixing a ceiling fan regulator, it is crucial to identify your fan model. Each model may have unique components and mechanisms, so knowing the specific model will help in locating the correct replacement parts or troubleshooting any issues with the regulator.
Conclusion
Congratulations! You’re now a ceiling fan regulator expert, armed with the knowledge to fix any issue that comes your way.
With just a few simple steps, you can adjust, troubleshoot, and even replace parts if needed.
No more noisy or stuck regulators can stand in your way!
So go forth and conquer the world of ceiling fan repairs with confidence, knowing that you have the power to keep your fan spinning smoothly.
- About the Author
- Latest Posts
Introducing Ron, the home decor aficionado at ByRetreat, whose passion for creating beautiful and inviting spaces is at the heart of his work. With his deep knowledge of home decor and his innate sense of style, Ron brings a wealth of expertise and a keen eye for detail to the ByRetreat team.
Ron’s love for home decor goes beyond aesthetics; he understands that our surroundings play a significant role in our overall well-being and productivity. With this in mind, Ron is dedicated to transforming remote workspaces into havens of comfort, functionality, and beauty.
Garage Door Opener
Craftsman Garage Door Opener Battery Backup Installation Guide
Dive into the essential steps for installing the Craftsman Garage Door Opener Battery Backup to safeguard your garage access in critical moments.

Let’s address the installation of the Craftsman Garage Door Opener Battery Backup in a systematic manner.
As we navigate through the intricacies of setting up this essential backup system, we'll uncover key insights that can make all the difference in ensuring a seamless integration.
Stay tuned as we unravel the nuances of this process, shedding light on crucial steps that could be the game-changer in safeguarding your garage access during unforeseen situations.
Key Takeaways
- LED lights indicate battery status for seamless operation
- Replacement batteries available for around $90 from Sears
- Troubleshooting may involve battery replacement for functionality
- Understanding system intricacies crucial for uninterrupted operation
Battery Backup System Overview
When considering the Battery Backup System Overview for the Craftsman garage door opener, it's essential to understand its fundamental role in ensuring uninterrupted operation during power outages. The battery backup system is a crucial component of the Craftsman garage door opener, providing power during outages to maintain continuous functionality.
LED lights on the opener display different colors to indicate the battery status, with green signaling normal operation and red indicating error detection. This feature significantly enhances the reliability and performance of the garage door opener, especially during power disruptions.
Sears offers replacement batteries specifically designed for the Craftsman garage door opener, with replacements typically priced around $90. Troubleshooting the battery backup system may involve replacing the battery if indicated as faulty, following Sears' installation guidance to ensure proper functioning.
Understanding the intricacies of the battery backup system is vital for ensuring the seamless operation of the Craftsman garage door opener during power outages.
Required Tools and Materials

To successfully install the Craftsman garage door opener battery backup, gather essential tools such as a screwdriver, ladder, and possibly a drill for mounting, along with specific materials like the battery backup unit, mounting brackets, screws, and wiring harness. When preparing for the installation, it's crucial to ensure you have the following tools and materials ready:
- Screwdriver: Necessary for removing panels and securing components during the installation process.
- Ladder: Used to access and work on the garage door opener system safely at elevated heights.
- Drill: Optional but may be needed for mounting the battery backup unit securely in place.
- Mounting Brackets, Screws, and Wiring Harness: These are essential components for attaching the battery backup unit to the garage door opener and connecting it effectively.
Before beginning the installation, always prioritize safety precautions by disconnecting power sources and following the manufacturer's guidelines meticulously to prevent any accidents.
Step-by-Step Installation Instructions
Let's begin with the step-by-step installation instructions for integrating the Craftsman Garage Door Opener battery backup system. Follow these detailed steps to ensure a smooth installation process:
Craftsman Garage Door Opener Battery Backup Installation Steps:
| Steps | Actions | Tips |
|---|---|---|
| Step 1 | Turn off the power to the garage door opener. | Ensure safety by disconnecting the power source. |
| Step 2 | Locate the motor unit of the garage door opener. | The backup battery will be connected here. |
| Step 3 | Connect the backup battery to the motor unit. | Follow the provided instructions for proper installation. |
| Step 4 | Check the LED lights on the opener to verify battery status. | Green light indicates full charge; red light signals low battery. |
| Step 5 | Test the garage door opener with the backup battery. | Ensure seamless functionality during a power outage. |
Testing and Troubleshooting

We'll now proceed to assess the functionality of the Craftsman Garage Door Opener battery backup system through a series of tests and troubleshooting procedures.
- Check LED Lights: Look at the LED lights on the garage door opener. Green indicates normal operation, yellow signals backup power engagement, and red suggests an error requiring service.
- Test Keypad Codes: Ensure you're using the correct keypad codes for both the wall mount opener and the remote to operate the garage door.
- Inspect Trolley Engagement: If the trolley disengages due to power loss, re-engage it according to the manufacturer's instructions.
- Red Light Indicator: If the red light persists after troubleshooting, contact a professional for service on the garage door opener.
Maintenance Tips and Safety Precautions
Inspecting and lubricating the moving parts regularly ensures smooth operation and extends the longevity of your Craftsman Garage Door Opener. To maintain optimal performance and safety, keep the photo-eye sensors clean and properly aligned for the safety reversal system to function correctly. Periodically test the battery backup system to ensure it is ready for any power outages. Check for any loose hardware and tighten as needed to prevent accidents or malfunctions. It is essential to schedule professional maintenance at least once a year to address any potential issues and ensure the garage door opener operates efficiently.
| Maintenance Tips and Safety Precautions | ||
|---|---|---|
| 1. Inspect and lubricate moving parts | 2. Clean and align photo-eye sensors | 3. Test battery backup system |
| Regular inspection and lubrication keep the garage door opener running smoothly. | Ensure sensors are clean and aligned for proper safety function. | Verify battery backup readiness for power outages. |
| 4. Check for loose hardware | 5. Schedule professional maintenance | |
| Tighten any loose hardware to prevent accidents. | Annual maintenance ensures optimal performance. |
Frequently Asked Questions
How Do You Replace a Craftsman Garage Door Opener Battery?
We start by replacing a Craftsman garage door opener battery by checking the LED lights for status:
- Green for normal,
- Yellow for backup,
- Red for error.
We then proceed to purchase a replacement battery for about $90. We can find these batteries and installation guidance from Sears.
Common issues that may signal the need for battery replacement include:
- Trouble closing the door,
- Specific keypad codes,
- Trolley disengagement,
- A red service light.
Can You Add a Battery Backup to an Existing Garage Door Opener?
Yes, we can add a battery backup to an existing garage door opener. It's a simple upgrade that ensures seamless operation during power outages.
How Do You Install a Garage Backup Battery?
When installing a garage backup battery, we begin by ensuring the power is disconnected for safety.
Then, locate the designated terminals on the garage door opener and securely mount the battery.
Connect the battery to the terminals following the manufacturer's instructions carefully.
Test the backup battery regularly to confirm it's charged and ready to provide power during outages.
This will ensure uninterrupted operation of the garage door opener when needed.
Is Garage Door Opener Battery Backup Worth It?
Absolutely, having a garage door opener battery backup is totally worth it! It ensures continuous access to your garage, even during power outages, offering both convenience and security.
With seamless operation and no manual intervention required, the peace of mind it provides is priceless. The investment in a battery backup system for your garage door opener is a smart choice for anyone seeking uninterrupted accessibility in emergency situations.
Conclusion
In conclusion, installing a Craftsman garage door opener battery backup is a smart investment for ensuring your garage door operates smoothly even during power outages.
Did you know that 70% of homeowners experience at least one power outage every year? By following the step-by-step guide provided, you can easily set up your battery backup system and enjoy peace of mind knowing your garage door will always be functional.
- About the Author
- Latest Posts
Introducing Ron, the home decor aficionado at ByRetreat, whose passion for creating beautiful and inviting spaces is at the heart of his work. With his deep knowledge of home decor and his innate sense of style, Ron brings a wealth of expertise and a keen eye for detail to the ByRetreat team.
Ron’s love for home decor goes beyond aesthetics; he understands that our surroundings play a significant role in our overall well-being and productivity. With this in mind, Ron is dedicated to transforming remote workspaces into havens of comfort, functionality, and beauty.

In the realm of cooking, we understand the importance of having the proper tools at your disposal. Just like the saying, ‘a chef’s skills are only as good as their equipment.’ That’s why we have compiled a list of 10 clever kitchen gadgets that every home cook should have.
These innovative devices are designed to elevate your cooking experience and bring a touch of mastery to your culinary creations. From a smart refrigerator with a touchscreen display to a voice-controlled smart oven, these gadgets combine functionality and convenience in ways you never thought possible.
So, let’s dive in and discover the game-changing gadgets that are about to revolutionize your kitchen.
Key Takeaways
- Smart kitchen gadgets for coffee lovers offer customizable brewing options and remote brewing capabilities, making the coffee brewing process simplified and enhanced.
- Smart kitchen gadgets for precision cooking, such as smart sous vide precision cookers and programmable pressure cookers, ensure consistent and precise cooking results without constant monitoring.
- Smart kitchen gadgets for meal planning and organization, like app-controlled slow cookers and blenders, save time in monitoring and controlling the cooking process and make grocery shopping and meal preparation more efficient.
- Smart kitchen gadgets enhance cooking skills by elevating the home brewing and cooking experience to a professional level, ensuring recipe accuracy and consistency, and allowing for customization of cooking settings based on personal preferences.
Smart Refrigerator With Touchscreen Display
Our favorite feature of the smart refrigerator is its touchscreen display, which allows us to easily access and organize our groceries. With the integration of touchscreen technology, this interactive kitchen appliance revolutionizes the way we manage our food inventory.
The touchscreen display provides a user-friendly interface that enables us to effortlessly navigate through the refrigerator’s various features and functions. We can view our groceries at a glance, making it convenient to check what items we’ve and what needs to be restocked. The display also allows us to create shopping lists directly on the screen, ensuring that we never forget an essential ingredient again.
Furthermore, the interactive nature of the touchscreen allows us to customize settings according to our preferences. We can adjust temperature controls, select specific storage zones for different food items, and even set expiration reminders to minimize food waste. The smart refrigerator also offers recipe suggestions based on the ingredients available, making meal planning easier and more efficient.
In terms of design, the touchscreen display seamlessly blends with the aesthetics of the refrigerator, enhancing the overall visual appeal of our kitchen. Its intuitive interface and sleek appearance make it a desirable addition to any modern home.
Voice-Controlled Smart Oven
We love using our voice-controlled smart oven to effortlessly cook our favorite meals. This innovative kitchen gadget combines the convenience of voice control with advanced automation features, making it an essential tool for any home chef. With just a simple voice command, we can easily preheat the oven, adjust the temperature, set timers, and even check the cooking progress without lifting a finger.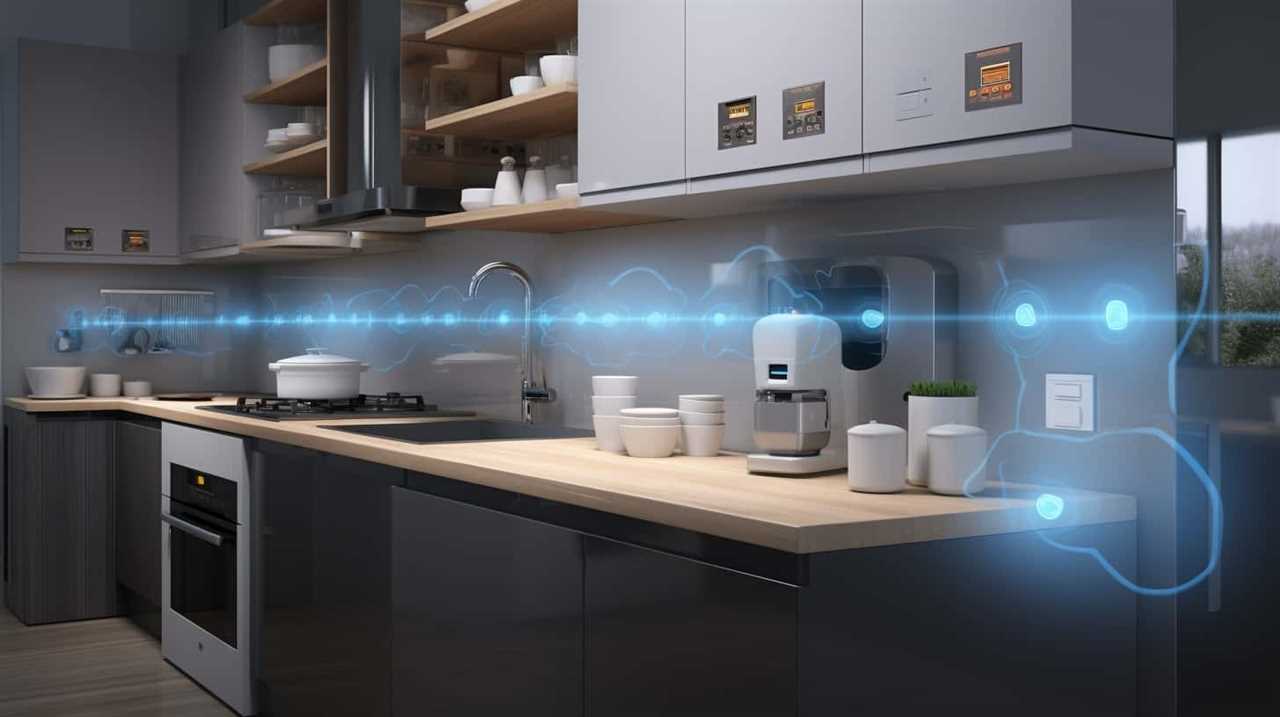
The automation benefits of a voice-controlled oven are truly remarkable. It saves us time and effort by eliminating the need to manually operate the oven. We can multitask in the kitchen or attend to other chores while our meal bakes to perfection. The table below highlights some of the key features and advantages of a voice-controlled smart oven:
| Features | Advantages |
|---|---|
| Voice control | Hands-free operation for a seamless cooking experience |
| Temperature control | Precise heat adjustment for consistent results |
| Timer setting | Set timers and receive alerts for perfect timing |
A voice-controlled smart oven takes cooking to a whole new level of convenience and efficiency. It empowers us to effortlessly create delicious meals while enjoying the benefits of automation. Whether we are busy professionals or culinary enthusiasts, this smart kitchen gadget is a must-have for those who seek mastery in the art of cooking.
Wi-Fi Enabled Smart Coffee Maker
We all know that a good cup of coffee is essential to kickstart our day. A Wi-Fi enabled smart coffee maker can take our coffee experience to the next level. With the benefits of automation, we can wake up to the aroma of freshly brewed coffee without lifting a finger.
But that’s not all – the remote brewing capabilities allow us to start brewing our coffee from anywhere in our home. This ensures that our cup of joe is ready when we need it.
And with customizable brewing options, we can personalize our coffee strength and flavor to suit our preferences.
Benefits of Automation
The convenience of automation is one of the key advantages offered by a Wi-Fi enabled smart coffee maker. With this innovative gadget, you can easily set your coffee to start brewing at a specific time, ensuring you wake up to the aroma of freshly brewed coffee.
Here are some benefits of automation in the kitchen:
- Time-saving: Automation allows you to focus on other tasks while your coffee maker takes care of brewing your favorite cup of joe.
- Customization: With a smart coffee maker, you can easily adjust the strength, temperature, and even the size of your coffee, ensuring it perfectly suits your preferences.
Automation in the kitchen, such as a Wi-Fi enabled smart coffee maker, is just one example of how technology has impacted cooking skills. It simplifies and enhances the coffee brewing process, giving home chefs more control and convenience.
As technology continues to evolve, we can expect even more innovative gadgets that will revolutionize the way we cook and enjoy our meals.
Remote Brewing Capabilities
Using the convenience of a time preposition, our smart coffee maker allows us to remotely brew a perfect cup of coffee from anywhere in the house. Imagine waking up in the morning and being able to start brewing your favorite cup of joe without even leaving your bed. With customizable recipes and remote temperature control, our smart coffee maker provides the ultimate brewing experience.
Take a look at the table below to see the features of our Wi-Fi enabled smart coffee maker:
| Feature | Description |
|---|---|
| Customizable Recipes | Create and save your own coffee recipes with different brewing parameters such as strength, grind size, and water temperature. |
| Remote Temperature Control | Adjust the temperature of your brew remotely, ensuring that you have the perfect cup of coffee every time. |
| Brew Scheduling | Set a schedule for your coffee maker to start brewing automatically, so you can wake up to a fresh pot of coffee every morning. |
| Notifications | Receive notifications on your smartphone when your coffee is ready or when the water reservoir needs to be refilled. |
| Compatibility | Our smart coffee maker is compatible with popular voice assistants, allowing you to control it with simple voice commands. |
With these features, our smart coffee maker revolutionizes the way you brew coffee, giving you full control and convenience right at your fingertips.
Customizable Brewing Options
Exploring the customizable brewing options of our Wi-Fi enabled smart coffee maker, we can create a personalized coffee experience with ease. With its remote brewing capabilities, this innovative kitchen gadget brings convenience and functionality to a whole new level.
Here’s what you can expect from our customizable brewing options:
- Adjustable Strength: Tailor the strength of your coffee to suit your taste preferences. Whether you prefer a bold and robust brew or a milder flavor, our smart coffee maker allows you to easily adjust the strength settings.
- Multiple Brewing Styles: From espresso to cappuccino, our coffee maker offers a variety of brewing styles. Experiment with different options to create your perfect cup of coffee.
With these customizable brewing options, you have complete control over your coffee-making process. Indulge in your favorite coffee creations and elevate your home brewing experience to a professional level. The possibilities are endless with our Wi-Fi enabled smart coffee maker.
Smart Food Scale With Recipe App Integration
One essential smart kitchen gadget that every home chef needs is a food scale that seamlessly integrates with recipe apps. This innovative device not only helps with portion control but also allows for accurate recipe tracking. With the integration of a recipe app, you can easily measure ingredients and keep track of your recipe progress all in one place.
Gone are the days of manually measuring ingredients with measuring cups and spoons. A smart food scale takes the guesswork out of cooking by providing precise measurements for ingredients. This ensures that your recipes come out perfectly every time. Whether you’re following a recipe from a cookbook or experimenting with your own creations, a food scale with recipe app integration is an invaluable tool in the kitchen.
The recipe tracking feature of this smart food scale allows you to keep track of the ingredients you have used and the ones you still need. It eliminates the need to manually cross off ingredients as you go, saving you time and preventing any missed or duplicated ingredients. This feature is especially helpful when cooking complex dishes with multiple components.
In addition to recipe tracking, a smart food scale with recipe app integration also provides portion control. It helps you measure the exact amount of each ingredient, ensuring that you’re following the recipe accurately and maintaining consistency in taste and texture. This is particularly useful for those who are watching their calorie intake or following specific dietary guidelines.
Smart Sous Vide Precision Cooker
Let’s dive into the next essential smart kitchen gadget: the smart sous vide precision cooker. This innovative device takes precision cooking to a whole new level. With its remote temperature control and cooking time optimization features, it revolutionizes the way you cook.
Imagine being able to control the temperature of your sous vide cooker from anywhere in your home. Whether you’re in the living room, taking care of other tasks, or simply relaxing on the couch, you can easily monitor and adjust the temperature with just a few taps on your smartphone. No more rushing back and forth to the kitchen to make sure everything is cooking perfectly.
But that’s not all. The smart sous vide precision cooker also helps optimize cooking times. By precisely controlling the water temperature and circulating it evenly around your food, it ensures that your ingredients are cooked to perfection every time. This means no more guesswork or overcooking. With the smart sous vide precision cooker, you can achieve restaurant-quality results in the comfort of your own kitchen.
Mastering the art of sous vide cooking has never been easier with this smart gadget. Say goodbye to the hassle of traditional cooking methods and embrace the convenience and precision of the smart sous vide precision cooker. Elevate your culinary skills and impress your guests with perfectly cooked dishes that will leave them wanting more.
Automated Stirrer for Hands-Free Cooking
An automated stirrer is an essential kitchen gadget that every home chef needs for hands-free cooking. This innovative device takes the hassle out of stirring, allowing you to focus on other tasks while your food is being perfectly mixed. Whether you’re making a sauce, soup, or a delicious risotto, the automated stirrer ensures even heat distribution and prevents sticking or burning.
One popular option is the automated whisk, specifically designed for hands-free baking. With adjustable speed settings, it can effortlessly mix ingredients for cake batter, whipped cream, or meringues. Imagine being able to step away from the mixing bowl and let the whisk do all the work!
For those looking to take automation to the next level, a robotic chef for meal preparation is the ultimate kitchen companion. These advanced devices can chop, stir, and even cook your meals from start to finish. With pre-programmed recipes and precise temperature control, you can trust the robotic chef to create restaurant-quality dishes with minimal effort.
Investing in an automated stirrer or a robotic chef won’t only save you time and effort but also elevate your cooking game to the next level. Say goodbye to endless stirring and hello to hands-free cooking mastery!
Smart Air Fryer With Programmable Settings
Now let’s talk about the Smart Air Fryer with programmable settings.
This innovative kitchen gadget is a game-changer for home chefs looking to save time and enhance their cooking versatility.
With its time-saving cooking features and customizable settings, you can easily achieve crispy, delicious results without the need for excessive oil or complicated recipes.
Time-Saving Cooking Features
We love how our smart air fryer with programmable settings saves us time in the kitchen. With its automated meal planning feature, we can easily schedule our meals for the week and let the air fryer do the rest. It’s like having our own personal chef!
Additionally, the smart air fryer is compatible with smart meal delivery services, allowing us to receive pre-portioned ingredients directly to our doorstep. This means less time spent at the grocery store and more time doing what we love – cooking delicious meals.
The programmable settings also ensure that our food is cooked to perfection every time, eliminating the need for constant monitoring.
Thanks to this incredible kitchen gadget, we can now enjoy convenient and time-saving cooking without compromising on taste and quality.
Enhanced Cooking Versatility
Our smart air fryer’s programmable settings enhance our cooking versatility. With these advanced features, we can achieve cooking efficiency and explore a wide range of advanced culinary techniques.
The programmable settings allow us to adjust the temperature and cooking time precisely, ensuring that our food is cooked to perfection every time. We can experiment with different cooking methods, from air frying to baking, roasting, and even dehydrating.
This versatility opens up a world of possibilities in the kitchen, allowing us to create healthier versions of our favorite fried foods or explore new recipes that require specific cooking techniques. Whether we want to cook crispy chicken wings, bake a batch of cookies, or even make homemade beef jerky, our smart air fryer with programmable settings is a must-have tool for any home chef looking to elevate their culinary skills.
Wi-Fi Connected Smart Blender
To streamline our kitchen experience, we incorporated a Wi-Fi connected smart blender into our culinary routine, allowing us to effortlessly blend ingredients with just a few taps on our smartphones. The benefits of blending remotely are numerous, and the integration of Wi-Fi connectivity in kitchen appliances has revolutionized the way we prepare our meals.
Here are some key advantages of this innovative gadget:
- Convenience: With a Wi-Fi connected smart blender, we can control and monitor the blending process from anywhere in our home. Whether we’re in the living room or outside in the garden, we can easily adjust the speed and duration of the blending to achieve the desired consistency.
- Time-saving: Gone are the days of standing by the blender, constantly checking and adjusting the settings. With the Wi-Fi connectivity feature, we can set the blender to start at a specific time, ensuring that our ingredients are perfectly blended when we’re ready to use them.
- Recipe suggestions: Many smart blenders come with companion apps that offer a wide range of recipes and blending techniques. These apps provide step-by-step instructions and even suggest ingredient combinations based on our preferences, making it easier than ever to experiment with new flavors and textures.
- Customization: Wi-Fi connected smart blenders allow us to save our favorite blending settings, creating a personalized library of recipes that can be accessed with a simple tap on our smartphones. This level of customization ensures consistency in our cooking and allows us to recreate our favorite blends effortlessly.
The integration of Wi-Fi connectivity in kitchen appliances, such as the smart blender, has undoubtedly enhanced our culinary experience. With the ability to blend remotely, save time, access recipe suggestions, and personalize our blending settings, this gadget has become an indispensable tool in our kitchen.
Smart Pressure Cooker With Multiple Cooking Modes
For maximum versatility in the kitchen, we rely on a smart pressure cooker with multiple cooking modes. This innovative kitchen gadget takes the guesswork out of pressure cooking by offering a range of preset cooking modes, each designed to deliver perfect results for different types of dishes. Whether you’re in the mood for a hearty stew, a tender roast, or a flavorful risotto, this smart pressure cooker has got you covered.
With its multiple cooking modes, you can easily select the perfect setting for your desired dish. From high-pressure mode for quick cooking, to low-pressure mode for delicate foods, this smart pressure cooker adapts to your cooking needs. It also offers modes for sautéing, steaming, and even yogurt making, giving you the ability to create a wide variety of dishes with just one appliance.
Not only does this smart pressure cooker offer convenience and versatility, but it also comes with advanced features that make cooking even easier. With its programmable timer and delay start function, you can set it to start cooking at a specific time, allowing you to come home to a delicious meal. Some models even come with built-in sensors that automatically adjust the cooking time and temperature to ensure perfect results every time.
Smart Slow Cooker With App-Controlled Features
When it comes to convenience in cooking, a smart slow cooker with app-controlled features is a game-changer. With the ability to control cooking settings and monitor progress right from your smartphone, meal preparation becomes a breeze.
Not only does this save valuable time, but it also ensures enhanced cooking precision, allowing you to achieve perfect results every time.
App-Controlled Convenience for Cooking
With the use of an app-controlled smart slow cooker, we can easily enhance our cooking experience in the kitchen. This innovative gadget allows us to have app controlled meal delivery, ensuring that our meals are cooked to perfection even when we’re not in the kitchen.
The convenience of being able to monitor and control our slow cooker from anywhere using our smartphones is a game-changer. Additionally, this smart kitchen gadget contributes to smart kitchen organization by allowing us to plan our meals in advance and set timers remotely.
Imagine coming home to a perfectly cooked meal, with the aroma welcoming you at the door. This app-controlled convenience takes cooking to a whole new level, making it easier and more enjoyable for home chefs.
Now, let’s move on to the next section about time-saving meal preparation.
Time-Saving Meal Preparation
After experiencing the convenience of app-controlled meal delivery with our smart slow cooker, our time-saving meal preparation is taken to a new level. With the help of smart meal planning and efficient kitchen organization, we can now save significant amounts of time in the kitchen.
Our smart slow cooker comes with app-controlled features that allow us to monitor and control the cooking process from anywhere. We can easily adjust the temperature, cooking time, and even receive notifications when the meal is ready. This not only saves us time, but also ensures that our meals are cooked to perfection.
Additionally, the smart meal planning feature helps us plan our meals in advance, making grocery shopping and meal preparation more efficient. With these app-controlled features, we can now enjoy delicious homemade meals without spending hours in the kitchen.
Enhanced Cooking Precision
Our smart slow cooker’s app-controlled features allow us to achieve enhanced cooking precision. With the ability to control the cooking temperature with pinpoint accuracy, we can ensure that our recipes turn out perfectly every time.
The app provides us with a range of cooking temperatures to choose from, allowing us to select the ideal setting for each dish. Whether we’re slow cooking a tender roast or simmering a flavorful soup, the smart slow cooker ensures that the temperature stays consistent throughout the entire cooking process.
This level of control not only guarantees recipe accuracy but also allows us to experiment and fine-tune our favorite dishes to perfection. With the app-controlled features of our smart slow cooker, we can elevate our cooking skills to a whole new level.
Frequently Asked Questions
How Do I Connect My Smart Refrigerator to My Home Wi-Fi Network?
Connecting a smart refrigerator to the home Wi-Fi network is a common concern for many users. In this blog post, we’ll guide you through the process and provide step-by-step instructions to ensure a seamless connection.

First, make sure your refrigerator is powered on and within range of your Wi-Fi router.
Then, access the settings menu on your refrigerator, navigate to the Wi-Fi section, and select your home network.
Enter your Wi-Fi password when prompted, and voila! Your smart refrigerator is now connected to your home Wi-Fi network.
Can the Voice-Controlled Smart Oven Be Controlled Remotely Through a Smartphone App?
Yes, the voice-controlled smart oven can be controlled remotely through a smartphone app.
Smart kitchen appliances, such as voice-controlled smart ovens, are revolutionizing the way we cook and making our lives easier.
With the smartphone app, you can preheat the oven, adjust the temperature, and set timers from anywhere.
This feature is especially handy for busy home chefs on the go.
Upgrade your kitchen gadgets with a voice-controlled smart oven for complete control at your fingertips.
Can the Smart Coffee Maker Be Programmed to Brew Coffee at Specific Times?
Yes, programmable coffee makers can be a game-changer for every home chef. With the ability to schedule coffee brewing at specific times, you can wake up to the rich aroma of freshly brewed coffee, ready to kickstart your day.
Imagine the convenience of having your favorite cup of joe waiting for you when you stumble into the kitchen. It’s a small yet significant luxury that can make mornings more enjoyable and efficient.
Does the Smart Food Scale Provide Nutritional Information for the Ingredients Being Weighed?
Yes, the smart food scale does provide nutritional information for the ingredients being weighed. This feature is incredibly helpful for home chefs who want to track their calorie intake or ensure they’re following specific dietary requirements.
The scale connects to a smartphone app that displays the nutritional data in a clear and easy-to-read format. However, it’s worth noting that the accuracy of the nutritional information may vary depending on the database used by the app.
Can the Smart Pressure Cooker Be Used for Canning or Preserving Food?
Yes, the smart pressure cooker can be used for canning or preserving food.
It has a built-in canning function that ensures optimal pressure and temperature for safe preservation.
This feature allows us to can fruits, vegetables, and even meats with ease.
By using the smart pressure cooker for canning, we can extend the shelf life of our homegrown or homemade foods, preserving their freshness and flavor for longer periods.
It’s a convenient and efficient way to stock up on homemade goodies.
What Makes These Kitchen Gadgets Essential for Home Chefs?
Every home chef knows the value of having the right tools in the kitchen. These smart kitchen gadgets for home chefs are essential for making cooking more efficient and enjoyable. From digital food scales to precision cookers, these gadgets help home cooks achieve professional results in their own kitchens.
Conclusion
In conclusion, these 10 smart kitchen gadgets are essential for every home chef.
With a smart refrigerator, voice-controlled oven, and Wi-Fi enabled coffee maker, cooking has never been easier.
The integration of recipe apps with a smart food scale and precision cooker ensures accurate and delicious results.
Additionally, programmable settings in the air fryer and blender, multiple cooking modes in the pressure cooker, and app-controlled features in the slow cooker take convenience to the next level.
Upgrade your kitchen with these smart devices and elevate your culinary experience.
- About the Author
- Latest Posts
Introducing Charles, the Editor in Chief at ByRetreat, whose passion for interior design and editorial excellence elevates every remote workspace to new heights. With his keen eye for detail, impeccable taste, and expertise in design, Charles brings a wealth of knowledge and creativity to the ByRetreat team.
As the Editor in Chief of a renowned lifestyle blog, Charles has honed his skills in curating captivating content and staying up-to-date with the latest trends in interior design. His deep understanding of aesthetics and the power of storytelling through design enables him to create remote workspaces that are not only visually stunning but also rich in personality and meaning.
Garage Door Opener
What Makes Torsion Bar Garage Door Openers Unique?
Heralded as the pinnacle of garage door opener technology, torsion bar systems offer unparalleled efficiency and innovation – discover what sets them apart.

When it comes to garage door openers, torsion bar systems shine like a smoothly running gear in a machine. Their intricate design and functionality provide insight into a realm of efficiency and creativity.
But what truly sets torsion bar garage door openers apart from the rest? Let's explore the mechanisms that make them a preferred choice for many homeowners and professionals alike.
Key Takeaways
- Space-saving design with wall-mounting and torsion bar operation
- Quieter and smoother operation with minimized vibrations
- Innovative torsion spring technology enhances efficiency and safety
- Enhanced durability and strength for reliable performance
Space-Saving Design and Mechanism
The space-saving design and mechanism of torsion bar garage door openers offer a practical solution for limited garage space. By being wall-mounted beside the door, these openers utilize a torsion bar for smooth and quiet operation, eliminating the need for overhead tracks. This setup not only saves valuable ceiling space but also contributes to a sleek and modern garage aesthetic.
The torsion bar, a key component of these openers, ensures a reliable and durable operation, making them suitable for both residential and commercial settings. The mechanism behind torsion bar openers allows for a quiet and efficient performance, providing users with a peaceful garage environment. The durability and reliability of these openers make them a popular choice for those seeking a long-lasting and low-maintenance solution for their garage door needs.
With their space-saving design and smooth operation, torsion bar garage door openers offer a liberating experience for users looking to optimize their garage space effectively.
Quieter and Smoother Operation

How do torsion bar garage door openers achieve a quieter and smoother operation compared to other types? Torsion bar openers excel in providing a superior user experience with their innovative design and functionality. Here are the key factors contributing to their quiet and smooth operation:
- Torsion Bar Design: The torsion bar system minimizes vibrations and noise, resulting in a quieter operation that enhances overall comfort.
- Even Weight Distribution: By distributing the weight of the door evenly, torsion bar openers ensure smooth and balanced movement without jerking or jolting.
- Durability and Long-Lasting Performance: These openers are built to last, offering reliable performance over an extended period while maintaining their efficiency.
- Minimized Friction: The torsion bar design reduces friction during operation, leading to a smoother movement that's both efficient and quiet.
Innovative Torsion Spring Technology
Pivoting from the discussion on quieter and smoother operation, torsion bar garage door openers incorporate innovative torsion spring technology to enhance efficiency and performance. Torsion springs are at the core of this technology, storing mechanical energy to aid in lifting and closing the garage door. This design not only ensures smoother operation but also makes the installation space efficient. Torsion bar openers stand out for their safety and reliability, attributes that are reinforced by the robust torsion spring system they utilize.
| Torsion Springs | Garage Door Installation | Safety and Reliability |
|---|---|---|
| Efficient operation | Space-saving | Enhanced safety |
| Mechanical energy | Compact design | Reliable performance |
| Long lifespan | Easy setup | Peace of mind |
| Durability |
With torsion spring technology, these door openers provide a balance of power and finesse, ensuring a secure and efficient garage door operation.
Enhanced Durability and Strength

Enhanced in durability and strength, torsion bar garage door openers outperform other types with their superior construction and longevity. Torsion bar systems are engineered to withstand heavy loads and frequent use, making them a reliable choice for long-term garage door operation.
Here are four key reasons why torsion bar garage door openers are renowned for their durability and strength:
- Robust Torsion Springs: Torsion bar openers utilize high-quality torsion springs that provide smoother door operation and increased strength compared to traditional extension springs.
- Longevity and Reliability: The torsion bar design enhances the overall lifespan of the garage door opener, ensuring it can endure years of continuous use without compromising performance.
- Reduced Wear and Tear: The unique construction of torsion bar systems minimizes wear on components, leading to decreased maintenance needs and prolonged durability.
- Handling Heavy Loads: Torsion bar openers are specifically built to handle heavy garage doors with ease, showcasing their strength and resilience in demanding operating conditions.
Customizable Options for Different Needs
With a focus on meeting diverse needs, torsion bar garage door openers offer a range of customizable options tailored to various garage door sizes and weights. When selecting a torsion bar opener, it's crucial to consider the specific requirements of your garage door to ensure optimal performance. The table below outlines some of the customizable options available for torsion bar garage door openers:
| Customizable Option | Description | Benefits |
|---|---|---|
| Torsion Spring Size | Different sizes available based on the weight and height of the garage door. | Ensures proper balance and operation. |
| Material Selection | Various materials like steel or aluminum can be chosen based on durability and budget considerations. | Offers flexibility and customization. |
| Tension Settings | Precise and adjustable tension settings allow for fine-tuning according to the door's requirements. | Enhances performance and reliability. |
Frequently Asked Questions
What Does Torsion Bar Do in Garage Door?
The torsion bar in a garage door system plays a critical role in balancing the door's operation. It connects to tension springs, ensuring smooth and controlled movement during opening and closing.
Which Is Better Torsion or Extension Springs?
Torsion springs are superior to extension springs due to their durability and longer lifespan. Positioned above the door, torsion springs operate by turning to open, making them space-efficient. They're safer and less prone to sudden snapping.
In contrast, extension springs are more susceptible to wear and tear, requiring more maintenance. For a reliable garage door system, we recommend torsion springs over extension springs.
What Are the Disadvantages of a Jackshaft Garage Door Opener?
Disadvantages of a jackshaft garage door opener include:
- Potential complexity in installation
- Requiring more clearance space
- Being pricier
- Limited availability compared to trolley openers
- Not universally suitable based on garage configurations
These factors can impact ease of use, cost, and compatibility. It's essential to consider these drawbacks before selecting a jackshaft opener for your garage.
What Are the Advantages of Screw Drive Garage Door Openers?
Screw drive garage door openers offer simplicity with fewer moving parts, utilizing a threaded steel rod for efficient door operation.
These durable openers require minimal maintenance, making them a preferred choice for heavy garage doors due to their smooth and quiet performance.
Cost-effective and reliable, screw drive openers are popular among homeowners for their effectiveness and longevity.
Conclusion
In conclusion, torsion bar garage door openers stand out in the realm of garage door technology due to their space-saving design, innovative torsion spring technology, and enhanced durability.
Like a well-oiled machine, these openers operate quietly and smoothly, providing a reliable and secure way to open and close your garage door.
With customizable options to suit different needs, torsion bar openers truly elevate the safety and efficiency of your garage door system.
- About the Author
- Latest Posts
Introducing Ron, the home decor aficionado at ByRetreat, whose passion for creating beautiful and inviting spaces is at the heart of his work. With his deep knowledge of home decor and his innate sense of style, Ron brings a wealth of expertise and a keen eye for detail to the ByRetreat team.
Ron’s love for home decor goes beyond aesthetics; he understands that our surroundings play a significant role in our overall well-being and productivity. With this in mind, Ron is dedicated to transforming remote workspaces into havens of comfort, functionality, and beauty.
-

 Vetted2 weeks ago
15 Best Drip Irrigation Systems to Keep Your Garden Thriving
-

 Vetted1 day ago
15 Best Foot Massagers for Neuropathy to Soothe Your Feet and Relieve Discomfort
-

 Vetted1 week ago
15 Best Sports Laundry Detergents for Keeping Your Activewear Fresh and Clean
-

 Vetted1 week ago
15 Best Tall Toilets for Seniors That Combine Comfort and Safety
-

 Vetted2 weeks ago
15 Best Dish Scrubbers to Keep Your Kitchen Sparkling Clean
-

 Beginners Guides4 weeks ago
Designing Your Retreat Center – Essential Tips
-

 Vetted4 weeks ago
15 Best Tile Adhesives for Outdoor Use – Top Picks for Durable and Weather-Resistant Installations
-

 Beginners Guides4 weeks ago
Are Retreats Profitable


