Beginners Guides
Mug Painting Inspo
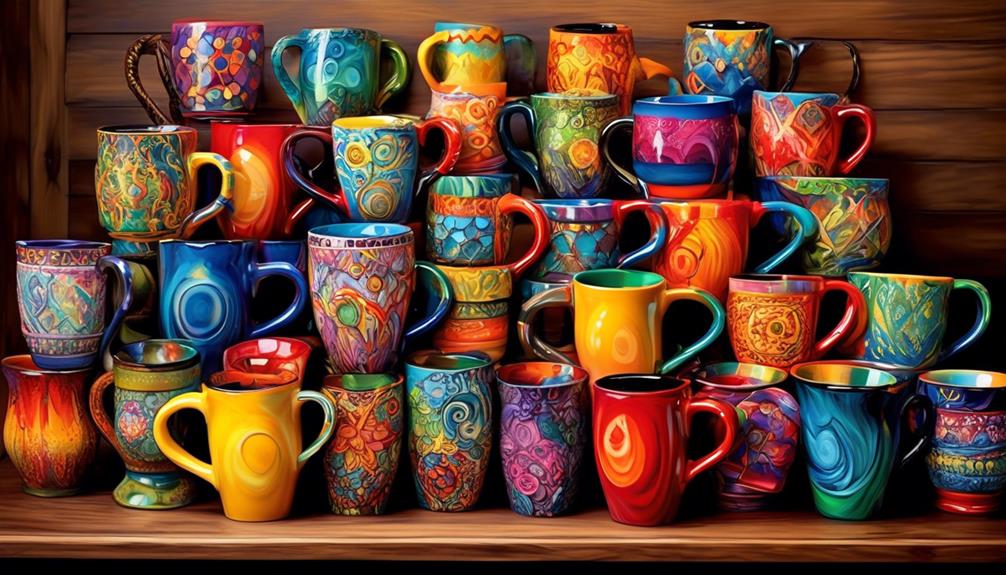
We have all felt the delight of drinking a warm drink from a beautifully hand-painted mug that enhances the entire experience.
But have you ever wondered how those stunning designs come to life? There's a world of endless inspiration waiting to be explored, from vibrant floral patterns to whimsical animal characters and intricate geometric shapes.
Whether you're a seasoned artist or just dipping your brush into the world of mug painting, there's something for everyone.
So, grab your favorite mug and let's uncover the endless possibilities of mug painting inspiration.
Key Takeaways
- Mastering brush strokes and understanding pressure and style are essential for creating different textures and effects in mug painting.
- Color blending techniques, including mixing and layering different hues, can help achieve seamless transitions and captivating gradients in mug designs.
- Using bright watercolors and paying attention to intricate details can create colorful floral designs on mugs, incorporating delicate veins and varied textures on petals and leaves.
- Whimsical animal characters can be created with vibrant colors, playful patterns, and imaginative features like expressive eyes and wide grins, infusing personality and charm into mug designs.
Mug Painting Techniques
When painting a mug, it's essential to understand the various techniques that can bring your design to life with vibrant colors and lasting durability. One of the fundamental aspects of mug painting is mastering brush strokes. The direction, pressure, and style of your brush strokes can greatly influence the final look of your design. The way the bristles glide or dab against the surface can create different textures and effects, adding depth and character to your artwork. Experimenting with various brush stroke techniques can help you achieve the precise look you desire, whether it's bold and expressive or delicate and intricate.
Color blending is another crucial technique in mug painting. It involves mixing and layering different hues to achieve seamless transitions and captivating gradients. Understanding color theory and the properties of different paint mediums is essential for successful blending. Whether you prefer a smooth ombre effect or a striking contrast between colors, mastering the art of color blending can elevate your mug painting to a professional level. By skillfully blending colors, you can create captivating designs that are visually stunning and unique.
Colorful Floral Designs
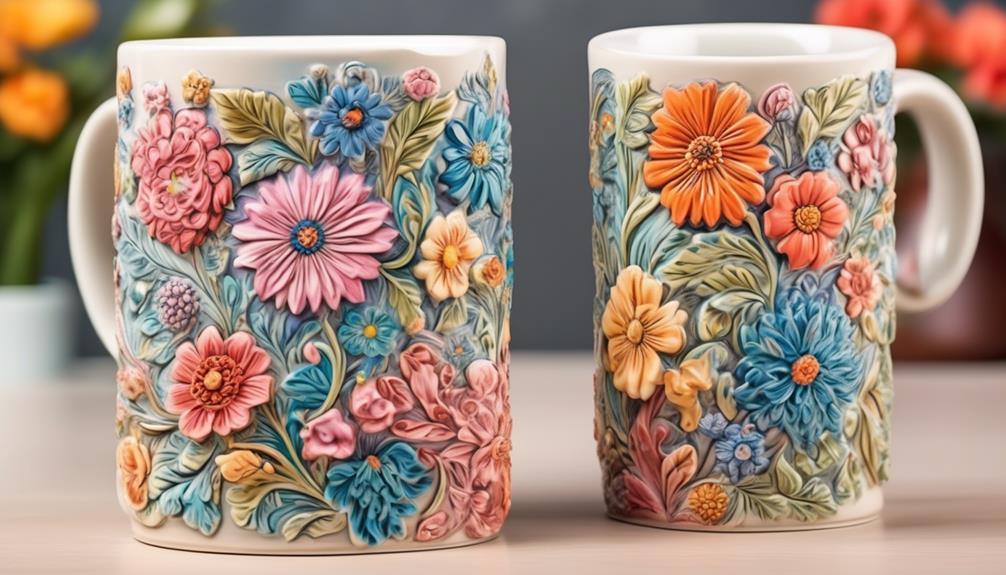
Mastering brush strokes and color blending in mug painting sets the foundation for creating vibrant and enduring colorful floral designs on your mugs. When painting colorful floral designs, it's essential to use bright watercolors to achieve the lively and captivating look. Adding intricate details to the petals and leaves will elevate the overall visual appeal of your mug.
| Petals | Leaves | Background |
|---|---|---|
| Delicate and vibrant | Varied shades of green | Soft pastel hues |
| Layered with highlights | Veins and textures | Subtle washes of color |
| Intricate patterns | Diverse shapes | Blended gradients |
Using bright watercolors to paint the petals will make them appear lively and eye-catching. Incorporating intricate details, such as delicate veins and varied textures on the leaves, adds depth and visual interest to the design. Additionally, paying attention to the background by using soft pastel hues and subtle washes of color will ensure that the floral elements stand out beautifully. These elements combined will result in a mug that exudes charm and elegance, making it a delightful addition to your collection.
Whimsical Animal Characters
To create whimsical animal characters on your mugs, begin by selecting vibrant colors and playful patterns to infuse personality and charm into your designs. When envisioning whimsical animal characters on your mug, think about using lively hues such as bright yellows, ocean blues, and grassy greens to bring a sense of joy and liveliness to your creation.
Additionally, consider incorporating playful patterns like polka dots, stripes, or even tiny paw prints to add a touch of whimsy and fun to your design. Here's a visual guide to help you bring these ideas to life:
- Imagine a cheerful yellow giraffe with a long neck and playful spots cavorting across the mug's surface. Its long eyelashes and friendly smile add a delightful touch to the design.
- Picture a mischievous monkey swinging from a branch, surrounded by vibrant green leaves and playful bananas. The monkey's expressive eyes and wide grin capture the essence of playful curiosity.
These colorful and imaginative ideas will surely bring a smile to your face every time you reach for your whimsical animal character mug.
Geometric Patterns and Shapes
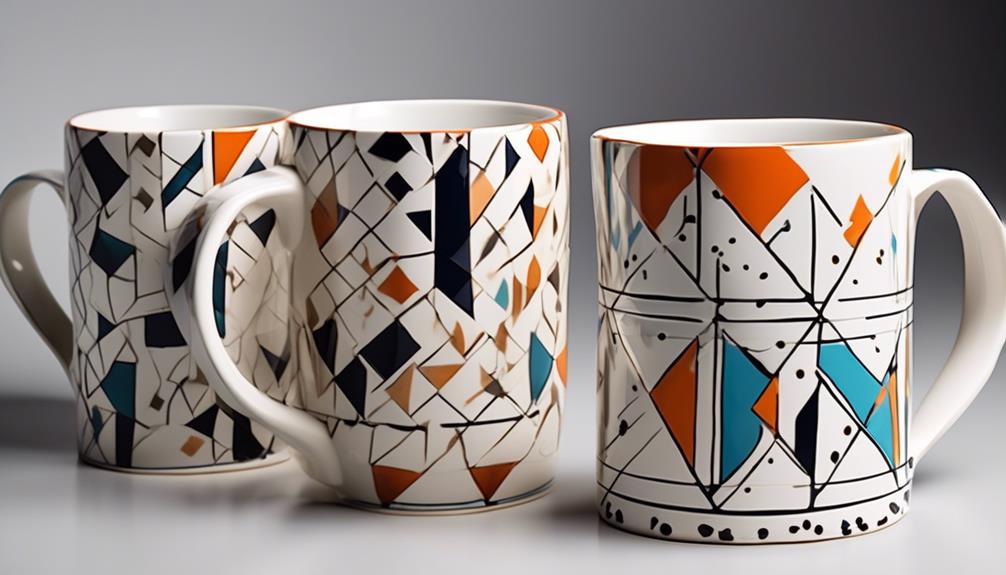
Exploring the world of geometric patterns and shapes brings an exciting dimension to mug painting, allowing for the creation of captivating designs that play with symmetry and precision. Geometric art provides an endless array of possibilities, from simple lines and circles to intricate abstract shapes. When incorporating geometric patterns into mug painting, one can experiment with various arrangements of squares, triangles, hexagons, and other shapes to create visually striking designs. The precise nature of geometric patterns allows for meticulous detailing and clean, sharp lines, resulting in a modern and sophisticated aesthetic.
Abstract shapes, such as spirals, chevrons, and tessellations, offer an opportunity to add depth and complexity to mug designs. These shapes can be repeated to form intricate patterns, or used individually to create a focal point on the mug's surface. By playing with the scale and arrangement of these shapes, one can achieve a sense of movement and rhythm within the design, adding visual interest and dynamic energy to the finished piece.
Whether opting for a minimalist approach or a bold, graphic style, geometric patterns and shapes open up a world of creative possibilities for elevating mug painting to a whole new level of artistry.
Inspirational Quotes and Phrases
Adorning mugs with inspirational quotes and phrases infuses them with meaningful and uplifting messages, adding a personal touch to each sip. It's like wrapping your hands around a warm cup of motivation. When you reach for your mug, you might find yourself inspired by words that resonate deep within your soul, fueling your day with positivity and purpose.
Imagine sipping from a mug adorned with motivational mantras, such as 'Embrace the journey' or 'You are capable of amazing things.' These uplifting messages serve as gentle reminders to stay focused on our goals and to approach each day with optimism. Each sip becomes a moment of reflection, as the words on the mug offer encouragement and strength.
- Motivational Mantras
- 'Believe in yourself'
- 'You are enough'
- Uplifting Messages
- 'Choose joy'
- 'Dream big'
These phrases, carefully painted on a mug, hold the power to uplift the spirit and set a positive tone for the day.
Frequently Asked Questions
Can I Use Regular Acrylic Paint for Mug Painting?
Yes, regular acrylic paint can be used for mug painting. However, there are also specialized acrylic paint alternatives designed specifically for use on ceramics. These alternatives offer better durability and adherence to the mug surface.
To achieve the best results, it's important to properly prepare the mug surface. This involves cleaning it thoroughly and, if necessary, using a primer specifically designed for ceramics. By doing this, you can ensure that the paint will adhere well to the mug surface and create a long-lasting design.
What Type of Brush Should I Use for Painting Details on Mugs?
When painting details on mugs, it's crucial to use fine-tipped brushes, such as liner or round brushes, to achieve precision. These brushes allow for intricate designs on the curved mug surface.
When painting, it's essential to use controlled brushstrokes and a steady hand to create clean and crisp details.
Experiment with different painting techniques, like stippling or dry brushing, to achieve varying textures and effects on the mug.
How Can I Make My Mug Designs Dishwasher Safe?
To make mug designs dishwasher safe, we ensure temperature resistance and design durability. Apply a sealant that can withstand heat and won't compromise the color longevity. This helps to protect the design and maintain its quality even after multiple washes.
It's essential to use a sealant specifically formulated for ceramics to ensure the best results. With proper sealant application, your mug designs will stay vibrant and dishwasher safe.
Are There Any Special Techniques for Painting on Ceramic Mugs?
When painting on ceramic mugs, it's crucial to start with proper preparation of the mug surface to ensure the paint adheres well. The temperature at which the painting is done also impacts the final result.
As for design trends, custom mug ideas are all the rage. Incorporating personalized elements and unique patterns can make your mug stand out. These techniques help create stunning and durable designs that can withstand regular use and washing.
Where Can I Find Inspiration for Creating My Own Unique Mug Designs?
When seeking inspiration for creating our own unique mug designs, we often explore various sources to develop our color palette and design themes. Inspirational sources like nature, art, and cultural motifs can influence our mug painting styles.
We look into different painting techniques, such as watercolor effects or intricate patterns, to spark our creativity. By immersing ourselves in diverse artistic expressions, we find the inspiration to craft one-of-a-kind mug designs.
What Are Some Inspiring Designs for Painting a Coffee Mug?
Looking for inspiration for your next painting a coffee mug tutorial? Consider vibrant floral patterns, geometric shapes, or abstract watercolor designs. Add a personal touch with monograms, animals, or uplifting quotes. Use colorful ceramic paint for durability and finish with a food-safe sealant for long-lasting beauty.
Conclusion
After exploring various mug painting techniques, from colorful floral designs to whimsical animal characters and geometric patterns, we're inspired to bring our own unique touch to our mugs.
The possibilities are endless, and we can't wait to unleash our creativity and personalize our morning coffee routine.
Stay tuned for our next mug painting project as we dive into the world of inspirational quotes and phrases, adding a touch of motivation to our daily cup of joe.
- About the Author
- Latest Posts
Introducing Ron, the home decor aficionado at ByRetreat, whose passion for creating beautiful and inviting spaces is at the heart of his work. With his deep knowledge of home decor and his innate sense of style, Ron brings a wealth of expertise and a keen eye for detail to the ByRetreat team.
Ron’s love for home decor goes beyond aesthetics; he understands that our surroundings play a significant role in our overall well-being and productivity. With this in mind, Ron is dedicated to transforming remote workspaces into havens of comfort, functionality, and beauty.
Beginners Guides
Electric Griddle Temperature for Pancakes
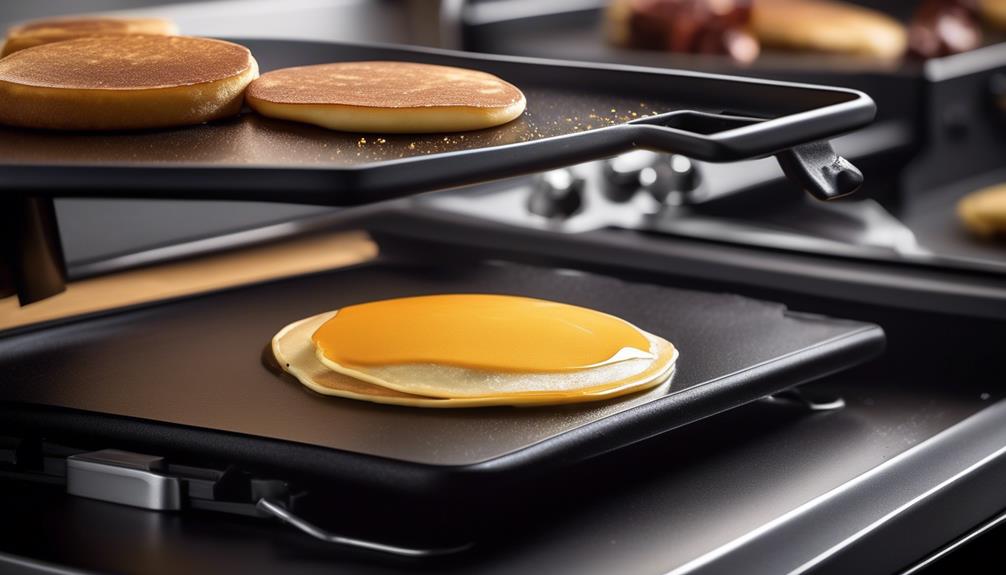
When cooking pancakes on an electric griddle, getting the temperature just right is crucial. If it’s too high, you run the risk of burning the outside and leaving the inside uncooked. If it’s too low, you’ll end up with pale, rubbery pancakes.
Temperature control is crucial for achieving the perfect pancake texture and flavor. As a professional chef, we've spent countless hours experimenting with different temperatures to perfect the art of pancake-making on an electric griddle.
But before we reveal the optimal temperature range, let's discuss why temperature control is crucial for achieving the perfect pancake texture and flavor.
Key Takeaways
- Maintaining correct temperature on electric griddle is crucial for fluffy, evenly cooked pancakes
- Achieving optimal temperature range is essential for perfect pancakes of different types
- Incorrect temperatures result in undercooked or overcooked pancakes, with burnt or rubbery texture
- Testing griddle temperature by sprinkling water and adjusting temperature accordingly ensures perfect results for each pancake
Importance of Temperature Control
Maintaining the correct temperature on an electric griddle is crucial for achieving perfectly fluffy and evenly cooked pancakes. Temperature consistency is key to ensuring that the pancakes cook evenly and don't end up burnt or undercooked. To achieve this, it's essential to preheat the electric griddle to the correct temperature and maintain it throughout the cooking process.
The ideal temperature for cooking pancakes on an electric griddle is around 375°F. This temperature allows the pancakes to cook through without burning on the outside.
When it comes to cooking techniques, using a consistent temperature enables us to employ various cooking methods to achieve different textures and flavors. For example, cooking pancakes at a slightly lower temperature results in a more even, golden-brown color, while a slightly higher temperature can create a slightly crispier exterior. Additionally, maintaining a consistent temperature allows for better control over the cooking process, ensuring that the pancakes are cooked to perfection each time.
Mastering the art of temperature control and cooking techniques on an electric griddle is essential for achieving the perfect pancakes.
Optimal Temperature Range
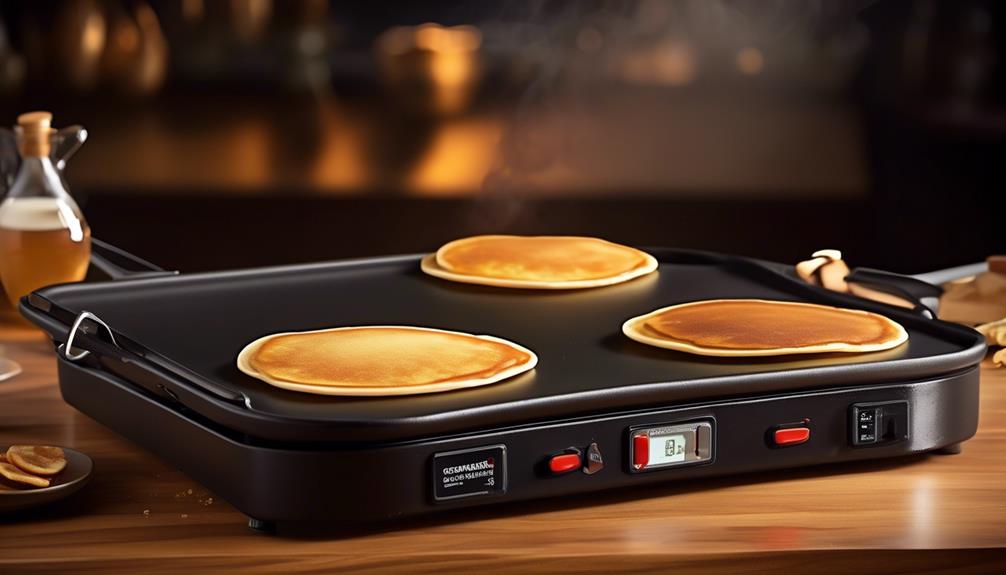
We find that achieving the optimal temperature range on the electric griddle is essential for consistently perfect pancakes. Cooking techniques and recipe variations can significantly impact the ideal temperature for pancake preparation. The table below outlines the optimal temperature range for cooking pancakes on an electric griddle, as well as some variations to consider for different pancake types.
| Pancake Type | Ideal Temperature Range | Cooking Techniques |
|---|---|---|
| Buttermilk | 375°F – 385°F | Pour batter in small circles and wait for bubbles to form before flipping. |
| Blueberry | 365°F – 375°F | Use lower heat to prevent berries from burning, flip when the edges look set. |
| Chocolate Chip | 355°F – 365°F | Cook at a slightly lower temperature to avoid scorching the chocolate chips. |
| Whole Wheat | 375°F – 385°F | Cook at a slightly higher heat to ensure thorough cooking of denser batter. |
| Vegan | 355°F – 365°F | Use a lower temperature to allow the batter to cook through without burning. |
Experimenting with different temperature ranges and cooking techniques based on the pancake type can help achieve the perfect texture and flavor for each recipe variation.
Effects of Incorrect Temperatures
When the temperature is incorrect, pancakes can either turn out undercooked in the center or overcooked and dry around the edges. Overheating the griddle can lead to pancakes cooking too quickly on the outside while the inside remains raw. This results in a gooey, unappetizing texture and an unevenly cooked pancake.
On the other hand, underheating the griddle can cause the batter to spread too much before setting, resulting in thin, rubbery pancakes. The impact of underheating is also evident in the prolonged cooking time, leading to dry and tough pancakes due to excessive evaporation of moisture. Additionally, pancakes cooked at a lower temperature may absorb more grease or oil, making them excessively oily and less appetizing.
It's crucial to maintain the correct temperature to achieve that perfect golden-brown color and a light, fluffy texture throughout the pancake. Finding the optimal temperature for your electric griddle is essential to ensure that the pancakes are cooked evenly, with a delicate balance of moistness and fluffiness.
Tips for Testing Griddle Temperature
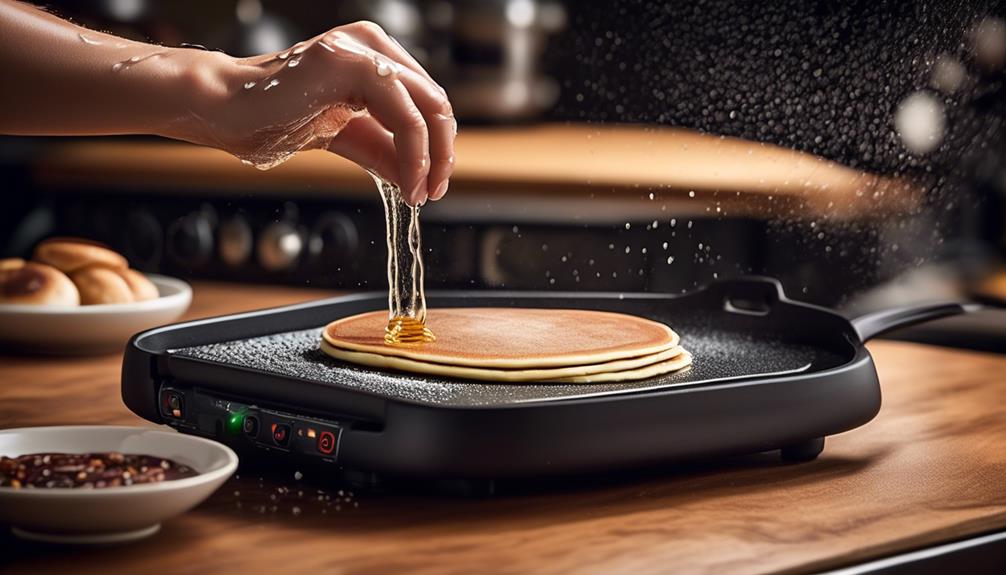
To ensure the griddle is at the right temperature, a simple test is to sprinkle a few drops of water onto the cooking surface and observe how they react. Here are some tips for testing griddle temperature:
- Even Heat Distribution: After preheating the griddle, sprinkle a few drops of water across the cooking surface. If the water droplets sizzle and evaporate evenly across the griddle, it indicates that the heat is evenly distributed, and the griddle is ready for cooking.
- Quick Reaction: The water droplets should sizzle upon contact and evaporate within a few seconds. This quick reaction indicates that the griddle is hot enough to cook pancakes evenly without burning them.
- Levelling the Surface: Before testing the temperature, ensure that the griddle is placed on a level surface to allow for even heat distribution and accurate testing.
- Consistency: Repeat the water droplet test in different areas of the griddle to ensure consistent heat distribution across the entire cooking surface.
Adjusting Temperature for Different Pancake Types
For optimal results when cooking various types of pancakes, adjusting the temperature of the electric griddle is essential. The texture and cooking time of pancakes vary depending on the type of batter and ingredients used.
When making fluffy buttermilk pancakes, set the griddle to a medium heat, around 350°F (175°C). This allows the pancakes to cook through evenly without burning while achieving a light and airy texture.
Thicker batters, such as those used for blueberry or chocolate chip pancakes, require a slightly lower temperature to ensure that the inside cooks fully without the outside becoming too dark. Adjust the griddle to a medium-low heat, approximately 325°F (163°C), to achieve the perfect balance.
For thinner and delicate pancakes like crepes, a low heat setting, around 275°F (135°C), is ideal. This lower temperature prevents overcooking and helps maintain a tender texture.
Additionally, adjusting the temperature based on the type of pancake batter used can affect the cooking time, ensuring that each pancake is perfectly cooked and delightful to eat.
Frequently Asked Questions
Can I Use an Electric Griddle for Pancakes if It Doesn't Have Temperature Control?
Yes, you can use an electric griddle for pancakes even if it doesn't have temperature control.
When it comes to griddle alternatives, a non-adjustable electric griddle can still produce delicious pancakes.
To ensure even cooking, preheat the griddle and test the temperature by sprinkling a few droplets of water.
As for pancake flipping techniques, use a spatula and wait for bubbles to form on the surface before flipping.
Are There Any Safety Concerns Related to Electric Griddle Temperatures for Making Pancakes?
When it comes to electric griddle safety, it's essential to understand the potential risks associated with improper temperature settings.
In pancake cooking, maintaining the right temperature is crucial to ensure they cook evenly and avoid burning.
It's important to be mindful of overheating the griddle, which can pose safety concerns.
Can I Use a Specific Type of Oil or Butter to Help Regulate the Griddle Temperature for Pancakes?
We can use a butter alternative to help regulate the griddle temperature for pancakes.
Additionally, the choice of oil can affect heat distribution on the griddle. It's important to select an oil with a high smoking point, like vegetable or canola oil, to maintain the desired cooking temperature.
This will help ensure even cooking and prevent the pancakes from burning.
How Do Different Altitudes Affect the Optimal Temperature for Cooking Pancakes on an Electric Griddle?
At high altitudes, the lower air pressure affects the optimal cooking temperature for pancakes on an electric griddle. The batter may need adjustments to maintain the desired pancake consistency.
Additionally, the cooking time could be slightly longer due to the altitude effects on heat transfer. It's essential to experiment and make slight modifications to the griddle temperature and cooking time to achieve perfect pancakes at different altitudes.
Are There Any Specific Temperature Adjustments Needed for Gluten-Free or Vegan Pancake Batter on an Electric Griddle?
We've found that specific temperature adjustments can be necessary for gluten-free or vegan pancake batter on an electric griddle. When dealing with altitude effects, temperature control becomes crucial to achieve the desired texture and flavor.
It's important to note that safety concerns should also be considered when making these adjustments. We've learned that fine-tuning the temperature settings for gluten-free or vegan pancake batter can lead to outstanding results.
What is the Ideal Temperature for Cooking Pancakes on an Electric Griddle?
The ideal pancake griddle temperature is around 375°F to 400°F. This allows the pancakes to cook evenly and develop a golden-brown color. A hotter griddle can result in uneven cooking and burnt pancakes, while a lower temperature can make them pale and doughy.
Conclusion
So, next time you're making pancakes on the electric griddle, remember that getting the temperature right is crucial for perfect pancakes.
It's no coincidence that the optimal temperature range ensures fluffy, golden-brown pancakes every time.
Keep an eye on the temperature and make any necessary adjustments to achieve the best results.
Happy flipping!
- About the Author
- Latest Posts
Introducing Ron, the home decor aficionado at ByRetreat, whose passion for creating beautiful and inviting spaces is at the heart of his work. With his deep knowledge of home decor and his innate sense of style, Ron brings a wealth of expertise and a keen eye for detail to the ByRetreat team.
Ron’s love for home decor goes beyond aesthetics; he understands that our surroundings play a significant role in our overall well-being and productivity. With this in mind, Ron is dedicated to transforming remote workspaces into havens of comfort, functionality, and beauty.
Beginners Guides
Top of Curtain Light Blocker

When it comes to achieving a peaceful and cozy vibe in our homes, we frequently face the difficulty of controlling natural light.
We've all experienced the frustration of too much sunlight streaming into a room, disrupting our relaxation or work environment.
This is where the top of curtain light blocker comes into play. It offers a subtle yet effective solution to control the amount of light entering a space.
But how do these light blockers work, and what should we consider when choosing one?
Stick around to find out how these simple yet ingenious devices can make a significant difference in our daily lives.
Key Takeaways
- Blocking out light creates a peaceful and relaxing environment
- Light blockers support optimal sleep quality by managing exposure to light
- Incorporating light blockers enhances the overall ambiance of living spaces
- Light-blocking curtains can be stylish and elegant, adding sophistication to a room
Importance of Light Blockers
Blocking out light is crucial for creating a peaceful and relaxing environment, allowing us to unwind and recharge without interruption. When it comes to ensuring optimal sleep quality, light blockers play a pivotal role.
Our bodies are naturally attuned to the cycle of light and dark, known as the circadian rhythm. By incorporating light-blocking curtains into our home decor, we can effectively manage our exposure to light, especially during the evening and early morning hours. This, in turn, promotes better sleep quality by signaling to our bodies that it's time to wind down and prepare for rest.
Incorporating light blockers into our home decor not only supports our sleep quality but also enhances the overall ambiance of our living spaces. The use of stylish and elegant light-blocking curtains not only serves a functional purpose but also adds a touch of sophistication to the room. By carefully selecting the right fabric, color, and design, we can seamlessly integrate these light blockers into our decor, elevating the aesthetic appeal of our homes while prioritizing our sleep health.
Types of Top of Curtain Light Blockers
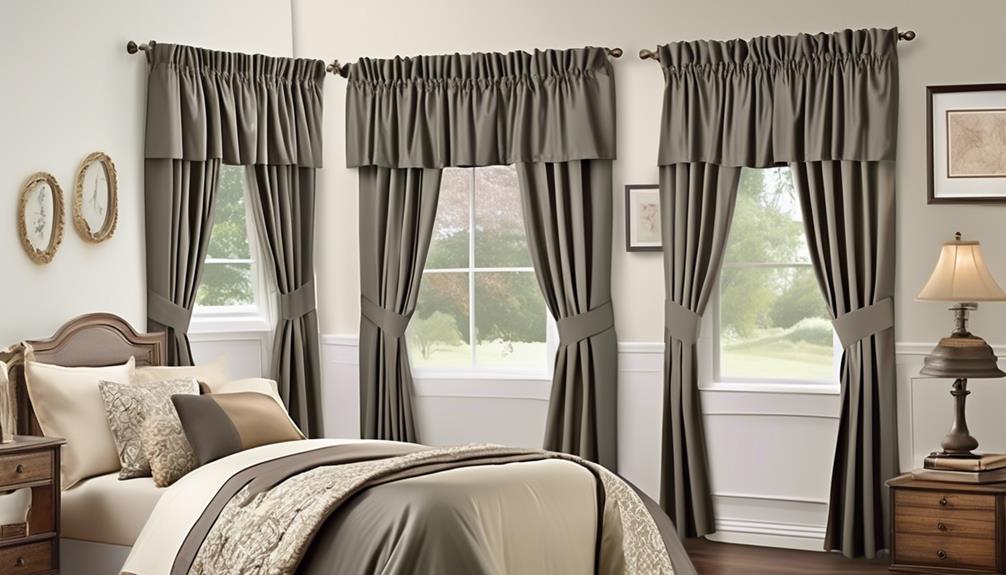
Now, let's explore the diverse range of top of curtain light blockers that seamlessly combine functionality with sophisticated design, enhancing both our sleep environment and the aesthetic appeal of our living spaces.
- Blackout Curtain Liners: These are curtain accessories specifically designed to block light from entering through the top of the curtain. They're typically made of thick, opaque fabric and can be easily attached to the back of existing curtains, providing an effective solution for those seeking to create a completely dark sleeping environment.
- Valances with Light Blocking Lining: Valances not only add a decorative touch to window treatments but can also be equipped with light-blocking lining. This combination of style and functionality allows for the control of light entering through the top of the window while adding an elegant finish to the overall look of the window treatment.
- Top-Down Bottom-Up Shades: These innovative window treatments offer the flexibility to control light from both the top and bottom of the window. By lowering the top of the shade, natural light can be maximized while still maintaining privacy and light control at the top of the window.
These types of top of curtain light blockers not only enhance the functionality of window treatments but also contribute to creating a peaceful and stylish living space.
Factors to Consider When Choosing
When selecting a curtain light blocker, it's essential to consider factors such as the level of light control needed, the aesthetic impact on the room, and the compatibility with existing window treatments.
Material options play a crucial role in the effectiveness of the light blocker. Thicker, heavier materials like velvet or suede offer superior light-blocking capabilities, making them ideal for bedrooms or home theaters where complete darkness is desired. On the other hand, lighter materials such as linen or sheer fabrics provide a gentle filtering effect, allowing some natural light to illuminate the room while still offering privacy.
Color choices also contribute significantly to the overall impact of the curtain light blocker. Darker colors like navy, charcoal, or chocolate brown are popular choices for light blockers as they absorb more light, preventing it from filtering through. However, for spaces where a lighter, airy ambiance is preferred, lighter hues like ivory, soft grey, or pastel tones can complement the room's decor while still providing some level of light control.
It's important to consider the existing color scheme and ambiance of the room when choosing the color of the light blocker to ensure a harmonious overall aesthetic.
Installation Tips for Maximum Effectiveness

For optimal light-blocking effectiveness, we recommend starting the installation process by carefully measuring the dimensions of your window or doorway. This step is crucial in ensuring that the light blocking materials fit snugly and cover the entire opening, preventing any light leakage.
After obtaining accurate measurements, the following installation techniques will help maximize the effectiveness of your light-blocking solution:
- Proper Mounting: Ensure that the light-blocking materials are securely mounted above the window or doorway to prevent gaps where light could enter. This may involve using sturdy curtain rods, installing tension rods, or securely attaching the light-blocking material to the window frame.
- Overlap and Seams: When using multiple panels or pieces of light-blocking material, pay attention to how they overlap and any seams that may be present. Properly aligning and securing these areas will minimize the potential for light to filter through.
- Sealant and Weather Stripping: In addition to the light-blocking materials, consider using sealant or weather-stripping around the edges of the window or doorway to further block out light and ensure a tight seal.
Maintenance and Care Tips
Regularly inspecting and gently cleaning the light-blocking materials will help maintain their effectiveness over time. When it comes to cleaning tips, it's essential to follow the care instructions provided by the manufacturer. For most fabric curtain light blockers, regular vacuuming with a brush attachment can help remove dust and prevent it from settling into the fibers. For spot cleaning, use a mild detergent and water, but always test it on a small, inconspicuous area first to ensure it doesn't damage the fabric. When dealing with more stubborn stains, professional dry cleaning may be necessary to preserve the fabric's durability.
In addition to cleaning, proper maintenance also involves periodic checks for any signs of wear and tear. Look out for fraying edges, loose threads, or any discoloration that may indicate sun damage. Addressing these issues promptly can help prolong the lifespan of your light-blocking curtains.
Frequently Asked Questions
Are Top of Curtain Light Blockers Effective in Reducing Energy Costs?
Yes, top of curtain light blockers are effective in reducing energy costs.
During installation, we consider material choices and maintenance requirements for optimal energy savings. The installation process is straightforward, and the maintenance is minimal.
These blockers effectively reduce heat transfer and block sunlight, reducing the need for air conditioning and lowering energy costs.
Can Top of Curtain Light Blockers Be Used in Conjunction With Blackout Curtains?
Absolutely! When it comes to light blocker compatibility, you'll find that top of curtain light blockers work seamlessly with blackout curtains.
As for installation tips, make sure to place the light blocker right at the top of the curtain to effectively block out any unwanted light.
This will enhance the effectiveness of the blackout curtains and create a truly dark and peaceful environment.
Do Top of Curtain Light Blockers Help to Reduce Outside Noise?
Yes, top of curtain light blockers can help reduce outside noise. They provide an additional layer of sound insulation, enhancing the effectiveness of your window treatments in creating a peaceful indoor environment.
This privacy solution is a smart choice for interior design, seamlessly blending functionality and style. When seeking mastery in addressing outside noise, incorporating top of curtain light blockers into your space can significantly enhance the tranquility of your home.
Can Top of Curtain Light Blockers Be Customized to Fit Different Curtain Sizes?
Absolutely, top of curtain light blockers can be customized to fit different curtain sizes. We've found that having the ability to tailor the sizing to our specific needs has been incredibly helpful.
The installation options are quite versatile, allowing us to seamlessly integrate the blockers into our existing curtain setup.
This customization ensures a snug fit and maximum light-blocking efficiency, making it an essential addition to our home.
Are There Any Safety Concerns With Using Top of Curtain Light Blockers, Such as Fire Hazards?
Safety concerns regarding top of curtain light blockers primarily revolve around fire hazards. It's crucial to ensure that the materials used are fire-retardant and comply with safety standards. Additionally, proper installation and maintenance are essential to mitigate any potential risks.
Regularly inspecting the blockers and keeping them away from heat sources are key safety measures. Understanding and addressing these concerns will help ensure a safe and secure environment when using top of curtain light blockers.
How can I use a coffee mug to block out light at the top of my curtains?
One creative solution for blocking out light at the top of your curtains is crafting with coffee mugs. Simply attach the coffee mugs to the top of the curtains using hooks or clips. The solid structure of the mugs will effectively block out unwanted sunlight, while adding a unique and decorative touch to your space.
Conclusion
In conclusion, choosing the right top of curtain light blocker is like finding the perfect pair of sunglasses on a bright, sunny day. It's essential for creating a comfortable and relaxing atmosphere in your home.
By considering the types, factors, installation tips, and maintenance, you can ensure maximum effectiveness and long-lasting benefits.
So, let's block out that unwanted light and enjoy the cozy ambiance in our living spaces.
- About the Author
- Latest Posts
Introducing Ron, the home decor aficionado at ByRetreat, whose passion for creating beautiful and inviting spaces is at the heart of his work. With his deep knowledge of home decor and his innate sense of style, Ron brings a wealth of expertise and a keen eye for detail to the ByRetreat team.
Ron’s love for home decor goes beyond aesthetics; he understands that our surroundings play a significant role in our overall well-being and productivity. With this in mind, Ron is dedicated to transforming remote workspaces into havens of comfort, functionality, and beauty.
Beginners Guides
Can You Use Water Instead of Milk
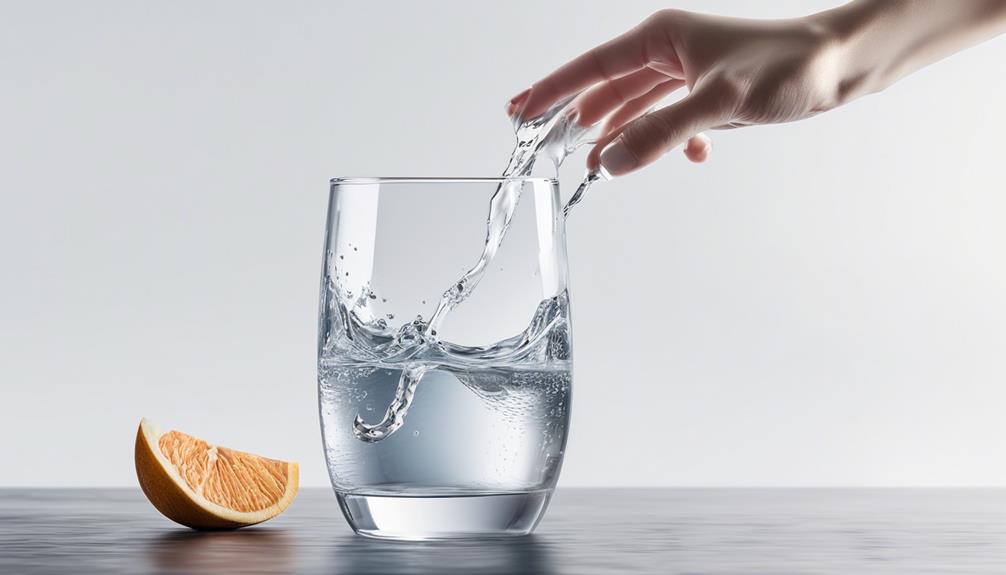
As food enthusiasts, we frequently consider the idea of replacing milk with water in different recipes. But is it a delicious experiment or a risky endeavor?
The decision to substitute water for milk in cooking and baking can be a topic of contention among chefs and home cooks alike. While some may shun the notion outright, others have found surprising success in their culinary creations.
But before we reveal the verdict, let's weigh the pros and cons of this substitution to uncover its impact on flavor, texture, and overall dish quality.
Key Takeaways
- Water is a suitable alternative for individuals with dietary restrictions or lactose intolerance.
- Using water instead of milk can help reduce calorie consumption and is favorable for those monitoring their sugar intake.
- Water can be fortified with essential nutrients, making it a viable option for a balanced diet.
- However, water lacks essential nutrients like calcium, vitamin D, and protein found in milk, which may impact bone health, muscle function, and overall well-being.
Benefits of Using Water Instead of Milk
Using water instead of milk can offer several health benefits, particularly for individuals with dietary restrictions or lactose intolerance. While milk provides essential nutrients such as calcium, vitamin D, and protein, water can be a suitable alternative in certain circumstances.
In terms of health benefits, water is naturally free from cholesterol and saturated fats, making it a heart-healthy choice. Additionally, for those managing their calorie intake, using water instead of milk can help reduce overall calorie consumption, potentially aiding in weight management.
In a nutritional comparison, water is calorie-free and doesn't contain sugar, making it a favorable option for those monitoring their sugar intake. While milk is a good source of calcium and protein, water can be fortified with calcium and other essential nutrients, making it a viable option for maintaining a balanced diet.
It's important to note that while water can offer health benefits, it's essential to obtain nutrients such as calcium and vitamin D from other sources if milk is being replaced. Consulting with a healthcare professional or registered dietitian can help individuals make informed decisions about incorporating water as an alternative to milk in their diet.
Drawbacks of Using Water Instead of Milk
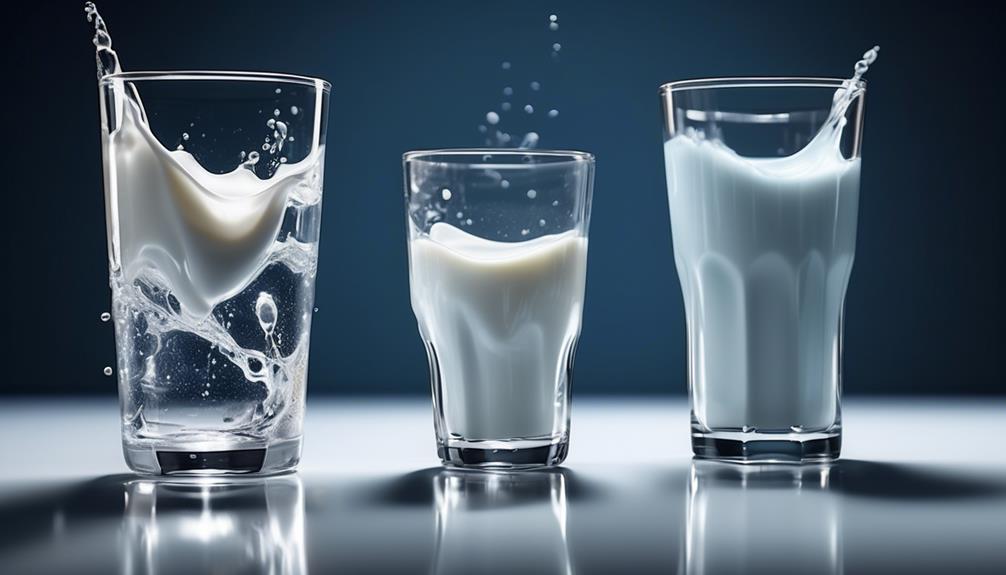
Although water can offer certain health benefits, there are potential drawbacks to using it instead of milk in one's diet. Nutritional impact is one of the primary concerns when considering replacing milk with water. Milk is a rich source of essential nutrients such as calcium, vitamin D, and protein, which are integral for bone health, muscle function, and overall well-being. Water, on the other hand, doesn't provide these essential nutrients, potentially leading to deficiencies if not compensated for in other areas of the diet.
Taste comparison is another significant drawback. Milk has a creamy and slightly sweet taste, which enhances the flavor of various dishes and beverages. When water is used instead of milk, the absence of the creamy texture and natural sweetness may lead to a less appealing taste in recipes such as smoothies, oatmeal, and baked goods.
Considering these drawbacks, it's essential to weigh the nutritional and taste implications before substituting water for milk in your diet. While water has its benefits, it's crucial to ensure that essential nutrients provided by milk are adequately replaced to maintain a balanced and wholesome diet.
Tips for Substituting Water for Milk in Recipes
In recipes, replacing milk with water can be achieved by adjusting the liquid component to maintain the desired consistency and texture. Here are some tips for substituting water for milk in recipes:
- Consider the Flavor Impact: When using water instead of milk, it's important to consider the impact on the overall flavor of the dish. Water may dilute the flavor compared to milk, so you might need to adjust other ingredients or add flavor enhancers to compensate.
- Adjust for Texture: Milk contributes to the richness and creaminess of many dishes. When substituting water, consider how this might affect the texture of the final product. You may need to make adjustments to maintain the desired texture.
- Be Mindful of Nutritional Differences: Milk provides important nutrients such as calcium and protein, which may be lacking when using water. Consider the nutritional impact of the substitution, especially if the dish is a significant part of your diet.
- Experiment and Adapt: Different recipes may react differently to the substitution of water for milk. It may require some experimentation and adaptation to achieve the desired results.
- Seek Alternative Substitutes: In some recipes, alternatives such as nut milk or soy milk may provide a more suitable substitution for milk, offering a closer flavor and nutritional profile.
When substituting water for milk, it's important to be mindful of the flavor impact, nutritional differences, and to make appropriate adjustments to achieve the desired texture and taste.
Culinary Applications for Using Water Instead of Milk
Considering the impact of substituting water for milk in recipes, culinary applications for this substitution can be explored to achieve a range of flavors and textures. When using water in baking, it's essential to consider alternative ingredients that can maintain moisture and richness. For instance, using vegetable oil, coconut milk, or yogurt in place of milk can help preserve the tenderness and flavor of baked goods. Additionally, incorporating flavorful ingredients such as vanilla extract, almond extract, or citrus zest can enhance the taste profile when using water instead of milk.
Flavor considerations are crucial when substituting water for milk in recipes. While water may not contribute the same creamy and rich flavor that milk does, it provides a neutral base that allows other ingredients to shine. When using water in savory dishes, incorporating herbs, spices, and aromatics can elevate the overall taste. In sweet recipes, utilizing high-quality ingredients such as cocoa powder, fruit purees, or nut butters can add depth and complexity to the flavors.
Exploring baking alternatives and carefully considering flavor profiles are essential when using water as a substitute for milk in culinary applications.
Best Practices for Using Water in Place of Milk
When substituting water for milk in recipes, it's important to consider best practices to ensure optimal results in terms of texture and flavor.
- Flavor Considerations: While water can dilute the flavor in some recipes, it can be offset by using high-quality ingredients and boosting flavors with additional spices or extracts.
- Nutritional Impact: Substituting water for milk can significantly reduce the calorie and fat content of the dish, making it a healthier option for individuals with dietary restrictions or preferences.
- Texture Differences: Water lacks the richness and creaminess of milk, so it's important to adjust other ingredients or cooking methods to maintain the desired texture in the final dish.
- Recipe Modification: Some recipes may require adjustments when using water instead of milk, such as increasing the amount of fat or using alternative thickeners to achieve the desired consistency.
- Balancing Act: It's crucial to strike a balance between achieving the desired texture and flavor while considering the nutritional impact of using water in place of milk.
Understanding these best practices will help ensure successful outcomes when using water as a substitute for milk in various recipes.
Frequently Asked Questions
Can Water Be Used as a One-To-One Replacement for Milk in All Recipes?
We can use water as a one-to-one replacement for milk in some recipes, depending on the cooking techniques and recipe modifications.
However, ingredient substitution and culinary experimentation are crucial. In certain dishes, such as soups or certain breads, water can be a suitable alternative.
Yet, it's important to recognize that in recipes requiring the richness and creaminess of milk, water may not yield the desired results.
Are There Any Health Concerns or Nutritional Deficiencies When Using Water Instead of Milk?
When using water instead of milk, there are potential health implications and nutritional deficiencies to consider. Water lacks the essential nutrients found in milk, such as protein, calcium, and vitamins. These deficiencies could impact overall health and wellness.
It's important to consider the nutritional comparison between water and milk to ensure that dietary needs are being met. Making informed choices about ingredient substitutions is crucial for maintaining a balanced diet.
How Does Using Water Instead of Milk Affect the Taste and Texture of the Final Dish?
Using water instead of milk can alter the taste and texture of dishes. In many recipes, milk's creaminess contributes to a richer taste and smoother texture compared to water.
For example, in baking, using water may result in a less tender and moist outcome compared to using milk.
The taste comparison and texture difference between water and milk are noticeable, so it's essential to consider the specific dish and its requirements when making substitutions.
Are There Any Specific Types of Recipes Where Using Water Instead of Milk Is Not Recommended?
In cooking techniques, using water instead of milk may not be recommended for certain baking substitutes and culinary applications.
For example, in recipes that rely on the richness and creaminess of dairy, such as custards or creamy soups, water may not provide the desired texture and flavor.
However, in some dairy alternatives, like certain vegan recipes, water can be a suitable replacement for milk.
Can Water Be Used in Place of Milk in Beverages Like Coffee or Smoothies?
Yes, water can be used as a dairy alternative in beverages like coffee or smoothies. This substitution is becoming increasingly popular due to environmental concerns associated with milk production.
It's interesting to note that by swapping milk for water, individuals can reduce their carbon footprint and water usage.
However, it's important to consider the impact on flavor and texture, as water may not provide the same richness as milk in certain beverages.
Is Water a Suitable Substitute for Milk in Pancake Batter?
When making pancakes with milk, you may wonder if water can be a suitable substitute. While water lacks the creaminess and richness of milk, it can still be used in a pinch. Keep in mind that the texture and flavor of the pancakes may be slightly different when using water instead of milk.
Conclusion
In conclusion, using water instead of milk can be a refreshing alternative in certain recipes, but it's important to consider the potential drawbacks.
While water can provide a lighter texture and subtle flavor, it may not offer the same richness and creaminess as milk.
Like a delicate dance between two partners, the choice between water and milk in cooking requires careful consideration to achieve the perfect balance of taste and texture.
- About the Author
- Latest Posts
Introducing Ron, the home decor aficionado at ByRetreat, whose passion for creating beautiful and inviting spaces is at the heart of his work. With his deep knowledge of home decor and his innate sense of style, Ron brings a wealth of expertise and a keen eye for detail to the ByRetreat team.
Ron’s love for home decor goes beyond aesthetics; he understands that our surroundings play a significant role in our overall well-being and productivity. With this in mind, Ron is dedicated to transforming remote workspaces into havens of comfort, functionality, and beauty.
-
 Vetted3 weeks ago
15 Best Contact Paper for Kitchen Cabinets to Elevate Your Home Decor
-

 Vetted1 week ago
15 Best Poe Cameras for Home Security – Reviews & Buying Guide
-

 Vetted4 weeks ago
15 Best Leather Restorer Products to Revive Your Furniture and Accessories
-

 Vetted3 weeks ago
15 Best Drain Snakes to Unclog Your Pipes Like a Pro
-
 Beginners Guides2 days ago
I Inhaled Vinegar Fumes
-

 Vetted3 weeks ago
14 Best Stationery Brands for Your Next Writing Adventure
-

 Beginners Guides2 weeks ago
Swinger Porch Light Color
-

 Mardi Gras Decoration3 weeks ago
Why Does Hobby Lobby Not Do Mardi Gras?


