Decor
5 Mirror Painting Techniques That Will Leave You in Awe
Lose yourself in the mesmerizing world of mirror painting with these 5 techniques that will leave you in awe of the artistic possibilities.

When painting mirrors, techniques like choosing the right base color, precise layer application, and intricate detailing depth can transform it into awe-inspiring art. Start with a base color that complements the frame, applying it evenly with thin layers and allowing it to dry completely. Master the dry brush technique by lightly stroking raised details with white paint for a textured look. Layering colors enhances visual interest and complexity, building richness in the design. Complete the masterpiece by selecting a proper sealant, applying it evenly, and buffing the surface for a smooth finish. Learn more about these mesmerizing mirror painting methods here.
Key Takeaways
- Experiment with dark base coat for striking contrast.
- Master the dry brush technique for textured, distressed look.
- Add depth with layering for visual interest.
- Use subtle shading to enhance realism.
- Finish with appropriate sealant for longevity.
Choosing the Right Base Color
When selecting the ideal base color for mirror painting, consider the existing frame color and style to guarantee a cohesive look. The base color sets the foundation for the entire Mirror Makeover project.
Dark hues like Stormy Seas create a striking contrast, making ornate details pop with elegance and sophistication. On the other hand, lighter shades such as Fluff offer a softer touch, perfect for a more delicate and refined appearance.
Opting for a base color that provides one-coat coverage can streamline the painting process, saving time and effort. These efficient options eliminate the need for multiple layers, allowing you to achieve a flawless finish with ease.
Experimenting with different painting techniques, such as dry brushing with a highlight color, can further enhance the ornate details of the mirror frame. This technique adds depth and dimension to the overall look, creating a visually enthralling result.
Applying the Base Coat

To achieve a smooth and even coverage on the mirror frame, start by applying the dark base coat. This base color should be chosen for its ability to provide one-coat coverage, guaranteeing that the frame is evenly coated. When applying the base coat, it's crucial to leave some of the original gold peeking through to add dimension and visual interest to the final result.
Additionally, remember to apply thin layers of chalk paint to preserve the intricate details of the mirror frame.
Make sure the base coat is allowed to dry completely before moving on to the next step in the painting process.
The matte finish of the chalk paint will create a sophisticated look on the mirror frame.
Depending on the shade chosen, lighter colors may require additional coats to achieve the desired coverage and effect.
Mastering the Dry Brush Technique

Let's explore mastering the dry brush technique for enhancing ornate details on a mirror frame.
To begin, gather your materials: spray paint for the base coat, painter's tape to protect areas you don't want to paint, white paint for the dry brush effect, and a satin finish for a polished look.
Start by applying the base coat and allowing it to dry completely. Next, dip a dry brush lightly into the white paint, ensuring there's only a minimal amount on the bristles.
Carefully stroke the brush over the raised details of the mirror frame, focusing on corners and intricate designs. Gradually build up the white paint to achieve the desired highlighted effect.
The goal is to create a textured, distressed appearance that adds depth and character to the frame. By using the dry brush technique, you can achieve a subtle and nuanced finish that brings out the beauty of the mirror's ornate features.
Adding Depth With Layering

Layering paint on mirrors is a technique that enhances depth and dimension in artwork. By building up multiple layers of paint, artists can add richness and complexity to their designs.
Here are three key ways in which layering can elevate mirror paintings:
- Color Variation: Incorporating different colors in layers allows for the creation of visual interest and depth. By strategically layering complementary or contrasting colors, artists can achieve a dynamic and engaging effect on reflective surfaces.
- Subtle Shading: Layering paint enables artists to achieve subtle variations in shading and highlights. This technique adds nuance and realism to the artwork, enhancing the overall depth perception and three-dimensional quality of the piece.
- Aesthetic Enhancement: Experimenting with layering techniques can greatly enhance the aesthetic appeal of mirror paintings. Through careful application and blending of paint layers, artists can create captivating visuals that draw the viewer in and evoke a sense of wonder.
Layering paint on mirrors opens up a world of creative possibilities, allowing artists to explore the interplay of color, light, and reflection to create stunning works of art.
Finishing Touches and Sealant Application

After completing the mirror painting, our next step involves applying a sealant to protect the finished artwork. Make sure to choose a sealant that complements the painted mirror frame, as sealants come in various finishes like matte, satin, and glossy to suit different preferences.
To apply the sealant, lightly scuff the painted surface with a fine-grit sandpaper to guarantee proper adhesion. Then, using a clean brush, paint and dab the sealant onto the mirror frame in thin, even layers.
Once the sealant has been applied, allow it to dry according to the manufacturer's instructions. Different sealants may require specific drying times and application methods to achieve ideal results.
After the sealant has dried completely, gently buff the surface with a soft, lint-free cloth or paper towel to remove any excess residue and reveal a smooth finish. This final step not only enhances the aesthetic appeal of the painted mirror but also ensures its longevity by preventing fading and chipping.
Frequently Asked Questions
How to Make a Mirror Distressed?
To make a mirror distressed, we can apply Vaseline strategically before painting. This method creates a vintage aesthetic by allowing the paint to adhere unevenly.
Once the paint dries, gently rub the areas with a paper towel to reveal the distressed look. This technique adds character and antiquity to the mirror frame, enhancing its overall appearance with a rustic and weathered charm.
Distressing a mirror with Vaseline is a simple yet effective way to achieve a unique and aged style.
How to Make a Glass Effect in Paint?
To create a stunning glass effect in paint, we use transparent or translucent colors to replicate the reflective quality of glass. By layering light and shadow with various brush strokes and blending techniques, we achieve depth and dimension.
Adding gloss or varnish enhances the illusion of transparency, simulating the smooth, reflective surface of glass. Practice painting glass objects to refine your skills and master the art of capturing realistic glass effects on canvas.
What Are the Benefits of Mirror Painting?
When painting on mirrors, the benefits are manifold. The reflective nature of mirrors adds depth and intrigue to artworks, engaging viewers with distorted reflections.
Artists can experiment with various techniques like solid color chalk painting, distress painting, and overlay painting to create unique visual effects. Utilizing mirrors as a canvas enhances artistic expression, offering a versatile approach to exploring different styles.
Techniques such as using dark wax, foil overlay, and metallic finishes further elevate the aesthetic appeal of mirror paintings.
How to Make a Cheap Mirror Look Expensive?
To make a cheap mirror look expensive, we can employ various techniques. Metallic wax or silver/gold overlay can add a luxurious touch.
Pearl glaze or foil overlay creates a sophisticated appearance. Antique stains or dark wax give a rich, aged look.
Layering paint colors or using a salt wash technique achieves a high-end finish. Dry brush painting and distressing methods offer unique styles.
These methods elevate the mirror's appearance without breaking the bank.
Conclusion
To sum up, these mirror painting techniques are truly enchanting and mesmerizing.
The combination of colors, textures, and techniques will elevate your artwork to new heights.
So, grab your brushes and get ready to create stunning masterpieces that will astonish and ignite inspiration.
Let your creativity flow and watch as your mirrors come to life with a touch of artistic flair.
Mirror painting has never been more spellbinding!
- About the Author
- Latest Posts
Introducing Ron, the home decor aficionado at ByRetreat, whose passion for creating beautiful and inviting spaces is at the heart of his work. With his deep knowledge of home decor and his innate sense of style, Ron brings a wealth of expertise and a keen eye for detail to the ByRetreat team.
Ron’s love for home decor goes beyond aesthetics; he understands that our surroundings play a significant role in our overall well-being and productivity. With this in mind, Ron is dedicated to transforming remote workspaces into havens of comfort, functionality, and beauty.
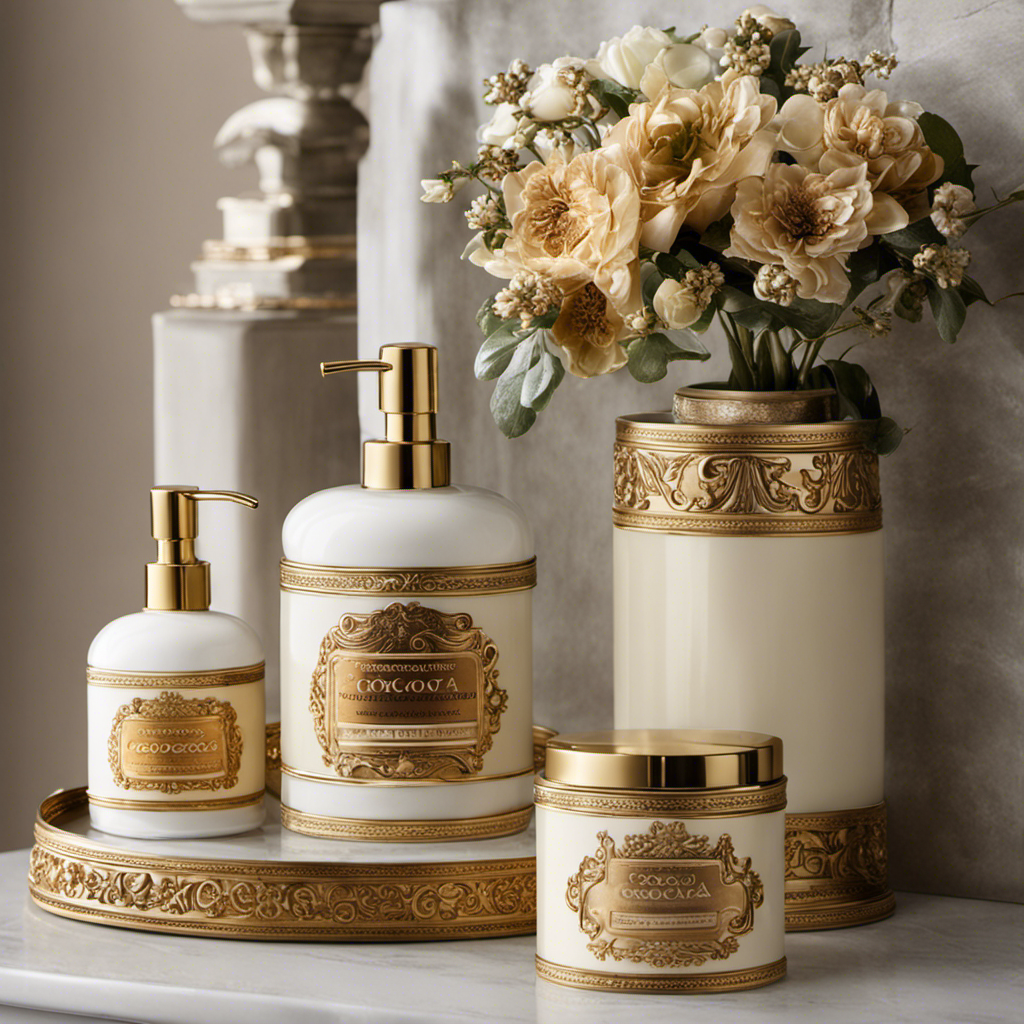
As someone who loves cooking, I frequently encounter the phrase ‘for decorative purposes only’ in relation to cocoa butter. But what does it really signify?
In this article, we will delve into the world of decorative cocoa butter, exploring its purpose and how it differs from its edible counterpart.
Join me as we uncover the safety concerns, techniques, and inspiring ideas for incorporating decorative cocoa butter into your desserts, adding a touch of elegance and creativity to your culinary creations.
Key Takeaways
- ‘For Decor Use Only’ indicates that decorative cocoa butter is meant for decorative purposes and not for consumption.
- Decorative cocoa butter may not meet the same standards as food-grade cocoa butter, raising safety concerns.
- It is important to read labels and follow instructions when using decorative cocoa butter to ensure safety.
- Edible cocoa butter is safe for consumption and meets strict food safety standards, while non-edible cocoa butter is intended for external use only and should not be consumed.
The Definition of "For Decor Use Only
‘For Decor Use Only’ is a phrase commonly used to indicate that a product should only be used for decorative purposes. When it comes to cocoa butter, understanding the purpose of this designation is crucial.
Cocoa butter is often used in the food industry for its unique properties and flavor. However, in some cases, cocoa butter may also be sold for decorative purposes only. This means that it is not safe for consumption and should not be used in cooking or baking.
Safety concerns and precautions come into play here, as cocoa butter designated for decorative use may not meet the same standards as food-grade cocoa butter. It is important to always read labels and follow instructions to ensure your safety and the safety of others when using cocoa butter for decorative purposes.
Understanding the Purpose of Decorative Cocoa Butter
When it comes to decorative cocoa butter, it is essential to understand the distinction between edible and non-edible techniques.
Edible techniques involve using food-grade cocoa butter that is safe for consumption, while non-edible techniques use cocoa butter mixed with non-edible coloring agents.
These techniques are explained in detail to ensure that the decorative elements on cocoa butter products are not only visually appealing but also safe for consumption.
Edible Vs. Non-Edible
You should always check the label to determine if the cocoa butter is intended for edible or non-edible use only. This is crucial to ensure your safety and the safety of others when using cocoa butter for various purposes.
Edible cocoa butter is specifically formulated and processed to meet strict food safety standards, making it safe for consumption. It can be used in cooking, baking, and making chocolate confections.
On the other hand, non-edible cocoa butter is intended for external use only and should not be consumed. It is commonly used in skincare products, such as lotions and creams, due to its moisturizing properties. Using non-edible cocoa butter for consumption can pose health risks and should be avoided.
Always follow the instructions and safety precautions provided on the label to ensure the proper use of cocoa butter.
Decorative Techniques Explained
The different decorative techniques can add a unique touch to your creations.
When it comes to decorating with edible alternatives, there are a few options to consider. One popular technique is using cocoa butter to create beautiful designs on cakes, cookies, and other desserts.
Cocoa butter is a natural fat extracted from cocoa beans and has a smooth texture that allows for easy application.
However, for those looking for alternative decorative materials, there are other options available. Non-edible materials such as fondant, gum paste, and edible ink can be used to create intricate designs that are not meant to be consumed.
These materials provide a wide range of colors and textures, allowing for endless creativity in your decorations.
Whether you choose to use edible alternatives or non-edible materials, the key is to experiment and find the technique that best suits your desired aesthetic.
Cocoa Butter as a Decorative Element
To incorporate cocoa butter as a decorative element, simply mix it with food coloring and apply it to your desserts. Cocoa butter is an ideal medium for creating creative designs on cakes, cookies, and other sweet treats. Its smooth texture and ability to hold vibrant colors make it a popular choice among bakers and pastry chefs.
When mixed with food coloring, cocoa butter can be used to paint intricate patterns, create marbled effects, or even add a glossy sheen to your desserts. The possibilities are endless when it comes to creative cocoa butter designs.
Whether you want to create elegant floral patterns or whimsical designs, cocoa butter can elevate your desserts to a whole new level of artistry.
How Decorative Cocoa Butter Differs From Edible Cocoa Butter
Mixing food coloring with cocoa butter creates a distinct difference between decorative cocoa butter and edible cocoa butter.
Decorative cocoa butter is primarily used for aesthetic purposes in the culinary field, adding vibrant colors and intricate designs to various desserts and pastries. It is not meant to be consumed directly and should be used sparingly as a decorative element.
On the other hand, edible cocoa butter is used as a cooking ingredient and is safe for consumption. It is commonly used in chocolate making, baking, and as a substitute for regular butter in recipes. Edible cocoa butter undergoes a stricter quality control process to ensure its safety and suitability for consumption.
While both decorative and edible cocoa butter are derived from cocoa beans, their intended uses and production methods set them apart.
Safety Concerns and Precautions With Decorative Cocoa Butter
For your safety, it’s important to be aware of the precautions and potential concerns when working with decorative cocoa butter. Decorative cocoa butter may add a touch of elegance to your desserts, but there are certain safety precautions that must be followed to avoid any potential risks. Here are three important points to consider:
-
Allergies: Decorative cocoa butter may contain ingredients that could trigger allergic reactions in some individuals. It is crucial to check the ingredients list carefully and inform customers of any potential allergens.
-
Storage and Handling: Decorative cocoa butter should be stored in a cool, dry place away from direct sunlight to maintain its quality and prevent melting. When handling it, ensure clean and dry hands to avoid contamination.
-
Proper Usage: Decorative cocoa butter is meant for external use only and should not be ingested. It is essential to clearly label any products containing decorative cocoa butter to prevent accidental consumption.
Where to Find Decorative Cocoa Butter Products
You can easily find decorative cocoa butter products at specialty baking supply stores or online retailers. These products are perfect for adding a touch of elegance and creativity to your cake decorating. Whether you are a professional baker or a home baker looking to elevate your creations, decorative cocoa butter can be a game-changer. With its vibrant colors and smooth texture, it allows you to create stunning designs and intricate patterns on your cakes.
To help you find the best decorative cocoa butter products, I have compiled a table below with some popular options available in the market:
| Brand | Type |
|---|---|
| Chef Rubber | Cocoa Butter |
| PatisFrance | Coloring |
| Sugar Craft | Metallic |
| Callebaut | Shimmer |
| Roxy & Rich | Pearlized |
These brands offer a wide range of colors and finishes, ensuring you can find the perfect cocoa butter product for your cake decorating needs. So go ahead and unleash your creativity with decorative cocoa butter!
Tips for Using Decorative Cocoa Butter in Cake Decorating
To achieve the best results with decorative cocoa butter in cake decorating, it’s important to experiment with different techniques and temperatures. Here are three tips to help you make the most of your cocoa butter decorations:
-
Temperature control: Cocoa butter is sensitive to temperature changes, so it’s crucial to melt it slowly and gently. Use a double boiler or a microwave on low heat to melt the cocoa butter. Avoid overheating, as it can affect the consistency and texture of the cocoa butter.
-
Proper application: When applying cocoa butter to your cake, make sure it is at the right temperature. If it’s too hot, it may melt the cake or create uneven patterns. If it’s too cold, it won’t spread smoothly. Test a small amount on a separate surface before applying it to the cake to ensure the right consistency.
-
Safety precautions: Remember to handle cocoa butter with care. As it melts at a low temperature, it can cause burns if it comes into contact with the skin. Use protective gloves and handle it with caution to avoid any accidents.
Exploring Different Designs and Techniques With Decorative Cocoa Butter
In my previous subtopic, I discussed some tips for using decorative cocoa butter in cake decorating. Now, let’s delve into the exciting world of exploring unique designs and techniques with this versatile ingredient.
Decorative cocoa butter offers endless possibilities for creating vibrant colors and intricate patterns on cakes and other confections. One of the most fascinating aspects of using decorative cocoa butter is the ability to experiment with different designs. From delicate floral motifs to bold geometric patterns, the options are truly limitless.
By combining various techniques such as airbrushing, stenciling, and hand-painting, you can achieve stunning results that will amaze your customers and guests. By exploring the vast array of colors and textures available, you can create visually striking masterpieces that showcase your creativity and skill.
Whether you prefer a minimalist approach or enjoy the complexity of intricate designs, decorative cocoa butter allows you to express your artistic vision in delicious and visually appealing ways.
Now, let’s move on to the next section where we will address some frequently asked questions about decorative cocoa butter.
Frequently Asked Questions About Decorative Cocoa Butter
As a chocolatier, I often receive questions about the edibility and shelf life of decorative cocoa butter.
When it comes to the edibility of decorative cocoa butter, it is important to note that not all varieties are meant to be consumed. Some decorative cocoa butters are made with ingredients that are not considered food-grade and are intended for decorative purposes only.
Additionally, shelf life concerns should be taken into account, as decorative cocoa butter can have a shorter shelf life compared to regular cocoa butter due to the addition of coloring agents and other additives.
Edible or Not
You should check the label to determine if the cocoa butter is edible or not. Safety concerns are a top priority when it comes to consuming any food product, and cocoa butter is no exception. Here are three important factors to consider regarding the edibility of cocoa butter:
-
Ingredients: Look for cocoa butter that is made from food-grade ingredients. This ensures that it is safe for consumption and free from any harmful additives.
-
Manufacturing process: The cocoa butter should be produced in a facility that follows strict quality control measures. This ensures that it is processed in a hygienic environment, minimizing the risk of contamination.
-
Storage conditions: Proper storage is crucial to maintaining the safety and quality of cocoa butter. Ensure that the product is stored in a cool, dry place to prevent spoilage or rancidity.
Shelf Life Concerns?
To determine the shelf life of the product, check the label for information on storage conditions and expiration dates. Shelf life considerations are crucial when it comes to maintaining the quality and safety of cocoa butter.
Proper storage recommendations are often provided on the packaging to ensure that the product remains fresh and usable for an extended period. These recommendations typically include storing the cocoa butter in a cool, dry place away from direct sunlight and heat sources. It is essential to follow these guidelines to prevent the cocoa butter from spoiling or becoming rancid.
Additionally, expiration dates are indicated on the label, indicating the date by which the product should be consumed for optimal quality. By adhering to the storage recommendations and monitoring the expiration dates, you can maximize the shelf life of your cocoa butter and enjoy its benefits for a longer period.
The Pros and Cons of Using Decorative Cocoa Butter
When considering decorative cocoa butter, it’s important to weigh the pros and cons. As a passionate baker, I have extensively researched the topic and compiled a list of three crucial factors to help you make an informed decision:
-
Pros:
- Enhances the visual appeal of desserts, adding a touch of elegance and sophistication.
- Allows for intricate designs and artistic expression, making your creations stand out.
- Provides versatility in decorating options, from simple patterns to elaborate designs.
-
Cons:
- Requires practice and skill to achieve desired results, as it can be challenging to work with.
- Limited shelf life, as cocoa butter has a tendency to go rancid if not stored properly.
- Safety concerns and precautions, as it is essential to avoid allergic reactions and cross-contamination.
Is Cocoa Butter Safe to Use as Decor for Shelves by the Fireplace?
Yes, cocoa butter is safe to use as decor for fireplace shelves. It can add a warm and inviting touch to the space. Just be mindful of heat exposure, as cocoa butter can melt in high temperatures. Overall, it can be a delightful addition to your fireplace decor.
Inspiring Ideas for Incorporating Decorative Cocoa Butter Into Your Desserts
As a dessert enthusiast, I’m always on the lookout for creative ways to elevate my dessert presentations.
In this discussion, we will explore the fascinating world of decorative cocoa butter designs and how they can be incorporated into dessert decoration techniques.
From intricate patterns to vibrant colors, these designs offer endless possibilities for adding a touch of elegance and artistry to your sweet creations.
Creative Cocoa Butter Designs
You can create unique and intricate designs using cocoa butter for decor purposes only. Cocoa butter, a versatile and edible fat extracted from cocoa beans, can be molded and sculpted into various shapes to add a touch of elegance to desserts and confections.
Here are three captivating ways to use cocoa butter for decorative purposes:
-
Cocoa Butter Molds: With specialized molds, you can create stunning chocolate decorations, such as flowers, leaves, or even intricate patterns. The smooth texture of cocoa butter allows for precise detailing, resulting in visually appealing designs.
-
Cocoa Butter Sculptures: By heating and cooling cocoa butter, it becomes malleable, allowing you to sculpt it into three-dimensional shapes. From figurines to architectural elements, cocoa butter sculptures can elevate the aesthetics of your desserts.
-
Colorful Cocoa Butter Designs: Cocoa butter can be mixed with food-safe coloring agents to create vibrant and eye-catching designs. From marbled patterns to gradient effects, these colorful cocoa butter designs can enhance the visual appeal of any dessert.
Dessert Decoration Techniques
To enhance the visual appeal of your desserts, try experimenting with different techniques for decorating. One popular method is using cocoa butter molds, which allow you to create intricate designs and shapes to elevate your dessert presentation. Cocoa butter molds are made from food-grade silicone or polycarbonate and are specifically designed to be used with cocoa butter. They come in a variety of shapes and sizes, allowing you to customize your desserts to your liking. Simply melt the cocoa butter, pour it into the molds, and let it set. Once hardened, you can easily remove the cocoa butter shapes and use them to decorate your desserts. Whether you’re creating beautiful flowers, elegant patterns, or fun shapes, cocoa butter molds are a versatile tool that can take your dessert presentation to the next level.
| Pros | Cons |
|---|---|
| Easy to use | Requires practice |
| Creates intricate designs | Can be expensive |
| Versatile | Limited shelf life |
| Food-grade material | Requires special equipment |
| Adds professional touch | Limited design options |
Overall, incorporating cocoa butter molds into your dessert decoration techniques can help you create visually stunning and professional-looking desserts. Experiment with different designs and have fun exploring the endless possibilities that cocoa butter molds offer.
Frequently Asked Questions
Can Decorative Cocoa Butter Be Consumed?
Yes, decorative cocoa butter cannot be consumed. It is used solely for decoration purposes and should not be used as a moisturizer. Edible cocoa butter, on the other hand, is safe for consumption and can be used in various recipes.
Is Decorative Cocoa Butter Safe for People With Allergies?
Decorative cocoa butter, when labeled "for decor use only," should not be consumed. However, for people with allergies, cross-contamination risks exist. It is recommended to use alternative products that are safe and suitable for those with allergies.
How Long Does Decorative Cocoa Butter Last?
Decorative cocoa butter lasts for a specific duration known as its shelf life. Proper storage is crucial in extending its lifespan. To ensure maximum longevity, keep it in a cool, dry place away from direct sunlight and moisture.
Can Decorative Cocoa Butter Be Used on Any Type of Dessert?
Yes, decorative cocoa butter can be used on any type of dessert. However, it’s important to note that there are alternatives available. The pros of using decorative cocoa butter include enhancing visual appeal, but cons include potential flavor alteration.
Does Decorative Cocoa Butter Have Any Nutritional Value?
Decorative cocoa butter is not intended for consumption and therefore does not have any nutritional value. However, it can be used in skincare products for its moisturizing properties and in baking to enhance the texture of baked goods.
Conclusion
In conclusion, I have come to appreciate the unique role of decorative cocoa butter in enhancing the visual appeal of desserts. The phrase ‘For Decor Use Only’ simply means that the cocoa butter is not intended for consumption. However, this does not diminish its value as a creative tool for pastry chefs and home bakers. By understanding the differences between decorative and edible cocoa butter, and taking necessary safety precautions, you can unlock a world of possibilities for stunning dessert designs.
So go ahead, let your imagination run wild, and create edible masterpieces with decorative cocoa butter!
- About the Author
- Latest Posts
Meet Bethia, the visionary designer at ByRetreat who brings a touch of magic to every remote workspace she creates. With a boundless imagination and an eye for beauty, Bethia is passionate about transforming ordinary spaces into extraordinary havens of creativity and comfort.
Bethia possesses a unique talent for envisioning the perfect combination of furniture, colors, and textures that harmonize seamlessly in a room. She understands that selecting furniture goes beyond mere functionality; it’s about curating pieces that evoke a sense of style and sophistication while enhancing the overall ambiance.
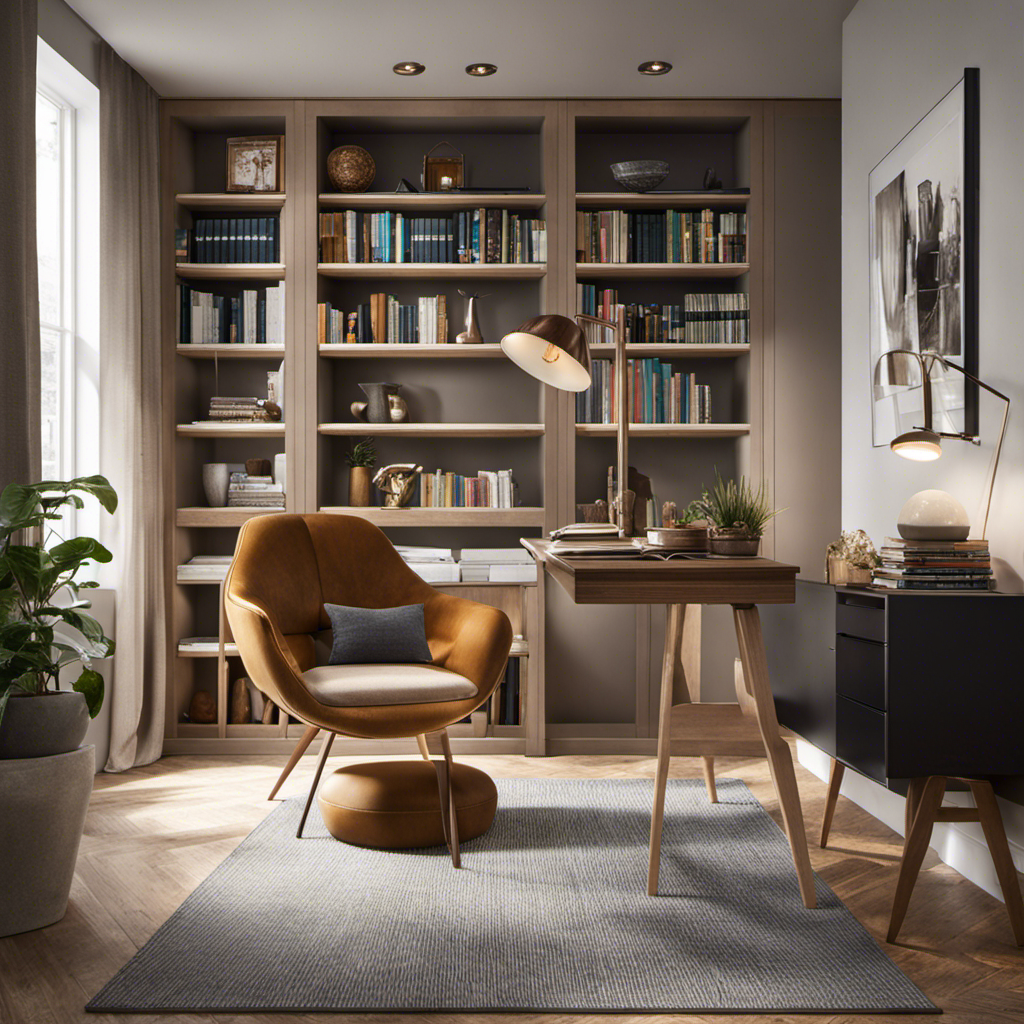
As a busy student, it is crucial for success to find a dedicated area for studying and working with classmates. Picture entering a small group study room that caters to your requirements while also igniting creativity and productivity.
With the right furniture, functional layout, and personalized touches, this space can become a haven for learning.
In this article, I will share expert tips and tricks on how to decorate a small group study room that is both practical and inviting.
Key Takeaways
- Opt for functional and versatile furniture, such as modular or stackable pieces.
- Maximize vertical space with creative shelving solutions, like floating shelves.
- Use adjustable desk lamps for focused lighting and incorporate ambient lighting for a warm atmosphere.
- Choose colors like blue or green to boost productivity and focus.
Choosing the Right Furniture
When decorating a small group study room, it’s important to choose the right furniture. The furniture arrangement plays a crucial role in creating a conducive and efficient space.
To make the most of the limited space, I suggest opting for functional and versatile pieces. Consider using modular or stackable furniture that can be easily rearranged to accommodate different group sizes and activities.
Additionally, investing in ergonomic chairs is essential for providing comfort and support during long study sessions. These chairs are designed to promote good posture and reduce the risk of back pain.
Maximizing Storage Space
When it comes to maximizing storage space in any room, two key points come to mind: creative shelving solutions and utilizing hidden storage options.
As someone who has faced the challenge of organizing a small space, I have learned the importance of thinking outside the box when it comes to storage.
From floating shelves that double as wall art to hidden compartments under furniture, there are countless ways to make the most of every inch of your space.
Creative Shelving Solutions
One option for creative shelving solutions in a small group study room is to use floating shelves. These innovative bookshelves are not only aesthetically pleasing but also provide space-saving solutions.
With floating shelves, you can maximize the vertical space in the room, allowing for more storage without taking up valuable floor space. The beauty of these shelves is that they appear to be suspended in mid-air, giving a modern and sleek look to your study room.
You can arrange them in different configurations, creating a unique and personalized display for your books, study materials, and decorative items. Additionally, floating shelves are easy to install and can be adjusted to fit your needs.
They are a practical and stylish choice for organizing your small group study room.
Utilizing Hidden Storage Options
Utilizing hidden storage options can provide a clever solution for maximizing space in your study area. When it comes to organizing study materials, having a clutter-free workspace is essential. Here are some hidden storage ideas that can help you keep your study area neat and organized:
-
Install floating shelves with hidden compartments: These shelves not only provide extra storage space for books and stationery but also have hidden compartments where you can store smaller items like flashcards or sticky notes.
-
Use a storage ottoman: A storage ottoman serves a dual purpose as a comfortable seat and a hidden storage space. You can store textbooks, notebooks, or study guides inside, keeping them easily accessible yet out of sight.
-
Invest in a desk with built-in storage: Opt for a desk that has drawers or shelves built into it. This will allow you to keep your study materials within reach without cluttering your workspace.
Creating a Functional Layout
To create a functional layout for your small group study room, start by considering the placement of furniture and the flow of movement within the space. A functional seating arrangement is crucial in promoting effective collaboration and productivity.
Optimize the floor space by choosing furniture that is compact and versatile. Utilize modular seating options such as ottomans or bean bags that can be easily moved and rearranged to accommodate different group sizes and activities.
Consider incorporating flexible workstations with adjustable height desks, allowing for both sitting and standing positions. Additionally, strategically place storage solutions such as bookshelves or cabinets to maximize space and keep the room organized.
Lighting and Ambiance
When planning the layout of your study space, it’s important to consider the lighting and ambiance to create a conducive environment for learning and productivity.
The right lighting fixtures can make a significant difference in how you feel while studying. Opt for adjustable desk lamps that provide focused lighting for reading and writing tasks.
Additionally, consider adding ambient lighting to create a warm and inviting atmosphere.
Ambient music can also enhance your study experience by reducing distractions and promoting relaxation. Choose instrumental tracks or soft melodies that won’t divert your attention from the task at hand.
Selecting the Perfect Color Scheme
When it comes to creating the perfect color scheme for a productive environment, understanding color psychology is key. Different colors can have a profound impact on our mood, energy levels, and overall productivity.
By selecting colors that promote focus and creativity, we can optimize our workspaces for maximum efficiency.
Additionally, harmonizing colors for cohesion is essential in creating a visually pleasing and cohesive environment, where everything feels connected and balanced.
Color Psychology for Productivity
Choose colors like blue or green for your small study room to boost productivity and focus. Color schemes have a significant impact on our mood and can greatly influence our ability to concentrate and learn.
Here are three reasons why incorporating blue or green into your study room can enhance your productivity:
- Blue promotes calmness and tranquility, creating a serene environment that is conducive to studying.
- Green is associated with nature and growth, stimulating creativity and promoting a sense of renewal and freshness.
- Both blue and green are known to reduce stress and anxiety, allowing you to stay focused and motivated.
Harmonizing Colors for Cohesion
To create a cohesive and harmonious look, consider pairing colors that complement each other in your study space. Choosing complementary colors is a great way to add visual interest and create a balanced environment. When it comes to using accent colors effectively, think about highlighting certain areas or elements in your room. For example, you can use an accent color on the bookshelf or desk accessories to make them stand out. To give you some inspiration, here’s a table showcasing some popular complementary color combinations:
| Complementary Colors | Example |
|---|---|
| Blue and Orange | |
| Purple and Yellow | |
| Green and Red | |
| Pink and Mint |
Bold Vs. Neutral Shades
Using bold shades can add a pop of color and create a vibrant atmosphere in your study space. Bold colors, such as deep blues or vibrant yellows, can energize the room and stimulate creativity.
On the other hand, neutral shades like soft grays or creamy whites can create a calming and focused environment. When choosing between bold and neutral shades for your study space, consider the following:
- Bold shades can inspire motivation and productivity, while neutral shades promote a sense of tranquility.
- Bold colors can make a small space feel more dynamic and lively, while neutral colors can make the room appear larger and more open.
- Consider color psychology for productivity – for example, blue is known to enhance focus and concentration, while green promotes a sense of balance and harmony.
Incorporating Wall Decorations
Adding wall decorations can instantly transform a small group study room into a more inspiring and inviting space. When it comes to incorporating artwork, I believe that selecting pieces that reflect your personality and interests is key. Whether you prefer abstract paintings or vintage posters, hanging art on the walls can create a focal point and stimulate creativity.
Another option to consider is using wallpaper. With a wide range of patterns and textures available, wallpaper can add depth and visual interest to the room. From floral designs to geometric prints, the possibilities are endless. Just make sure to choose a wallpaper that complements the overall theme and color scheme of the room.
Adding Comfortable Seating Options
When selecting seating options, it’s important to prioritize comfort and functionality. In a small group study room, creating a cozy and inviting atmosphere is crucial to encourage productivity and collaboration. Here are some tips to add comfortable seating options:
-
Seating arrangement
-
Arrange the seats in a way that promotes interaction and easy communication among group members.
-
Opt for versatile seating options like bean bags, floor pillows, or poufs that can be easily moved and rearranged.
-
Cozy cushions
-
Invest in cushions with soft and plush materials to provide maximum comfort.
-
Choose cushions in different sizes and shapes to accommodate varying preferences and seating positions.
-
Functional features
-
Look for seating options with built-in storage compartments to keep study materials organized and within reach.
-
Consider chairs with adjustable height or swivel function to cater to individual needs.
Can Tumblr Room Decor Ideas Be Applied to a Small Group Study Room?
Looking to transform your small group study room? Consider incorporating popular tumblr room decor ideas for a cozy and inspiring atmosphere. Utilize string lights, cozy throw pillows, and stylish wall art to create a relaxed yet productive space. Embrace the creativity and individuality that tumblr room decor ideas can bring to your study room.
Personalizing the Space
After ensuring there are comfortable seating options in my small group study room, the next step is to personalize the space with personalized decor and inspirational quotes. I believe that the environment we study in greatly impacts our motivation and productivity, so I want to create a space that inspires and uplifts me.
To start, I’ll hang a bulletin board on one of the walls where I can pin up my favorite quotes and motivational images. This will serve as a constant reminder of my goals and aspirations. Additionally, I’ll invest in a few decorative items, like a small potted plant or a colorful lamp, to add a touch of personality to the room.
Lastly, I’ll consider painting one wall a vibrant color or using removable wallpaper with a unique pattern to make the space feel more visually appealing. By incorporating personalized decor and inspirational quotes, my small group study room will become a place where I feel inspired, focused, and ready to conquer my academic challenges.
Frequently Asked Questions
How Can I Effectively Manage and Organize Cables and Cords in a Small Study Room?
I’ve found that effective cable management and cord organization in a small study room can make a huge difference. By using cable clips, cord organizers, and cable sleeves, you can keep everything neat and tangle-free.
Are There Any Space-Saving Desk Options for a Small Study Room?
I’ve found some great space-saving desk options for my small study room. They not only provide a functional workspace but also have creative storage solutions to keep everything organized and within reach.
What Are Some Tips for Creating a Quiet and Peaceful Atmosphere in a Small Study Room?
Creating a productive environment in a small study room involves managing distractions and creating a quiet atmosphere. Symbolically, imagine a serene oasis where focus and productivity flourish. Here are some tips to achieve that peaceful ambiance.
How Can I Incorporate Natural Lighting Into a Small Study Room?
I love finding ways to incorporate natural lighting into my small study room. It not only brightens up the space but also offers numerous benefits like improved focus and mood. Adding some plants adds a fresh and lively ambiance to the room.
Are There Any Innovative Storage Solutions Specifically Designed for Small Study Rooms?
There are many innovative furniture options and creative shelving solutions designed specifically for small study rooms. These can help maximize storage space and keep the room organized, making it easier to study and work efficiently.
Conclusion
After carefully considering all the elements of decorating a small group study room, I’m confident that the space has been transformed into a cozy and functional haven for learning.
The furniture arrangement optimizes the limited space, while the clever storage solutions keep everything organized and accessible.
The lighting sets a warm and inviting ambiance, and the carefully selected color scheme adds a touch of personality.
With comfortable seating options and personalized touches, this study room is now an oasis of productivity and inspiration, where knowledge thrives.
- About the Author
- Latest Posts
Meet Bethia, the visionary designer at ByRetreat who brings a touch of magic to every remote workspace she creates. With a boundless imagination and an eye for beauty, Bethia is passionate about transforming ordinary spaces into extraordinary havens of creativity and comfort.
Bethia possesses a unique talent for envisioning the perfect combination of furniture, colors, and textures that harmonize seamlessly in a room. She understands that selecting furniture goes beyond mere functionality; it’s about curating pieces that evoke a sense of style and sophistication while enhancing the overall ambiance.

Ross, a top retailer for budget-friendly home decor, obtains their products from a wide-reaching global supply chain. Through strategic partnerships and collaborations with manufacturers around the world, they offer customers the finest selection.
As I delved into the depths of Ross’s sourcing strategy, I uncovered fascinating secrets about their buying process and how they choose their home decor offerings.
Join me on this journey as we explore where Ross gets their fabulous home decor and the stories behind each unique piece.
Key Takeaways
- Ross partners with suppliers from different countries to source home decor items based on quality, reliability, and cost-effectiveness.
- Ross forms partnerships and collaborations with suppliers, resulting in access to a wide range of products and competitive pricing for customers.
- Ross has established manufacturing partnerships, allowing them to understand the origins of their home decor offerings and maintain a diverse and constantly changing inventory.
- Ross employs direct sourcing techniques, such as attending trade shows and visiting manufacturers, to eliminate middlemen and offer unbeatable value to customers.
Ross’s Sourcing Strategy
Ross’s sourcing strategy includes partnering with various suppliers to acquire their home decor items. This strategy plays a crucial role in Ross’s inventory management and pricing strategy.
By partnering with multiple suppliers, Ross ensures a diverse range of products for its customers. This allows them to offer competitive prices and attract a wider consumer base. The company carefully selects its suppliers based on factors such as quality, reliability, and cost-effectiveness.
Through effective negotiation and collaboration, Ross is able to secure favorable terms and conditions with its suppliers, which ultimately benefits the end consumers. This sourcing strategy allows Ross to maintain a steady supply of home decor items and keep its inventory well-stocked.
Transitioning into the subsequent section about the global supply chain of Ross, it is important to understand how these partnerships contribute to the overall success of the company’s sourcing process.
The Global Supply Chain of Ross
The global supply chain of Ross includes sourcing home decor items from various countries. Ross operates a vast network of distribution channels to ensure a steady flow of products to their stores. These distribution channels are designed to efficiently transport goods from suppliers to the shelves of Ross stores all around the world.
By sourcing products from different countries, Ross has a significant impact on local economies. They create opportunities for manufacturers and suppliers, boosting employment and economic growth in these regions. Additionally, Ross’s presence in these countries stimulates the local retail industry and encourages the development of other related businesses.
Through their global supply chain and partnerships with suppliers, Ross plays a crucial role in supporting local economies worldwide.
Speaking of partnerships and collaborations…
Partnerships and Collaborations
One way Ross boosts local economies is by forming partnerships and collaborations with suppliers from different countries. These partnerships bring several benefits, such as access to a wider range of products, competitive pricing, and the opportunity for collaborative design.
Here’s how these partnerships work:
-
Access to a wider range of products: By partnering with suppliers from different countries, Ross can offer a diverse selection of home decor items to its customers. This allows them to cater to various tastes and preferences, ensuring a satisfying shopping experience.
-
Competitive pricing: Collaborating with suppliers from different countries enables Ross to source products at competitive prices. This allows them to offer affordable options to their customers while maintaining a good profit margin.
-
Collaborative design: Ross actively works with its suppliers to develop unique and exclusive designs for their home decor products. This collaborative approach ensures that customers can find one-of-a-kind pieces that are not available elsewhere.
By forming these partnerships and collaborations, Ross is able to provide a wide range of high-quality home decor items to its customers, while also supporting local economies and fostering innovative design.
Moving forward, let’s uncover Ross’s extensive manufacturer network and explore how they maintain their global supply chain.
Uncovering Ross’s Manufacturer Network
I’ve always been curious about where Ross gets their home decor products. Recently, I stumbled upon some fascinating information that sheds light on their supplier network.
Ross has managed to keep their supplier secrets well-guarded. But through some digging, I uncovered some manufacturing partnerships that they have established. These partnerships reveal the sources behind Ross’s diverse range of home decor offerings.
This new information allows us to better understand the origins of the products we find in their stores.
Ross’s Supplier Secrets
Did you know that Ross gets their home decor from a network of hidden suppliers? It’s fascinating to learn about Ross’s distribution methods and how they manage to offer such affordable prices.
Ross is known for their treasure hunt shopping experience, where you can find high-quality home decor items at a fraction of the price. They achieve this through their unique pricing strategy.
Ross works closely with a network of suppliers who provide them with a wide range of home decor products. These suppliers often include manufacturers, wholesalers, and even boutique stores looking to clear out their inventory. By sourcing products directly from these suppliers, Ross is able to cut out middlemen and negotiate lower prices, which they then pass on to their customers. This allows Ross to offer unbeatable value for their home decor items.
Now, let’s delve into the manufacturing partnerships revealed and explore how Ross maintains such a diverse and constantly changing inventory.
Manufacturing Partnerships Revealed
Ross’s unique pricing strategy is made possible through partnerships with a network of suppliers who provide a diverse range of home decor products. These partnerships are an integral part of Ross’s sourcing strategies, allowing them to offer customers quality products at affordable prices.
Through their extensive supplier network, Ross is able to access a wide variety of home decor items, from furniture to wall art to decorative accessories. These partnerships also enable Ross to stay up-to-date with the latest trends in home decor, ensuring that their selection is always fresh and exciting.
By working closely with their suppliers, Ross is able to negotiate competitive prices, allowing them to pass on the savings to their customers. This collaborative approach to sourcing has been key to Ross’s success in the home decor market.
Transitioning into the subsequent section about ‘sourcing Ross’s home decor,’ it is important to understand the role of their supplier network in bringing these products to their stores.
Sourcing Ross’s Home Decor
To find a wide variety of affordable home decor items, you’ll want to understand how Ross’s supplier network plays a crucial role. Ross utilizes various sourcing methods to ensure a diverse range of products for their customers. Here are three key aspects of their sourcing process that contribute to their extensive product variety:
-
Global Partnerships: Ross establishes partnerships with manufacturers and suppliers from around the world. This allows them to access unique and culturally diverse home decor items, such as handcrafted textiles from India or intricately carved wooden furniture from Indonesia.
-
Closeout Purchases: Ross also takes advantage of closeout opportunities, where they can acquire excess or discontinued merchandise from other retailers. This enables them to offer a constantly changing selection of home decor items at discounted prices.
-
Private Labels: In addition to sourcing from external suppliers, Ross also develops their own private label brands. This gives them more control over the design and manufacturing process, allowing them to offer exclusive and affordable home decor options.
Understanding Ross’s sourcing methods is just the first step in exploring their buying process, which involves careful selection and strategic planning.
Exploring Ross’s Buying Process
Have you ever wondered how Ross chooses the home decor they sell? Well, let me shed some light on their buying process.
When it comes to sourcing techniques, Ross extensively explores various avenues. They have a dedicated team that scours the market for unique and trendy items. They attend trade shows, visit manufacturers directly, and maintain strong relationships with suppliers.
Understanding manufacturing connections is crucial to their success. Ross carefully selects partners that uphold high quality standards and ethical practices. This ensures that the home decor they offer is not only stylish but also reliable and made with care.
With their meticulous approach, Ross ensures that every piece of home decor they choose fits their brand and meets the expectations of their customers.
Now, let’s delve into the secrets behind Ross’s home decor selections and discover what makes them stand out.
Does Ross sell modern decor bedding sets in their home decor collection?
Yes, Ross does sell modern decor bedding sets in their home decor collection. With a wide variety of styles and colors to choose from, you can find the perfect modern decor bedding set to complement any bedroom design. Upgrade your bedroom with a trendy and affordable modern decor bedding set from Ross.
The Secrets Behind Ross’s Home Decor Selections
Let’s take a closer look at the secrets behind how Ross chooses the home decor they sell. As an insider at Ross, I can tell you that our design inspiration comes from a variety of sources, both internal and external. Behind the scenes at Ross’s headquarters, our team of talented designers and buyers work tirelessly to curate a selection of home decor that is both stylish and affordable. We stay up-to-date with the latest design trends by attending industry trade shows and keeping a close eye on social media platforms. Additionally, we have established relationships with a network of suppliers who provide us with unique and on-trend pieces. Our goal is to offer our customers a wide range of options that will inspire them to create the home of their dreams.
To give you a glimpse into our selection process, here is a table showcasing some of the key factors we consider when choosing home decor for Ross:
Factors Considered Description Design Trends We stay on top of the latest design trends to ensure our selection is current and fashionable. Customer Feedback We value our customers’ opinions and take into account their preferences and feedback. Quality and Affordability We strive to offer high-quality products at affordable prices, making home decor accessible to all.
Frequently Asked Questions
How Does Ross Determine the Prices for Their Home Decor Items?
Ross determines the prices for their home decor items through a pricing strategy that takes into account factors such as sourcing process, market demand, and competition. It allows them to offer affordable options to customers.
Can Customers Request Specific Home Decor Items From Ross?
Yes, customers can request specific home decor items from Ross. Ross’s customer service aims to ensure customers’ satisfaction by fulfilling their requests to the best of their ability.
What Is Ross’s Return Policy for Home Decor Items?
Ross’s return policy for home decor items is straightforward. If you’re not satisfied with your purchase, you can return it within 30 days. Prices at Ross for home decor are affordable, allowing you to spruce up your space without breaking the bank.
Does Ross Offer Any Warranties or Guarantees on Their Home Decor Products?
Yes, Ross offers warranty coverage on their home decor products. They prioritize customer satisfaction and provide guarantees to ensure the quality and durability of their items.
Are There Any Exclusive or Limited-Edition Home Decor Items Available at Ross?
Yes, Ross offers exclusive and limited-edition home decor items. They collaborate with top designers and have exclusive partnerships, ensuring a unique and sophisticated collection. You won’t find these pieces anywhere else!
Conclusion
After delving into the depths of Ross’s sourcing strategy, it becomes clear that their home decor is a result of a well-connected global supply chain.
Through strategic partnerships and collaborations, Ross has managed to uncover a vast network of manufacturers, ensuring a diverse and ever-changing selection of home decor items.
Their meticulous buying process ensures that only the best pieces make it onto their shelves.
So next time you find yourself admiring a beautiful decor piece at Ross, remember that it’s a hidden gem, carefully curated from far and wide.
- About the Author
- Latest Posts
Meet Katherine, the creative enthusiast at ByRetreat who infuses her boundless passion for design into every remote workspace she crafts. With an innate sense of creativity and an eye for unconventional beauty, Katherine brings a unique and inspiring perspective to the team.
Katherine’s love for design is infectious, and her ability to think outside the box sets her apart. She believes that true artistry lies in embracing a variety of styles and mixing them harmoniously to create captivating spaces. By combining different textures, colors, and patterns, Katherine weaves a tapestry of creativity that breathes life into each remote workspace.
-

 Decor1 week ago
Maximalist Decor Explained: Embrace More Style
-

 Vetted2 weeks ago
15 Best Foot Massagers for Neuropathy to Soothe Your Feet and Relieve Discomfort
-

 Vetted3 weeks ago
15 Best Sports Laundry Detergents for Keeping Your Activewear Fresh and Clean
-

 Vetted3 weeks ago
15 Best Tall Toilets for Seniors That Combine Comfort and Safety
-

 Vetted4 weeks ago
15 Best Dish Scrubbers to Keep Your Kitchen Sparkling Clean
-

 Vetted2 days ago
15 Best Cleaners for Fiberglass Showers to Keep Your Bathroom Sparkling Clean
-

 Decor4 weeks ago
What Is Eclectic Home Decor
-

 Vetted7 days ago
15 Best Organic Pest Control Solutions for a Naturally Pest-Free Home


