Decor
10 Inspiring Jessica Helgerson Interior Design Projects
Yearning for exceptional interior design projects that blend history with modernity? Dive into Jessica Helgerson's portfolio and discover unique spaces that will leave you inspired and craving more.
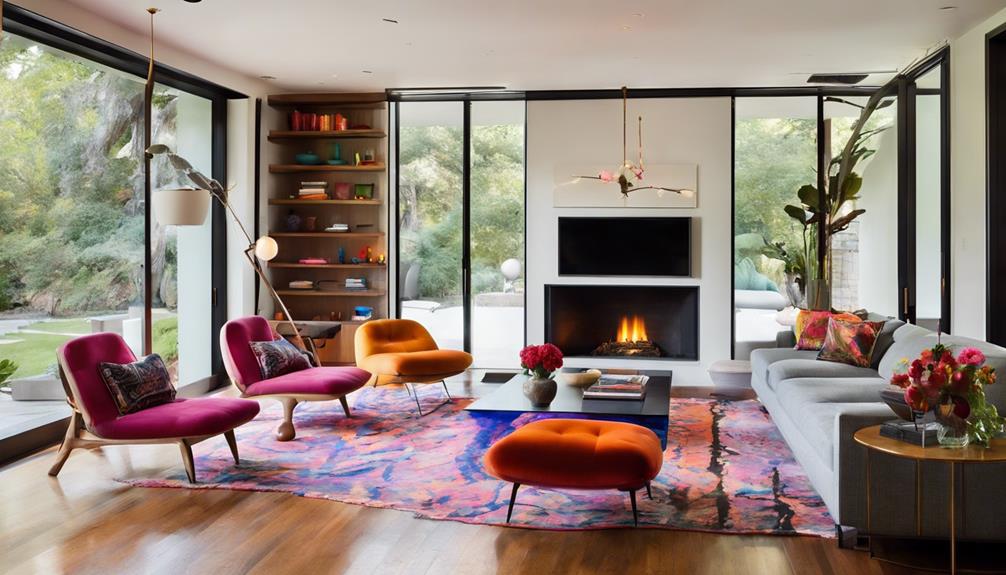
Have you ever wondered what sets Jessica Helgerson's interior design projects apart from the rest?
With a keen eye for detail and a commitment to sustainable practices, each of her creations tells a unique story that resonates with both history and modernity.
As we explore the ten inspiring projects curated from her extensive portfolio, you'll find yourself drawn into a world where design meets purpose, leaving you enthusiastic to discover more about the innovative approaches she employs to transform spaces into timeless works of art.
Key Takeaways
- Sustainable practices integrated with reclaimed materials and energy-efficient features.
- Modern designs maximizing natural light and using eco-friendly finishes.
- Cozy spaces blending warmth and sophistication for a welcoming feel.
- Fusion of vintage and modern elements creating unique, personality-filled interiors.
Classic Farmhouse Revamp
In transforming a classic farmhouse in Portland, Oregon, Jessica Helgerson skillfully balanced historical preservation with contemporary design to create a sustainable and aesthetically pleasing living space. The farmhouse renovation exemplified Helgerson's keen eye for blending the old with the new, showcasing a harmonious marriage of traditional charm and modern functionality. Sustainable design principles were at the forefront of the project, with the incorporation of reclaimed wood and energy-efficient fixtures, reflecting Helgerson's commitment to environmentally conscious practices.
The farmhouse renovation not only breathed new life into the historic property but also served as a demonstration of Helgerson's innovative approach to interior design. By carefully preserving key architectural elements while introducing contemporary features, she successfully created a space that honors the past while embracing the future. The juxtaposition of old and new within the farmhouse renovation not only added layers of depth and character to the space but also demonstrated Helgerson's ability to transform a conventional farmhouse into a sustainable, modern oasis.
Modern Minimalist Retreat

Embracing a design ethos rooted in simplicity and functionality, Jessica Helgerson Interior Design crafts a modern minimalist retreat characterized by clean lines, a neutral color palette, and sustainable materials. The interior of this retreat is a proof of minimalist principles, where every element serves a purpose while contributing to the overall aesthetic.
- Maximized Natural Light: Through strategic placement of windows and skylights, the space is flooded with natural light, creating a bright and airy ambiance.
- Serene Atmosphere: The design fosters a sense of calm and tranquility, achieved through a harmonious blend of color, texture, and form.
- Sustainable Materials: Helgerson's commitment to sustainability is evident in the use of eco-friendly finishes and reclaimed wood, ensuring a minimal environmental footprint.
- Seamless Indoor-Outdoor Integration: The retreat blurs the boundaries between indoor and outdoor spaces, allowing residents to experience a seamless connection to nature.
- Customized Storage Solutions: Thoughtfully integrated storage elements maintain the minimalist aesthetic while enhancing functionality and organization within the space.
This modern minimalist retreat exemplifies the perfect balance between design innovation and practicality.
Sustainable Urban Oasis
Transforming a 1905 Craftsman house into an eco-friendly urban retreat, the Sustainable Urban Oasis project by Jessica Helgerson Interior Design showcases innovative sustainable design elements that harmonize style with environmental consciousness. This project prioritized sustainability by incorporating features like salvaged materials, energy-efficient appliances, and passive solar design strategies. The Urban Oasis also boasted a green roof, rainwater collection system, and native plant landscaping to enhance its eco-friendly profile. To maximize energy efficiency, natural light, cross-ventilation, and high-quality insulation were skillfully integrated into the design. Jessica Helgerson's team successfully demonstrated how sustainable practices can be seamlessly woven into stylish and functional interior design solutions.
| Sustainable Design Elements | Eco-Friendly Urban Retreat |
|---|---|
| Salvaged materials | Green roof |
| Energy-efficient appliances | Rainwater collection system |
| Passive solar design strategies | Native plant landscaping |
| Natural light | Energy efficiency |
Scandinavian-Inspired Cozy Home

Pivoting from the Sustainable Urban Oasis project, the Scandinavian-Inspired Cozy Home by Jessica Helgerson Interior Design embodies a blend of minimalism, natural light, and warm textures to create a serene and inviting living space. Helgerson's thoughtful curation of elements transforms this home into a haven of contemporary comfort and understated elegance.
- Scandinavian-inspired Design: The interior design draws inspiration from Scandinavian aesthetics, characterized by simplicity, functionality, and a connection to nature.
- Simplicity: Clean lines, uncluttered spaces, and a focus on key elements contribute to a sense of calm and spaciousness.
- Natural Light: Large windows and strategically placed skylights flood the interiors with sunlight, enhancing the overall ambiance.
- Warm Textures: Soft textiles, wooden accents, and cozy rugs add warmth and tactility to the minimalist design, inviting inhabitants to relax and unwind.
- Functionality and Comfort: The design prioritizes usability and coziness, ensuring that every corner serves a practical purpose while maintaining a welcoming atmosphere.
Timeless Mid-Century Modern Residence
The Timeless Mid-Century Modern Residence project by Jessica Helgerson Interior Design seamlessly merges iconic mid-century modern design elements with contemporary flair, creating a space that exudes sophistication and timeless elegance. Helgerson's expertise in balancing mid-century modern aesthetics with a contemporary twist is evident throughout the project.
The sophisticated color palette of warm neutrals and rich woods, punctuated by bold color accents, contributes to the overall timeless and elegant interior. Natural materials such as wood and stone play a pivotal role in establishing a strong connection with the surrounding environment, enhancing the space's organic feel.
Helgerson's meticulous attention to detail shines through in the seamless integration of vintage and modern furniture pieces, resulting in a cohesive and inviting atmosphere. This project exemplifies the designer's signature style of creating functional, beautiful, and sustainable spaces that endure the test of time.
The Timeless Mid-Century Modern Residence is a true proof of Jessica Helgerson Interior Design's ability to blend classic design elements with contemporary sensibilities, appealing to those who appreciate innovation and timeless sophistication.
Rustic Chic Countryside Escape
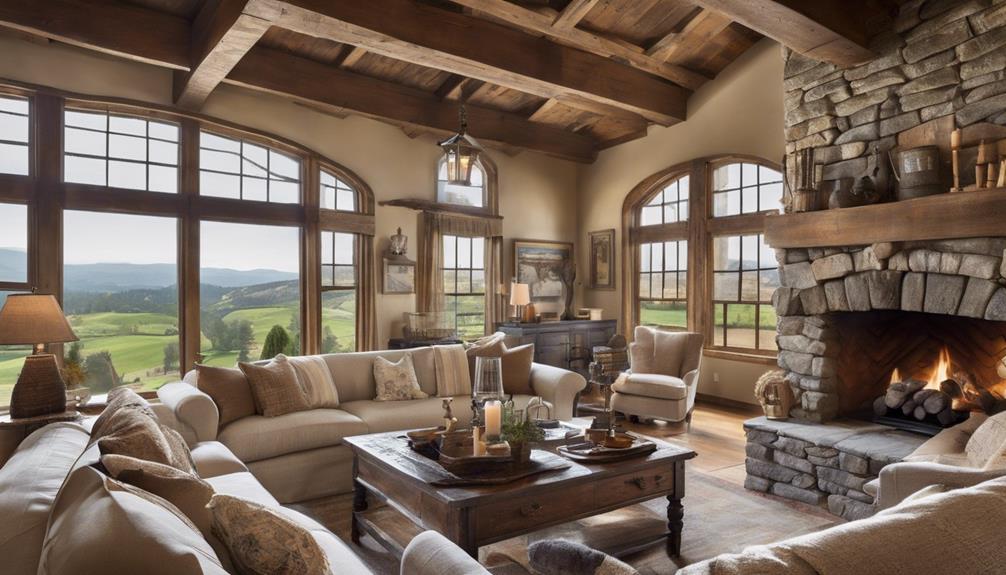
The Rustic Chic Countryside Escape project by Jessica Helgerson Interior Design encapsulates the essence of a cozy farmhouse retreat nestled in the picturesque hills of Washington state.
The seamless integration of natural materials like reclaimed wood and stone not only adds a touch of rustic charm but also creates a harmonious blend with the surrounding countryside.
Helgerson's skillful combination of contemporary design elements with timeless country charm results in a space that exudes warmth, comfort, and a unique character.
Cozy Farmhouse Retreat
Nestled amidst the serene countryside of Portland, Oregon, Jessica Helgerson Interior Design's Cozy Farmhouse Retreat epitomizes rustic elegance and sustainable living practices. The project seamlessly blends natural materials like reclaimed wood and stone, creating a warm and inviting ambiance. Here are five key features of this rustic chic countryside escape:
- Harmonious blend of natural materials
- Cozy living room with a stone fireplace
- Vintage decor elements for charm
- Sustainable practices including reclaimed materials
- Signature style reflecting timeless design principles
Helgerson's attention to detail and commitment to environmental responsibility shine through in this residential and commercial project, offering clients a peaceful rural haven that marries comfort with sustainability.
Natural Materials Blend
Amidst the serene countryside of Portland, Oregon, Jessica Helgerson Interior Design's Cozy Farmhouse Retreat showcases a seamless harmony of natural materials like reclaimed wood, stone, and linen in its Rustic Chic Countryside Escape project.
The warm color palette, inspired by the surrounding landscape, infuses earthy tones and organic textures, creating a cozy ambiance. Helgerson's design philosophy emphasizes a strong link between interior spaces and the natural world, elevating the tranquility of the setting.
Timeless Country Charm
Exuding an enduring allure rooted in rustic chic elements, the Timeless Country Charm project by Jessica Helgerson Interior Design captivates with its seamless blend of natural materials and sophisticated design choices. The countryside escape showcases a harmonious mix of wood, stone, and other organic elements, embodying a modern take on traditional country charm. Key aspects of this project include:
- Warmth and coziness envelop the space, creating a welcoming atmosphere.
- Sustainable and environmentally responsible design choices highlight a deep connection to nature.
- Elegant design touches elevate the rustic chic aesthetic, balancing sophistication with rural charm.
- Jessica Helgerson's expertise shines through, showcasing her talent for crafting livable spaces with a touch of countryside allure.
- The overall ambiance exudes a timeless appeal, offering a retreat from the hustle and bustle of modern life.
Elegant Coastal Living Space

In this elegant coastal living space project by Jessica Helgerson Interior Design, modern elements are seamlessly integrated with the historic home's original architectural features. The design skillfully combines contemporary aesthetics with the coastal charm of the surroundings, creating a harmonious and sophisticated living space. Natural materials such as wood and stone play a pivotal role in enhancing the coastal ambiance, adding texture and warmth to the interior.
The color palette chosen for this project draws inspiration from the ocean and beach, reflecting soothing blues, sandy neutrals, and soft whites. This thoughtful selection evokes a sense of tranquility and serenity, further accentuating the coastal theme. Functional furniture layouts are strategically implemented to optimize space and promote a comfortable living experience. Every piece is carefully placed to ensure both practicality and visual appeal, enhancing the overall functionality of the room.
The strategic lighting choices in this coastal living space project play a crucial role in creating ambiance and highlighting key design elements. By incorporating modern lighting fixtures, the space achieves a balance between elegance and functionality, illuminating the room effectively while complementing the overall design scheme.
Bohemian-Inspired Urban Loft

Moving from the elegant coastal living space project seamlessly blending modern and historical elements, Jessica Helgerson Interior Design shines in the Bohemian-inspired urban loft project with a mesmerizing mix of vintage and modern design elements. This commercial loft space showcases a unique fusion of old and new, creating an enchanting atmosphere that exudes bohemian charm. Here are five key elements that set this project apart:
- Vintage and Modern Fusion: The loft seamlessly combines vintage pieces with modern furniture to create a one-of-a-kind aesthetic.
- Sustainable Design Practices: Jessica Helgerson prioritizes sustainability by incorporating reclaimed materials and eco-friendly furnishings into the design.
- Textural Harmony: The project expertly blends textures, colors, and patterns to craft a cozy and eclectic living space.
- Warm and Inviting Atmosphere: Helgerson's design approach focuses on creating a welcoming environment that radiates bohemian charm.
- Personality-Filled Spaces: True to her signature style, the urban loft reflects Helgerson's knack for designing spaces that resonate with the client's lifestyle while infusing a touch of creativity and innovation.
Vintage Industrial Warehouse Conversion

The Vintage Industrial Warehouse Conversion project undertaken by Jessica Helgerson Interior Design exemplifies the seamless integration of historic charm with contemporary functionality in a commercial setting. With over 15 years of experience, Helgerson's team transformed a 5000 sq ft warehouse into a cutting-edge office space that marries the old with the new. By incorporating modern design elements and sustainable practices, such as using reclaimed wood and energy-efficient lighting, the project achieved a harmonious balance between past and present.
| Features | Description |
|---|---|
| Historic Charm | Preservation of original brick walls and industrial elements to honor the warehouse's history |
| Modern Design Elements | Integration of open workspaces, sleek furniture, and contemporary finishes |
| Sustainable Practices | Use of reclaimed materials, energy-efficient lighting, and green design principles |
This warehouse conversion design skillfully showcases Helgerson's ability to create environments that not only respect the building's heritage but also embrace the needs of modern businesses. The result is a space that feels both nostalgic and forward-thinking, setting a new standard for commercial interior transformations.
Luxurious Art Deco Apartment

We can't help but marvel at the exquisite elegance and timeless luxury showcased in Jessica Helgerson's Art Deco apartment design.
The seamless integration of Art Deco elements, from intricate geometric patterns to opulent materials, creates a sophisticated and lavish atmosphere.
Helgerson's meticulous craftsmanship and attention to detail elevate this space into a harmonious blend of vintage glamour and contemporary sophistication.
Elegant Art Deco Design
With a meticulous blend of rich materials and unique architectural details, the Luxurious Art Deco Apartment designed by Jessica Helgerson Interior Design exudes an elegant and sophisticated ambiance reminiscent of the timeless Art Deco era.
- The project showcases elegant, timeless Art Deco elements throughout the space.
- A harmonious blend of rich materials like brass, velvet, and marble creates a luxurious and sophisticated atmosphere.
- Unique architectural details, such as geometric patterns and ornate moldings, add Art Deco glamour.
- The color palette includes rich jewel tones like emerald green and sapphire blue.
- Attention to detail is evident in custom furnishings and lighting choices, enhancing the opulent feel of the space.
Timeless Luxe Interiors
Radiating a timeless allure, the Luxurious Art Deco Apartment by Jessica Helgerson Interior Design captivates with its opulent blend of sumptuous materials and meticulous design details.
Helgerson's meticulous curation of luxurious materials like velvet, marble, and brass showcases a harmonious fusion of classic Art Deco influences and contemporary sophistication.
The bespoke feel of the interiors is heightened by the detailed craftsmanship and custom pieces integrated throughout the space. By skillfully balancing vintage elements with modern design, Helgerson creates a refined and upscale ambiance that sets a benchmark in the design industry.
The geometric patterns, rich colors, and sleek finishes chosen for this interior design program exemplify a perfect marriage of elegance and innovation, making this Art Deco Apartment a timeless masterpiece.
Frequently Asked Questions
What Are the 7 Rules of Interior Design?
We understand the 7 rules of interior design: balance, harmony, contrast, rhythm, emphasis, scale, and proportion. They guarantee visual stability, unity, interest, flow, and cohesion in a space. Applying these principles innovatively transforms spaces into mesmerizing environments.
What Are the 7 Elements of Interior Design?
We believe the 7 key elements of interior design are space, line, form, light, color, texture, and pattern. These aspects work together to create visually stunning and functional spaces that cater to diverse needs and preferences.
What Is the First Item an Interior Designer Should Consider?
When beginning a design project, we prioritize understanding the client's needs, lifestyle, and preferences. Tailoring the design to their requirements guarantees a personalized space. Considering functionality, budget, timelines, space evaluation, and architectural style are essential in creating a cohesive design.
What Is the Most Important Thing in Interior Design?
In interior design, creating functional and beautiful spaces that reflect the client's personality and lifestyle reigns supreme. Like a symphony conductor harmonizing instruments, attention to detail, thoughtful space planning, and sustainability are essential for success.
Conclusion
As we explore further into Jessica Helgerson's interior design projects, one thing becomes abundantly clear – her ability to transform spaces is truly remarkable.
Each project showcases her talent for blending functionality with beauty, creating environments that aren't only visually stunning but also sustainable.
The anticipation builds as we eagerly anticipate the next innovative design that Helgerson will unveil, leaving us in awe of her creative prowess and dedication to excellence in every project she undertakes.
- About the Author
- Latest Posts
Introducing Ron, the home decor aficionado at ByRetreat, whose passion for creating beautiful and inviting spaces is at the heart of his work. With his deep knowledge of home decor and his innate sense of style, Ron brings a wealth of expertise and a keen eye for detail to the ByRetreat team.
Ron’s love for home decor goes beyond aesthetics; he understands that our surroundings play a significant role in our overall well-being and productivity. With this in mind, Ron is dedicated to transforming remote workspaces into havens of comfort, functionality, and beauty.
Decor
Master Antiquing With Chalk Paint in 5 Steps
Start your journey to mastering antiquing with chalk paint in 5 steps and transform your furniture into vintage treasures.
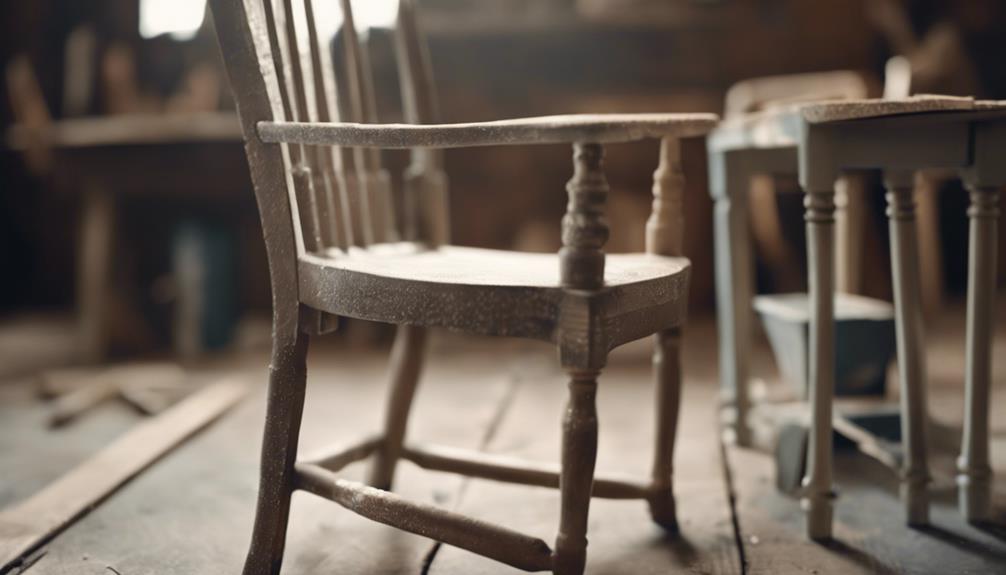
Master antiquing with chalk paint in 5 steps involves thorough surface cleaning, applying chalk paint in thin coats, distressing for a vintage look, sealing with a wax or polyurethane finish, and exploring different distressing techniques. Prepare by cleaning and sanding the surface, then choose high-quality paint and brushes for application. Experiment with dry and wet distressing, and seal the finish to protect against chipping and fading. For unique finishes, mix distressing methods and select the right sealant based on desired outcome. Mastering chalk paint antiquing takes practice and attention to detail, ensuring a beautifully aged furniture look.
Key Takeaways
- Choose high-quality chalk paint for best results.
- Apply thin, even coats for a smooth finish.
- Experiment with distressing techniques like dry or wet distress.
- Seal the finish with wax or polyurethane for durability.
- Practice and refine distressing skills for a masterful antique look.
Preparation
Before distressing furniture with chalk paint, we make sure to thoroughly clean the surface and lightly sand any rough spots for a smoother finish. This step is essential in achieving a professional-looking result.
Cleaning the furniture surface with White Lightning or TSP Degreaser helps remove any dirt, grease, or other contaminants that could interfere with the adhesion of the chalk paint. Using a lint-free cloth ensures that the surface is free of any residue that could affect the paint application.
Additionally, lightly sanding the furniture helps create a clean and smooth surface for the chalk paint to adhere to evenly. This process also helps remove any existing imperfections, ensuring a flawless final result.
Proper preparation sets the foundation for successful distressing with chalk paint, allowing for a more authentic and aged appearance.
After distressing, sealing the piece with a clear wax coat will protect the finish and enhance the overall look of the furniture.
Applying Chalk Paint
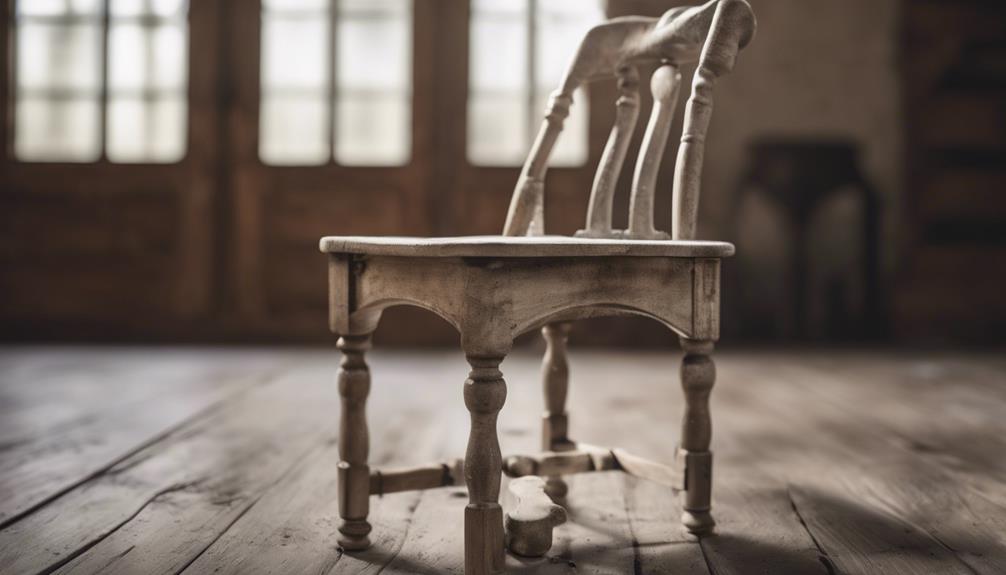
To achieve a professional finish with chalk paint, we recommend selecting a high-quality paint suitable for the specific furniture type.
When applying chalk paint, it's important to do so in thin coats to guarantee even application. Utilizing chalk paint brushes can help achieve better control and coverage.
It's vital to allow each coat of chalk paint to dry completely before applying the next one. This process helps prevent smudging and promotes a consistent finish.
Additionally, when starting a project, make sure you have enough chalk paint, typically a quart for larger pieces, to maintain color consistency throughout the furniture item.
Distressing Techniques
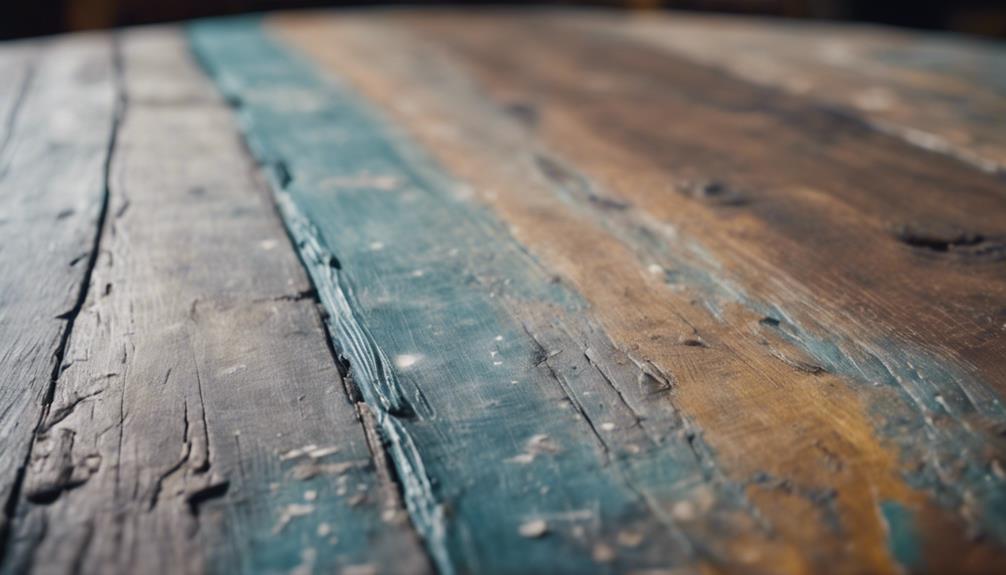
We can achieve various vintage looks by using different distressing techniques with chalk paint. Dry distress involves lightly sanding the chalk paint to reveal the underlying layers, creating a weathered appearance reminiscent of aged furniture.
On the other hand, wet distress requires wiping the chalk paint with a damp cloth to achieve a more natural, worn look. Wax distress, also known as the resist technique, utilizes wax as a barrier to create a subtle distressed effect on the furniture, adding depth and character to the piece.
Each distressing method offers a unique finish, allowing for experimentation and customization to achieve an authentic antique appearance. By trying out different distressing techniques, individuals can discover the method that best suits their desired vintage look.
Whether it's through sanding, wax resist, wet distress, or a combination of these methods, chalk paint provides a versatile medium for creating distinctive and aged finishes on furniture pieces.
Sealing the Finish
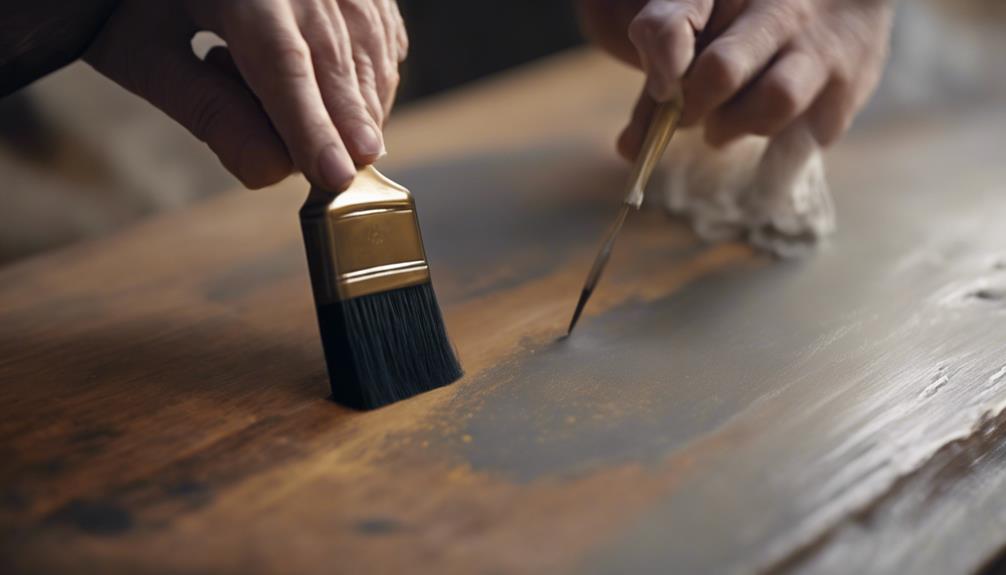
For achieving a durable and long-lasting distressed finish on furniture painted with chalk paint, selecting a high-quality clear wax or polyurethane sealant is essential. Applying a protective layer of sealant is vital to preserve the distressed look and prevent chipping or fading of the paint. It is recommended to apply the sealant in even coats to guarantee a smooth and lasting finish. Here is a comparison table to help you choose between wax and polyurethane sealants for your distressed furniture:
| Criteria | Wax Sealant | Polyurethane Sealant |
|---|---|---|
| Finish | Matte or Satin Finish | Glossy or Satin Finish |
| Durability | Requires Reapplication Over Time | Long-lasting and Durable |
| Application Ease | Easy to Apply, Buffing Required | Requires Thorough Application |
Both wax and polyurethane sealants offer protection and enhancement to your chalk-painted distressed furniture. Select the one that best suits your desired finish and maintenance preferences.
Chalk Paint Distressing Tips
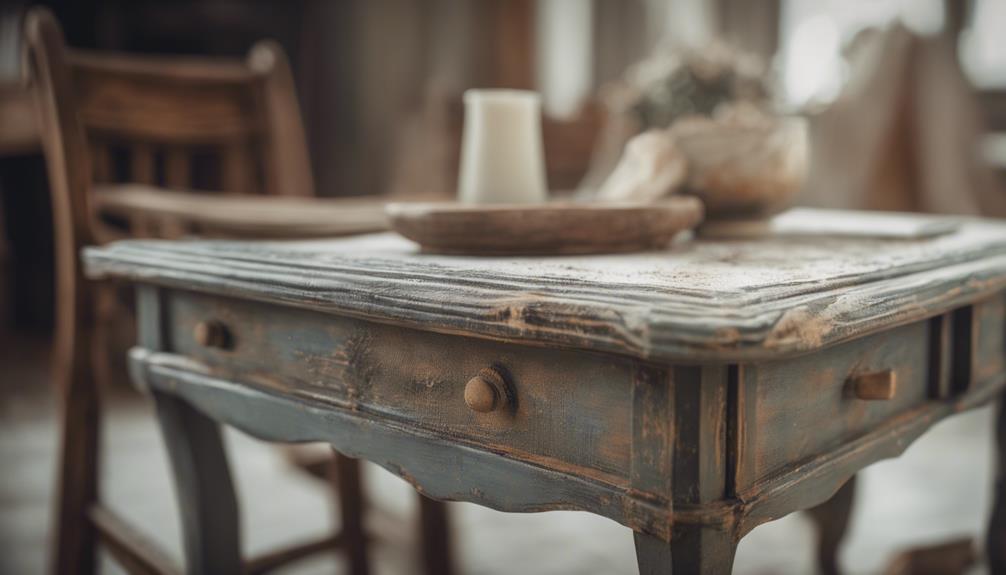
Let's explore effective techniques for distressing chalk paint to achieve a vintage and worn look on furniture surfaces.
When aiming for a customized distressed finish, there are various distressing methods to choose from. Dry distress involves lightly sanding the chalk paint to reveal the base color underneath, offering a classic vintage appearance.
On the other hand, the wet distress technique includes wiping off the chalk paint with a damp cloth to create a natural worn effect.
For a more subtle distressed finish, consider using the wax distress or resist technique by applying wax to protect certain areas from paint.
Remember to protect the paint and preserve the finish by sealing distressed furniture with wax or polyurethane.
Frequently Asked Questions
How to Get an Antique Look With Chalk Paint?
To achieve an antique look with chalk paint, consider distressing techniques like dry distressing, wet distressing, or wax distress.
Dry distressing involves light sanding for a vintage appearance.
Wet distressing requires wiping the paint with a damp cloth for a natural worn look.
Wax distress, or resist technique, can create a subtle distressed effect on furniture.
Sealing the distressed piece with clear wax or polyurethane is essential to protect the finish and maintain the antique aesthetic.
How to Make Furniture Look Distressed With Chalk Paint?
To make furniture look distressed with chalk paint, we can use various techniques. Dry distressing involves lightly sanding the surface to reveal the base layer, creating a vintage effect.
Wet distressing entails wiping the paint with a damp cloth to expose the underlying color, achieving a natural worn look.
Wax distressing, known as the resist technique, uses wax to create a subtle distressed effect.
These methods offer unique ways to customize and achieve a distressed look with chalk paint.
How Do You Chalk Paint Step by Step?
We begin chalk painting by cleaning and lightly sanding the furniture surface.
Next, select a high-quality chalk paint and apply it in thin, even coats.
Explore different distressing methods such as dry, wet, or wax distress.
Finally, seal the distressed furniture with clear wax or polyurethane for protection.
Following these steps attentively guarantees a successful chalk painting project with a beautifully antiqued finish.
Do I Distress or Wax First?
We recommend distressing before waxing when working with chalk paint for an authentic aged appearance. Distressing creates texture and depth, enhancing the final antique effect once sealed with wax.
Applying wax over distressed areas not only protects the finish but also accentuates the distressed look. Waxing before distressing can complicate the process as the wax may interfere with sanding.
Distressing first allows for better control over the furniture's final appearance.
Conclusion
To sum up, mastering antiquing with chalk paint is a fulfilling process that can transform ordinary furniture into stunning pieces with character and charm.
As the saying goes, 'A piece of furniture is like a blank canvas waiting to be brought to life.'
By following these 5 steps, you can discover the full potential of chalk paint and create unique and beautiful pieces that will stand the test of time.
Happy antiquing!
- About the Author
- Latest Posts
Introducing Ron, the home decor aficionado at ByRetreat, whose passion for creating beautiful and inviting spaces is at the heart of his work. With his deep knowledge of home decor and his innate sense of style, Ron brings a wealth of expertise and a keen eye for detail to the ByRetreat team.
Ron’s love for home decor goes beyond aesthetics; he understands that our surroundings play a significant role in our overall well-being and productivity. With this in mind, Ron is dedicated to transforming remote workspaces into havens of comfort, functionality, and beauty.
Decor
10 Steps to Painting a Plastic Frame
Uncover professional tips for transforming plastic frames with paint, ensuring a flawless finish and lasting results.
To paint a plastic frame effectively, start by selecting polypropylene or polyethylene frames. Clean thoroughly and lightly sand before applying a suitable primer. Use rubbing alcohol for a smooth finish, then mask off areas and apply even coats of paint with proper drying time. Add creative touches and seal with polyurethane for protection. This process guarantees a professional-looking result that lasts.
Key Takeaways
- Select plastic frames suitable for painting, avoiding PVC or polystyrene.
- Thoroughly clean and lightly sand the frame for adhesion.
- Apply a plastic-specific primer evenly after surface prep.
- Use painter's tape for clean lines and masking off.
- Seal with polyurethane for protection and finish longevity.
Selecting the Right Plastic Frame
When selecting a plastic frame for painting, make sure it's made of suitable materials like polypropylene or polyethylene for better paint adhesion. Different plastics have varying levels of compatibility with paint, so it's important to choose the right type to achieve best results.
Avoid using frames made of polyvinyl chloride (PVC) or polystyrene, as these materials may not allow the paint to adhere effectively, leading to peeling or flaking over time.
Certain types of paint may also work better with specific plastic frames. Checking the manufacturer's recommendations for the frame can provide valuable insights into which paints are most suitable for that particular material.
Opting for plastic frames specifically designed for painting can ensure a smoother process and a more professional finish.
Cleaning and Sanding the Surface
How should we prepare the plastic frame surface before painting to guarantee excellent adhesion and a smooth finish? To guarantee a successful paint job, follow these steps:
- Cleaning:
Begin by thoroughly cleaning the plastic frame to remove any dirt, dust, or grime. This step is vital as any impurities on the surface can affect the adhesion of the paint.
- Sanding:
Lightly sand the surface of the plastic frame to create a rough texture. This roughness provides a better grip for the paint, allowing it to adhere more effectively and prevent peeling or chipping.
- Primer:
Consider applying a suitable primer after cleaning and sanding the frame. A primer helps the paint adhere better to the surface and can also aid in achieving a smoother finish.
- Masking:
Before painting, make sure to mask off any areas of the frame that you don't want to paint. This step ensures clean and precise lines, giving your project a professional look.
Wiping Down With Rubbing Alcohol
We recommend wiping down the plastic frame with rubbing alcohol to guarantee proper adhesion and a smooth finish before painting. Rubbing alcohol plays a vital role in preparing the plastic surface for painting by effectively removing any dirt, oils, or residue that could hinder paint adhesion. This step ensures that the paint adheres well to the plastic surface, reducing the risk of peeling or flaking over time. The quick evaporation of rubbing alcohol leaves behind a clean and dry surface, ready for the next steps in the painting process.
To illustrate the importance of this step, let's take a look at the table below:
| Benefits of Wiping Down with Rubbing Alcohol |
|---|
| Removes dirt, oils, and residue from the plastic surface |
| Enhances paint adhesion for a smoother finish |
| Quick evaporation leaves a clean surface ready for painting |
| Prevents peeling or flaking of the paint over time |
| Effective and efficient preparation before priming or painting |
Masking Off Areas for Painting

When masking off areas for painting a plastic frame, it's essential to use painter's tape to guarantee clean lines and edges.
Make sure to press down firmly on the tape to avoid any paint bleeding onto unwanted areas.
Carefully mask off intricate details or sensitive parts to achieve a professional finish.
Taping off Edges
To achieve clean and precise lines in your painting, carefully use painter's tape to mask off areas of the plastic frame that you don't want to paint.
Here are some essential steps to follow when taping off edges:
- Prepare the Surface: Make sure the edges are clean and dry before applying the tape to promote adhesion and prevent paint seepage.
- Apply the Tape: Gently press the painter's tape along the edges of the areas you want to protect, ensuring it adheres firmly to the surface.
- Seal the Edges: Run your finger along the edge of the tape to secure it tightly to the plastic frame and prevent any paint from bleeding through.
- Double-Check: Before painting, inspect the taped-off areas to confirm that the edges are properly sealed and that there are no gaps where paint could seep under the tape.
Taking the time to tape off the edges meticulously will result in a professional and polished finish for your painted plastic frame.
Covering Sensitive Parts
Cover delicate parts like glass or hardware with masking paper or plastic before painting the plastic frame to protect them from unwanted paint.
When working on plastic frames, it's important to use painter's tape to mask off areas that shouldn't be painted. Make sure the painter's tape is firmly pressed down to create a tight seal and prevent any paint from seeping through.
In addition to using painter's tape, consider covering sensitive components such as glass or hardware with masking paper to safeguard them during the painting process. Taking the time to accurately mask off these areas will result in clean and precise paint lines, contributing to a professional-looking finish on your plastic frame.
Properly covering these sensitive parts is essential in achieving a polished and refined appearance for your painted plastic frame.
Applying a Suitable Primer
Let's kick off this step by prepping the plastic frame with a primer that's compatible with plastic surfaces. Here's what you need to know:
- Choose the Right Primer: Select a primer specifically designed for plastic frames to guarantee proper adhesion.
- Apply Evenly: Use smooth, consistent strokes to apply the primer evenly over the entire surface of the frame.
- Allow Sufficient Drying Time: Let the primer dry completely as per the manufacturer's instructions before proceeding with the next steps.
- Ensure Complete Coverage: Make sure the primer covers the plastic frame entirely to establish a strong base for the paint.
Using Appropriate Paint for Plastic

After preparing the plastic frame with a suitable primer, the next crucial step involves selecting the right paint specifically formulated for plastic surfaces.
When painting a plastic picture frame, it's vital to choose a type of paint that's designed to adhere to plastic materials. Using regular paints may result in poor adhesion, leading to peeling or chipping off easily. To guarantee a durable and long-lasting finish, opt for acrylic paint or other paints labeled for plastic surfaces. These specialized paints are formulated to bond effectively with plastic, preventing flaking and ensuring a smooth application.
Whether you prefer spray paints for a quick and even coverage or brush-on paints for more detailed work, selecting the appropriate paint for your plastic picture frame is key to achieving a professional-looking result.
Applying Even Coats of Paint
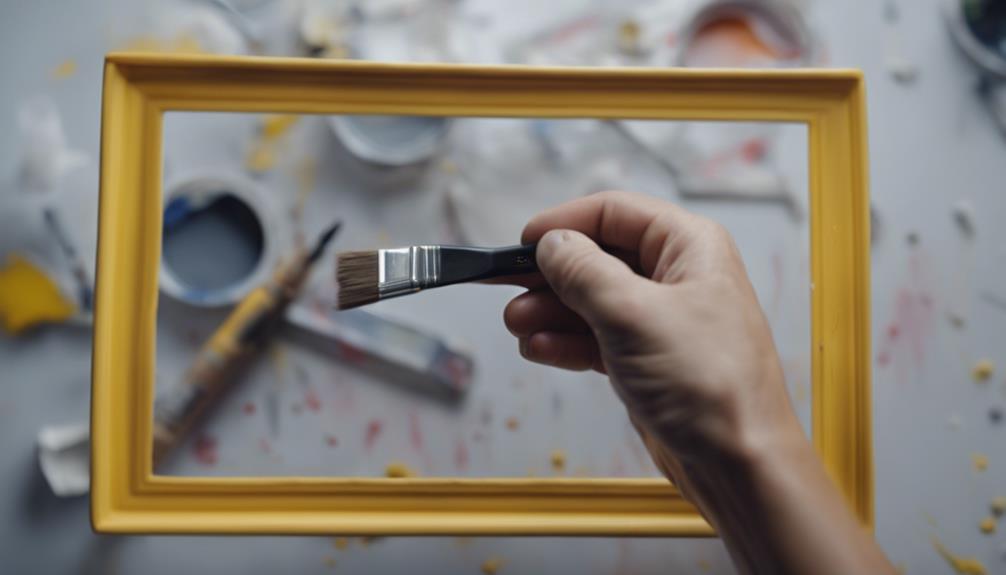
To achieve a smooth and professional finish on a plastic frame, it's essential to apply even coats of paint. When painting picture frames, following these guidelines guarantees a flawless result:
- Apply Thin and Even Coats: Each layer of paint should be applied thinly and evenly across the frame to prevent drips or uneven coverage.
- Allow Proper Drying Time: It's vital to let each coat dry before applying the next one. This helps the paint set correctly and adhere well to the plastic surface.
- Opt for Light Coats: Applying multiple light coats is preferable to a single heavy coat. This technique prevents clumping or streaking, resulting in a more uniform finish.
- Maintain Consistency: Consistency in paint application is key to achieving a uniform color and texture throughout the frame. Make sure to follow a systematic approach to ensure a professional-looking outcome.
Allowing Each Coat to Dry
Guaranteeing that each coat of paint is thoroughly dried is a critical step in achieving a flawless finish on a plastic frame. By allowing sufficient drying time between coats, we can prevent potential issues like smudges, drips, or uneven application.
It's vital to follow the recommended drying times based on the type of paint utilized to secure the best results.
Patience for Drying Times
For best results, guaranteeing each coat of paint on the plastic frame dries thoroughly before applying the next coat is essential. Here are some key points to keep in mind:
- Prevent Smudging and Streaking: Allowing each coat to dry completely helps prevent unwanted smudges or streaks in the paint job.
- Refer to Manufacturer's Instructions: Drying times can vary depending on the type of paint used. Always refer to the manufacturer's instructions for specific guidance on drying times.
- Avoid Rushing the Process: Rushing the drying process can result in a less durable finish and potential imperfections. Patience is key for a flawless outcome.
- Achieve Professional Results: Patience during drying times ensures a smooth and professional-looking paint job on the plastic frame, leading to a high-quality and long-lasting finish.
Importance of Waiting
Allowing each coat of paint to thoroughly dry is crucial for achieving a flawless finish on a plastic frame. When painting a plastic frame, the significance of waiting between coats can't be emphasized enough.
Properly allowing each coat to dry guarantees that the paint adheres evenly, preventing issues like smudging, running, or uneven coverage. Rushing this process can lead to a less durable and professional-looking result, with potential peeling or chipping over time.
The drying time required between coats may vary depending on the type of paint being used, so it's essential to follow the specific instructions provided on the paint label. Patience is key in achieving a smooth and flawless paint job on your plastic frame.
Adding Touch-Ups and Details

We often enhance the visual appeal of the painted plastic frame by adding intricate designs or patterns using acrylic craft paint on rubber stamps for a personalized touch.
To add that extra flair, here are some tips for detailing your plastic frame:
- Create Stencils: Make stencils from contact paper or use pre-made ones to easily incorporate decorative elements onto the frame.
- Antiqued Look: Apply acrylic paint or tinted glaze to achieve a vintage appearance, enhancing the frame's visual appeal.
- Metallic Touch: Experiment with gold or silver glaze for an elegant and luxurious finish.
- Creative Touches: Utilize stamps, painted designs, or rubbed-on color to elevate the overall aesthetic of the frame.
Sealing With Polyurethane

To protect and enhance the painted plastic frame, we recommend sealing it with polyurethane, a clear and durable sealant. Applying polyurethane over the painted surface not only provides protection against scratches, moisture, and UV rays but also helps to prolong the lifespan of the paint.
When selecting polyurethane, consider the different finishes available, such as matte, satin, semi-gloss, or glossy, to achieve the desired look for your frames.
To apply polyurethane effectively, make sure that the painted plastic frame has already received a coat of primer and is completely dry. Use a high-quality brush or foam applicator to apply thin and smooth coats of polyurethane to avoid streaks or bubbles. Allow each coat to dry thoroughly before adding additional layers.
Frequently Asked Questions
How to Paint a Plastic Frame?
When painting a plastic frame, proper preparation is essential. Sand the surface lightly and clean it with rubbing alcohol for better adhesion. Use a primer specifically formulated for plastic to make sure the paint sticks well.
Apply multiple thin coats of paint, allowing each layer to dry completely before adding more. Consider adding unique touches like stamps or antiquing for a personalized look.
Following these steps will result in a beautifully painted plastic frame.
What Paint to Use on Plastic Frames?
When painting plastic frames, it's important to select the right type of paint for excellent adhesion and durability. Utilizing paints specifically formulated for plastics guarantees a lasting finish.
Look for spray paints or brush-on craft paints labeled for plastic use. Consider using a plastic primer if the desired color is unavailable in the chosen paint type.
Adhering to these guidelines guarantees a successful painting project with vibrant and long-lasting results.
What Kind of Paint Will Stick to Plastic?
When considering what kind of paint will stick to plastic, it's important to choose a paint specifically designed for plastic surfaces. Regular brush-on or spray-on paints may not adhere well, leading to peeling or chipping.
Opt for spray paint formulated for plastic or use a plastic primer before painting to guarantee better adhesion. Acrylic craft paint can also be suitable for decorative purposes, but for a long-lasting finish, selecting the right plastic-specific paint is essential.
How Do You Prep Plastic for Paint?
When prepping plastic for paint, we must start by thoroughly cleaning the surface to remove any debris.
Light sanding helps the paint adhere better, and wiping with rubbing alcohol guarantees a clean canvas for painting.
Masking off areas we don't want to paint is vital.
Applying a suitable primer designed for plastic promotes paint adhesion and a smooth finish.
These steps are essential to achieve a professional-looking paint job on plastic surfaces.
Conclusion
In just 10 simple steps, you can transform a plain plastic frame into a personalized work of art.
By following these easy instructions, you can create a unique and custom piece that reflects your style and creativity.
So grab your supplies and get painting – the possibilities are endless!
- About the Author
- Latest Posts
Introducing Ron, the home decor aficionado at ByRetreat, whose passion for creating beautiful and inviting spaces is at the heart of his work. With his deep knowledge of home decor and his innate sense of style, Ron brings a wealth of expertise and a keen eye for detail to the ByRetreat team.
Ron’s love for home decor goes beyond aesthetics; he understands that our surroundings play a significant role in our overall well-being and productivity. With this in mind, Ron is dedicated to transforming remote workspaces into havens of comfort, functionality, and beauty.
Decor
How to Paint a Mirror Like a Pro in 3 Easy Steps
Find out how to transform your mirror into a masterpiece with these three easy steps that will elevate your space instantly.
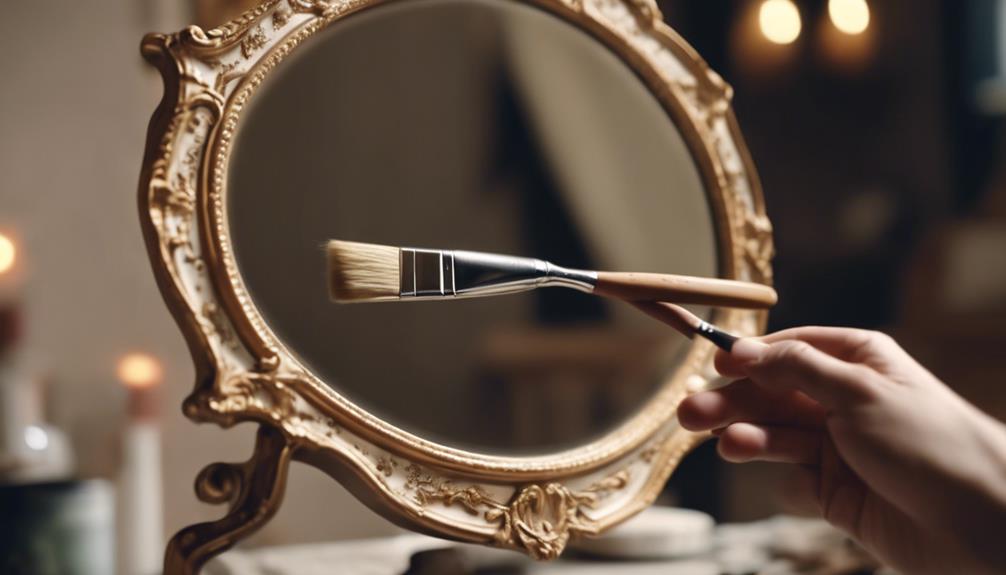
Painting a mirror like a pro is simple in three steps. First, clean and trace the frame, then prime with gesso. Apply paint from the edges in thin layers using quality brushes. Opt for enamel or acrylic paint, allowing thorough drying between coats. Finish with sealant for protection. This process guarantees a flawless, professional look that enhances any space with elegance and style. Mastering these steps will help create a polished finish that transforms your mirror into a work of art.
Key Takeaways
- Use high-quality enamel or acrylic paint for a professional finish.
- Apply thin, even layers starting from the edges.
- Allow each coat to dry completely before adding another.
- Finish with a sealant or varnish for protection and longevity.
- Focus on details and take your time for a polished result.
Prepare Mirror Frame
Let's begin by cleaning the mirror frame with a soft cloth and window cleaner to remove any dirt or residue. Make sure to use rubbing alcohol or vinegar for tougher areas, guaranteeing the surface is completely clean before starting the painting process.
Once clean, trace the area to be painted on the mirror frame using a white soluble pencil for precise painting boundaries. This step is essential in achieving a clean and professional look for your mirror project.
Next, seal the mirror frame with white gesso as a primer to prevent paint peeling and ensure long-lasting results. This will create a smooth surface for the paint to adhere to, enhancing the durability of your design.
Additionally, consider using makeup pencils, white crayons, or fabric pencils for tracing intricate designs on the mirror frame before painting to achieve a detailed and polished final look. Make sure to take your time during this preparation process to guarantee a high-quality finish for your mirror frame project.
Apply Paint Evenly

To guarantee a smooth and professional finish, apply the paint evenly on the mirror surface using a high-quality paintbrush.
Here are some key tips to help you achieve a flawless coat of paint on your mirror:
- Start painting from the edges: Begin by carefully painting along the edges of the mirror frame before moving towards the center. This method ensures a consistent application and helps prevent any uneven patches.
- Work in thin layers: Avoid applying thick coats of paint as this can lead to drips and streaks on the mirror surface. Instead, opt for multiple thin layers, allowing each coat to dry completely before adding another one.
- Use a steady hand: When applying the paint, maintain a light touch and steady hand to achieve an even finish. This technique helps in creating a uniform look across the entire mirror.
Achieve Professional Finish
For a professional finish when painting a mirror, select high-quality enamel or acrylic paint specifically formulated for glass surfaces. To achieve a polished look, it is vital to apply thin coats of paint in even layers, allowing each coat to dry thoroughly before adding the next. This process guarantees a smooth and professional result on your painted mirror surface. Additionally, consider applying a sealant or varnish to protect the painted surface and enhance its longevity. Taking your time and paying attention to details will help you safeguard the painted surface and achieve a polished finish.
| Key Steps to Achieve Professional Finish |
|---|
| Choose high-quality enamel or acrylic paint designed for glass surfaces |
| Apply thin coats in even layers |
| Allow drying time between coats |
Frequently Asked Questions
How to Do Mirror Painting?
When tackling mirror painting, selecting the correct acrylic paint designed for glass surfaces is crucial. By seeking inspiration from TikTok artists, applying thin layers of paint, and ensuring each coat is dry before adding another, you can achieve a professional finish.
Seal the painted mirror with a varnish or sealant for durability. Experimenting with different painting styles and techniques is crucial for crafting a unique and creative mirror design.
How to Paint a Mirror to Look Vintage?
When aiming to paint a mirror for a vintage appearance, we recommend utilizing chalk paint for its ability to achieve a classic look.
Lightly sanding the frame before painting can enhance the vintage effect, while distressing techniques like dry brushing or layering can contribute to an aged appearance.
Consider applying dark wax or antiquing glaze to develop a vintage patina, resulting in a weathered finish that exudes a timeless charm.
How to Get Mirror Finish When Painting?
To achieve a mirror finish when painting, it's essential to use a high-quality mirror-specific paint. Make sure the mirror surface is thoroughly clean and free of any debris to prevent imperfections.
Apply thin, even coats of paint to avoid drips and streaks that can compromise the mirror-like appearance. Consider using spray paint for a more uniform finish and to prevent brush strokes.
Allow adequate drying time between coats for a flawless mirror-like finish.
How Do You Paint a Mirror Without Getting Paint on the Mirror?
When painting a mirror, we implement a meticulous approach to prevent any unwanted paint mishaps.
Careful preparation, like using painter's tape and paper to shield the mirror, is crucial. Selecting the appropriate paint type for the frame minimizes the risk of paint reaching the mirror.
Applying paint with precision and swiftly addressing any accidental spills on the mirror guarantees a flawless finish. Patience and attention to detail are key elements in achieving a polished result.
Conclusion
To sum up, painting a mirror like a pro may seem simple, but achieving that flawless finish requires attention to detail and patience.
So next time you pick up that paintbrush, remember to take your time and follow these steps carefully.
And who knows, maybe your mirror will reflect not just your image, but also your newfound painting skills.
Happy painting!
- About the Author
- Latest Posts
Introducing Ron, the home decor aficionado at ByRetreat, whose passion for creating beautiful and inviting spaces is at the heart of his work. With his deep knowledge of home decor and his innate sense of style, Ron brings a wealth of expertise and a keen eye for detail to the ByRetreat team.
Ron’s love for home decor goes beyond aesthetics; he understands that our surroundings play a significant role in our overall well-being and productivity. With this in mind, Ron is dedicated to transforming remote workspaces into havens of comfort, functionality, and beauty.
-

 Vetted3 weeks ago
15 Best Contact Paper for Kitchen Cabinets to Elevate Your Home Decor
-

 Vetted2 weeks ago
15 Best Poe Cameras for Home Security – Reviews & Buying Guide
-

 Vetted4 weeks ago
15 Best Leather Restorer Products to Revive Your Furniture and Accessories
-

 Vetted3 weeks ago
15 Best Drain Snakes to Unclog Your Pipes Like a Pro
-

 Beginners Guides4 days ago
I Inhaled Vinegar Fumes
-

 Vetted4 weeks ago
14 Best Stationery Brands for Your Next Writing Adventure
-

 Beginners Guides2 weeks ago
Swinger Porch Light Color
-

 Mardi Gras Decoration3 weeks ago
Why Does Hobby Lobby Not Do Mardi Gras?


