
Creating a damage-free gallery wall is easy if you plan carefully and choose the right tools. Use removable hooks, adhesive strips, and a level to guarantee your artwork stays secure without holes. Measure, sketch, and visualize your layout before hanging, then select hooks based on weight and wall type. Keep your display looking great with regular maintenance and adjustments. Continue exploring to discover expert tips for perfecting your damage-free gallery wall.
Key Takeaways
- Use damage-free adhesive hooks and strips suitable for wall surface and weight of artwork.
- Plan your layout with paper templates or painter’s tape before hanging.
- Measure and level carefully to ensure precise, balanced arrangement without wall holes.
- Focus on weight capacity and surface compatibility when selecting hanging hardware.
- Regularly maintain and adjust the display to keep it looking professional and damage-free.

Adhesive Wall Hooks for Hanging Heavy Duty 50 lbs Large Hooks for Walls No Damage, Towel Sticky Clear Hook, Waterproof, Home, Bathroom, Kitchen, Office, and Outdoor 10 Pack
- Premium Material Construction: Stainless steel and PVC for durability
- Heavy Duty Support: Holds up to 50 lbs on smooth surfaces
- Versatile Usage: Suitable for towels, coats, keys, and more
As an affiliate, we earn on qualifying purchases.
As an affiliate, we earn on qualifying purchases.
Why Use Damage-Free Methods for Your Gallery Wall?
Using damage-free methods for your gallery wall is a smart choice because it allows you to change or update your display without leaving behind holes or marks. When you choose the right hanging methods, you protect your walls and preserve their appearance over time. Damage-free options, like adhesive strips or hooks, are gentle yet secure, making it easy to swap out wall art whenever you want a fresh look. These methods are especially useful if you rent or frequently redecorate, saving you from patching and repainting. Plus, damage-free hanging methods are simple to install and remove, giving you flexibility without risking wall damage. They’re a practical, stylish solution for creating a versatile and ever-changing gallery wall. Incorporating smart hanging solutions can further enhance your setup by providing more precise and automated display options, making the process even more convenient and adaptable. Additionally, understanding projector technology concepts can help you choose the best methods for displaying artwork or multimedia content in your space. Exploring sauna heaters and cold plunge systems can inspire creative ways to incorporate wellness elements into your home decor. Furthermore, utilizing natural landscaping ideas can help you blend your gallery wall with outdoor aesthetics if you have an exterior wall or garden feature.
What Tools Do You Need for a No-Hole Gallery Display?
To set up a no-hole gallery display, you’ll need a few essential tools that allow you to hang your artwork without damaging your walls. Command hooks or adhesive strips are perfect for this, holding frames securely without nails or screws. For artistic framing, choose lightweight frames that complement your wall color coordination, ensuring a cohesive look. A level helps you align pieces precisely, maintaining a polished arrangement. Measuring tapes or painter’s tape are useful for planning your layout before hanging. Keep a pencil nearby to mark placement points gently. These tools make it easy to create a stunning gallery wall while protecting your walls from holes and ensuring your artwork looks perfectly arranged. Additionally, selecting damage-free hanging options can further support your efforts to keep your walls pristine while creating a beautiful display. Incorporating smart home compatible hanging solutions can also streamline your setup and maintenance. Proper planning with the right tools can turn your wall into a professional-looking gallery without any damage. Using home maintenance techniques and tools can help you achieve a secure and damage-free display that lasts.
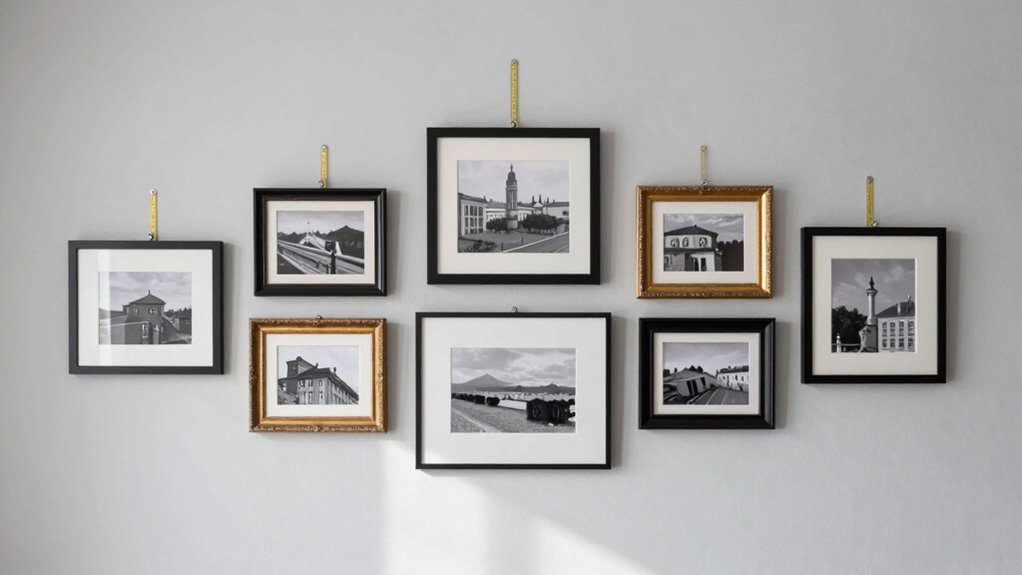
How to Plan Your Gallery Wall Layout: Measuring, Mockups, and Visualization
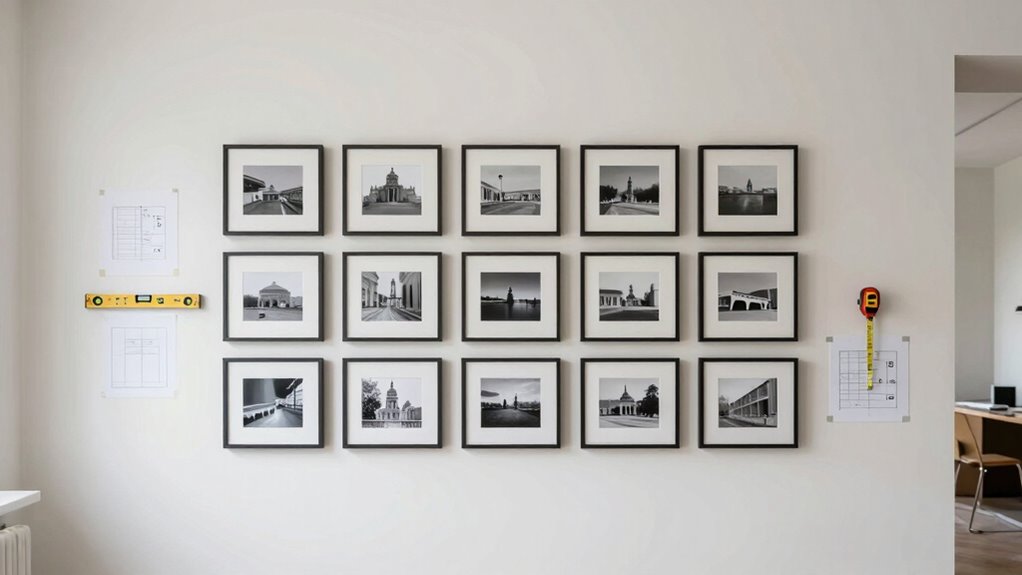
To create a balanced gallery wall without holes, start with precise measurements and the right tools to map out your space accurately. Make mockups of your layout using paper or digital templates to see how pieces will fit together. Visualizing the final arrangement helps you make adjustments before hanging, ensuring a polished look.
Precise Measurements and Tools
Before hanging your gallery wall, taking precise measurements and utilizing the right tools guarantees a seamless layout. Achieving measuring accuracy is essential to ensure your artwork aligns perfectly and maintains a balanced look. Use a sturdy ruler, a tape measure, or a laser measure for the most precise results. Selecting the right tools depends on your space and the complexity of your layout—laser measures are ideal for larger walls, while tape measures work well for smaller areas. Always double-check measurements and record them carefully. Accurate measurements prevent misplacements and help you visualize the final arrangement clearly. By focusing on measuring accuracy and tool selection, you set a solid foundation for a professional-looking gallery wall that avoids unnecessary holes and adjustments.
Creating Effective Mockups
Once you’ve taken accurate measurements and selected the right tools, creating mockups allows you to visualize your gallery wall before hanging. Start by choosing frame selection that complements your space and enhances your artwork or photos. Use paper cutouts or digital templates to represent each frame’s size and shape, arranging them on your wall area. Focus on color coordination by grouping similar hues or contrasting tones to achieve your desired aesthetic. This step helps you identify the best placement, balance, and spacing without making holes. Adjust the mockups easily until you’re satisfied with the layout. Creating effective mockups saves time and prevents mistakes, ensuring your final gallery wall looks cohesive and polished. It’s an essential step in planning like a pro.
Visualizing the Final Layout
Visualizing the final layout is a crucial step that transforms your mockups into a clear plan for your gallery wall. It helps you see how the art placement will look on your wall and guarantees visual balance. Use your mockups or digital tools to arrange your pieces, paying attention to spacing and alignment. Consider how each piece interacts with others, creating harmony and avoiding clutter. Visualize the overall flow, making sure the arrangement feels balanced and cohesive. This step allows you to make adjustments before committing to the final setup, saving time and effort. By clearly visualizing the layout, you’ll confidently execute your gallery wall with a polished, professional look—without the need for holes or guesswork.
Which Damage-Free Hanging Techniques Work Best?

Command hooks and removable adhesive strips are popular damage-free options, but how well do they hold up over time? You might find that some work better for heavier frames or longer-lasting displays. Let’s explore which techniques deliver the best results for your gallery wall. Additionally, understanding the weight capacity of each hanging method can help you choose the most secure option for your needs. Proper surface preparation can also enhance adhesion and prevent accidental falls. For optimal results, consider the adhesive strength of your chosen hooks or strips relative to the weight of your artwork. Being aware of surface compatibility can further improve the durability of your display. Moreover, selecting appropriate materials ensures the longevity and safety of your gallery wall.
Command Hooks Effectiveness
When it comes to damage-free hanging, command hooks stand out as a popular and reliable option, but their effectiveness depends on choosing the right type for your wall and weight needs. Proper command hooks effectiveness hinges on selecting hooks with strong damage free adhesion suited for your items. Heavy objects require larger hooks with higher weight capacity, while lighter decor benefits from smaller, discreet hooks. To maximize results, follow the manufacturer’s instructions carefully. Here’s a quick comparison:
| Hook Type | Best For | Damage Free Adhesion | Max Weight | Reusability |
|---|---|---|---|---|
| Small Command 170 | Light frames, decor | Yes | 0.5 lbs | Yes |
| Large Command 170 | Medium frames, art | Yes | 3 lbs | Yes |
| Utility Hooks | Heavier items, shelves | Yes | 5-7 lbs | Yes |
| Clear Mini Hooks | Small items, keys | Yes | 0.5 lbs | Yes |
| Metal Hooks | Heavier tools, decor | Yes | 10 lbs | Yes |
Removable Adhesive Strips
Removable adhesive strips are an excellent damage-free hanging solution that combines ease of use with minimal wall impact. They’re perfect for creating gallery walls without leaving holes or marks. When choosing removable adhesive strips for damage free hanging, consider these options:
- Weight capacity – Ensure the strips support your artwork’s weight to prevent slips or falls.
- Surface compatibility – Check that the strips work well on your wall type, whether painted, wallpapered, or textured.
- Ease of removal – Opt for strips that come off cleanly without peeling paint or damaging the wall surface.
Using removable adhesive strips allows you to arrange your gallery wall confidently, knowing you won’t compromise your wall’s integrity. They’re a reliable, damage-free hanging method for your stylish display.
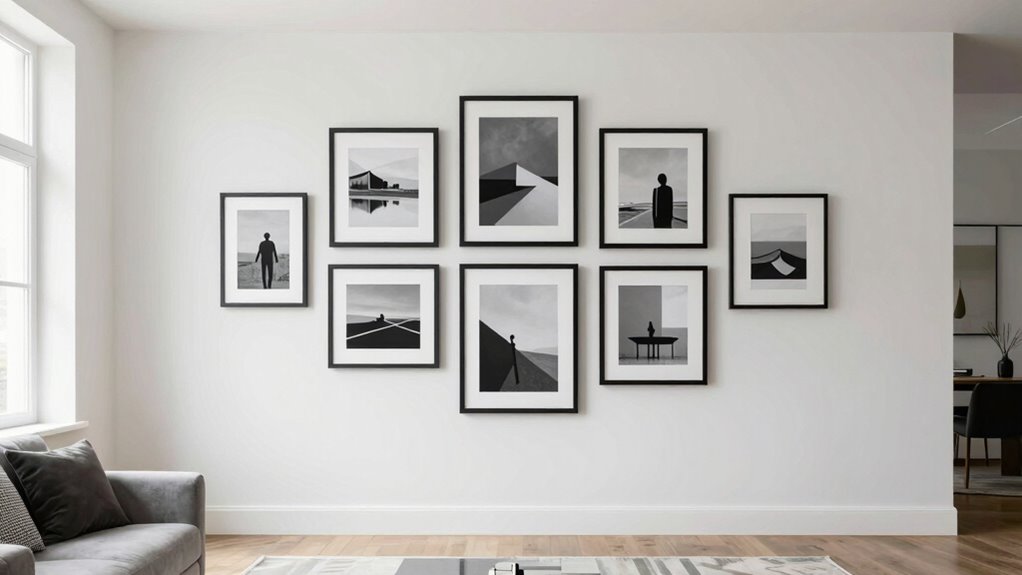
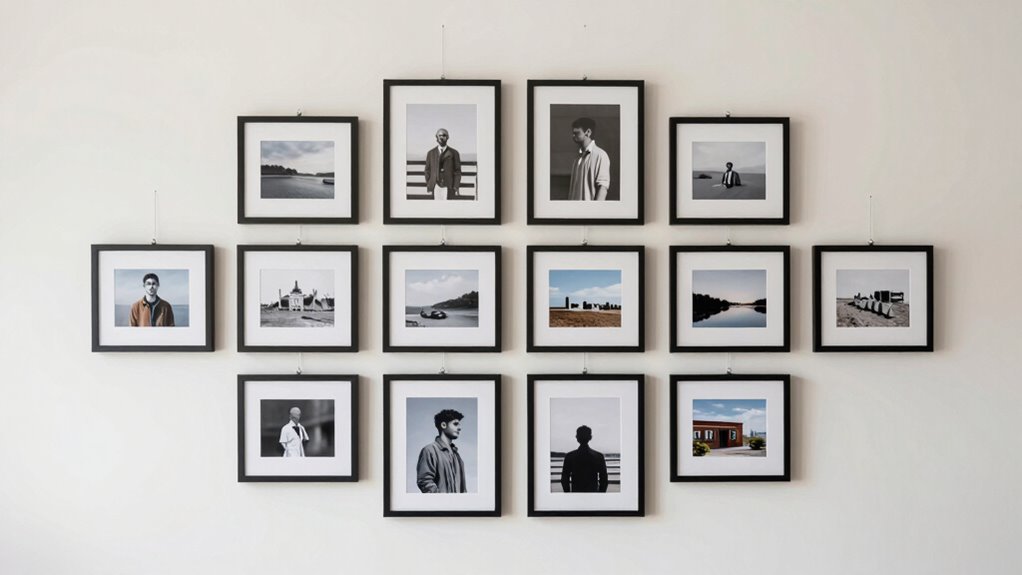
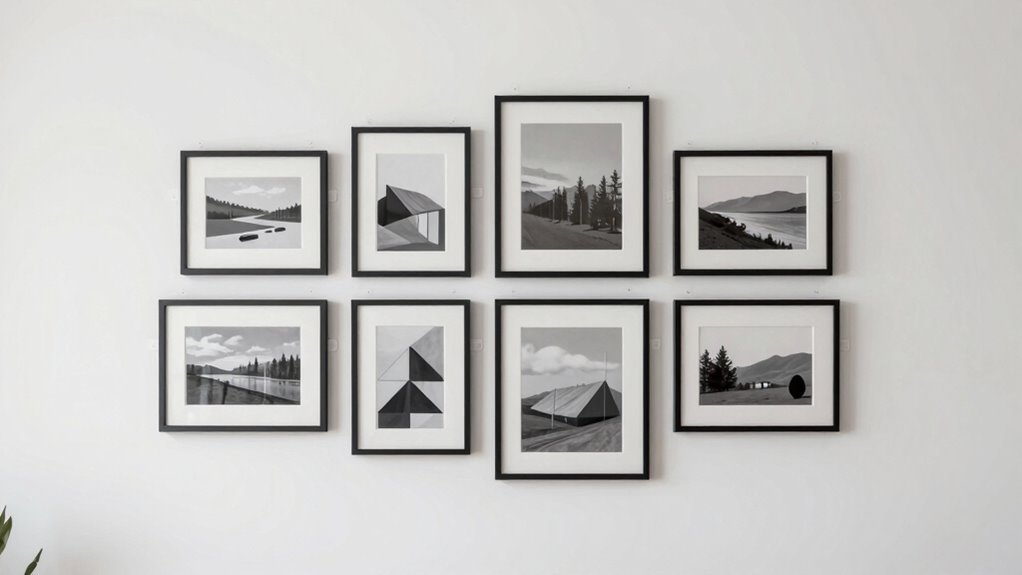
How to Arrange Your Photos and Art for a Cohesive Look

Creating a cohesive gallery wall starts with planning your layout before hanging a single piece. Begin by considering color coordination; select artwork and photos with complementary hues or a consistent palette to unify the display. Mix and match frame styles thoughtfully—using similar finishes or sizes can create harmony, even with varied designs. Arrange your pieces on the floor first, experimenting with different configurations to find a balanced look. Keep spacing even and consider a central focal point to anchor the arrangement. Use painter’s tape on the wall to mock up your layout, ensuring the placement feels intentional. By paying attention to color coordination and frame styles, you’ll craft a polished, unified display that feels curated and stylish.
Tips for Maintaining and Preserving Your Damage-Free Gallery Wall

To keep your gallery wall looking pristine over time, regular maintenance is key. Proper care helps preserve the artistic framing and ensures your display remains stunning. Here are three tips:
Regularly clean, monitor fading, and rotate artwork to keep your gallery wall beautiful over time.
- Clean your artwork gently using a soft, dry cloth to remove dust without damaging the frame or surface. Regular cleaning can prevent buildup that may cause discoloration or deterioration over time. Incorporating professional cleaning techniques can further safeguard your artwork’s condition and longevity.
- Check for fading or discoloration, especially with color-coordinated pieces, and reposition or replace if necessary to maintain visual harmony. Incorporating lighting management can also help prevent fading caused by prolonged exposure to light.
- Rotate or swap out artwork periodically to refresh the display and prevent damage from prolonged exposure to light. This practice aligns with content creation strategies that emphasize keeping content fresh and engaging.
- Utilize project management support to coordinate maintenance tasks and ensure your gallery wall stays in optimal condition. Additionally, understanding quality assessment can help you select durable pieces that withstand regular handling and environmental changes.
Troubleshooting Common Issues and Fixes Without Drilling
Even with careful maintenance, issues can arise that threaten the integrity of your damage-free gallery wall. If your gallery lighting isn’t providing even illumination, try repositioning your light sources or using adhesive-backed LED strips that don’t require drilling. For frame selection, if a frame isn’t sitting flush, check if the adhesive hooks or strips are properly aligned and rated for your frame’s weight. Sometimes, a slight shift in placement causes imbalance or sagging. To fix this, adjust the hooks or replace them with stronger options. If a piece appears crooked, minor adjustments with repositionable mounting strips can realign your artwork without damage. Regularly inspecting and tweaking your setup guarantees your gallery wall remains pristine and perfectly arranged. Additionally, understanding wall compatibility can help you choose the best mounting solutions that prevent damage and ensure stability. Considering mounting hardware options suited to your wall type can further enhance the stability and safety of your gallery wall. Exploring quality assessment for mounting accessories can also ensure you select durable, reliable options that hold your artwork securely. Furthermore, inspecting the weight capacity of your mounting hardware ensures your frames are supported safely and securely. To further enhance your gallery’s stability, exploring the latest advanced mounting techniques can provide additional support and flexibility.
Frequently Asked Questions
Can Damage-Free Methods Support Heavy Artwork or Frames?
Yes, damage-free methods can support heavy artwork or frames if you choose options with strong adhesive strength. Use high-quality hooks or strips specifically designed for heavy loads, and guarantee you follow the weight guidelines. Properly cleaning the surface before application can also improve adhesive strength. While these methods are effective, always double-check the weight limits to keep your art securely displayed without damaging your walls.
Are There Specific Wall Types Unsuitable for No-Hole Displays?
Certain wall types, like textured or uneven surfaces, aren’t ideal for no-hole displays. For example, if your wall has popcorn texture, adhesives may struggle with wall surface compatibility, causing instability. Adhesive limitations become evident on delicate wallpaper or painted drywall that can peel or damage easily. Always test a small area first, ensuring your chosen method adheres securely without risking damage, especially on surfaces that aren’t smooth or sturdy.
How Long Can Damage-Free Adhesives Hold Artwork Securely?
Damage-free adhesives can typically hold your artwork securely for several weeks to a few months, depending on the weight and surface. To maximize their effectiveness, you should explore alternative adhesive options suited for your wall type and verify proper wall surface preparations. Clean surfaces thoroughly, remove dust, and follow manufacturer instructions. Regularly check the adhesion, especially in humid or high-traffic areas, to prevent accidental falls or damage.
Can Damage-Free Hanging Techniques Be Reused on Different Walls?
Yes, damage-free hanging techniques can often be reused on different walls, but you should consider wall compatibility and adhesive longevity. Different surfaces, like painted drywall or textured walls, may affect how well the adhesive sticks and comes off. Always check the adhesive’s instructions for reuse, and test on a small area first. With proper care, you can enjoy repositioning your artwork without damaging your walls or sacrificing adhesive quality.
What Are the Best Practices for Removing Damage-Free Hangers Without Damage?
To remove damage-free hangers without damage, use the right removal tools like plastic putty knives or dental floss. Gently slide the tool under the hanger to break the adhesive’s strength, minimizing wall damage. Carefully pull or slide the hanger off, applying steady pressure. Avoid ripping or pulling abruptly, and make sure you work slowly to preserve your wall surface, keeping your walls pristine and ready for your next display.
Conclusion
Now that you know the secrets to creating a stunning, damage-free gallery wall, imagine the possibilities—your space transformed without a single hole. But what if you encounter a stubborn frame or an unexpected challenge? Stay vigilant, because the right technique could be the key to revealing your perfect display. Ready to elevate your decor without compromise? The next step could change the way you hang, forever. Are you prepared to master the art of damage-free gallery walls?