Decor
How to Make Adorable White Moss Dollar Store Pumpkins
Discover the simple, budget-friendly magic that transforms plain foam pumpkins into stunning, rustic fall decorations with a few clever tweaks.
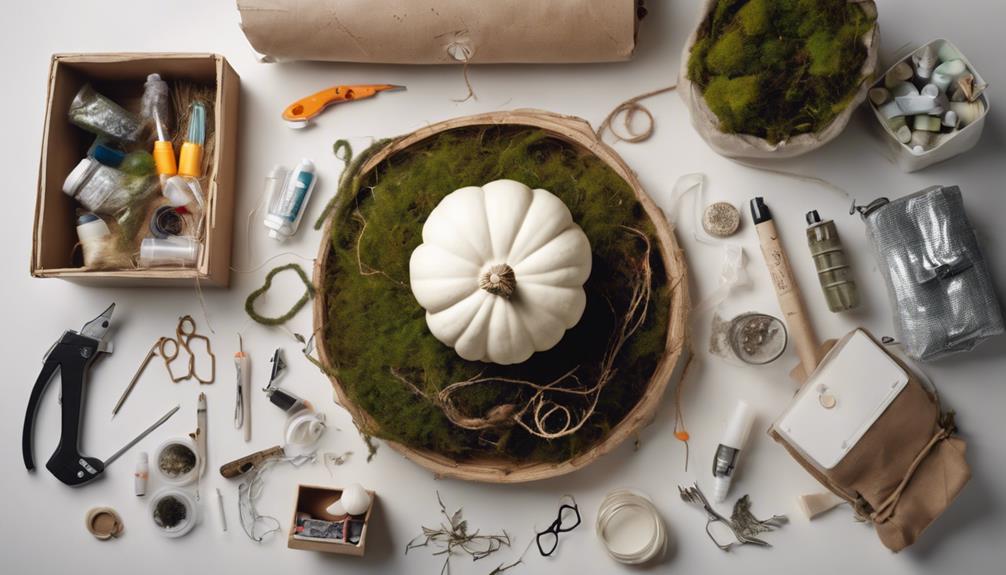
We transform plain Dollar Tree foam pumpkins into adorable fall decorations by combining white chalk paint and Spanish moss accents. First, we gather and prepare the pumpkins by wiping them down with a damp cloth and lightly sanding for paint adhesion. Then, we apply a uniform white chalk paint base coat, allowing it to dry completely before adding moss accents with hot glue. By layering the moss and trimming excess, we achieve a textured, polished finish. From here, we can customize our pumpkins with different shades of white paint, texture, and added embellishments – and explore even more creative possibilities.
Key Takeaways
• Gather Dollar Tree foam pumpkins in various sizes with smooth surfaces for easy decoration.
• Apply a uniform white chalk paint base coat to the entire surface, allowing each coat to dry completely.
• Attach Spanish moss with hot glue in small sections, pressing moss gently onto the glue for a textured appearance.
• Experiment with shades of white paint, texture, and layered paint for a unique, mossy effect.
• Add extra dimension with faux moss, glitter, or other embellishments to personalize your Dollar Store pumpkins.
Gather Dollar Tree Pumpkins
Let's kick off our DIY project by picking up the essentials: we're heading to the Dollar Tree to snag a few of their affordable foam pumpkins. We're going for a rustic, fall-inspired look, and these foam pumpkins will provide the perfect base. Since they're only a dollar each, we can experiment with different designs and textures without breaking the bank.
We'll grab a few of these foam pumpkins in various sizes to create a visually appealing arrangement. When selecting our pumpkins, we'll look for ones with a smooth surface, as this will make it easier to attach our decorative elements later on. We might also consider the shape and size of the pumpkins, opting for a mix of larger and smaller ones to add visual interest.
With our foam pumpkins in hand, we'll be ready to start transforming them into adorable white moss pumpkins that'll add a touch of autumn charm to our homes.
Prepare Pumpkins for Painting
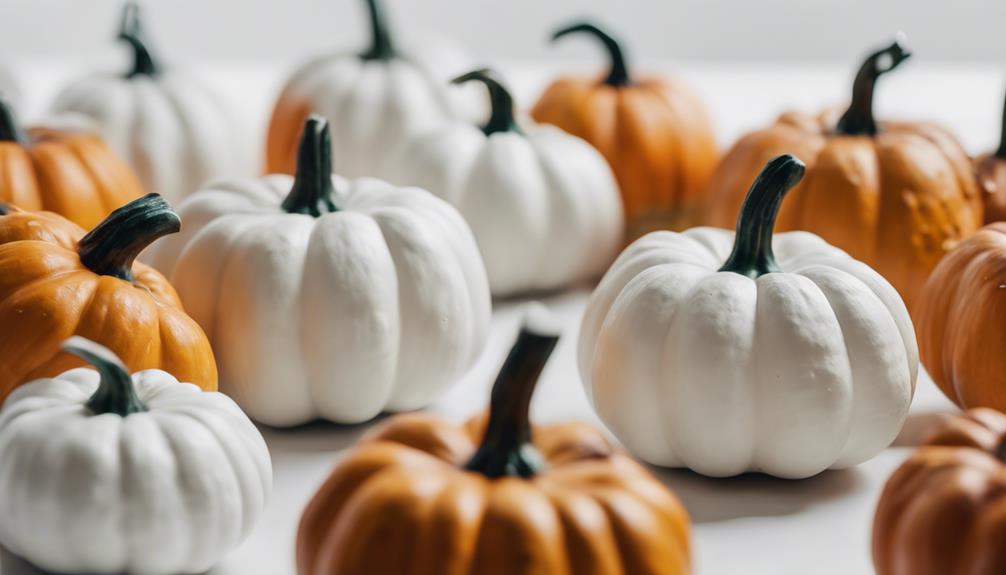
We begin preparing our foam pumpkins for painting by gently wiping them down with a damp cloth to remove any dirt or dust that may have accumulated during storage or transportation. This guarantees a smooth surface for painting and helps the paint adhere better.
Next, we lightly sand the surface of the pumpkins using fine-grit sandpaper to create a rough texture for the paint to grip onto. This step is essential in achieving a smooth and even paint job.
Once the pumpkins are sanded, we're ready to apply our first coat of white chalk paint. We consider using a sponge brush or foam brush for a smooth and even application of the paint. We make sure to allow the first coat to dry completely before adding additional coats, ensuring the paint adheres properly and doesn't peel off.
Apply White Chalk Paint Base
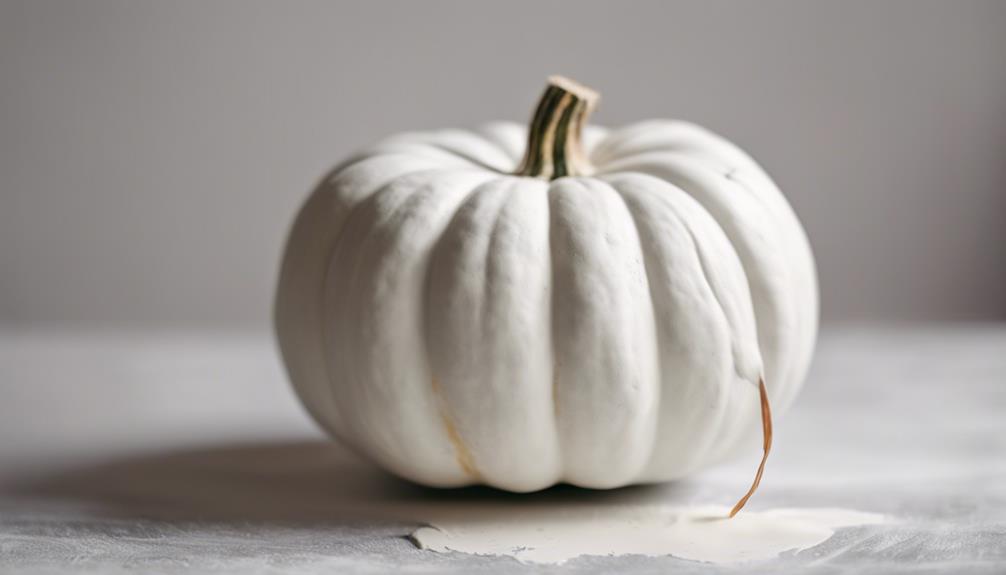
As we apply the white chalk paint base to our Dollar Tree foam pumpkins, we're not just slapping on a coat of paint – we're setting the stage for a beautiful, cohesive look.
We'll explore the importance of a smooth finish, and share our top tips for achieving a flawless base coat.
From the essential characteristics of a good base coat to the secrets of a silky smooth finish, we'll cover it all in the following sections.
Paint Application Tips
We apply a uniform base coat of white chalk paint to the entire surface of the foam pumpkins using a foam brush or paintbrush. This step is important in creating a clean canvas for our moss and embellishments to shine. When applying the paint, we make sure to cover the entire pumpkin, including the stem, to guarantee a seamless look.
Here are some key tips to keep in mind when applying the white chalk paint:
- Use thin coats: Apply multiple thin coats of paint, allowing each coat to dry completely before adding the next. This prevents the paint from pooling and ensures an even finish.
- Work in a well-ventilated area: Chalk paint can have strong fumes, so make sure to work in a well-ventilated area to avoid inhaling the fumes.
- Use a foam brush or paintbrush: These types of brushes are perfect for applying a smooth, even coat of paint.
- Avoid using hot glue at this stage: We'll get to using hot glue later in the process, but for now, let's focus on getting our paint just right.
Base Coat Essentials
Applying a uniform base coat of white chalk paint to the entire surface of the foam pumpkin is essential in creating a clean canvas for our moss and embellishments to shine. This base coat provides a neutral background that allows our decorations to pop. We want to make sure to cover the entire surface of the pumpkin with an even coat of white chalk paint, ensuring that every nook and cranny is coated.
| Step | Action | Result |
|---|---|---|
| 1 | Apply white chalk paint | Uniform base coat |
| 2 | Cover entire surface | No bare spots |
| 3 | Allow to dry | Paint is set |
| 4 | Inspect for coverage | Even coat achieved |
| 5 | Move to next step | Ready for moss |
Smooth Finish Secrets
We start by spreading a smooth, even layer of white chalk paint onto the foam pumpkin using a foam brush or paint sponge, ensuring a flawless finish. This initial coat is important in achieving a professional-looking result.
We make sure to apply the paint in thin, even layers, allowing each layer to dry completely before adding the next. This prevents the paint from pooling or becoming too thick, which can lead to an uneven finish.
Here are some key takeaways to keep in mind when applying the white chalk paint base:
- Use a foam brush or paint sponge for even coverage and a flawless finish.
- Apply multiple thin coats to achieve a smooth, professional-looking finish.
- Allow each coat to dry completely before adding the next to prevent pooling or unevenness.
- Don't overload the brush or sponge with too much paint, as this can lead to a thick, uneven coat.
Add Spanish Moss Accents
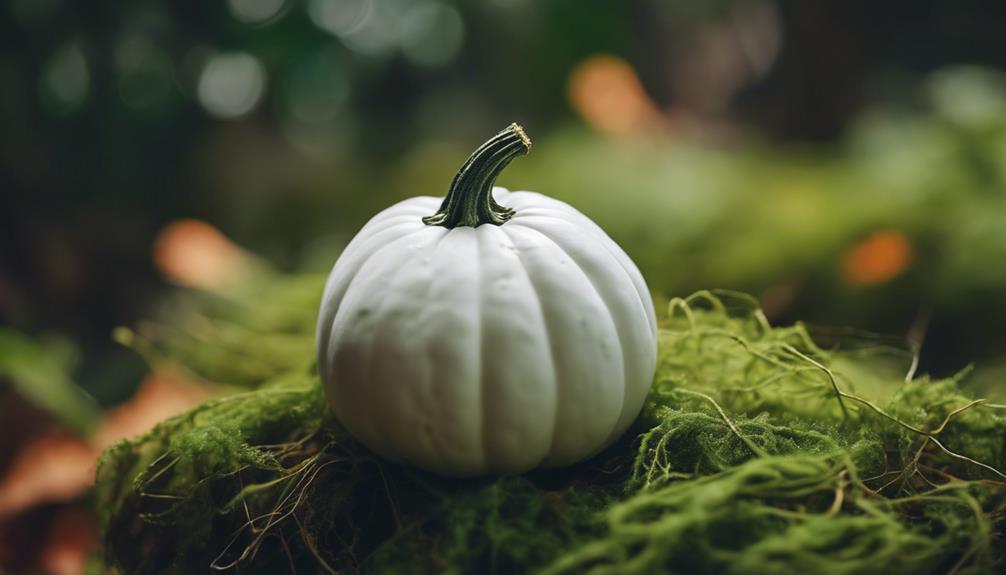
We'll add a charming, organic touch to our pumpkins by attaching small pieces of Spanish moss with hot glue, creating a beautifully textured appearance. This natural, rustic look complements our white pumpkins perfectly, and it's easy to achieve.
We can find Spanish moss accents at craft stores or online, and they come in various sizes and shapes to mix and match with our pumpkins. To start, we'll need a glue gun and some Spanish moss. We'll break the moss into small pieces, ensuring they're not too dense or bulky for our pumpkins.
Then, we'll use our glue gun to attach the moss pieces to the pumpkin, creating a beautiful, textured design. The white color of the Spanish moss blends seamlessly with our white pumpkins, adding a touch of elegance to our decor. By attaching the moss with hot glue, we'll achieve a stunning, organic look that's perfect for fall or winter decorations.
Attach Moss With Hot Glue
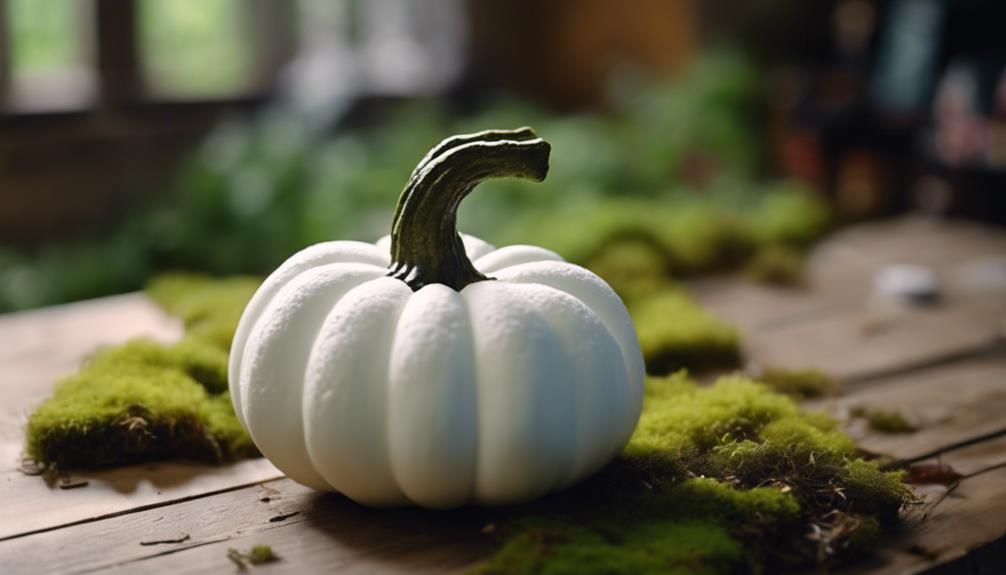
With our glue gun loaded and Spanish moss at the ready, we're now ready to attach the moss to our pumpkin, adding a delightfully textured element to our decor. To guarantee a secure attachment, we'll apply the hot glue in small sections, making sure to press the moss onto the glue gently to avoid burning ourselves.
Here's how we'll attach the moss to our pumpkin:
- Apply hot glue in small sections to the pumpkin's surface.
- Press the white moss onto the hot glue, taking care not to burn ourselves.
- Keep adding moss in layers until the entire pumpkin is covered, creating a textured look.
- Trim any excess moss with scissors for a clean and polished finish.
Allow Glue to Dry Completely
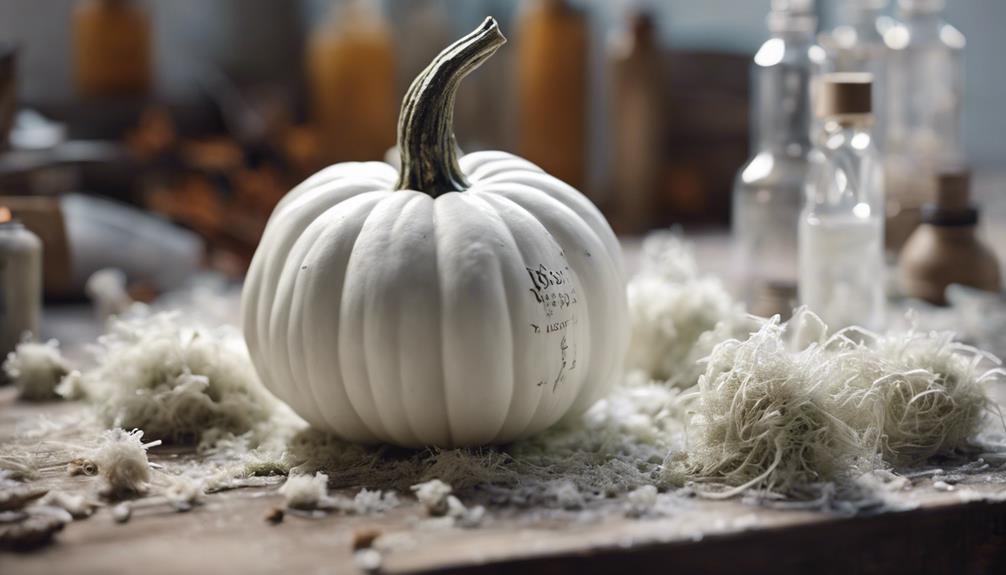
Now that the moss is attached, it's essential to allow the glue to dry completely in order to guarantee a secure hold. We've come too far to risk the moss falling off or shifting, and patience is key in this step.
If we rush the process, we might end up with a pumpkin that's not one cohesive piece. By allowing the glue to dry thoroughly, we make certain that the moss stays in place and maintains the desired appearance.
This step may seem tedious, but it's vital for a beautifully adorned white moss dollar store pumpkin. We can't stress enough how important it's to wait for the glue to dry completely. It may take some time, but the result will be worth it.
We'll be left with a stunning, long-lasting moss-covered pumpkin that's truly one piece. So, let's take a deep breath and let the glue do its magic. The wait will be worth it when we're admiring our handiwork.
Display Fall Decor Accents
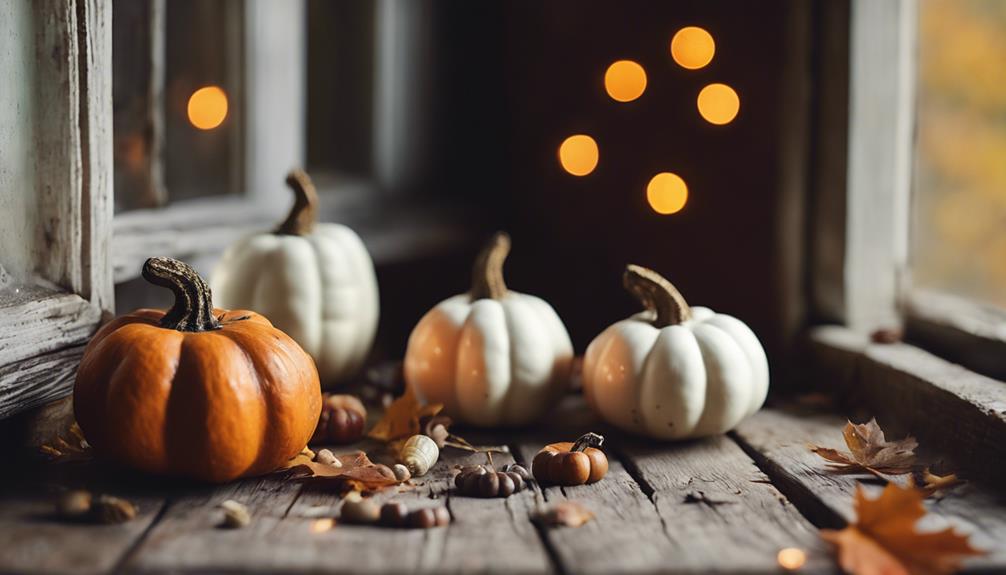
As we move on to displaying our adorable white moss pumpkins, we're excited to incorporate them into our fall decor.
We'll explore the essential elements that make our seasonal decor pop, such as thoughtfully placing our pumpkins alongside other autumnal accents.
Fall Decor Essentials
We adorn our homes with fall decor essentials like white moss dollar store pumpkins to create a warm and inviting atmosphere. These charming accents add a touch of autumn beauty to our spaces, making them feel cozy and welcoming.
To create a beautiful fall display, we can incorporate these pumpkins with other essential decor items.
Here are some must-haves for a beautiful fall display:
- Candles: Add a warm glow to your space with candles in autumnal scents like pumpkin spice or apple cinnamon.
- Wreaths: Create a stunning focal point with a fall-themed wreath on your front door or wall.
- Cozy Blankets: Add a layer of warmth and comfort with plush blankets in autumnal hues.
- Fall Leaves: Bring the outdoors in by adding artificial or real fall leaves to your decor.
Pumpkin Display Ideas
By grouping our white moss-covered pumpkins with other fall decor accents, we can create a charming and inviting display that captures the essence of the season. To achieve this, we can use a mix of sizes and shapes of white moss pumpkins to add variety and interest to our display.
Incorporating other elements like faux leaves, acorns, pinecones, or small pumpkins will enhance the fall theme and create a cozy atmosphere.
When it comes to pumpkin display ideas, we can arrange our white moss pumpkins on a rustic tray, wooden crate, or woven basket for a cozy and inviting look. Adding some finishing touches like fairy lights, candles, or a fall-themed sign will add warmth and ambiance to our space.
Tips for Customization Options
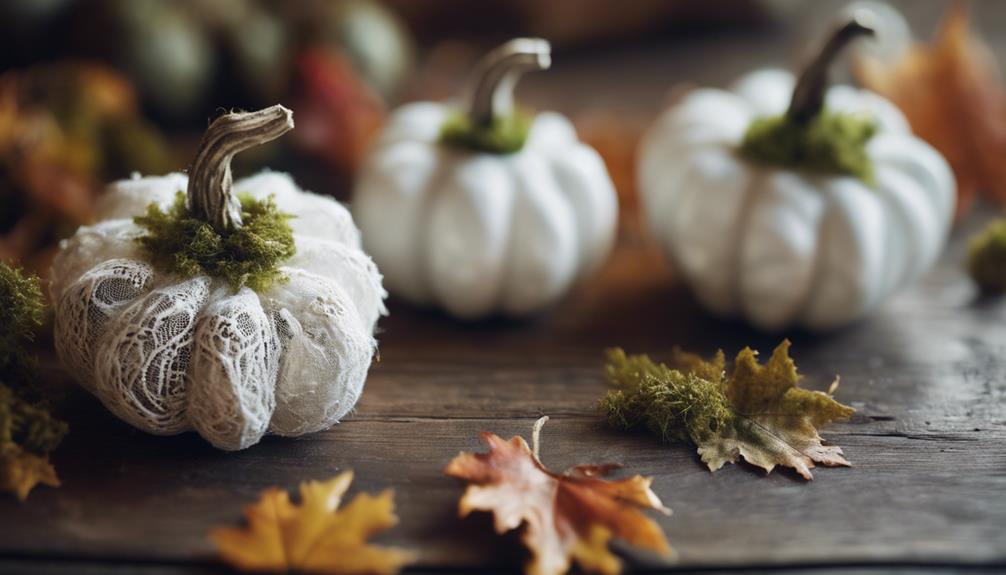
With a little creativity, we can take our Dollar Store pumpkins to the next level by experimenting with various customization options. By adding our personal touch, we can make them really pretty and truly one-of-a-kind.
Here are some tips to get us started:
- Experiment with shades of white paint to achieve the desired mossy effect. Consider mixing in a touch of green paint for a more realistic look.
- Use texture to add dimension. Use a small paintbrush or sponge to carefully apply white paint to specific areas for a textured moss look.
- Add extra dimension with layered paint. Lightly dab on different shades of white and green paint for a natural mossy look.
- Finishing touches matter. Sprinkle on some faux moss or glitter for added texture and charm to your Dollar Store pumpkins.
Frequently Asked Questions
How to Make a Pumpkin White?
When we want to make a pumpkin white, we start by applying a base coat of white chalk paint.
We use a foam brush or sponge to evenly cover the pumpkin, ensuring a smooth, clean look.
After allowing the paint to dry completely, we can add additional decorations or a clear sealant for a glossy finish.
This simple process transforms our pumpkin, giving it a beautiful, snowy appearance.
How to Stack Craft Pumpkins?
We stack craft pumpkins by applying hot glue to the bottom of each pumpkin and attaching them to each other. It's crucial to hold the pumpkins together for a few seconds to establish a strong bond.
We recommend starting with the largest pumpkin at the base and working our way up to the smallest. This creates a visually appealing and sturdy stacked pumpkin display.
What Kind of Paint to Use on Plastic Pumpkins?
'Practice makes perfect,' and when it comes to painting plastic pumpkins, we've learned that using the right paint is essential. We opt for acrylic or spray paint specifically designed for plastic surfaces, ensuring good adhesion and coverage.
A matte or satin finish gives a realistic look. We recommend checking online tutorials or craft stores for the best paint options. Priming before painting can also enhance durability.
How Do You Make Glitter Pumpkins?
We're excited to share how to create glitter pumpkins, a delightful addition to our fall decor.
To get started, we apply a coat of white chalk paint to our foam pumpkins. Once dry, we use spray adhesive to cover them with white Spanish moss for a soft, textured look.
Conclusion
As we wrap up this DIY project, we can't help but wonder: what other creative ways can we repurpose dollar store finds?
With these adorable white moss pumpkins, we've proven that a little bit of creativity and some basic crafting skills can transform ordinary items into extraordinary fall decor.
By following these simple steps, we've turned plain pumpkins into unique, rustic-chic accents that add a touch of autumn charm to our homes.
- About the Author
- Latest Posts
Introducing Ron, the home decor aficionado at ByRetreat, whose passion for creating beautiful and inviting spaces is at the heart of his work. With his deep knowledge of home decor and his innate sense of style, Ron brings a wealth of expertise and a keen eye for detail to the ByRetreat team.
Ron’s love for home decor goes beyond aesthetics; he understands that our surroundings play a significant role in our overall well-being and productivity. With this in mind, Ron is dedicated to transforming remote workspaces into havens of comfort, functionality, and beauty.
Architecture Home Styles
Does a Wrap Around Porch Add Value to Your Home? Find Out
Discover the surprising impact a wrap-around porch can have on your home's appraisal and desirability in the real estate market.
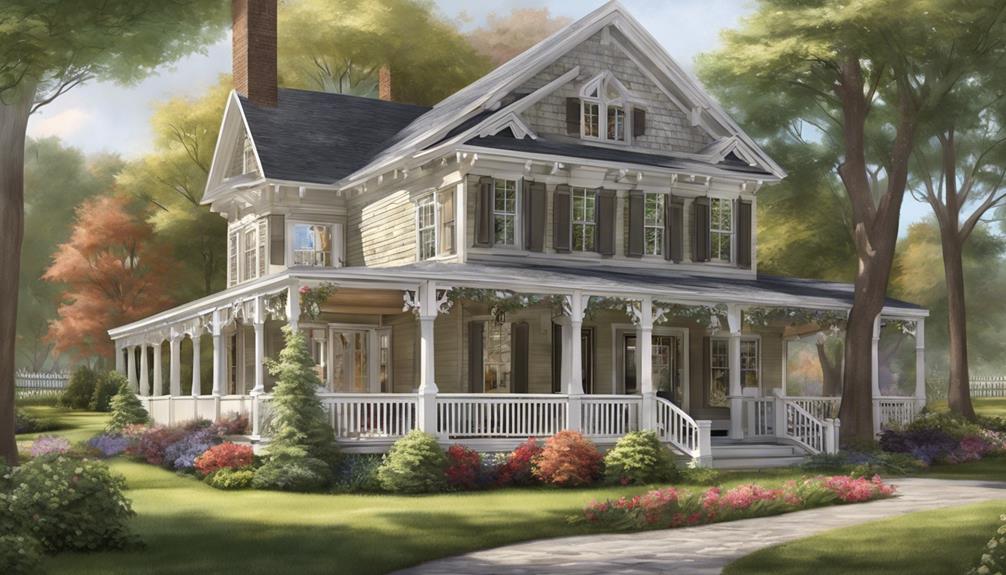
Adding a wrap-around porch to your home can greatly increase its charm and resale value.
However, the question remains – does this addition truly elevate your property's overall value?
Let's explore the various factors at play and uncover the potential impact that a wrap-around porch could have on your home's appraisal and desirability in the real estate market.
Key Takeaways
- A wrap-around porch enhances property value and appeal.
- It provides versatile outdoor living space.
- The porch creates a seamless indoor-outdoor transition.
- Elevates curb appeal, attracting buyers and adding charm to the home.
Benefits of Adding a Wrap-Around Porch
Adding a wrap-around porch to your home significantly boosts its value and enhances the overall appeal of the property. The addition of a wrap-around porch not only increases the monetary value of your home but also provides an inviting outdoor living space for various activities.
This extension offers a seamless transition between indoor and outdoor areas, creating a versatile space for relaxation and entertainment. Furthermore, the curb appeal of your home is elevated with the addition of a wrap-around porch, adding a charming visual element that attracts potential buyers and impresses guests.
Whether you envision hosting gatherings or simply enjoying a tranquil morning coffee, a wrap-around porch offers limitless possibilities for utilization. Its modern appeal and desirable features make it a sought-after enhancement for homeowners looking to elevate their living experience and increase the value of their property.
Factors Impacting Home Value With Wrap-Around Porch
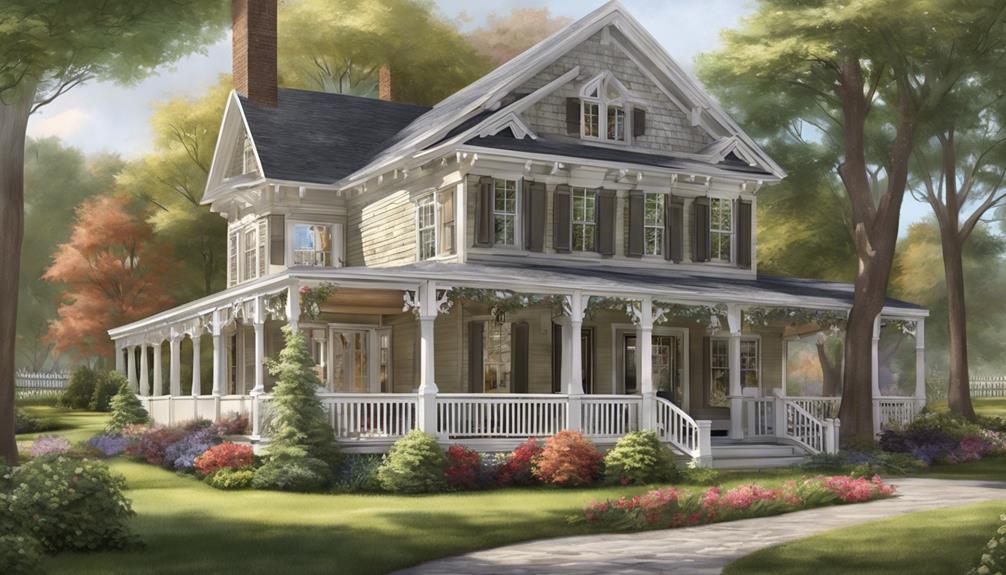
When considering the factors that influence a home's value with a wrap-around porch, we must examine how curb appeal impacts buyer interest.
Functional outdoor space adds utility and charm, further enhancing the property's appeal.
Ultimately, these elements work together to increase the overall property value.
Curb Appeal Impact
Enhancing a home's curb appeal through the addition of a wrap-around porch can significantly elevate its overall value and desirability. When considering the curb appeal impact of a wrap-around porch, several key factors come into play:
- Location: The neighborhood and surroundings can influence how much value a wrap-around porch adds to a home.
- Architectural Cohesion: A well-designed wrap-around porch that complements the style of the house can enhance its visual appeal.
- Market Trends: The real estate market conditions and buyer preferences play a crucial role in determining the impact of a wrap-around porch on the value of a property.
These factors interact to shape the perception of a home's value and the effectiveness of a wrap-around porch in enhancing it.
Functional Outdoor Space
Utilizing a wrap-around porch effectively expands a home's functional outdoor space, offering additional square footage for diverse activities and social gatherings. The presence of such a feature not only increases the usable square footage but also facilitates easier entertaining by providing ample seating and social areas.
Furthermore, the enhanced curb appeal that a wrap-around porch brings creates a welcoming aesthetic, ultimately adding value to the home. These outdoor living spaces play a significant role in enhancing homeowners' quality of life, providing a versatile area for relaxation and socialization.
It's crucial to ensure proper construction and maintenance of the wrap-around porch to preserve its value and contribute positively to the overall home value.
Increased Property Value
Expanding on the functionality of a wrap-around porch, understanding the factors impacting home value with this feature is crucial for homeowners looking to maximize their property's worth. When considering how a front porch addition adds value, it's essential to recognize the following:
- Average Return on Investment: The average return on investment for adding a wrap-around porch can vary depending on location and market conditions.
- Enhanced Appeal: A well-designed wrap-around porch adds value by inviting your home, attracting potential buyers, and contributing to a modern and desirable home aesthetic.
- Market Influences: Factors like surrounding homes and neighborhood trends can impact how much value a wrap-around porch adds to your property.
Enhancing Curb Appeal With a Wrap-Around Porch

With a wrap-around porch, a home's curb appeal undergoes a remarkable transformation, creating a welcoming and visually appealing facade. This addition not only enhances curb appeal but also increases the property's visual appeal and attractiveness to potential buyers. The welcoming aesthetic created by a wrap-around porch can significantly elevate the overall exterior appearance of your home, making it more appealing in the real estate market.
The charm and character brought by a well-designed wrap-around porch play a crucial role in making your home stand out amongst other properties. The complete transformation that a wrap-around porch offers can make a strong first impression on visitors and passersby, setting your home apart from the rest. By investing in a wrap-around porch, you aren't only adding value to your property but also creating a unique and inviting atmosphere that enhances the overall appeal of your home.
Functional Advantages of a Wrap-Around Porch
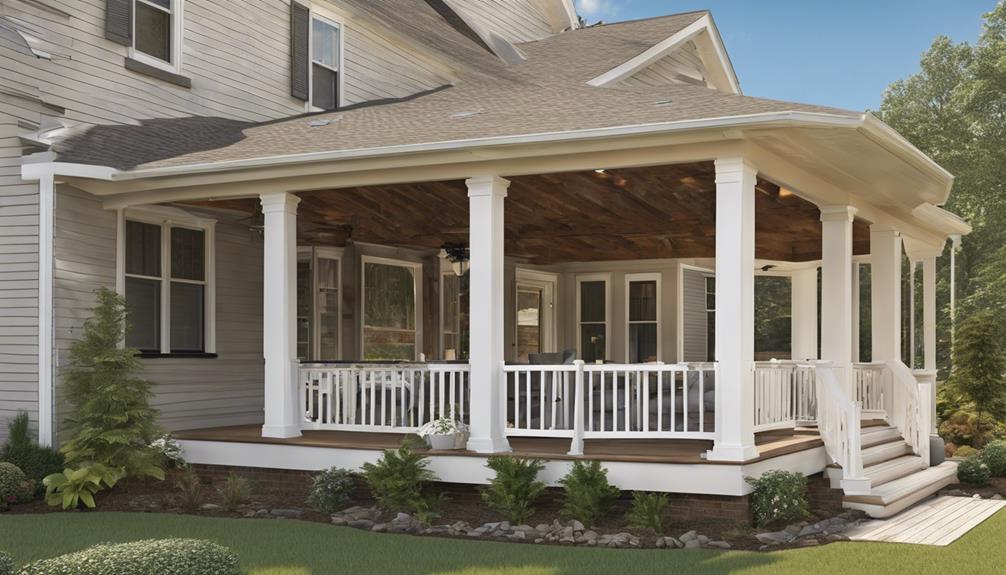
Enhancing the functionality of a home, a wrap-around porch offers additional usable square footage and versatile spaces for various activities, such as entertaining and relaxation.
Functional Advantages of a Wrap-Around Porch:
- Increased Usable Space: A wrap-around porch acts as an extension of the interior living space, providing room for diverse activities and creating a seamless indoor-outdoor flow.
- Enhanced Socializing Opportunities: With ample seating and open areas, the porch becomes an inviting space for gatherings, barbecues, or simply enjoying a cup of coffee with friends and family.
- Customization for Personal Comfort: Homeowners can personalize their wrap-around porch to suit their relaxation needs, whether it's adding a swing, cozy seating, or a dining area. This customization not only adds value to the home but also enhances the overall appeal and functionality of the property.
Market Trends for Homes With Wrap-Around Porches
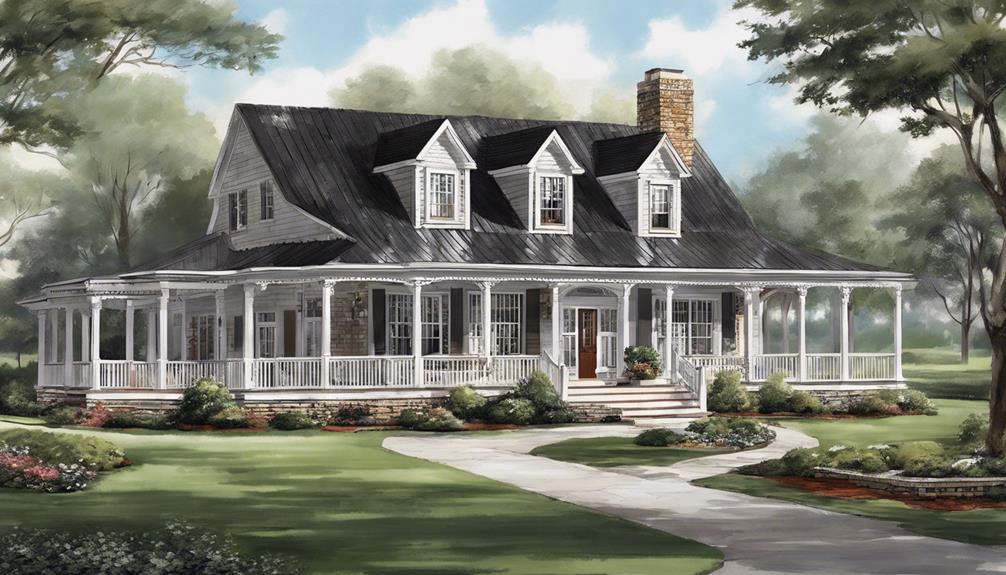
We observe a clear uptrend in the popularity of homes with wrap-around porches, reflecting a shift in buyer preferences towards properties that offer enhanced outdoor living spaces.
Analyzing buyer behavior reveals a strong inclination towards homes with this feature, indicating a significant market demand for properties with wrap-around porches.
Understanding these trends can provide valuable insights for homeowners and real estate professionals looking to capitalize on this market preference.
Porch Popularity Trends
Recent market data reflects a notable surge in the popularity of homes boasting wrap-around porches, indicating a growing preference among buyers for this charming architectural feature. This trend highlights a desire for outdoor spaces that seamlessly blend functionality and aesthetic appeal, offering homeowners a cozy retreat to enjoy both relaxation and social gatherings. Many of these homes also incorporate beautiful gable roof designs, further enhancing their classic and timeless appeal. The combination of these two features has become a sought-after pairing, resonating with buyers who value both charm and character in their living spaces.
Porch Popularity Trends:
- Increased Demand: Homes with wrap-around porches have seen a 26% rise in popularity, showcasing a strong market demand for this feature.
- Quicker Sales: Properties with wrap-around porches tend to sell faster, spending 18 fewer days on the market than those without this appealing attribute.
- Value Appreciation: Houses featuring wrap-around porches have experienced a 12% increase in value compared to similar homes lacking this amenity.
These trends highlight the desirability and financial benefits associated with homes that include wrap-around porches, making them a lucrative option for both buyers and sellers in today's real estate market.
Buyer Preferences Analysis
Analyzing current market trends reveals a strong preference among buyers for homes featuring wrap-around porches due to their charm and appeal as inviting outdoor spaces. Buyer preferences indicate that 65% favor houses with a porch, leading to faster sales and higher selling prices compared to those without.
Real estate data supports this by showing up to a 10% premium value for homes with wrap-around porches. Families and individuals seeking outdoor living spaces find these homes particularly attractive. The charm and inviting nature of wrap-around porches play a significant role in influencing purchase decisions positively.
As buyers increasingly prioritize outdoor amenities and unique features, homes with wrap-around porches stand out for their value and desirability in today's market.
Customization Options for Wrap-Around Porches
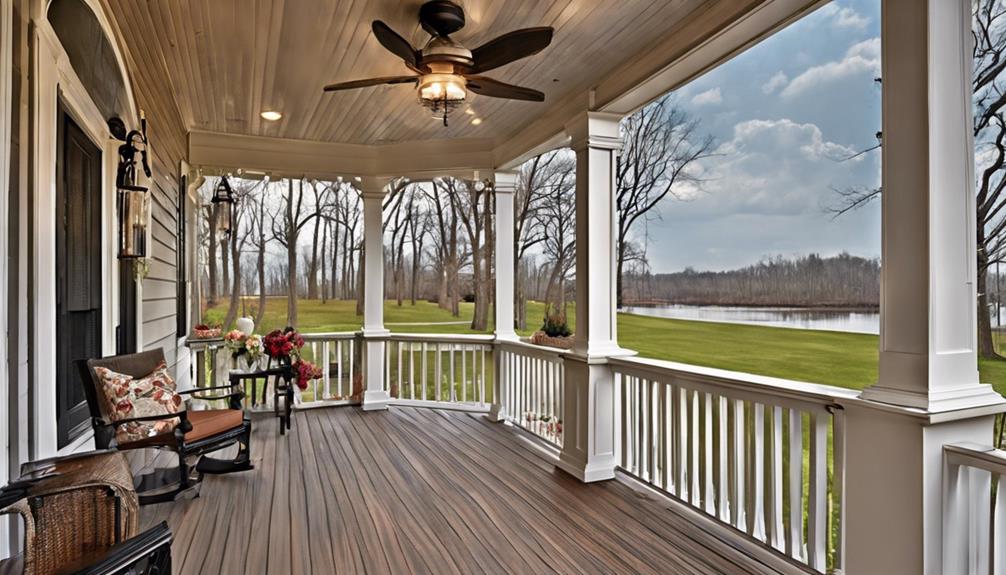
When customizing a wrap-around porch, homeowners have a plethora of options to enhance the seating arrangements, decor, and overall functionality. Here are some customization options to consider:
- Outdoor Accessories: Incorporating swings, hammocks, planters, and outdoor rugs can add a unique touch to the wrap-around porch, creating a cozy and inviting atmosphere for relaxation or social gatherings.
- Lighting Choices: Selecting the right lighting fixtures can transform the porch into a functional space for evening entertainment or quiet nights outdoors. Options like string lights, lanterns, or wall sconces can enhance both aesthetics and practicality.
- Flooring Materials: Choosing the appropriate flooring material is essential for both durability and visual appeal. Options such as wood, composite decking, or tile can be tailored to match the home's style and the homeowner's preferences, adding a cohesive look to the overall design.
Return on Investment for Wrap-Around Porch Addition
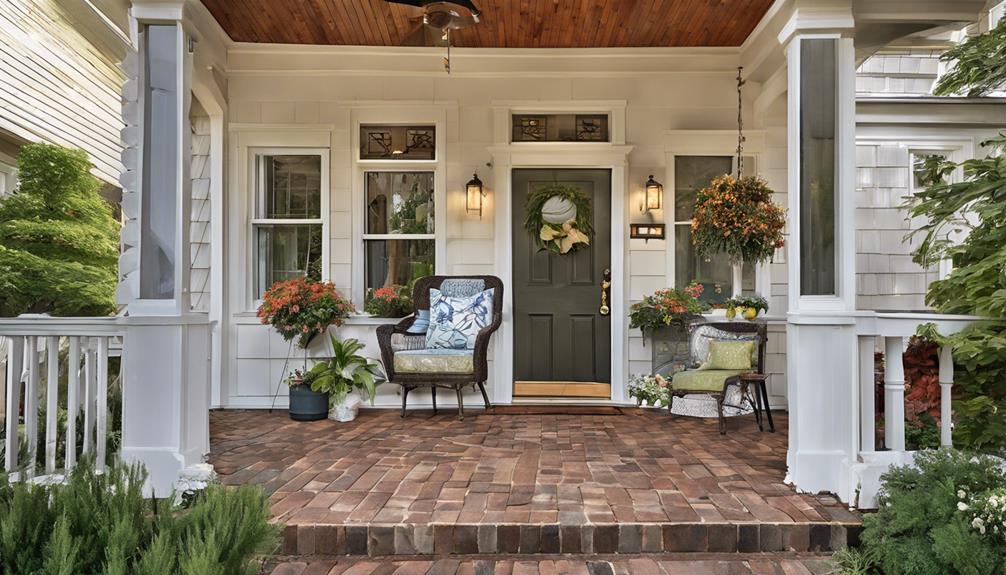
Typically, investing in a wrap-around porch addition yields a substantial return on investment, averaging around 84%. The financial impact of adding a wrap-around porch can be quite significant, as it not only enhances your home's aesthetic appeal but also boosts its resale value.
Factors such as the current real estate market conditions and the quality of materials used can influence the return on investment for a porch addition. While the ROI may vary depending on these factors, a well-designed wrap-around porch generally adds substantial value to your property.
This increase in home value can make the investment in a wrap-around porch a wise choice for homeowners looking to improve their property. By considering the potential return on investment and the added resale value, adding a wrap-around porch can be a strategic decision to enhance both the functionality and appeal of your home.
Considerations Before Adding a Wrap-Around Porch
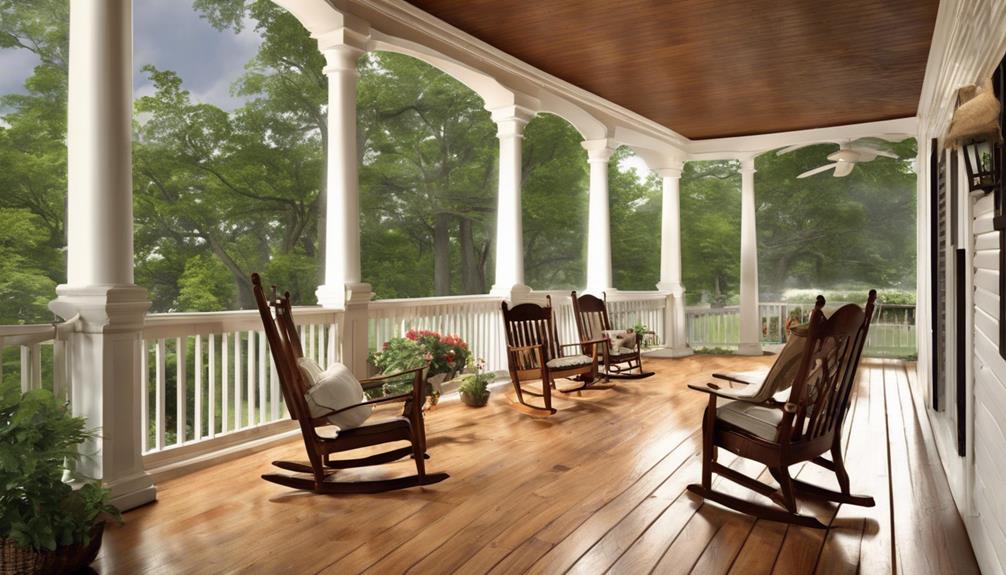
Considering the architectural style of your home is crucial before deciding to add a wrap-around porch.
- Architectural Style: Determine if a wrap-around porch complements the existing style of your home. For example, a Victorian-style home may benefit from a detailed and ornate porch, while a modern home might suit a sleek and minimalist design.
- Available Space: Assess the size of your property and consider how a wrap-around porch could affect outdoor activities, landscaping, and traffic flow. Ensure there's ample space for the porch without overcrowding the yard.
- Zoning Regulations: Research local zoning laws and obtain necessary permits before starting construction. Compliance with regulations ensures the porch addition is legal and avoids potential fines or delays.
Before proceeding, weigh the cost considerations, including materials, labor, and maintenance, to ensure the investment aligns with your budget. Additionally, consult a real estate agent to understand the potential impact a wrap-around porch may have on your home's value in the local market.
These considerations will help you make an informed decision about adding a wrap-around porch to your home.
Frequently Asked Questions
Does a Wrap-Around Porch Add Value to Your Home?
Adding a wrap-around porch can significantly boost a home's value, with returns ranging from 12% to 84%. Factors like location and quality influence the return on investment.
A well-designed porch enhances curb appeal and attracts buyers. The extra living space and charm it provides make it a sought-after feature.
In the end, a wrap-around porch can pay for itself by increasing the home's resale value.
How Much Value Does a Porch Add?
When determining the added value of a porch, we consider various factors. These include location, materials used, and overall design. Porches can enhance curb appeal and provide additional outdoor living space, both of which are attractive to potential buyers.
Understanding the local real estate market and trends is crucial for maximizing the value a porch can bring to your home. Investing in a well-designed porch can yield a significant return on investment.
Does Enclosing a Porch Add Value to a Home?
Enclosing a porch can significantly increase a home's value by adding usable indoor space that can be included in the overall square footage. This added square footage enhances the home's appeal and functionality, providing versatile living areas for relaxation or entertainment.
Quality materials and craftsmanship in the enclosure process can lead to a higher return on investment. Properly enclosed porches are a valuable addition to homes, both in terms of practicality and resale value.
How Much Value Does a Screened Porch Add to a House?
When it comes to the value a screened porch adds to a house, it's essential to consider various factors such as location, quality, and current market trends.
Screened porches can enhance a home's appeal by providing a bug-free outdoor living space, increasing functionality and enjoyment.
The return on investment for a screened porch can range from 25-50% of its cost, making it a worthwhile addition for many homeowners seeking both comfort and value.
Conclusion
In conclusion, the addition of a wrap-around porch to your home not only increases its value but also creates a charming and inviting space for relaxation and entertainment.
With its potential to enhance curb appeal and provide functional benefits, a wrap-around porch is a valuable investment that can set your home apart in the market.
Consider the possibilities and enjoy the beauty and versatility that a wrap-around porch can bring to your living space.
- About the Author
- Latest Posts
Introducing Ron, the home decor aficionado at ByRetreat, whose passion for creating beautiful and inviting spaces is at the heart of his work. With his deep knowledge of home decor and his innate sense of style, Ron brings a wealth of expertise and a keen eye for detail to the ByRetreat team.
Ron’s love for home decor goes beyond aesthetics; he understands that our surroundings play a significant role in our overall well-being and productivity. With this in mind, Ron is dedicated to transforming remote workspaces into havens of comfort, functionality, and beauty.

Are you searching for a way to incorporate rustic charm into your home decor? Consider using dried corn stalks. These versatile and natural accents can be utilized to craft beautiful wreaths, inviting table centerpieces, or even a festive autumn entryway display. If you’re feeling inspired, you may even want to explore selling home decor online and showcase your unique creations to others who appreciate the cozy, farmhouse aesthetic.
With their natural beauty and versatility, dried corn stalks can be a stunning addition to any room.
In this article, I’ll guide you through the process of drying corn stalks, from choosing the right stalks to storing them for longevity.
Get ready to transform your space with this simple yet impactful DIY project.
Key Takeaways
- Choose sturdy and mold-free corn stalks with strong stalks
- Harvest and prepare the stalks at the right time using sharp tools
- Dry the stalks in a well-ventilated area with low humidity for several weeks
- Store the dried corn stalks in a cool and dry place, away from moisture, to maintain their shape and prevent mold
Choosing the Right Corn Stalks
When choosing the right corn stalks for decor, it’s important to look for ones that are sturdy and free of mold or pests. To start, consider the corn varieties available and choose those with strong stalks that can withstand the drying process. Look for stalks that are thick and healthy, without any signs of rot or insect damage.
When harvesting the corn stalks, make sure to use sharp and clean harvesting equipment to prevent any contamination. This includes using sharp knives or shears to cut the stalks cleanly without causing any unnecessary damage. By selecting the right corn stalks and using proper harvesting equipment, you can ensure that your dried corn stalks will be beautiful and durable for your decor projects.
Now, let’s move on to the next section about harvesting corn stalks for drying.
Harvesting Corn Stalks for Drying
Once you’ve gathered mature corn plants, make sure to remove any leaves or excess debris before beginning the drying process. This will ensure that your corn stalks are clean and ready for drying.
When it comes to choosing suitable corn varieties for drying, look for varieties with sturdy stalks that can withstand the drying process without breaking.
As for harvesting tools and equipment, a sharp pair of garden shears or a machete will do the trick. Cut the stalks as close to the ground as possible, being careful not to damage the plants nearby.
Now that you have harvested your corn stalks, it’s time to move on to preparing them for drying.
Preparing Corn Stalks for Drying
When it comes to preparing corn stalks for drying, there are a few key points to keep in mind.
First, proper harvesting techniques are crucial to ensure the stalks are in the best condition for drying. This includes cutting the stalks at the right time and using sharp tools to avoid damage.
Second, the drying time and conditions are important factors to consider. Stalks should be hung in a well-ventilated area with low humidity, and it may take several weeks for them to fully dry.
Lastly, preserving the color and texture of the corn stalks can be achieved by avoiding direct sunlight during the drying process and storing them in a dry, dark place after they have dried.
Proper Harvesting Techniques
To properly harvest corn stalks for decor, you’ll want to ensure that the ears are fully mature and the husks are dry and brown. This will ensure that the corn is at its peak for drying and will result in the best quality stalks for your decor. When choosing the right corn varieties for decor, look for varieties that have strong, sturdy stalks and large, attractive ears. After harvesting, it’s important to handle the corn stalks carefully to prevent damage. Trim off any excess leaves or husks, and remove any damaged or diseased ears. Once you have selected the best stalks, you can begin the drying process.
| Steps | Harvesting Techniques |
|---|---|
| 1 | Ensure ears are fully mature and husks are dry and brown |
| 2 | Choose corn varieties with strong stalks and attractive ears |
| 3 | Handle stalks carefully to prevent damage |
| 4 | Trim off excess leaves and remove damaged or diseased ears |
Now that you have properly harvested your corn stalks, it’s time to move on to the next step: drying time and conditions.
Drying Time and Conditions
Now you’ll want to find a cool, dry place with good air circulation to hang your harvested corn stalks for optimal drying time and conditions. Here are some drying techniques and optimal conditions to consider:
- Hang the corn stalks upside down to encourage even drying and prevent the stalks from curling.
- Choose a location away from direct sunlight to avoid fading the vibrant colors of the corn.
- Ensure there is good air circulation around the stalks to prevent mold or moisture buildup.
- Keep the area cool and dry, as excessive heat or humidity can hinder the drying process.
By following these drying techniques and providing optimal conditions, you can preserve the color and texture of your corn stalks for long-lasting decor.
To further enhance the preservation process, let’s move on to the next section about preserving color and texture.
Preserving Color and Texture
To maintain the vibrant colors and texture of your harvested corn stalks, it’s important to take proper steps in preserving them. Preserving the color and texture of corn stalks can be achieved through various drying techniques and preservation methods.
One effective method is air drying. After harvesting the corn stalks, remove any excess leaves and debris, and then hang them upside down in a cool, dry place with good air circulation. This will allow the stalks to dry naturally while maintaining their color and texture.
Another method is using a desiccant, such as silica gel or borax. Simply place the corn stalks in a container with the desiccant, ensuring they are completely covered, and leave them for a few weeks to dry.
By following these preservation techniques, you can ensure that your corn stalks retain their vibrant colors and texture for decorative purposes.
Now, let’s move on to hanging the corn stalks to dry…
Hanging Corn Stalks to Dry
Hang your corn stalks upside down in a well-ventilated area to allow them to dry thoroughly. Hanging corn stalks outdoors is a great alternative to drying them indoors. Here are some practical tips for drying corn stalks outdoors:
-
Find a shady spot: Direct sunlight can cause the stalks to dry too quickly, leading to cracking and loss of color. Choose a spot that is shaded for most of the day to ensure a slow and even drying process.
-
Use a sturdy hanger: Hang the stalks upside down from a sturdy hanger or a clothesline. Make sure the stalks are securely attached to prevent them from falling and getting damaged.
-
Protect from moisture: Cover the stalks with a breathable material, like a paper bag or cheesecloth, to protect them from moisture and dust while they dry.
-
Monitor regularly: Check on the stalks regularly to ensure they are drying properly. If you notice any signs of mold or rot, remove the affected stalks immediately.
Drying Corn Stalks Indoors
When it comes to drying corn stalks indoors, there are several key points to consider. Firstly, the best drying method for corn stalks is to hang them upside down in a warm, dry location with good air circulation. This allows the stalks to gradually dry out without becoming moldy or decaying.
Secondly, the ideal time and temperature for drying corn stalks is to let them hang for several weeks in a room with a temperature between 60-80°F (15-27°C). This ensures that the stalks dry out completely and are ready for storage.
Lastly, when it comes to indoor storage, it is important to keep the dried corn stalks in a cool, dry place. This helps prevent any moisture or pests from affecting them. By following these tips, you can successfully dry and store corn stalks indoors.
Best Drying Methods
The best way to dry corn stalks for decor is by using a dehydrator or an oven. These methods allow for efficient drying while preserving freshness and maintaining the natural color of the corn stalks. Here are some tips to help you achieve the best results:
- Cut the corn stalks at the base and remove any leaves or husks.
- Arrange the stalks in a single layer on the dehydrator trays or oven racks.
- Set the dehydrator to a low temperature, around 100°F (38°C), or preheat the oven to its lowest setting.
- Allow the corn stalks to dry for several hours, checking periodically for dryness.
By using these drying methods, you can effectively dry your corn stalks for decor purposes.
Now, let’s move on to the next section, where we will discuss the importance of time and temperature in the drying process.
Time and Temperature
Using a dehydrator or oven, you can achieve optimal results by allowing the corn stalks to dry for several hours at a low temperature. Drying techniques are crucial in preserving the corn stalks’ natural beauty and ensuring they last long as decor.
The key to successful drying is finding the optimal conditions where the moisture is removed without damaging the stalks. By setting the dehydrator or oven to a low temperature, around 100-120°F, you can slowly dry the corn stalks, preventing them from becoming brittle or discolored. It is important to give them enough time to dry completely, typically around 6-8 hours.
This slow and gentle process will help preserve the stalks’ vibrant colors and prevent any molding or rotting. Once the corn stalks are thoroughly dried, you can move on to the next step of indoor storage tips.
Indoor Storage Tips
To ensure your corn stalks remain in good condition during indoor storage, remember to keep them in a cool and dry place. Here are some tips for storing your corn stalks indoors:
- Choose a location with a consistent indoor temperature, ideally between 60-70 degrees Fahrenheit, to prevent the stalks from drying out too quickly or becoming brittle.
- Keep the humidity levels under control by placing a dehumidifier or moisture-absorbing packets in the storage area. This will help prevent mold and mildew from forming on the stalks.
- Avoid exposing the stalks to direct sunlight, as it can cause fading and deterioration.
- Store the corn stalks upright or hang them to maintain their shape and prevent bending or breaking.
By following these tips, you can ensure that your corn stalks remain in pristine condition throughout the indoor storage period.
Now, let’s move on to the various outdoor drying methods for corn stalks.
Outdoor Drying Methods for Corn Stalks
For outdoor drying methods, you can simply bundle the corn stalks together and hang them upside down. This is one of the easiest and most effective techniques for drying corn stalks naturally. Choose a dry, well-ventilated area, such as a covered porch or shed, to hang the stalks. Make sure the stalks are secured tightly with twine or rope to prevent them from falling.
Allow the corn stalks to hang for several weeks until they are completely dry and brittle. During this time, the stalks will naturally preserve and retain their shape. Once the drying process is complete, you can move on to monitoring the stalks to ensure they are fully dried and ready for use in your decor projects.
Monitoring the Drying Process
Make sure you regularly check the corn stalks to ensure they are drying properly. Monitoring the drying process is crucial for achieving the best results when drying corn stalks for decor.
Here are some key things to keep in mind:
-
Moisture levels: Use a moisture meter to monitor the moisture content of the stalks. Ideally, the moisture level should be below 15% for safe storage.
-
Air circulation: Ensure proper air circulation around the stalks by spacing them out and avoiding overcrowding. This will help prevent mold and mildew growth.
-
Inspect for mold: Regularly inspect the stalks for any signs of mold or mildew. If you spot any, remove the affected stalks immediately to prevent further contamination.
-
Turn the stalks: Turn the stalks occasionally to promote even drying. This will help prevent moisture buildup in certain areas.
Storing Dried Corn Stalks
When it comes to storing dried corn stalks, there are a few key points to keep in mind.
First, it’s important to choose the best storage method to ensure their longevity.
Second, understanding the ideal length of storage time is crucial to maintaining their quality.
Lastly, taking preventative measures to avoid mold and pests will help preserve the stalks and keep them looking their best.
Best Storage Methods
To preserve the quality of your dried corn stalks, you should consider storing them in a cool and dry place. Here are some best storage techniques to follow for preserving their natural color:
- Choose a storage location with low humidity, as moisture can cause the stalks to become moldy or discolored.
- Keep the stalks away from direct sunlight, as prolonged exposure can fade their vibrant colors.
- Store the stalks in a well-ventilated area to prevent any buildup of moisture or odors.
- If possible, wrap the stalks in a breathable material like paper or fabric to protect them from dust or insects.
By following these storage techniques, you can maintain the natural beauty of your dried corn stalks for a longer period.
Now, let’s discuss the length of time you can store them without compromising their quality.
Length of Storage Time
Storing dried corn stalks in a cool, dry place will help maintain their natural beauty for an extended period. The length of time you can store dried corn stalks varies depending on the conditions and how well you care for them. To give you an idea of the potential storage time, here’s a table that outlines the approximate longevity of dried corn stalks under different storage conditions:
| Storage Conditions | Length of Storage Time |
|---|---|
| Cool and dry | Up to 1 year |
| Humid and warm | Several months |
| Exposed to sunlight | Few weeks |
| Poorly ventilated | Few days |
| Stored with pests | Few hours |
To maintain dried corn stalks for longevity, it’s crucial to ensure they are stored in a cool, dry environment. This will prevent mold and pests from damaging them. Transitioning into the next section, let’s explore some effective methods for preventing mold and pests without compromising the natural beauty of the corn stalks.
Preventing Mold and Pests
One effective way to prevent mold and pests is by regularly inspecting your dried corn stalks for any signs of damage or infestation. Here are some practical tips for preventing mold and controlling pests when drying corn stalks:
- Store your dried corn stalks in a cool, dry place to discourage mold growth.
- Keep the stalks off the ground by using racks or hanging them to prevent pests from accessing them.
- If you notice any signs of mold, such as a musty smell or fuzzy growth, discard the affected stalks to prevent the spread of mold.
- Use natural pest control methods, such as placing cedar chips or lavender sachets near the dried corn stalks, to repel pests.
By following these simple steps, you can ensure that your dried corn stalks remain mold-free and pest-free, making them perfect for decorating your home.
Now, let’s move on to some creative ideas on how to use dried corn stalks as decorations.
Decorating Ideas With Dried Corn Stalks
Get creative with dried corn stalks by using them as rustic centerpieces or wall decorations.
One great way to utilize dried corn stalks is by making wreaths. To create a stunning dried corn stalk wreath, gather a bunch of stalks and tie them together with twine or floral wire. Arrange the stalks in a circular shape, making sure they overlap slightly, and secure them in place. You can then add other natural elements like pinecones, dried flowers, or burlap ribbons to enhance the rustic look.
Another idea is to use dried corn stalks as centerpieces. Simply gather a few stalks of varying heights and tie them together with a ribbon or raffia. Place the stalks in a vase or mason jar filled with dried flowers, wheat, or other fall foliage. The combination of the corn stalks and natural elements will add a charming touch to your table.
To maintain dried corn stalks for longevity, it’s important to take proper care of them.
Maintaining Dried Corn Stalks for Longevity
After learning about different decorating ideas with dried corn stalks, I now want to share some tips on maintaining their longevity.
Preserving the natural beauty of dried corn stalks is essential to ensure they last for a long time. Here are some practical ways to achieve this:
-
Keep them away from moisture: Moisture can cause mold and decay, so it’s important to store dried corn stalks in a dry area.
-
Avoid direct sunlight: Sun exposure can fade the colors of the stalks, so it’s best to display them in a shaded area.
-
Regularly dust them: Dust can accumulate on dried corn stalks, so gently dust them off every now and then to keep them looking fresh.
-
Avoid touching them frequently: Frequent handling can cause the stalks to become brittle and break, so it’s best to limit touching them as much as possible.
Frequently Asked Questions
Can I Dry Corn Stalks That Have Already Been Harvested for Consumption?
I’ve found some great corn stalk preservation techniques that work for stalks harvested for consumption. Once dried, they can be used for various creative purposes, adding a rustic touch to your decor.
What Are Some Alternative Methods for Drying Corn Stalks Indoors?
I’ve discovered some creative ways to dry corn stalks indoors. They’re easy and effective, plus they help preserve the vibrant colors. Let me share these alternative methods with you.
How Long Does It Typically Take for Corn Stalks to Completely Dry?
It typically takes a few weeks for corn stalks to completely dry. The best methods for drying include hanging them upside down in a cool, dry place or using a dehydrator.
Can I Use Dried Corn Stalks for Purposes Other Than Decoration?
Yes, dried corn stalks have alternative uses beyond decoration. They can be used for various creative projects, such as making wreaths, centerpieces, or even as materials for crafting baskets and corn husk dolls.
Are There Any Specific Maintenance Steps I Need to Follow to Keep Dried Corn Stalks in Good Condition for a Long Time?
To keep dried corn stalks in good condition for a long time, follow specific maintenance steps. Proper drying techniques and preserving methods are crucial. I’ll share practical tips and detailed information to help you keep your corn stalks preserved and looking great.
Conclusion
In conclusion, drying corn stalks for decor is a delightful and decorative DIY project. By carefully choosing the right stalks, harvesting and preparing them properly, and monitoring the drying process, you can achieve stunning results.
Hanging the stalks indoors allows for easy drying and ensures a longer lifespan. Once dried, these stalks can be used in various creative ways to add a rustic touch to your home.
So, seize the opportunity to showcase your creativity and create captivating corn stalk arrangements that will leave your guests in awe!
- About the Author
- Latest Posts
Meet Katherine, the creative enthusiast at ByRetreat who infuses her boundless passion for design into every remote workspace she crafts. With an innate sense of creativity and an eye for unconventional beauty, Katherine brings a unique and inspiring perspective to the team.
Katherine’s love for design is infectious, and her ability to think outside the box sets her apart. She believes that true artistry lies in embracing a variety of styles and mixing them harmoniously to create captivating spaces. By combining different textures, colors, and patterns, Katherine weaves a tapestry of creativity that breathes life into each remote workspace.
Architecture Home Styles
Why Build a House With Wood Instead of Concrete?
Fascinated by the allure of wood in home construction? Discover the surprising advantages that make it a superior choice over concrete.
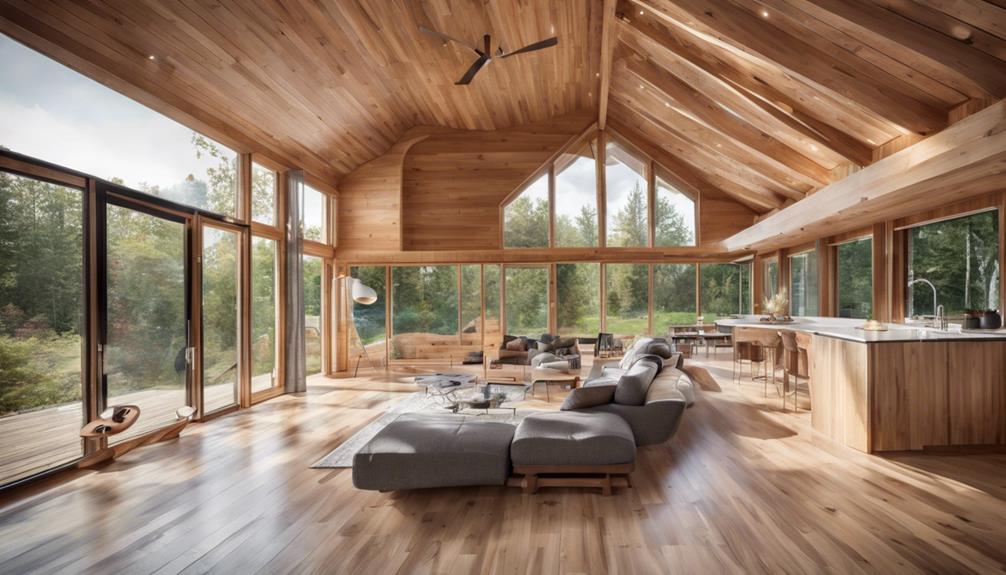
When it comes to the long-standing argument about building materials, the decision between wood and concrete is crucial. Although the difference between these two choices may appear significant, the advantages of wood construction remain captivating and motivating.
From its eco-friendly nature to its technical prowess, the allure of wood in building homes surpasses mere aesthetics. The reasons behind opting for wood over concrete go beyond the surface, delving into realms that might surprise even the most seasoned of builders.
Key Takeaways
- Wood construction is more cost-effective than concrete, saving money in the long run.
- Wood offers design flexibility and aesthetic appeal unmatched by concrete.
- Wooden structures provide strength, longevity, and adaptability for future modifications.
- Choosing wood over concrete promotes sustainability, environmental benefits, and a healthier ecosystem.
Sustainability of Wood Construction
When considering the sustainability of wood construction, it's crucial to acknowledge its significant role in locking up carbon dioxide and promoting environmental friendliness. Wood acts as a carbon sink, absorbing and storing carbon dioxide throughout its lifespan, thereby reducing carbon dioxide emissions in the atmosphere. This characteristic makes wood a renewable resource that aids in combating climate change.
Sustainable forestry practices further enhance the environmental benefits of wood construction by ensuring that forests are managed responsibly, maintaining natural forest carbon levels, and promoting biodiversity.
Versatility in Design and Function
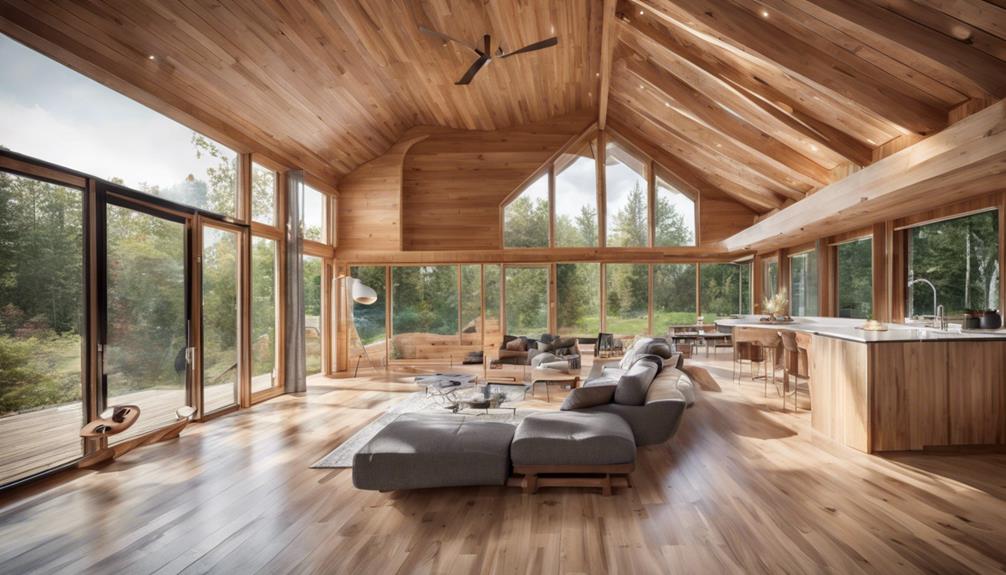
Wood construction offers unparalleled design flexibility, allowing architects and designers to create intricate and customized structures that stand out aesthetically.
The adaptability of wood in construction also enables functional versatility, catering to a wide range of building requirements and design preferences.
Design Flexibility
With its unparalleled design flexibility, wood offers architects and builders a myriad of possibilities for creating intricate and unique architectural details that are challenging to achieve with concrete. Wood's versatility allows for the development of curved and organic shapes, enhancing the aesthetic appeal of a structure.
Moreover, the material provides more design freedom for interior layouts, enabling customizable living spaces tailored to specific needs. Wood's adaptability also facilitates easy modifications and renovations over time, accommodating changing functional requirements within a house.
- Wood enables intricate and unique architectural details.
- Wood allows for curved and organic shapes, enhancing aesthetics.
- Wood provides design freedom for customizable living spaces.
- Wood's adaptability enables easy modifications and renovations.
Functional Adaptability
Functional adaptability in construction allows for diverse architectural styles and configurations, enhancing the versatility and functionality of a structure.
Wood, with its unique properties, offers a wide range of design possibilities. Its natural flexibility enables intricate detailing and customization, adding aesthetic appeal to a house.
Moreover, wood's adaptability extends to structural needs, providing strength and durability while accommodating various designs. The ease of working with wood facilitates modifications and additions over time, ensuring the long-term functionality of the house.
Aesthetic Appeal of Wooden Homes
The inherent charm of wooden homes lies in their ability to evoke a sense of timeless elegance and natural beauty, enhancing the overall aesthetic appeal of residential properties. Wooden homes offer a warm and inviting aesthetic with natural beauty that enhances curb appeal.
The unique grain patterns and textures of wood create a timeless and classic look for residential properties. Wood siding and trim can be customized to suit various architectural styles, from traditional to modern designs.
Wooden homes can be stained or painted in a wide range of colors to match personal preferences and complement the surroundings. The organic and earthy feel of wood in home construction provides a sense of harmony with nature and a cozy living environment.
Wood's versatility in design and its ability to blend seamlessly with different styles make it a favored choice for those seeking a distinctive and visually appealing home.
Cost-Effectiveness of Wood Vs. Concrete
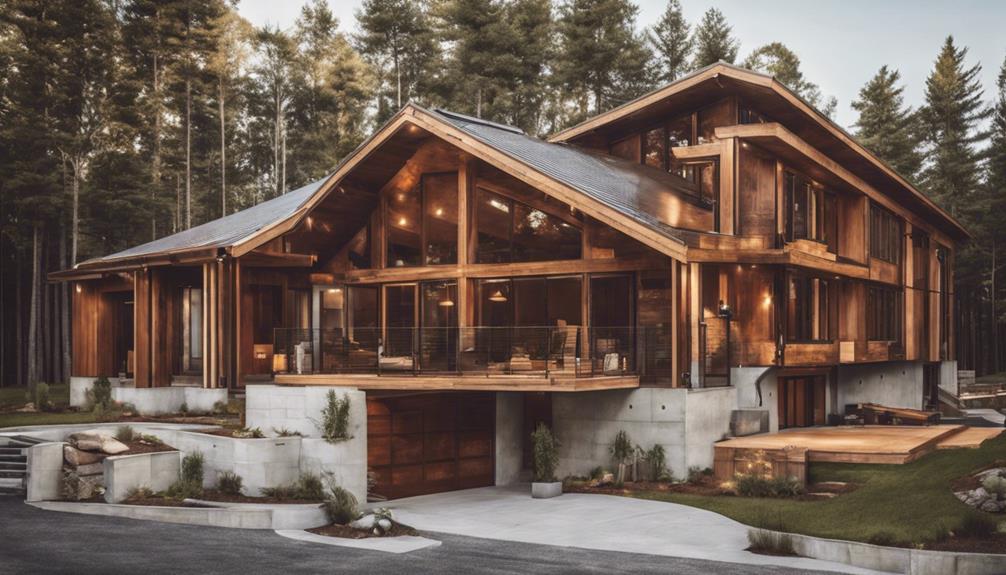
When comparing the cost-effectiveness of wood versus concrete in construction, it becomes evident that wood offers a compelling advantage due to its lower material and labor expenses.
Wood construction can be up to 30% cheaper than concrete, primarily because of the lower costs associated with sourcing wood materials and the reduced labor required for wood construction.
Additionally, the rising prices of concrete further emphasize wood as a more cost-effective alternative for house construction.
The affordability of wood makes it a popular choice for budget-conscious homeowners, allowing for significant savings in overall construction expenses.
Opting for wood over concrete not only provides cost savings during the initial construction phase but also throughout the lifespan of the house.
These cost-effectiveness benefits highlight wood as a practical and economical option for those looking to build a quality home while managing expenses efficiently.
Energy Efficiency and Insulation Benefits
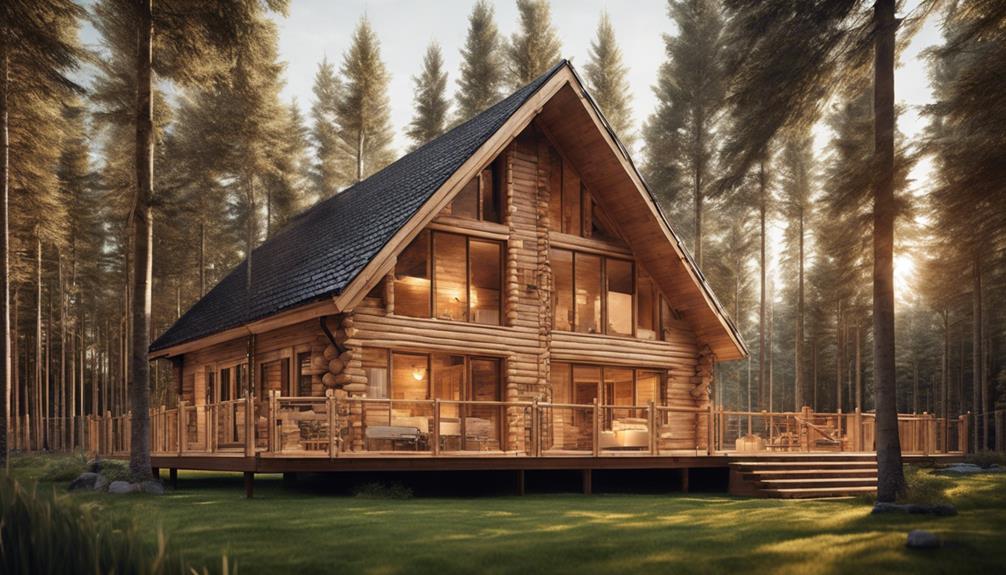
Wood construction offers superior insulation capabilities compared to concrete, resulting in decreased energy usage for climate control. This enhanced thermal performance not only lowers energy bills but also fosters a more sustainable living environment.
The natural insulating properties of wood help maintain comfortable indoor temperatures year-round.
Lower Energy Bills
Enhancing energy efficiency and reducing overall costs, wood's superior insulation properties make it a compelling choice for construction compared to concrete.
Wood offers exceptional insulation, leading to decreased energy bills by efficiently regulating indoor temperatures.
To elaborate further, wood construction requires less energy for processing and installation, resulting in reduced energy consumption and cost savings.
Additionally, wood's natural insulating capacity helps homes built with wood stay cooler in summer and warmer in winter, lessening the need for extensive HVAC system usage.
By opting for wood over concrete, homeowners can experience substantial savings on their energy bills, making it a practical and energy-efficient choice for modern constructions.
- Wood's superior insulation reduces energy bills
- Wood construction requires less energy
- Natural insulating capacity of wood
- Savings on energy bills with wood construction
Natural Insulation Properties
With its superior insulation properties, wood stands out as a preferred choice over concrete for enhancing energy efficiency and providing excellent insulation benefits in construction projects. Wood offers natural insulating capacity that outperforms concrete, leading to reduced energy costs for heating and cooling. The thermal properties of wood make it an ideal material for maintaining comfortable indoor temperatures throughout the year. Wooden structures excel in insulation, creating a more energy-efficient home environment compared to concrete buildings. By utilizing wood in construction, significant energy savings can be achieved due to its inherent insulating qualities.
| Insulation Properties | Energy Efficiency |
|---|---|
| Superior to concrete | Reduces energy costs |
| Natural insulating capacity | Maintains comfortable temperatures |
| Excellent thermal properties | Increases energy savings |
Speed of Construction With Wood

Optimizing construction speed is a critical factor in project efficiency and cost-effectiveness, and wood construction offers a significant advantage in accelerating building timelines. Wood construction allows for faster building times compared to concrete, reducing construction schedules by weeks or even months.
The prefabrication of wood components off-site enables quicker assembly on-site, accelerating the construction process. Wood's lighter weight and ease of handling contribute to swift construction progress, especially in modular construction methods. Additionally, wood's flexibility and simplicity in design facilitate rapid adjustments and modifications during the construction process.
Quick assembly of wood components results in earlier occupancy and reduced overall project timelines, saving time and costs. Wood construction's speed advantage not only meets tight project deadlines but also allows for efficient project management and quicker realization of returns.
Flexibility for Future Renovations
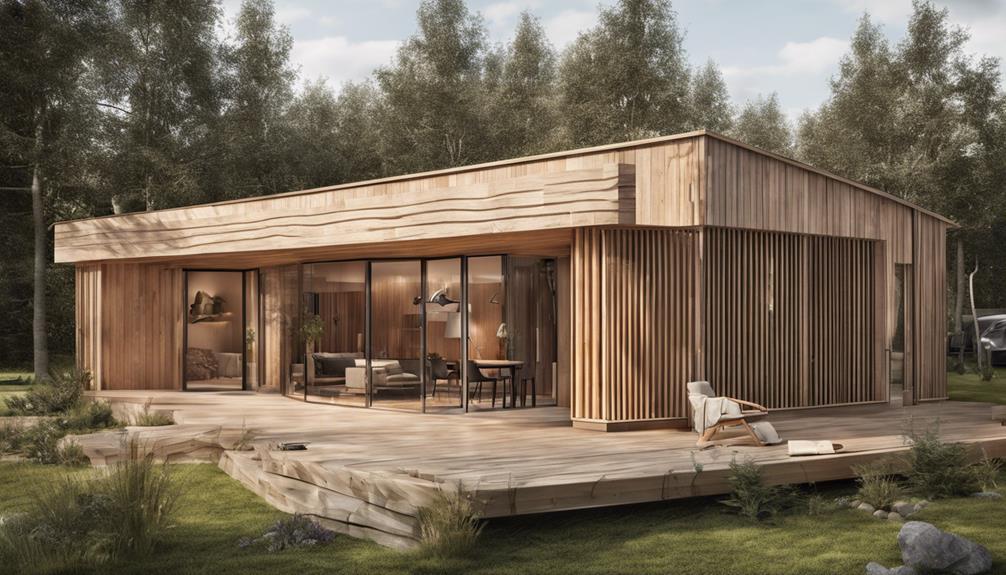
Wood construction's inherent flexibility facilitates seamless future renovations, offering homeowners a practical and cost-effective option for adapting their living spaces. Wood-framed structures allow for modifications and upgrades with minimal disruptions and lower costs compared to concrete buildings. The table below highlights the key advantages of wood-framed houses in terms of flexibility for future renovations:
| Advantages of Wood-Framed Houses for Renovations |
|---|
| 1. Easy modifications and renovations |
| 2. Less disruptive and cost-effective renovations |
| 3. Opportunity for personalized and creative changes |
Wood's flexibility enables homeowners to customize their space to suit changing needs and preferences without the need for extensive structural changes. This adaptability makes wood construction an ideal choice for those planning future renovations. Whether it's adding a new room, upgrading fixtures, or reconfiguring layouts, wood-framed houses provide the versatility needed for efficient and innovative remodeling projects.
Environmental Impact of Choosing Wood
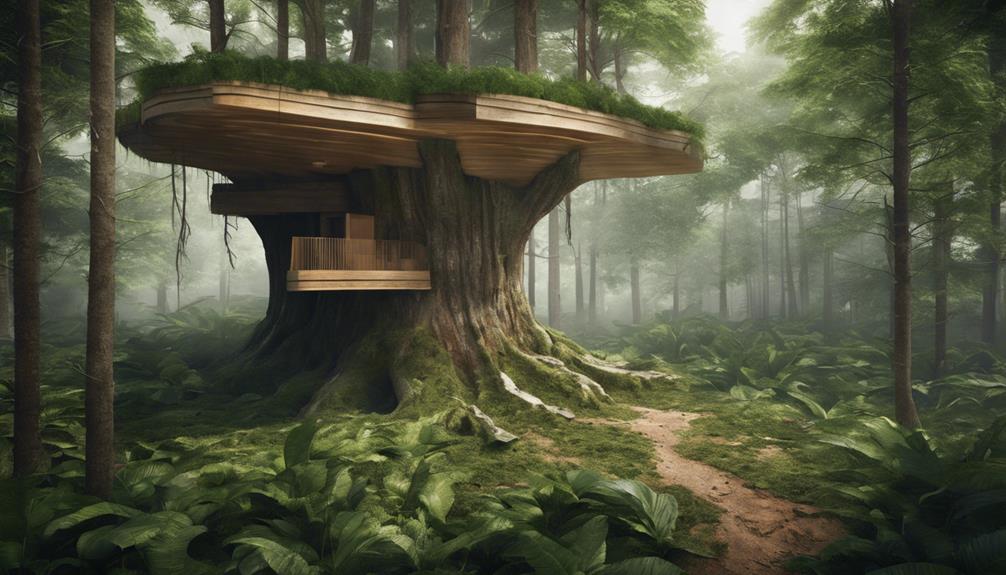
Selecting wood as the primary building material can significantly impact the environment due to its carbon storage properties and eco-friendly characteristics. Wood construction has a positive environmental effect as it stores carbon dioxide, contributing to sustainability. When choosing wood over concrete, carbon emissions are reduced, mitigating the impact on the environment.
Additionally, wood is known for being an eco-friendly and natural building material that locks up carbon, further benefiting the environment. In contrast to concrete, which is often criticized for its sustainability drawbacks, wood construction stands out for its ability to store carbon and promote environmental well-being.
- Wood construction stores carbon dioxide, contributing to environmental sustainability.
- Choosing wood over concrete can help reduce carbon emissions and mitigate the impact on the environment.
- Wood is an eco-friendly and natural building material that locks up carbon, benefiting the environment.
- Wood construction requires no electric power and offers below-floor insulation, enhancing energy efficiency.
Durability and Longevity of Wooden Structures
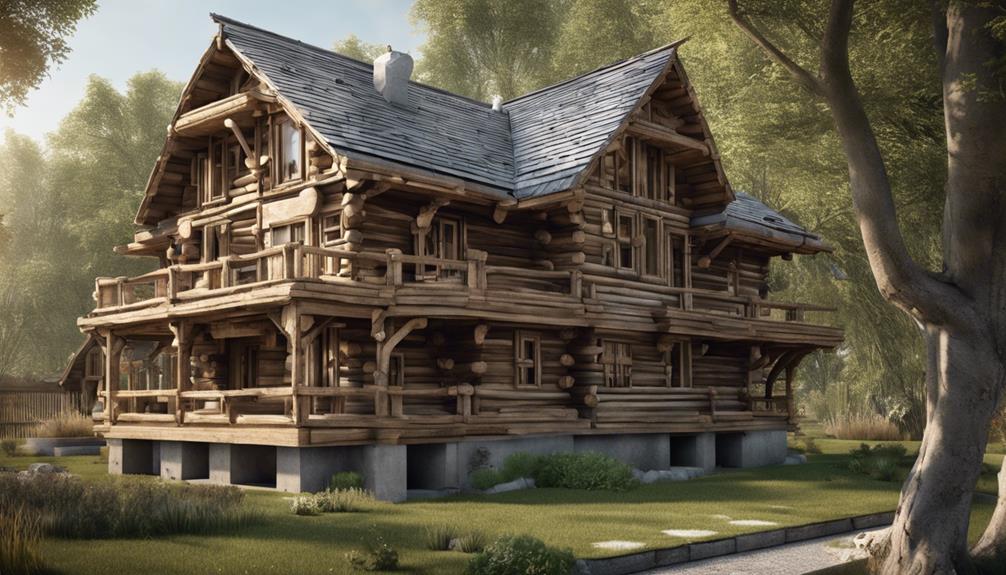
Wooden structures exhibit impressive durability, capable of lasting over a century when properly maintained. Factors such as design, construction quality, and environmental conditions significantly influence the longevity of wooden buildings.
With advancements in wood treatment technologies and proper care, wooden structures can rival concrete in their ability to withstand the test of time.
Strength of Wood
When considering the durability and longevity of structures, it becomes evident that wood possesses unique characteristics that allow it to outlast rigid materials like concrete.
Wood's natural ability to flex and distribute stress enables it to withstand strong winds and earthquakes better than concrete. This flexibility is a key factor in the longevity of wooden structures, as seen in examples like the Horyu-ji Temple in Japan, standing strong for over 1,300 years.
Additionally, properly maintained wooden structures can surpass the lifespan of concrete buildings, evident in historic wooden homes that have stood for hundreds of years. The Chapel Bridge in Switzerland, in use since the 14th century, showcases wood's durability and longevity in construction.
Resistance to Elements
With its ability to withstand low-intensity earthquakes and light tornadoes, wood showcases remarkable durability and longevity as a building material. The flexibility of wood allows it to absorb stress from minor seismic activities and wind loads, making it a resilient choice for areas prone to such natural occurrences.
Properly maintained wooden structures can last for centuries, highlighting the longevity of wood in construction. Wood's natural ability to expand and contract with temperature changes enhances its durability, reducing the risk of cracks and structural damage over time. Historical wooden buildings worldwide stand as testaments to the enduring strength of wood when treated and preserved correctly.
The unique combination of durability, flexibility, and longevity makes wood an innovative and sustainable option for building resilient structures.
Natural Aging Process
As structures made from wood age naturally, their durability and longevity are significantly enhanced through a process that increases hardness and resistance to environmental factors. This aging process is a key factor in why wooden structures stand the test of time. Here are some key points to consider:
- Enhanced Hardness: The aging of wood results in a denser and harder material, making it more robust and less prone to damage.
- Improved Resistance: Over time, wood develops a natural resistance to elements such as moisture, pests, and decay, increasing its lifespan.
- Unique Patina: The aging process gives wood a distinctive patina that not only adds visual appeal but also acts as a protective layer.
- Structural Stability: As wood ages, it gains structural stability, ensuring that the building remains strong and secure for years to come.
Health and Well-being Benefits of Wood Buildings
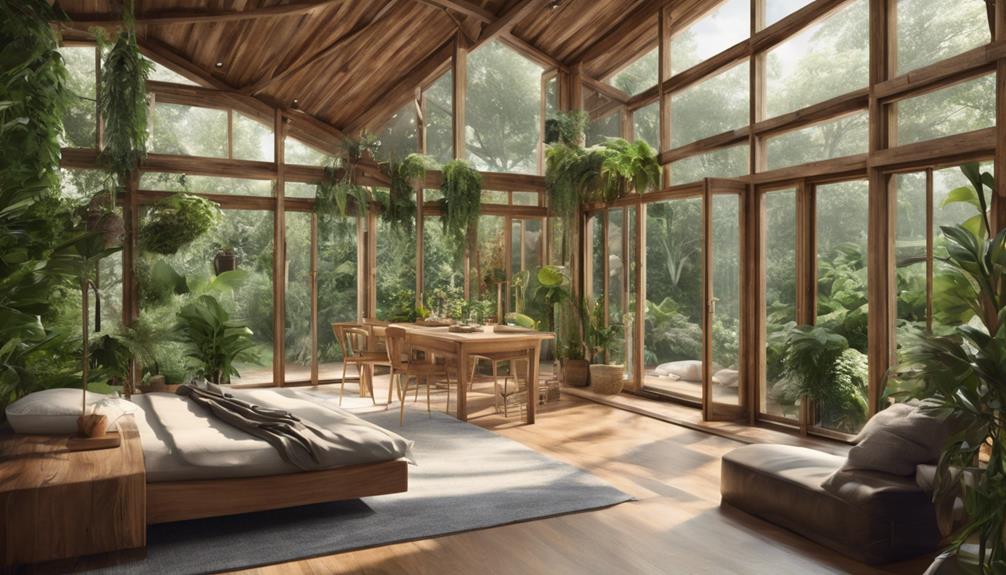
Utilizing wood in construction not only enhances the structural integrity of buildings but also significantly boosts occupants' health and well-being. Wood buildings offer notable health benefits by promoting better indoor air quality. The natural ability of wood to regulate humidity levels helps reduce the risk of mold growth, creating a healthier environment for occupants. Additionally, the biophilic design of wood structures plays a crucial role in enhancing well-being. By connecting individuals to nature, these designs have been shown to reduce stress levels, improve mental health, and foster a sense of calmness.
Moreover, the use of wood in construction contributes to a more comfortable living environment. Wood's natural thermal insulation properties help maintain consistent temperatures, leading to reduced energy consumption and cost savings. Research also highlights the positive impact of wooden elements on occupants' overall mood, productivity, and creativity. In healthcare facilities, wood construction has been associated with lower stress levels, improved cognitive function, and faster recovery rates. Embracing wood in building design not only ensures structural resilience but also prioritizes the health and well-being of those who inhabit these spaces.
Frequently Asked Questions
Why Are Houses Made of Wood Instead of Concrete?
We choose wood over concrete for housing due to several advantages.
Wood's flexibility offers superior earthquake resistance, while its insulation properties boost energy efficiency. Additionally, wooden structures display higher fire resistance and collapse more slowly than concrete buildings.
Wood allows for quicker construction and cost savings, making it a practical choice.
The aesthetic appeal and cultural significance of wooden houses further drive their popularity over concrete alternatives. Wooden houses often embody a sense of charm and warmth, connecting occupants with nature in a way that concrete structures seldom achieve. This timeless quality contributes to the ongoing debate of modern vs traditional residential buildings, with many favoring the authentic craftsmanship of wood over the industrial feel of concrete. Additionally, wooden homes frequently feature intricate designs that celebrate local heritage, making them an enduring symbol of tradition and culture in communities worldwide.
Is It Better to Build a House With Wood or Cement?
Building a house with wood or cement presents distinct advantages. Wood offers flexibility, earthquake resistance, and sustainability benefits.
On the other hand, concrete boasts durability and energy efficiency. The choice depends on factors like cost, aesthetics, and environmental impact.
Both materials have their strengths, so it's crucial to weigh the pros and cons based on your specific needs. Which one aligns best with your priorities?
Why Don't We Build Houses Out of Concrete?
We don't build houses out of concrete primarily due to higher costs and longer construction times compared to wood.
Concrete's less popularity in residential construction is influenced by the quicker construction times, flexibility, and ease of working with wood.
Additionally, wood's lighter weight contributes to easier transportation and assembly, while its superior thermal insulation properties outperform concrete, providing better energy efficiency in residential buildings.
What Is the Disadvantage of Concrete House?
When considering the disadvantages of a concrete house, it's crucial to note the higher material and labor costs, challenging transportation and installation due to its weight, longer construction timelines, and susceptibility to cracking and structural damage over time.
Additionally, repairing and renovating concrete houses can be more intricate and expensive compared to wood houses.
These factors collectively contribute to the drawbacks of opting for a concrete house over a wooden one.
Conclusion
In conclusion, the choice to build a house with wood instead of concrete offers a plethora of perks. From its sustainability and versatility to its aesthetic appeal and cost-effectiveness, wood construction stands out as a superior option.
With its energy efficiency, flexibility for renovations, and positive environmental impact, wooden structures provide durability and longevity. Embracing wood in construction not only enhances the health and well-being of occupants but also contributes to a more sustainable future.
- About the Author
- Latest Posts
Introducing Ron, the home decor aficionado at ByRetreat, whose passion for creating beautiful and inviting spaces is at the heart of his work. With his deep knowledge of home decor and his innate sense of style, Ron brings a wealth of expertise and a keen eye for detail to the ByRetreat team.
Ron’s love for home decor goes beyond aesthetics; he understands that our surroundings play a significant role in our overall well-being and productivity. With this in mind, Ron is dedicated to transforming remote workspaces into havens of comfort, functionality, and beauty.
-

 Vetted1 week ago
15 Best Drip Irrigation Systems to Keep Your Garden Thriving
-

 Vetted11 hours ago
15 Best Tall Toilets for Seniors That Combine Comfort and Safety
-

 Vetted4 days ago
15 Best Dish Scrubbers to Keep Your Kitchen Sparkling Clean
-

 Beginners Guides2 weeks ago
Designing Your Retreat Center – Essential Tips
-
 Vetted3 weeks ago
15 Best Tile Adhesives for Outdoor Use – Top Picks for Durable and Weather-Resistant Installations
-

 Beginners Guides3 weeks ago
Are Retreats Profitable
-

 Decor4 days ago
What Is Eclectic Home Decor
-

 Vetted3 weeks ago
15 Creative Ways to Cover Up Popcorn Ceilings and Transform Your Space


