Valentine's Day Decoration
How to Decorate Your House for Valentine's?
2025
When it comes to decorating for Valentine's Day, it's easy to feel torn between wanting to create a romantic ambiance and avoiding clichéd decorations. But fear not, because we've got some stylish and sophisticated ideas to elevate your home's Valentine's Day decor.
Whether you're celebrating with a significant other, friends, or simply want to infuse your space with love, we've gathered some tasteful and thoughtful ways to transform your home into a cozy and enchanting Valentine's Day haven.
Key Takeaways
- Incorporate a romantic color palette using red and pink hues.
- Use candles in shades of red and pink for intimacy and warmth.
- Create a calming and soothing environment with blush pink hues.
- Use soft, dim lighting to create a romantic ambiance.
Romantic Color Palette
As we prepare to infuse our homes with romance for Valentine's Day, we can create a warm and intimate atmosphere by incorporating a romantic color palette that evokes love and affection. Red and pink are the quintessential colors of love, and they can be seamlessly woven into our home decor to set a romantic ambiance.
Incorporating these colors through decorative pillows, throws, curtains, and table linens can instantly transform the atmosphere of a room. Soft, blush pink hues can create a calming and soothing environment, while bold red accents can add passion and energy to the space.
Consider adding fresh red or pink flowers to various rooms, as they not only bring vibrant pops of color but also fill the air with a delightful fragrance. Candles in shades of red and pink can also add a touch of intimacy and warmth to any room.
DIY Valentine's Day Crafts
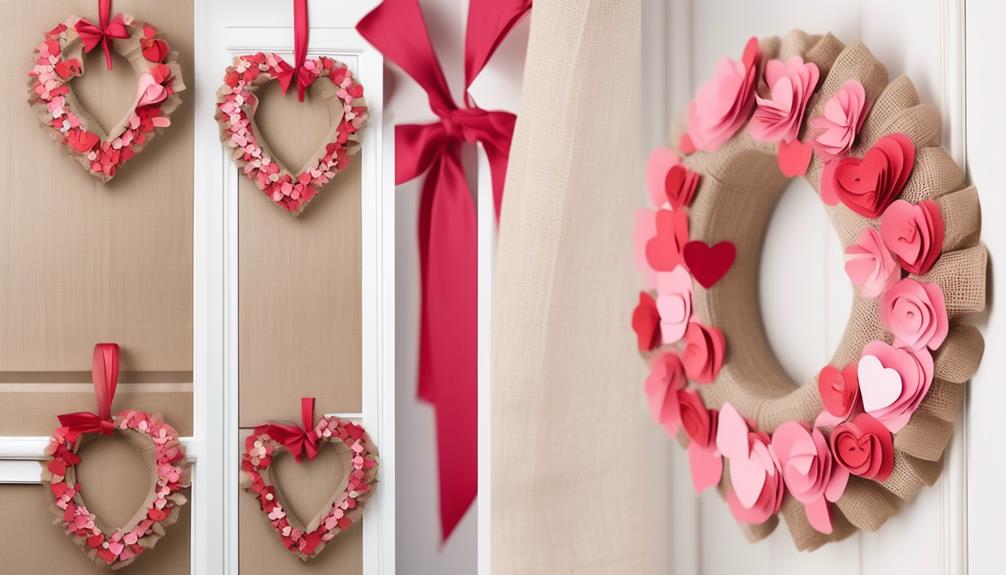
Get ready to add a personal touch to your Valentine's Day celebrations with easy and charming DIY crafts.
Creating a Valentine's wreath is a delightful way to welcome guests into your home. You can use a simple grapevine wreath as a base and adorn it with faux roses, hearts, and ribbons for a romantic touch. Hang it on your front door or above your mantelpiece to infuse your home with love.
Another lovely DIY craft idea is to make a heart garland to decorate your fireplace or walls. Cut out heart shapes from colored paper or felt, then string them together with twine or ribbon. You can personalize the hearts with sweet messages, glitter, or paint to make them unique to your relationship.
These DIY Valentine's Day crafts aren't only beautiful but also a wonderful way to spend quality time with your partner or loved ones. Embrace the spirit of creativity and love as you adorn your home with these handmade decorations.
Floral and Candle Displays
Enhance the romantic ambiance in your home with captivating floral arrangements and flickering candle displays. Here are four enchanting ideas to create an intimate and alluring atmosphere:
- Floral Arrangement: Select a mix of fresh flowers in shades of red, pink, and white to create a stunning centerpiece. Roses, tulips, and carnations are classic choices that embody love and passion. Arrange them in a clear glass vase or opt for a vintage-inspired ceramic container for a touch of elegance.
- Scented Candles: Infuse the air with the alluring fragrance of scented candles. Choose scents like rose, jasmine, or vanilla to evoke feelings of romance and warmth. Place them strategically around the room to cast a soft, flattering glow and fill the space with a delightful aroma.
- Mix of Blooms and Candles: Combine small floral arrangements with clusters of scented candles for a visually captivating display. Group them on a decorative tray or scatter them along the mantel for an enchanting effect that will captivate the senses.
- Floating Florals and Candles: For a whimsical touch, create floating floral and candle displays. Place delicate blossoms and floating candles in a large glass bowl filled with water to add a dreamy, ethereal element to your Valentine's Day decor.
Cozy Textiles and Pillows

After setting the stage with captivating floral and candle displays, we can now turn our attention to the inviting embrace of cozy textiles and pillows to further elevate the romantic ambiance of your home for Valentine's Day. Soft throws and plush cushions are essential elements to create a warm and intimate atmosphere. Imagine snuggling up with your loved one on a velvety soft throw, surrounded by an array of plump cushions, as you bask in the glow of candlelight and the sweet scent of fresh flowers.
| Soft Throws | Plush Cushions |
|---|---|
| Faux fur throw | Velvet cushions |
| Knit blanket | Furry throw pillows |
| Cashmere wrap | Silk cushion covers |
These cozy textiles and pillows not only add a touch of luxury and comfort but also provide a sense of closeness and togetherness, perfect for celebrating love on Valentine's Day. The tactile sensation of these soft fabrics combined with the visual appeal of plush cushions creates a sensory experience that enhances the romantic mood in your home. So, drape your sofas with soft throws and scatter plush cushions around your living space to create a haven of warmth and intimacy for you and your loved one.
Love-Infused Table Settings
Let's infuse your table settings with love to create an enchanting and romantic atmosphere for your Valentine's Day celebration. To set the stage for a memorable and intimate evening, consider the following tips for creating romantic tablescapes and a heartwarming ambiance:
- Candlelit Glow: Illuminate your table with the soft, flickering glow of candles. Choose elegant candle holders and scatter tea lights or pillar candles to cast a warm and intimate light over your romantic dinner setting.
- Floral Elegance: Adorn your table with a beautiful floral centerpiece. Select blooms in hues of red, pink, and white to evoke passion and romance. A stunning arrangement won't only add a touch of elegance but also infuse the air with a delightful fragrance.
- Luxe Linens: Elevate your table with luxurious linens in rich, sensual textures. Consider using a satin tablecloth or velvet placemats to add a sumptuous and indulgent feel to your dining experience.
- Charming Details: Add romantic details such as heart-shaped napkin rings, love-themed place cards, or delicate lace doilies to infuse your table setting with sweet, sentimental touches.
Frequently Asked Questions
What Are Some Unique Ways to Incorporate Personalized Touches Into Valentine's Day Decorations?"
When it comes to personalized crafts, we love incorporating sentimental items like photographs into our DIY centerpieces. It adds a special touch and makes the decorations uniquely ours.
One idea is to create a photo timeline of memorable moments as a couple, then display it as a centerpiece.
Another idea is to make personalized love notes or mini scrapbooks to scatter around the house. It's a wonderful way to infuse romance into the decor.
Are There Any Non-Traditional Color Palettes That Can Still Create a Romantic Atmosphere for Valentine's Day?"
Absolutely!
Non-traditional colors, like deep purples, moody blues, or rich emerald greens, can create a romantic ambiance.
Consider incorporating these alternative palettes into your Valentine's Day decor through creative arrangements of flowers, table settings, and accent pieces.
These unique colors can infuse your space with a sense of intimacy and sophistication, setting the stage for a truly memorable celebration.
How Can I Make My Valentine's Day Decorations Pet-Friendly?"
We've found that 67% of pet owners include their furry friends in Valentine's Day celebrations.
To make our decorations pet-friendly, we can create DIY pet toys, incorporate pet-safe plants, and arrange pet-friendly table settings.
Including our pets in the celebration not only adds to the intimacy of the occasion but also ensures that they feel loved and included in our festivities.
What Are Some Eco-Friendly Options for Valentine's Day Decorations?"
We're all about finding eco-friendly DIY decorations for Valentine's Day.
Sustainable materials like recycled paper, biodegradable balloons, and natural fabrics can add a touch of love to your home while being kind to the environment.
Whether it's crafting paper heart garlands or repurposing glass jars into candle holders, there are so many creative and sustainable options to make your Valentine's Day decorations both intimate and eco-conscious.
Are There Any Cultural or Religious Elements That Can Be Incorporated Into Valentine's Day Decor?"
Incorporating cultural traditions and religious symbols into Valentine's Day decor can add depth and meaning to the celebration.
From colorful Chinese lanterns to the romantic symbolism of roses in Islamic art, there are countless ways to infuse diverse cultural and religious elements into the decor.
Embracing these traditions not only enriches the visual appeal of the space but also fosters a sense of connection and inclusivity, making the celebration even more special.
Conclusion
As we sprinkle our homes with love and romance, let's remember that decorating for Valentine's Day is like painting a canvas with passion and warmth.
From the delicate floral displays to the cozy textiles and vibrant color palette, our homes become a sanctuary of love.
So let's embrace the DIY crafts, light the candles, and set the table with love-infused settings, creating a space that radiates with the spirit of Valentine's Day.
- About the Author
- Latest Posts
Introducing Ron, the home decor aficionado at ByRetreat, whose passion for creating beautiful and inviting spaces is at the heart of his work. With his deep knowledge of home decor and his innate sense of style, Ron brings a wealth of expertise and a keen eye for detail to the ByRetreat team.
Ron’s love for home decor goes beyond aesthetics; he understands that our surroundings play a significant role in our overall well-being and productivity. With this in mind, Ron is dedicated to transforming remote workspaces into havens of comfort, functionality, and beauty.

On Valentine’s Day, we often feel conflicted between wanting to express creativity and feeling the urge to stick to classic romantic gestures.
But what if we could infuse this special day with a touch of originality that truly reflects our unique bond?
From personalized DIY gifts to surprise romantic gestures, there are countless ways to elevate the Valentine's Day experience.
So, how do we navigate this delicate balance between tradition and innovation to create a memorable celebration that speaks to the depth of our connection?
Key Takeaways
- Personalized DIY gifts and surprises are a thoughtful and meaningful way to express love on Valentine's Day.
- Themed homemade treats and a romantic dinner add delight and creativity to the celebration.
- Handwritten love notes and memory lane scrapbooking deepen intimacy and create lasting memories.
- Customized date nights and DIY love coupons infuse affection and create unique experiences.
Personalized DIY Gifts
We love creating personalized DIY gifts for Valentine's Day to show our loved ones how much they mean to us. There's something so special about putting in the time and effort to make a gift with our own hands. DIY gift wrapping adds a personal touch to the presents, and it's a way for us to express our creativity. We enjoy selecting beautiful papers, ribbons, and embellishments to make each gift unique and memorable.
One of our favorite personalized DIY gifts is creating personalized photo albums. We gather our favorite memories with our loved ones and compile them into a beautiful album. Adding little handwritten notes or captions alongside the photos makes it even more meaningful. It's a heartfelt way to reminisce about the wonderful moments we've shared and to let our loved ones know just how much they're cherished.
These DIY gifts allow us to pour our love into something tangible, and that's what makes them so special. It's our way of saying 'I love you' in a thoughtful and personalized manner.
Themed Homemade Treats

Creating themed homemade treats adds an extra layer of delight to Valentine's Day celebrations, as we infuse our favorite flavors and heartfelt creativity into delectable goodies. Whether you're planning a romantic picnic or a cozy evening at home, themed dessert ideas can elevate the sweetness of the occasion. Here are some delightful and intimate themed homemade treat ideas to make this Valentine's Day even more special:
| Themed Dessert Ideas | Romantic Picnic | DIY Gift Baskets |
|---|---|---|
| Heart-shaped cookies | Picnic blanket | Homemade chocolate |
| Red velvet cupcakes | Sparkling wine | Personalized notes |
| Chocolate-covered | Fresh fruits | Handcrafted trinkets |
| strawberries |
When planning a romantic picnic, consider packing heart-shaped cookies and red velvet cupcakes to add a sweet touch. For a cozy night in, DIY gift baskets filled with homemade chocolate and personalized notes can create an intimate and thoughtful experience. Handmade decorations and handcrafted trinkets can also add a personal touch to the Valentine's Day celebration.
Handwritten Love Notes
As we savor the themed homemade treats, expressing our affection through handwritten love notes becomes a heartfelt way to deepen the intimacy of our Valentine's Day celebration.
Handwritten poetry and romantic sketches allow us to convey our deepest emotions in a personal and meaningful way. The act of putting pen to paper and crafting heartfelt verses or drawing delicate images creates a tangible expression of our love that can be cherished for years to come.
Love letter calligraphy adds an elegant touch, turning a simple note into a work of art. The graceful curves and flowing lines of calligraphy elevate the written words, making them even more enchanting.
Personalized stationery provides a beautiful canvas for our love notes. Whether it's a monogrammed letterhead or a custom-designed card, the stationery itself becomes a part of the message, adding a unique and thoughtful element to our expressions of love.
The tactile experience of holding a handwritten love note and seeing the care put into its creation fosters a deep sense of connection and intimacy between us.
Customized Date Night
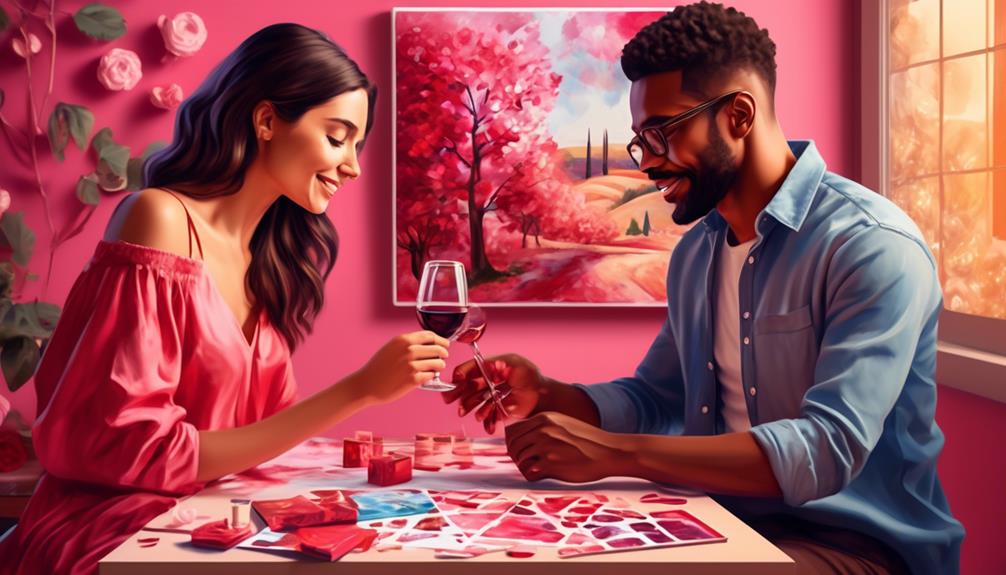
Let's talk about how to make Valentine's Day special with a customized date night.
From personalized dinner ideas to DIY romantic activities, there are so many ways to tailor the evening to your unique relationship.
Whether it's cooking a favorite meal together or creating a cozy at-home movie night, the key is to make the experience truly yours.
Personalized Dinner Ideas
For a unique and memorable Valentine's Day experience, consider crafting a personalized dinner to delight your loved one.
Start by setting the mood with romantic tablescapes, such as candles, rose petals, and soft lighting.
Next, create a personalized cocktail to kick off the evening, tailored to your partner's favorite flavors and spirits.
For the main course, plan a menu that reflects your partner's tastes and preferences, whether it's a homemade Italian feast or a gourmet steak dinner.
Finish the evening with a decadent dessert, such as a rich chocolate fondue or a personalized cake with a loving message.
DIY Romantic Activities
Crafting a customized date night provides an opportunity to infuse creativity and thoughtfulness into your Valentine's Day celebration.
Start by creating DIY floral arrangements together, allowing the sweet scent of fresh blooms to enhance the romantic ambiance.
Consider a couples' painting session, where you can explore your artistic side while bonding over shared creativity.
Select a romantic playlist that resonates with your relationship, setting the mood for an intimate evening.
For a cozy and charming experience, opt for a candlelit picnic in your living room or a scenic spot. Pack your favorite foods and drinks, and revel in each other's company under the soft glow of candlelight.
These personalized activities will create cherished memories and deepen your connection on this special day.
Creative Arts and Crafts
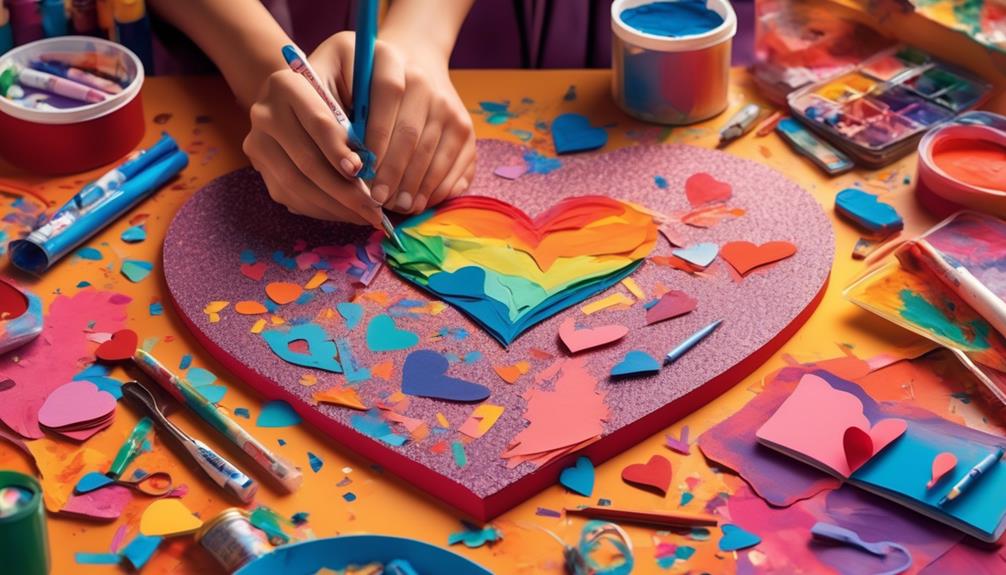
We enjoy expressing our love and creativity through handmade gifts and decorations on Valentine's Day. It's a wonderful way to show our affection and thoughtfulness. When it comes to creative arts and crafts, we find joy in exploring different techniques and materials to make unique and personalized items for our loved ones.
Here are a few creative arts and crafts ideas for Valentine's Day:
- Creative Painting Techniques: Experiment with abstract painting, watercolor techniques, or acrylic pouring to create one-of-a-kind artwork for your special someone. You can also try painting on unconventional surfaces like wood slices or canvas bags to add a personalized touch.
- Unique Jewelry Making: Dive into the world of jewelry making by crafting custom pieces such as charm bracelets, beaded necklaces, or wire-wrapped rings. Incorporate meaningful symbols or birthstones to make the jewelry even more special.
- Handmade Pottery: Get your hands dirty and create pottery items like mugs, vases, or bowls. The process of molding and shaping clay can be a deeply intimate and romantic experience, and the end result is a truly unique gift that carries your personal touch.
These creative arts and crafts activities not only allow us to express our affection but also create lasting mementos for Valentine's Day.
Thoughtful Acts of Service
We love the idea of showing love through thoughtful acts of service.
Whether it's doing a chore for your partner, preparing a homemade meal, or planning a surprise date, these gestures can make a meaningful impact.
It's the little things that often speak volumes and create lasting memories.
Acts of Kindness
One way to show love and appreciation on Valentine's Day is by performing thoughtful acts of service for others. It's a chance to spread love and kindness beyond the romantic gestures. Here are a few simple ways to make a big impact:
- Random Acts of Kindness: Surprise someone with a small gesture, like bringing them their favorite coffee or leaving a heartwarming note to brighten their day.
- Kindness Challenge: Encourage friends and family to join in a kindness challenge, where each person commits to performing a certain number of acts of kindness throughout the day.
- Acts of Service: Offer to help a loved one with a task or chore they've been dreading, showing them that you care about their well-being and want to make their day a little easier.
Personalized Surprises
After performing random acts of kindness and participating in a kindness challenge, consider surprising your loved ones with personalized acts of service tailored to their unique preferences and needs.
Personalized gift wrapping adds a thoughtful touch to presents, showing that you've taken the time to make the gift extra special. Consider using their favorite colors, patterns, or adding personalized notes to the wrapping.
Customized date activities are another way to show your loved one that you understand and value their interests. Whether it's planning a picnic in a scenic spot, organizing a cooking class, or arranging a movie marathon featuring their favorite films, the effort put into tailoring the experience won't go unnoticed.
These personalized surprises demonstrate your attentiveness and thoughtfulness, making Valentine's Day truly memorable.
Meaningful Gestures
Amidst the hustle and bustle of Valentine's Day, consider expressing love and appreciation through meaningful gestures, such as thoughtful acts of service tailored to your loved one's unique preferences and needs. Here are a few ways to create heartfelt moments:
- Symbolic gestures: Surprise your partner with a chore they dislike doing, or take on a task that's been weighing on their mind, demonstrating your understanding and support.
- Expressive art: Create a customized coupon booklet offering services like a massage, breakfast in bed, or a movie night of their choice, showcasing your thoughtfulness and effort.
- Sentimental tokens: Plan a day of pampering that includes their favorite activities and treats, showing them that you cherish their happiness and well-being.
These gestures can create intimate and memorable experiences, strengthening the bond between you and your loved one.
Unique Outdoor Adventures

Venturing into the great outdoors for a unique Valentine's Day adventure can add excitement and romance to the special day. Outdoor picnics provide a wonderful opportunity to connect with nature and each other. Find a secluded spot with breathtaking views, pack a basket with delectable treats, and enjoy an intimate meal surrounded by the beauty of the outdoors.
Nature scavenger hunts can also be a delightful way to spend the day. Create a list of items to find, such as heart-shaped rocks, colorful feathers, or unique flowers, and set off on an adventure together. The thrill of the hunt combined with the joy of discovery will surely create lasting memories.
Exploring the great outdoors allows us to immerse ourselves in the beauty of nature and experience a sense of wonder and awe together. These unique outdoor adventures can ignite passion and deepen the bond between partners, making Valentine's Day truly unforgettable.
Surprise Romantic Gestures
We've all been there — wanting to surprise our significant other with a romantic gesture that will truly make their heart skip a beat.
Whether it's finding the perfect thoughtful gift, crafting homemade love notes, or planning a romantic dinner, there's no shortage of ways to express our love on Valentine's Day.
These surprise gestures have the power to create unforgettable moments and deepen the bond we share with our loved ones.
Thoughtful Gift Ideas
Exploring unique and thoughtful gift ideas can add an element of surprise and romance to Valentine's Day celebrations. When it comes to romantic gestures, thoughtful gestures truly make the heart flutter.
Consider these intimate and personalized gift ideas to express your love on this special day:
- Customized Memory Book: Compile your favorite memories, inside jokes, and photos into a personalized scrapbook or photo album. It's a heartfelt way to celebrate your unique connection.
- Handcrafted Love Coupons: Create homemade gift coupons redeemable for special favors or activities. It's a fun and intimate way to show your partner how much they mean to you.
- Engraved Jewelry: A piece of jewelry with a special date, initials, or a meaningful message engraved on it can serve as a cherished reminder of your love.
These thoughtful gifts will surely make your Valentine's Day celebration memorable and full of love.
Homemade Love Notes
Crafting homemade love notes can add a touch of sweetness and surprise to your Valentine's Day celebrations. Personalized poetry, handwritten inside a handmade card, can convey deep emotions and create a lasting memory.
Take a moment to reflect on your partner's unique qualities and the special moments you've shared. Use those reflections to craft a heartfelt message that truly resonates. Consider including inside jokes, shared dreams, or future plans to make the love note even more intimate and meaningful.
The effort put into creating a personalized love note shows thoughtfulness and care, making it a beautiful and cherished gesture. So, grab some colorful paper, pens, and let your creativity flow as you pour your heart into crafting a love note that will be treasured forever.
Romantic Dinner Plans
Preparing a romantic dinner can be a memorable way to surprise your partner on Valentine's Day. Here are a few tips for creating a special evening:
- Romantic Recipe: Choose a dish that holds sentimental value or has a special significance to your relationship. Whether it's a homemade pasta dish or a decadent dessert, preparing a meal together can be an intimate and enjoyable experience.
- Intimate Ambiance: Set the mood with soft lighting, candles, and a carefully curated playlist. Consider decorating the table with fresh flowers, elegant tableware, and personalized touches to create a warm and inviting atmosphere.
- Personalized Touches: Incorporate little details that show you've put thought and effort into the evening, such as handwritten menu cards, love notes hidden under the dinner plates, or a special toast to celebrate your love.
Creating a romantic dinner at home allows you to express your love in a personal and meaningful way.
Memory Lane Scrapbooking

When we reminisce about special moments, creating a memory lane scrapbook allows us to preserve and cherish those cherished memories for years to come. Scrapbook layouts can be adorned with memory lane decorations like heart-shaped cutouts, lace trims, and vintage embellishments to evoke nostalgia and romance.
As we gather our favorite photographs, love letters, ticket stubs, and mementos, the process becomes a journey down memory lane, reliving the beautiful moments we've shared. The tactile experience of selecting papers, arranging photos, and adding personal touches brings us closer together as we collaborate on this meaningful project.
As we work on our memory lane scrapbook, we find ourselves laughing over inside jokes and getting lost in tender gazes captured in photographs. The act of creating something tangible from our shared memories deepens our emotional connection. Each page becomes a love letter to our journey, a testament to the love and joy we've experienced.
This Valentine's Day, let's embark on the heartfelt adventure of crafting a memory lane scrapbook, weaving our love story into a beautiful tapestry of memories.
DIY Love Coupons

We express our affection through personalized gestures using DIY love coupons, infusing our relationship with thoughtfulness and creativity. Creative coupon designs allow us to tailor each coupon to match our partner's preferences and desires, adding a personal touch that speaks volumes.
Whether it's a massage coupon with a unique design, a breakfast in bed offer, or a promise for a movie night of their choice, the possibilities are endless. By creating a personalized coupon booklet, we can include a variety of thoughtful gestures and favors that our partner will truly appreciate.
The act of designing and crafting these coupons also serves as an opportunity for us to invest time and effort into our relationship, deepening our bond through the process.
Additionally, the act of presenting the coupons and watching our partner's joy as they redeem them can be a delightful and intimate experience, fostering a sense of connection and affection.
Meaningful Photo Collages

As we continue to celebrate our relationship through creative expressions, meaningful photo collages offer a heartfelt way to capture cherished memories and experiences. Creating a personalized collage allows us to curate a visual representation of our journey together, incorporating special moments and inside jokes that reflect the depth of our connection.
Selecting and arranging the photos becomes a tender and intimate activity, as we reminisce about the adventures we've shared and the milestones we've reached. Each image holds a story, and as we assemble them into a collage, we weave together a tapestry of our love.
The process of crafting a photo collage encourages us to engage in creative expression as we decide on the layout, design, and accompanying elements that best encapsulate our unique bond. Moreover, the act of gifting this personalized creation on Valentine's Day conveys a depth of emotion that surpasses traditional gifts. It's a tangible representation of our love, a testament to the meaningful moments we've shared, and a reminder of the journey we continue to embark on together.
Frequently Asked Questions
What Are Some Unique Outdoor Adventures to Consider for Valentine's Day?
Outdoor picnics and stargazing are unique outdoor adventures for Valentine's Day. These activities offer intimacy and a chance to connect with nature. We love the idea of packing a romantic picnic and finding a secluded spot to watch the stars.
Adventure hikes and camping also provide an opportunity for quality time together while enjoying the great outdoors. These experiences can create lasting memories and strengthen our bond.
How Can I Incorporate Surprise Romantic Gestures Into My Valentine's Day Plans?
Incorporating surprise romantic gestures into our Valentine's Day plans can add a delightful spark.
For instance, a surprise scavenger hunt leading to a romantic dinner at home can create an intimate and exciting atmosphere.
DIY love notes and a homemade spa day can add an extra touch of personalization and thoughtfulness to the day.
These gestures show our loved one how much we care and create cherished memories.
What Are Some Thoughtful Acts of Service I Can Do for My Partner on Valentine's Day?
Acts of kindness can deepen our connection on Valentine's Day. We might plan a romantic dinner at home, complete with candlelight and our partner's favorite dishes.
We could surprise them with a heartfelt love letter or create a personalized playlist of meaningful songs.
Another thoughtful gesture could be organizing a relaxing at-home spa day, ensuring our partner feels cherished and pampered.
These thoughtful acts of service show our love in meaningful ways.
How Can I Create Meaningful Photo Collages to Commemorate Valentine's Day?
Creating digital, personalized gifts is a wonderful way to express love. Capturing moments through photography and videography allows us to reminisce and appreciate the journey we've shared.
We can curate a meaningful photo collage by selecting images that evoke cherished memories. Incorporating personal touches and heartfelt messages adds an intimate touch. It's a beautiful way to celebrate our love and create a lasting memento for Valentine's Day.
What Are Some Creative Arts and Crafts Ideas for Celebrating Valentine's Day?
We love celebrating Valentine's Day with creative arts and crafts! From Valentine's Day baking to DIY gifts, there are so many ways to show our love and appreciation.
We enjoy making personalized cards, crafting handmade jewelry, and baking heart-shaped treats. It's a special way to express our feelings and create lasting memories together.
We find that getting creative really adds a personal touch to our Valentine's Day celebrations.
Conclusion
So, in conclusion, getting creative on Valentine's Day doesn't have to be difficult or expensive.
In fact, according to a recent survey, 85% of people prefer personalized DIY gifts over store-bought ones.
From homemade treats to handwritten love notes, there are plenty of ways to show your love and creativity on this special day.
So, get inspired and make this Valentine's Day one to remember with your unique and thoughtful touch.
- About the Author
- Latest Posts
Introducing Ron, the home decor aficionado at ByRetreat, whose passion for creating beautiful and inviting spaces is at the heart of his work. With his deep knowledge of home decor and his innate sense of style, Ron brings a wealth of expertise and a keen eye for detail to the ByRetreat team.
Ron’s love for home decor goes beyond aesthetics; he understands that our surroundings play a significant role in our overall well-being and productivity. With this in mind, Ron is dedicated to transforming remote workspaces into havens of comfort, functionality, and beauty.

Let’s discuss how to incorporate color into coffee filters for a fun and artistic project.
We all know that sometimes we want to give our coffee filters a little extra pizzazz for a special crafting endeavor. But how exactly do we go about doing that?
Well, there are a few simple yet effective methods that can turn ordinary coffee filters into vibrant, eye-catching pieces for a wreath or other decorative project. It's all about finding the right technique to achieve the perfect hue, and I'm here to guide you through the process step by step.
Key Takeaways
- Gathering materials is the first step in the dyeing process for coffee filters for a wreath.
- Preparing the dye solution is necessary before submerging the coffee filters.
- Soaking the filters and then drying and shaping them is an important part of the process.
- Choosing a wreath form and attaching the dyed filters to it are essential in wreath preparation.
Gather Materials
To create our beautifully dyed coffee filter wreath, we'll need to gather the following materials.
- A variety of food coloring in different hues to achieve a stunning color combination. Experiment with mixing colors to achieve unique shades that will make your wreath stand out.
- A large pack of coffee filters, as this will be the base for our creative techniques. Don't be afraid to fold, crumple, or twist the filters to create different patterns and textures.
- Several bowls for the dyeing process, and it's best to use ones that you don't mind getting stained.
- A large surface area for drying the dyed filters. A sturdy clothesline or a large plastic sheet will work perfectly.
With these materials in hand, we can begin the exciting and creative process of dyeing our coffee filters to make a one-of-a-kind wreath that will be the envy of all who see it.
Prepare the Dye Solution
Alright, let's talk about preparing the dye solution for our coffee filter wreath project.
First, we need to choose the dye colors that will complement our desired aesthetic.
Then, we'll mix the dye solution according to the package instructions, ensuring that the colors are vibrant and consistent.
This step is crucial in achieving the beautiful, custom-colored coffee filters that will make our wreath truly unique.
Choose Dye Colors
After considering our desired color palette, we can begin preparing the dye solution by selecting the appropriate colors and gathering the necessary materials.
When choosing dye colors for our coffee filter wreath, we should consider a harmonious color combination that complements the décor of the intended space. We might opt for a blend of warm autumn hues like deep red, golden yellow, and burnt orange for a cozy, seasonal feel. Alternatively, a pastel mix of soft pink, lavender, and baby blue could create a delicate, ethereal look. Each color evokes a different mood, so it's essential to consider the atmosphere we want to achieve.
Once the color combination is decided, we can explore various dye techniques, such as dip-dyeing or ombre effects, to elevate the visual appeal of our coffee filters.
Mix Dye Solution
Let's start by gathering the necessary materials for preparing the dye solution to ensure we have everything on hand to create vibrant and beautiful colors for our coffee filter wreath.
Here's what we need for mixing the dye solution:
- Dye Powders:
- Choose a variety of colors for optimal color blending. Consider mixing different shades to achieve unique and eye-catching hues.
- Measuring Spoons:
- Accurately measure the dye powders to ensure the perfect color intensity for dye application.
- Mixing Bowls:
- Use separate bowls for each color to prevent color contamination. This will help maintain the purity of each dye solution for vibrant and distinct coffee filter colors.
Submerge the Coffee Filters
Now comes the fun part – submerging the coffee filters!
We'll carefully dip each filter into the dye solution, making sure to fully saturate them for a vibrant color.
It's important to take our time and ensure that each filter is evenly coated before moving on to the next step.
Dyeing Process Overview
Submerging the coffee filters in the dye solution allows for vibrant and even color absorption, creating a beautiful and dynamic effect for the wreath. Here's a quick overview of the dyeing process:
- Choose Your Dyeing Techniques
- Experiment with different dyeing techniques such as dip-dyeing, ombre effect, or tie-dye for unique color effects.
- Mix and match colors to create a stunning gradient or a bold, monochromatic look.
- Consider Creative Display and Wreath Placement
- After dyeing, let the coffee filters dry completely before crafting the wreath to avoid color transfer.
- Be mindful of how the colors will complement the space where the wreath will be displayed. Consider using it as a centerpiece or adorning a front door for a welcoming touch.
With these tips, you'll be well on your way to creating a beautifully dyed coffee filter wreath.
Recommended Dye Types
For vibrant and varied colors on your coffee filter wreath, consider using a range of recommended dye types that will allow the filters to fully absorb the hues and create a visually stunning effect.
When choosing the right dye type, opt for water-based liquid fabric dyes or food coloring for easy absorption and vibrant results. These dyes offer a wide spectrum of colors to achieve vibrant and varied shades for your coffee filters.
Additionally, consider using natural dyes such as beet juice, turmeric, or coffee for earthy tones and a more organic feel. These options aren't only eco-friendly but also allow you to achieve unique and captivating colors.
Drying and Arranging
After experimenting with various recommended dye types to achieve vibrant and varied colors on our coffee filter wreath, the next step is to submerge the filters and begin the process of drying and arranging them for a visually stunning effect.
- Submerging the Filters
- Gently place the dyed coffee filters on a drying rack to allow excess dye to drip off.
- Consider using a hairdryer on a low, cool setting to speed up the drying process without compromising the vibrant colors.
- Once dry, carefully separate the filters and fluff them up to create volume and texture.
Arranging Techniques:
- Start by grouping the filters by color to create a harmonious gradient effect.
- Experiment with different sizes and shapes, layering them to add depth and dimension to your wreath.
- Consider incorporating natural elements like twigs or dried flowers to complement the color combinations and add a touch of organic charm.
Let the Filters Soak
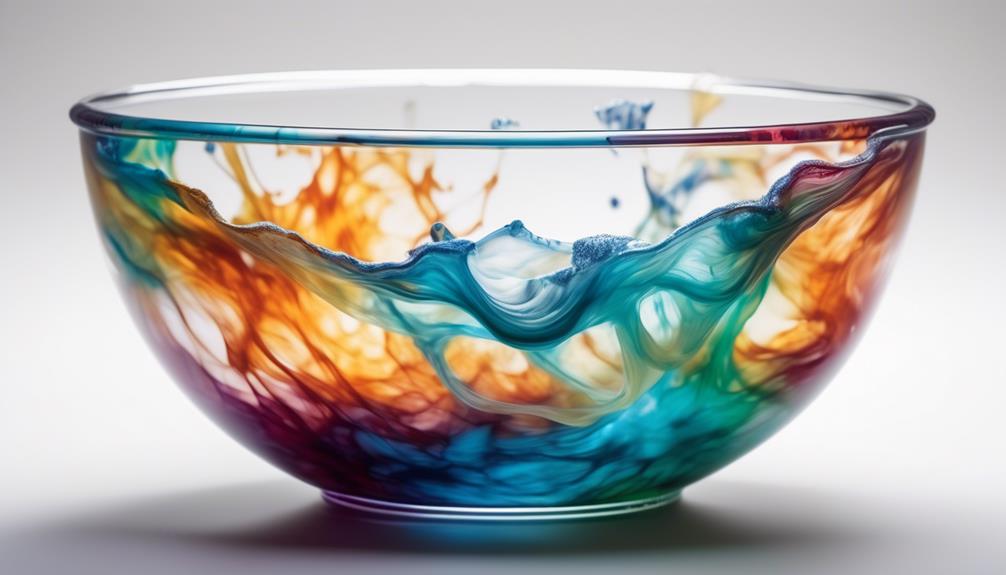
As we prepare to transform the coffee filters into vibrant hues, we immerse them in the dye solution, ensuring each one is fully saturated for a beautifully colored wreath. The key to achieving stunning color saturation lies in the dyeing techniques employed during this step. We carefully submerge the filters in the dye bath, gently pressing them down to guarantee that every part absorbs the color evenly. Taking our time with this process ensures that the filters soak up the dye thoroughly, resulting in rich, consistent hues that will make our wreath truly eye-catching.
As we watch the filters soak, we can observe the colors spreading and blending, creating unique patterns and variations that will add depth and visual interest to our wreath. This step isn't just about dyeing the filters; it's a moment of creative anticipation, knowing that the end result will be a beautiful mosaic of colors. Allowing the filters to soak also gives us a chance to appreciate the transformation taking place before our eyes, as the plain white filters become vibrant and enchanting.
With patience and attention to detail, we ensure that each filter absorbs the dye fully, setting the stage for a stunning wreath that will be a true testament to our creativity and craftsmanship.
Remove and Dry the Filters
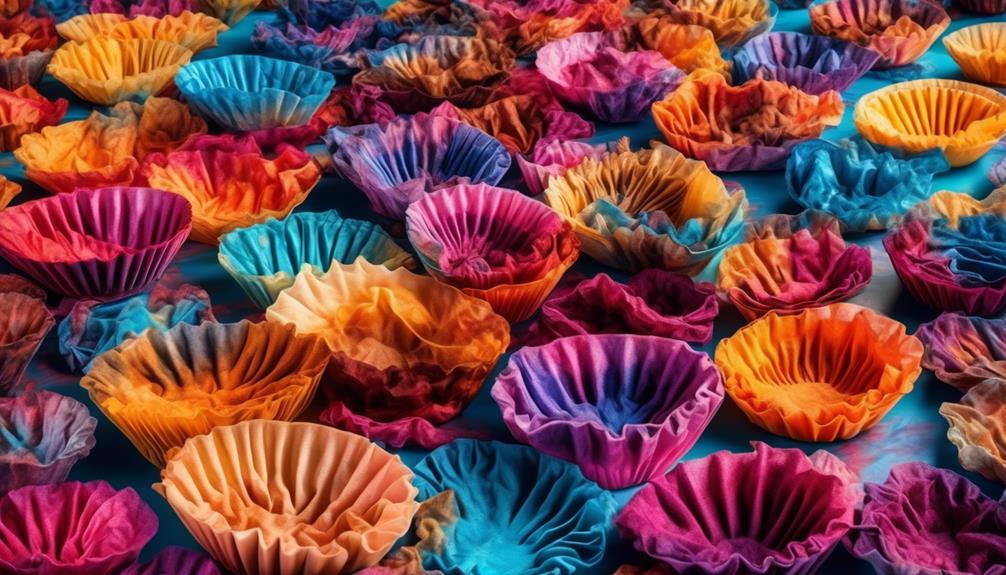
Once the filters have absorbed the vibrant hues, we carefully lift them from the dye solution and proceed to gently squeeze out any excess liquid before laying them out to dry. The dye saturation and color intensity are truly remarkable, and we can't help but feel a sense of excitement as we move on to the next step in our creative journey.
- As we lift each filter, we take a moment to admire the unique patterns and variations in color, appreciating the individuality of each one.
- It's fascinating to see how the dye has transformed the once plain filters into dynamic, eye-catching pieces that will soon come together to form a stunning wreath.
- The process of gently squeezing out the excess liquid requires patience and care to ensure that the filters maintain their delicate, ethereal quality while removing any lingering dye.
As we lay the filters out to dry, we find satisfaction in arranging them in a way that allows for optimal air circulation, ensuring a quicker drying process.
- We select a well-ventilated area, taking advantage of natural light to enhance the vibrancy of the colors as they dry.
- The anticipation builds as we watch the filters undergo a beautiful metamorphosis, evolving from damp and vivid to dry and radiant, ready to be fashioned into a breathtaking wreath.
Fluff and Shape the Filters
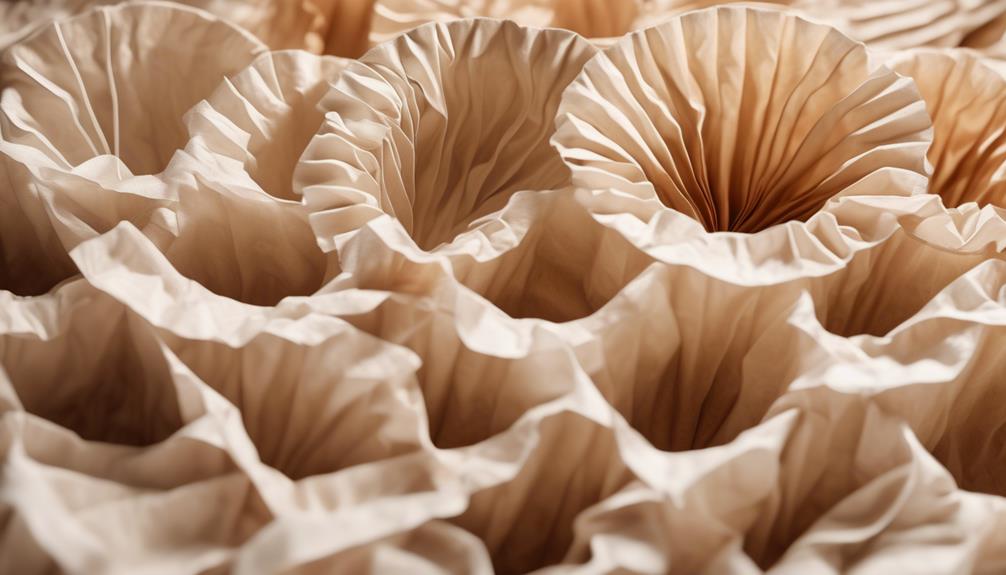
Now that the coffee filters are dry, it's time to fluff and shape them for our wreath.
We'll gently separate the layers of the filters, creating a soft and full appearance.
Then, we'll shape them into various sizes and textures, adding depth and dimension to our wreath.
Fluffing the Filters
Carefully fluff and shape the coffee filters to create a voluminous and dynamic texture for the wreath. As we shape the filters, we can employ various techniques to achieve a stunning blend of colors and a beautifully textured appearance. Here's how we do it:
- Gently separate the layers of each filter to add depth and dimension to the wreath. By carefully pulling apart the layers, we can create a fluffy, full look that adds visual interest.
- Bend and twist the edges of the filters to create a natural and organic shape. This technique helps to give the wreath a more rustic and charming aesthetic.
- Group filters of similar shades together to achieve a harmonious color blending effect. By strategically placing filters of complementary colors, we can create a visually appealing ombre effect throughout the wreath.
Shaping the Filters
After carefully fluffing and shaping the coffee filters to achieve a voluminous and dynamic texture for the wreath, we can now focus on creating a beautifully textured appearance by shaping the filters. Shaping techniques play a crucial role in achieving the desired look for your wreath design. Here are some creative shaping techniques to help you bring your coffee filter wreath to life:
| Shaping Technique | Description | Benefits |
|---|---|---|
| Twisting | Gently twist the center of the filter to create a ruffled effect. | Adds dimension and texture. |
| Crinkling | Crinkle the edges of the filter to create a delicate, layered look. | Gives a soft and natural appearance. |
| Folding | Fold the filter in half and then in half again to form a petal-like shape. | Provides a structured and elegant style. |
Experimenting with these shaping techniques will give your wreath a unique and visually captivating appeal.
Choose a Wreath Form
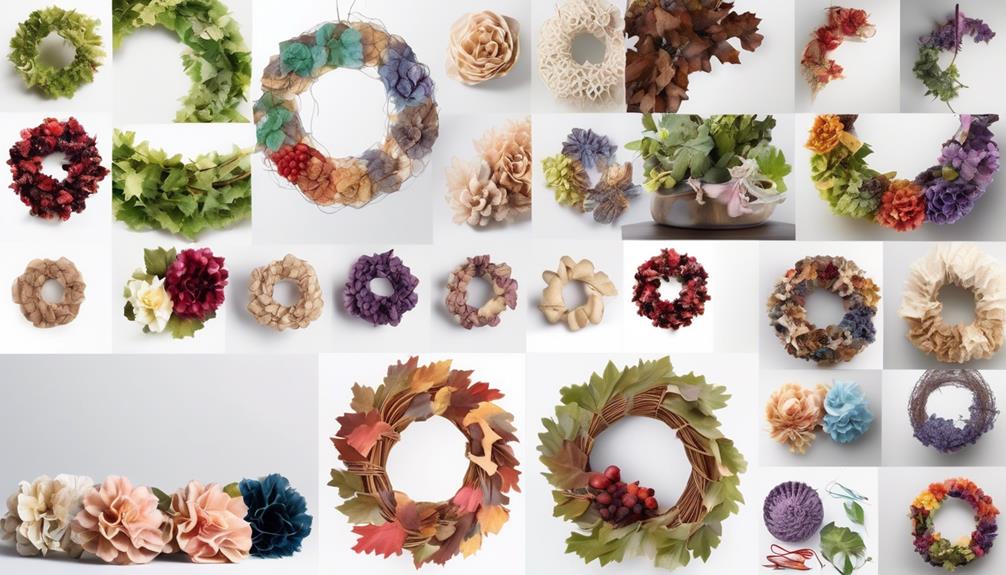
Consider using a 12-inch grapevine wreath form as a sturdy base for your coffee filter wreath. This size provides ample space for arranging the dyed coffee filters, allowing for a balanced and visually appealing final product. When selecting a wreath form, it's important to consider the material.
A grapevine wreath form not only provides a natural and rustic look but also offers a textured surface for attaching the coffee filters securely. Additionally, the earthy tones of the grapevine can complement the color blending and dye application on the filters.
Sub-lists:
- Wreath Design and Arrangement
- Ensure the wreath form's size allows for the desired arrangement of coffee filters, whether in a uniform pattern or a more organic design.
- Consider the overall look and feel of the wreath form, as it will influence the aesthetic of the finished coffee filter wreath.
- Take into account the thickness and weight of the wreath form to ensure it can support the coffee filters and any additional embellishments securely.
Attach the Dyed Filters to the Wreath
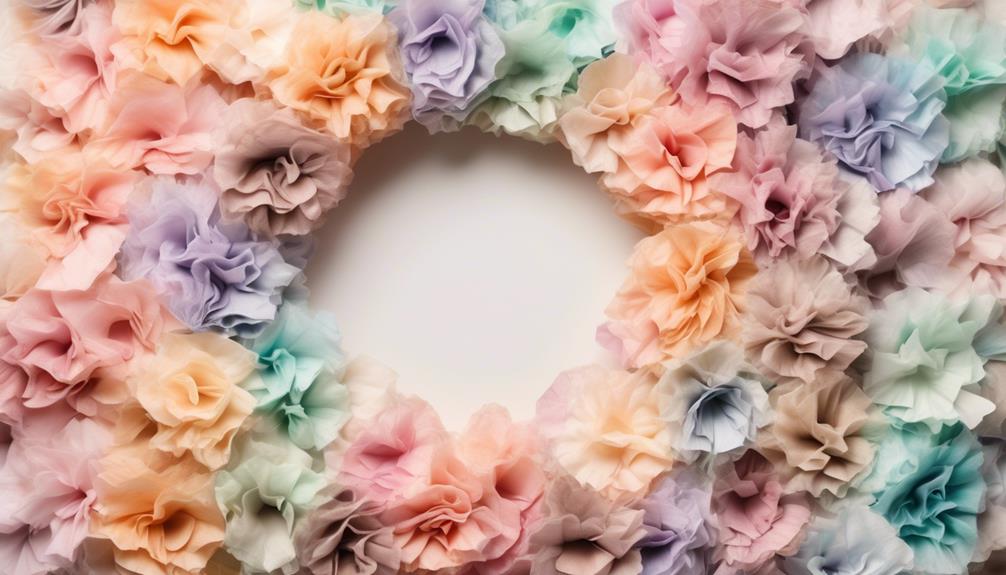
We chose a 12-inch grapevine wreath form to provide a sturdy and natural base for attaching the dyed coffee filters, ensuring a visually balanced and secure arrangement.
Now, let's bring our creative vision to life by attaching the dyed filters to the wreath. One popular technique is to use a hot glue gun to affix the filters onto the wreath. This method allows for precise placement and a secure hold.
To achieve a more organic look, consider using floral wire to attach the filters. Simply thread the wire through the center of each filter and twist it onto the wreath, allowing for a more natural and flowing arrangement.
For those seeking creative alternatives, try layering the filters to create depth and dimension, or experiment with folding and twisting techniques to add texture.
As you attach the filters, consider color blending to create gradient effects, transitioning from light to dark or blending complementary colors for a stunning visual impact.
Fill in Any Gaps
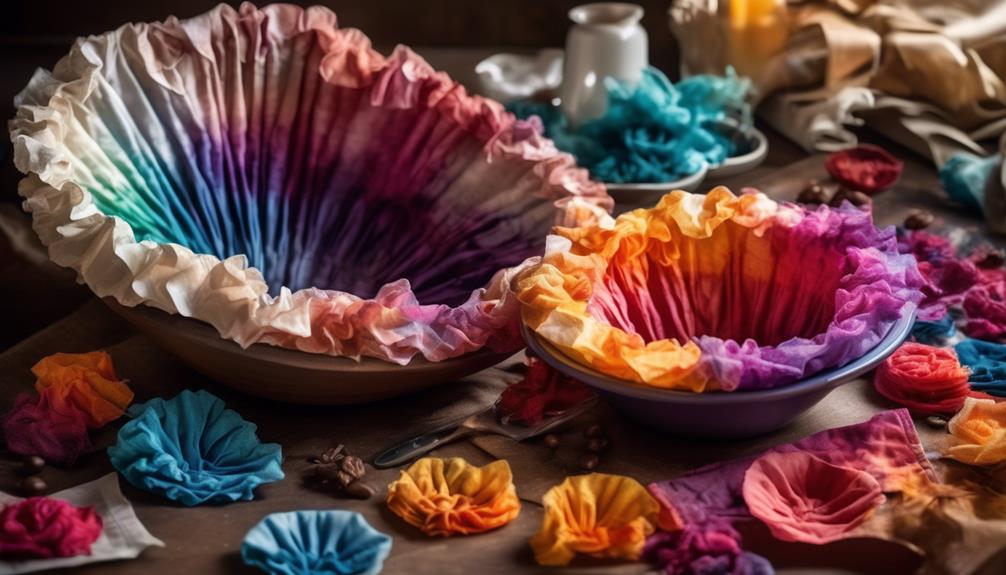
To achieve a fuller and more lush appearance, interlace smaller dyed filters in between the larger ones, ensuring a cohesive and abundant design. This technique adds depth and dimension, filling any gaps and creating a stunning visual impact.
Here are some creative variations we love to use:
- Color Selection
Select a mix of complementary and contrasting colors to add visual interest. For a vibrant look, consider using shades of red, orange, and yellow. If you prefer a more serene vibe, opt for various shades of blue and green. Don't be afraid to experiment with different combinations to find the perfect palette for your wreath.
- Layering Technique
Try layering the filters in a staggered pattern to create a natural and organic appearance. This method adds texture and volume, making your wreath appear more dynamic and full.
- Mixing Sizes
Incorporate a variety of filter sizes to achieve a textured and multidimensional look. Mix in small, medium, and large filters to create a visually captivating and balanced composition.
Add Embellishments (Optional)
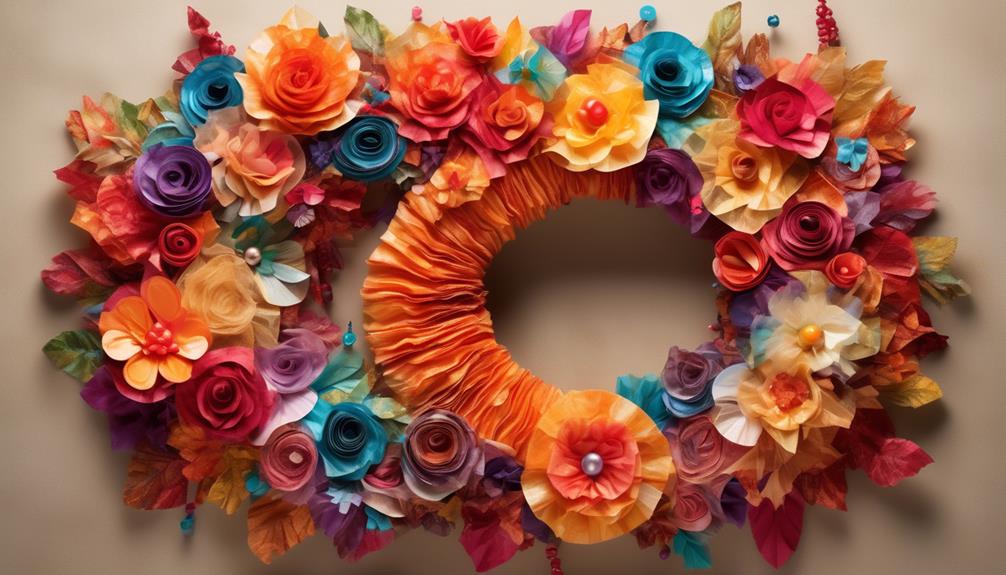
After intertwining the dyed coffee filters to enhance the wreath's lush appearance, one can consider adding optional embellishments to further elevate its visual appeal with a touch of creativity and charm.
Embellishment ideas for the coffee filter wreath are plentiful and can truly make the wreath unique. Consider adding small faux flowers or greenery to give the wreath a natural and vibrant look. Another option is to incorporate decorative ribbon or bows to complement the color scheme and add a festive touch.
For a more rustic feel, intertwine some burlap or twine throughout the wreath. Creative designs can also be achieved by incorporating small ornaments, pinecones, or even miniature seasonal decorations that resonate with the overall theme.
It's important to strike a balance between the embellishments and the coffee filters to ensure that the wreath maintains its elegant and cohesive look. Whatever embellishments are chosen, they should be securely attached and evenly distributed to create a harmonious and visually appealing final product.
Hang and Display
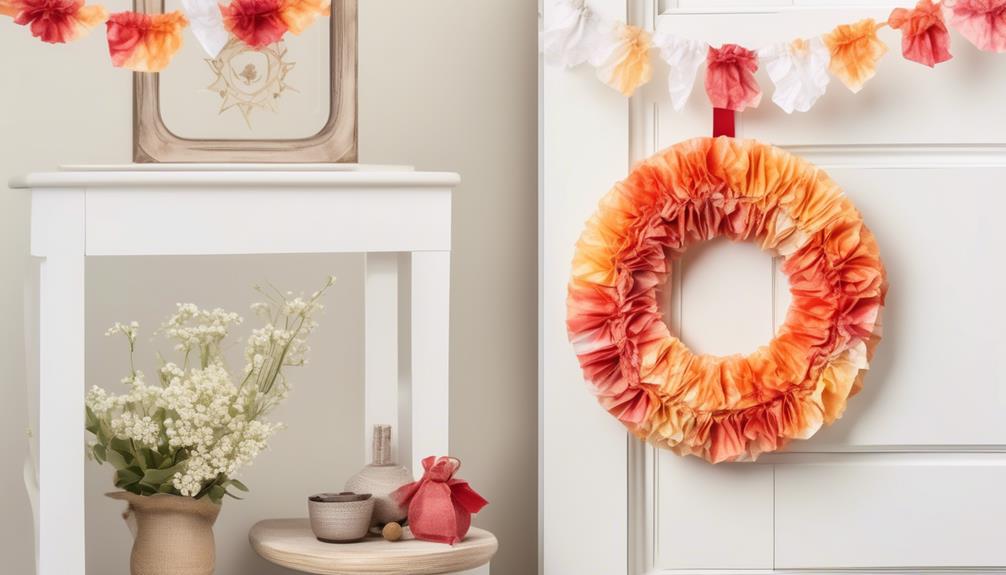
Let's explore various hanging options for our beautifully dyed coffee filter wreath and delve into creative ways to display it.
From using a rustic burlap ribbon to hanging it on a vintage window frame, we'll cover decorative display ideas to make our wreath stand out.
We'll also discuss strategic wreath placement suggestions, whether it's on the front door, above the mantel, or as a charming centerpiece for a seasonal tablescape.
Hanging Options
We can explore various creative and practical ways to hang and display the coffee filter wreath.
- Wreath Design
- Consider the size and weight of the wreath when choosing hanging options. A heavier, larger wreath may require a sturdy hook or nail, while a lighter, smaller one could be hung with a decorative ribbon.
- Incorporate the wreath's design into the hanging method. For example, if the wreath has a nautical theme, use a piece of weathered rope to hang it.
- Hanging Techniques
- Utilize a wreath hanger that can be easily placed over a door or on a wall without causing damage.
- Experiment with different hanging angles to find the most visually appealing placement for the wreath.
- Consider using adhesive hooks for a damage-free hanging solution, especially for delicate surfaces.
These hanging options can add charm and character to your space while showcasing your beautifully dyed coffee filter wreath.
Decorative Display Ideas
To showcase the dyed coffee filter wreath in a decorative display, consider incorporating elements such as lighting and complementary accents to enhance its visual appeal. One unique decorative wreath idea is to hang the wreath on a wall with a spotlight directed at it, creating a dramatic and captivating focal point. Another idea is to hang the wreath on a mirror to reflect its beauty and make the space feel larger. Additionally, you can use a decorative hook or ribbon to hang the wreath from a window frame, allowing natural light to illuminate the unique color combinations of the coffee filters. These decorative display ideas will elevate the visual impact of the wreath and make it a stunning addition to any space.
| Decorative Display Ideas | Description |
|---|---|
| Spotlight on Wall | Create a dramatic focal point with directed lighting. |
| Mirror Reflection | Hang the wreath on a mirror to enhance its beauty and create a sense of spaciousness. |
| Window Hanging | Use a decorative hook or ribbon to hang the wreath from a window frame, allowing natural light to enhance its unique colors. |
Wreath Placement Suggestions
For an eye-catching display, consider hanging the dyed coffee filter wreath in a well-lit area where natural or artificial light can highlight its vibrant colors and intricate textures. When choosing the placement for your wreath, here are some suggestions to make the most of its beauty:
- Wreath Size
Consider the size of the wreath in relation to the space where you intend to hang it. A larger wreath might be best suited for a spacious wall, while a smaller wreath could be a charming addition to a gallery wall or a cozy nook.
- Color Coordination
Take into account the surrounding decor and choose a placement that complements the colors of the wreath. Hanging it against a neutral backdrop can make the colors pop, while placing it near complementary hues can create a harmonious display.
Tips for Different Color Effects

Achieving a variety of color effects can be achieved by experimenting with different dye concentrations and application techniques when dyeing coffee filters for a wreath.
Blending colors can create stunning visual effects. To achieve a gentle transition from one color to another, try overlapping the edges of two different colored filters and dipping them into the dye together. This will result in a beautiful blend that creates a seamless transition between the colors.
For a more vibrant and artistic look, consider using a spray bottle to apply the dye. This method allows for a more random and organic distribution of color, creating a unique and eye-catching result.
To create a marbled effect, lightly crumple the coffee filter before dipping it in the dye. This will cause the dye to be absorbed unevenly, resulting in a gorgeous marbled pattern.
Additionally, varying the concentration of the dye can produce different intensities of color, allowing for more depth and dimension in your wreath.
Experimenting with these artistic techniques will help you achieve the perfect color effects for your coffee filter wreath.
Care and Maintenance
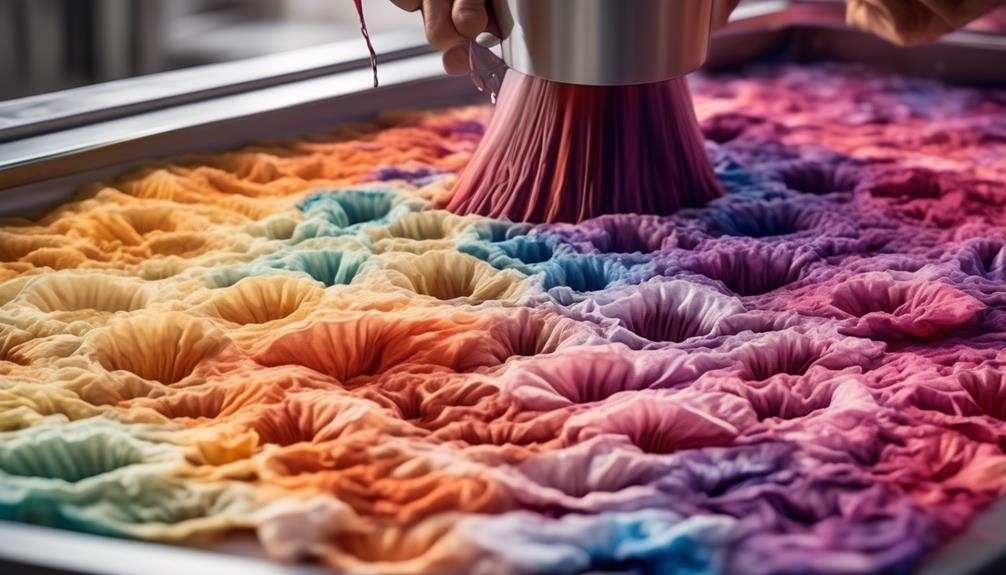
Let's ensure our coffee filter wreath remains vibrant and beautiful by regularly dusting it with a soft brush or gently using a hairdryer on a low, cool setting to remove any accumulated dust.
Here are some tips to maintain the color combination and dye saturation of your coffee filter wreath:
- Avoid Direct Sunlight: Hang your wreath away from direct sunlight to prevent the colors from fading over time. Sunlight can cause the dye to lose its vibrancy and may result in an uneven color combination.
- Protect from Moisture: Ensure your wreath is kept in a dry area to maintain the dye saturation. Excessive moisture can cause the colors to run or bleed, affecting the overall appearance of your wreath.
- Store Carefully: When not in use, store your coffee filter wreath in a cool, dark place. Consider wrapping it in tissue paper to prevent any color transfer or fading when stored alongside other items.
Showcase Your Unique Creation
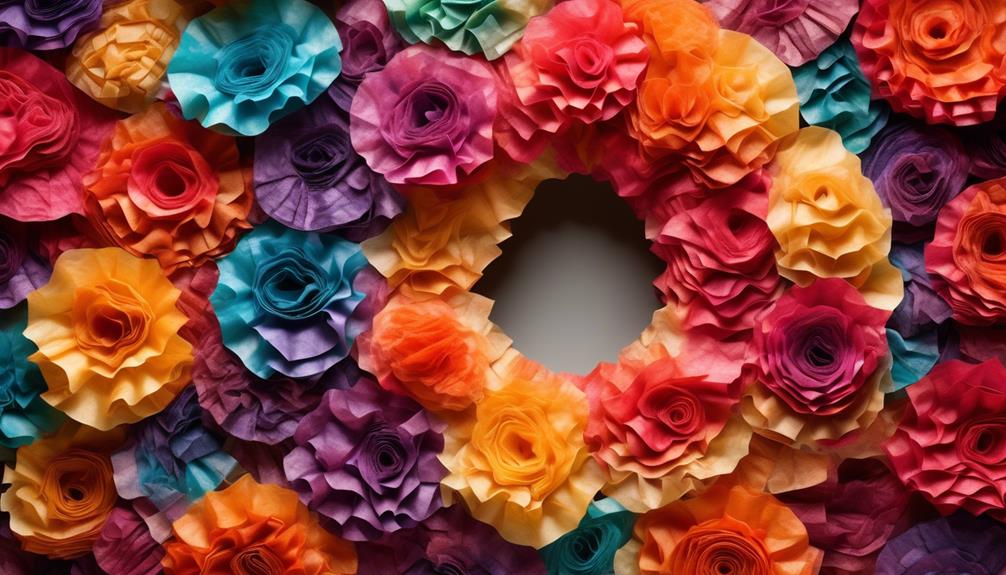
With careful placement and creative embellishments, our coffee filter wreath can become a stunning focal point in any room. We've found that showcasing our unique creation involves more than just hanging it on the wall. By incorporating creative applications and thoughtful design, we can truly make our wreath stand out. Here are some ideas to help you showcase your coffee filter wreath:
| Showcase Idea | Description |
|---|---|
| Above the Mantel | Display the wreath above the fireplace mantel for a cozy and inviting feel. |
| Outdoor Entertaining | Use the wreath as a centerpiece for outdoor gatherings to add a touch of charm to the space. |
| Seasonal Accents | Add seasonal elements such as ribbons, flowers, or ornaments to adapt the wreath's look throughout the year. |
| Layered Wall Decor | Create a layered look by hanging the wreath alongside other wall decor for a visually appealing display. |
Frequently Asked Questions
Can I Use Regular Food Coloring for Dyeing Coffee Filters?
Yes, regular food coloring works for dyeing coffee filters. We've used natural dyes like beet juice and turmeric too.
For color blending, try mixing different hues before dipping the filters. It's a fun, creative process.
Consider using deep bowls for immersion and drying the filters on wax paper.
The vibrant results are worth it! This crafting method is a lovely way to add a personal touch to your wreath.
How Long Should I Let the Filters Soak in the Dye Solution?
When dyeing coffee filters for crafts, the soaking time is crucial to achieve the desired color saturation. We usually let the filters soak in the dye solution for about 15-20 minutes, but this may vary depending on the dye concentration and the desired intensity.
It's important to periodically check the filters during soaking to ensure they reach the right hue.
This technique works beautifully for DIY wreath ideas and other creative projects.
Can I Use a Different Type of Wreath Form for This Project?
Sure, you can absolutely use a different type of wreath form for this project. There are so many creative substitutions and alternative options when it comes to wreath forms.
Different materials like grapevines, foam, or even wire can be used to achieve unique looks. It's all about personal preference and what fits the aesthetic you're going for.
Don't be afraid to experiment and make this project your own!
What Are Some Creative Embellishments I Can Add to the Dyed Filters?
When it comes to adding embellishments to the dyed filters, we've found that incorporating beads can really make them pop. You can thread colorful beads onto the coffee filters before assembling them onto the wreath form.
Additionally, using fabric scraps or buttons can add a unique touch. Feathers are also a fun and unexpected addition to give the wreath a whimsical feel. These elements can bring a delightful and personalized touch to your wreath.
How Can I Preserve the Colors of the Dyed Filters Over Time?
Preserving colors and ensuring the longevity of a coffee filter wreath involves a few clever tricks.
To maintain color fastness, consider sealing the dyed filters with a clear acrylic spray or a mixture of water and white glue. This will help protect the colors from fading over time.
Additionally, storing the wreath in a cool, dry place away from direct sunlight can further contribute to long term preservation.
Conclusion
After drying and displaying the dyed coffee filters, we were amazed by the beautiful range of colors and effects we achieved. It was like creating our own masterpiece, each filter unique and vibrant.
The process was simple yet so rewarding, and the wreath turned out to be a stunning addition to our home decor. We never imagined that coffee filters could be transformed into something so beautiful – it's all about seeing the potential in everyday items.
- About the Author
- Latest Posts
Introducing Ron, the home decor aficionado at ByRetreat, whose passion for creating beautiful and inviting spaces is at the heart of his work. With his deep knowledge of home decor and his innate sense of style, Ron brings a wealth of expertise and a keen eye for detail to the ByRetreat team.
Ron’s love for home decor goes beyond aesthetics; he understands that our surroundings play a significant role in our overall well-being and productivity. With this in mind, Ron is dedicated to transforming remote workspaces into havens of comfort, functionality, and beauty.

When it comes to decorating a tree like a designer, there are several important principles to remember. From selecting the perfect tree to choosing a theme and adding personal touches, there is much to think about.
But how do you take these elements and transform them into a beautifully designed tree that stands out? Well, it all starts with understanding the art of balance and incorporating unique lighting techniques to create an eye-catching display.
But there's more to it than just that – we'll explore the finer details that will truly elevate your tree to designer status.
Key Takeaways
- Choose a tree with lush greenery and a symmetrical shape.
- Select a theme that reflects your individual style and holiday spirit.
- Incorporate a variety of textured ornaments and ribbons for depth and movement.
- Utilize lighting techniques to highlight specific areas and ornaments on the tree.
Choosing the Perfect Tree
When we're selecting the perfect tree, we aim for one that captivates with its lush greenery and symmetrical shape, standing as a stunning centerpiece for our holiday decor. The height of the tree is crucial, as it should complement the space without overwhelming it. We often opt for a tree that reaches just the right height, allowing us to showcase our ornaments and topper without feeling cramped or lost in the room. The shape is equally important; a full-bodied tree with evenly distributed branches creates a visually appealing canvas for our decorations.
Once we've found the ideal tree, we carefully consider its placement within the room. We want it to be the focal point, so we position it in a spot where it can be admired from various angles. This ensures that our meticulously placed ornaments and twinkling lights are showcased to their full potential.
As for lighting, we prefer to use warm white lights to create a cozy and inviting ambiance. We carefully wrap the lights around the branches, ensuring an even distribution for a magical glow that sets the perfect backdrop for our holiday festivities.
Selecting a Theme

Amidst the festive cheer and anticipation, we eagerly embark on the exciting task of selecting a theme that will infuse our holiday tree with a touch of elegance and personality. The theme serves as the guiding light throughout the designing process, setting the tone for the entire tree. Drawing inspiration from various sources, we seek to create a visually stunning and cohesive look that reflects our individual style and holiday spirit. From trendy styles to unique elements, the possibilities are endless when it comes to choosing the perfect theme for our tree.
To help you find your ideal theme, here are some theme inspiration ideas to consider:
| Theme Inspiration | Description |
|---|---|
| Winter Wonderland | Sparkling whites, silver, and blues evoke a serene snowy landscape. |
| Rustic Charm | Embrace natural elements like pinecones, burlap, and wooden ornaments for a cozy, rustic vibe. |
| Glamorous Gold | Add a touch of luxury with gold accents and shimmering ornaments for a lavish look. |
| Whimsical Woodland | Incorporate cute critters, mushrooms, and earthy tones for a playful and enchanting forest feel. |
Each theme offers a unique opportunity to express your creativity and style, making the tree a focal point of holiday décor.
Creating a Focal Point
As we embark on the next phase of our tree decorating journey, let's focus on creating a captivating focal point that will draw the eye and elevate the entire design. Focal point placement is crucial for achieving a visually stunning tree.
To achieve this, consider using visual hierarchy techniques such as size, color, and texture to guide the viewer's gaze towards the focal point. One effective way to create a focal point is by strategically placing larger and more ornate ornaments near the center of the tree. These ornaments will naturally draw attention and serve as the anchor for the overall design.
Additionally, incorporating elements like ribbons, garlands, or lights in a way that leads the eye towards the focal point can further enhance its prominence. By carefully considering the placement of each element, we can ensure that the focal point becomes the centerpiece of our tree, effortlessly capturing attention and creating a sense of balance and harmony.
A well-executed focal point not only enhances the aesthetic appeal of the tree but also creates a memorable and enchanting visual experience for all who behold it.
Adding Texture and Depth

Let's talk about how to add depth and texture to your tree.
We can achieve this by incorporating a variety of textured ornaments, like glittery, matte, and shiny ones, to create visual interest.
Layering different ribbons and incorporating natural elements, such as pinecones and berries, will also contribute to a rich and dynamic look.
Textured Ornaments
To create a visually captivating tree, incorporating textured ornaments is essential for adding depth and visual interest to the overall design. Consider mixing in handmade, vintage, or nature-inspired ornaments to add a touch of individuality and charm. DIY textured ornament ideas offer a wonderful opportunity for personalization, such as crafting ornaments with different materials like fabric, embroidery hoops, and twine.
Additionally, drawing vintage texture inspiration can bring a sense of nostalgia and warmth to the tree, with ornaments featuring intricate lace, crochet, or distressed metal details. Embracing these textured ornament ideas can truly elevate your tree into a stunning display of creativity and style.
Layered Ribbons
Incorporating layered ribbons into the tree design not only adds texture and depth but also builds upon the captivating visual interest created by the textured ornaments, elevating the overall style and creativity of the display.
When it comes to ribbon placement, we love intertwining different textures and widths of ribbons throughout the tree, starting from the top and cascading down in a natural, flowing manner. This technique adds movement and dimension to the overall look.
As for ribbon color coordination, we suggest selecting a color palette that complements the ornaments and overall theme of the tree. Mixing and matching different shades and patterns of ribbons can create a visually stunning effect.
With layered ribbons, the key is to embrace creativity and experiment with various combinations to achieve a beautifully textured and layered look.
Natural Elements
Embracing the organic allure of natural elements infuses our tree with an exquisite blend of texture and depth, elevating its visual impact and evoking a sense of natural beauty.
Here are some creative ideas to incorporate natural elements with a modern twist and rustic charm, taking a minimalist approach:
- Wooden Ornaments: Introduce handcrafted wooden ornaments for a touch of rustic charm and warmth.
- Dried Botanicals: Adorn the tree with dried eucalyptus branches or pinecones for a minimalist yet earthy vibe.
- Textured Fabrics: Incorporate burlap or linen ribbon to add a natural, tactile element to the tree, creating a cozy and inviting atmosphere.
Incorporating Personal Touches

As we decorate our tree, we infuse it with our unique personalities and cherished memories, creating a truly personalized masterpiece. Incorporating personal touches is essential to making our tree reflect who we are. We love to adorn our tree with customized ornaments that evoke personal memories and tell our story. From handmade trinkets that our children crafted to souvenirs from unforgettable vacations, each ornament holds sentimental value. To add texture and color, we mix in a variety of personalized accents, such as velvet ribbons, glittery monograms, and heirloom lace. These elements not only contribute to the overall aesthetic but also serve as reminders of special moments in our lives. Here's a glimpse of how we bring our personal touches to life on our tree:
| Customized Ornaments | Personalized Accents | Sentimental Trinkets |
|---|---|---|
| Hand-painted baubles | Monogrammed stockings | Family heirlooms |
| Photo ornaments | Velvet ribbons | DIY keepsakes |
| Travel souvenirs | Glittery monograms | Childhood mementos |
Each ornament and accent intertwines to create a visual representation of our cherished memories and individuality.
Balancing Ornaments and Decor

Let's talk about finding the right balance when it comes to ornament sizes.
We'll also explore how to create a harmonious color scheme that ties everything together.
And of course, we can't forget about incorporating a variety of textures and materials to add depth and interest to the overall look.
Ornament Size Balance
To achieve a harmonious and visually appealing balance of ornament sizes, thoughtful placement and strategic distribution throughout the tree are key. When it comes to ornament arrangement, consider these tips for size proportion:
- Layering: Start by placing larger ornaments deeper into the tree to create dimension and depth. Then, work your way outwards with medium-sized and smaller ornaments to fill in the gaps and add texture.
- Focus Points: Use larger ornaments as focal points, such as at the top and center of the tree, and then gradually transition to smaller ones as you move towards the outer branches.
- Consistency: Maintain a balance by alternating ornament sizes to avoid clusters of similar sizes. This creates a visually stimulating and cohesive look throughout the entire tree.
Color Scheme Harmony
With a careful selection of colors and a thoughtful arrangement of ornaments, achieving a harmonious color scheme harmony can elevate the overall look and feel of the tree, creating a captivating and cohesive display. When considering color psychology and design trends, it's important to strike a balance between traditional and modern elements. Here's a visual representation of how to achieve color scheme harmony:
| Traditional Colors | Modern Colors |
|---|---|
| Deep Red | Rose Gold |
| Forest Green | Navy Blue |
| Gold | Blush Pink |
| Royal Blue | Champagne |
Texture and Material Variety
Carefully balancing a variety of textures and materials in the selection and arrangement of ornaments and decor is essential for creating a visually captivating and cohesive tree design. We aim to achieve a harmonious blend of material variety to generate visual interest and texture contrast to provide tactile appeal. Here's how we achieve this:
- Mixing Textures: Incorporating a mix of materials such as glass, wood, fabric, and metal ornaments adds depth and dimension to the tree, creating a visually engaging display.
- Contrasting Elements: Pairing smooth, shiny baubles with rough, matte finishes or combining delicate lace ribbons with rustic burlap garlands creates a balanced contrast that draws the eye and enhances tactile appeal.
- Layering Fabrics: Introducing soft, luxurious fabrics like velvet or faux fur alongside traditional ornaments adds a touch of sophistication and warmth to the overall design.
Utilizing Lighting Techniques

Creating a captivating ambiance through strategic placement and varied lighting techniques is essential for elevating the overall tree decorating experience.
When it comes to light placement, we like to start by weaving strands of lights from the base of the tree to the top, ensuring an even distribution and avoiding any clumps or bare spots. As we wrap the branches, we focus on creating depth by intertwining lights both closer to the trunk and along the outer edges, adding dimension to the tree's glow.
Additionally, we carefully consider light color choices, opting for warm white or soft, twinkling LED lights to evoke a cozy and inviting atmosphere. These hues complement the tree's natural beauty and provide a timeless elegance. When using multiple strands, we vary the intensities and hues to create a captivating interplay of light and shadow.
Topper and Tree Skirt Selection

When selecting a topper and tree skirt, we aim to find pieces that complement the overall theme and style of the decorated tree, adding a touch of elegance and cohesiveness to the display. Here are some creative ideas to consider:
- Tree Topper Alternatives: Instead of a traditional star or angel, consider using unexpected items such as oversized decorative feathers, a cluster of sparkling twigs and berries, or a vintage-inspired clock to add a unique touch to the tree's crown.
- Creative Tree Skirts: Explore unconventional materials like faux fur, burlap, or even a vintage quilt as a tree skirt. These non-traditional options can add texture and visual interest to the base of the tree, enhancing the overall aesthetic.
- DIY Topper Ideas: Get crafty and make your own tree topper! Consider crafting a wire star wrapped in fairy lights, a handmade paper mache ornament, or a personalized monogram letter adorned with greenery and ribbon.
Frequently Asked Questions
How Do You Prevent Your Tree From Shedding Needles?
To keep our tree from shedding needles, we prioritize tree preservation and needle retention. Proper watering and tree care are essential. We ensure the tree stays hydrated, placing it away from heat sources. Regularly misting the tree helps maintain moisture.
Also, we avoid overcrowding the tree with heavy ornaments. Taking these steps keeps our tree looking lush and full, creating a beautiful holiday atmosphere in our home.
What Are Some Alternative Options for Tree Toppers Besides Traditional Stars or Angels?
When it comes to alternative toppers, we've found that thinking outside the box can really elevate the tree's style.
Unique ornaments, like a shimmering snowflake or a sparkly ribbon bow, can bring a touch of glamour to the top.
It's all about finding that perfect finishing touch that speaks to your personal style and makes a statement.
Let your creativity shine, and your tree topper will be the crowning jewel of your holiday decor.
Can You Provide Tips for Incorporating a Designer Look on a Budget?
When it comes to budget-friendly decor, we love incorporating a designer look with some creative flair.
One tip is to mix and match ornaments in different shapes, sizes, and textures to create visual interest. Look for designer-inspired ornaments at discount stores or make your own with unique materials like feathers, beads, or fabric.
Another idea is to use a statement ribbon as garland to add a touch of elegance without breaking the bank.
What Are Some Creative Ways to Incorporate Family Heirlooms Into the Tree Decor?
Incorporating vintage ornaments into the tree is a beautiful way to honor family traditions. We love to get creative with displaying these cherished heirlooms.
We might tie them with elegant ribbons or showcase them in clusters for a stunning effect.
It's all about infusing the tree with the rich history and personal stories behind each ornament, creating a design that's not only stylish but also deeply meaningful.
How Can You Ensure That the Tree Decorations Are Pet-Friendly and Safe for Curious Pets?
To keep our furry pals safe and the tree looking designer chic, we opt for pet-friendly decorations and ensure pet safety by avoiding small, chewable ornaments.
We prevent tree shedding by opting for faux trees and incorporate family heirlooms for a sentimental touch.
For a budget-friendly designer look, we use DIY projects and get creative with alternative tree toppers.
It's all about creating a festive and safe environment for our beloved pets while maintaining a stylish aesthetic.
Conclusion
In the end, decorating a tree like a designer is all about bringing your vision to life with creativity and style. With the perfect tree, a well-chosen theme, and a mix of textures and personal touches, you can create a stunning masterpiece that will be the envy of all who see it.
So go ahead and let your imagination run wild, because when it comes to decorating a tree, the sky's the limit!
- About the Author
- Latest Posts
Introducing Ron, the home decor aficionado at ByRetreat, whose passion for creating beautiful and inviting spaces is at the heart of his work. With his deep knowledge of home decor and his innate sense of style, Ron brings a wealth of expertise and a keen eye for detail to the ByRetreat team.
Ron’s love for home decor goes beyond aesthetics; he understands that our surroundings play a significant role in our overall well-being and productivity. With this in mind, Ron is dedicated to transforming remote workspaces into havens of comfort, functionality, and beauty.
-

 Vetted3 weeks ago
15 Best Drip Irrigation Systems to Keep Your Garden Thriving
-

 Vetted2 days ago
15 Best Foot Massagers for Neuropathy to Soothe Your Feet and Relieve Discomfort
-

 Vetted1 week ago
15 Best Sports Laundry Detergents for Keeping Your Activewear Fresh and Clean
-

 Vetted1 week ago
15 Best Tall Toilets for Seniors That Combine Comfort and Safety
-

 Vetted2 weeks ago
15 Best Dish Scrubbers to Keep Your Kitchen Sparkling Clean
-

 Beginners Guides4 weeks ago
Designing Your Retreat Center – Essential Tips
-

 Vetted4 weeks ago
15 Best Tile Adhesives for Outdoor Use – Top Picks for Durable and Weather-Resistant Installations
-

 Beginners Guides4 weeks ago
Are Retreats Profitable


