Decor
How to Cure Acrylic Paint on Ceramic
Learn the essential steps to properly cure acrylic paint on ceramic for long-lasting, durable results that will preserve your beautiful artwork.
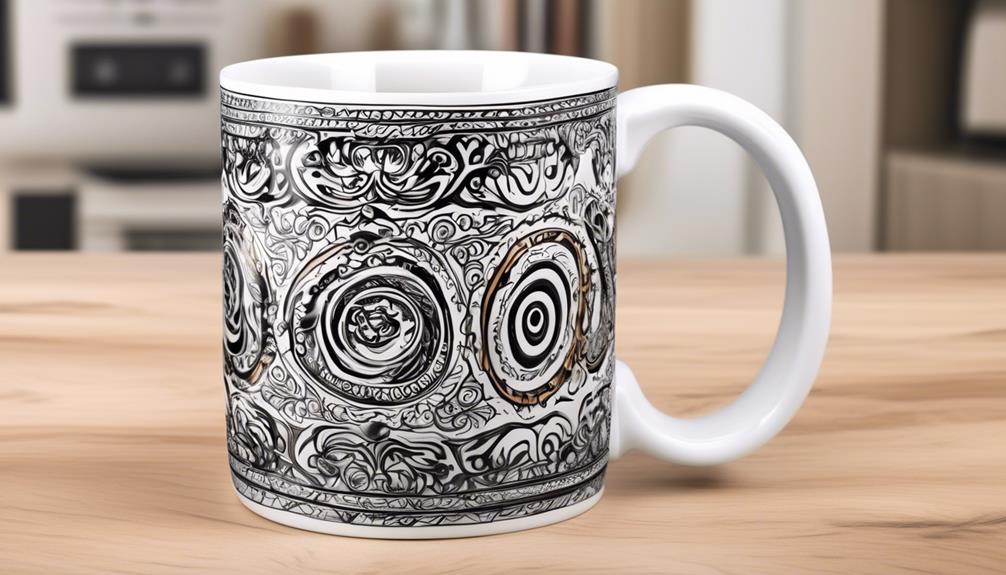
Thus, you’ve completed your masterpiece on a ceramic surface using acrylics, and now you’re pondering over the method to set the paint permanently.
Well, there are some specific steps to take to achieve the best results, and it’s essential to understand the proper curing process for acrylic paint on ceramic.
By following these steps, you can ensure that your painted ceramic pieces will withstand the test of time and usage.
Key Takeaways
- Acrylic paint can adhere effectively to unglazed ceramic surfaces, making them ideal for painting.
- It is important to use non-toxic acrylic paint specifically designed for ceramics that come into contact with food and beverages.
- Different types of ceramics, such as greenware and bisque-fired clay, require different painting techniques.
- Varnishing and topcoating can help enhance the longevity and durability of acrylic paint on ceramics.
Understanding Acrylic Paint Properties
Understanding the properties of acrylic paint is essential for successful application on ceramics, as it allows for optimal adhesion and longevity of the painted surface.
When it comes to acrylic painting on ceramics, the porous nature of unglazed surfaces provides an ideal environment for acrylics to adhere effectively. It’s crucial to select non-toxic acrylic paint when working on ceramics, especially for items like plates or cups that come into contact with food and beverages.
Additionally, being aware of the types of ceramics, such as greenware and bisque-fired clay, is fundamental in determining the most suitable acrylic painting techniques for each type.
Furthermore, understanding the necessity of varnishing and topcoating can significantly enhance the longevity and durability of acrylic paint on ceramics, protecting the painted surface from wear and tear.
Lastly, conducting tests with different acrylic paint types and mediums on ceramics is crucial for identifying the best options that offer superior adhesion and durability when fired in a kiln.
Mastering these properties of acrylics is key to achieving exceptional results when painting on ceramics.
Choosing the Right Ceramic Surface
When it comes to choosing the right ceramic surface for acrylic painting, we need to consider various ceramic types and their surface preparations.
Understanding the properties of each type, such as unglazed, greenware, and bisque-fired ceramics, is crucial in achieving the desired results.
Ceramic Types
Choosing the right ceramic surface is crucial when working with acrylic paint, as it directly impacts the paint’s adhesion and the overall outcome of the artwork. When considering ceramic types for painting with acrylics, it’s important to understand the following:
- Greenware Ceramics: These are air-dried and unglazed, providing a smooth surface ideal for acrylic painting.
- Bisque-Fired Clay Ceramics: Although unglazed, these ceramics have been fired in a kiln, making them less delicate and suitable for acrylic painting.
- Glazed Ceramics: Regular acrylic paint can’t adhere to glazed ceramics, but specialized acrylic paint designed for glazed ceramics or glass can be used.
- Versatility: Acrylic paint allows for limitless creative possibilities, enabling artists to adorn figurines, pots, trays, vases, and create abstract designs, patterns, and landscapes on ceramic surfaces.
Understanding these ceramic types will help artists choose the most suitable surface for their acrylic painting endeavors on ceramics.
Surface Preparation
To achieve the best results when preparing the ceramic surface for acrylic painting, it’s essential to consider the type of ceramic and its compatibility with acrylic paint.
For surface preparation, it’s crucial to use acrylic paint on unglazed ceramics, such as greenware and bisque-fired clay. These unglazed surfaces provide the necessary porosity for the paint to adhere effectively.
Avoid painting on glazed ceramics, as regular acrylic paint won’t bond well with the smooth, non-porous surface.
Greenware ceramics, which are air-dried and unglazed, offer a suitable surface for acrylic painting. Additionally, bisque-fired clay ceramics, unglazed but kiln-fired, provide a less delicate yet porous surface that’s ideal for acrylic paint absorption.
Ensure the chosen ceramic surface is compatible with acrylic paint to achieve the best painting results.
Surface Preparation for Painting
Before diving into the painting process, we need to ensure that the ceramic surface is thoroughly clean and free of any dirt, dust, or oils.
If the ceramic is glazed, it’s essential to consider using a primer to promote paint adhesion.
Taking these steps will help us achieve a smooth and long-lasting finish for our acrylic paint on ceramic.
Clean Ceramic Thoroughly
We thoroughly clean the ceramic surface before painting to ensure the removal of any dirt, dust, or grease that may impact the paint’s adhesion.
- Use a clean, wet cloth to wipe the surface of the ceramic thoroughly and ensure it’s completely dry before painting.
- Sand or treat glazed ceramics to create a porous surface for better adhesion of acrylic paint.
- Read the label and use non-toxic acrylic paint specifically designed for ceramics for best results.
- Consider oven-baking the ceramics after painting and apply a varnish to seal the paint for longer-lasting results.
Use Primer if Needed
If the surface of the ceramic appears highly glazed or non-porous, a suitable primer designed for ceramic surfaces should be used to ensure proper adhesion of the acrylic paint. Evaluate the surface to determine if a primer is necessary for the paint to adhere effectively. Apply the primer evenly over the ceramic surface, creating a suitable base for the acrylic paint.
It’s essential to allow the primer to fully dry and cure before applying the acrylic paint to ensure proper bonding and longevity of the painted design. Before proceeding with the full painting process, test the adhesion of the primer and acrylic paint on a small area of the ceramic. This step will help ensure that the paint adheres well and achieves the desired finish.
Selecting High-Quality Acrylic Paints
Select high-quality acrylic paints with a high pigment concentration for vibrant colors and better coverage. When selecting acrylic paints for ceramic projects, it’s crucial to consider various factors to ensure the best results. Here are some key considerations for choosing high-quality acrylic paints:
- Pigment Concentration: Look for acrylic paints with a high pigment concentration as they offer more intense and vibrant colors. High-quality pigments also provide better coverage, allowing you to achieve rich, opaque layers with fewer coats.
- Lightfastness Rating: Consider the lightfastness rating of the paint, which indicates its resistance to fading over time. Opt for paints with excellent lightfastness to ensure long-term color stability, especially if the ceramic piece will be displayed in a well-lit area.
- Consistency and Flow: Choose acrylic paints with a smooth consistency and good flow. These characteristics make the paint easier to apply and blend, enabling you to create seamless transitions and intricate details on the ceramic surface.
- Suitability for Ceramics: Opt for acrylic paints specifically labeled as suitable for use on ceramics. These paints are formulated to adhere well to ceramic surfaces and offer enhanced durability, ensuring your artwork withstands the test of time.
Applying Acrylic Paint to Ceramic
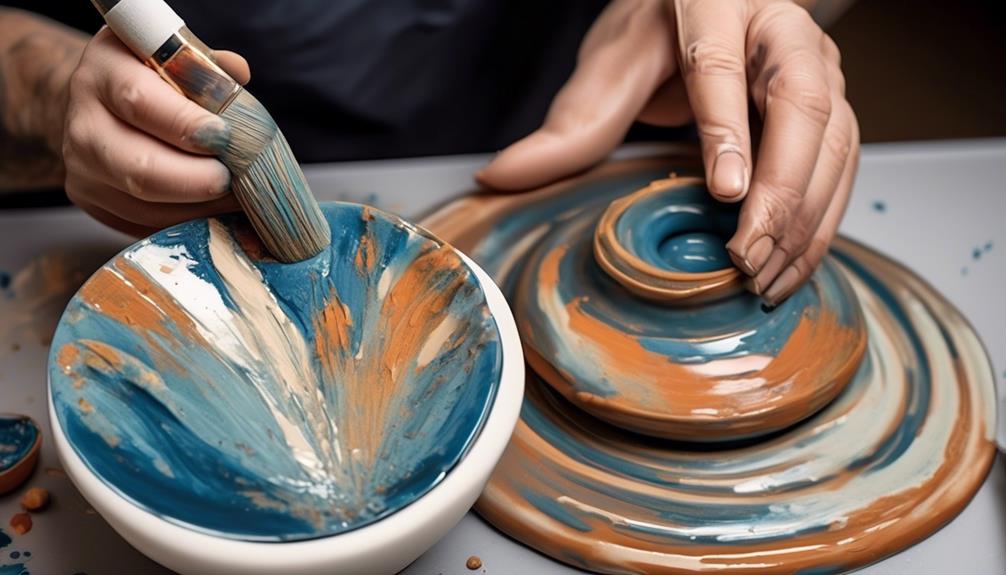
When applying acrylic paint to ceramic, it’s crucial to ensure proper adhesion and surface preparation.
We’ll cover essential tips for achieving optimal paint adhesion and techniques for preparing the ceramic surface.
These steps are vital for creating long-lasting and vibrant painted designs on various types of ceramic.
Paint Adhesion Tips
To achieve strong paint adhesion when applying acrylic paint to ceramic, thoroughly clean the surface and consider using a primer for optimal results. Here are some essential tips for enhancing paint adhesion on ceramic surfaces:
- Clean the Surface: Wipe the ceramic surface with a damp cloth to remove any dust, dirt, or debris that could hinder paint adhesion.
- Use a Primer: Consider using a primer designed specifically for ceramic surfaces to create a suitable base for the acrylic paint to adhere to.
- Apply Thin Layers: Apply thin, even layers of acrylic paint, allowing each layer to dry completely before adding the next one to improve adhesion and prevent peeling.
- Seal the Paint: After the paint has dried, consider sealing it with a varnish or sealant designed for acrylic paint to enhance durability and adhesion.
Surface Preparation Techniques
Consider using a specialized acrylic paint for unglazed ceramics to ensure optimal adhesion and longevity of the paint. When preparing the surface of greenware ceramics, handle them with care due to their fragility. Wipe the ceramic surface with a clean, wet cloth before painting to remove any dust or debris that could affect the paint adhesion. After painting, oven-bake bisque-fired clay ceramics according to the paint manufacturer’s instructions to ensure the acrylic paint lasts. For glazed ceramics, use specialized acrylic paint products designed for this surface to achieve the best results.
Surface Preparation Techniques Use specialized acrylic paint for unglazed ceramics Handle greenware ceramics with care Wipe the surface with a clean, wet cloth before painting Oven-bake bisque-fired clay ceramics after painting Use specialized acrylic paint products for glazed ceramics
Tips for Achieving Desired Designs
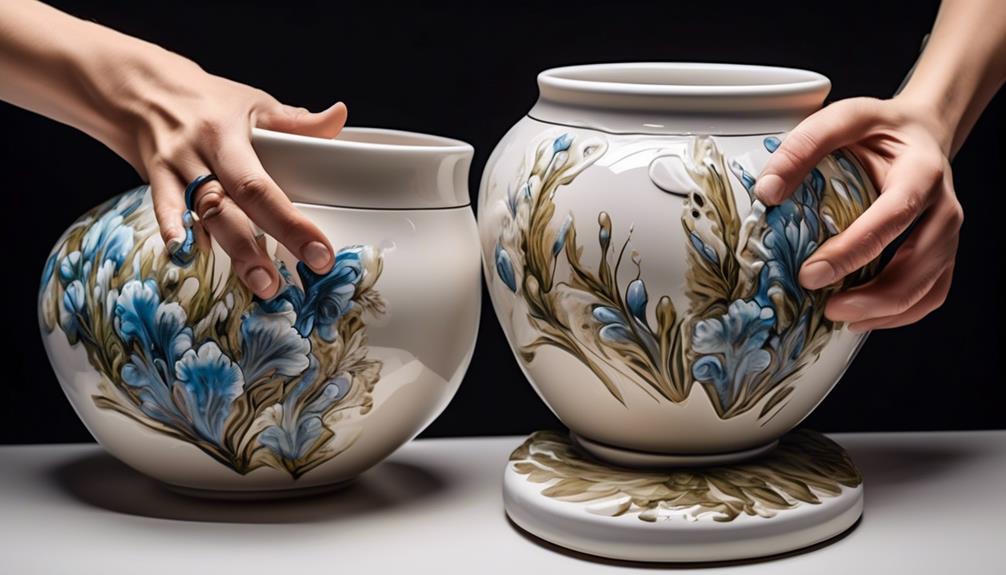
Achieving the desired designs on ceramic surfaces can be enhanced by ensuring the proper preparation and selection of acrylic paint products. To achieve mastery in creating stunning designs, consider the following tips:
- Choose the Right Type of Ceramic: Select the appropriate ceramic surface for acrylic painting, such as unglazed greenware or bisque-fired clay, to ensure optimal paint adhesion and longevity of the design.
- Prepare the Surface Thoroughly: Wipe the ceramic surface clean before painting to remove any dirt or debris, ensuring better adhesion of the acrylic paint and a smoother finish for the design.
- Select Specialized Acrylic Paint Products: Consider using acrylic paint products specifically designed for glazed ceramics and prepare the surface by sanding or treating it before painting to achieve vibrant and long-lasting designs.
- Seal and Protect the Design: Use varnish to seal the acrylic paint on unglazed ceramic, and apply multiple coats for better protection and longevity of the desired designs.
Drying Stage: Allowing Paint to Set
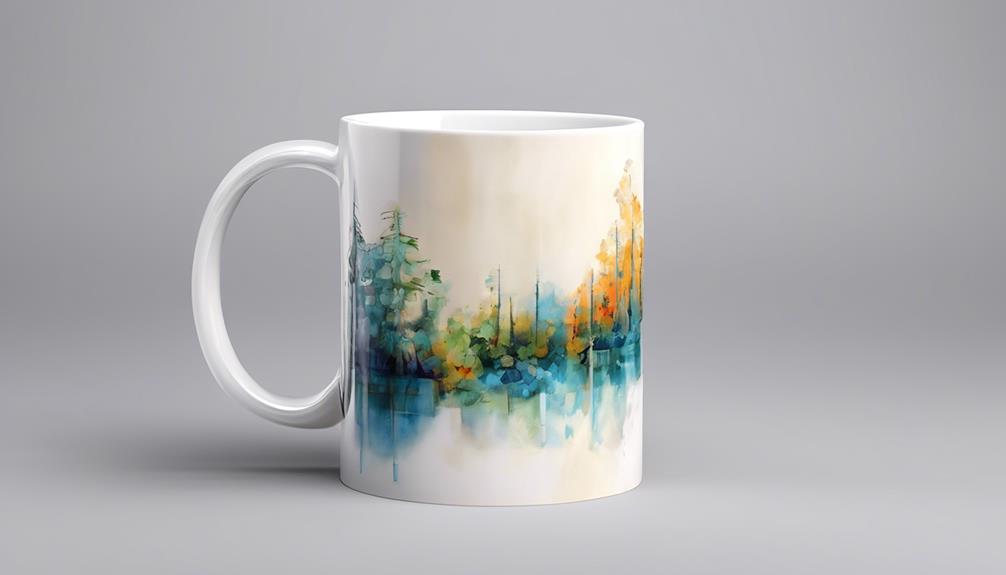
After preparing the ceramic surface and selecting the appropriate acrylic paint products, the next crucial step is allowing the paint to properly set and cure during the drying stage. Here are some key methods and tips for ensuring the paint sets and cures effectively:
Drying Method Time Required Additional Considerations Air drying 24 hours Ideal for ceramics that are not oven-safe Oven baking 30 minutes at 140°F Suitable for oven-safe ceramics Heat gun Varies Use caution to avoid overheating the ceramic Hairdryer Varies Maintain a safe distance to avoid cracking the paint
It’s important to note that while the paint may be touch-dry within 20 minutes, it requires a full 24 hours to cure completely. Additionally, using ceramic paints with a taklon brush and hand washing the painted ceramics gently, rather than putting them in the dishwasher, can help maintain the design. By following these guidelines, you can ensure that the acrylic paint on your ceramic piece sets and cures effectively, resulting in a vibrant and long-lasting finish.
Air-Drying Vs. Heat Curing
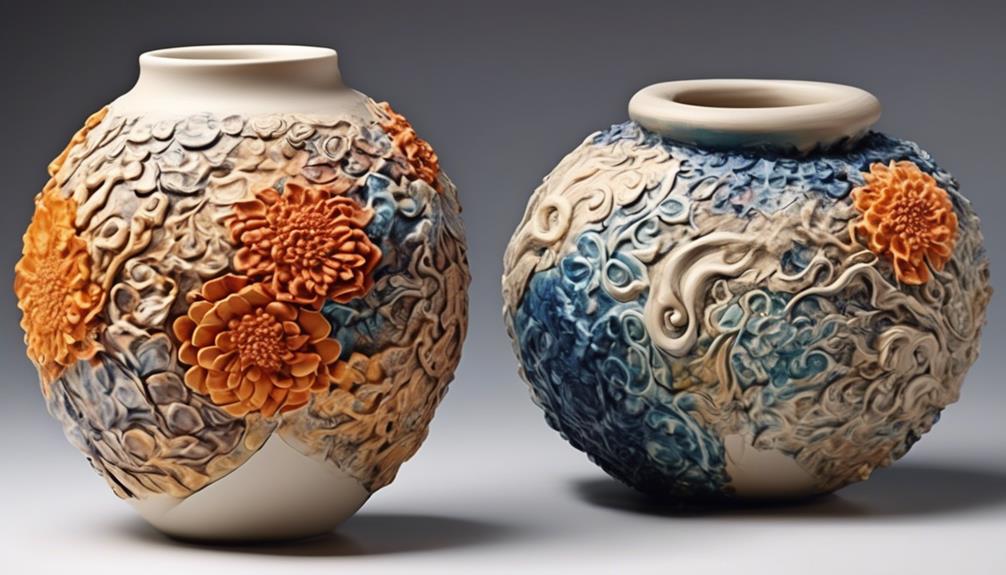
So, let’s talk about the benefits of air-drying and the process of heat curing for curing acrylic paint on ceramic.
We’ll discuss how each method affects the time and effectiveness of the curing process.
This will help us understand the best approach for our specific project needs.
Air-Drying Benefits
Comparing the benefits of air-drying and heat curing for curing acrylic paint on ceramic reveals the advantages of a natural and gentle curing process without the need for specialized equipment.
The benefits of air-drying include:
- Convenience for artists without access to a kiln or oven.
- Safety for delicate or heat-sensitive pieces.
- Elimination of the risk of thermal shock.
- Environmental friendliness and energy efficiency.
These benefits make air-drying a favorable option for curing acrylic paint on ceramic, especially for those seeking a more natural and gentle curing process.
Additionally, the convenience and safety aspects make it an attractive choice for artists working with delicate or heat-sensitive ceramic pieces.
Heat Curing Process
As we explore the heat curing process for acrylic paint on ceramics, the benefits of air-drying, such as convenience and safety for delicate pieces, remain important considerations.
However, heat curing offers distinct advantages. It accelerates the curing time, leading to a durable and long-lasting finish. This process involves baking the painted ceramic in an oven at a specific temperature for a set period, ensuring a strong bond between the acrylic paint and the ceramic surface.
Heat curing enhances the resistance of the paint to wear and tear, resulting in a more robust and resilient finish compared to air-drying.
While air-drying may be suitable for certain projects, heat curing is the preferred method for achieving a professional, enduring outcome on ceramic pieces.
Time and Effectiveness
When considering the time and effectiveness of curing acrylic paint on ceramic, the choice between air-drying and heat curing is crucial for achieving the desired outcome.
Here’s what you need to know:
- Air-drying is effective for non-heat-resistant ceramics, but it’s a slower process.
- Heat curing requires baking at a specific temperature for a set duration, providing a durable finish in a shorter timeframe.
- Air-drying may take 24 hours or longer to fully cure, while heat curing offers a quicker solution.
- Heat curing creates a long-lasting, durable bond between acrylic paint and the ceramic surface, making it more effective for lasting results.
Ultimately, the decision between air-drying and heat curing depends on the project’s time frame and the desired level of durability for the painted ceramic.
Baking Acrylic Paint on Ceramic
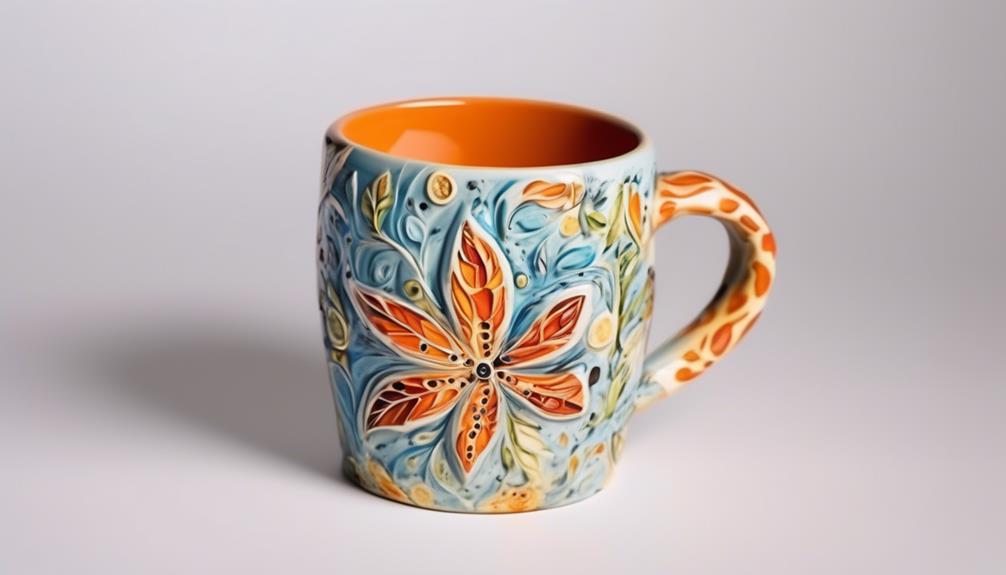
Baking acrylic paint on ceramic requires careful consideration of the material’s heat resistance and the proper technique to ensure a durable finish.
To start, it’s crucial to prepare the surface properly. Make sure the painted ceramic is clean and dry before placing it in a preheated oven at 275°F for 30 minutes. It’s essential to place the ceramic on a cool oven rack to prevent thermal shock.
Always start with a cold oven to avoid cracking and allow the ceramic to gradually heat and cool alongside the oven. After baking, wait at least 72 hours before using or washing the ceramic to ensure the paint fully cures and adheres.
It’s important to note that not all ceramics are oven-safe, so confirm the material’s suitability for baking acrylic paint. Additionally, avoid using this method for ceramics that will come into direct contact with food.
Using Sealants for Longevity
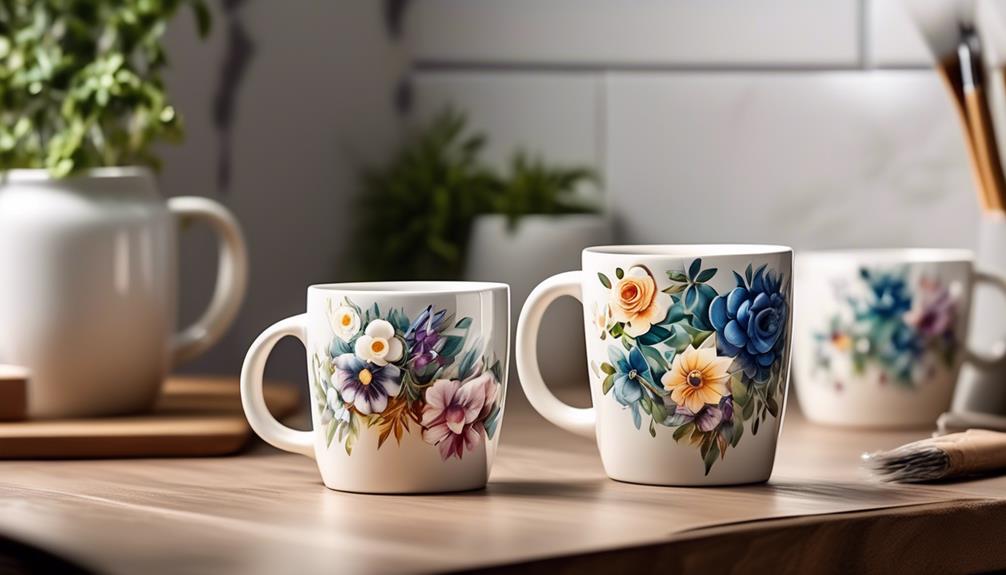
To enhance the durability and longevity of acrylic paint on ceramics, applying a water-based polyurethane sealant is a recommended step. Here are some key points to consider when using sealants for longevity:
- Protection from Wear and Tear: A water-based polyurethane sealant provides a protective layer that helps safeguard the painted surface of ceramics from everyday wear and tear.
- Multiple Coats for Enhanced Protection: Applying multiple coats of sealant can significantly improve the protection and longevity of the acrylic paint on ceramics, especially in high-traffic or frequently used areas.
- Clear and Non-Yellowing Sealant: It’s important to choose a clear and non-yellowing water-based polyurethane sealant specifically designed for sealing acrylic paints on ceramics to ensure the preservation of the paint’s true colors over time.
- Enhanced Durability through Oven-Baking: For an extra level of durability, consider oven-baking the ceramic after painting and sealing. This additional step can further enhance the longevity of the acrylic paint.
Caring for Painted Ceramic Pieces
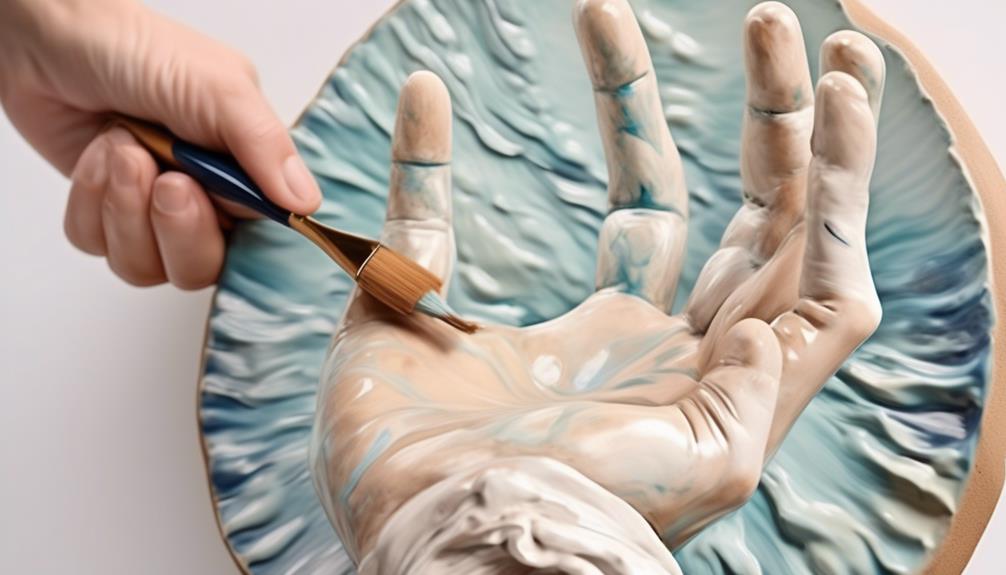
How can we ensure the longevity of painted ceramic pieces? Caring for painted ceramic pieces is crucial to maintaining their beauty and integrity. By following a few simple guidelines, we can extend the lifespan of these cherished artworks. Here’s a table summarizing key care tips:
Care Tips for Painted Ceramic Pieces Use non-toxic acrylic paint on unglazed ceramics for best results. Seal the painted surface with water-based polyurethane varnish to ensure longevity. Avoid harsh chemicals, excessive heat, and moisture to preserve the paint on ceramic pieces. Hand wash painted ceramics gently and avoid soaking them in water. Do not put painted ceramics in the dishwasher or microwave to maintain the integrity of the paint.
Adhering to these care tips will help protect the painted ceramic pieces from damage and fading, ensuring their longevity. It’s important to handle them with care and avoid exposing them to conditions that could compromise the paint. By following these guidelines, we can enjoy the beauty of painted ceramic pieces for years to come.
Troubleshooting Common Issues
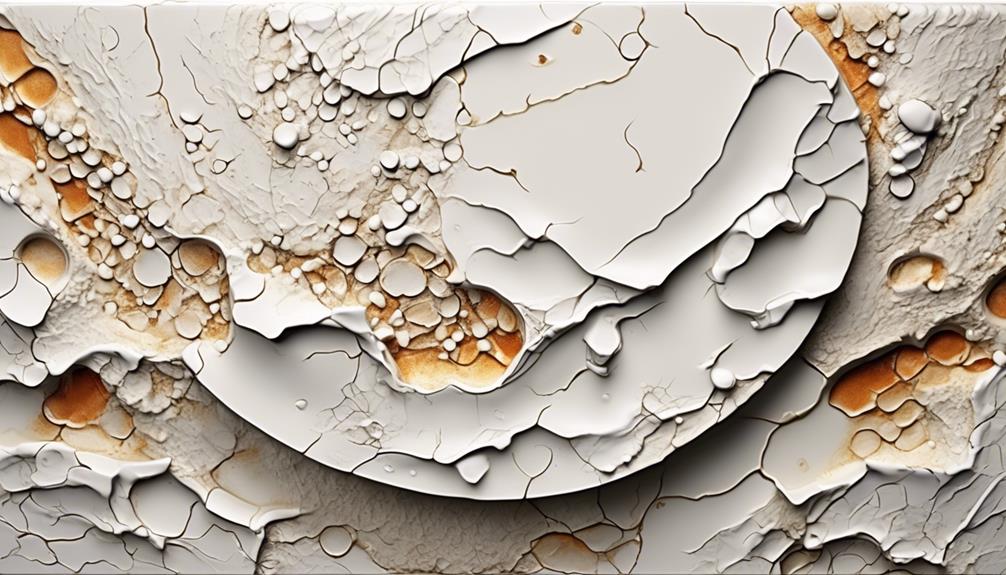
When troubleshooting common issues with acrylic paint on ceramic, consider using GAC 200 or thinning the paint with water to address adhesion problems.
Here are some tips to troubleshoot common issues when working with acrylic paint on ceramic:
- Adhesion Problems: If the acrylic paint isn’t sticking to the ceramic surface, try using GAC 200 or thinning the paint with water to improve adhesion.
- Durability Concerns: Enhance the durability of painted ceramics by applying a functional and durable topcoat, such as a two-part epoxy, especially for items intended to hold water or plants.
- Curing Time: Allow the painted ceramics to dry for 20 minutes. For full curing, heat them in the oven for 30 minutes at 140 degrees or let them air dry for an extended period if they’re not oven-safe.
- Paint Transparency: Ceramic paints can be transparent. Use a clear medium to achieve an opaque look, and consider layering colors to create an opaque effect if needed.
These troubleshooting tips can help you address common issues that may arise when curing acrylic paint on ceramic.
Enhancing Finished Pieces
Using a water-based polyurethane varnish can enhance the protection and longevity of acrylic paint on unglazed ceramic pieces. It’s essential to seal and protect the painted surface with this varnish.
Applying multiple coats will provide better protection and ensure the longevity of the paint. When choosing a varnish, opt for a clear, non-yellowing water-based polyurethane varnish for optimal results. Specialized varnishes designed for ceramic painting can also be considered to ensure lasting durability and a professional finish.
Regular inspection and maintenance of the varnished ceramic pieces are crucial to preserve the vibrancy and integrity of the acrylic paint.
Displaying and Using Painted Ceramics
To showcase painted ceramics, consider utilizing display stands or wall-mounted shelves to enhance their visibility and aesthetic appeal. Additionally, here are some tips for displaying and using painted ceramics:
- Lighting: Place your painted ceramics in well-lit areas to highlight the colors and details of the artwork. Consider using spotlights or track lighting to draw attention to specific pieces.
- Grouping: Arrange painted ceramics in groups or clusters to create an attractive visual impact. Grouping pieces with similar themes or color schemes can create a cohesive and harmonious display.
- Functional Use: Incorporate painted ceramics into daily life by using them as functional art pieces. For example, use a hand-painted mug for your morning coffee or display a decorative plate in your dining room.
- Rotating Displays: Change up your display regularly to prevent visual fatigue and to showcase different pieces. Rotating displays also allow you to enjoy all of your painted ceramics and prevent any pieces from being overlooked.
Exploring Advanced Techniques
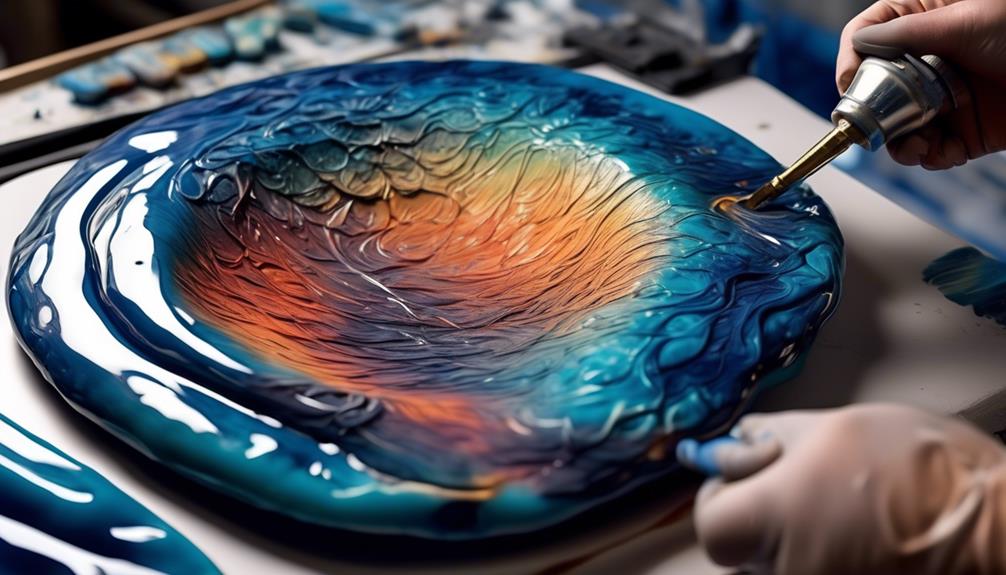
Exploring advanced techniques in acrylic painting on ceramic presents an opportunity to elevate the intricacy and depth of artistic expression.
When working with unglazed ceramics like greenware or bisque-fired clay, advanced techniques can truly enhance the final result. For greenware, consider experimenting with delicate layering techniques to create depth and dimension. Additionally, utilizing fine-tipped brushes for intricate detailing can bring out the finer aspects of your design.
When painting on bisque-fired clay, advanced techniques such as dry brushing or sgraffito can add texture and visual interest to the piece. These methods involve using minimal paint or scratching the surface to reveal the clay beneath, creating unique and visually striking effects.
For those seeking to paint on glazed ceramics, specialized acrylic paint products designed for this purpose can open up a world of advanced techniques. Techniques like color blending, stippling, or even using masking fluid can further enhance the visual appeal of your glazed ceramic pieces.
Exploring these advanced techniques will undoubtedly take your acrylic painting on ceramics to the next level, allowing for greater artistic mastery and creativity.
Frequently Asked Questions
How Do You Seal Acrylic Paint on Ceramics?
We seal acrylic paint on ceramics by using a varnish designed for ceramics or baking the painted piece in the oven.
The varnish provides a protective layer, while oven-baking helps cure and set the paint. Both methods ensure durability and longevity of the painted ceramics.
It’s important to follow the instructions for the specific varnish or baking process to achieve the best results and preserve the vibrant designs on the ceramics.
Is Acrylic Paint Permanent on Ceramic?
Absolutely, acrylic paint can exhibit permanence on certain ceramic surfaces. When properly applied and sealed, it can endure on unglazed ceramics due to its absorption into porous surfaces.
However, it needs special treatment to adhere to glazed ceramics. We’ve found that oven-baking, varnishing, and using specialized products can enhance its longevity.
It’s a fascinating process that requires attention to detail and the right materials for a lasting result.
How Do You Dry Acrylic Paint on Ceramic?
We dry acrylic paint on ceramic by heating it in the oven at 140 degrees for 30 minutes or letting it air dry for an extended period.
It’s crucial to ensure the paint is fully cured before handling it.
This process helps the acrylic paint adhere to the ceramic surface and last longer.
Proper drying is essential for achieving vibrant and long-lasting designs on ceramics.
How Do You Cure Ceramic Paint?
We’ve found that curing ceramic paint is crucial for long-lasting results.
Our go-to method is to air dry for 24 hours or bake at 140 degrees for the same duration. This ensures a durable finish.
A key point to remember is to avoid dishwasher and microwave use to maintain the paint.
Conclusion
In the end, curing acrylic paint on ceramic is like baking a masterpiece in the kiln of creativity. With the right techniques and a little patience, you can ensure that your painted ceramics will stand the test of time.
So, grab your brushes and let your imagination run wild – the world is your canvas, and the ceramic is your masterpiece waiting to be born.
- About the Author
- Latest Posts
Introducing Ron, the home decor aficionado at ByRetreat, whose passion for creating beautiful and inviting spaces is at the heart of his work. With his deep knowledge of home decor and his innate sense of style, Ron brings a wealth of expertise and a keen eye for detail to the ByRetreat team.
Ron’s love for home decor goes beyond aesthetics; he understands that our surroundings play a significant role in our overall well-being and productivity. With this in mind, Ron is dedicated to transforming remote workspaces into havens of comfort, functionality, and beauty.
Decor
Can You Paint Over Mirrors?
Fascinate with how painting over mirrors can transform them into stunning pieces of art, adding a touch of creativity to your space.
Yes, painting over mirrors can enhance their appearance greatly while allowing for creative expression. To begin, clean the mirror with a damp cloth, sketch the design, and apply a thin layer of white gesso as a primer. Opt for enamel or acrylic glass paints for a professional finish. Make sure thorough drying before adding a sealant for protection. Experiment with different techniques to achieve unique results. Remember, using the right materials and following proper steps are essential for a successful mirror painting project. Want to discover more about techniques, paint types, and sealing options?
Key Takeaways
- Clean mirror thoroughly before painting to ensure proper adhesion.
- Apply white gesso primer to create a suitable painting surface on the mirror.
- Use enamel or acrylic glass paints designed for longevity and durability.
- Allow the painted mirror to fully dry and cure for a lasting finish.
- Seal the painted mirror with a protective sealant to maintain the design and colors.
Surface Preparation
Before delving into the actual painting process, we must ensure the mirror surface is properly prepared for best results. To start, cleaning the mirror thoroughly with a damp microfiber cloth is essential to remove any dirt or grime that could interfere with the paint adhesion.
Once the mirror is clean, using a water-soluble pencil to sketch out the design you intend to paint helps in visualizing the final outcome. Remember, leaving certain areas unpainted can create intriguing reflection effects.
Applying a thin layer of white gesso acts as a primer, enhancing the adherence of the acrylic paint to the mirror surface. This step is vital for a lasting finish. Allow the white gesso to dry for a minimum of 24 hours before proceeding with the painting process.
Proper surface preparation sets the foundation for a successful mirror painting project, ensuring a smooth and durable result that showcases your chosen design effectively.
Choosing the Right Paint
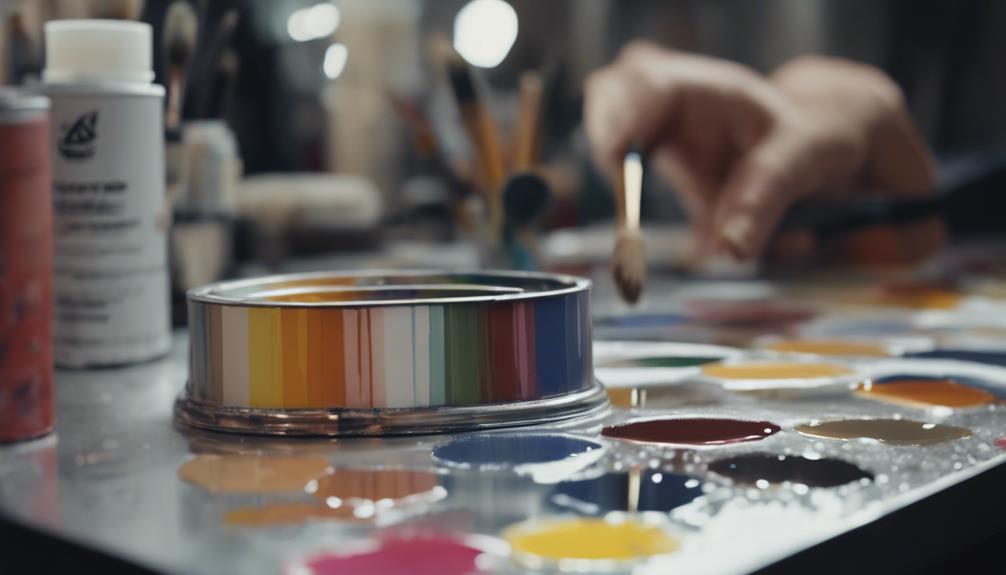
In order to guarantee a successful mirror painting project, it's important to carefully select the right paint that's specifically formulated for glass surfaces. When choosing the right paint for your mirror project, consider the following:
- Glass Paint: Opt for enamel or acrylic paints that are designed for use on glass surfaces. These paints provide better adhesion and durability, ensuring your mirror painting lasts.
- Deco Art and Americana Glass Paints: These brands offer a wide range of colors and finishes specifically tailored for glass painting. Their quality formulations can provide a professional-looking result on your mirrors.
- White Acrylic Paint as Primer: Using white gesso or primer before painting your mirror can help prevent peeling and ensure proper adhesion of the paint to the glass surface. This step is vital for achieving a smooth and long-lasting finish on your mirror.
Selecting the right paint is essential for achieving permanent and professional results when painting over mirrors. Experiment with different types to find the one that works best for your specific project.
Applying Primer
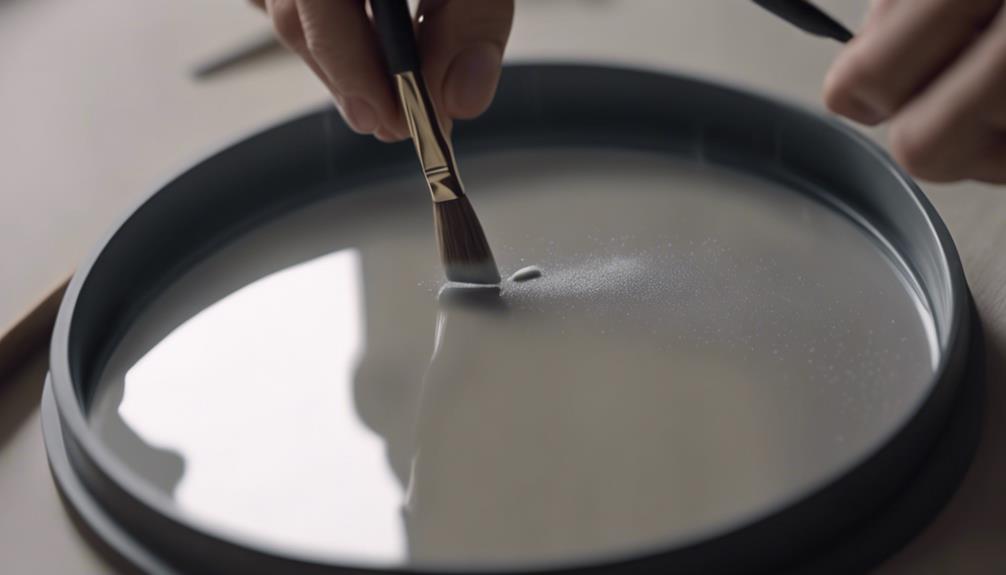
Let's begin by discussing the process of applying primer when painting over mirrors.
When looking to paint a mirror surface, using white gesso as a primer is crucial. White gesso serves as a foundational layer that promotes adhesion between the mirror and the paint, preventing issues like peeling or chipping.
To apply the primer, start by thinly coating the mirror with white gesso and allowing it to dry thoroughly, ideally overnight. This creates a suitable surface for painting by providing a base that the paint can adhere to effectively.
White gesso, a common art supply, can be easily obtained from art supply stores or online, making it a convenient choice for mirror painting projects.
Techniques for Painting Mirrors
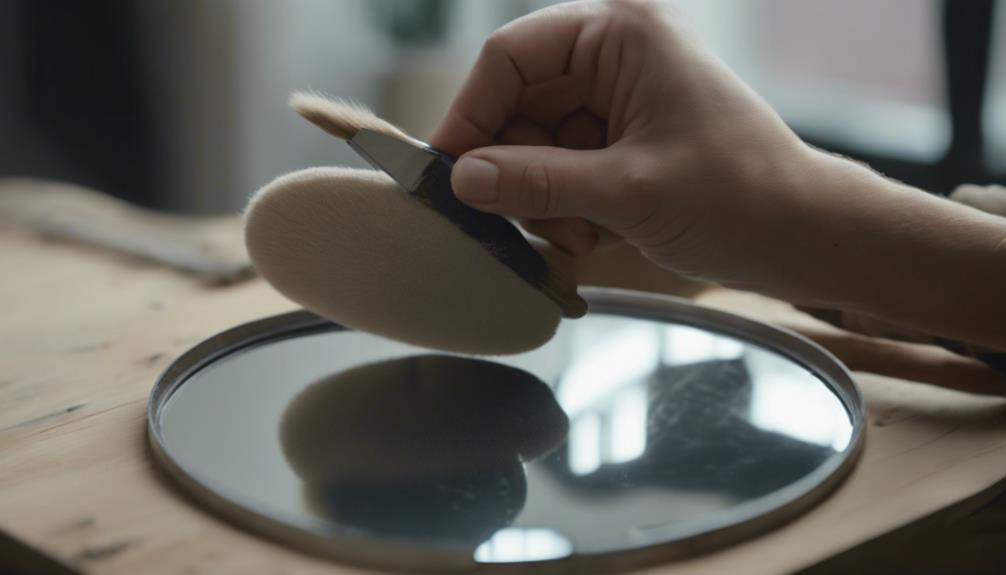
When tackling the task of painting mirrors, it's crucial to explore various techniques to achieve desired results.
From layering colors to using cotton swabs for precision, the process involves a blend of creativity and skill.
Mirror Surface Preparation
Preparing the mirror surface for painting involves ensuring it's thoroughly cleaned with a damp cloth to remove any dirt or residue.
Once the surface is clean, using a water-soluble pencil to sketch your desired design on the mirror can serve as a helpful guide during the painting process.
Applying a thin coat of white gesso primer before painting is essential to help the acrylic paint adhere better to the mirror surface.
Painting Techniques
After preparing the mirror surface with the necessary cleaning and priming steps, exploring different painting techniques can enhance the overall look and creativity of your painted mirror.
When it comes to painting mirrors, using acrylic paint designed for glass surfaces or priming with white gesso can guarantee a durable and long-lasting finish. Experiment with various paint types such as enamel, acrylic, or specialized glass paints to achieve unique effects on your mirror.
Consider using chalk paint, enamel spray paint, or glass paints for distinct finishes. Before painting, it's important to prep the mirror surface with white gesso or a glass primer to promote adhesion and longevity of the paint.
When painting mirrors, try different techniques such as layering colors to create depth, using Q-tips for intricate details, and incorporating reflection effects to add dimension. These techniques can elevate the aesthetic appeal of your painted mirror and allow for personalized creativity in your artistic endeavors.
Drying and Curing Process
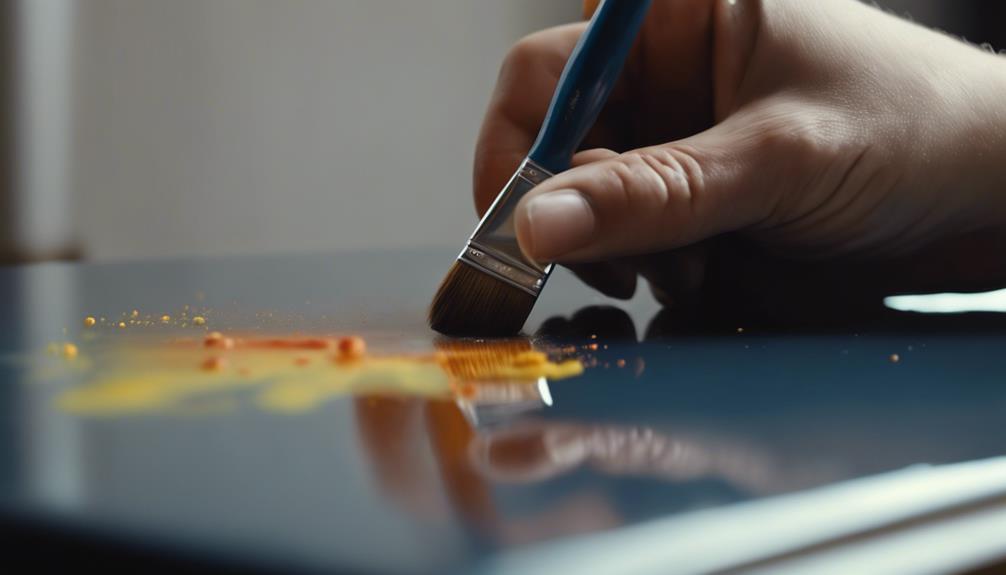
To guarantee a successful painting project on a mirrored surface, it's essential to understand the significance of the drying and curing process.
Here are some key points to keep in mind:
- Different Paint Types: Acrylic paint typically dries faster, usually within an hour, compared to oil paint, which may require more time to fully cure on a mirrored surface.
- Importance of Proper Drying: Make sure the painted mirror is completely dry before handling or displaying it. This precaution helps prevent smudges or damage to the design, ensuring a pristine finish.
- Longevity and Maintenance: Properly cured paint not only secures longevity and durability on the mirror surface but also allows for regular cleaning and maintenance without compromising the artwork.
Adding Sealant for Protection
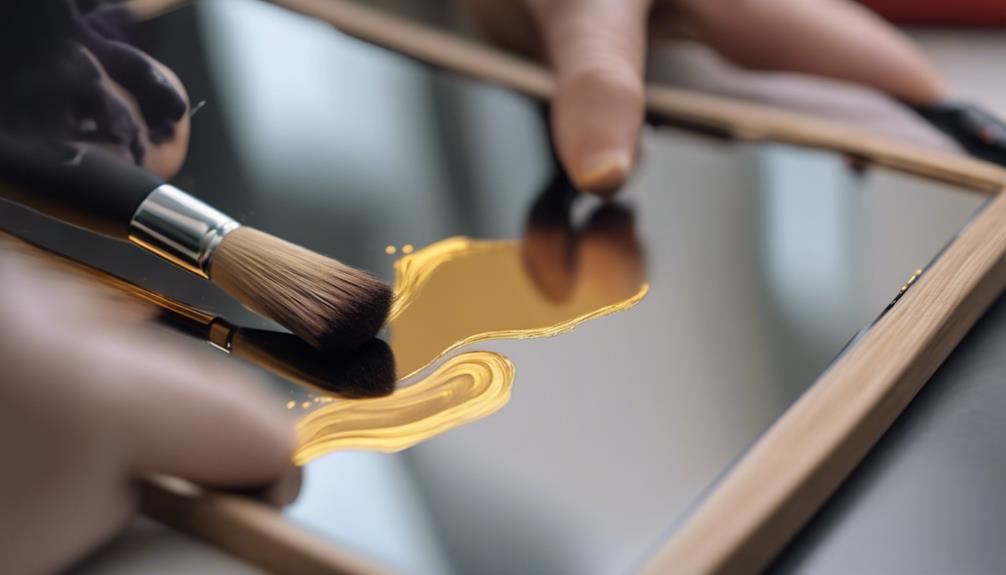
When adding sealant for protection to painted mirrors, it's crucial to choose a non-toxic sealant suitable for the type of paint used on the mirror. This step helps to safeguard the painted surface from scratches, peeling, and other forms of damage that could compromise the mirror's appearance. By applying sealant, you can enhance the durability of the paint, extending the lifespan of your painted mirror. Additionally, a properly sealed painted mirror is easier to clean and maintain over time, ensuring its continued beauty.
To guarantee a smooth finish, wipe off any excess sealant carefully with a soft cloth. This will help maintain the integrity of the sealant layer while keeping your painted mirror looking its best. By taking these protective measures, you can enjoy your painted mirror for years to come, with its vibrant colors and design preserved for all to admire.
Tips and Inspiration
Let's explore some creative tips and inspiration for painting mirrors. When diving into mirror painting projects, it's crucial to gather ideas from various sources like TikTok, where talented creators share innovative techniques and designs to spark your creativity.
- Choose the Right Paint:
Opt for enamel or acrylic paint specifically formulated for glass surfaces. These paints adhere well to glass, providing long-lasting results that won't chip or peel easily.
- Preparation is Key:
Before painting, prime your mirror with white gesso. This step guarantees better paint adhesion and prevents peeling over time.
- Finishing Touches:
After painting, consider applying a sealant or varnish to protect the painted surface and enhance its longevity. This extra layer acts as a shield against scratches and helps maintain the vibrancy of the colors used.
Experiment with different paint types, techniques, and tools like painters tape, rubbing alcohol for cleaning, Chalk Paint for a matte finish, and spray paints for a quick application to transform your mirror into a stunning decor piece.
Frequently Asked Questions
What Kind of Paint Will Stick to a Mirror?
When considering what kind of paint will adhere well to a mirror, it's important to opt for enamel or acrylic paint specifically designed for glass surfaces.
To enhance adhesion, using a white gesso primer before painting is advisable.
Glass paints, chalk paints, and enamel spray paints are all viable options for painting over mirrors.
Transparent glass paint may necessitate heat setting for improved adherence.
Specialized products like Glass Paint Perfection or Gallery Glass Window Color Textured Paint are formulated for mirror painting.
Can You Cover a Mirror With Paint?
Yes, covering a mirror with paint is possible using glass paint, enamel paint, or acrylic paint formulated for glass surfaces.
Glass paint offers a unique finish that maintains reflection.
Enamel paint, known for durability, provides a long-lasting solution for mirror painting.
Acrylic paint, when used with a primer like white gesso, can create a painted mirror surface.
Consider using spray glass paint for a smooth, professional-looking finish when painting over mirrors.
What Kind of Paint Will Stick to Glass?
When considering what kind of paint will adhere to glass, options like:
- Acrylic glass paints
- Enamel paints
- Chalk paints
- Glass-specific paints such as Deco Art or Americana
Additionally, enamel or looking glass spray paints can create a mirror-like finish on glass surfaces. For specialized painting on mirrors, options like Glass Paint Perfection or Gallery Glass Window Color Textured Paint offer specific solutions.
Using a primer like white gesso before painting can enhance paint adhesion to glass surfaces.
How to Prep a Mirror for Painting?
When prepping a mirror for painting, start by cleaning the surface thoroughly and sketching out your design with a water-soluble pencil.
To enhance reflection effects, consider leaving some areas unpainted. Apply a primer like white gesso, allowing it to dry for 24 hours, followed by a thin layer of white acrylic paint as a base.
This process guarantees adhesion and longevity for your painted design on the mirror.
Conclusion
To sum up, painting over mirrors is possible with the right preparation and techniques. Remember, Rome wasn't built in a day, so take your time and follow the steps outlined above for a successful project.
With a little patience and attention to detail, you can transform your mirrors into unique pieces of art that reflect your personal style.
So go ahead, grab your brushes and let your creativity shine!
- About the Author
- Latest Posts
Introducing Ron, the home decor aficionado at ByRetreat, whose passion for creating beautiful and inviting spaces is at the heart of his work. With his deep knowledge of home decor and his innate sense of style, Ron brings a wealth of expertise and a keen eye for detail to the ByRetreat team.
Ron’s love for home decor goes beyond aesthetics; he understands that our surroundings play a significant role in our overall well-being and productivity. With this in mind, Ron is dedicated to transforming remote workspaces into havens of comfort, functionality, and beauty.
Decor
Step-by-Step DIY Nest Creation
Take your crafting skills to the next level with this step-by-step guide on creating a stunning DIY nest – the perfect decorative touch!
To create a DIY nest, gather Spanish moss, twigs, and pine straw. Cut and layer the moss over twigs, securing with a glue gun. Add sticks and green moss for structure and aesthetics. Weave pine straw in a circular pattern for support. Shape the nest with glue for stability. Complete drying guarantees durability. Display creatively for a decorative touch. Achieve authenticity by crafting a sturdy and comfortable nest. Mastering the art of weaving materials meticulously will lead to a beautiful result worth the effort.
Key Takeaways
- Use Spanish moss and twigs for flexibility and authenticity.
- Layer moss over twigs, secure with glue for durability.
- Incorporate sticks and green moss for structural integrity.
- Weave pine straw in a circular pattern for support.
- Shape nest, dry glue for stability, display creatively.
Gather Essential Materials
Let's begin by gathering the essential materials needed for creating a DIY nest. To craft a cozy nest, we'll require Spanish moss, twigs, a glue gun, and wire cutters.
The Spanish moss, available in shades of grey and green, will add a natural touch to our nest. Twigs will provide structure and authenticity to mimic a real bird's nest.
The glue gun is essential for securely attaching the materials together, ensuring our nest stays intact. Wire cutters will help shape the wire for the nest's structure, allowing us to customize the size and shape as needed.
When selecting the materials, it's important to choose moss colors that complement each other to create a visually appealing nest. Using a bowl as a mold for shaping the nest will give it a defined structure.
Safety is paramount when working with hot glue and moss to prevent burns, so caution should be exercised throughout the crafting process. By gathering these materials, we're ready to commence the journey of creating our DIY nest.
Prepare the Base With Spanish Moss

To create a sturdy foundation for our DIY nest, we'll prepare the base using Spanish moss. Spanish moss is a popular choice for creating the base of DIY nests due to its flexibility and natural appearance. By cutting the Spanish moss into small, manageable pieces, we can easily shape and layer it to form a solid base for our nest.
Layering the Spanish moss over twigs not only adds to the natural look but also provides a strong foundation for the nest structure.
Securing the Spanish moss in place is vital for the nest's durability. Using a glue gun to attach the Spanish moss ensures that the base remains intact and well-formed, preventing it from unraveling or shifting. This method of securing the moss allows for a more stable and long-lasting DIY nest construction.
Weave in Sticks and Green Moss
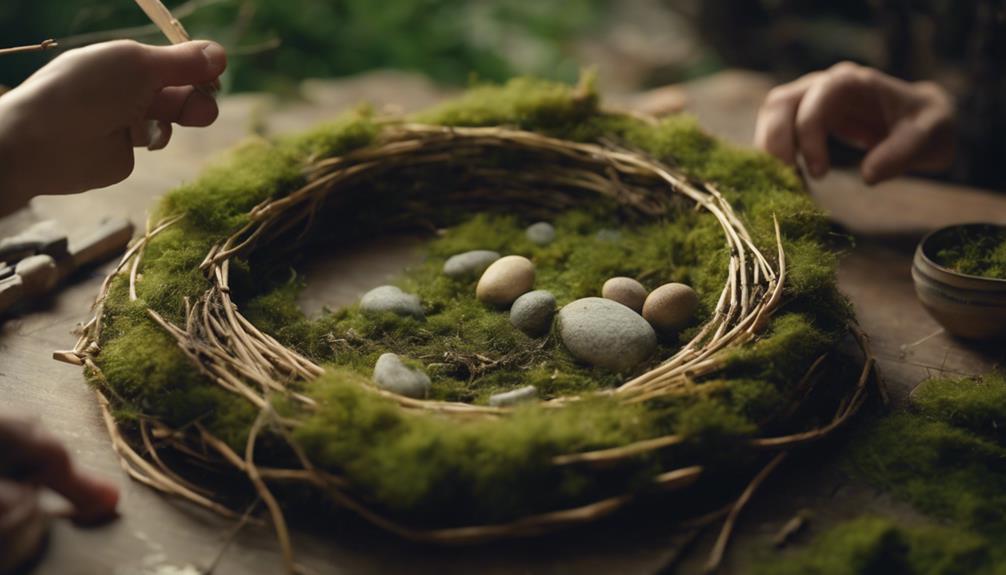
Weaving sticks into the nest enhances its structural integrity and imbues it with a natural charm. Sticks provide a solid framework for the nest, making it sturdy and reliable for the bird's habitation. Green moss, on the other hand, adds a touch of nature's beauty, creating a lush and realistic appearance. By strategically weaving sticks and incorporating green moss, we make the nest not only functional but visually appealing.
To get a better idea of how sticks and green moss can be used to create a beautiful nest, refer to the table below:
| Aspect | Description |
|---|---|
| Sticks | Provide structural support |
| Green Moss | Enhances visual appeal |
As you weave in the sticks and green moss, remember that the combination of these elements will not only make the nest more authentic but also visually appealing. This step is essential in achieving a well-crafted and inviting bird nest.
Add Pine Straw in Circular Pattern
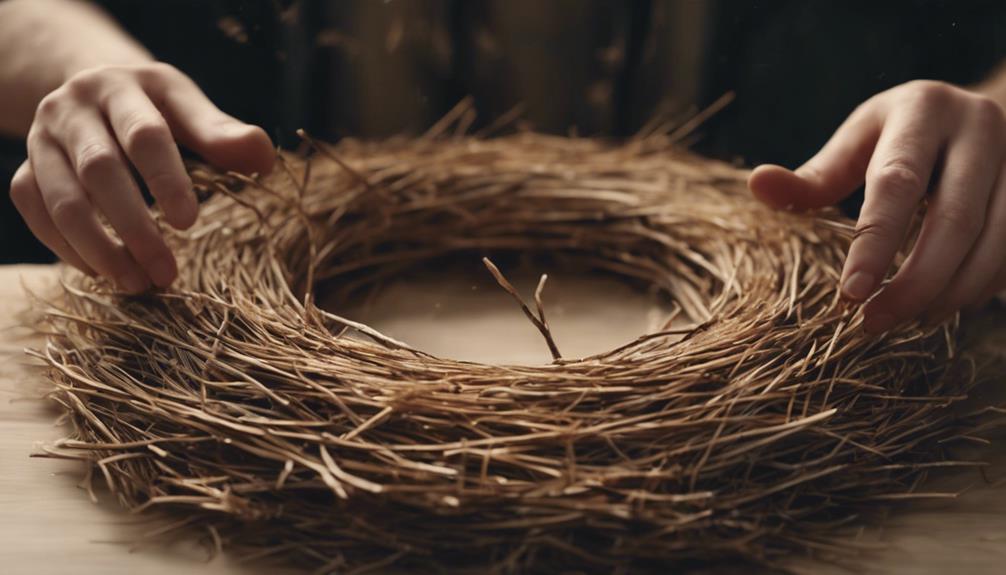
Adding pine straw in a circular pattern serves as a foundational step in creating a robust and visually appealing bird nest. Here are some key points to keep in mind when incorporating pine straw into your DIY bird nest:
- Weave pine straw in a circular pattern to provide a sturdy base for the nest, ensuring stability and structural integrity.
- Pine straw brings a natural and rustic element to the nest's design, enhancing its overall aesthetic appeal.
- Layer the pine straw evenly to offer support and structure to the nest, making it a comfortable and secure environment for birds.
- The circular weaving technique helps in shaping and defining the form of the nest, creating a well-defined structure.
- Make sure to securely weave the pine straw to prevent unraveling during the nest-making process, ensuring durability and longevity for the nest.
Shape the Nest and Dry Glue
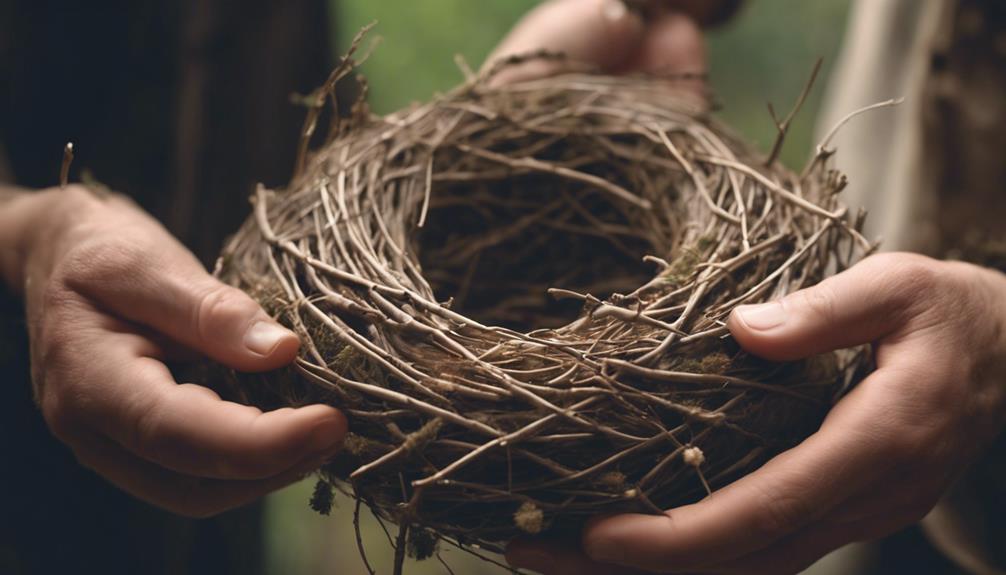
Let's discuss some key points about shaping the nest and drying the glue.
Nest shaping techniques involve gently molding moss and sticks into a round form for structural integrity.
Applying glue and using a heat gun for drying are crucial steps to guarantee that your DIY nest stays sturdy and ready for display.
Nest Shaping Techniques
To shape the nest and guarantee its structural integrity, we utilize a method of weaving sticks into the moss and then applying heat to dry the glue thoroughly. This process ensures a secure and stable foundation for the nest, making it suitable for holding decorations or eggs.
Here are some key nest shaping techniques we employ:
- Weave sticks into the moss: By intertwining sticks within the moss base, we create a sturdy framework that mimics natural bird nests.
- Apply heat to dry the glue: Using a heat gun, we carefully dry the glue to firmly bond the materials together, reinforcing the nest's structure.
- Mold into a round form: Shaping the nest into a circular structure not only enhances its appearance but also provides a cozy space for decorative elements.
- Confirm complete glue dryness: It's important to wait until the glue is fully dried before proceeding with adding embellishments to prevent any dislodging.
- Display creatively: Once the nest is complete, consider showcasing it on a DIY cake stand or beneath a cloche for a charming decorative touch.
Drying Glue Application
To guarantee the stability and durability of the nest structure, we shape the materials into the desired form and then apply a thin, even layer of hot glue for secure bonding. Proper glue application is essential to make sure all parts of the nest are securely attached. Utilizing a heat gun aids in drying the glue efficiently. However, caution must be taken not to overheat the glue, as this can potentially damage the nest materials. Below is a table outlining the steps involved in drying glue application:
| Glue Application Steps | Description | Importance |
|---|---|---|
| Shape Materials | Mold materials into desired form | Ensures proper fit |
| Apply Thin Layer | Evenly spread hot glue on surfaces | Secure bonding |
| Use Heat Gun | Dry glue quickly and effectively | Speeds up the process |
Nest Construction Tips
For shaping the nest and ensuring secure bonding, weave sticks into the moss and apply spray glue to create a sturdy structure. Incorporate green moss to give the nest a natural appearance.
Here are some nest construction tips to help you make a nest:
- Weave sticks into the moss for added structure and support.
- Use spray glue to hold the moss and sticks together, creating a durable nest shape.
- Utilize a heat gun to quickly dry the glue, ensuring a secure bond.
- Add finishing touches such as displaying bluebird eggs in the nest for a realistic touch.
- Enhance the overall presentation by placing the nest on a handmade DIY cake stand and incorporating decorative elements like a cloche and vintage door sign.
These tips will assist you in creating a beautiful and authentic bird nest that can be a lovely addition to your home decor or nature-inspired displays.
Display With Bluebird Eggs
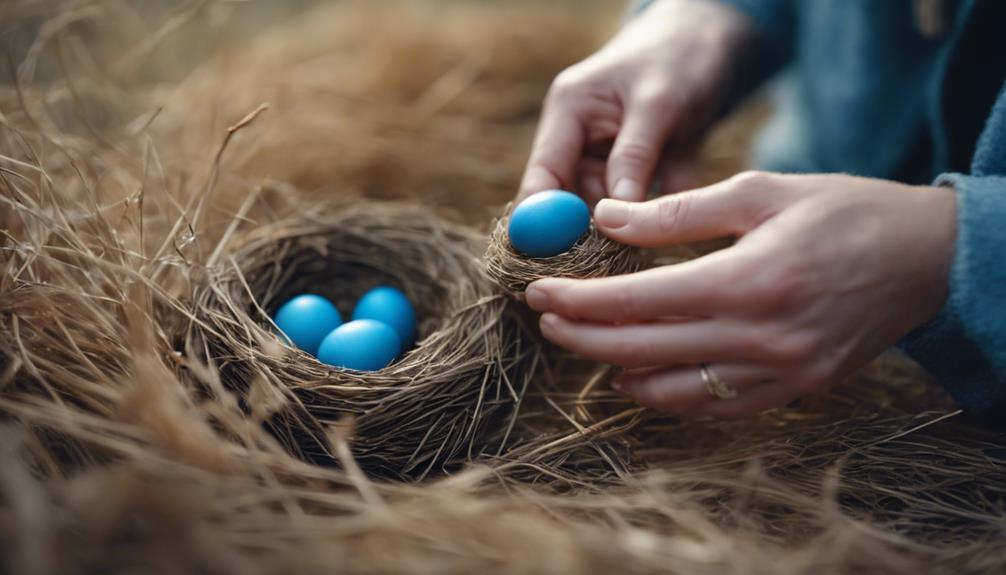
Adding a touch of realism, we display the DIY nest with delicate bluebird eggs. These eggs are an important element in creating a lifelike appearance for our DIY creation. Bluebird eggs are known for their light blue color, often speckled with tiny dots, adding to the overall authenticity of the display. Their oval-shaped structure, resembling miniature works of art, enhances the natural look we aim to achieve.
Strategically placing the bluebird eggs within the nest is essential for a visually appealing outcome. The combination of the nest and these small, intricately designed eggs creates a charming display that can brighten any room.
Frequently Asked Questions
How Do You Make Your Own Nest?
To make our own nest, we gather moss and twigs as primary materials. Cut the moss into small pieces and layer it over twigs for the base. Secure the moss with a glue gun for a sturdy structure.
Optionally, add artificial eggs or decorations for enhancement. To guarantee the moss, store it in a cool, dry place away from direct sunlight. This method guarantees longer-lasting nests with a natural aesthetic.
How Do You Make a Nest for Yourself?
When making a nest for ourselves, we carefully select materials like twigs, moss, and a glue gun to craft a cozy abode.
By shaping a sturdy base with twigs and layering it with moss, we guarantee a comfortable dwelling place.
Consider personalizing with artificial eggs or decorations for a unique touch.
Opt for preserved moss for longevity and store the nest in a cool, dry spot.
Whether for Easter decor or home accents, the possibilities are endless!
How Do You Make a Simple Nest for Kids?
To create a simple nest for kids, gather materials like twigs, grass, and moss. Encourage children to shape the nest with their hands or small tools. Use non-toxic glue or natural elements to secure the nest structure.
Let kids express creativity by adding small decorations such as feathers or tiny eggs. Engaging children in this process fosters a deeper appreciation for nature and enhances their imaginative skills.
How Do You Make a Makeshift Nest?
To make a makeshift nest, gather Spanish moss, twigs, and a glue gun. Cut the moss into small pieces and form a base using twigs.
Layer the moss over the twigs and secure it with the glue gun for stability. Consider adding artificial eggs or small decorations for a decorative touch.
For longer-lasting nests, opt for preserved moss and guarantee proper storage to maintain its quality.
Conclusion
To sum up, creating a DIY nest can be a simple and rewarding project. By following the step-by-step instructions outlined in this article, you can easily craft a beautiful and natural-looking nest to display in your home.
Remember to gather all the necessary materials, shape the nest carefully, and add the finishing touches for a realistic touch. Let your creativity soar as you bring this unique piece of nature into your living space.
Just like a bird building its nest, you too can create a cozy and inviting atmosphere in your home.
- About the Author
- Latest Posts
Introducing Ron, the home decor aficionado at ByRetreat, whose passion for creating beautiful and inviting spaces is at the heart of his work. With his deep knowledge of home decor and his innate sense of style, Ron brings a wealth of expertise and a keen eye for detail to the ByRetreat team.
Ron’s love for home decor goes beyond aesthetics; he understands that our surroundings play a significant role in our overall well-being and productivity. With this in mind, Ron is dedicated to transforming remote workspaces into havens of comfort, functionality, and beauty.
Decor
Timeless Beauty: Vintage Glass Globes
Open the door to a world of enchanting vintage glass globes, where timeless beauty and intricate designs await your discovery.

Vintage glass globes represent a timeless allure with intricate designs, enchanting colors, and enduring charm that have fascinated collectors and design aficionados for ages. These pieces showcase intricate patterns and delicate craftsmanship, emanating a sense of refinement and elegance from past eras. Their ability to diffuse light beautifully with frosted glass and colorful accents adds vibrancy to any space. Envelop yourself in a cozy atmosphere that seamlessly blends classic aesthetics with comforting nostalgia. Explore the versatile applications, various sizes, shapes, and designs of vintage globes to enhance your space with their enduring beauty and charm.
Key Takeaways
- Vintage glass globes offer intricate designs and craftsmanship, showcasing unique colors and patterns.
- Their elegance lies in delicate craftsmanship, frosted glass for beautiful light diffusion, and colorful accents.
- Nostalgic charm emanates from glass globes, evoking an enchanting allure and cozy atmosphere with warm glows.
- Create tranquility with their soft lighting, intricate designs, and peaceful ambiance, blending sophistication and peace.
- Versatile beauty in vintage globes with intricate detailing, diffused light, and various designs for customization in any space.
Timeless Appeal of Vintage Glass Globes
With their intricate designs and craftsmanship, vintage glass globes exude a timeless charm and elegance that fascinates collectors and enthusiasts alike. These glass globes, steeped in nostalgia, are coveted for their unique colors, shapes, and patterns that add a touch of the past to any contemporary space.
Collectors appreciate the quality and beauty of vintage glass globes, often using them as decorative pieces to elevate the ambiance of their homes. The intricate designs and delicate craftsmanship of these globes showcase the artistry and attention to detail that went into their creation, making them not just decorative items but also pieces of art.
Their versatility as decor pieces allows them to enhance the aesthetic of any room, creating a warm and inviting atmosphere that resonates with a sense of history and sophistication. Vintage glass globes truly stand the test of time, fascinating generations with their enduring charm and beauty.
Elegance in Vintage Glass Design
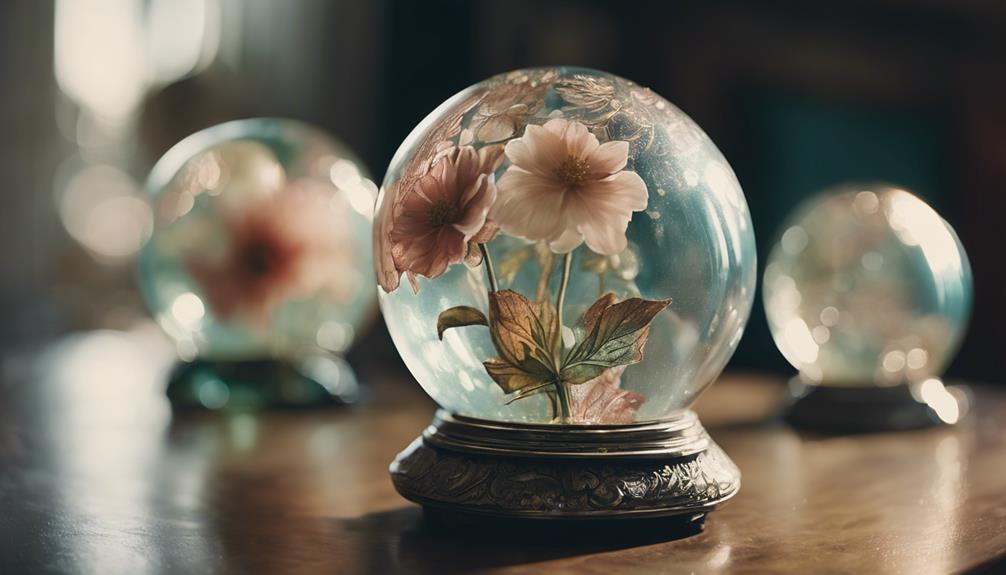
Vintage glass design exudes elegance through intricate patterns and delicate craftsmanship, capturing the essence of past eras. The sophistication of vintage glass globes is evident in the attention to detail, with many showcasing elaborate designs that reflect the artistry of bygone times. Crafted with precision, these globes often feature frosted glass that diffuses light beautifully, along with colorful accents that add a touch of vibrancy to any space.
Whether used as lamp shades, ceiling fixtures, or decorative accents, vintage glass globes bring a sense of refinement to interior decor.
Collectors are drawn to the allure of vintage glass globes, appreciating the historical significance and meticulous craftsmanship that went into creating these pieces. The timeless beauty of these globes adds a level of sophistication to any collection, making them coveted items for enthusiasts seeking to preserve the elegance of the past.
Nostalgic Charm of Glass Globes

Radiating an enchanting allure that evokes a sense of nostalgia, glass globes bring a timeless charm to interior spaces with their intricate designs and warm glow.
The nostalgic charm of vintage glass globes lies in their ability to transport us to bygone eras, where intricate details and delicate designs were commonplace in lighting fixtures. These globes, with their soft glow and inviting ambiance, infuse a room with a cozy atmosphere that's both classic and comforting.
The enduring appeal of glass globes is rooted in their vintage aesthetics, which effortlessly blend with a variety of interior styles.
Their versatility in shapes, sizes, and colors allows for a personalized touch, making them a popular choice for those seeking to add a touch of elegance to their living spaces.
Whether suspended from a ceiling or adorning a table lamp, glass globes exude a timeless beauty that transcends trends, ensuring they remain a staple in interior décor for years to come.
Creating Tranquility With Glass Globes
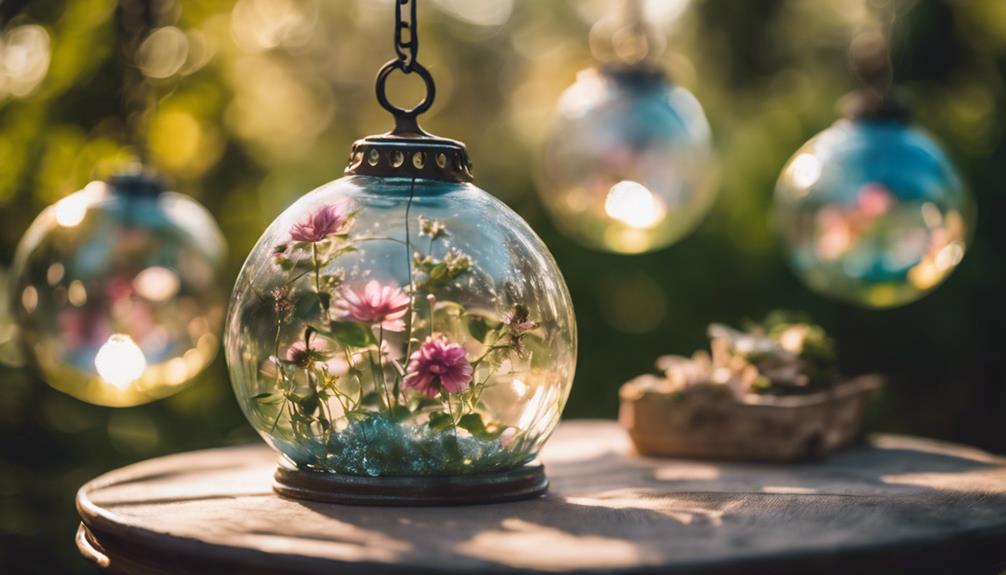
To enhance the ambiance of a space with a serene and calming atmosphere, consider incorporating vintage glass globes renowned for their soft lighting and tranquil ambiance. These timeless pieces exude elegance through their delicate craftsmanship and intricate designs, adding sophistication to any setting.
The soft and diffused lighting emitted by glass globes not only enhances the aesthetic of the room but also creates a sense of peace and tranquility.
With a wide range of sizes and shapes available, vintage glass globes can complement various decor styles, from traditional to modern, offering a versatile option for aesthetic enhancement. Whether suspended from the ceiling as a statement piece or used as table lamps to create a cozy corner, these globes bring beauty and elegance to any space.
Versatile Beauty of Vintage Globes

Exploring the versatility of vintage glass globes reveals their ability to enhance any space with timeless beauty and charm. These globes, with their intricate detailing and craftsmanship, exude a unique elegance that can elevate the aesthetic of a room effortlessly. They come in various sizes, shapes, and designs, allowing for customization to suit different decor styles. Vintage glass globes can serve multiple purposes, functioning as pendant lights to illuminate specific areas, as chandeliers to create a focal point, or even as standalone decorative pieces for a touch of sophistication.
| Vintage Glass Globes | Benefits |
|---|---|
| Intricate Detailing | Adds elegance and sophistication to any space |
| Versatile Applications | Can be used as pendant lights or chandeliers |
| Diffused Light | Creates a cozy atmosphere with soft illumination |
The diffused light that emanates through these globes not only provides adequate lighting but also contributes to a warm and inviting ambiance, making the space feel more intimate and welcoming.
Frequently Asked Questions
Can Vintage Glass Globes Be Used Outdoors?
Yes, vintage glass globes can typically be used outdoors, provided they're made of durable materials like tempered glass. Outdoor conditions may expose them to elements like wind, rain, and sunlight, so selecting robust globes is essential. Make sure proper installation to prevent damage from environmental factors.
Regular maintenance, such as cleaning and inspection for cracks, will help prolong their lifespan. Following these practices will help preserve the vintage glass globes' aesthetic appeal while enjoying them in outdoor settings.
Are Vintage Glass Globes Fragile or Durable?
Vintage glass globes, whether antique or modern, can vary in durability. While they exude charm and elegance, they often require delicate handling due to their fragile nature.
However, with proper care and maintenance, these globes can withstand the test of time. It's essential to avoid subjecting them to harsh impacts or extreme temperatures, as this can lead to breakage.
Regular cleaning and gentle handling are key to preserving their beauty for years to come.
How Do I Clean and Maintain Glass Globes?
When maintaining glass globes, a gentle approach is essential. Begin by dusting regularly with a soft, lint-free cloth.
For deeper cleaning, mix mild dish soap with warm water, dampen a microfiber cloth, and carefully wipe the globe. Avoid harsh chemicals or abrasive materials that may scratch the glass.
Guarantee thorough drying to prevent water spots. Regular upkeep will preserve the clarity and beauty of your glass globes for years to come.
Can Vintage Glass Globes Be Customized or Personalized?
While one may dream of a vintage glass globe sporting their initials or a custom design, altering these pieces can diminish their historical and aesthetic value.
Authenticity is paramount in preserving the charm and uniqueness of vintage items. However, if personalization is desired, consider commissioning a skilled artisan to create a separate custom piece inspired by the vintage globe.
This way, one can enjoy a personalized touch without compromising the integrity of the original vintage glass globe.
Are Vintage Glass Globes Suitable for All Types of Lighting Fixtures?
Vintage glass globes are versatile and suitable for various lighting fixtures. They can enhance the aesthetic appeal of chandeliers, pendants, sconces, and even table lamps.
Their timeless elegance and adaptability make them a popular choice for both traditional and contemporary settings. Due to the wide range of sizes and styles available, vintage glass globes can effortlessly complement different types of lighting fixtures, providing a touch of sophistication and charm to any space.
Conclusion
To sum up, vintage glass globes offer a timeless beauty that adds elegance and charm to any space. Whether used as a centerpiece on a dining table or as a pendant light in a living room, these globes create a sense of tranquility and versatility that's unmatched.
One example of their impact is how a vintage glass globe pendant light can transform a modern kitchen into a cozy and inviting space, adding a touch of nostalgia and sophistication.
- About the Author
- Latest Posts
Introducing Ron, the home decor aficionado at ByRetreat, whose passion for creating beautiful and inviting spaces is at the heart of his work. With his deep knowledge of home decor and his innate sense of style, Ron brings a wealth of expertise and a keen eye for detail to the ByRetreat team.
Ron’s love for home decor goes beyond aesthetics; he understands that our surroundings play a significant role in our overall well-being and productivity. With this in mind, Ron is dedicated to transforming remote workspaces into havens of comfort, functionality, and beauty.
-
 Vetted4 weeks ago
15 Best Contact Paper for Kitchen Cabinets to Elevate Your Home Decor
-

 Vetted2 weeks ago
15 Best Poe Cameras for Home Security – Reviews & Buying Guide
-

 Vetted4 weeks ago
15 Best Drain Snakes to Unclog Your Pipes Like a Pro
-

 Beginners Guides6 days ago
I Inhaled Vinegar Fumes
-

 Vetted4 weeks ago
14 Best Stationery Brands for Your Next Writing Adventure
-

 Beginners Guides2 weeks ago
Swinger Porch Light Color
-

 Mardi Gras Decoration4 weeks ago
Why Does Hobby Lobby Not Do Mardi Gras?
-
 Vetted2 weeks ago
15 Best Blinds for Bathroom Windows to Enhance Privacy and Style


