Decor
How to Build Halloween Door Decor
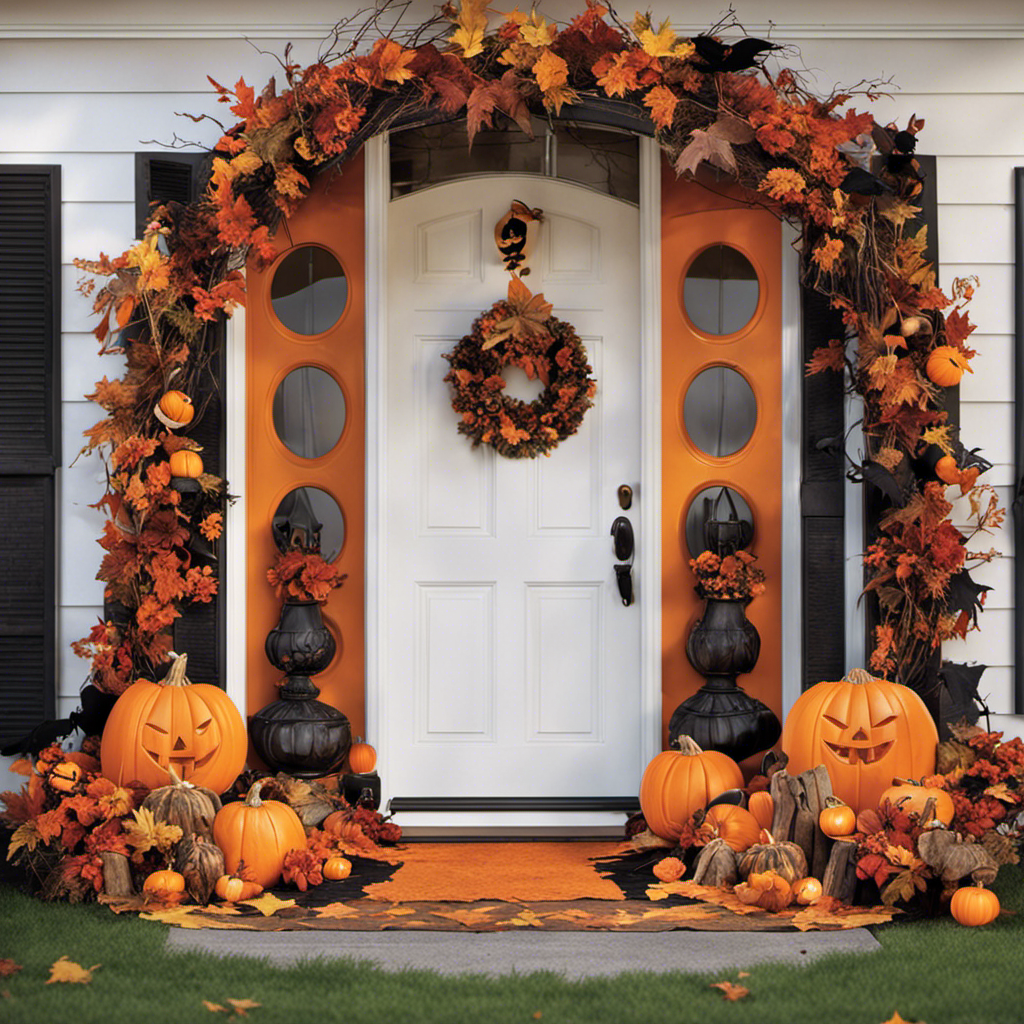
As Halloween approaches, I find myself eagerly preparing for the spookiest night of the year. And what better way to set the stage for a hauntingly good time than with some eye-catching Halloween door decor?
In this article, I’ll guide you through the process of building your own door decorations that will leave your neighbors in awe. From choosing the right materials to adding the perfect finishing touches, I’ll share all the tips and tricks you need to create a door that screams Halloween.
Let’s dive in and bring your door to life with frightful flair!
Key Takeaways
- Budget-friendly materials like cardboard, craft paper, and fabric can be used for Halloween door decor.
- Use bold and dark colors like black, purple, and orange to bring the design to life.
- Adding texture through techniques like sponging, dabbing, or stippling enhances the Halloween door decor.
- Measure the door, prep the surface, and use cutting techniques for clean and precise cuts.
Choosing the Right Materials and Supplies
You should start by making a list of the materials and supplies you’ll need for your Halloween door decor. Choosing the right materials is key to creating a spooky and eye-catching design. Consider your budget when selecting the materials, as you want to create something impressive without breaking the bank.
Look for affordable options like cardboard, craft paper, and fabric that can be easily transformed into ghosts, witches, or pumpkins. Don’t forget about paint, glue, and other adhesives to bring your creations to life.
Once you have gathered all your materials, it’s time to sketch out your design. Planning is essential to ensure you have a clear vision of how everything will come together and make your Halloween door decor truly stand out.
Sketching Out Your Design
When it comes to sketching, color choices play a crucial role in bringing your design to life. The right colors can evoke emotions, create depth, and add visual interest to your sketches.
In addition to color, adding details to your sketches is essential for capturing the intricacies of your design and ensuring that it is accurately represented.
Color Choices for Sketching
To make your Halloween door decor standout, start by choosing the perfect colors for sketching. Exploring different techniques and creating a spooky atmosphere can be achieved through careful color selection. When it comes to Halloween, bold and dark colors are key.
Consider using a combination of black, purple, and orange to bring your design to life. Black can create a mysterious and eerie feel, while purple adds a touch of magic and mystique. Orange, of course, is the quintessential Halloween color, symbolizing pumpkins and autumn. By utilizing these colors in your sketches, you can evoke a sense of spookiness and excitement.
Now, let’s move on to adding the intricate details to your sketches, bringing your Halloween door decor to life without skipping a beat.
Adding Details to Sketch
Now that you have chosen the perfect colors, it’s time to add the intricate details to your sketch and bring it to life.
Adding texture is a great way to make your Halloween door decor stand out. You can achieve this by using different techniques such as sponging, dabbing, or stippling. For example, if you are creating a spider web, you can use a sponge to lightly dab on some white paint to give it a 3D effect.
Another way to enhance your design is by using stencils. Stencils allow you to create precise shapes and patterns with ease. Whether it’s a spooky ghost or a wicked witch, stencils can help you add those perfect finishing touches to your Halloween door decor.
Now that your sketch is complete, it’s time to move on to measuring and prepping your door.
Measuring and Prepping Your Door
First, grab your measuring tape and carefully assess the height and width of your door for accurate dimensions. Measuring techniques are crucial at this stage to ensure your decorations fit perfectly.
Start by measuring the height of your door from top to bottom, making note of any architectural details that might affect your design. Then, measure the width of your door frame, taking into account any molding or trim that might be present.
Once you have these measurements, you can proceed with door preparation. This may involve cleaning the door surface, removing any existing decorations or hardware, and ensuring the surface is smooth and ready for your creative touch.
With your door properly measured and prepped, you can now move on to the exciting part of cutting and shaping your decorations seamlessly.
Cutting and Shaping Your Decorations
Once you’ve measured and prepped your door, it’s time to start cutting and shaping your decorations. This is where your creativity can really shine! There are various cutting techniques you can use to bring your Halloween door decor to life. From simple silhouettes to intricate designs, the possibilities are endless. As for shaping tools, you’ll need a few essentials like a jigsaw, a coping saw, and some sandpaper for smoothing out rough edges. These tools will help you achieve clean and precise cuts, ensuring that your decorations look professional.
To give you an idea of the cutting techniques and shaping tools, here’s a handy table:
| Cutting Techniques | Shaping Tools |
|---|---|
| Silhouette | Jigsaw |
| Intricate Design | Coping Saw |
| Smooth Edges | Sandpaper |
Now that you have your decorations cut and shaped, it’s time to move on to the next exciting step of painting and decorating your door decor.
Painting and Decorating Your Door Decor
When it comes to painting and decorating your door decor, there are a few key points to consider.
First, the color choice for your door can greatly impact the overall look and feel of your decoration. Whether you go for a classic black, a spooky purple, or a vibrant orange, the color sets the tone for your Halloween display.
Next, get creative with embellishments and accessories to make your door decor stand out. From cobwebs and spiders to bats and witches, there are endless options to add that extra touch of spookiness.
Lastly, don’t forget to consider the size and placement of your decorations to ensure they fit well on your door and create a cohesive and eye-catching design.
Color Choices for Door
For a spooky touch, you can use black and orange as the primary color choices for your Halloween door decor. These colors are iconic and instantly evoke the spirit of Halloween.
Here are three ways you can use this color scheme to create a spooky atmosphere:
-
Paint your door black: This will instantly give your door a dark and eerie vibe. You can then add orange accents or decorations to make it pop.
-
Use orange lights: String orange fairy lights around your door to create a warm and inviting glow. This will make your door stand out and add a festive touch.
-
Hang black and orange garlands: Drape black and orange garlands across your door for a dramatic effect. You can even add spider webs or bats for an extra spooky touch.
By using these color choices, you’ll be well on your way to creating a Halloween door decor that will give your visitors a frightful welcome.
Now, let’s move on to the creative embellishments and accessories to take your decor to the next level.
Creative Embellishments and Accessories
To add an extra touch of creativity, you could incorporate spooky props and themed accessories into your Halloween door design.
Accessories for pumpkins are a great way to enhance your door decor. Consider adding mini witches hats, fake spiders, or even a pair of creepy eyes peering out from behind the pumpkins. These small details can make a big difference in the overall effect of your design.
Another creative idea is to incorporate unique wreath designs. Instead of a traditional round wreath, try using a black cat-shaped wreath or a spiderweb-shaped wreath. These unconventional designs will make your door stand out from the rest.
Now that you have some creative ideas for embellishments and accessories, it’s time to move on to assembling and attaching your door decor seamlessly.
Assembling and Attaching Your Door Decor
You’ll need to gather all the pieces and fasten them together to assemble your Halloween door decor. Here are three key techniques to help you with the process:
-
Measuring Techniques: Before you start assembling, it’s important to measure your door to ensure a proper fit. Take accurate measurements of the height and width, and consider any obstructions like doorknobs or windows. This will help you determine the size and placement of your decor.
-
Securing Techniques: Once you have your pieces ready, it’s crucial to secure them firmly to your door. Use strong adhesive tapes, such as double-sided foam tape or mounting squares, to attach lightweight items. For heavier objects, like wreaths or signs, consider using removable hooks or over-the-door hangers for added stability.
-
Wire or Zip Ties: For more complex and intricate decor, like garlands or spider webs, use wire or zip ties to secure them in place. These versatile tools allow you to easily twist or fasten the elements together, ensuring a secure and long-lasting attachment.
Now that your Halloween door decor is assembled and secured, it’s time to add some lighting and special effects to bring your creation to life.
Adding Lighting and Special Effects
Now that I’ve assembled and attached my Halloween door decor, it’s time to add some spooky lighting and special effects.
To create an eerie ambiance, I’m going to use special effects lighting. I’ll start by placing small LED spotlights around my decor, aiming them at different angles to cast creepy shadows. I can even use colored gels to give the lighting a sinister hue.
Next, I’ll add some DIY spooky sound effects. I’ll hide a small Bluetooth speaker behind my decor and play haunting sounds like creaking doors, howling winds, or ghostly whispers. This will surely give trick-or-treaters a frightful experience when they approach my door.
Now that I’ve set the stage for a truly terrifying Halloween, let’s move on to hanging and securing our door decor.
Hanging and Securing Your Door Decor
When it comes to hanging and securing your door decor, there are a few key points to keep in mind.
Proper mounting techniques are essential to ensure that your decorations stay in place and don’t fall off.
Choosing sturdy materials is also crucial, as flimsy or weak materials can easily break or get damaged.
Lastly, weatherproofing your decorations is important to protect them from the elements and ensure their longevity.
Proper Mounting Techniques
To ensure a secure hold, it’s important to use the right mounting techniques when installing your Halloween door decor. Here are three tips to help you achieve a sturdy and long-lasting installation:
-
Choose the appropriate mounting hardware: Depending on the weight and size of your door decor, consider using adhesive hooks, suction cups, or screws. Make sure the hardware is designed to hold the specific type of material you are working with.
-
Clean and prepare the surface: Before attaching any mounting hardware, clean the surface of your door to ensure proper adhesion. Remove any dirt or debris, and use rubbing alcohol to remove any residue. If necessary, use sandpaper to create a rough surface for better grip.
-
Follow the instructions: Each type of mounting hardware comes with specific installation instructions. Be sure to read and follow them carefully to ensure a secure hold. This will help prevent any damage to your door or decor.
By using these mounting techniques, you can confidently install your Halloween door decor without fear of it falling off or causing any damage.
Now, let’s move on to choosing sturdy materials for your project.
Choosing Sturdy Materials
It’s important to select durable materials that can withstand the elements and ensure the longevity of your installation. When it comes to outdoor Halloween decorations, you want to choose materials that are not only spooky, but also built to last. Here are some tips for choosing long lasting materials for your Halloween door decor:
| Material | Description | Benefits |
|---|---|---|
| PVC | Lightweight and weather-resistant | Easy to work with and can withstand harsh weather conditions |
| Metal | Sturdy and durable | Provides a more realistic and long-lasting look |
| Outdoor paint | Specifically designed for outdoor use | Resistant to fading and peeling |
Weatherproofing Your Decorations
Once you’ve selected your materials, a good way to ensure the longevity of your outdoor decorations is by weatherproofing them. This will protect them from the elements and keep them looking great for years to come. Here are three effective sealing techniques to protect your decorations against rain and wind:
-
Waterproof spray: A quick and easy method is to use a waterproof spray specifically designed for outdoor use. Simply spray a thin, even coat onto your decorations, making sure to cover all surfaces. This will create a barrier that repels water and prevents damage.
-
Clear sealant: For a more thorough protection, consider using a clear sealant. Apply a generous coat over the entire surface of your decorations, paying extra attention to any seams or joints. This will create a strong barrier against moisture and prevent any water from seeping in.
-
Outdoor varnish: If you want an extra layer of protection, outdoor varnish is a great option. Apply a coat of varnish over the entire surface of your decorations, allowing it to dry completely between coats. This will provide a durable, waterproof finish that will keep your decorations safe from rain and wind.
By weatherproofing your decorations using these sealing techniques, you can ensure that they will withstand the elements and remain in great condition.
Now, let’s move on to some maintenance and storage tips to further prolong the life of your Halloween door decor.
Maintenance and Storage Tips
Keeping your Halloween door decor in good condition is important, so make sure to follow these maintenance and storage tips.
After the spooky season is over, it’s crucial to give your decorations a little TLC. First, assess any damage and make any necessary repairs. Replace any broken or missing parts, such as lights or props. Clean off any dirt or debris using a mild soap and water solution.
Once your decorations are clean and repaired, it’s time to store them properly. Invest in storage solutions like plastic bins or storage bags to keep them safe from dust and moisture. Label each container so you can easily find them next year.
By following these maintenance tips and utilizing effective storage solutions, your Halloween door decor will stay in great shape for many years to come.
As you pack away your Halloween door decor, you might already find yourself brainstorming ideas for next year’s decorations. The possibilities are endless, from spooky haunted houses to adorable pumpkins and witches. Let your imagination run wild and think about incorporating different themes or styles.
Maybe you want to go all out with a full-on graveyard scene, complete with tombstones and skeletons. Or perhaps you prefer a more whimsical approach, with friendly ghosts and smiling jack-o’-lanterns. Get inspired by browsing through magazines or searching online for creative Halloween door decor ideas.
With a little creativity and some planning, you can create a door display that will amaze and delight trick-or-treaters for years to come.
Inspiration and Ideas for Future Halloween Door Decor
As you pack away your Halloween door decor, you might already be thinking of new ideas for next year’s spooky displays. Don’t worry, I’ve got you covered with some inspired ideas to take your Halloween decorations to the next level.
Here are three decorating techniques and DIY Halloween props to consider:
-
Haunted House Entrance: Transform your front door into a haunted house entrance by adding faux cobwebs, spooky silhouettes, and a creaky door sound effect. Hang a sign that says ‘Enter if you dare’ to add an extra touch of fright.
-
Witch’s Brew Cauldron: Create a DIY cauldron prop by spray painting a large black pot and adding green LED lights inside. Place it near your door and fill it with dry ice for an eerie smoke effect. Don’t forget to add a witch’s broomstick and some potion bottles for an authentic touch.
-
Monster Mouth: Turn your front door into a monster’s mouth by cutting out large teeth from foam board and attaching them around the edges. Add googly eyes and some fake blood for a gruesome touch. This decoration is sure to give your trick-or-treaters a scare they won’t forget.
With these decorating techniques and DIY Halloween props, your door will be the talk of the neighborhood next Halloween. Get creative, have fun, and let the spooky spirit come alive!
Frequently Asked Questions
What Are Some Alternative Materials That Can Be Used for Halloween Door Decor?
When it comes to Halloween door decor, there are plenty of alternative materials you can use. From repurposing old items to using unexpected objects, the possibilities for creative DIY ideas are endless.
How Do I Choose the Right Paint Colors for My Halloween Door Decor?
When choosing paint colors for my Halloween door decor, I consider the vibe I want to create. Dark and eerie shades like deep purple or black can add a spooky touch, while vibrant orange and green can give a playful and festive feel. Experiment and have fun!
Are There Any Safety Precautions I Should Take When Assembling and Attaching My Door Decor?
When assembling and attaching Halloween door decor, it’s important to prioritize safety. Securely fasten all components to avoid accidents. Also, consider storing the decor properly after the holiday season to preserve its quality.
Can I Use Battery-Operated Lights for My Halloween Door Decor Instead of Traditional Plug-In Lights?
Yes, you can definitely use battery-operated lights for your Halloween door decor instead of traditional plug-in lights. The pros of battery-operated lights include convenience and flexibility, while the cons include limited battery life and potential for dimmer lighting.
How Do I Store My Halloween Door Decor to Ensure It Stays in Good Condition for Future Use?
To ensure my Halloween door decor stays in good condition for future use, I employ various storing techniques and preserving methods. From carefully wrapping it in tissue paper to storing it in a sturdy box, I prioritize its protection and longevity.
Conclusion
In conclusion, building Halloween door decor is not only a creative and fun project, but it also allows you to showcase your spooky spirit to all who visit your home.
By following the steps outlined in this article, you can create a unique and eye-catching design that will be the envy of the neighborhood.
So grab your materials, let your imagination run wild, and get ready to scare up some Halloween magic.
Happy decorating!
- About the Author
- Latest Posts
Meet Katherine, the creative enthusiast at ByRetreat who infuses her boundless passion for design into every remote workspace she crafts. With an innate sense of creativity and an eye for unconventional beauty, Katherine brings a unique and inspiring perspective to the team.
Katherine’s love for design is infectious, and her ability to think outside the box sets her apart. She believes that true artistry lies in embracing a variety of styles and mixing them harmoniously to create captivating spaces. By combining different textures, colors, and patterns, Katherine weaves a tapestry of creativity that breathes life into each remote workspace.
Eclectic Style
Accessory Obsession: The Eclectic Add-Ons That'll Transform Your Look!
Harness the power of eclectic accessories to transform your look and discover the secrets to elevating your style effortlessly!

Accessorizing's your secret weapon to instantly elevate any outfit. By carefully choosing colors that complement or contrast your wardrobe, you can create a striking look. Experiment with different materials—gold, gemstones, or sustainable options—for added flair. Don't forget about textures; mixing shiny and matte pieces adds depth. To showcase your collection, consider stylish jewelry displays and the right lighting, which can enhance the appeal of your accessories. Add personal touches with decorative elements like vintage sketches or colorful bead hangings to truly express your style. Curious about how to make these concepts work for you? Keep exploring for more insights!
Key Elements

When you're choosing accessories, the key elements of color scheme, materials, and textures can make or break your look.
Think about how vibrant hues, luxurious metals, and interesting fabrics can work together to express your unique style.
Color Scheme
A well-chosen color scheme can transform your entire outfit, ensuring your accessories not only complement but also enhance your personal style.
When diving into your accessory obsession, think about how colors interact. Incorporating complementary colors—those opposite each other on the color wheel—can create striking contrasts that make your accessories pop. For instance, pairing a vibrant blue bag with a warm orange dress draws the eye and adds excitement.
On the other hand, if you prefer a more subtle look, consider using analogous colors—those found next to each other on the color wheel. This approach results in a harmonious effect, ideal for layered or stacked jewelry, like wearing shades of green with turquoise accents.
As you accessorize, pay attention to the dominant colors in your wardrobe. Selecting pieces that reflect your overall aesthetic not only enhances your outfit but also creates a cohesive look.
Materials
Understanding the materials used in your accessories can elevate your style and enhance your overall look. Accessory Obsession offers an impressive variety of jewelry crafted from materials like gold, silver, gemstones, and pearls. Each material has its own unique qualities; for instance, pearls add timeless elegance to both casual and formal attire, making them a versatile choice.
When you choose multi-color designs, you open up a world of pairing possibilities, allowing you to mix and match with different outfits. This versatility caters to diverse tastes, ensuring that there's something for everyone. Plus, the ongoing shift towards sustainable and ethical sourcing means you can feel good about your fashion choices, not just in style but also in responsibility.
The incorporation of eclectic styles and innovative materials not only enhances visual appeal but also allows you to express your individuality. By selecting accessories that resonate with your personal style, you'll create a look that's uniquely yours.
Textures
Textures play an essential role in defining your accessory choices, transforming simple pieces into enchanting statements that enhance your overall look. The smoothness of pearls contrasts beautifully with the ruggedness of metal, adding visual interest and depth to your ensemble. When you mix different textures—like pairing a shiny statement necklace with matte earrings—you create a dynamic, eye-catching look that draws attention.
Incorporating materials like wood, glass, and gemstones introduces natural elements that add warmth and authenticity to your jewelry collection. Layering pieces with varying textures allows you to create a complex aesthetic, showcasing your personal style and individual expression. This approach not only highlights your creativity but also makes your outfit more engaging.
Understanding how different textures interact with light can help you select jewelry that enhances your outfit. For instance, a glittering piece can draw attention to specific features or colors, making your overall appearance more fascinating.
Essential Fixtures and Furniture
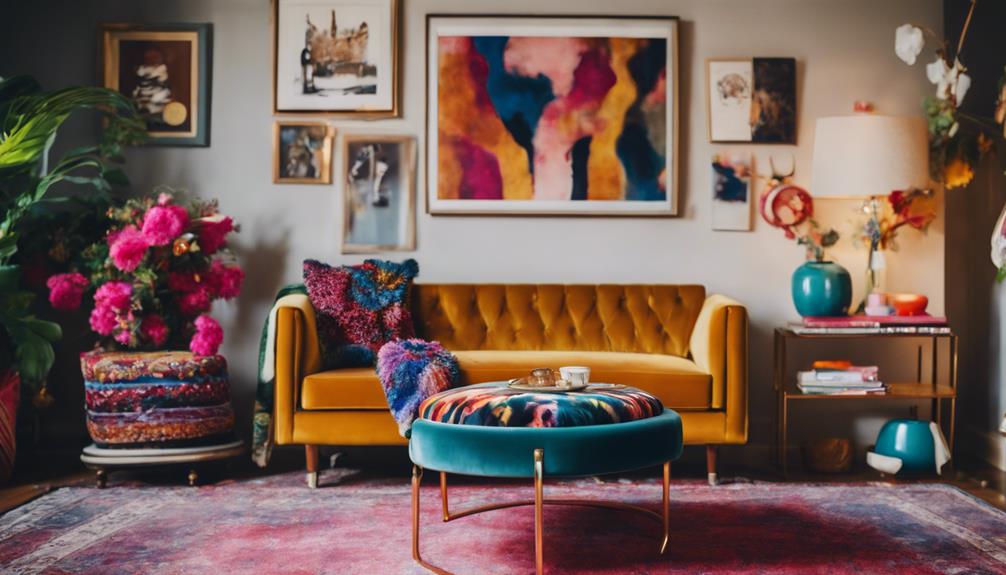
When it comes to showcasing your jewelry, the right fixtures can make all the difference.
Consider adding a vintage jewelry display stand, a rotating carousel, or a wall-mounted organizer to elevate both style and functionality.
These essential pieces not only keep your accessories accessible but also turn them into eye-catching decor.
Vintage Jewelry Display Stand
Enhancing your space with a vintage jewelry display stand not only showcases your collection but also adds a touch of elegance and nostalgia to your decor. These stands come in various materials like wood, metal, and glass, allowing you to choose one that perfectly complements your existing furniture and accessories.
By utilizing a vintage display stand, you can organize your jewelry effectively, preventing tangles and damage while making it easy to access your favorite pieces. Imagine effortlessly finding that perfect necklace or pair of earrings without rummaging through a cluttered box!
Vintage display stands often feature unique designs, such as intricate carvings or ornate detailing, which can serve as a conversation starter and focal point in your space. They reflect your personal style and appreciation for timeless craftsmanship, setting you apart from more conventional storage options.
Investing in a vintage jewelry display stand not only elevates the aesthetic appeal of your collection but also transforms your room into a curated space that showcases your taste.
Rotating Jewelry Carousel Display
A rotating jewelry carousel display offers a stylish and efficient way to showcase your accessories while keeping them organized and easily accessible. With 360-degree visibility, you can easily admire your collection and select the perfect piece for any outfit. These displays come in various sizes and styles, catering to diverse jewelry collections, from necklaces to earrings and bracelets.
Incorporating tiered levels in your carousel design maximizes vertical space, making it a smart choice for smaller areas. You won't have to worry about clutter, as the organized layout allows you to see all your favorites at a glance. Many of these displays are crafted from durable materials like acrylic or metal, ensuring they last while adding a modern touch to your décor.
Using a rotating display enhances your jewelry organization, making it simple to switch out pieces regularly and keep your collection fresh and appealing. You'll love how this fixture transforms your space into a chic showcase for your accessories.
Wall-Mounted Jewelry Organizer
If you've enjoyed the convenience of a rotating jewelry carousel, you'll love the wall-mounted jewelry organizer for its ability to maximize vertical space while adding a stylish touch to your decor. These organizers are perfect for small areas, keeping your jewelry collection organized and accessible without taking up valuable counter space.
Wall-mounted jewelry organizers come equipped with hooks, shelves, and compartments designed specifically for necklaces, bracelets, and earrings. This thoughtful design helps you avoid tangling and damage, ensuring your favorite pieces remain in great condition. Plus, with everything visible, you can quickly grab what you need without rummaging through a cluttered drawer.
Many options feature decorative designs, allowing them to complement your home decor while serving a practical purpose. By regularly rotating displayed pieces, you'll not only keep your organizer looking fresh but also encourage daily use of your jewelry collection.
This simple addition to your space can transform how you accessorize, making it easier to experiment with different looks.
Lighting Ideas
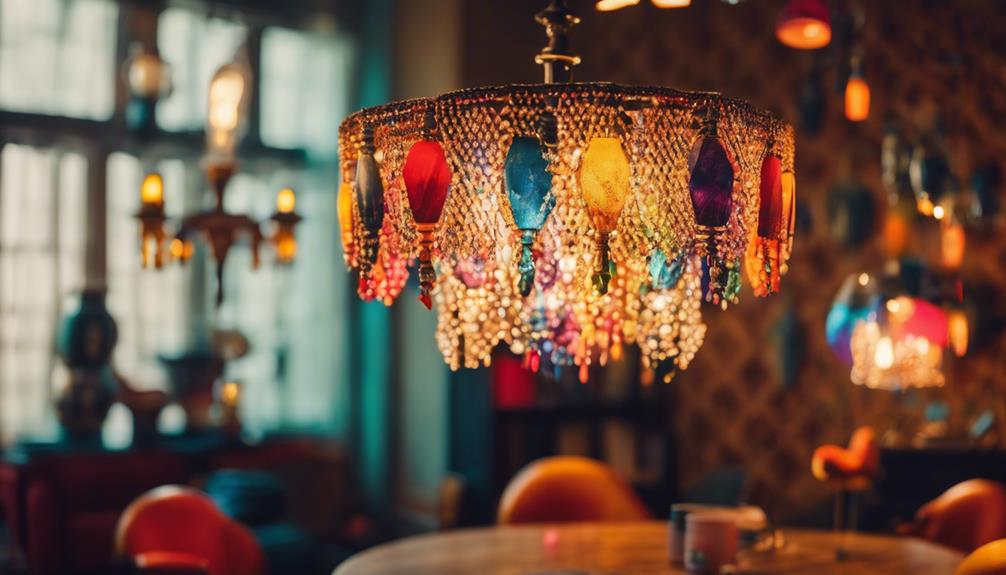
When you think about lighting for your jewelry display, consider how soft LED strip lighting can create a warm, inviting glow.
Pendant lights add elegance while track lighting lets you highlight specific pieces effortlessly.
Accent wall sconces can also enhance the overall ambiance, making your accessories shine even brighter.
Soft LED Strip Lighting
Soft LED strip lighting transforms your jewelry displays by creating a warm atmosphere that highlights each piece brilliantly without harsh glare. These energy-efficient strips allow you to customize installations, cutting them to fit any display setup perfectly. You can easily enhance the aesthetic of your accessories, ensuring they catch the eye of anyone who walks by.
One of the best features of LED strip lights is their adjustable brightness and color temperature settings. This means you can create the perfect ambiance, whether you want a soft glow for a cozy feel or a brighter light to showcase intricate details. The improved visibility draws attention to your jewelry, making each piece more appealing to potential customers or guests.
Additionally, soft LED lighting evokes positive emotions, enhancing the overall shopping or viewing experience. When your displays shine in the right light, it creates a welcoming environment that invites people to explore your eclectic collection.
Pendant Lights With Warm Glow
Pendant lights with a warm glow instantly elevate the ambiance of your space, creating a cozy and inviting atmosphere that draws people in. These versatile lighting options fit seamlessly into any room, whether you're enhancing your living room, dining area, or bedroom.
With various styles available—from sleek modern designs to charming vintage looks—you can easily find the perfect pendant light to complement your interior design theme.
Choosing warm-toned bulbs, like soft white or amber, is key to achieving that inviting quality, typically in the 2700K to 3000K range. You can also play with the height at which you hang your pendant lights; varying heights will add depth and visual interest to your space.
Consider using multiple pendants in a cluster for a more dramatic effect, making a stunning statement piece.
To further enhance the ambiance, opt for dimmable options that allow you to adjust the brightness according to your needs. Whether you're hosting a dinner party or enjoying a quiet evening, pendant lights with a warm glow provide the flexibility to create the perfect mood for any occasion.
Track Lighting for Jewelry Display
Elevate your jewelry displays with track lighting that offers adjustable illumination, allowing you to spotlight your favorite pieces and enhance their beauty. This type of lighting is ideal for showcasing the intricate details of your jewelry, as it lets you direct light at various angles, highlighting textures and colors effectively.
By choosing LED track lights, you'll not only enjoy energy efficiency but also benefit from longevity; some options can last up to 25,000 hours. This means fewer replacements and lower costs in the long run. Plus, many track lighting systems are dimmable, enabling you to customize the ambiance for any occasion, whether you're hosting a casual get-together or a formal event.
Using warm light in your displays can greatly enhance the luxurious feel of your jewelry, making each piece appear more inviting and appealing to potential customers. With track lighting, you can create a dynamic and eye-catching environment that draws attention and makes your jewelry shine.
Transform your space and let your collection sparkle with the perfect track lighting setup!
Accent Wall Sconce Lighting
Accent wall sconce lighting adds a touch of elegance while providing focused illumination to highlight specific areas of your space. These fixtures not only enhance the ambiance but also serve as stylish focal points. You can choose from a variety of styles and designs, ensuring that your sconces complement both modern and traditional decor.
By installing sconces at eye level, you'll create a more inviting atmosphere. They can draw attention to artwork or unique architectural features on your walls, making your space feel curated and intentional. Additionally, wall sconces are perfect for creating layered lighting. When combined with overhead fixtures and table lamps, they help you achieve a well-lit and dynamic environment.
Consider incorporating energy-efficient options like LED bulbs into your accent wall sconces. This allows you to reduce electricity consumption while still enjoying a warm and inviting glow.
Whether you want to brighten a reading nook or showcase a treasured piece of art, wall sconces can transform your look and enhance your overall decor. So, explore different styles and find the perfect sconces to elevate your space!
Decorative Elements
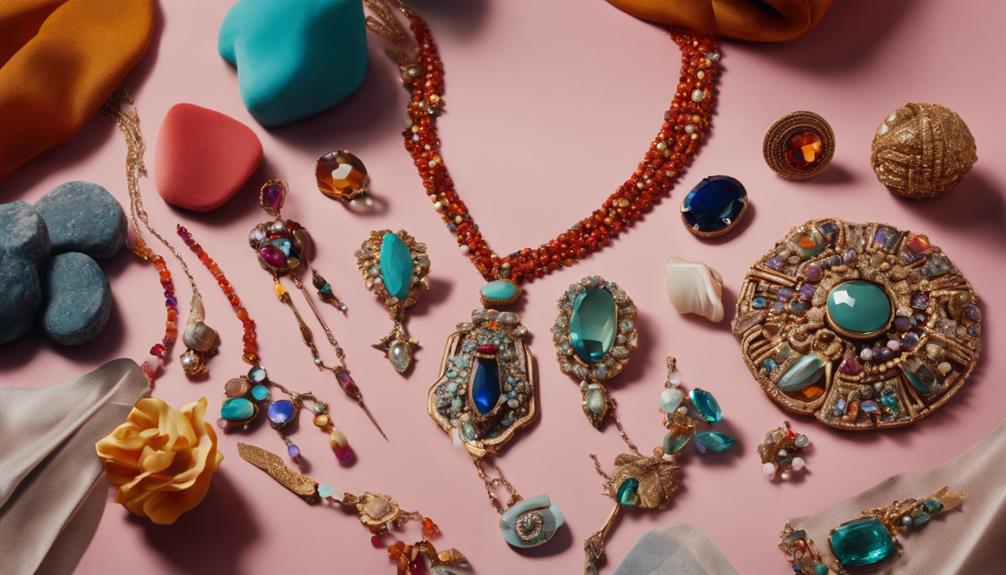
When you think about enhancing your jewelry display, consider incorporating framed vintage jewelry sketches or an antique mirror with an intricate frame.
These decorative elements can add a touch of elegance and personality to your space.
A colorful beaded wall hanging can also bring in a vibrant pop, making your collection truly stand out.
Framed Vintage Jewelry Sketches
Framed vintage jewelry sketches add a unique artistic touch to your decor, blending seamlessly with your accessory collection. These sketches showcase intricate designs and styles from various eras, allowing you to appreciate the evolution of jewelry fashion while inspiring new looks for your outfits.
Incorporating framed sketches into your space creates a cohesive theme, particularly when you display them alongside actual jewelry pieces that reflect the styles depicted. You'll find that these charming artworks not only enhance the aesthetic appeal of your room but also spark conversations about jewelry history and your personal style.
Sourcing vintage jewelry sketches is easier than you might think. You can hunt for these treasures in antique shops or browse online platforms, making them accessible to anyone looking to enrich their decor with unique and meaningful art.
Antique Mirror With Intricate Frame
Finding an antique mirror with an intricate frame can transform your space, adding both elegance and a touch of history to your decor. This stunning statement piece enhances the overall aesthetic, bringing depth and character to any room. The detailed craftsmanship of antique frames often features ornate designs, showcasing historical artistry that elevates your decor style.
These mirrors are incredibly versatile, fitting seamlessly into various design themes, whether you're leaning toward vintage, rustic, modern, or eclectic. Placing an antique mirror strategically can also create the illusion of a larger space, reflecting light and brightening up darker areas. Imagine a beautifully framed mirror above a mantel or in a hallway, instantly drawing the eye and enhancing the ambiance.
Collecting antique mirrors can be a rewarding hobby, as unique pieces often appreciate in value over time due to their rarity and craftsmanship. Each mirror tells a story, making it more than just a decor item but a conversation starter as well.
Colorful Beaded Wall Hanging
Colorful beaded wall hangings instantly brighten up your space, adding vibrant energy and unique texture to your decor. These decorative elements can transform any room, making them a must-have for your home. With their eye-catching designs, they often feature a mix of materials like wood, glass, and natural fibers, allowing you to showcase your individual style.
When you incorporate a colorful beaded wall hanging, you create a focal point that draws attention and inspires creativity. Whether your space is casual or formal, these pieces can elevate the ambiance, making your home feel more inviting. Plus, many of these hangings are handcrafted, ensuring that each piece is unique and supports artisanal craftsmanship.
Hanging one in your living room or bedroom not only enhances the aesthetic but also gives your space a lively atmosphere. The playful colors and textures encourage you to express yourself, making it a versatile addition to your decor.
Don't underestimate the impact of a colorful beaded wall hanging; it's an eclectic accessory that can truly transform your look and feel at home.
Flooring

When it comes to flooring, your choices can truly transform a space.
Reclaimed wood planks add rustic charm, while polished concrete with a gloss finish brings a modern edge.
If you're looking for versatility, textured vinyl plank flooring offers both style and durability.
Reclaimed Wood Floor Planks
Reclaimed wood floor planks bring a unique character and history to your space, making them an eco-friendly and stylish choice for any home.
Sourced from old structures like barns and factories, each plank tells a story, adding warmth and charm to your interiors. By choosing reclaimed wood, you're not only embracing sustainability but also reducing the demand for new lumber, which helps minimize waste.
These planks often prove to be more durable than new wood, having weathered various environmental conditions over time. This means they can withstand the test of time in your home, providing a solid foundation for your living space.
You'll find reclaimed wood flooring available in various finishes and styles, allowing you to achieve that rustic or vintage aesthetic you love.
Additionally, installing reclaimed wood floors can enhance your home's resale value. Buyers increasingly seek out these distinctive options for their sustainability and unique appearance.
Polished Concrete With Gloss Finish
If you're seeking a sleek and modern flooring option, polished concrete with a gloss finish offers durability and an eye-catching aesthetic that can elevate any space. Achieved by grinding the concrete surface and applying a high-shine sealant, this flooring enhances both durability and beauty. You'll appreciate its resistance to stains, moisture, and heavy foot traffic, making it perfect for high-traffic areas in your home or business.
The gloss finish doesn't just look good; it reflects light, brightening up any room and creating a contemporary atmosphere. You'll find that maintaining polished concrete is a breeze, requiring only periodic cleaning and occasional reapplication of the sealant to keep that shine intact. This low-maintenance aspect is a significant advantage for busy lifestyles.
Moreover, polished concrete is energy efficient, helping you save on heating and cooling costs by retaining ambient temperature. Choosing this eco-friendly flooring not only enhances your space but also contributes positively to the environment.
Textured Vinyl Plank Flooring
Textured vinyl plank flooring offers a stylish and durable solution that beautifully imitates the look of natural materials while being easy to maintain. You'll find a variety of styles, colors, and designs available, making it simple to match your decor and personal style. Whether you prefer the warmth of wood or the elegance of stone, there's a textured vinyl option to suit your taste.
One of the standout features of this flooring is its water-resistant or waterproof nature, making it perfect for high-moisture areas like kitchens and bathrooms. You won't have to worry about spills or humidity ruining your floors. Plus, textured vinyl planks are comfortable underfoot, often featuring additional cushioning for a softer feel compared to traditional hard flooring.
Installation is a breeze, too. Many products come with a click-lock design, allowing you to tackle the project as a DIY endeavor without needing adhesives. This means you can transform your space effortlessly, adding a touch of sophistication while enjoying the practical benefits.
With textured vinyl plank flooring, you'll elevate your home's aesthetic while keeping maintenance low and comfort high.
Conclusion
Incorporating eclectic accessories into your space can truly transform your look. By choosing the right fixtures, lighting, and decorative elements, you'll create an environment that reflects your personality and style.
Don't underestimate the impact of flooring either; it can tie everything together beautifully.
So go ahead—experiment, mix and match, and let your creativity shine. With these vibrant add-ons, your space won't only feel fresh but also uniquely yours!
- About the Author
- Latest Posts
Introducing Ron, the home decor aficionado at ByRetreat, whose passion for creating beautiful and inviting spaces is at the heart of his work. With his deep knowledge of home decor and his innate sense of style, Ron brings a wealth of expertise and a keen eye for detail to the ByRetreat team.
Ron’s love for home decor goes beyond aesthetics; he understands that our surroundings play a significant role in our overall well-being and productivity. With this in mind, Ron is dedicated to transforming remote workspaces into havens of comfort, functionality, and beauty.
Decor
Create a Scandinavian Oasis in a Small Apartment
Keen to transform your small apartment into a Scandinavian oasis? Discover essential tips that will elevate your space into a serene retreat.

You can create a Scandinavian oasis in your small apartment by using a neutral color palette of whites, creams, and muted tones to enhance brightness. Embrace natural materials like wood and soft textiles to add warmth. Opt for minimalist, multifunctional furniture to maximize space while maintaining style. Layer in cozy elements, such as chunky throws and fluffy cushions, for comfort. Don't forget to play with lighting, using soft pendant lights and warm fairy lights to create a welcoming atmosphere. Explore more tips and tricks to transform your space into a tranquil retreat that reflects Scandinavian design principles.
Key Elements

To create your Scandinavian oasis, focus on a cohesive color scheme, using whites and muted tones to keep the space bright and airy.
Incorporate natural materials and textures, like wood and textiles, to add warmth while maintaining a minimalist vibe.
Color Scheme
A well-chosen color scheme can transform a small apartment into a Scandinavian oasis, emphasizing brightness and spaciousness while maintaining a calming aesthetic.
Start with a mainly neutral color palette of whites and creams, which creates a bright and airy atmosphere that enhances the sense of space. These shades not only reflect much light but also serve as a perfect backdrop for your decor.
To add subtle color while keeping the vibe cohesive, incorporate muted tones like soft greys, pale blues, or gentle greens in your accessories. If you're looking to introduce depth, consider an accent wall in warm, earthy tones such as ochre or terracotta. This adds character without overwhelming the design.
Ensure you maximize natural light by keeping windows clear and opting for light, sheer curtains. This connection with the outdoors further enhances brightness.
Materials
Natural materials like wood, cotton, and linen embody the essence of Scandinavian design, creating a warm and inviting atmosphere in your small apartment. By choosing these natural materials, you not only enhance the aesthetic but also promote a sustainable lifestyle. Opt for furniture made from reclaimed wood or sustainably sourced timber to align with eco-friendly values while adding character to your space.
Incorporate soft textiles like chunky blankets and plush rugs, which are essential for layering comfort in your oasis. These elements invite relaxation and contribute to the cozy feel that defines Scandinavian design. A mainly neutral color palette works wonders here; whites and creams serve as perfect backdrops, making your apartment feel more spacious and airy.
Don't forget to bring in greenery! Plants not only introduce natural beauty but also improve air quality, bridging the gap between your indoor space and the outdoors. By thoughtfully selecting natural and sustainable materials, you create a harmonious environment that reflects both style and conscience, making your small apartment a true Scandinavian retreat.
Textures
Mixing textures like soft textiles, natural wood, and leather adds depth and warmth to your Scandinavian-inspired small apartment, making it feel inviting rather than cold or sterile. Embrace Scandinavian style by incorporating fluffy cushions, chunky knit throws, and woven rugs; these elements create a cozy atmosphere while enhancing comfort in multifunctional areas like your living room and bedroom.
Opt for light wood finishes, such as birch or ash, to complement the simple lines of your decor and bring a natural element indoors. To elevate the visual interest of your Scandinavian home, consider adding statement pieces like hand-woven baskets or textured wall hangings. These focal points enrich your space without overwhelming the minimalist aesthetic that defines Scandinavian design.
Additionally, prioritize sustainable materials, such as organic cotton or linen for your furnishings. This choice not only aligns with Scandinavian values but also promotes an eco-friendly lifestyle within your apartment. By thoughtfully mixing these textures, you'll create a harmonious environment that reflects both the elegance and comfort of Scandinavian living.
Essential Fixtures and Furniture
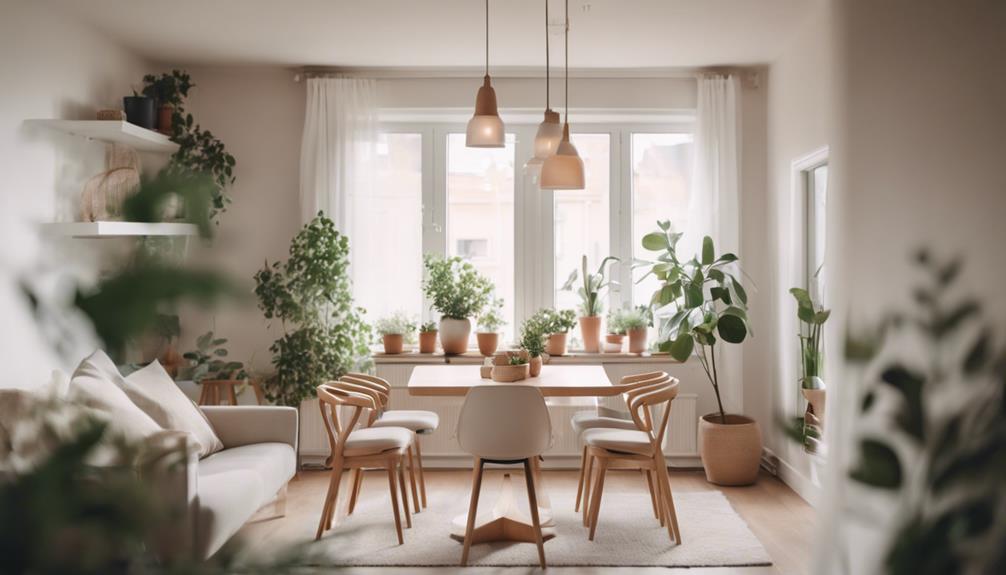
When it comes to essential fixtures and furniture, you'll want to focus on Scandinavian-style pieces that embody simplicity and functionality.
A wooden dining table, a lounge chair, and a coffee table can create a harmonious and inviting atmosphere in your small apartment.
These selections not only maximize space but also enhance the overall aesthetic of your Scandinavian oasis.
Scandinavian-Style Wooden Dining Table
A Scandinavian-style wooden dining table combines minimalist design with functionality, making it a perfect centerpiece for your small apartment. These tables typically feature clean lines and are crafted from natural materials like oak or beech, enhancing both durability and aesthetic appeal. Their minimalist design not only looks great but also fits seamlessly into your limited space.
One of the standout features of these tables is their multifunctionality. They can serve as a dining area and a workspace, which is essential in compact living environments. Many Scandinavian dining tables also come with extendable options, allowing you to host guests without sacrificing everyday usability.
The light, neutral finishes often found in Scandinavian design, such as white-washed or natural wood, help reflect natural light, creating an airy atmosphere in your home. This enhances the overall aesthetic while promoting a sense of calm and organization.
Incorporating a Scandinavian dining table into your space aligns perfectly with minimalist principles, prioritizing functionality and simplicity. It's more than just a piece of furniture; it's a statement of style and practicality, ideal for creating your Scandinavian oasis.
Scandinavian-Style Lounge Chair
Scandinavian-style lounge chairs offer a perfect blend of comfort and minimalist design, making them essential fixtures in any small apartment. With their clean lines and ergonomic shapes, these chairs provide superior support for relaxation while adding a touch of elegance to your space.
Crafted from natural materials like wood and upholstered in soft, neutral fabrics, they create a cozy atmosphere that encourages you to unwind.
Popular models, such as Hans J. Wegner's iconic 'Papa Bear' chair, showcase functionality without sacrificing style, serving as statement pieces within your minimalist decor. The muted color palettes enhance the light and airy feel of your room, ensuring versatility that complements various interior styles.
Moreover, many Scandinavian lounge chairs feature removable covers or interchangeable fabrics, which make maintenance a breeze and allow for seasonal updates. This aligns perfectly with the principles of sustainability inherent in Scandinavian design.
By choosing a lounge chair that reflects these values, you not only elevate your living space but also contribute to a more eco-friendly lifestyle.
Scandinavian-Style Coffee Table
Choosing a coffee table with clean lines and natural materials can instantly elevate the aesthetic of your small apartment while maximizing functionality. Look for options crafted from light-colored woods like ash or birch, which not only brighten your space but also align with the Scandinavian design ethos of minimalism.
Multifunctional coffee tables are a must-have; consider those with hidden compartments or shelving. They help you keep clutter at bay while providing essential storage. You'll appreciate how these designs seamlessly blend form and function, making the most of your compact living area.
To enhance warmth and comfort without compromising the minimalist vibe, incorporate textured elements like a woven or chunky knitted table runner. This adds a cozy touch that complements the simplicity of your coffee table.
Lighting Ideas

When it comes to lighting in your Scandinavian oasis, the right choices can transform your small space.
Consider soft pendant lights overhead and wall-mounted sconces to create a welcoming ambiance.
Adding natural light-reflecting fixtures and warm fairy lights can enhance the cozy vibe you're aiming for.
Soft Pendant Lights Overhead
Soft pendant lights can instantly transform your small apartment, creating a warm and inviting atmosphere that enhances the cozy aesthetic central to Scandinavian design. When selecting pendant lights, consider those made from natural materials like wood or rattan. These organic elements not only add texture but also align beautifully with the minimalist ethos of Scandinavian decor.
Adjustable pendant lights can provide the flexibility you need for both task and ambient lighting in multifunctional spaces. This adaptability is especially important in small apartments where every square inch counts. Aim for a neutral color palette—whites, creams, or soft pastels—to maintain that light and airy feel that Scandinavian design champions.
Don't forget to layer your lighting! Combining pendant lights with other sources like floor lamps or wall sconces can create a balanced lighting scheme that enhances the overall serenity of your space.
By thoughtfully incorporating soft pendant lights, you'll enhance the cozy, inviting atmosphere that makes your small apartment feel like a true Scandinavian oasis.
Wall-Mounted Sconces for Ambiance
Wall-mounted sconces can effortlessly elevate the ambiance of your small apartment, providing both style and functionality while saving precious floor space. These fixtures are perfect for minimalist designs, helping you maintain a clean and uncluttered look. With their ability to provide ambient lighting, sconces enhance the cozy atmosphere that's central to Scandinavian design, making your space warm and inviting.
When choosing sconces, consider models with adjustable arms or dimmable features. This versatility allows you to customize the lighting for different activities, whether you're reading a book or working on a project. To stay true to Scandinavian principles, look for designs that incorporate natural materials and light colors, such as wood or brushed metal. These elements not only reflect simplicity and functionality but also add a touch of elegance to your decor.
Strategically placing sconces at eye level can create a sense of openness and warmth. This thoughtful positioning helps illuminate darker corners, enhancing the overall aesthetic of your small apartment. By incorporating wall-mounted sconces, you'll transform your living space into a Scandinavian oasis filled with light and comfort.
Natural Light-Reflecting Fixtures
Natural light-reflecting fixtures play an essential role in enhancing the airy feel of your small apartment, making it a true Scandinavian oasis. To maximize this effect, opt for pendant lights with transparent shades. These allow natural light to flow freely, diffusing throughout your space and keeping it bright and inviting.
Pair these with wall sconces that feature warm-toned bulbs to create a cozy ambiance during darker hours, ensuring you don't overshadow the natural light.
Incorporating mirrors strategically across your room is another effective way to amplify brightness. Position them to reflect light fixtures and windows, creating a sense of openness that's synonymous with Scandinavian design.
Additionally, consider using floor lamps with adjustable heads. These versatile fixtures let you direct light where it's needed while maintaining a minimalist aesthetic.
Warm Fairy Lights Accents
To enhance the cozy atmosphere already created by natural light-reflecting fixtures, warm fairy lights can be the perfect accent in your small apartment. These lights promote the Danish concept of hygge, elevating relaxation and comfort.
Opt for energy-efficient LED fairy lights; they not only last longer but also support a sustainable lifestyle.
You can string fairy lights along walls, around windows, or drape them over furniture to add a whimsical touch while keeping with the minimalist aesthetic of Scandinavian design. Dimmable options are great, letting you adjust brightness to match your mood, whether you're working or unwinding after a long day.
Consider incorporating fairy lights into your plants or bookshelves. This adds warmth and visual interest without cluttering your space, perfectly aligning with the principles of functionality and simplicity.
Decorative Elements

To elevate your Scandinavian oasis, focus on key decorative elements that bring both style and comfort.
A handwoven wool throw blanket adds warmth, while a ceramic vase filled with wildflowers introduces a touch of nature.
Don't forget to hang framed nature-inspired wall art, which not only personalizes your space but also enhances the overall aesthetic.
Handwoven Wool Throw Blanket
Handwoven wool throw blankets effortlessly enhance your space with cozy texture and warmth, embodying the Scandinavian principle of comfort. These blankets add a tactile element that invites relaxation, making any seating area feel more inviting. With their natural insulating properties, they help regulate temperature, ensuring you stay comfortable throughout the year, whether it's a chilly winter evening or a cool summer night.
When choosing a wool throw, opt for neutral colors or subtle patterns to maintain a minimalist aesthetic. This approach allows your blanket to blend seamlessly with the light and airy palette typical of Scandinavian design. Handcrafted variations further elevate your decor, offering unique decorative elements that tell a story and add personality without overwhelming your space.
Investing in sustainable, ethically sourced wool throw blankets not only supports eco-friendly practices but also aligns with the Scandinavian focus on natural materials. By incorporating these throws into your small apartment, you're not just enhancing your decor; you're embracing a lifestyle that values comfort, sustainability, and style.
Ceramic Vase With Wildflowers
Incorporating a ceramic vase with wildflowers adds a touch of natural elegance to your Scandinavian-inspired apartment, enhancing the cozy and inviting atmosphere.
The simple design of a ceramic vase serves as a striking focal point, harmonizing beautifully with the minimalist aesthetic that defines Scandinavian decor.
Wildflowers, with their organic forms and vibrant colors, introduce a sense of warmth that complements the hygge lifestyle. This combination creates a lovely contrast against your apartment's neutral color palette, drawing attention without overwhelming the space.
When you choose locally-sourced or handmade ceramic vases, you not only embrace sustainability but also add unique character to your decor, aligning perfectly with the Scandinavian principle of using natural materials.
To maximize the visual impact of the wildflowers, place the vase in well-lit areas, such as near windows. This encourages a connection to nature, promoting relaxation in your small apartment.
Plus, the gentle movement of the flowers in sunlight can create a calming ambiance, enhancing your overall sense of well-being. Embrace this decorative element to transform your space into a serene oasis that reflects the beauty of nature.
Framed Nature-Inspired Wall Art
Framed nature-inspired wall art transforms your small apartment into a tranquil retreat, perfectly reflecting Scandinavian design's emphasis on a seamless connection to the outdoors. By incorporating artwork that features natural landscapes, botanical illustrations, or serene wildlife, you enhance the calming atmosphere and add visual interest to your minimalist space.
When selecting frames, opt for materials like wood or bamboo to complement your decor and maintain a cohesive look. This choice not only aligns with the Scandinavian aesthetic but also underscores the organic theme present in nature-inspired art.
Consider arranging your pieces in a gallery wall format, creating a focal point that draws the eye while maximizing vertical space—especially beneficial in smaller apartments. A well-planned arrangement can make the room feel more expansive and curated.
To guarantee harmony within your space, use a neutral color palette for the artwork. This will help the pieces blend effortlessly with the soft tones of your walls and other decor, enhancing the airy and light feel you desire.
With these thoughtful touches, your apartment will embody the serenity and beauty of a Scandinavian oasis.
Flooring

When choosing flooring for your Scandinavian oasis, you'll want to focus on options that enhance light and space.
Light ash wood planks, soft beige cork, and reclaimed white oak floorboards can all contribute to a bright, airy atmosphere while adding character.
Each choice not only supports the aesthetic but also aligns with the principles of sustainability and practicality.
Light Ash Wood Planks
Light ash wood planks offer a durable and stylish flooring option that enhances the spacious feel of your small apartment while reflecting natural light.
Their pale hue creates a bright and airy atmosphere, making your living space feel larger than it is. The subtle grain pattern adds a touch of elegance and warmth, perfectly aligning with the minimalist aesthetic of Scandinavian design.
These planks are ideal for high-traffic areas, as they're known for their durability and resistance to wear. You won't have to worry about scuffs or scratches disrupting the beauty of your flooring. Plus, maintaining light ash wood is simple; regular sweeping and an occasional damp mop will keep it looking fresh and clean.
If you're eco-conscious, you'll appreciate that light ash wood planks can be sourced sustainably, which aligns with modern Scandinavian living values. By choosing this flooring, you're not just investing in style and practicality; you're also making a choice that reflects your commitment to the environment.
Embrace the warmth and sophistication of light ash wood planks, and transform your small apartment into a Scandinavian oasis.
Soft Beige Cork Flooring
Soft beige cork flooring not only complements the airy feel of light ash wood planks but also enhances the cozy atmosphere typical of Scandinavian design. This eco-friendly option offers excellent natural insulation, which helps regulate temperatures in your small apartment and can even reduce your energy costs.
You'll appreciate the textured surface beneath your feet, providing a warm and comfortable feel that aligns perfectly with the inviting nature of Scandinavian interiors. Plus, cork is a hypoallergenic material that resists mold and mildew, making it a healthy choice for urban living spaces often plagued by pollution.
Another benefit is its natural sound-absorbing properties, which create a serene, tranquil oasis amidst the hustle and bustle of city life. The neutral beige tone of cork flooring seamlessly fits into a minimalist aesthetic, allowing you to experiment with versatile decor and furniture arrangements that reflect Scandinavian design principles.
Reclaimed White Oak Floorboards
Reclaimed white oak floorboards bring a sustainable charm to your small apartment, infusing it with unique character and a rich history. Choosing this flooring option not only reduces waste but also enhances your space with its natural grain and light color, creating a bright and airy atmosphere that perfectly complements Scandinavian design aesthetics.
These floorboards are durable and resistant to wear, making them ideal for high-traffic areas in your home. Plus, they're easy to maintain, allowing you to enjoy your oasis without constant upkeep. By opting for reclaimed materials, you contribute to eco-friendly living, minimizing the demand for new resources and helping to preserve forests for future generations.
White oak's versatility also means it can seamlessly blend with various textures and colors. This provides a neutral base that adapts beautifully to seasonal decor changes, ensuring your apartment feels fresh and inviting year-round.
With reclaimed white oak floorboards, you'll create a stunning foundation that reflects your style while embracing sustainability. So, invest in this timeless flooring choice and watch your small apartment transform into a Scandinavian haven.
Conclusion
Transforming your small apartment into a Scandinavian oasis is all about embracing simplicity and functionality.
By incorporating key elements like clean lines and natural materials, choosing essential fixtures and furniture, and adding thoughtful lighting and decorative touches, you can create a serene space.
Don't forget to pay attention to flooring, as it sets the foundation for your aesthetic.
With these tips, you'll enjoy a cozy, stylish retreat that reflects the calm and beauty of Scandinavian design.
- About the Author
- Latest Posts
Introducing Ron, the home decor aficionado at ByRetreat, whose passion for creating beautiful and inviting spaces is at the heart of his work. With his deep knowledge of home decor and his innate sense of style, Ron brings a wealth of expertise and a keen eye for detail to the ByRetreat team.
Ron’s love for home decor goes beyond aesthetics; he understands that our surroundings play a significant role in our overall well-being and productivity. With this in mind, Ron is dedicated to transforming remote workspaces into havens of comfort, functionality, and beauty.
Eclectic Style
Apartment Envy: The Eclectic Spaces That'll Make You Want to Move!
Curate your dream apartment with vibrant eclectic spaces that blend unique styles and textures, sparking your desire to transform your living environment!
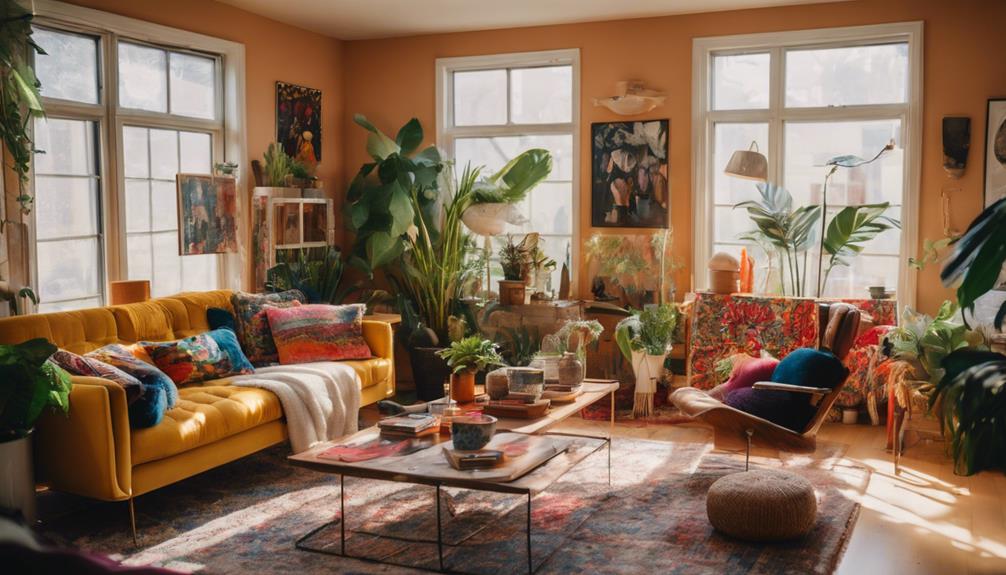
If you're feeling some apartment envy, eclectic spaces might be your answer. They blend vibrant colors, layered textures, and unique materials, creating a warm and inviting atmosphere. Imagine vintage finds paired with bold textiles that reflect your style. Look for furniture that combines function and charm, like mid-century coffee tables and sleek Scandinavian chairs. Lighting plays a key role, too—choose dimmable pendant lights or chic wall sconces for ambiance. With eye-catching decor and customizable flooring options, these spaces truly inspire you to rethink your home. There's so much more to explore in crafting your perfect eclectic retreat!
Key Elements
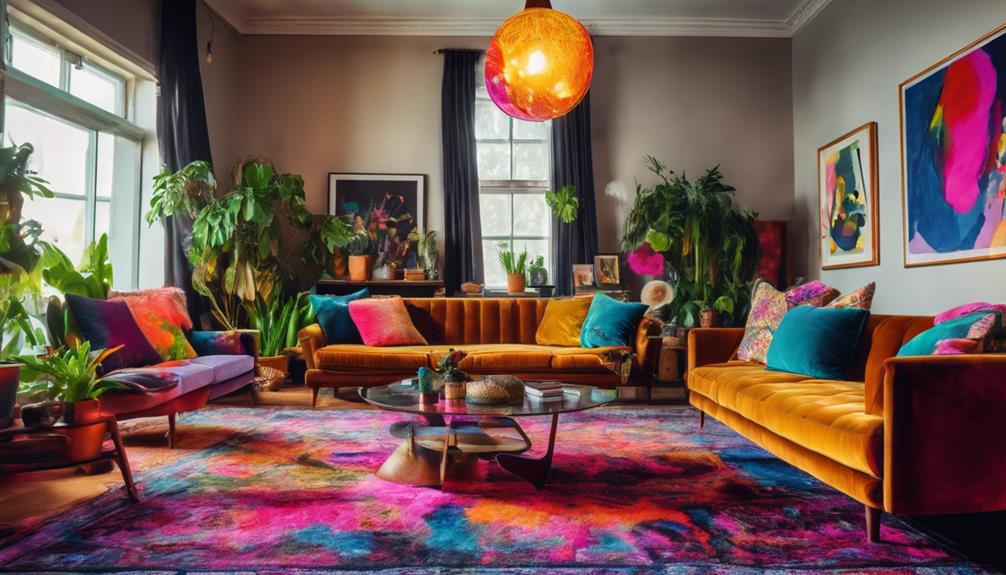
When creating your ideal eclectic space, pay close attention to the key elements: color scheme, materials, and textures.
A harmonious color palette can set the mood, while varied materials and layered textures add depth and comfort.
Color Scheme
A well-chosen color scheme transforms your apartment into a harmonious and inviting space. By opting for a limited color palette of two to three similar hues, you create visual harmony and foster a calming atmosphere. Warm combinations like cream, chocolate, and tan can evoke feelings of coziness, making your living area feel more comfortable and welcoming.
Consistency in your color choices throughout the apartment enhances cohesion, preventing visual clutter and allowing each area to flow seamlessly into the next.
If you want to inject some modern flair, consider incorporating bold colors and patterns. They can make your space feel eclectic and striking, appealing to those who crave a vibrant aesthetic.
Don't forget the strategic use of accent colors. These pops of color can draw attention to specific decor elements, adding depth and interest to your design scheme.
Materials
Materials are essential in crafting an eclectic apartment, as they define both the aesthetic and functionality of your space. When you combine various materials, you create visual interest and warmth that draws people in. Incorporating natural elements like wood and stone enhances the organic feel, making your home feel lively and inviting.
Embrace vintage and thrifted items; they add character and charm while promoting sustainability. You'll find that these unique pieces tell a story, enriching your design with history. Bold textiles are another key element—think patterned rugs and colorful throw pillows. They unify your space and allow you to express your personal style through color and design.
Don't shy away from mixing materials like metal, glass, and ceramics. This dynamic contrast will reflect your individuality and enhance the eclectic vibe of your apartment.
Textures
Textures play an essential role in transforming your apartment into a warm and inviting retreat. By layering various textures through textiles like throw blankets and plush pillows, you can greatly enhance the coziness of your living space. These elements not only offer comfort but also create a dynamic environment that feels personalized and lived-in.
Consider incorporating textured paint options, such as lime washing or plaster, to add depth and visual interest to your walls. This technique can make a considerable difference in the overall atmosphere. Plush rugs also contribute to comfort underfoot while serving as focal points that tie together the room's design.
When you mix textiles in similar colors, you achieve a cohesive look that adds dimension and richness to your decor. Strategically placing textured items throughout your space fosters engagement, inviting guests to appreciate the layered design.
Whether it's a chunky knit throw or a soft velvet cushion, each texture invites touch and interaction, enhancing the overall appeal of your home. Embrace these textures to create a space that not only reflects your style but also wraps you in warmth and comfort.
Essential Fixtures and Furniture

When you're choosing essential fixtures and furniture, think about how each piece can elevate your space.
A vintage mid-century coffee table can add charm, while sleek Scandinavian dining chairs provide both style and comfort.
Don't overlook the practicality of an industrial pipe bookshelf, which can showcase your favorite books and decor while maximizing your apartment's layout.
Vintage Mid-Century Coffee Table
Vintage mid-century coffee tables embody a timeless elegance, showcasing unique designs that elevate any living space with their clean lines and organic shapes.
These stunning pieces, originating from the design movements of the 1950s and 1960s, are highly sought after for their blend of functionality and aesthetics.
Crafted from rich hardwoods like walnut and teak, these coffee tables not only provide visual appeal but also guarantee durability and longevity. Many of them come with innovative storage solutions, such as hidden compartments or integrated shelving, making them practical additions to your living area.
As retro decor gains popularity, the market for vintage mid-century coffee tables continues to grow, with prices varying based on condition, rarity, and designer provenance.
Incorporating one of these tables can transform your living room into a stylish focal point, seamlessly blending with various decor styles—from eclectic to minimalist.
Sleek Scandinavian Dining Chairs
If you appreciate the timeless appeal of vintage furniture, you'll find that sleek Scandinavian dining chairs offer a perfect blend of minimalist design and ergonomic comfort that enhances any dining space.
These chairs feature clean lines and a focus on functionality, making them ideal not just for dining but also for workspaces.
Crafted from sustainable materials, sleek Scandinavian dining chairs reflect a commitment to eco-friendly practices and durability. You'll often see a mix of wood, metal, and textile components in their designs, adding both texture and style.
Their versatility allows them to seamlessly integrate into various decor styles, whether your space leans modern or eclectic.
Brands like Muuto and Hay have gained popularity for their emphasis on craftsmanship and innovation, providing a range of Scandinavian dining chairs available in multiple colors to suit your taste.
The light colors and natural finishes characteristic of Scandinavian design contribute to a bright, airy feel in your dining area, promoting a sense of well-being and openness.
With these chairs, you're not just elevating your dining experience; you're also enriching the entire aesthetic of your home.
Industrial Pipe Bookshelf
An industrial pipe bookshelf combines rugged charm with practicality, making it an essential fixture for maximizing storage in any space. Crafted from metal pipes and reclaimed wood, this unique piece not only serves as a striking focal point but also efficiently utilizes vertical space. If you're living in a small apartment, an industrial pipe bookshelf allows you to store your books and decorative items without taking up too much floor area.
These bookshelves adapt well to various decor styles, from modern to rustic, making them versatile additions to your eclectic home. Many designs feature adjustable shelves, letting you customize the arrangement to suit different book sizes and personal preferences. This flexibility enhances your home decor while ensuring your bookshelf remains functional.
You can find industrial pipe bookshelves as DIY kits, which encourage creativity and personalization, or purchase ready-made pieces from specialty furniture retailers. Whichever route you choose, incorporating an industrial pipe bookshelf into your living space won't only enhance your storage capabilities but also elevate your room's aesthetic appeal.
Don't be surprised if your friends start asking where they can find one of their own!
Lighting Ideas

When it comes to lighting, you can transform your apartment into a cozy haven with the right choices.
Consider adding pendant lights with warm bulbs, soft LED floor lamps, and vintage table lamps with shades to create a layered look.
Don't forget chic wall sconces with dimmers to adjust the mood whenever you need!
Pendant Lights With Warm Bulbs
Pendant lights with warm bulbs instantly transform your space into a cozy retreat, enhancing the ambiance while adding a touch of style. Typically around 2700K, these lights create a warm and inviting atmosphere, perfect for making any room feel more welcoming. You can use pendant lights not just for illumination but also as statement pieces that draw attention to specific areas or decor, adding character to your living space.
Consider choosing pendant lights with dimmable capabilities; this way, you can easily adjust the brightness to suit different occasions, whether you're hosting a dinner party or enjoying a quiet evening at home. Their versatility allows them to complement a variety of styles—be it vintage or modern—making them ideal for eclectic decor that reflects your personal aesthetic.
Strategically placing pendant lights over dining tables or kitchen islands serves both functional and decorative purposes in smaller living spaces. With the right choice, these lights will enhance your home's cozy atmosphere while showcasing your unique style.
Soft LED Floor Lamps
Soft LED floor lamps brighten up your space while offering energy-efficient lighting that's both stylish and practical. They consume up to 80% less electricity than traditional incandescent bulbs, making them a sustainable choice for your home.
With adjustable brightness settings, you can easily create a cozy atmosphere tailored to your needs, whether you're unwinding with a book or hosting friends.
These lamps come in a variety of modern designs that can seamlessly fit into your eclectic decor. From minimalist styles to those with vintage charm, soft LED floor lamps enhance the aesthetic appeal of any room.
Their soft lighting not only reduces eye strain but also promotes relaxation, making them perfect for reading nooks or cozy corners.
Many models even incorporate smart technology, allowing you to control the lighting remotely via apps or voice commands. This added convenience and versatility make soft LED floor lamps an excellent addition to your home.
Vintage Table Lamps With Shades
Vintage table lamps with shades bring a distinct charm to your space, enhancing its character while providing functional lighting that complements your style.
These lamps reflect unique eras, from Art Deco to Mid-Century Modern, making them perfect for adding personality to any room. The interplay of light and shade creates a warm ambiance, ideal for cozy reading nooks or intimate dining areas.
When you incorporate vintage table lamps into your decor, you not only illuminate your home but also introduce pieces that serve as conversation starters. Each lamp tells a story, showcasing your personal history and style while adding a touch of nostalgia to contemporary interiors.
Layering vintage lamps with various shades allows for creative expression, letting you play with colors, patterns, and textures.
Plus, collecting vintage table lamps can be a sustainable choice; many are crafted from high-quality materials that stand the test of time, contrasting sharply with modern disposable options.
Chic Wall Sconces With Dimmer
Chic wall sconces with dimmers offer you the flexibility to create the perfect ambiance for any occasion while adding a stylish touch to your decor. With dimmer switches, you can easily adjust the lighting levels to suit your mood, whether you're hosting a dinner party or enjoying a quiet evening at home. These sconces soften harsh overhead lighting, making your space feel warm and inviting.
Modern designs often feature materials like brass, glass, or ceramic, ensuring that your chic wall sconces not only provide functional illumination but also serve as eye-catching decor elements. By incorporating these stylish fixtures, you can enhance the overall aesthetic of your room, complementing other decor pieces and elevating your space.
Additionally, dimmable sconces improve energy efficiency, allowing you to reduce electricity consumption by adjusting brightness according to your needs. This practical approach to lighting can transform the vibe of your apartment, making it a cozy haven you'll love to show off.
Decorative Elements

When it comes to decorative elements, a handcrafted ceramic vase can add a unique touch to your space.
Pair it with a geometric patterned throw pillow for a pop of visual interest, and don't forget to showcase those framed vintage travel postcards.
These pieces not only reflect your personality but also create a warm and inviting atmosphere in your apartment.
Handcrafted Ceramic Vase
Handcrafted ceramic vases bring a unique, artisanal flair to your home decor, showcasing the artist's creativity through distinctive glazes and textures. Each piece is a representation of the craftsmanship, with irregularities that make every vase one-of-a-kind. This uniqueness adds to an eclectic aesthetic, perfectly resonating with personalized living spaces.
When you incorporate a handcrafted ceramic vase into your decor, you're not just adding a decorative element; you're inviting conversation. Guests will appreciate the story behind the piece and the artistry involved, making it a focal point in your room. Whether you choose to fill it with fresh flowers or let it stand alone, its versatility enhances the overall ambiance.
Moreover, by supporting artisans through your purchases, you're promoting sustainable practices and bolstering local economies within the craft community. It's a meaningful way to enrich your home while embracing the beauty of handcrafted art.
Geometric Patterned Throw Pillow
Geometric patterned throw pillows instantly elevate your space, adding visual interest and serving as striking focal points in your decor. These pillows come in a variety of color schemes and shapes, making them an easy choice for any design style, whether modern or eclectic. By incorporating a few geometric patterned throw pillows, you can quickly transform your living room or bedroom into a vibrant oasis.
One of the best decorating hacks is to mix and match different patterns and textures. For instance, pairing textured velvet with a bold, graphic pattern can create depth and comfort in your seating area. This combination not only enhances aesthetics but also invites relaxation.
What's great about these decorative elements is their affordability and versatility. You don't need to commit to larger changes to create a home you love; a few carefully selected throw pillows can make all the difference.
They can create a sense of movement and dynamism, making your space feel more lively and inviting. So, go ahead and explore the world of geometric patterns—your cozy, stylish retreat awaits!
Framed Vintage Travel Postcards
Adding framed vintage travel postcards to your decor brings a personalized touch that complements the vibrant patterns of your throw pillows while sparking conversations about your adventures.
These unique decorative elements evoke nostalgia and wanderlust, making them perfect conversation starters in any living space.
You can easily source these postcards from thrift stores, flea markets, or online marketplaces, adding an affordable yet meaningful aspect to your home decor.
Displaying them in a gallery-style arrangement can create an eye-catching focal point that enhances the overall aesthetic of your room.
Incorporating postcards from various destinations reflects your personal travel experiences, infusing character and identity into your living space.
When you choose frames that complement the postcards' colors and themes, you elevate their visual impact, ensuring they blend harmoniously with your design scheme.
Whether you're a seasoned traveler or someone who simply appreciates the beauty of far-off places, framed vintage travel postcards will add warmth and charm to your home.
Flooring

When you're choosing flooring, think about how different materials can transform your space.
Reclaimed hardwood brings warmth, while cork flooring absorbs sound, making your apartment quieter.
If you prefer a modern vibe, textured concrete could be the stylish choice you need.
Reclaimed Hardwood for Warmth
Reclaimed hardwood flooring brings a unique warmth to your space, blending character and history with sustainable design choices. Sourced from salvaged wood, it provides a distinct aesthetic that new materials simply can't replicate. Each plank carries its own story, showcasing unique character through variations in color, texture, and grain.
Choosing reclaimed hardwood isn't just about looks; it's also an environmentally friendly decision. By reducing waste and minimizing the need for new lumber, you're contributing to sustainable building practices.
The durability of reclaimed hardwood is another significant advantage. Often sourced from older trees that have matured over decades, it's well-suited for high-traffic areas in your home.
When you install reclaimed hardwood flooring, you create a cozy atmosphere that complements a variety of design styles. Whether your space leans towards rustic charm or modern elegance, this flooring option enhances the overall warmth of your home.
You'll find that reclaimed hardwood not only elevates your aesthetic but also invites comfort, making it an excellent choice for anyone looking to add a touch of history and sustainability to their living space.
Cork Flooring for Sound Absorption
Cork flooring offers remarkable sound absorption, effectively reducing noise levels in your home by up to 50% compared to harder surfaces. This means you can enjoy a quieter living environment, free from the echoes and noise that often come with tile or hardwood floors. The unique cellular structure of cork acts as a natural sound absorber, compressing and expanding to dampen sound vibrations.
Not only does cork flooring enhance your acoustic comfort, but it's also a sustainable flooring option. Harvested from the bark of cork oak trees without harming the trees themselves, cork promotes environmental conservation while providing you with a stylish and functional surface.
In addition to its sound-dampening qualities, cork flooring is hypoallergenic, resistant to mold and mildew, and offers thermal insulation. This combination of benefits makes it ideal for homes with active lifestyles, especially if you have kids or pets.
You'll appreciate the comfortable underfoot experience cork provides, making your space feel cozy and inviting. So, if you're looking for a flooring solution that balances performance, sustainability, and comfort, cork flooring is definitely worth considering.
Textured Concrete for Modern Appeal
Textured concrete flooring brings a sleek, modern appeal to your apartment while offering unmatched durability and low maintenance. This flooring option fits perfectly within a modern aesthetic, providing a unique blend of style and practicality. You can customize your space with various techniques like stamping, polishing, or staining to create different visual effects.
One of the standout features of textured concrete is its low-maintenance nature. It resists stains and scratches, making it ideal for busy urban living where spills and wear are common. Plus, its excellent thermal mass helps regulate indoor temperatures, potentially lowering energy costs.
With a range of finishes available, from matte to glossy, textured concrete can seamlessly complement various decor styles. Whether you're aiming for a minimalist or industrial vibe, this flooring option enhances the overall ambiance of your home.
If you're looking to elevate your apartment's style while keeping maintenance effortless, textured concrete flooring is a fantastic choice. It perfectly balances beauty and functionality, making it a top contender for your next renovation.
Conclusion
If you're feeling that apartment envy, it's time to take inspiration from these eclectic spaces!
By incorporating unique fixtures and vibrant decor, you can transform your home into a stylish sanctuary.
Don't underestimate the power of lighting and flooring to elevate your vibe, either.
Embrace your creativity and make your space a true reflection of you.
With a few thoughtful changes, you'll love where you live and might just inspire others to feel the same!
- About the Author
- Latest Posts
Introducing Ron, the home decor aficionado at ByRetreat, whose passion for creating beautiful and inviting spaces is at the heart of his work. With his deep knowledge of home decor and his innate sense of style, Ron brings a wealth of expertise and a keen eye for detail to the ByRetreat team.
Ron’s love for home decor goes beyond aesthetics; he understands that our surroundings play a significant role in our overall well-being and productivity. With this in mind, Ron is dedicated to transforming remote workspaces into havens of comfort, functionality, and beauty.
-
 Vetted5 days ago
15 Best Fillers for Concrete Cracks – Expert Recommendations and Reviews
-

 Vetted7 days ago
15 Best Plants for Large Pots to Transform Your Outdoor Space
-
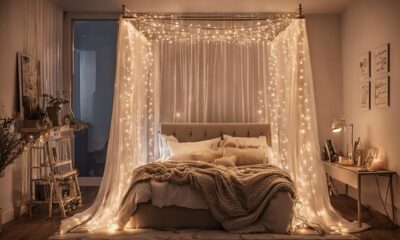
 Vetted6 days ago
15 Best Fairy Lights to Transform Your Space With Magical Illumination
-

 Vetted1 week ago
15 Best Folding Beds for Small Spaces – Space-Saving Solutions for Comfort and Convenience
-

 Vetted1 week ago
15 Best Waterproof Flooring Options for Your Bathroom – Ultimate Guide & Reviews
-

 Vetted2 weeks ago
15 Best Grocery Carts to Make Shopping a Breeze
-

 Vetted21 hours ago
15 Best Subfloor Options for Your Basement Renovation – Ultimate Guide
-
 Vetted3 weeks ago
15 Best Gravel for Driveway: The Ultimate Guide for a Durable and Stunning Entrance


