Christmas Decoration
How Make Christmas Decorations Out of Paper
2025

It’s that time of the year when we embellish our living spaces with holiday decor, and what could be a more delightful approach than making paper Christmas ornaments?
From delicate snowflakes to jolly Santa Clauses, the possibilities are endless when it comes to using this versatile material.
In this guide, we will explore various paper crafts that will add a touch of charm and holiday spirit to your living space.
Whether you're looking to create a whimsical paper garland or a traditional paper wreath, we have you covered.
So gather your scissors, glue, and colorful paper, and let's embark on a journey of crafting joy as we learn how to make beautiful Christmas decorations out of paper.
Key Takeaways
- Paper ornaments can be made by folding and cutting paper into intricate designs, such as snowflakes, ball ornaments, and origami shapes.
- Paper garlands can be created by looping strips of colorful paper together, cutting out snowflake designs, or making miniature Christmas tree shapes.
- Paper wreaths can be made using assorted paper with unique patterns and colors, and can be decorated with paper lanterns, candle holders, and personalized tags.
- Paper lanterns and candle holders add a whimsical and cozy touch to paper wreaths, creating a warm and festive ambiance.
Paper Ornaments
We love using paper to create beautiful and unique Christmas ornaments. Paper crafts are a fantastic way to add a personal touch to your holiday decorations. With just a few simple materials, you can make stunning ornaments that will impress your family and friends.
One popular paper ornament idea is the paper snowflake. These delicate designs are made by folding and cutting paper into intricate patterns. They can be hung on the tree or used as window decorations, adding a touch of elegance to any room.
Another great idea is the paper ball ornament. These can be made by folding and gluing strips of colored paper into a ball shape. You can mix and match different colors to create a festive and eye-catching display.
For those looking for a more unique twist, try making origami ornaments. Origami is the art of folding paper into various shapes. From stars to angels, there are endless possibilities for creating intricate and beautiful ornaments. You can even personalize them by writing messages or adding glitter for a touch of sparkle.
Paper Garland

As we continue exploring the world of paper Christmas decorations, let's now turn our attention to the enchanting art of paper garland. Paper garlands are a versatile and cost-effective way to add a festive touch to any holiday setting. Whether you hang them on your Christmas tree, drape them across a mantel, or use them to decorate a staircase, paper garlands can instantly transform any space into a winter wonderland.
Here are three ideas for creating your own paper garland:
- Classic Paper Chain Garland: This traditional paper garland is simple yet timeless. Cut strips of colorful paper and loop them together to form a chain. You can experiment with different colors and patterns to match your holiday theme.
- Snowflake Garland: Add a touch of elegance to your holiday decor with a snowflake garland. Cut out intricate snowflake designs from white paper and string them together. Hang them near a window or above a fireplace for a whimsical effect.
- Miniature Christmas Tree Garland: Create a festive garland using miniature paper Christmas trees. Cut out tree shapes from green paper and decorate them with glitter, sequins, or tiny ornaments. Attach them to a string and hang them on your tree or along a wall for a charming display.
Paper garlands are a fun and creative way to bring holiday cheer to your home. So gather your supplies and get ready to enjoy some holiday crafting!
Paper Wreath
Now let's talk about creating a beautiful paper wreath for your Christmas decorations.
To make this festive piece, you'll need some colored paper, scissors, glue, and a wreath form.
We'll guide you through each step of the process, from cutting out the paper leaves to attaching them onto the wreath form.
Materials Needed
To create a stunning paper wreath, gather the following materials:
- Assorted paper: Look for paper with unique patterns and colors to add visual interest to your wreath. Consider using scrapbook paper, wrapping paper, or even old book pages for a vintage touch.
- Scissors: Invest in a good pair of scissors to ensure clean and precise cutting. You'll need them to cut out various shapes and designs from the paper.
- Glue or adhesive: Use a strong glue or adhesive to secure the paper pieces together and create your wreath. A glue stick or craft glue should work well for this project.
Step-By-Step Instructions
Let's dive into the step-by-step instructions for creating a beautiful paper wreath. This paper craft is a perfect way to add a festive touch to your holiday decor. Here's what you'll need:
| Materials | Tools |
|---|---|
| Colored paper | Scissors |
| Glue or tape | Pencil |
| Ribbon or string | Ruler |
- Start by cutting out strips of colored paper. You can use different shades of green for a traditional wreath or get creative with other colors.
- Take one strip of paper and form a loop, securing the ends with glue or tape. Repeat this step with the remaining strips.
- Arrange the loops in a circular shape, overlapping them slightly to create a wreath. Use glue or tape to hold them together.
- Cut out decorative shapes from colored paper, such as holly leaves or snowflakes.
- Glue or tape the decorative shapes onto the wreath, adding a festive touch.
- Attach a ribbon or string to the top of the wreath for hanging.
There you have it! A beautiful paper wreath for your holiday crafting.
Decorating Ideas
As we explore the creative possibilities of decorating your paper wreath, let's discover some delightful ideas to make your holiday decor truly unique and festive.
- Paper Lanterns: Add a touch of whimsy to your paper wreath by incorporating paper lanterns. Cut out lantern shapes from colorful paper and attach them to the wreath using string or ribbon. You can even add battery-operated tea lights inside the lanterns to create a warm and cozy glow.
- Paper Candle Holders: To give your wreath a cozy and inviting feel, create paper candle holders. Cut out cylindrical shapes from sturdy paper and fold them into holders. Insert battery-operated tea lights or small LED candles into the holders and secure them to the wreath with glue or tape. These candle holders will add a soft and warm ambiance to your holiday decor.
- Personalized Tags: To make your paper wreath truly unique, create personalized tags. Cut out small tag shapes from decorative paper and write the names of your family members or guests on them. Attach the tags to the wreath using ribbon or string, and voila! Your wreath becomes a personalized piece of art that will bring joy and warmth to your holiday celebrations.
Paper Snowflakes

Let's grab a sheet of paper and start cutting!
When it comes to making paper snowflakes, the possibilities are endless. We can use scissors to create intricate designs or fold the paper multiple times to achieve a symmetrical pattern.
Cutting the Paper
To create beautiful paper snowflakes, we start by carefully folding the paper into intricate patterns. Once the paper is folded and secured in place, it's time to bring out the paper cutting tools.
Here are three essential techniques and tools to help you achieve stunning results:
- Scissors: Sharp, precision scissors are crucial for cutting clean and precise lines on the folded paper. Make sure to choose a pair that's comfortable to hold and maneuver.
- Craft knife: For more intricate designs, a craft knife can be used to make delicate cuts or add intricate details. Remember to always exercise caution and use a cutting mat to protect your work surface.
- Paper punch: Paper punches come in various shapes and sizes, allowing you to create uniform patterns effortlessly. Simply align the punch with the folded paper, press down, and release to create perfectly shaped cutouts.
With these paper cutting techniques and tools, you'll be able to transform ordinary sheets of paper into stunning snowflake decorations for the holiday season.
Designing Unique Patterns
Once we have mastered the art of cutting paper and have become comfortable with the various tools and techniques, we can now move on to the exciting task of designing unique patterns for our paper snowflakes. Creating our own designs allows us to add a personal touch to our Christmas decorations and showcase our creativity. To get started, let's brainstorm some ideas for unique designs and patterns. Here's a helpful table to organize our thoughts:
| Design Ideas | Description | Inspiration |
|---|---|---|
| Geometric | Incorporate clean lines and shapes for a modern look | Architecture, tessellations |
| Nature-inspired | Mimic the intricate patterns found in leaves or flowers | Botanical illustrations, photographs |
| Whimsical | Let your imagination run wild with fun and playful designs | Children's illustrations, fantasy artwork |
Paper Santa Claus

We can create a delightful Paper Santa Claus using just a few simple materials and a touch of creativity. Here's how you can make your own Santa Claus decoration:
- Gather the materials:
- Red and white construction paper
- Scissors
- Glue or tape
- Start by cutting out a large circle from the red construction paper. This will be Santa's body. Next, cut out a smaller circle from the white construction paper and glue it onto the red circle to create Santa's face.
- Now it's time to create Santa's iconic hat. Cut out a triangle shape from the red construction paper and fold it in half to form the hat. Attach it to the top of Santa's face using glue or tape.
- To complete Santa's costume, cut out two small rectangles from the white construction paper and glue them onto the bottom of Santa's face to create his beard. You can also add a small rectangle for his mustache.
With these simple steps, you can create your very own Paper Santa Claus decoration. Hang it on your Christmas tree or display it on a shelf to add a festive touch to your holiday decor.
Paper Christmas Tree

After creating your adorable Paper Santa Claus decoration, let's move on to the next festive project: making a stunning Paper Christmas Tree. Decorating your home with a paper Christmas tree isn't only budget-friendly, but it also adds a touch of charm to your holiday decor. With a few simple folding techniques, you can create a beautiful tree that will impress your family and friends.
To get started, gather the following materials:
- Green construction paper or cardstock
- Scissors
- Glue stick
- Decorative items (such as glitter, sequins, or stickers)
- Optional: a small cardboard or paper tube for the trunk
Once you have your materials ready, follow these steps to make your paper Christmas tree:
- Cut the construction paper or cardstock into progressively smaller squares, with each square being slightly smaller than the one before it. You'll need at least four or five squares.
- Take the largest square and fold it in half diagonally to form a triangle. Then, fold it in half diagonally again to make a smaller triangle.
- Open up the triangle and apply glue to one side. Fold the triangle back together, pressing firmly to ensure the glue sticks.
- Repeat steps 2 and 3 with the remaining squares, making each triangle slightly smaller than the previous one.
- Once all the triangles are folded and glued, stack them on top of each other, starting with the largest triangle at the bottom and ending with the smallest at the top. If desired, you can glue a small cardboard or paper tube to the bottom triangle to serve as the tree trunk.
- Decorate your paper Christmas tree with glitter, sequins, or stickers. Get creative and let your imagination run wild!
Paper Stockings
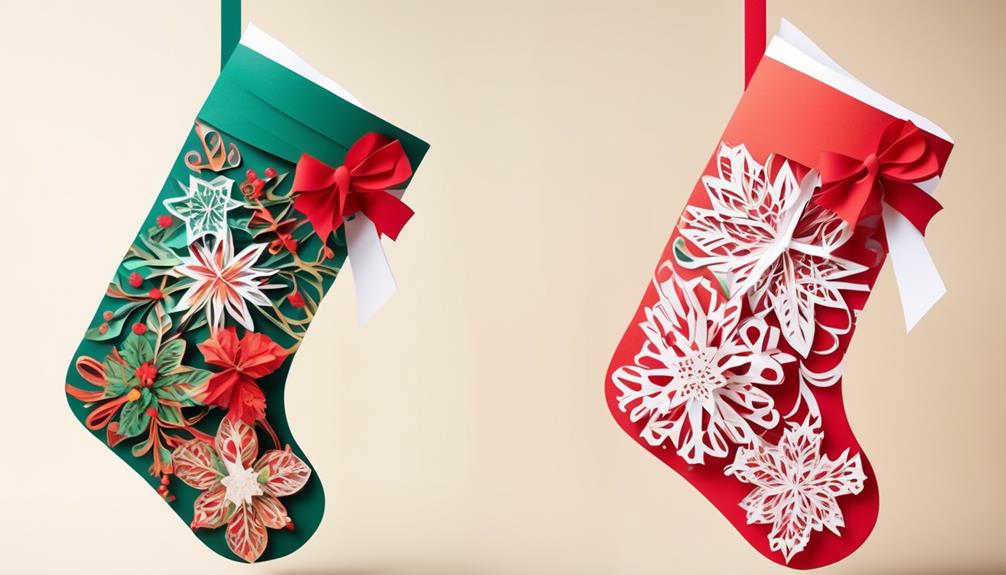
As we delve into the charming world of Christmas decorations made from paper, let's now explore the delightful craft of crafting paper stockings. Paper stockings are a fun and creative way to add a festive touch to your holiday décor.
Here are three key ideas to keep in mind when making paper stockings:
- Paper stocking patterns: Begin by finding or creating a paper stocking pattern. You can easily find printable templates online or draw your own design. Consider choosing patterns that reflect your personal style or match the overall theme of your Christmas decorations.
- Alternative stocking materials: While paper is the main material for crafting paper stockings, you can also incorporate other materials to enhance their appearance. For example, you can use glitter, sequins, or ribbons to add a touch of sparkle or texture to your stockings. Get creative and experiment with different materials to make your stockings truly unique.
- Personalization: One of the best things about making paper stockings is the opportunity to personalize them. Use markers, paints, or colored pencils to add names, initials, or festive designs to each stocking. This will make them even more special and meaningful.
Paper Gift Tags

Crafting paper gift tags is a simple and enjoyable way to add a personal touch to your holiday presents. Paper crafts are a popular choice for DIY projects, and gift tags are no exception. Not only are they easy to make, but they also allow you to express your creativity and customize each tag to fit the recipient's style.
To start making your own paper gift tags, gather your materials. You'll need colored or patterned paper, scissors, a hole punch, and some twine or ribbon. You can also use decorative punches, stamps, or stickers to add extra flair to your tags.
Next, cut your paper into tag shapes. You can make them rectangular, square, or even create unique shapes like hearts or stars. Once you have your desired shapes, punch a hole at the top of each tag for the twine or ribbon to go through.
Now comes the fun part – decorating your tags! Use markers, pens, or stamps to write the recipient's name or a festive message on each tag. You can also add additional decorations like glitter, stickers, or washi tape to make them even more special.
Finally, thread your twine or ribbon through the hole and tie it securely. Your paper gift tags are now ready to be attached to your presents!
Crafting paper gift tags is a fun and creative way to personalize your holiday gifts. With just a few simple materials and a little bit of time, you can make unique tags that are sure to impress your loved ones. So, why not give it a try and add an extra special touch to your presents this year?
Paper Advent Calendar
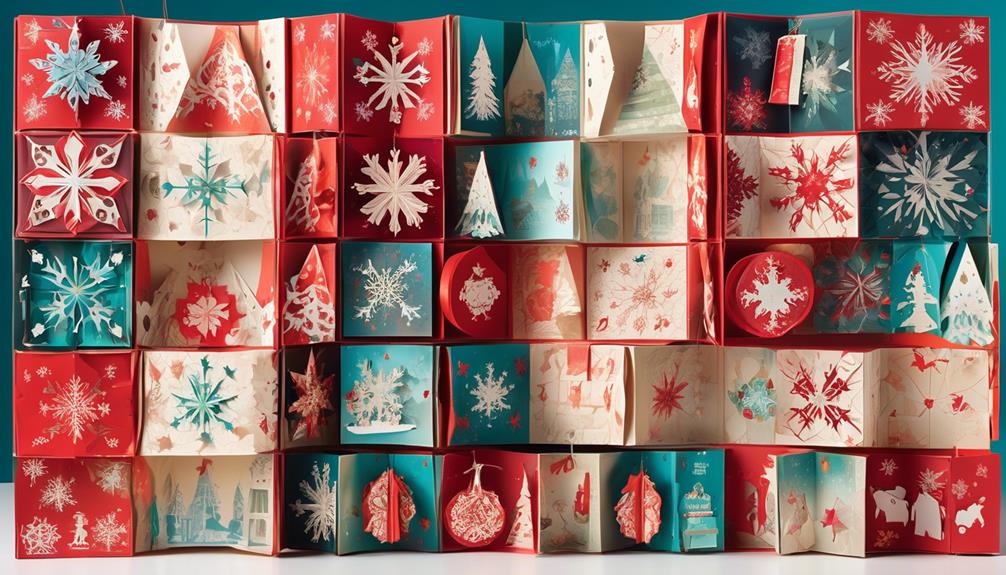
To create a festive countdown to Christmas, a paper Advent calendar is a delightful DIY project that can be enjoyed by both children and adults. It not only adds a touch of charm to your holiday decor but also brings a sense of anticipation as each day gets closer to Christmas.
Here are three simple steps to create your own paper Advent calendar:
- Gather your materials: Start by gathering all the necessary supplies for your project. You'll need colored paper or cardstock, scissors, glue or tape, markers or pens, and a ruler. You can also get creative and add embellishments like stickers, glitter, or ribbon to make your calendar even more festive.
- Design your calendar: Use your creativity to design the layout of your Advent calendar. You can create a traditional calendar with 24 numbered squares, or you can try a more unique design like a Christmas tree or a Santa Claus shape. Make sure to leave enough space for small pockets or envelopes to hold treats or small surprises for each day.
- Assemble and decorate: Cut out your chosen design and assemble the calendar using glue or tape. Add the numbers to each pocket or envelope, and decorate the calendar with markers, stickers, or any other embellishments you desire. Hang it on a wall or door, and enjoy the excitement of opening a new surprise every day leading up to Christmas.
Creating a paper Advent calendar is a fun and engaging way to count down the days until Christmas. It's a perfect project for paper crafts enthusiasts and DIY lovers. Get started on your own Advent calendar and make the holiday season even more special.
Frequently Asked Questions
Can I Use Any Type of Paper for Making Paper Ornaments?
We can use a variety of paper types to make paper ornaments, such as colored construction paper, scrapbook paper, or even old newspaper. Additionally, alternative materials like cardstock or tissue paper can also be used for unique and creative decorations.
How Can I Make a Paper Garland Without a Sewing Machine?
We can make a paper garland without a sewing machine using alternative materials like glue or tape. Different techniques, such as folding, cutting, and stringing, can be used to create a festive and handmade decoration.
What Are Some Creative Ways to Display a Paper Wreath?
We have found some creative ways to display a paper wreath. One idea is to hang it on a wall using adhesive hooks. Another option is to attach it to a ribbon and hang it on a door. For alternative materials, consider using recycled magazines or colored cardstock.
Can I Use Regular Printer Paper to Make Paper Snowflakes?
Yes, you can use regular construction paper to make paper snowflakes. It's a great way to add a personal touch to your holiday decor. Additionally, colored tissue paper is perfect for making vibrant paper ornaments.
How Can I Add a Personal Touch to My Paper Santa Claus Decorations?
To add a personal touch to our paper Santa Claus decorations, we can get creative with unique designs. By incorporating different colors, patterns, and embellishments, we can make our ornaments stand out and truly reflect our own style and personality.
Conclusion
Create beautiful and budget-friendly Christmas decorations with just paper!
From whimsical ornaments to stunning garlands, paper crafts offer endless opportunities for creativity. Let your imagination soar as you fold, cut, and shape paper into snowflakes, Santa Claus, and even a Christmas tree.
Hang paper stockings and adorn gifts with handmade tags. And don't forget the excitement of counting down the days with a paper Advent calendar.
Transform your home into a festive wonderland with these simple yet stunning paper creations.
Joyfully embrace the magic of Christmas!
- About the Author
- Latest Posts
Introducing Ron, the home decor aficionado at ByRetreat, whose passion for creating beautiful and inviting spaces is at the heart of his work. With his deep knowledge of home decor and his innate sense of style, Ron brings a wealth of expertise and a keen eye for detail to the ByRetreat team.
Ron’s love for home decor goes beyond aesthetics; he understands that our surroundings play a significant role in our overall well-being and productivity. With this in mind, Ron is dedicated to transforming remote workspaces into havens of comfort, functionality, and beauty.
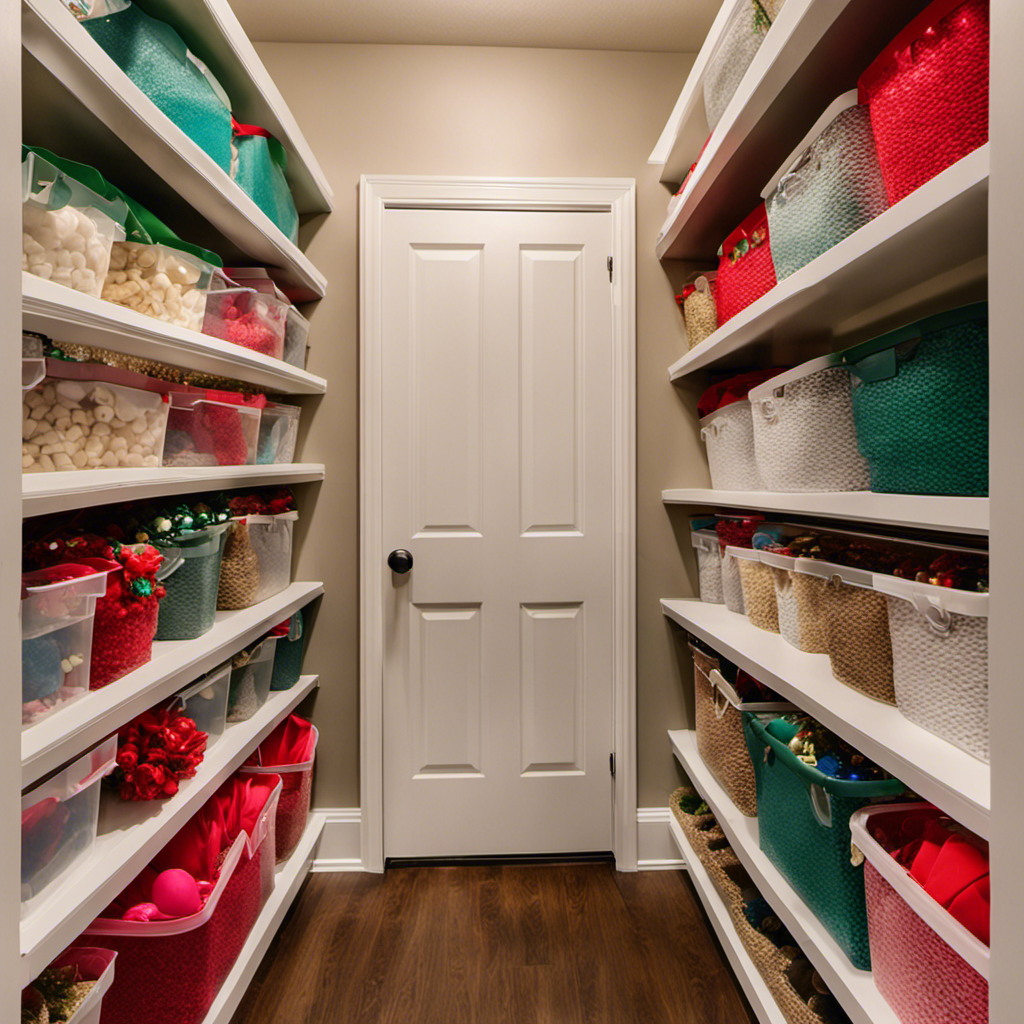
While standing in my cluttered apartment, surrounded by boxes of holiday decorations, I come to the realization that I need to come up with a plan. It is now time to take on the challenging task of organizing and storing all of this festive decor until next year.
But where do I start? With limited storage space, I need to get creative. In this article, I will share practical tips and tricks on how to efficiently store holiday decor in your apartment.
From decluttering to utilizing vertical space, I’ve got you covered. Let’s dive in and make this storage process a breeze.
Key Takeaways
- Measure available storage space and create a list of items that can fit in each area.
- Utilize under bed space and invest in storage solutions to maximize storage options.
- Organize items by category and use storage containers to keep items grouped together.
- Use clear plastic bins, label each bin, and stack them vertically to maximize space.
Assess Your Storage Space
You’ll need to take a look at how much storage space you have available in your apartment. Assessing your storage needs is crucial to effectively store your holiday decor.
Start by measuring the available closet space, shelves, and cabinets. Take note of the dimensions and make a list of what items can fit into each space.
If you find that you’re running out of storage options, don’t forget to utilize the under bed space. Invest in under bed storage containers or vacuum-sealed bags to store your seasonal items. These containers are perfect for stashing away wreaths, ornaments, and other decorations.
Sort and Declutter
When it comes to organizing and decluttering, there are three key points to keep in mind:
-
Organizing by category: By organizing items into categories such as clothing, books, or kitchen supplies, it becomes easier to find and access what you need.
-
Utilizing storage containers: Using storage containers, such as bins or baskets, helps to keep items grouped together and easily accessible.
-
Maximizing vertical space: Making the most of your storage area by using shelves or hanging organizers can help to maximize vertical space.
Organize by Category
To efficiently store your holiday decor in your apartment, start by categorizing items by type. This will make it easier to locate specific items when you need them next year. Here are three simple steps to help you organize your holiday decor and maximize space in your apartment:
-
Sort and store seasonal clothing: Separate your holiday-themed clothing, such as sweaters and accessories, from your regular wardrobe. Place them in clear plastic bins or vacuum-sealed bags to save space and protect them from dust and moisture.
-
Group similar items together: Gather all your ornaments, lights, and garlands and store them in separate containers. This will make it easier to find specific decorations when it’s time to decorate again.
-
Label and stack boxes: Once you have categorized your holiday items, label each box with its contents. Stack them neatly in a designated storage area, such as a closet or under the bed, to save space.
Utilize Storage Containers
Utilizing storage containers is a practical way to keep your holiday items organized and easily accessible. When it comes to storing holiday decor in my apartment, I’ve found some storage hacks and space-saving ideas that work wonders.
First, I use clear plastic bins to store ornaments, lights, and other small decorations. The transparent design allows me to easily see what’s inside each container without having to open them all. Additionally, I label each bin with a Sharpie marker, specifying its contents, making it even easier to find what I need.
To save space, I stack the bins vertically, taking advantage of the vertical storage in my closet. This way, I maximize the use of the available space and keep my holiday items organized and protected until the next season.
Maximize Vertical Space
If you want to make the most of your available space, try stacking the storage bins vertically to maximize vertical storage in your closet. Here are three reasons why this storage solution can help you maximize space:
-
Efficient Use of Vertical Space: By stacking the storage bins vertically, you can utilize the full height of your closet. This allows you to store more items without taking up additional floor space.
-
Easy Access to Items: When you stack the storage bins vertically, you can easily see and access each bin without having to move or rearrange other bins. This makes it convenient to find and retrieve specific items when you need them.
-
Neat and Organized Appearance: Stacking the storage bins vertically creates a clean and organized look in your closet. It eliminates clutter and makes it easier to maintain a tidy space.
Invest in Proper Containers
Make sure you have enough storage containers to properly store your holiday decor in your apartment. When it comes to maximizing space and storing large items, investing in proper containers is essential.
Look for containers that are sturdy and stackable, so you can make the most of your storage space. Opt for clear containers, as they allow you to easily see what’s inside without having to open each one. Additionally, consider getting containers with dividers or compartments to keep smaller holiday items organized and prevent them from getting lost or damaged.
Label each container with its contents to make it easier to find what you need next year. By investing in the right storage containers, you can keep your holiday decor safe and organized in your apartment.
Organize by Category
When it comes to efficiently storing holiday decor in my apartment, one of the key factors is labeling and categorizing. By clearly labeling each container with its contents, I can easily find what I need without having to dig through multiple boxes.
Additionally, organizing my decor by category, such as ornaments, lights, and tree decorations, helps to further streamline the storage process and make it more efficient.
Labeling and Categorizing
To easily find your holiday decor next year, label and categorize each box according to the specific decorations inside. This is important for efficient storage and will save you time when it’s time to decorate again.
Here are three tips for effective organization when storing holiday decor in small spaces:
-
Use clear plastic bins: Transparent bins allow you to easily see what’s inside without having to open each box. This makes it easier to locate specific items and saves you from rummaging through multiple boxes.
-
Create a labeling system: Use labels or color-coded stickers to indicate the contents of each box. For example, you can use red stickers for Christmas decorations and green stickers for Halloween items. This will make it easier to find exactly what you need when you’re looking for specific holiday decor.
-
Store vertically: Utilize vertical space by stacking boxes on shelves or in cabinets. This maximizes storage capacity and keeps your holiday decor organized and easily accessible.
Efficient Storage Solutions
Using clear plastic bins and creating a labeling system will help you easily locate your holiday decorations when you need them.
When it comes to efficient storage solutions for your apartment, there are a few space-saving tips to consider. First, utilize the vertical space in your closets by installing shelves or hanging organizers. This will maximize the storage options available to you.
Additionally, consider investing in collapsible or stackable storage containers. These can be easily stored away when not in use, saving you valuable space.
Another space-saving tip is to store smaller decorations inside larger ones. For example, place ornaments inside a larger storage bin or wrap lights around a cardboard tube.
Label Everything
Make sure to label all of your holiday decor boxes with specific descriptions to easily find what you need next year. Here are three reasons why labeling is important for easy identification:
-
Efficient Organization: Labeling your holiday decor boxes allows you to quickly identify what’s inside without having to open each box. You can easily locate specific items such as ornaments, lights, or tree toppers, saving you time and effort.
-
Stress-Free Decorating: When you label your storage containers, you can easily retrieve the exact items you need for decorating. No more rummaging through multiple boxes or searching for misplaced decorations. Simply read the labels and grab what you need, making your holiday decorating experience more enjoyable and stress-free.
-
Future Planning: Labeling your holiday decor boxes enables you to plan ahead for future celebrations. You can keep track of items that may need to be replaced or upgraded, ensuring that you have everything you need for the next holiday season.
In addition to labeling, using clear storage containers for your holiday decor offers several benefits:
-
Visibility: Clear containers allow you to see the contents without having to open them, making it easier to locate specific items.
-
Protection: Clear containers are often made from durable materials that provide better protection for your holiday decorations against dust, moisture, and potential damage.
-
Stackability: Clear storage containers are designed to stack neatly, maximizing your storage space and keeping your apartment clutter-free.
Utilize Vertical Space
By labeling and using clear storage containers for your holiday decorations, you can maximize vertical space in your apartment. When it comes to storing holiday decor, utilizing vertical space is crucial in small living spaces.
One creative storage idea is to invest in stackable bins or crates. These can be easily stacked on top of each other, making use of the vertical space in your apartment.
Another option is to install floating shelves on the walls. This allows you to display your holiday decorations while also freeing up valuable floor space.
Additionally, utilizing the space under your bed is a smart way to store holiday decor. Invest in under-bed storage containers or vacuum-sealed bags to keep your decorations organized and out of sight until the next holiday season.
Protect Fragile Items
To keep fragile items safe, you’ll want to wrap them in bubble wrap or packing paper before placing them in storage containers. Here are three steps to protect your delicate items using proper packing materials:
-
Wrap each fragile item individually: Start by wrapping each delicate item, such as holiday ornaments or delicate figurines, in bubble wrap or packing paper. This will provide a protective layer to prevent any damage during storage.
-
Use sturdy storage containers: Opt for sturdy storage containers that are specifically designed for fragile items. These containers are usually made of durable materials and have built-in dividers or compartments to keep your delicate items secure and organized.
-
Fill empty spaces: Once you’ve placed your wrapped fragile items in the storage containers, fill any empty spaces with additional packing material, such as packing peanuts or crumpled paper. This will prevent your delicate items from shifting or moving around during storage.
By following these steps and using the right packing materials, you can ensure that your fragile holiday decor stays safe and intact until the next holiday season.
Now that you know how to protect your delicate items, let’s move on to creating a storage plan for next year.
Create a Storage Plan for Next Year
Now that you know how to protect fragile items, let’s discuss planning for storage next year. Creating a storage plan can help you stay organized and ensure that your holiday decor stays in good condition. One way to start is by creating a timeline. Determine when you want to start and finish the storage process, and break it down into smaller tasks. This will help you stay on track and avoid last-minute scrambling. Additionally, finding unconventional storage solutions can maximize the space in your apartment. Consider using under-bed storage containers, hanging organizers, or even repurposing furniture for storage. By thinking outside the box, you can find creative ways to store your holiday decor efficiently. To help you visualize your storage plan, here’s a table with some ideas:
| Task | Timeline | Storage Solution |
|---|---|---|
| Take down decorations | January 1st | Cardboard boxes |
| Sort and organize | January 2nd – January 5th | Clear plastic bins |
| Label containers | January 6th – January 7th | Label maker |
| Store in designated | January 8th – January 15th | Under-bed storage containers |
| storage area |
Frequently Asked Questions
What Are Some Creative Ways to Utilize Vertical Space for Holiday Decor Storage in a Small Apartment?
Maximizing vertical space in a small apartment for holiday decor storage can be challenging, but with creativity and resourcefulness, practical solutions are possible. Over the door storage and adhesive wall hooks are two ideas for utilizing vertical space.
How Do I Protect Delicate or Fragile Holiday Decorations During Storage?
To protect delicate ornaments, I wrap them in tissue paper and store them in sturdy boxes. For fragile holiday lights, I wind them carefully around cardboard or use specialized light storage containers.
Are There Any Specific Container Recommendations for Storing Artificial Christmas Trees in an Apartment?
For storing artificial Christmas trees in an apartment, specific container recommendations include using a tree storage bag or a large plastic bin. Alternatively, you can disassemble the tree and store it in its original box.
What Is the Best Way to Organize and Store Holiday Lights to Prevent Tangling or Damage?
The best way to store holiday wreaths is by using wreath storage containers or hanging them in a closet. For organizing holiday wrapping paper, a vertical gift wrap organizer or a clear plastic bin works well.
Should I Consider Investing in Specialized Storage Solutions, Such as Ornament Organizers or Wreath Containers, for My Holiday Decorations?
I’ve found that investing in specialized storage solutions like ornament organizers or wreath containers has made a huge difference in keeping my holiday decorations organized and protected. However, there are also plenty of DIY storage ideas that can work just as well.
Conclusion
In conclusion, storing holiday decor in your apartment can be a breeze if you follow these simple steps.
- Assess your storage space
- Sort and declutter
- Invest in proper containers
- Organize by category
- Label everything
- Utilize vertical space
- Protect fragile items
- Create a storage plan for next year
By taking these practical and detailed actions, you’ll not only save space but also save time and reduce stress when it’s time to decorate for the next holiday season.
So get organized and enjoy a clutter-free apartment all year round!
- About the Author
- Latest Posts
Meet Bethia, the visionary designer at ByRetreat who brings a touch of magic to every remote workspace she creates. With a boundless imagination and an eye for beauty, Bethia is passionate about transforming ordinary spaces into extraordinary havens of creativity and comfort.
Bethia possesses a unique talent for envisioning the perfect combination of furniture, colors, and textures that harmonize seamlessly in a room. She understands that selecting furniture goes beyond mere functionality; it’s about curating pieces that evoke a sense of style and sophistication while enhancing the overall ambiance.

As someone who lives in Salt Lake City, I have found that vinyl decals are a great way to add some personality to any room.
Did you know that there are numerous local home decor stores, online retailers, and specialty shops right here in Salt Lake City that offer a wide selection of vinyl decals?
Whether you’re looking for affordable options, custom designs, or decals specifically for kids’ rooms or seasonal decor, this article will guide you on where to buy the best vinyl decals in Salt Lake City.
Key Takeaways
- There are several specialty shops in Salt Lake City that offer vinyl decals, including Decal Haven, Vinyl Visions, Vinyl Haven, and Decal Delights.
- Online retailers and local home decor stores in Salt Lake City are also options for purchasing vinyl decals.
- Customizable room decor options are available for those looking for personalized vinyl decal designs.
- Vinyl decals can be a cost-effective option for adding decorative elements to different rooms and wedding decorations in Salt Lake City.
Local Home Decor Stores in Salt Lake City
If you’re looking for local home decor stores in Salt Lake City, you should check out some of the boutique shops in the downtown area. These stores are a treasure trove of unique and trendy items that will add a touch of style to your home.
When it comes to local home decor trends, vinyl decals are all the rage right now. They are a great way to personalize your space and showcase your creativity. Whether you’re looking to jazz up your walls, furniture, or even your appliances, there are plenty of DIY vinyl decal projects available at these stores.
From intricate designs to simple patterns, you’ll find everything you need to transform your home into a stylish sanctuary.
Online Retailers for Vinyl Decals in Salt Lake City
When it comes to finding the best local decal retailers in Salt Lake City, I’ve done my research and can confidently recommend a few top-notch options.
These stores not only offer a wide selection of high-quality vinyl decals but also provide excellent customer service and competitive prices.
However, if you prefer the convenience of online shopping, there are also some great online retailers that specialize in vinyl decals and ship to Salt Lake City.
Best Local Decal Retailers
One of the best places to find local decals in Salt Lake City is at the vinyl shop downtown. They have a wide selection of affordable vinyl decals that are perfect for adding a personal touch to your home or vehicle. The shop is run by a talented group of artists who create unique designs that you won’t find anywhere else. They also offer custom decal services, so you can bring in your own design and have it turned into a high-quality vinyl decal. The shop is known for its excellent customer service and attention to detail. Whether you’re looking for a small decal to decorate your laptop or a large decal to cover the back of your car, this vinyl shop downtown is the place to go.
| Decal Type | Price Range | Size Range | Design Options |
|---|---|---|---|
| Wall Decals | $10-$50 | Small to Large | Customizable |
| Car Decals | $5-$30 | Small to X-Large | Pre-made and Customizable |
| Laptop Decals | $5-$20 | Small | Pre-made and Customizable |
| Window Decals | $5-$25 | Small to Medium | Customizable |
Online Decal Shopping
Looking for a convenient way to shop for decals? Check out the online stores that offer a wide variety of designs and customization options.
As an avid decal enthusiast, I have found that purchasing decals online has numerous benefits. Firstly, online decal sellers provide a vast selection of designs to choose from. Whether you’re looking for a cute floral pattern or a trendy geometric design, you’re sure to find it online.
Additionally, online stores often offer customization options, allowing you to personalize your decals with your name or favorite quote.
Another advantage of purchasing decals online is the ease and convenience of shopping from the comfort of your own home. With just a few clicks, your decals will be on their way to your doorstep.
Specialty Shops for Vinyl Decals in Salt Lake City
If you’re in Salt Lake City and want to buy vinyl decals, check out the specialty shops in the area. As a local resident and vinyl decal enthusiast, I can tell you that Salt Lake City has a vibrant community of artists who create unique and trendy designs for vinyl decals.
Here are some reasons why you should explore the specialty shops in Salt Lake City:
-
Support local artists: These specialty shops often collaborate with local artists, giving them a platform to showcase their talent and creativity. By purchasing vinyl decals from these shops, you directly support the artists in your community.
-
Stay ahead of vinyl decal trends: The specialty shops in Salt Lake City are always up-to-date with the latest vinyl decal trends. Whether you’re into minimalistic designs, floral patterns, or quirky pop culture references, you’ll find a wide range of options to choose from.
Affordable Vinyl Decals in Salt Lake City
When it comes to finding vinyl decals in Salt Lake City, there are two main options to consider: local decal shops and online decal options.
Local decal shops offer the advantage of being able to see and touch the decals in person before making a purchase, as well as the opportunity to support local businesses.
On the other hand, online decal options provide a wider variety of designs and styles to choose from, often at more affordable prices.
Ultimately, the choice between the two will depend on personal preferences and priorities.
Local Decal Shops
I’ve heard there are some great local decal shops in Salt Lake City. As a DIY enthusiast, I’m always on the lookout for local decal artists who can bring my creative visions to life.
Here are some reasons why you should check out these local decal shops:
-
Wide range of designs: These shops have a diverse selection of decals, from intricate floral patterns to bold geometric shapes. Whatever your style, you’re sure to find something that suits your taste.
-
Customization options: The local decal artists are skilled at creating custom designs. Whether it’s a personalized monogram or a unique logo for your business, they can bring your ideas to life.
-
Quality materials: These shops use high-quality vinyl that is durable and easy to apply. The decals will last for years without fading or peeling.
Online Decal Options
There are plenty of online options to explore for unique and customizable decals. As someone who loves adding a personal touch to my space, I have spent hours searching for the perfect custom decal designs.
One of my favorite websites to browse is Decal Guru. They offer a wide range of designs, from intricate patterns to inspirational quotes. The best part is that they allow you to customize the size and color of the decals to fit your specific needs.
When it comes to installing vinyl decals, I have learned a few tips and tricks along the way. Firstly, make sure to clean the surface thoroughly before applying the decal. This will ensure a smooth and long-lasting adhesion.
Secondly, use a credit card or squeegee to remove any air bubbles and smooth out the decal. Lastly, be patient and take your time during the installation process. Rushing can lead to mistakes and a less-than-perfect result.
With these online options and installation tips, you can easily transform any space with beautiful custom decals.
Custom Vinyl Decal Shops in Salt Lake City
Looking for custom vinyl decal shops in Salt Lake City? You’ll find a variety of options to choose from in the area.
As someone who has a passion for vinyl decal designs, I have explored the city and discovered some hidden gems. Here are two of my favorite shops that offer a wide range of custom vinyl decal designs and expert vinyl decal application techniques:
-
Decal Haven: This shop is a paradise for vinyl decal enthusiasts. They have a vast collection of pre-made designs, but their specialty lies in creating personalized custom decals. Their skilled team can bring your ideas to life on high-quality vinyl material. From wall decals to vehicle graphics, they have it all.
-
Vinyl Visions: Known for their attention to detail, Vinyl Visions is the go-to place for intricate vinyl decal designs. Their talented artists can create stunning decals for any surface, including glass, metal, and wood. They also offer expert advice on vinyl decal application techniques, ensuring a flawless finish.
Both shops provide exceptional customer service and guarantee satisfaction. So, whether you’re looking to add a unique touch to your home decor or want to advertise your business with eye-catching decals, these shops in Salt Lake City have got you covered.
Where to Find Unique Vinyl Decals in Salt Lake City
If you’re in the area, you can find a wide selection of unique vinyl decals at these specialty shops in Salt Lake City.
One of my favorite spots is Vinyl Haven, a local artist collective that showcases a variety of custom decals created by talented artisans. They have everything from intricate nature scenes to whimsical cartoon characters.
Another great option is Decal Delights, a shop that specializes in DIY vinyl decal projects. They offer a range of designs, as well as the tools and materials needed to create your own personalized decals.
Whether you’re looking to add a touch of personality to your car, laptop, or home decor, these shops have you covered. Don’t miss out on the opportunity to support local artists and bring some creativity into your life!
Vinyl Decal Options for Different Room Decor in Salt Lake City
When it comes to finding affordable vinyl decal options for customizable room decor in Salt Lake City, local vendors offer a wide range of choices.
From stunning wall decals that add a pop of color to personalized decals for furniture and accessories, there is something for every style and budget.
Whether you’re looking to spruce up your living room or give your bedroom a fresh new look, these local vendors have you covered.
Affordable Vinyl Decal Options
You can find affordable vinyl decal options in Salt Lake City. As someone who loves decorating my space with unique designs, I have discovered some great places to get custom vinyl decals without breaking the bank.
Here are a few tips to help you find affordable options and make the most of your vinyl decal experience:
-
Look for local artists and small businesses: They often offer custom vinyl decal designs at more affordable prices compared to big retailers.
-
Check online marketplaces: Websites like Etsy and eBay have a wide range of vinyl decal options at different price points. You can find both pre-made designs and custom options.
-
Read reviews and ratings: This will give you an idea of the quality and durability of the decals.
-
Consider the material: Vinyl decals come in different qualities. Opt for high-quality vinyl that is easy to apply and remove without damaging your walls or furniture.
Customizable Room Decor
I’ve found some great places to get custom room decor that can be personalized to fit my style.
When it comes to customizable wall art and personalized home decor, I always turn to local artisans and small businesses.
One of my favorite places to find unique and personalized pieces is a quaint boutique called ‘The Artisan’s Haven.’ They have an incredible selection of customizable wall art, from hand-painted canvases to intricate wooden signs. The artists at The Artisan’s Haven take the time to understand my style and preferences, ensuring that the final product is a perfect reflection of my personality.
Another great option is an online marketplace called ‘Home Accents Unlimited.’ They offer a wide range of personalized home decor items, including custom throw pillows, monogrammed blankets, and personalized picture frames.
With these options, I can truly transform my living space into a one-of-a-kind sanctuary that exudes my individuality.
Local Salt Lake City Vendors
There are many local vendors in Salt Lake City that offer a variety of unique and personalized products. These local artisans are passionate about their craft and take pride in creating one-of-a-kind pieces. When it comes to DIY decal projects, Salt Lake City is the place to be. Here are a few reasons why you should consider buying from local vendors:
- Support local artisans who pour their heart and soul into their work.
- By purchasing from local vendors, you are supporting the local economy and helping these talented individuals thrive.
- Local vendors offer a personal touch and can create custom designs tailored to your preferences.
With so many talented artisans in Salt Lake City, you can find the perfect vinyl decals for your kids’ rooms. From whimsical designs to educational decals, these vendors have it all.
Best Places to Buy Vinyl Decals for Kids’ Rooms in Salt Lake City
If you’re looking for the best places to buy vinyl decals for kids’ rooms in Salt Lake City, you can check out local craft stores and online marketplaces.
When it comes to finding the best vinyl decal designs, these places offer a wide range of options to choose from.
Local craft stores like Crafty Corner and Painted Palette have a great selection of vinyl decals specifically designed for kids’ rooms. You can find adorable animals, colorful alphabet letters, and whimsical characters that will add a touch of fun and creativity to any child’s space.
Online marketplaces like Etsy and Amazon also offer a variety of vinyl decals with unique designs that can be customized to suit your child’s interests and preferences.
When it comes to installation, make sure to clean the surface thoroughly before applying the decal, and use a credit card or squeegee to smooth out any air bubbles.
With these tips and the best vinyl decal designs, you can transform your child’s room into a magical space they’ll love.
Vinyl Decals for Seasonal Decor in Salt Lake City
When it comes to vinyl decals, the possibilities are endless. Not only are they a great way to add a personal touch to any space, but they can also be easily changed out to match the seasons. In Salt Lake City, there are some exciting vinyl decal trends for seasonal decor that I can’t wait to share with you.
Here are a few DIY vinyl decal projects that are popular right now:
-
Seasonal Quotes and Sayings:
- Add a touch of festive cheer to your home with vinyl decals featuring seasonal quotes and sayings. From Halloween to Christmas, there are endless options to choose from.
-
Nature-inspired Designs:
- Bring the beauty of the outdoors inside with vinyl decals of leaves, flowers, and other nature-inspired designs. These decals are perfect for adding a fresh and vibrant look to your space.
Whether you’re looking to add a spooky touch for Halloween or a cozy vibe for winter, vinyl decals are a fun and easy way to update your seasonal decor. Get creative and start transforming your space today!
Where to Buy Vinyl Decals for Wedding Decor in Salt Lake City
You can find great options for vinyl decals to use in your wedding decorations right here in Salt Lake City. As a resident of this beautiful city, I am familiar with the local shops that offer custom vinyl decals that can add a unique touch to your wedding decor. One of my favorite places to shop for vinyl decals is Vinyl Designs. They offer a wide range of designs that can be customized to match your wedding theme. Another great option is Decal City, where you can find elegant and intricate designs that will surely impress your guests. When it comes to installation, remember to clean the surface before applying the decal and use a credit card or squeegee to smooth out any air bubbles. These simple tips will ensure a flawless application of your vinyl decals, adding a personal and stylish touch to your wedding decorations.
| Shop Name | Location | Customization Available? | Price Range |
|---|---|---|---|
| Vinyl Designs | Downtown SLC | Yes | $-$$ |
| Decal City | Midvale | Yes | $$-$$$ |
| Vinyl Express | Sugar House | No | $ |
| Decal World | West Valley City | Yes | $-$$ |
Tips for Choosing and Installing Vinyl Decals in Salt Lake City
To ensure a seamless application and personalized touch to your wedding decorations, consider these tips for selecting and installing vinyl decals in Salt Lake City.
-
Choose the Right Design:
Look for decals that match your wedding theme and color scheme. Consider custom designs to make your decor truly unique. Choose decals that complement the ambiance you’re aiming to create, whether it’s elegant, rustic, or modern. Just as the reasons we decorate for Christmas often center around creating warmth and joy, your wedding decals should evoke the emotions you want to share with your guests. Personal touches and thoughtful designs can transform your space into a memorable and inviting celebration. -
Measure and Plan:
Take accurate measurements of the space where you want to install the decals. Create a layout plan to visualize how the decals will look. -
Prepare the Surface:
Clean the surface thoroughly to remove any dust or dirt. Smooth out any uneven areas for better adhesion. -
Apply the Decals:
Start from one corner and gradually peel off the backing while applying pressure. Smooth out any air bubbles using a squeegee or credit card.
Frequently Asked Questions
Can Vinyl Decals Be Used on Outdoor Surfaces?
Yes, vinyl decals can be used on outdoor surfaces. The pros of using them include durability and weather resistance. However, they may fade over time and may not adhere well to uneven surfaces. Proper surface preparation and application techniques are key for successful outdoor use.
Are Vinyl Decals Easy to Remove Without Damaging the Wall or Surface?
Yes, vinyl decals are easy to remove without damaging the wall or surface. Some vinyl decal removal techniques include using heat, such as a hairdryer, and gently peeling it off. Additionally, using an adhesive remover can help remove any residue left behind.
Can Vinyl Decals Be Customized With Personal Designs or Text?
Yes, vinyl decals can be customized with personal designs or text. The options for custom vinyl decals are endless, allowing you to create a unique and personalized design. The vinyl decal design process is both creative and detail-oriented.
What Is the Average Price Range for Vinyl Decals in Salt Lake City?
In my experience, the average price range for vinyl decals in Salt Lake City varies depending on the size, complexity of the design, and installation requirements. It’s best to contact local vendors for specific pricing details.
Are Vinyl Decals a Good Option for Temporary Decor or Rental Homes?
Vinyl decals are a great option for temporary decor or rental homes. They are affordable, easy to apply and remove, and offer a wide range of designs. Unlike wallpaper, they don’t damage walls.
Conclusion
After exploring the various options for vinyl decals in Salt Lake City, I’m thrilled to have discovered a wide range of choices to suit every taste and style.
From local home decor stores to specialty shops and online retailers, the possibilities are endless. Whether you’re looking for affordable decals, custom designs, or decals for kids’ rooms, Salt Lake City has it all.
With the right tips and tricks, choosing and installing vinyl decals has never been easier. Transform your space and add a touch of personalization with these stylish and versatile decals.
- About the Author
- Latest Posts
Meet Bethia, the visionary designer at ByRetreat who brings a touch of magic to every remote workspace she creates. With a boundless imagination and an eye for beauty, Bethia is passionate about transforming ordinary spaces into extraordinary havens of creativity and comfort.
Bethia possesses a unique talent for envisioning the perfect combination of furniture, colors, and textures that harmonize seamlessly in a room. She understands that selecting furniture goes beyond mere functionality; it’s about curating pieces that evoke a sense of style and sophistication while enhancing the overall ambiance.

Are you feeling worn out by your Cookie Run Kingdom not having that special shine? Are you considering how to elevate your decor points to the next level? Well, search no more!
In this guide, we’ll show you the secrets to increasing your decor points and turning your kingdom into a true masterpiece. From understanding the intricacies of decor placement to unlocking powerful decor items, we’ve got you covered.
Get ready to transform your kingdom and impress all who visit with our expert tips and tricks. Let’s dive in!
Key Takeaways
- Understanding decor points and how they contribute to overall decor level
- Maximizing decor potential by strategically placing high-value decorations
- Creating theme-based decor arrangements and utilizing bonus item effects
- Unlocking and upgrading decor items to increase their point value
Understanding Decor Points in Cookie Run Kingdom
Understanding decor points in Cookie Run Kingdom is crucial for increasing your overall decor level. To maximize your decor potential and increase your decor level, it is important to have a clear understanding of how decor points work.
Decor points are earned by placing and upgrading different decorations in your kingdom. Each decoration has a specific point value that contributes to your overall decor level. The higher your decor level, the more benefits you unlock, such as increased gold production and enhanced character abilities.
To increase your decor level, focus on obtaining and placing high-value decorations strategically throughout your kingdom. By optimizing decor placement for maximum points, you can create a visually stunning and highly efficient kingdom that will impress other players and boost your overall success in Cookie Run Kingdom.
Now, let’s explore how to optimize decor placement for maximum points.
Optimizing Decor Placement for Maximum Points
When it comes to optimizing your decor placement in Cookie Run Kingdom, strategic furniture placement is key. By strategically placing your furniture items, you can maximize the number of decor points you earn.
Additionally, arranging your decor based on a theme not only adds aesthetic appeal but also boosts your decor points.
Lastly, don’t forget to utilize the bonus item effects that certain decor items offer, as they can significantly increase your overall decor points.
Strategic Furniture Placement
Strategic furniture placement can greatly impact your decor points in Cookie Run Kingdom. To create visually appealing decor, there are several furniture arrangement tips you can follow.
First, consider the scale and proportion of your furniture. Ensure that the size of each piece is appropriate for the space it occupies. A crowded room can feel overwhelming, while sparse furniture can make the space appear empty.
Additionally, pay attention to the flow and functionality of your furniture placement. Arrange your pieces in a way that allows for easy movement and access to different areas of the room.
Lastly, consider the focal point of the space and arrange your furniture around it to create a visually appealing arrangement. By strategically placing your furniture, you can elevate the overall aesthetic of your decor.
Transitioning into the subsequent section about theme-based decor arrangement, it’s important to note that choosing a specific theme for your decor can greatly enhance the overall impact of your design.
Theme-Based Decor Arrangement
To create a cohesive and visually engaging decor, you should choose a specific theme for your furniture arrangement in Cookie Run Kingdom.
Decorating styles play a crucial role in setting the overall ambiance of your kingdom. Whether you prefer a rustic farmhouse look or a sleek modern aesthetic, selecting a theme will help you streamline your choices and create a harmonious atmosphere.
To enhance the visual appeal of your decor, color coordination is essential. Choose a color palette that complements your theme and select furniture pieces that align with these colors. Consider incorporating contrasting hues or matching shades to add depth and visual interest.
By carefully curating your furniture arrangement based on a specific theme and color coordination, you can transform your kingdom into a visually stunning and cohesive space.
Now, let’s explore how you can further enhance your decor by utilizing bonus item effects.
Utilizing Bonus Item Effects
Using bonus item effects can greatly enhance the overall aesthetics and functionality of your themed decor in Cookie Run Kingdom. By strategically using decor items and choosing the right bonus items, you can create a visually stunning and highly efficient kingdom.
Here are four ways to make the most of bonus item effects:
-
Enchanted Flowerbed: Place this bonus item near your bakery to boost the production speed of your cookies. The vibrant flowers will also add a touch of beauty to your kingdom.
-
Mystic Fountain: Position this enchanting fountain in the center of your kingdom to increase the happiness of your residents. Its soothing sound and mystical aura will create a serene atmosphere.
-
Magical Lantern: Hang these lanterns along the pathways of your kingdom to provide a soft glow. Not only will it illuminate your decor, but it will also improve the movement speed of your cookies.
-
Treasure Chest: Position this treasure chest in a strategic location to increase the drop rate of valuable items. It will attract more visitors and help you amass riches faster.
By utilizing these bonus item effects, your themed decor will not only look visually appealing but also function optimally.
Now, let’s explore how unlocking and upgrading decor items can further increase your decor points.
Unlocking and Upgrading Decor Items for Higher Points
First, you’ll want to prioritize unlocking and upgrading decor items in order to earn higher points in Cookie Run Kingdom. Upgrading decor items not only increases their visual appeal but also boosts the points they provide. By unlocking new decor items, you can expand your options and create unique combinations that maximize your points. To give you an idea of the variety of decor items available, here is a table showcasing different categories and their corresponding effects:
| Category | Effect | Points |
|---|---|---|
| Furniture | Increases happiness and boosts point multiplier | +10% |
| Plants | Attracts more visitors and increases popularity | +5% |
| Decorations | Enhances overall ambiance | +2% |
| Special | Provides unique effects and bonuses | Varies |
Utilizing Decor Combos to Boost Points
Utilizing decor combos can greatly enhance your kingdom’s visual appeal and maximize your overall point score. By strategically combining different decor items, you can create stunning arrangements that impress both visitors and judges.
Here are four decor combo strategies to consider when decorating your Cookie Run Kingdom:
-
Theme-based Combos: Combine decor items that share a similar theme, such as a beach theme or a winter wonderland theme, to create a cohesive and visually appealing area.
-
Color-coordinated Combos: Arrange decor items that have matching or complementary colors to create a harmonious and aesthetically pleasing look.
-
Size and Scale Combos: Experiment with different sizes and scales of decor items to create depth and dimension in your kingdom.
-
Incorporating Bonus Items: Place bonus items strategically among your decor to maximize their effect on your overall point score.
By implementing these decor combo strategies and incorporating bonus items, you can elevate the visual appeal of your kingdom and boost your point score.
Now, let’s explore strategies for decorating different areas in Cookie Run Kingdom without losing any style or elegance.
Strategies for Decorating Different Areas in Cookie Run Kingdom
When it comes to creating visually stunning and immersive areas in Cookie Run Kingdom, selecting the right theme is crucial. A well-chosen theme can set the tone for the entire area and make it feel cohesive and inviting.
In addition to theme selection, maximizing decor placement is key to elevating the overall aesthetic appeal. By strategically placing decor items, you can create focal points, enhance the theme, and create a sense of depth and balance in your decorations.
Theme Selection Tips
Choosing a theme that resonates with your personal style can greatly boost your decor points in Cookie Run Kingdom. To create a visually appealing and cohesive decor, consider using creative color schemes that complement each other. Experiment with bold and vibrant combinations or opt for subtle and elegant palettes.
Incorporating seasonal elements is another effective way to enhance your decor. During festive times, add festive decorations such as pumpkins for Halloween or snowflakes for Christmas. These elements not only add a touch of charm but also make your decor feel fresh and relevant.
By carefully selecting themes that reflect your taste and incorporating creative color schemes and seasonal elements, you can elevate your decor game in Cookie Run Kingdom.
Now, let’s dive into the next section and explore ways to maximize your decor placement.
Maximizing Decor Placement
To get the most out of your decorations, try experimenting with different placement strategies for a visually dynamic and captivating decor. When arranging your decor, consider the size, shape, and color of each item to create a balanced and harmonious composition.
Start by choosing the right decor items that complement your theme and add personality to your kingdom. Mix and match different textures and materials to add depth and interest to your displays. Place taller items at the back and shorter ones in the front to create depth and perspective. Consider creating focal points by clustering similar items together or placing them in strategic locations. Remember to leave some empty spaces to allow the eye to rest and appreciate each piece. By incorporating these tips for arranging decor and choosing the right items, you can create a visually stunning and cohesive kingdom design.
As you become more experienced in decorating, you can move on to advanced tips and tricks to maximize your decor points. These techniques include utilizing lighting to highlight specific areas or items, using mirrors to create the illusion of a larger space, and incorporating interactive elements such as moving parts or sound effects. Additionally, you can experiment with different themes and styles to keep your decor fresh and exciting.
Advanced Tips and Tricks to Maximize Decor Points
One of the best ways to maximize decor points in Cookie Run Kingdom is by using advanced tips and tricks.
When decorating with limited resources, it’s essential to prioritize and strategically place your decor items.
Focus on using high-scoring items in prominent locations, such as the center of your kingdom or near popular buildings.
Additionally, consider the importance of decor variety.
Incorporating a diverse range of decor items not only adds visual interest to your kingdom but also boosts your decor points.
Mix and match different themes, colors, and styles to create a visually appealing and unique environment.
Don’t forget to rotate your decor items regularly to keep your kingdom fresh and exciting.
Frequently Asked Questions
Can I Earn Decor Points by Completing Quests or Challenges in Cookie Run Kingdom?
Yes, you can earn decor points by completing quests or challenges in CRK. To maximize your decor points in Cookie Run Kingdom, focus on completing as many quests and challenges as possible.
Are There Any Specific Decor Items That Give Bonus Points When Placed Together?
When it comes to increasing your Decor Points in Cookie Run Kingdom, there’s a secret: certain decor items have synergy when placed together. Discover the best combinations and watch your points soar!
How Often Should I Rearrange My Decor Items to Maximize My Decor Points?
When should you upgrade your decor items to maximize decor points? The level of your decor items can significantly impact your decor points. Consider rearranging them regularly to ensure you’re optimizing your points.
Can I Earn Decor Points by Interacting With Other Players’ Kingdoms?
Visiting and interacting with other players’ kingdoms is like a dance of decor points. Not only do you earn rewards, but you also unlock new strategies and collaborations to optimize your own decor points in Cookie Run Kingdom.
Are There Any Time-Limited Decor Items That Give Higher Points Than Regular Ones?
There are time-limited decor events that offer higher points than regular items. To maximize your decor points, participate in these events and strategically place the limited-time decorations in your kingdom.
Conclusion
In conclusion, the world of Cookie Run Kingdom is like a beautiful garden, and the decor points are the flowers that make it bloom.
By understanding the importance of decor points and implementing strategies like optimizing decor placement, unlocking and upgrading decor items, utilizing decor combos, and employing different decorating strategies for various areas, you can transform your kingdom into a majestic masterpiece.
Remember, every decor item you place is like a brushstroke on a canvas, so choose wisely and let your creativity flourish.
May your kingdom become a breathtaking work of art!
- About the Author
- Latest Posts
Meet Bethia, the visionary designer at ByRetreat who brings a touch of magic to every remote workspace she creates. With a boundless imagination and an eye for beauty, Bethia is passionate about transforming ordinary spaces into extraordinary havens of creativity and comfort.
Bethia possesses a unique talent for envisioning the perfect combination of furniture, colors, and textures that harmonize seamlessly in a room. She understands that selecting furniture goes beyond mere functionality; it’s about curating pieces that evoke a sense of style and sophistication while enhancing the overall ambiance.
-

 Decor7 days ago
Maximalist Decor Explained: Embrace More Style
-

 Vetted4 weeks ago
15 Best Drip Irrigation Systems to Keep Your Garden Thriving
-

 Vetted2 weeks ago
15 Best Foot Massagers for Neuropathy to Soothe Your Feet and Relieve Discomfort
-

 Vetted3 weeks ago
15 Best Sports Laundry Detergents for Keeping Your Activewear Fresh and Clean
-

 Vetted3 weeks ago
15 Best Tall Toilets for Seniors That Combine Comfort and Safety
-

 Vetted3 weeks ago
15 Best Dish Scrubbers to Keep Your Kitchen Sparkling Clean
-

 Decor3 weeks ago
What Is Eclectic Home Decor
-
 Vetted4 days ago
15 Best Organic Pest Control Solutions for a Naturally Pest-Free Home


