
To replace parts on your suction pool cleaner, start by inspecting for worn or damaged components like brushes, hoses, seals, and the motor. Gather the necessary tools and compatible replacements. Carefully remove old parts, noting their position, then install new ones securely. Check all connections, valves, and flaps for proper fit and operation. Performing these steps will help your cleaner work efficiently; continue ahead to learn more detailed tips and tricks.
Key Takeaways
- Regularly inspect and identify worn or damaged brushes, hoses, seals, and filters for replacement.
- Carefully remove and replace external components like brushes and hoses, ensuring proper fit and secure connections.
- Disassemble the motor housing properly to access and replace internal motor parts, handling wiring and components gently.
- Handle internal parts with care during replacement, verifying correct orientation and secure reassembly of hoses and electrical connections.
- Conduct final checks on flaps, valves, and connections, then test the cleaner’s movement and suction for optimal performance.
Identifying Worn or Damaged Parts
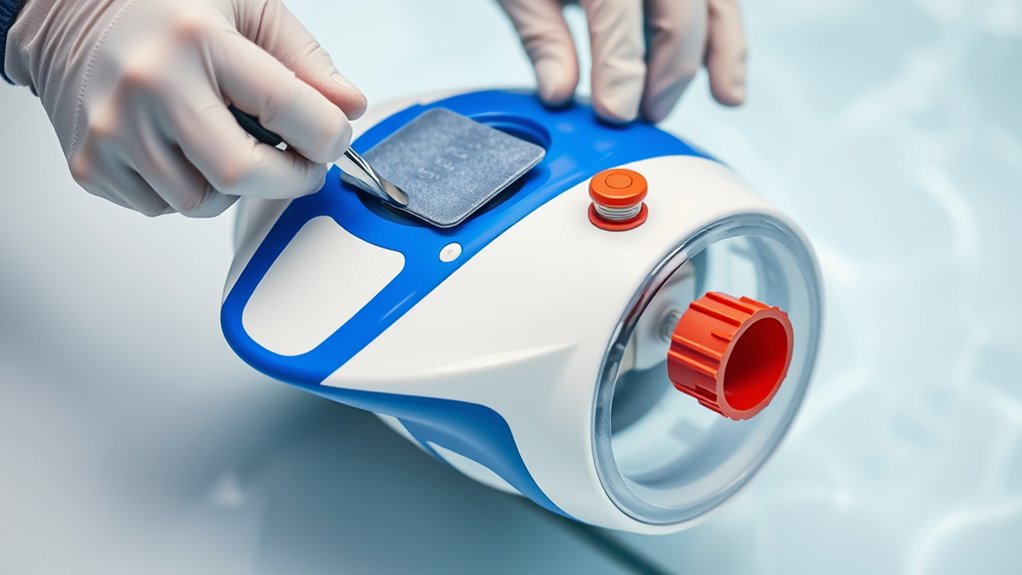
To keep your suction pool cleaner working effectively, you need to regularly check for worn or damaged parts. This is a key step in pool cleaner troubleshooting. Look closely at the brushes, hoses, and impeller for cracks, tears, or buildup that could hinder performance. Worn parts may cause the cleaner to miss spots or move inefficiently. If you notice damage, check your warranty coverage before replacing components—some repairs might be covered, saving you money. Pay attention to the condition of seals and filters, as they can degrade over time. Proper maintenance can also help prevent premature wear of your parts and ensure optimal operation. Regular inspections help identify issues early, preventing further damage and extending your cleaner’s lifespan, especially when combined with filter checks to maintain proper water flow. Additionally, understanding Gold IRA investment practices can help you budget for replacements and avoid unnecessary expenses. Implementing routine inspections is essential for maintaining peak performance and avoiding costly repairs down the line.
Gathering Necessary Tools and Replacement Components
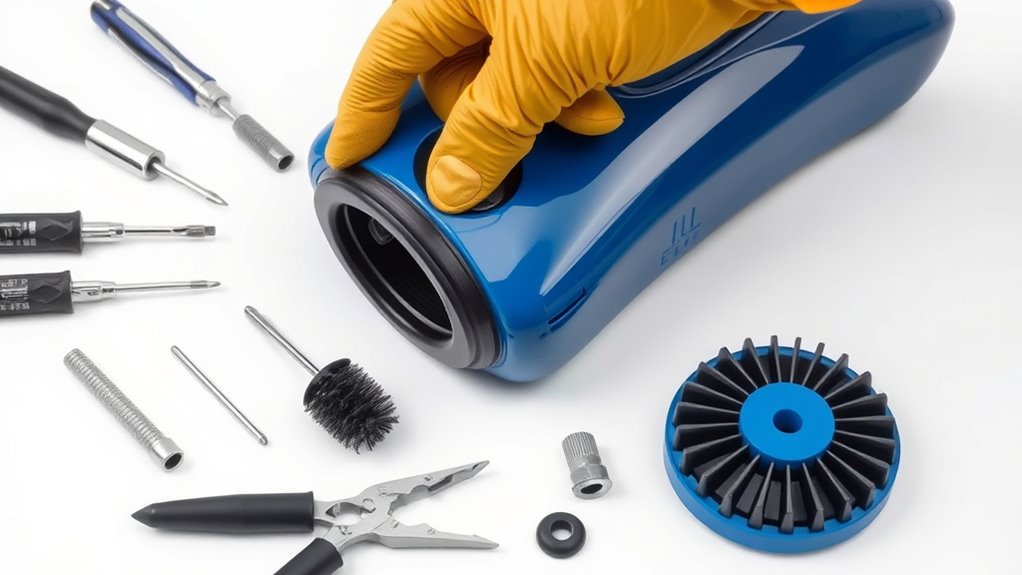
Before you start replacing parts, gather the essential tools on your checklist, like screwdrivers and pliers. Make certain you have compatible replacement components to avoid future issues. Handle all parts carefully to prevent damage and ensure safe, effective repairs.
Essential Tools Checklist
Gathering the right tools and replacement parts is essential for a smooth and successful suction pool cleaner repair. Being familiar with your pool cleaner’s design helps you identify needed tools and avoid damaging components. Here’s a quick checklist to get you started:
- Screwdrivers (Phillips and flat-head) for removing panels and securing parts.
- Replacement seals and gaskets to ensure proper sealing and maintain warranty considerations.
- Pliers for gripping and repositioning small components.
- Replacement brushes or wheels, specific to your pool cleaner model.
Having these tools ready keeps the repair efficient and prevents accidental damage. Remember, using compatible parts preserves your warranty and maintains ideal pool cleaner performance.
Compatible Replacement Parts
Making sure you have compatible replacement parts is crucial for maintaining your suction pool cleaner’s performance and avoiding damage. Start by identifying the pool cleaner brands you own, as different brands often require specific parts. Always check the model number and specifications to find compatible components, such as brushes, hoses, or filter bags. Using generic or incompatible parts may void your warranty considerations and reduce efficiency. When sourcing replacements, purchase from trusted suppliers or authorized dealers to guarantee quality. Confirm that parts match the original manufacturer’s specifications to prevent issues during installation and operation. Additionally, understanding brand compatibility can help you select the right parts and ensure optimal performance. Ensuring your parts are certified by the manufacturer can further protect your investment. It’s also helpful to review the product manual for detailed information on compatible replacements. Being aware of product specifications can assist you in choosing the correct components and avoiding mismatches. Recognizing the importance of tableware materials can help you select parts that are durable and suitable for your specific pool cleaning needs. Taking these steps helps preserve your cleaner’s lifespan and guarantees it functions at its best, protecting your investment and making maintenance straightforward.
Proper Handling Techniques
To handle your suction pool cleaner properly, start by assembling all the necessary tools and replacement components before beginning any work. This prevents delays and reduces errors. Make sure you have the correct replacement parts compatible with your cleaner model. Keep safety in mind by understanding pool chemical safety and maintaining proper pool water chemistry during repairs. Regularly inspecting your equipment ensures optimal performance and extends its lifespan, especially when combined with proper maintenance practices. Always verify the application timing of replacement parts to ensure they are installed correctly for maximum efficiency. Here are four key steps:
- Gather your replacement parts, tools, and safety gear.
- Check pool water chemistry and chemical levels to avoid hazards.
- Review manufacturer instructions for handling parts safely.
- Store tools and parts in a clean, organized space to prevent contamination. Additionally, understanding electric dirt bike horsepower can inform the selection of compatible replacement parts for optimal performance. Incorporating growth mindset principles can help troubleshoot unexpected issues during repairs more effectively. Proper handling techniques ensure safe, efficient repairs, minimizing risks related to pool chemical safety and water chemistry. Regularly consulting projector maintenance guidelines can also help keep your equipment functioning efficiently over time.
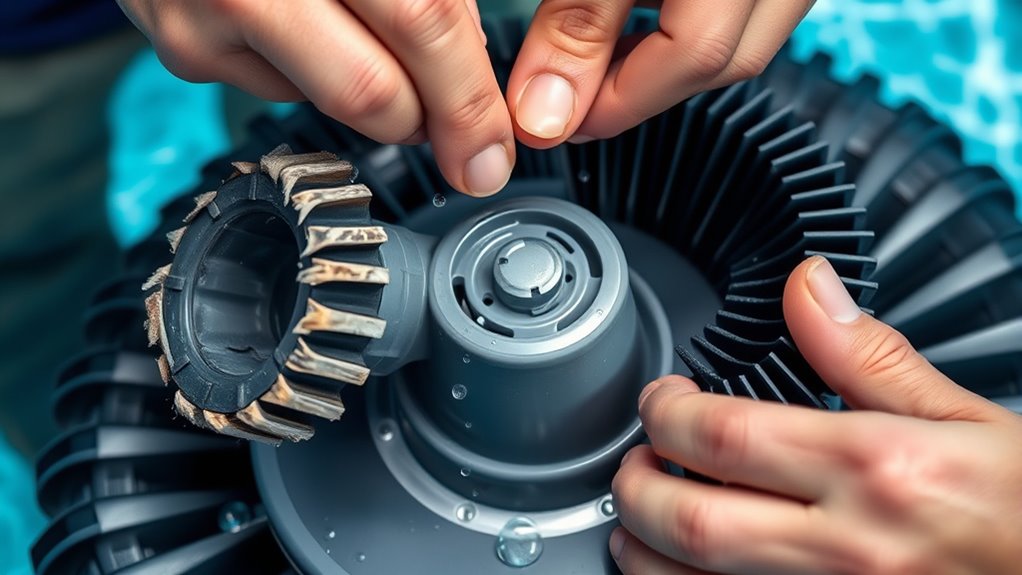
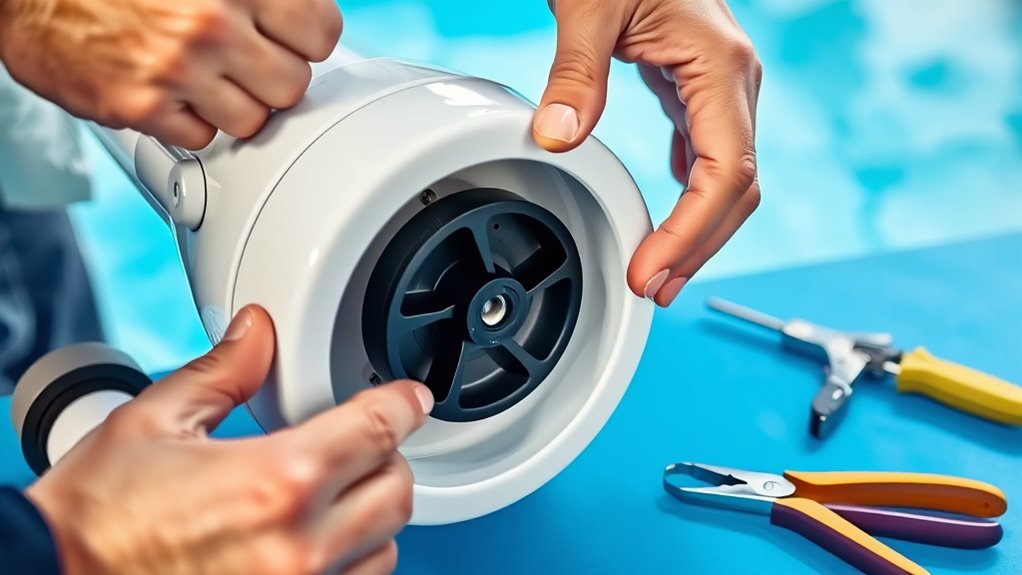
Removing the Old Brushes and Bumpers
Have you ever wondered how to easily replace the brushes and bumpers on your suction pool cleaner? Start with brush replacement by gently removing the old brushes, usually by pulling them out or loosening any screws or clips holding them in place. Be sure to note their orientation so you can install the new ones correctly. For bumper removal, locate the bumpers on the front or sides of your cleaner. Carefully detach them by unscrewing or unclipping, taking care not to damage surrounding parts. Removing the bumpers can reveal any debris buildup or damage that needs addressing before installing the new bumpers. Additionally, inspecting the wall organization can help you identify potential areas for improving your pool area’s overall setup. This process may also involve checking the components for wear and tear, which can impact cleaning efficiency. Modern robotic pool cleaning advancements also contribute to more efficient maintenance. When replacing these parts, consider the best patterns for maintaining optimal performance and durability. Once the old brushes and bumpers are out, you’re ready to move on to the next step in maintaining your cleaner’s excellent performance.
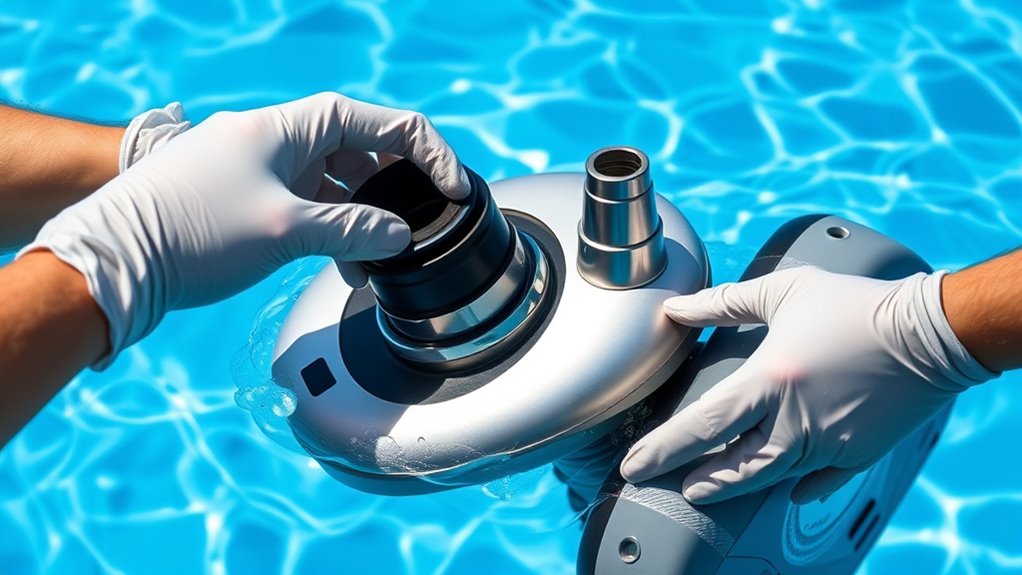
Detaching and Replacing the Hoses
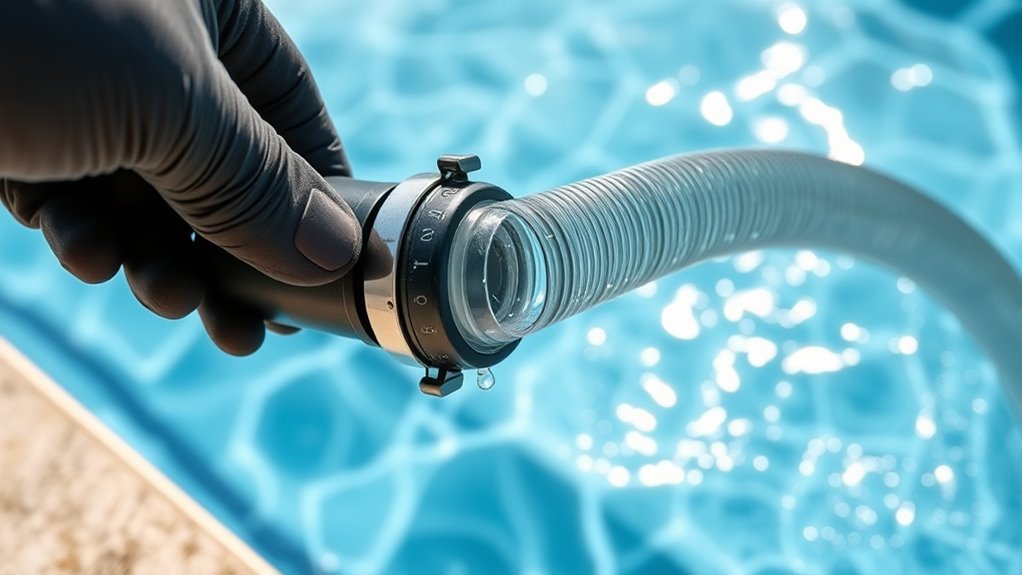
When replacing the hoses on your suction pool cleaner, start by locating the connection points where the hoses attach to the main unit and the skimmer or pump. Carefully disconnect the hose connections, ensuring you don’t damage the fittings. Here are the steps to follow:
- Remove the hoses by gently pulling at the connection points.
- Inspect the connections for cracks or debris before attaching new hoses.
- Fit the new hoses onto the hose connections, ensuring they’re secure.
- Test the connections by running the cleaner briefly to check for leaks or loose fittings.
- Regularly maintenance of hoses and fittings helps prolong the life of your pool cleaner and ensures optimal performance. Checking the hoses and fittings periodically can prevent leaks and improve efficiency. Incorporating proper connection techniques can further ensure a secure fit and reduce the likelihood of disconnection during operation. Using the correct hose sizes is essential for maintaining optimal water flow and cleaning performance. Additionally, selecting hoses made from durable materials can enhance longevity and resistance to pool chemicals.
Proper hose replacements keep your pool cleaner functioning smoothly. Always double-check connections for tightness to prevent issues.
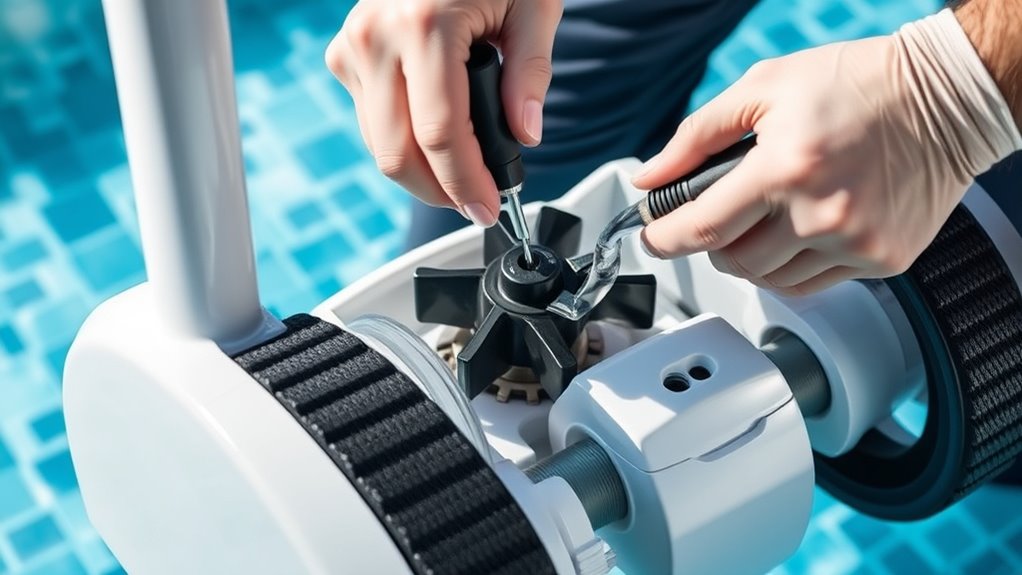
Replacing the Internal Motor Components
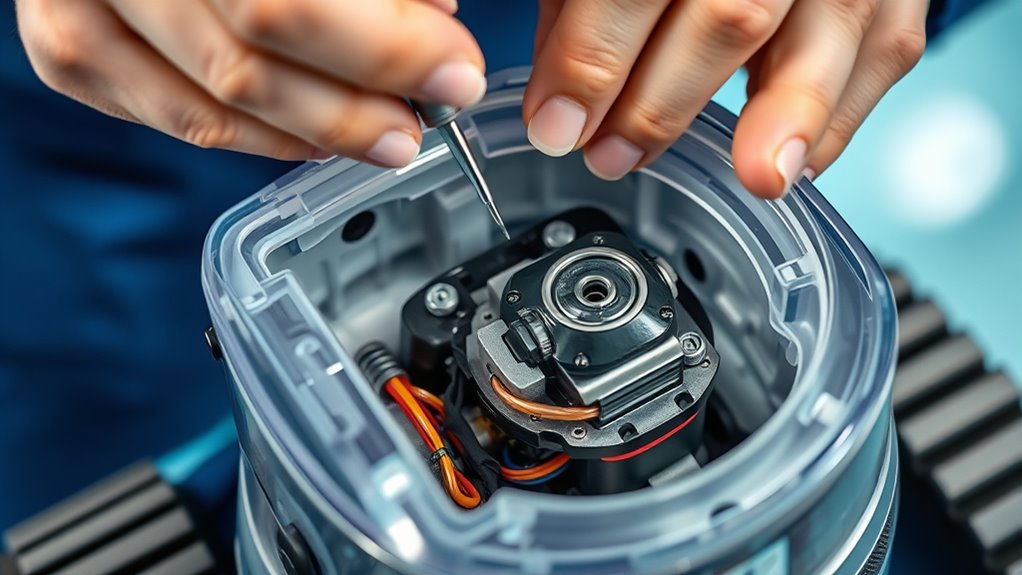
To replace the internal motor components, you’ll need to carefully disassemble the motor housing. Follow the motor disassembly process step-by-step to avoid damaging parts. Once the housing is open, you can access and replace the faulty internal components with new ones. Proper handling and understanding of the motor’s internal components are essential for effective repairs. Regular maintenance and pet hair management can also help prevent future issues with debris buildup inside the motor. Additionally, understanding the engineering design of the motor can improve your ability to troubleshoot and perform successful replacements.
Motor Disassembly Process
Disassembling the motor on your suction pool cleaner requires careful attention to detail. Follow these steps to guarantee proper disassembly and maintain ideal suction power and cleaning efficiency:
- Remove the motor cover carefully, noting screw placement.
- Disconnect the wiring harnesses, avoiding damage to delicate connections.
- Detach the rotor and stator assembly, handling components gently.
- Inspect internal parts for wear or damage, preparing for replacement.
Internal Component Replacement
Replacing internal motor components is a critical step in restoring your suction pool cleaner’s performance. Begin by carefully inspecting the motor for signs of wear or damage, and consider filter replacement to guarantee ideal airflow. During motor troubleshooting, you might find debris or clogs affecting performance; replacing internal parts can resolve these issues. Disconnect the power supply before opening the motor housing. Remove damaged brushes, worn-out bearings, or faulty wiring, and replace them with compatible parts. Ensure all connections are secure and test the motor before reassembling. Proper internal component replacement not only improves efficiency but also extends your cleaner’s lifespan. Take your time and verify each step to prevent further damage and keep your pool spotless.
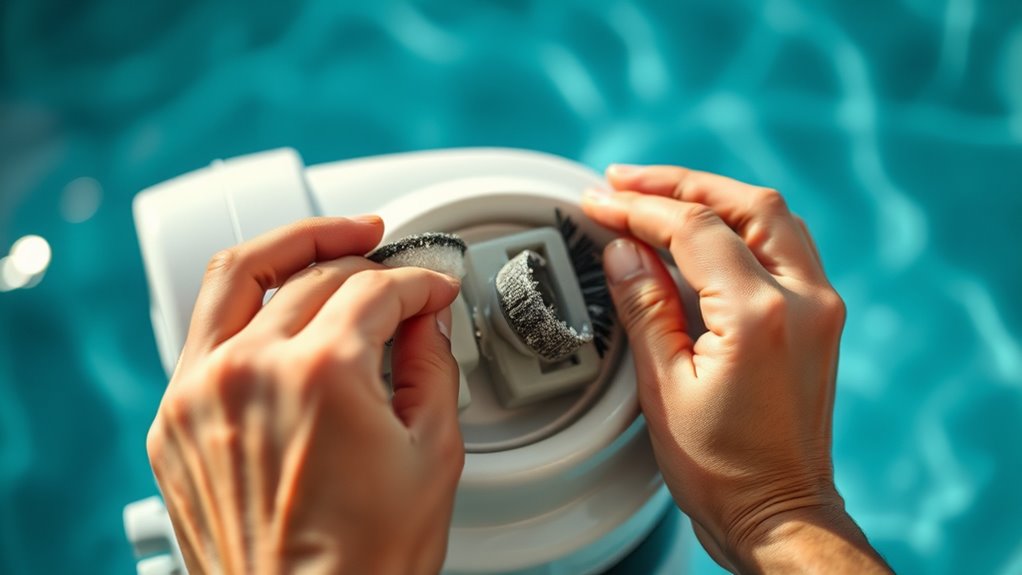
Checking and Securing the Pool Cleaner’s Flaps and Valves
Regularly inspecting the pool cleaner’s flaps and valves guarantees it functions effectively. Proper flap inspection and valve adjustment prevent leaks and ensure ideal suction. Here’s what you should check:
- Examine the flaps for tears, warping, or debris buildup.
- Make sure the flaps move freely and seal tightly.
- Adjust valves to maintain proper water flow and suction power.
- Confirm that all connections are secure and free of cracks.
Testing the Reassembled Cleaner in the Pool
After securing all flaps and valves, it’s time to test the cleaner in the pool to guarantee everything functions properly. Begin by turning on the pool’s filtration system and placing the cleaner in the water. Observe how it moves and ensure it covers the entire pool surface evenly. Proper pool cleaner calibration is essential for peak performance, so check that it’s moving with the correct water flow. If it’s moving too slowly or too quickly, adjust the water flow to achieve smooth, steady operation. Watch for any signs of leaks or blockages. Confirm the cleaner’s brushes and wheels are functioning properly. A successful test ensures your water flow enhancement is correct, and the cleaner will operate efficiently for future cleaning cycles.
Performing Routine Maintenance to Prevent Future Issues
Performing routine maintenance is essential to keep your suction pool cleaner operating effectively and to prevent costly repairs down the line. Regular upkeep helps you spot potential issues early and prolongs your cleaner’s lifespan. Here are four key steps:
- Clean the filter and brushes after each use to ensure peak performance.
- Store your pool cleaner properly, in a dry, shaded area, to avoid damage and maintain warranty coverage.
- Inspect hoses and connections for cracks or blockages, replacing parts as needed.
- Check for wear and tear periodically, replacing worn parts before they cause bigger problems.
Frequently Asked Questions
How Often Should I Replace Parts on My Suction Pool Cleaner?
You should regularly check your pool cleaner to determine when parts need replacing. For effective pool cleaner maintenance, follow a consistent replacement schedule, typically every 6 to 12 months, depending on usage and wear. Pay attention to signs like reduced suction or strange noises. Regular inspections help prevent breakdowns and keep your cleaner functioning efficiently, saving you time and money in the long run.
Can I Replace Parts Myself or Should I Hire a Professional?
When it comes to replacing parts on your suction pool cleaner, you can definitely do DIY repairs if you’re comfortable with basic tools and follow instructions carefully. However, for complex issues or if you’re unsure, it’s better to hire professional servicing. This guarantees the job is done correctly, prevents damage, and keeps your cleaner working efficiently. Always weigh your skill level before attempting repairs yourself.
Are There Compatible Replacement Parts for All Suction Pool Cleaners?
You might think finding compatible parts is impossible, but there’s hope! While universal compatibility exists, many suction pool cleaners require brand-specific parts for perfect fit and performance. Always check if the replacement parts are designed for your model. If you ignore this, you risk damaging your cleaner or voiding warranties. So, verify compatibility carefully, and you’ll keep your pool spotless without a headache.
What Are Signs That My Pool Cleaner Needs More Than Just Part Replacements?
If your pool cleaner isn’t performing well despite replacing parts, it might be indicating more than just simple issues. Look for signs like inconsistent cleaning, strange noises, or frequent jams—these are common pool issues that signal your cleaner needs a thorough check. Regular maintenance tips, such as cleaning filters and checking hoses, can help. If problems persist, it’s time to inspect deeper or seek professional assistance to avoid bigger damage.
How Do I Dispose of Old or Damaged Pool Cleaner Parts Properly?
Think of old pool cleaner parts as the leaves falling from a tree; they need proper disposal to keep your environment healthy. When you’re ready to discard damaged parts, do eco-friendly disposal by recycling or consulting local waste guidelines. Proper pool cleaner maintenance includes responsible disposal, preventing pollution. Always check with local recycling centers or waste management services to make certain you’re disposing of parts in an environmentally friendly way.
Conclusion
Now that you’ve mastered replacing those pesky parts, your pool cleaner will be running smoother than a royal butler serving tea. Who knew that a little maintenance could turn a stubborn device into a pristine aquatic servant? Just remember, with great power to fix comes great responsibility—so resist the urge to turn your pool cleaner into a DIY robot overlord. Keep up the routine, and enjoy a spotless pool without summoning the mechanical masses.