
To replace worn parts on your robotic pool cleaner, start by inspecting for signs like decreased cleaning, visible damage, or strange noises. Gather necessary tools, spare brushes, filters, and replacement parts suitable for your model. Turn off and carefully remove the cleaner from the water, then access and replace components like brushes, filters, tracks, or cables according to manufacturer instructions. For a smoother repair process, make certain everything is properly tested afterward; more tips are ahead to keep it running smoothly.
Key Takeaways
- Identify signs of wear such as decreased cleaning efficiency, visible damage, or unusual noises to determine parts needing replacement.
- Gather appropriate tools and compatible replacement parts based on model specifications and manufacturer guidelines.
- Organize and label spare parts and tools beforehand to streamline the replacement process.
- Safely remove the robotic cleaner from water, then access and detach worn components like brushes, filters, or wheels.
- Install new parts securely, then test the cleaner to ensure proper operation and performance post-replacement.
Identifying Signs of Wear and Tear
To keep your robotic pool cleaner functioning effectively, you need to recognize the signs of wear and tear early on. Common signs include decreased cleaning performance, such as missed spots or uneven cleaning. Wear indicators also include visible damage to brushes, wheels, or the body, like cracks or worn-out bristles. If you notice unusual noises during operation or the cleaner struggles to move smoothly, these are clear signs that parts may be worn or compromised. Additionally, if the suction seems weaker or debris isn’t being collected properly, it’s a sign that internal components might be wearing down. Paying attention to these wear indicators helps you catch problems early, preventing further damage and ensuring your pool stays clean and well-maintained. Regularly inspecting filter and suction components can help identify early signs of deterioration before performance declines significantly, especially since these parts are crucial for maintaining airflow and cleaning efficiency. Incorporating predictive maintenance techniques can further enhance your ability to identify potential issues before they lead to complete part failure, thereby extending the lifespan of your robotic cleaner. Being aware of AI in Business applications, such as automated diagnostics, can also assist in troubleshooting and maintaining your equipment more effectively.
Gathering the Necessary Tools and Replacement Parts
Before you start replacing parts, make sure you have the essential tools on hand, like screwdrivers and pliers. Next, verify that the replacement parts are compatible with your specific pool cleaner model. Additionally, inspecting the best products for your robotic pool cleaner can help ensure compatibility and longevity. Checking the contrast ratio of your projector can also guide you in selecting parts that support optimal image quality. Regularly reviewing performance metrics can assist in identifying worn components before failure occurs. For example, monitoring the durability of parts can help prevent unexpected breakdowns and extend the life of your cleaner. It’s also beneficial to understand the relationship dynamics involved in maintaining your equipment, as proper care and timely replacements are key to longevity. Finally, organize all your supplies to guarantee a smooth and efficient repair process.
Essential Tools Checklist
Having the right tools and replacement parts on hand makes the process of replacing worn components on your robotic pool cleaner much smoother. For effective pool maintenance and robotic cleaning, ensure you have essential tools like screwdrivers, pliers, and a socket set. A soft brush or cloth helps clean parts during the process. Keep spare parts such as brushes, filters, and seals nearby to save time. A small container for organizing screws and tiny components prevents loss. Having a multimeter can be useful if you need to check electrical connections. Before starting, review your cleaner’s manual to gather specific tools or parts recommended by the manufacturer. Being prepared with these tools guarantees you can perform repairs efficiently and keep your robotic pool cleaner running at its best. Understanding Self Watering Plant Pots can provide insights into maintenance and care that might be applicable to other equipment. Additionally, familiarity with Hyundai Tuning options can inspire innovative modifications to enhance your equipment’s performance and longevity. For example, knowing about essential oils and their properties may help in creating maintenance routines that reduce corrosion or improve equipment longevity through preventative care, and knowing the proper cleaning techniques can help extend the lifespan of your parts.
Identifying Compatible Parts
When identifying compatible parts for your robotic pool cleaner, it’s essential to understand the model and manufacturer specifications. This ensures you select the right replacements, like brushes, filters, or batteries. Check the user manual or manufacturer website for part numbers. Additionally, consider battery maintenance; using compatible batteries helps prolong your cleaner’s life. Software updates can also improve performance and compatibility with replacement parts, so keep your device’s firmware current. To simplify, compare parts with your existing ones using this table:
| Part Type | Compatible Models | Key Features |
|---|---|---|
| Main Brush | RC-100, RC-200 | Fit specific model sizes |
| Filter | FC-50, FC-60 | Compatibility with debris types |
| Battery | BATT-123, BATT-456 | Ensure correct voltage and size |
| Drive Motor | DM-789, DM-1010 | Match power specifications |
| Software Updates | Via manufacturer app | Improve battery maintenance and software updates |
Regularly verifying that parts are compatible with your model can prevent malfunctions and extend the lifespan of your cleaner and help maintain optimal performance. Understanding compatibility requirements can save time and money by avoiding incorrect parts purchases. Staying informed about manufacturer guidelines can ensure you’re following best practices for maintenance and upgrades, which is crucial for maximizing your device’s longevity. Incorporating proper storage methods can also help preserve the quality of your replacement parts over time.
Organizing Replacement Supplies
Gathering the right tools and replacement parts sets the foundation for a smooth maintenance process. Before you begin pool cleaner maintenance, verify you have all necessary items ready. Collect screwdrivers, pliers, and any specialty tools specified by the manufacturer. Organize your replacement parts, such as worn brushes or filters, and keep them within easy reach. Using waterproof storage protects these supplies from moisture and corrosion, prolonging their lifespan. Label each part and tool to streamline the process and prevent confusion. Having everything organized beforehand saves time and reduces frustration during repairs. Properly stored replacements make it easier to identify what’s needed and ensure you don’t forget essential components. Additionally, understanding the electric horsepower of your robotic pool cleaner can help you select the right replacement parts to maintain optimal performance. Recognizing the importance of maintenance schedules can also help extend the lifespan of your equipment. Staying informed about manufacturer recommendations ensures you follow the best practices for upkeep. With your supplies well-organized, you’ll be ready to efficiently replace worn parts and get your robotic pool cleaner back in top shape. Regularly inspecting your equipment and component quality can prevent unexpected breakdowns and enhance durability. To further optimize performance, consider keeping a performance log to track any issues or replacements over time.
Removing the Robotic Pool Cleaner From the Water
Before removing your robotic pool cleaner from the water, make sure the power supply is turned off to prevent any electrical hazards. Safety precautions are vital during this step to avoid accidents. Gently lift the cleaner from the pool, supporting it firmly. To help visualize, here’s a quick overview:
| Step | Equipment Needed | Safety Tip |
|---|---|---|
| Turn off power | Power switch or outlet | Double-check power is off |
| Support the cleaner | Hand or pole | Keep a firm grip |
| Remove from water | – | Avoid dropping |
| Place on a dry surface | Towel or mat | Prevent damage |
| Inspect for debris | None | Clear water before maintenance |
This process ensures safe pool maintenance and minimizes risks. Additionally, ensure the worn parts are replaced correctly during maintenance to keep the cleaner functioning optimally. Regularly inspecting the components can help prevent unexpected breakdowns and extend the lifespan of your device. Being aware of potential hazards during removal can further enhance safety protocols. Proper handling and adherence to safety steps are essential for a smooth maintenance routine and to avoid electrical accidents.
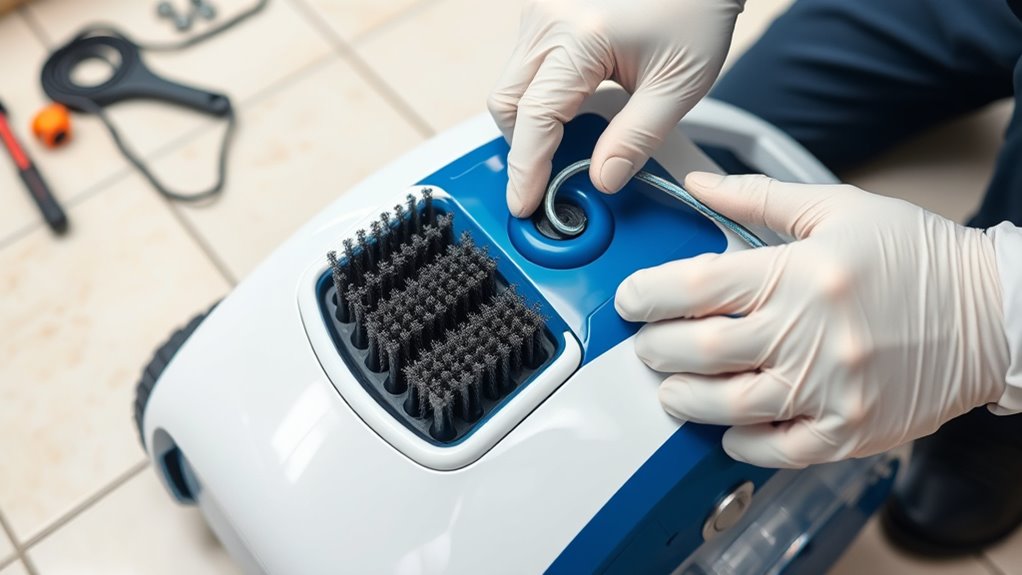
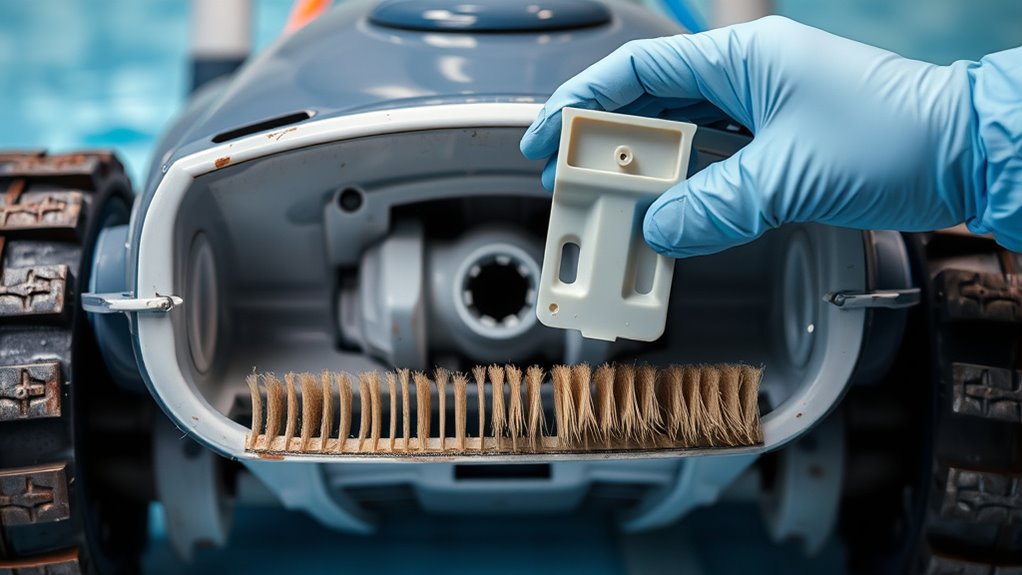
Accessing and Replacing the Brushes
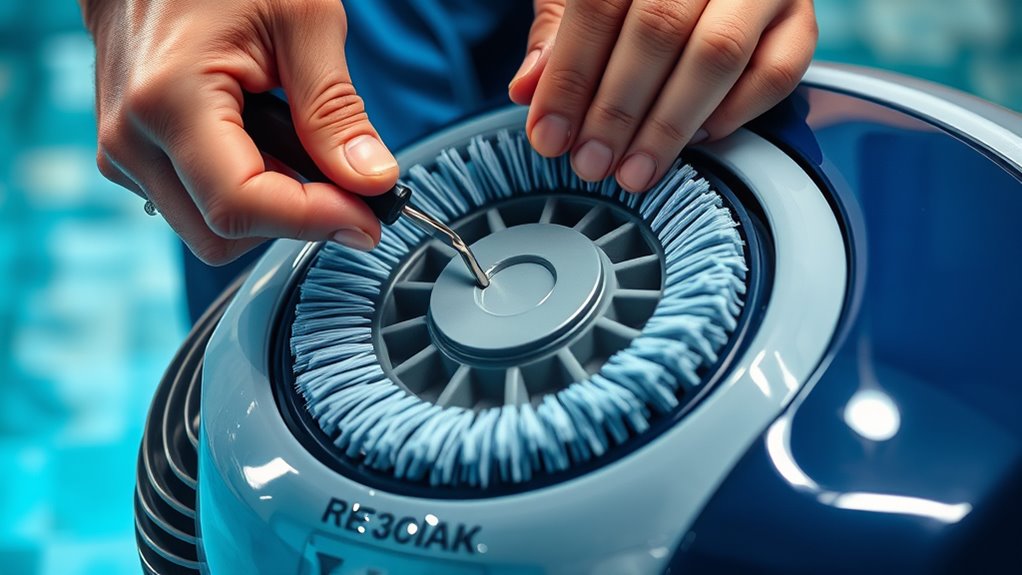
To access and replace the brushes on your robotic pool cleaner, start by removing the cover or panel that houses the brushes, typically located on the underside of the device. Carefully lift or unscrew the panel to reveal the brushes inside. During brush maintenance, check for wear or damage, and remove the old brushes by gently pulling them out. When installing new brushes, align them properly with the slots or connectors, ensuring they fit snugly. Proper brush installation is essential for peak cleaning performance. Once the new brushes are securely in place, reattach the cover or panel, making sure it’s sealed tightly. Regular brush maintenance helps prolong the life of your cleaner and keeps it working efficiently.
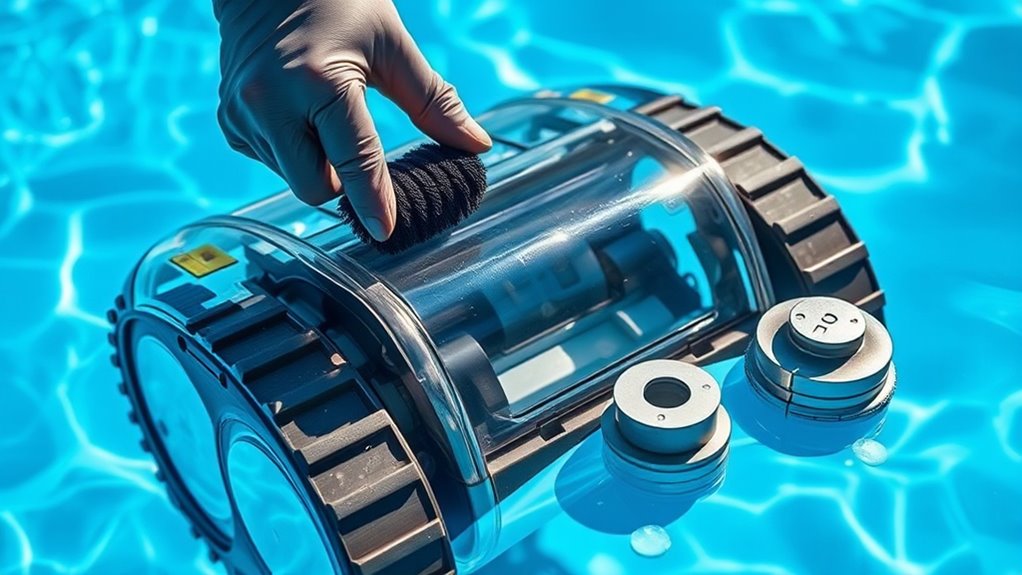
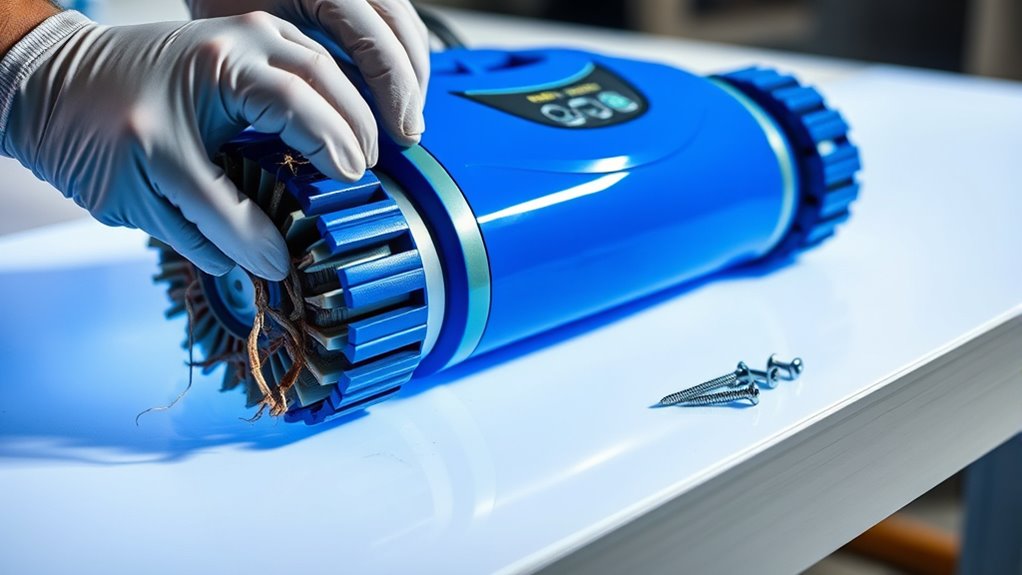
Replacing the Filters and Filter Cartridges

Replacing the filters and filter cartridges is a straightforward process that helps maintain your robotic pool cleaner’s efficiency. Regular filter maintenance guarantees your device operates at peak performance and prevents clogs. To replace them, first turn off your cleaner and remove the filter cover. Take out the old filter or cartridge, discard it, and rinse the new one with water if needed. Make sure it’s clean and free of debris before installing it back into the unit. Properly fitted filters improve filtration, capturing dirt, algae, and debris more effectively. Regularly replacing filters not only extends the lifespan of your cleaner but also keeps your pool cleaner and clearer. Always follow your manufacturer’s instructions for specific filter replacement procedures.
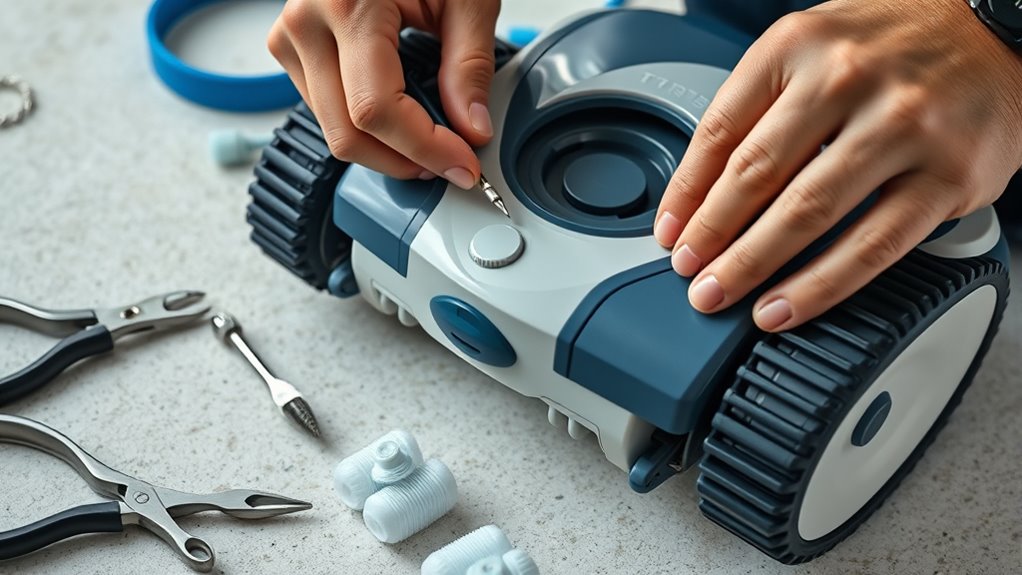
Inspecting and Replacing the Drive Tracks or Wheels
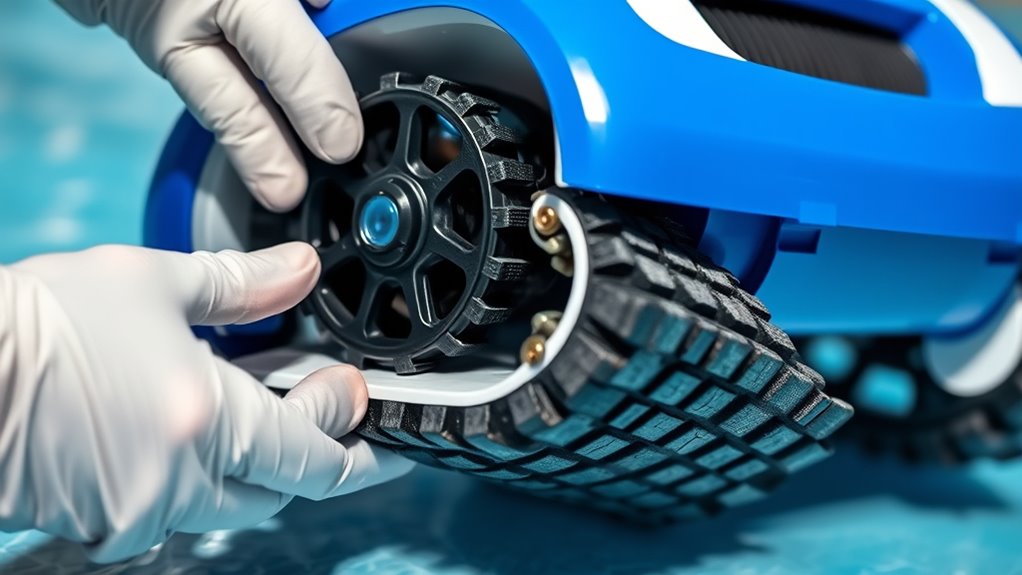
Regularly inspecting your robot’s drive tracks and wheels guarantees smooth movement and effective cleaning. Check the drive mechanism and look for signs of wear, cracks, or damage. Worn or damaged drive tracks can cause slipping or uneven cleaning, so replace them when necessary. Focus on the wheel assembly, ensuring the wheels spin freely and aren’t obstructed by debris or buildup. If you notice missing or broken wheels, remove the old parts carefully and install new ones, making sure they’re securely attached. Proper maintenance of the drive tracks and wheels ensures your robotic pool cleaner operates efficiently and prolongs its lifespan. Keep an eye out for signs of wear, and replace parts promptly to avoid more significant issues down the line.
Checking and Replacing the Cables and Connectors
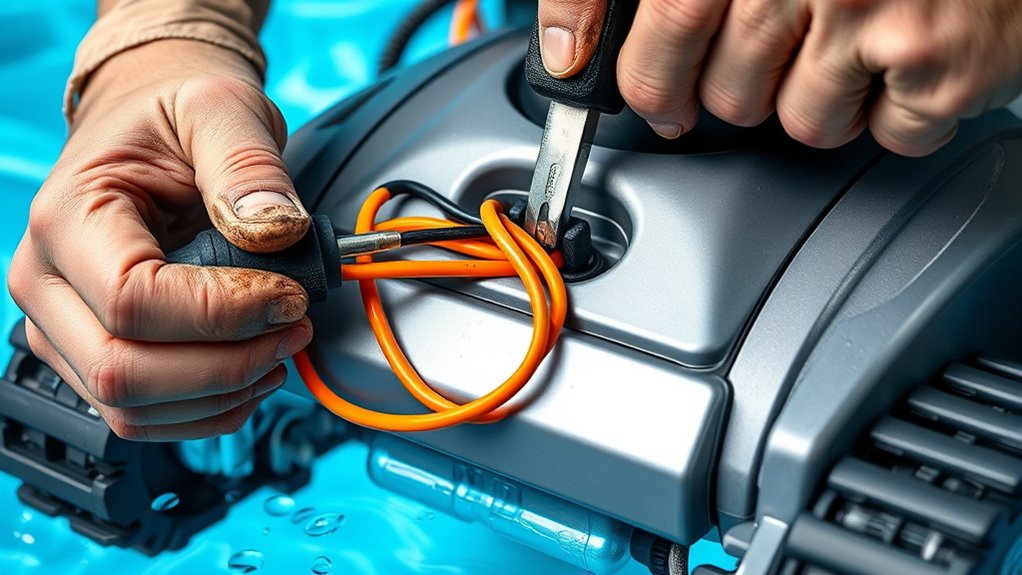
Since cables and connectors are essential for powering and controlling your robotic pool cleaner, it’s important to verify them regularly for damage or wear. Start with a thorough cable inspection, looking for cuts, abrasions, or exposed wires. Examine connectors for corrosion, loose fittings, or cracks. If you notice any issues, consider connector replacement to ensure proper function. When inspecting, keep in mind these key points:
- Check for frayed or damaged cables
- Look for bent or broken pins in connectors
- Ensure all connections are secure
- Remove debris or buildup around connectors
- Replace damaged cables or connectors promptly
Maintaining clean, intact cables and connectors ensures your cleaner runs smoothly and prolongs its lifespan. Regular inspection prevents future malfunctions and keeps your pool spotless.
Testing the Cleaner After Replacing Parts
After you’ve replaced the necessary parts on your robotic pool cleaner, it’s crucial to test it thoroughly before full operation. Start by running the cleaner in a controlled area to ensure all components function properly. Check that the brushes, sensors, and wheels respond correctly, and observe its movement. During testing, monitor how it interacts with your pool’s water and debris, paying attention to any unusual noises or stalls. Make sure your pool’s chemistry is balanced, as proper chemical levels help the cleaner perform at its best, especially during seasonal maintenance. Confirm that the cleaner covers the entire pool surface evenly. After testing, review the manufacturer’s instructions for any calibration needed. Proper testing helps prevent issues and ensures your pool stays clean and well-maintained.
Frequently Asked Questions
How Often Should I Replace Parts on My Robotic Pool Cleaner?
You might wonder how often to replace parts on your robotic pool cleaner. Follow a regular maintenance schedule and perform part inspections monthly. Check brushes, filters, and wheels for wear and tear. Replace worn parts promptly to keep your cleaner functioning effectively. Typically, brushes and filters last several months, but frequent use or debris may require more frequent replacements. Consistent inspection ensures peak performance and extends your cleaner’s lifespan.
Can I Replace Parts Myself or Should I Hire a Professional?
You can definitely try DIY repairs if you’re comfortable with basic tools and instructions. Many worn parts, like brushes or filters, are simple to substitute on your own. However, for more complex issues or if you’re unsure, it’s best to opt for professional servicing. Professionals have the expertise to ensure everything’s fixed correctly, preventing further damage and keeping your robotic pool cleaner running smoothly.
Are There Compatibility Issues Between Different Brands’ Replacement Parts?
You might think swapping parts is as simple as a quick fix, but beware—brand compatibility issues can turn that into a nightmare! Not all parts are interchangeable, and trying to mix brands could cause major damage. Always check if the parts are compatible, focusing on brand compatibility and part interchangeability. Stick with your cleaner’s brand to ensure smooth operation, avoiding costly mistakes and endless frustration.
What Safety Precautions Should I Take During the Replacement Process?
When replacing worn parts, you should prioritize electrical safety and proper tool handling. Always disconnect the power source before starting work to avoid shocks. Use insulated tools and wear gloves to protect yourself. Keep the work area dry and organized to prevent accidents. Follow manufacturer instructions carefully, and double-check connections before powering on the cleaner. These precautions guarantee your safety during the replacement process.
How Do I Dispose of Old or Damaged Parts Safely?
Think of old robotic pool cleaner parts as treasure chests filled with electronic waste and hazardous materials. To keep our environment safe, you should take these parts to a designated e-waste recycling center. Avoid throwing them in regular trash, as hazardous materials can leak and cause harm. Proper disposal guarantees you’re not only protecting nature but also preventing potential health risks from hazardous substances.
Conclusion
Think of your robotic pool cleaner as a trusty steed on a never-ending quest for crystal-clear water. When its armor shows signs of wear, don’t hesitate to repair and renew it. By replacing worn parts, you’re giving your cleaner new strength and agility, ensuring it continues its noble mission. With a little care and attention, your pool’s guardian will be ready to conquer dirt and debris, keeping your oasis pristine for years to come.