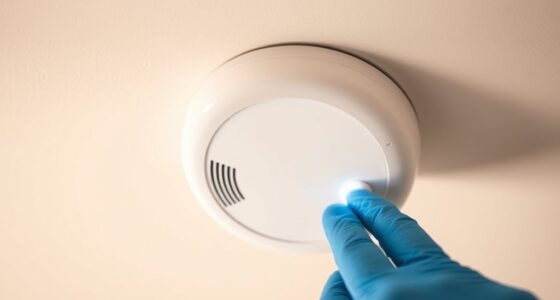
To achieve flawless walls, start by clearing and thoroughly cleaning the surface to guarantee good paint adhesion. Sand rough patches and repair cracks or holes for a smooth finish. Apply a high-quality primer to even out the surface, then protect edges with painter’s tape for sharp lines. Finally, inspect your work carefully for missed spots or drips. Follow these steps, and you’ll discover more expert tips for perfect walls along the way.
Key Takeaways
- Thoroughly clean and repair surfaces, filling cracks and smoothing for a perfect base.
- Use high-quality primers and patching compounds suited for your wall material.
- Sand surfaces evenly and feather edges for seamless repairs and a smooth finish.
- Apply paint in even coats, using proper techniques and painter’s tape for sharp edges.
- Conduct a final inspection to address imperfections and ensure a professional, flawless look.
Clearing and Cleaning the Surface
Have you ever wondered why your paint job doesn’t last as long as expected? It often comes down to proper surface preparation. Start by clearing the area of any furniture, fixtures, or obstacles. Next, clean the surface thoroughly to remove dirt, grease, and dust—these can prevent paint from adhering properly. When it’s time to match colors, ensure your paint storage containers are labeled and airtight to keep the paint fresh and prevent color mismatches later. Proper cleaning also helps you spot any cracks or imperfections that need repair. Taking these steps ensures your paint sticks well and looks vibrant. Clear, clean surfaces create the perfect foundation for a flawless finish, saving you time and effort in the long run.
Sanding for Smoothness
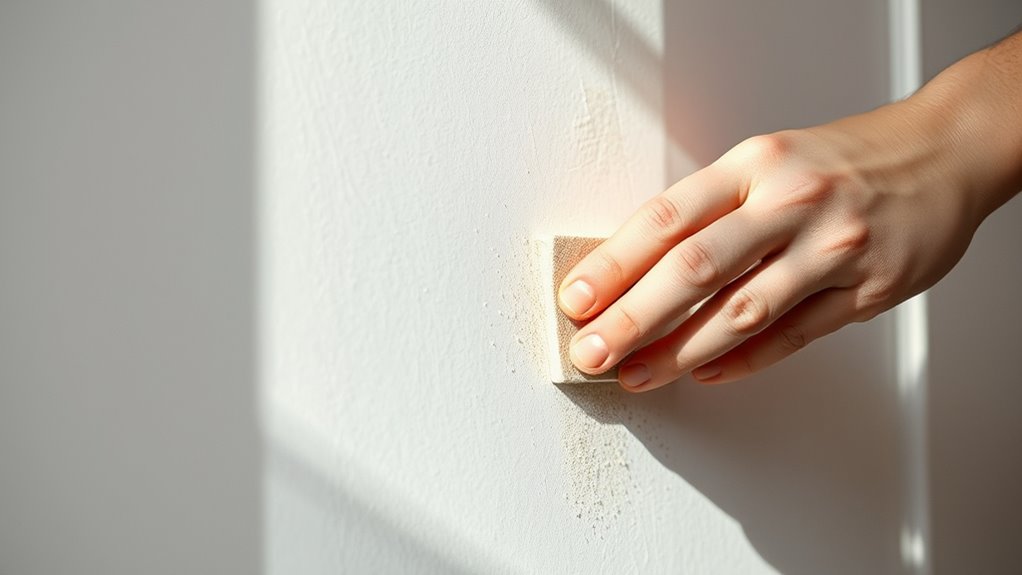
To achieve a flawless paint finish, sanding for smoothness is a crucial step. It refines the surface by smoothing rough patches and enhancing grain refinement. Proper abrasive selection ensures you don’t damage the wall or leave scratches. Use finer grits for a polished look and coarser ones for initial smoothing. Keep a consistent hand and check your progress regularly. Selecting the right sanding tools, such as sanding block, helps maintain even pressure for a uniform surface.
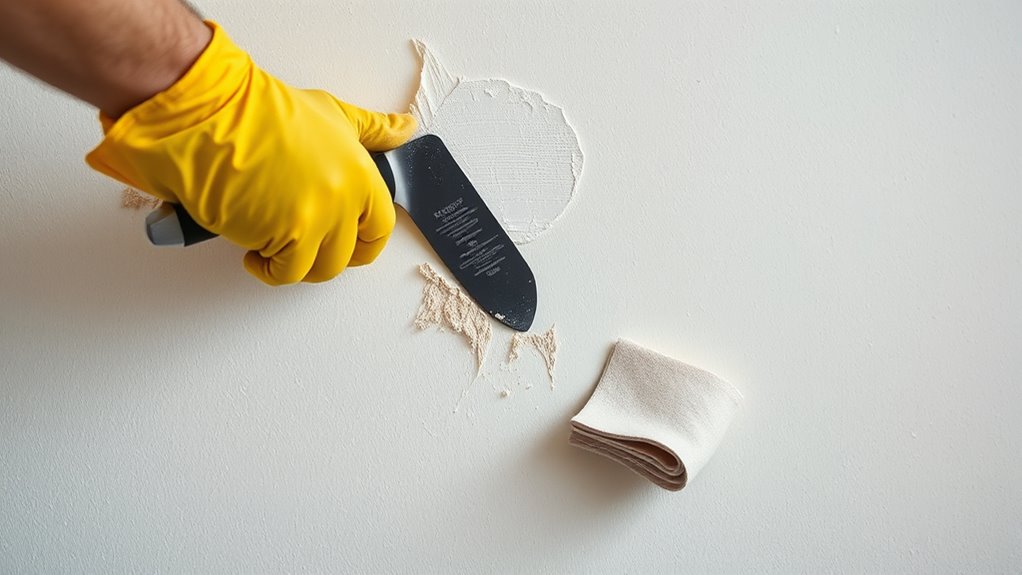
Repairing Cracks and Holes
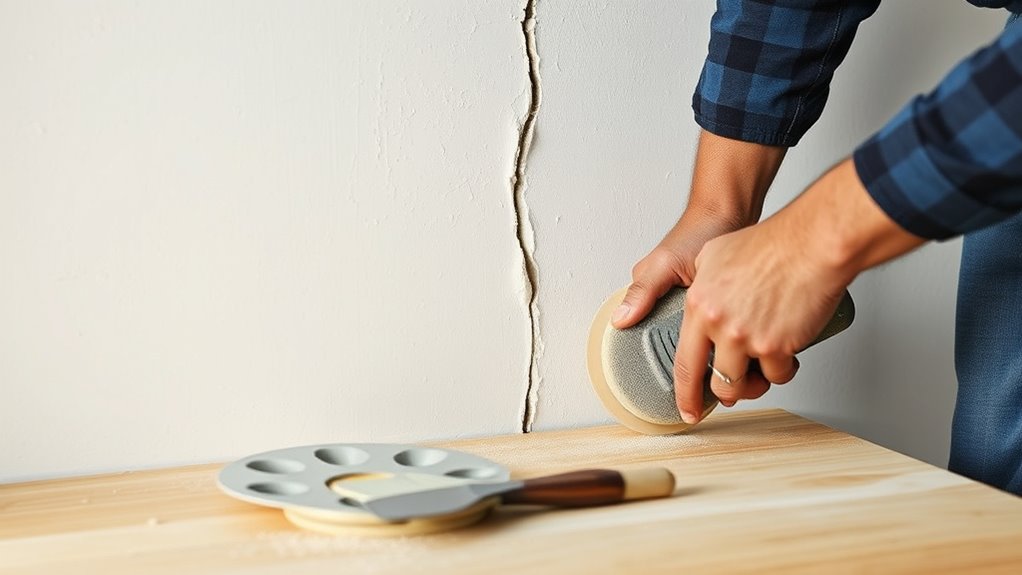
Before you start repairing cracks and holes, you need to evaluate the damage carefully to determine the best approach. Choosing the right materials guarantees your repairs will last and blend seamlessly with the existing surface. Once you’ve selected your materials, make sure to smooth the area thoroughly for a flawless finish. Considering proper surface preparation techniques, such as surface cleaning and priming, can further enhance the durability of your repairs.
Assess Damage Thoroughly
Evaluating damage thoroughly is essential before you start repairing cracks and holes. You need to carefully inspect the affected area, noting the size and depth of damage. This helps determine the best repair method and guarantees a smooth finish. Pay attention to color matching and texture assessment—matching the wall’s existing surface prevents noticeable repairs. Use the table below to guide your assessment:
| Damage Type | Key Considerations |
|---|---|
| Fine cracks | Monitor for expansion, match texture |
| Large holes | Assess underlying support, color match |
| Peeling paint | Check for moisture issues |
| Surface dents | Determine if filling is needed |
| Texture irregularities | Match existing wall texture |
Accurate damage assessment leads to better repairs and a flawless final paint job. Additionally, understanding surface preparation techniques can significantly improve the adhesion and durability of your repair work.
Proper Material Selection
Choosing the right materials is essential for effectively repairing cracks and holes. Selecting products with good paint durability assures your repairs last over time, resisting future damage and wear. Use patching compounds suited for your wall type, whether drywall or plaster, to achieve a solid, smooth surface. Proper filler selection also helps with color matching, making repairs less noticeable once painted. When choosing primers, opt for those that enhance adhesion and provide a uniform base, especially if you’re working with stained or damaged areas. Accurate material selection prevents future issues like peeling or cracking, saving you time and effort. Incorporating heat pump technology insights can also help you understand how proper maintenance and material choices contribute to the longevity of your repairs. Ultimately, using quality, appropriate repair materials results in a seamless finish that blends perfectly with the rest of your wall.
Smooth Surface Preparation
To achieve a flawless finish, start by repairing cracks and holes to create a smooth, even surface. Use a putty knife to fill gaps, then sand the area until it’s flush with the wall. Proper brush techniques matter—use light, sweeping strokes to blend patched areas seamlessly. When applying primer or touch-up paint, choose colors that coordinate well with your base shade to avoid mismatched spots. For larger repairs, consider using a roller for even coverage before brushing the edges for a smooth progression. Be sure to feather the edges of repairs to prevent noticeable bumps. Taking the time to fix imperfections and applying paint with precise brush techniques ensures a flawless surface, making your wall ready for a perfect final coat. Incorporating proper surface preparation methods can significantly improve the overall appearance of your walls.
Applying the Right Primer

To get the best results, you need to choose the right primer type for your surface. Make sure to clean and prepare the area properly before applying, and use even strokes to guarantee full coverage. Doing these steps carefully will help your paint adhere better and last longer.
Choose Appropriate Primer Type
Selecting the right primer is essential to ensuring your paint job lasts and looks professional. With so many primer options available, it’s important to choose one suited for your wall type and project needs. For example, use a bonding primer for surfaces with peeling paint or stains, and a stain-blocking primer for water marks or smoke damage. If you’re working with drywall, a basic primer will do, but for metal or glossy surfaces, opt for a specialized primer. Proper primer application is key; apply evenly and avoid over-priming, which can lead to drips or uneven coverage. Additionally, understanding the regional legal resources available can help if you encounter issues with paint contracts or disputes. Picking the appropriate primer type sets the foundation for a flawless finish and helps your paint adhere better, ensuring a durable, professional-looking result.
Prepare Surface Properly
Before applying primer, you need to prepare the surface thoroughly to guarantee proper adhesion and a smooth finish. Start by cleaning the walls to remove dust, dirt, and grease. Sand any rough spots or peeling paint to create an even surface. If you’re color matching or doing paint mixing, ensure the wall’s base color is uniform to prevent uneven coverage. Use a primer suitable for your wall type, and if needed, tint the primer slightly to match your paint, which helps with color matching later. Filling holes or cracks with a primer-compatible filler ensures a flawless look. Proper surface prep minimizes the risk of peeling or uneven texture, making the primer adhere better and setting a solid foundation for your paint job. Additionally, understanding proper surface preparation can significantly impact the durability and appearance of your painted walls.
Apply Even Coat
Achieving a smooth, even coat of primer is essential for a professional-looking finish. To do this, focus on maintaining consistent paint consistency and smooth brush strokes. Here are key tips:
- Use long, even brush strokes to spread the primer uniformly, avoiding streaks.
- Keep your primer at the right thickness; if it’s too thick, it will be hard to apply smoothly.
- Work in manageable sections to prevent overlaps and uneven layers.
- Proper preparation of your surface and material can significantly influence the final outcome, as forsale 100 indicates the importance of quality materials and proper application techniques.
Ensure your brush strokes flow seamlessly, and don’t press too hard. Stir the primer well before applying to maintain paint consistency. Applying an even coat reduces the need for multiple layers and creates a flawless surface ready for painting.
Taping and Protecting Edges
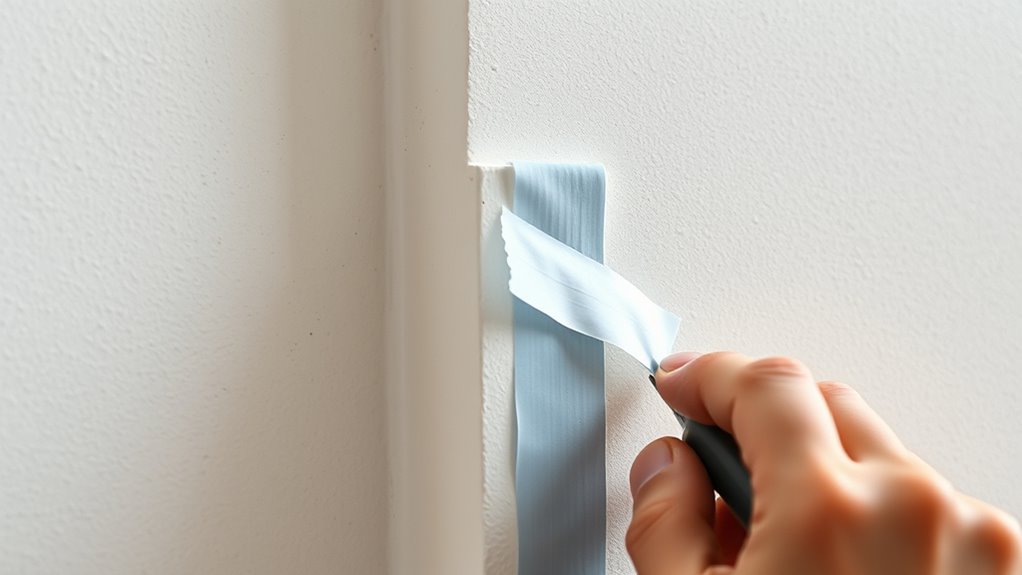
To guarantee clean, sharp paint lines, it’s essential to carefully tape and protect edges before you start painting. Start by applying painter’s tape along trim, baseboards, and adjacent surfaces, ensuring it’s pressed down firmly to prevent paint bleed. For a cleaner finish, consider edge sealing the tape’s edge with a small amount of the same paint you’ll use on the wall; this helps create a barrier against paint seepage. Once you’ve finished painting, wait for the paint to dry slightly, then gently remove the tape to avoid smudging. Proper tape removal reveals crisp, professional-looking edges. Taking your time during tape application and removal ensures a neat, flawless result, giving your walls that polished, finished appearance you desire. Incorporating curiosity-driven techniques can also help you develop more effective painting skills and explore new creative ideas.
Final Inspection and Surface Preparation

Once you’ve finished painting, taking the time for a thorough final inspection guarantees your work looks its best. Check for uneven paint application, ensuring proper paint adhesion and color consistency across all surfaces. Look closely at corners, edges, and large areas for drips, missed spots, or inconsistencies. Address any imperfections immediately to prevent them from setting. Examining surface flaws carefully helps ensure a smooth, professional finish.
To guarantee a flawless finish, focus on these key points:
- Confirm all surfaces are properly prepped to promote optimal paint adhesion.
- Verify color consistency, blending areas for a uniform look.
- Inspect for any surface flaws or spots needing touch-ups before the paint fully dries.
A careful final inspection guarantees your walls look professional and polished.
Frequently Asked Questions
How Do I Choose the Best Type of Paint for My Walls?
When choosing the best paint for your walls, consider your desired look and function. Explore various paint finish options like matte, eggshell, or satin to find what suits your space. Also, think about your paint color selection—lighter shades can make rooms feel bigger, while darker tones add coziness. Pick a high-quality paint that matches your needs, ensuring durability and easy maintenance for a flawless, professional result.
What Environmental Conditions Affect Paint Adhesion and Drying?
You might think environmental conditions don’t matter, but humidity control and temperature considerations are essential. High humidity can slow drying and cause paint to peel, while low humidity speeds up drying but may lead to cracks. Extreme temperatures can affect adhesion, with cold causing poor bonding and heat leading to blistering. To guarantee flawless results, paint in moderate conditions, maintain proper humidity, and avoid extreme temperatures for maximum adhesion and drying.
How Long Should I Wait After Repair Before Painting?
You should wait at least 24 hours after repair before painting, but timing considerations depend on the repair’s size and drying conditions. Confirm the repair is fully dry to prevent peeling or bubbling. If the repair involved moisture or a thicker application, give it more time—up to 48 hours. Rushing the process can compromise your finish, so always check that the repair is completely dry and stable before painting.
Can I Paint Over Wallpaper or Textured Surfaces?
Sure, go ahead and paint over wallpaper or textured surfaces—what could go wrong? Just kidding! You need to remove wallpaper properly and treat textured surfaces to guarantee your paint sticks and looks smooth. Skipping these steps can lead to peeling or an uneven finish. So, take the time for wallpaper removal and textured surface treatment; your walls will thank you with a flawless, professional look.
What Are Common Mistakes to Avoid During Surface Preparation?
When preparing a surface, avoid common mistakes like neglecting to remove surface contaminants, which can cause paint to peel or not adhere properly. Also, don’t skip proper sanding—improper sanding can leave bumps or rough patches that ruin your finish. Always clean the surface thoroughly first, and use the right sanding techniques to ensure a smooth, clean base. This helps your paint job stay flawless and long-lasting.
Conclusion
Now that your walls are perfectly prepped, imagine each stroke of paint as a brushstroke on a blank canvas, ready to reveal your vision. The smooth surface you’ve created is like a calm lake, reflecting your effort and care. With your meticulous preparation, every color will shine with clarity and vibrancy. Trust in your work, and watch your space transform into a masterpiece—proof that great things begin with a well-prepared surface.