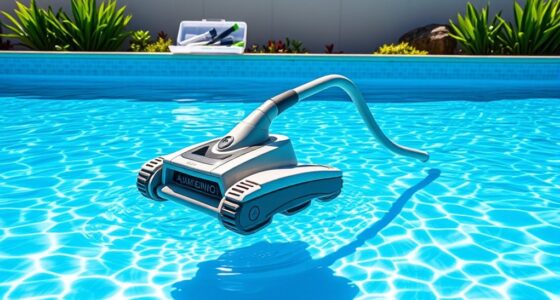

To install a suction pool cleaner, start by gathering your tools and turning off the pool pump and power supply for safety. Attach the hose securely to the cleaner and prime it by filling the hose with water to remove air bubbles. Connect the hose to the skimmer or pool return, then position the cleaner in the pool. Adjust the hose length for smooth movement and check the cleaner’s operation. Continuing will help you master all the steps for maximum performance.
Key Takeaways
- Turn off the pool pump and disconnect the power supply before starting installation.
- Attach the hose sections securely to the cleaner and prime the hose to remove air bubbles.
- Connect the hose to the skimmer or pool return fitting tightly, ensuring a leak-proof seal.
- Adjust the hose length to be slightly longer than the pool’s diagonal for optimal movement.
- Regularly check and maintain filters, hoses, and debris baskets to ensure efficient cleaning performance.

Hivone 40X32 LED Bathroom Mirror with Lights, Anti-Fog, Dimmable, Backlit + Front Lit, Smart Bathroom Vanity Mirror, Memory Function, Shatterproof, Tempered Glass (Horizontal/Vertical)
[Double Lighting Sources,Super Bright]: Hivone LED bathroom mirror built-in double light LED strips with backlit and front light...
As an affiliate, we earn on qualifying purchases.
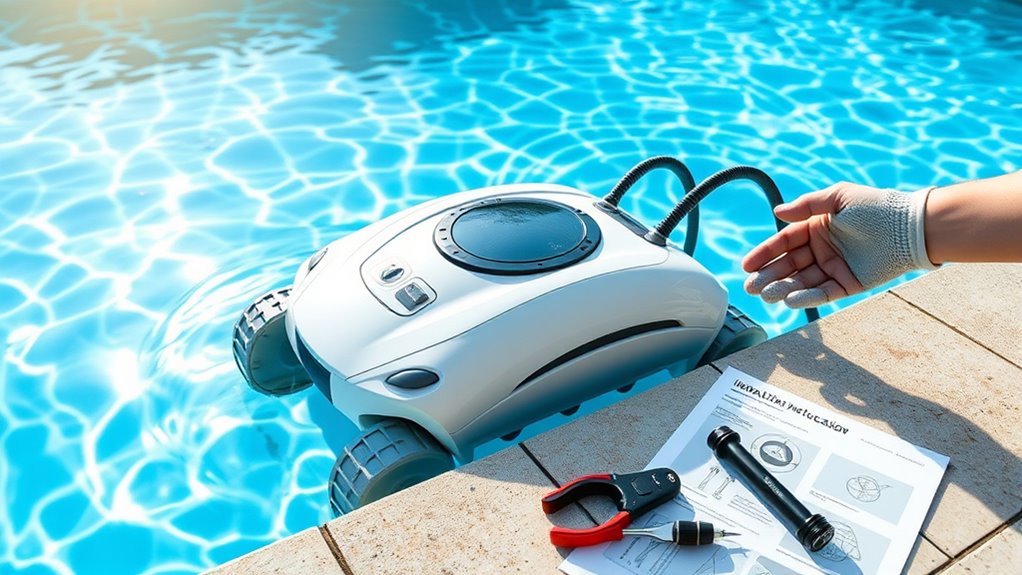
Gather Necessary Tools and Equipment

Before you begin installing your suction pool cleaner, it’s important to gather all the necessary tools and equipment. Properly preparing ensures smooth pool maintenance and helps you avoid unnecessary delays. You’ll need your suction cleaner, hoses, and an adapter if required. A pair of scissors or a knife will help trim hoses if needed. Keep a bucket or container nearby to hold small parts. Safety precautions are essential—wear gloves and ensure your work area is clear of tripping hazards. Having these tools ready prevents interruptions and keeps the process efficient. Double-check that all parts are present and compatible with your pool setup. Taking time to gather everything beforehand makes installation safer, easier, and more effective. Additionally, understanding the necessary cookies involved can help you better troubleshoot or optimize your setup in the future.

LOAAO 60X36 LED Bathroom Mirror with Lights, Anti-Fog, Dimmable, Backlit + Front Lit, Lighted Bathroom Vanity Mirror for Wall, Memory Function, Tempered Glass, ETL Listed
【Backlit+Front-lit, Double Lighting Sources】: loaao led bathroom mirror is designed with both backlight and front light; Double lighting...
As an affiliate, we earn on qualifying purchases.
Turn Off the Pool Pump and Power Supply

Turning off the pool pump and power supply is a crucial safety step before installing your suction cleaner. This prevents accidental startup, reducing the risk of injury and damage. Before turning off the pump, check for pool chemical compatibility to ensure cleaning chemicals won’t interfere with the equipment. Always follow pool safety precautions by disconnecting the power supply entirely to avoid electrical hazards. Wait a few minutes after shutting down the pump to let the water settle, making installation easier and safer. Remember, working with a powered system requires caution, so never bypass safety measures. Turning off the system thoroughly protects you and your pool equipment while ensuring the cleaner is installed correctly and safely. Proper fuel injection cleaning can also help maintain optimal pool pump performance and efficiency. Additionally, understanding pool system safety procedures can further reduce risks during maintenance.

Vacmaster Professional Beast Series VFB511H 0201 5-Gallon 5.5 Peak HP Wet/Dry Vac, Black
Beast Series High-Performance Motor with 320 Air Watts of Power, 20kPa
As an affiliate, we earn on qualifying purchases.
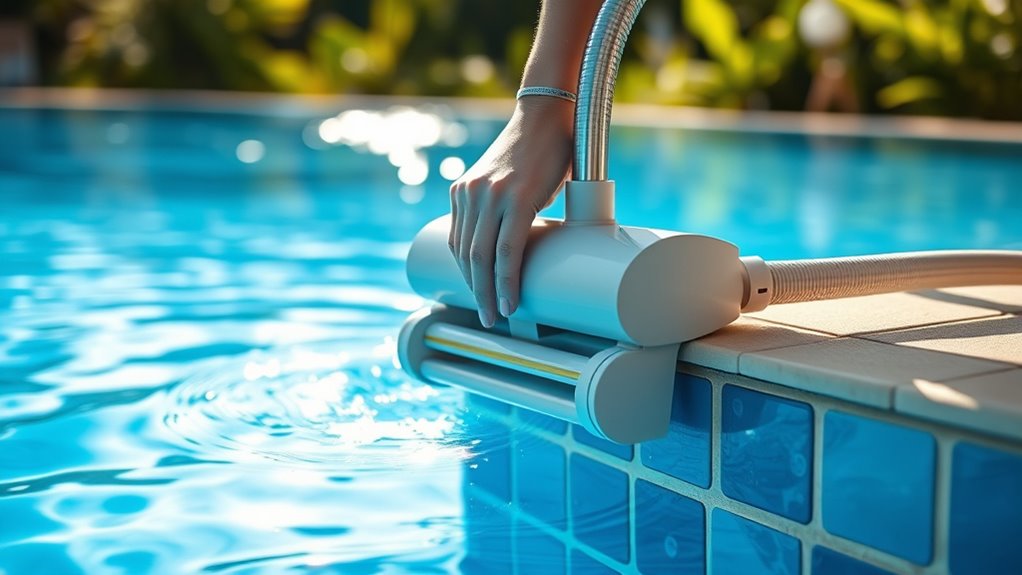
Attach the Hose to the Cleaner
Once the pool pump is off and the water has settled, you can begin attaching the hose to the cleaner. Start by connecting the hose to the cleaner’s designated hose connection, ensuring it fits snugly. Push the fittings together firmly to secure them, and double-check that all securing fittings are tight. Properly attaching the hose prevents leaks and guarantees optimal suction. If your cleaner has multiple hose sections, connect each piece securely, listening for a click or feeling for a snug fit. Make sure the connection is tight without forcing it, as over-tightening can damage the fittings. Additionally, verifying the effectiveness of the attachment can help ensure that the cleaner operates efficiently. Regularly inspecting and maintaining GMC tuning components can also prevent issues during pool cleaning. To further enhance the performance, be sure to maintain the cleaner properly by checking for blockages and ensuring all connections remain secure during use. Once the hose is properly attached and secured, you’re ready to proceed with the next steps in setting up your suction pool cleaner.

CRAFTSMAN CMXEVBE17595 16 Gallon 6.5 Peak HP Wet Dry Vac, Heavy-Duty Shop Vacuum Wet and Dry with Filter, Dust Bag, Hose and Attachments for Home Projects & Renovations
HEAVY-DUTY: Powerful 6.5 Peak HP provides extra power for large projects in the garage, shop and on the...
As an affiliate, we earn on qualifying purchases.
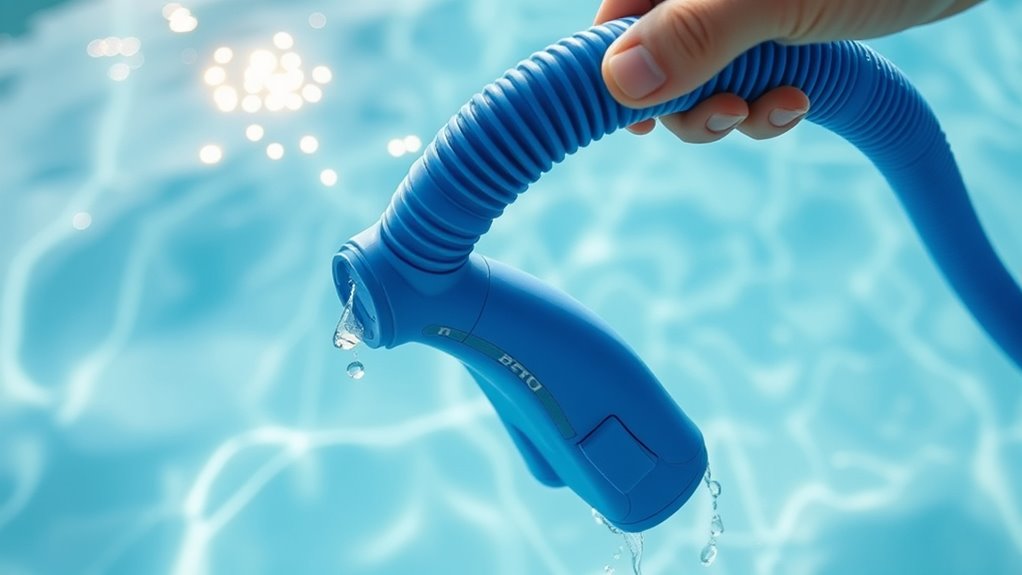
Prime the Hose to Remove Air Bubbles
Have you ever noticed air bubbles escaping from your hose during setup? That’s a sign you need to prime the hose to remove air bubbles. Hose priming is vital because trapped air can reduce suction and hinder the cleaner’s performance. To prime the hose, submerge it in the pool water, allowing water to fill the entire length and push out any air. Keep the hose submerged until you see no more air bubbles escaping. This ensures the hose is filled with water, creating a proper seal and ideal suction. Priming the hose also helps prevent air from entering the system during operation. Take your time, and make sure every section is filled with water before moving on to the next step. Additionally, ensuring the headphones are properly paired and functioning can help you monitor the process more effectively. Proper hose priming is essential for maintaining optimal suction and ensuring your pool cleaner works efficiently. Being aware of air bubbles during setup can help you troubleshoot potential issues early, especially since filter maintenance can influence overall system performance.
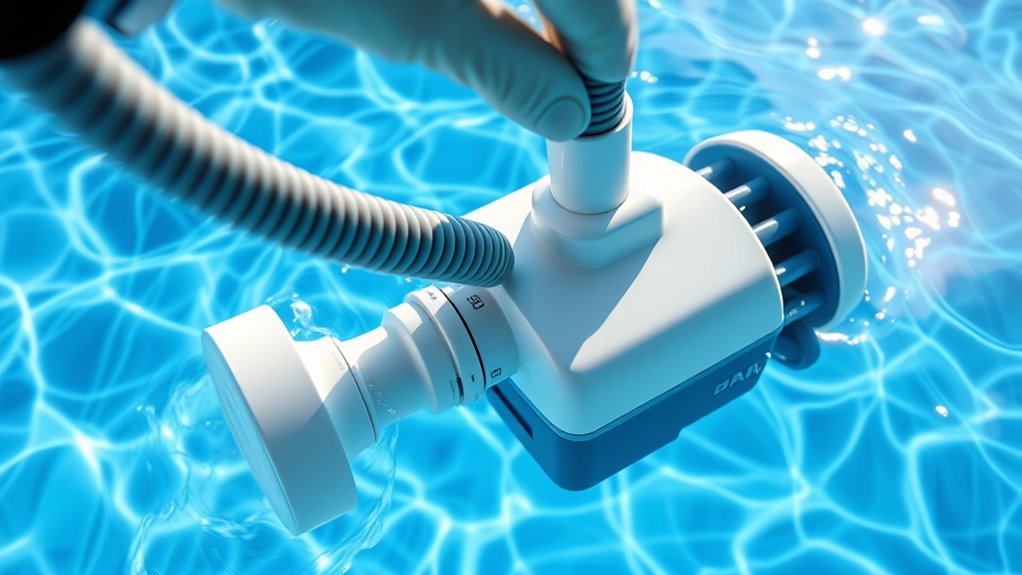
Connect the Hose to the Skimmer or Pool Return
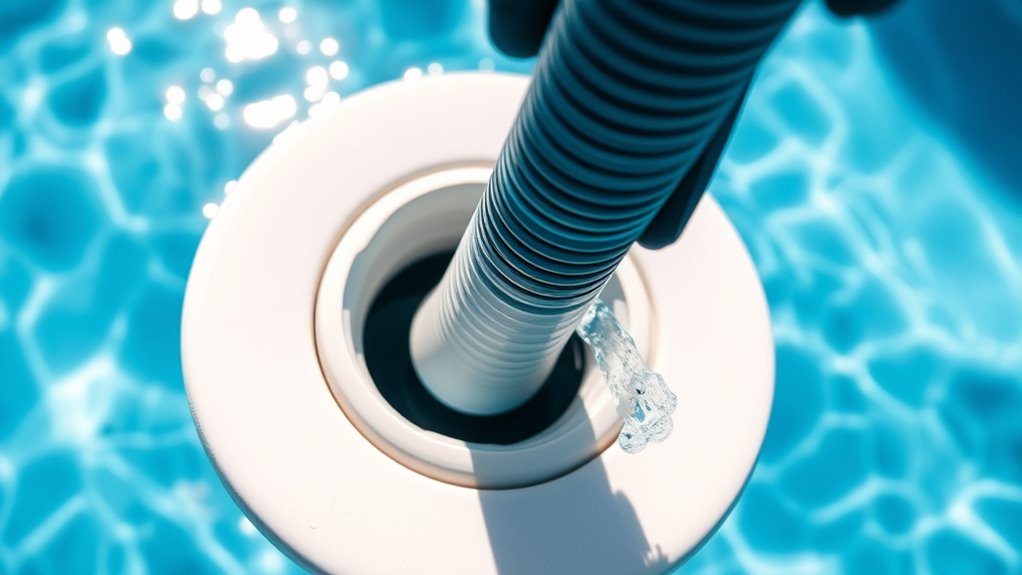
After you’ve primed the hose and removed all air bubbles, it’s time to connect it to the skimmer or pool return. For the hose connection, guarantee the end fits securely onto the skimmer attachment or pool return fitting. If your cleaner has a quick-connect feature, align the hose end with the fitting and press firmly until it clicks into place. Make sure the connection is tight to prevent leaks and loss of suction. If necessary, use clamps or adapters to secure the hose to the skimmer attachment. Double-check that the hose is straight and not twisted, which can obstruct water flow. A secure hose connection ensures ideal suction power and effective cleaning during operation. Proper installation is essential for maintaining optimal water circulation, which is vital for a clean and healthy pool environment. Additionally, verifying that the connection points are sealed properly can help prevent air leaks that might diminish the cleaner’s efficiency. Ensuring that hose fittings are compatible and tightly secured can further improve the overall performance of your pool cleaner.
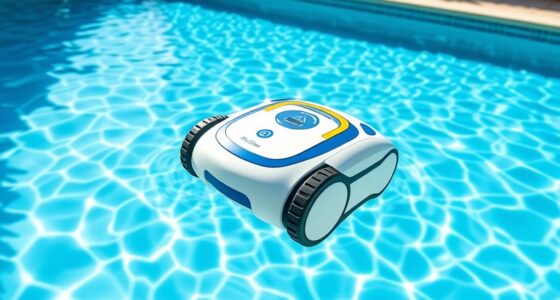
Position the Cleaner in the Pool and Turn on the Pump
To guarantee your suction pool cleaner works effectively, carefully position it in the pool so it can move freely across the surface and walls. Place the cleaner on the pool surface, ensuring it isn’t tangled or obstructed by steps or corners. This placement allows it to efficiently collect debris and cover the entire area. Once positioned, turn on the pump to activate the cleaner. Proper placement ensures ideal debris collection and prevents the cleaner from getting stuck or missing spots. Check that the hose is straight and unobstructed so the cleaner can move smoothly. Regularly inspecting the proper setup of your equipment can help maintain optimal performance. Ensuring your pool’s water circulation is adequate also plays a vital role in effective cleaning. Additionally, verifying that the suction power is sufficient will enhance debris pickup and cleaning efficiency. Maintaining the equipment’s condition through regular checks can further improve cleaning results. With the cleaner correctly positioned and the pump running, it will begin cleaning the pool surface and walls, removing dirt, leaves, and other debris efficiently.
Adjust the Hose Length for Proper Movement
Ensuring the hose length is correct is essential for your suction pool cleaner to move smoothly and clean effectively. If the hose is too long, it can tangle or restrict movement; if it’s too short, the cleaner won’t reach all areas. To optimize hose length, lay the hose straight along the pool surface, then measure and adjust so it’s slightly longer than the pool’s diagonal. Proper hose flexibility allows for easy maneuvering without kinks or tight bends. Make sure the hose isn’t stretched tight or sagging excessively, as both can hinder movement. When properly adjusted, the cleaner will glide effortlessly across the pool surface, covering every inch. Taking the time for length optimization ensures efficient cleaning and minimizes the need for frequent adjustments. Additionally, understanding automation in business can help you streamline the maintenance process with modern tools. Incorporating efficient cleaning techniques can further enhance the effectiveness of your pool maintenance routine. Being aware of hose management practices can also prevent tangles and prolong the lifespan of your equipment, which is especially important for maintaining optimal professional and financial outcomes.
Monitor the Cleaner and Make Adjustments as Needed

Regularly check how well your cleaner is working to guarantee it’s picking up debris effectively. If you notice any issues, tweak the settings or hose positioning to improve performance. Staying attentive allows you to make quick adjustments and keep your pool spotless. Remember, consistent maintenance and care can extend the lifespan of your pool equipment.
Check Cleaner Performance
How can you tell if your suction pool cleaner is working effectively? First, check the debris collection basket; if it’s full or clogged, the cleaner’s efficiency drops. Regular filter maintenance is essential—clean or replace filters to guarantee optimal suction and prevent blockages. Observe the cleaner’s movement across the pool floor; it should cover all areas evenly. If it’s missing spots or moving erratically, adjustments may be needed. Pay attention to the sound—struggling or unusual noises can indicate issues. Also, inspect the hose for leaks or kinks, which can reduce suction power. By monitoring these signs, you ensure your cleaner operates at peak performance, helping you maintain a clean pool with less effort.
Tweak Settings Regularly
To keep your suction pool cleaner performing at its best, you need to monitor its operation closely and make adjustments as necessary. Regularly check the filter for debris and perform filter maintenance to prevent clogs that can reduce cleaning efficiency. Keep an eye on the cleaner’s movement and coverage, adjusting settings if it misses spots or gets stuck. If your cleaner uses a battery, calibrate it periodically to ensure ideal power and runtime. Proper battery calibration prevents premature draining and prolongs battery life. Additionally, stay attentive to the cleaner’s suction strength; if it weakens, inspect the suction port and hoses for blockages. Making these small tweaks helps maintain peak performance and keeps your pool spotless.
Frequently Asked Questions
Can I Use a Suction Pool Cleaner in All Types of Pool Surfaces?
You might wonder if a suction pool cleaner works on all pool surfaces. The answer depends on the cleaner’s compatibility with your pool surface type. Some cleaners are designed for smooth surfaces like vinyl and fiberglass, while others can handle rougher surfaces like pebble or concrete. Always check the cleaner’s specifications to make certain it’s compatible with your pool surface, ensuring effective cleaning without damage.
How Often Should I Clean or Replace the Cleaner’S Filter or Brushes?
You should regularly check your suction pool cleaner’s filter and brushes to keep it running smoothly. Clean the filter every few weeks to prevent clogs and guarantee *best possible* suction, and replace brushes when they show signs of wear or damage. Consistent filter maintenance and timely brush replacement keep your cleaner effective, prolong its lifespan, and maintain a sparkling pool. Staying attentive to these tasks makes pool cleaning easier and more efficient.
Is It Safe to Leave the Cleaner in the Pool Unattended?
You shouldn’t leave your suction pool cleaner unattended for long periods, as it can affect chemical safety and maintenance tips. Regularly check the cleaner to guarantee it’s functioning properly and avoid potential damage or safety hazards. Always follow manufacturer instructions for safe operation, and remove the cleaner when not in use. This helps maintain water quality, prevents chemical imbalances, and keeps your pool safe and well-maintained.
What Should I Do if the Cleaner Gets Stuck or Stops Moving?
If your suction pool cleaner gets stuck or stops moving, start troubleshooting by checking for obstructions or tangled hoses. Make certain your maintenance routines include regular cleaning of the brushes and filters. You might also need to reposition the cleaner or adjust its float settings. Keep an eye on these issues regularly to prevent future problems, and always follow troubleshooting tips to keep your cleaner functioning smoothly and efficiently.
Can I Use the Suction Cleaner With a Variable Speed Pump?
Sure, you can use a suction pool cleaner with a variable speed pump—if you’re okay with some extra adjustments. Pump compatibility isn’t always straightforward, so you might need to tweak the cleaner’s settings or add a flow regulator. Don’t assume it’ll work perfectly out of the box. Expect to make some cleaner adjustments to guarantee proper suction and movement, because a mismatch could leave your pool messier than before!
Conclusion
Now that your suction pool cleaner is up and running, enjoy a spotless pool without the hassle of manual scrubbing. It’s a simple task that saves you time, yet the satisfaction of a pristine swim feels like a luxurious reward. While the cleaner works silently beneath the surface, you can relax poolside, knowing your effort was minimal but your results are impressive. Clean, effortless, and efficient—your pool has never looked better, even in the quietest moments.