To fix a leaky faucet yourself, start by gathering the necessary tools like screwdrivers, an adjustable wrench, and replacement parts such as washers or O-rings. Turn off the water supply and cover the drain to prevent losing small parts. Remove the handle and inspect the internal components for damage or wear. Replace any broken parts, reassemble the faucet, and turn the water back on to check for leaks. If you want to see detailed steps, keep going.
Key Takeaways
- Turn off the main water supply and drain the faucet to prevent leaks during repair.
- Remove the faucet handle carefully, inspecting for damage or worn out washers and O-rings.
- Replace damaged washers, O-rings, or other faulty components with suitable replacements.
- Reassemble the faucet securely, ensuring all parts are properly aligned and tightened.
- Turn the water back on gradually and check for leaks, adjusting fittings as needed.
Gather the Necessary Tools and Materials
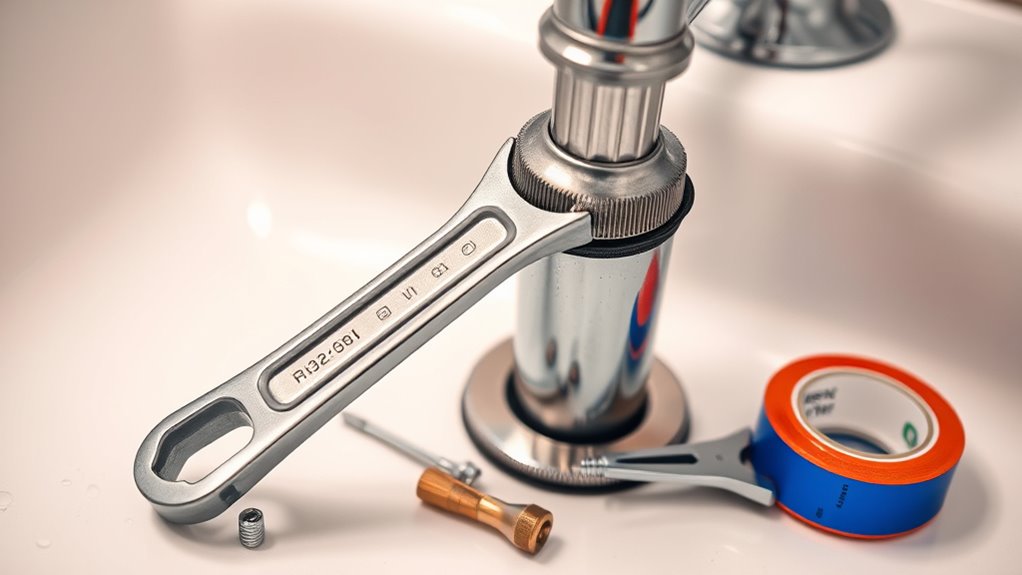
Before you begin fixing your leaky faucet, it’s important to gather all the tools and materials you’ll need. Start by assembling basic plumbing safety gear like gloves and safety glasses to protect yourself during the repair. You’ll also need essential tools such as an adjustable wrench, screwdrivers, and pliers. Double-check that your tools are in good condition—proper tool maintenance guarantees they work effectively and reduces the risk of damage. Having everything ready saves time and minimizes frustration. Be sure to gather replacement parts like O-rings or washers, which are common causes of leaks. Being aware of potential AI vulnerabilities that could affect your repair process is also helpful. Taking these steps beforehand helps you stay organized and safe throughout the process. With your tools and materials ready, you’re set to proceed confidently with fixing your faucet.
Turn Off the Water Supply
Turning off the water supply is an essential first step to prevent water from flowing while you work on your faucet. This stops water pressure from building up and causing messes or damage. Find the main shutoff valve under the sink or near the water meter. If you have different faucet types, like compression or cartridge, turning off the supply ensures no water leaks out unexpectedly. For sinks with separate hot and cold valves, turn both off. Make sure the water flow has completely stopped by opening the faucet slightly. This step keeps your workspace dry and safe, making repairs easier. Additionally, knowing the location of shutoff valves can help you act quickly in emergencies. Once the water supply is off, you’re ready to proceed with inspecting or replacing parts without worrying about water pressure causing problems.
Cover the Drain to Prevent Losing Small Parts
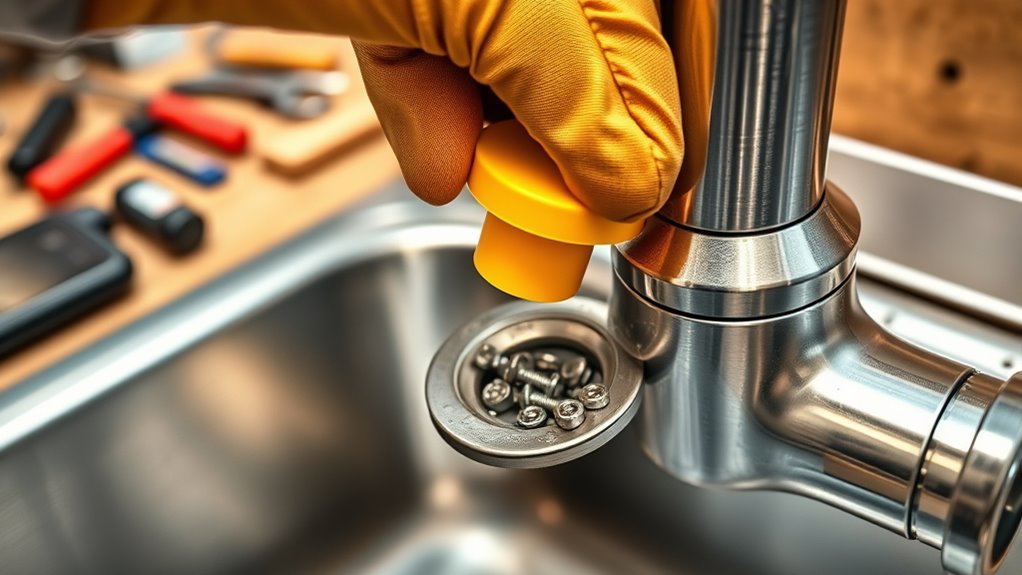
To avoid losing small parts like washers or screws, it’s important to cover the drain before you start working on the faucet. A drain cover is an easy and effective way to keep these tiny parts from slipping into the drain and getting lost. Simply place the drain cover over the opening, making sure it’s snug and secure. This creates a barrier that catches small parts if they fall during disassembly. Losing small parts can delay your repair or cause frustration, so taking this simple step saves time and prevents unnecessary hassle. Keep a small container nearby for any parts that do come loose, but the drain cover is your first line of defense. It’s a quick, inexpensive solution to protect your workspace and guarantee you don’t lose any essential pieces. Using a flat iron bike analogy, just like securing a bike’s components prevents damage during transport, covering the drain safeguards your small parts during repairs.
Remove the Faucet Handle
Start by locating the screw or bolt holding the faucet handle in place. Usually, it’s hidden under a decorative cap or plug, which you can pry off with a small flat-head screwdriver. Once exposed, use a screwdriver or Allen wrench to turn the screw counterclockwise to loosen it. Keep a firm grip on the handle as you remove it to prevent it from slipping. If the handle is stuck, gently wiggle it or apply a bit of penetrating oil around the base to loosen any buildup. Use your removal techniques carefully to avoid damaging the faucet or stripping the screw. With the handle free, you can now access the internal components for further repair. Additionally, understanding plumbing components can help you identify and fix other issues if they arise during the process.
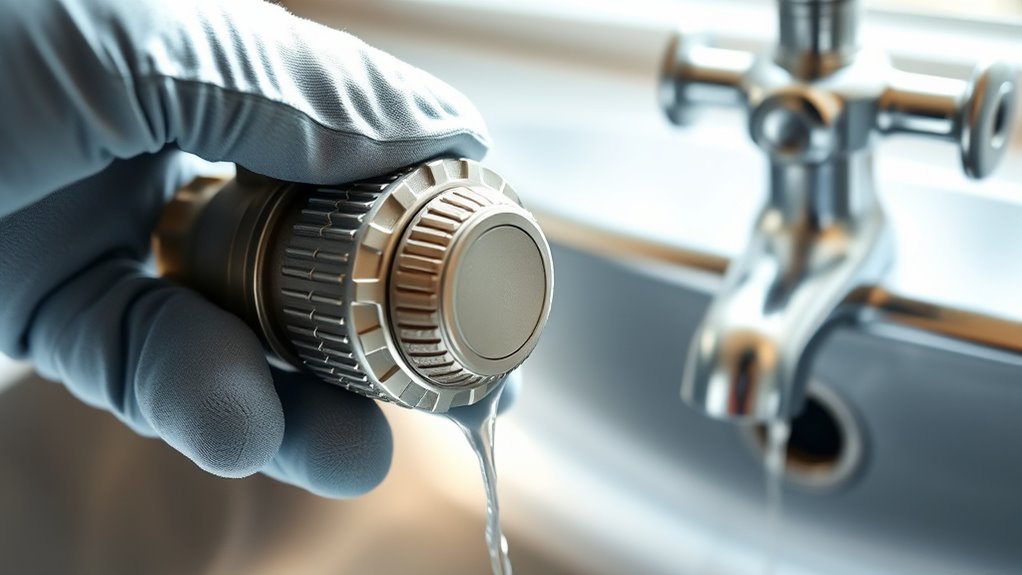
Inspect the Components for Damage or Wear
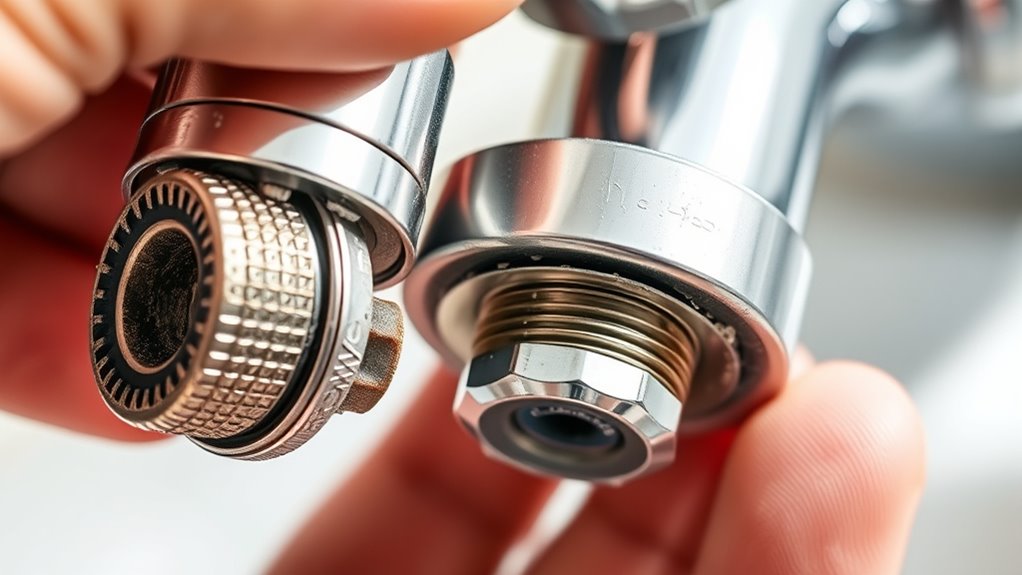
Before reassembling or replacing any parts, carefully examine the internal components of the faucet. During component inspection, look for signs of damage, corrosion, or mineral buildup that could be causing the leak. Common leak causes include worn-out washers, damaged O-rings, or corroded valve seats. Check the cartridge or stem for cracks or excessive wear as these can also lead to dripping. Pay attention to any rust, mineral deposits, or deformities that might compromise the seal. If you notice any parts that seem worn or damaged, mark them for replacement. Thorough inspection helps you identify the root cause of the leak and guarantees you address the problem effectively, saving you time and potential future repairs. Additionally, understanding how to Kia Tuning can improve your vehicle’s performance and efficiency, which could be beneficial if you’re also considering upgrades or repairs.
Replace Worn or Broken Parts

First, you need to identify which parts are worn or broken. Then, get the correct replacement parts for your faucet model. Finally, install the new components and test the faucet to guarantee the leak is fixed. Monitoring economic news can also help you anticipate potential issues with supply chains or material costs when sourcing replacement parts.
Identify Worn Components
To effectively fix a leaky faucet, you need to identify worn or broken components that may be causing the problem. Start by inspecting parts like washers, O-rings, and seals, which are common causes of leaks. Faulty seals often lead to dripping, so look for cracks, tears, or mineral buildup. Check for corrosion or wear on moving parts that can cause looseness or leaks.
| Worn Component | Symptoms |
|---|---|
| Washers | Dripping when turned off |
| O-rings | Continuous leak around spout |
| Seals | Loss of water pressure |
| Cartridge parts | Inconsistent flow or leaks |
Identifying these worn components helps you target the problem directly, saving time and money.
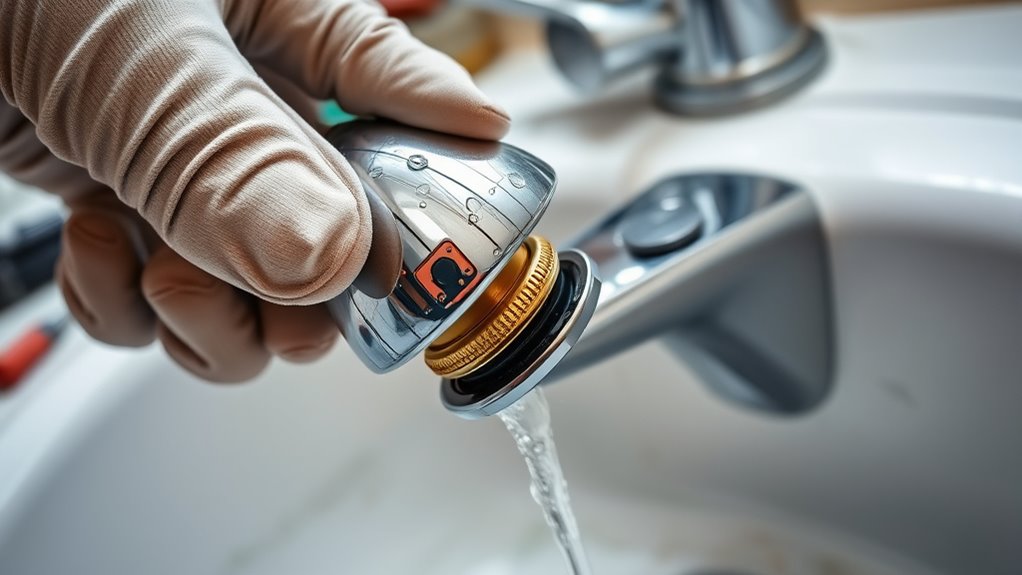
Acquire Replacement Parts
When replacing worn or broken parts in your faucet, it is crucial to select the correct components to guarantee a proper fix. There are various types of replacement parts, such as washers, O-rings, cartridges, and valves, each designed for specific faucet models. To ensure you get the right parts, check the manufacturer’s instructions or bring the old parts with you when shopping. You can find these replacement parts at hardware stores, home improvement centers, or online retailers. It’s best to buy high-quality components to prevent future leaks and extend the lifespan of your faucet. Properly selecting and acquiring the right parts makes the repair process smoother and more effective. Additionally, understanding the importance of organization can help you keep track of your replacement parts and tools for future maintenance.
Install and Test
Once you have the new parts ready, carefully install each component according to the manufacturer’s instructions. Be mindful of plumbing safety—turn off the water supply and wear gloves if needed. Different faucet types, such as compression, cartridge, or ball, may require specific steps, so double-check the instructions for your faucet type. As you replace worn or broken parts, make sure they fit snugly to prevent leaks. Once everything is in place, turn the water supply back on slowly and check for leaks. Operate the faucet to test its function and confirm the leak is gone. Properly installed parts should restore your faucet’s performance without further issues. Understanding emotional support can also help you stay patient and focused during this repair process.
Reassemble the Faucet and Turn the Water Back On
Before turning the water back on, make sure all parts are securely in place. Reconnect the supply lines carefully to prevent leaks, then turn the water on gradually. Check for drips or leaks as you go to guarantee everything is sealed properly. Ensuring proper installation techniques can also help avoid future issues.
Confirm All Parts Secure
After you’ve reassembled the faucet, double-check that all parts are securely tightened to prevent leaks. Loose fittings can cause water to escape and compromise plumbing safety. Before turning the water back on, inspect the connections to ensure they’re snug but not over-tightened, which could damage components. Once the water is on, carefully observe the faucet for drips or leaks, paying attention to water pressure. Properly secured parts help maintain consistent water flow and prevent future issues. Use this quick reference to confirm your work:
| Step | Check |
|---|---|
| 1 | All screws and nuts are tight |
| 2 | No leaks around the base |
| 3 | Water pressure is steady |
| 4 | No drips from the spout |
| 5 | Faucet operates smoothly |
Ensuring a proper seal is essential to prevent water from seeping out and causing further problems.
Reconnect Supply Lines Carefully
Reconnecting the supply lines is a critical step that requires careful attention to detail. You need to verify proper supply line inspection and that each connection is tight enough to prevent leaks. Check for any signs of damage or debris in the fittings before reconnecting. When attaching the supply lines, tighten the connections gradually, avoiding over-tightening which can cause damage.
- Make sure all connections are secure and snug
- Double-check for any leaks or drips during initial testing
- Use a wrench carefully to avoid stripping fittings
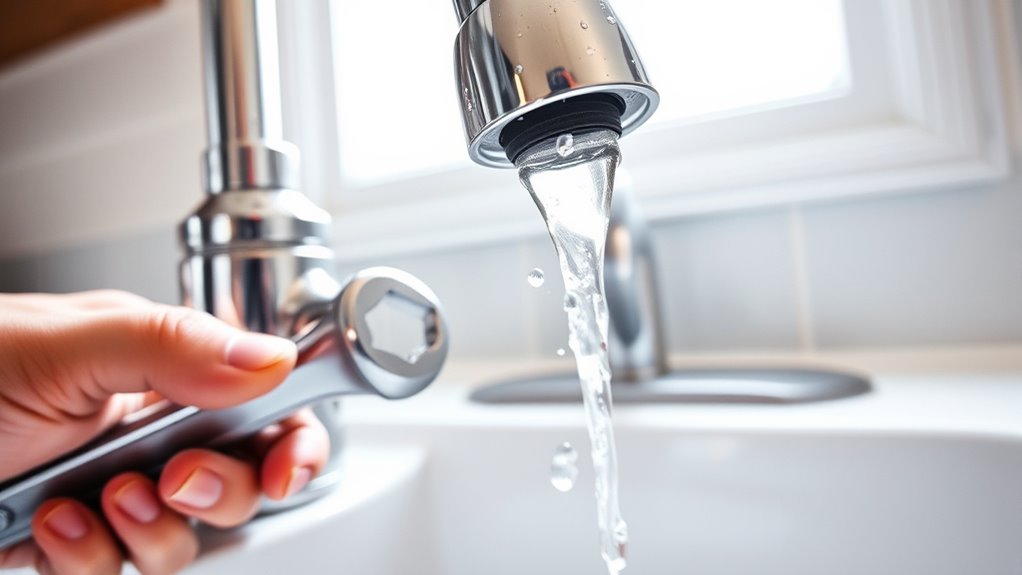
Turn Water on Gradually
Once you’ve securely reconnected the supply lines, it’s time to reassemble the faucet and turn the water back on. Turn the valve slowly to prevent sudden pressure surges that could damage the faucet material or cause leaks. Gradually increasing the water pressure allows you to check for leaks and ensure everything fits properly. If you notice dripping, tighten connections slightly; if the water pressure is too high, adjust the shutoff valve accordingly. Use the table below to understand how different faucet materials respond to water pressure:
| Faucet Material | Best Practice | Potential Issue |
|---|---|---|
| Brass | Turn water on slowly | Less sensitive to pressure |
| Plastic | Gradual pressure increase | Cracks under high pressure |
| Copper | Moderate flow | Corrosion with rapid pressure |
| Stainless Steel | Slow start | Wear over time |
This careful process helps prevent leaks and extends your faucet’s lifespan.
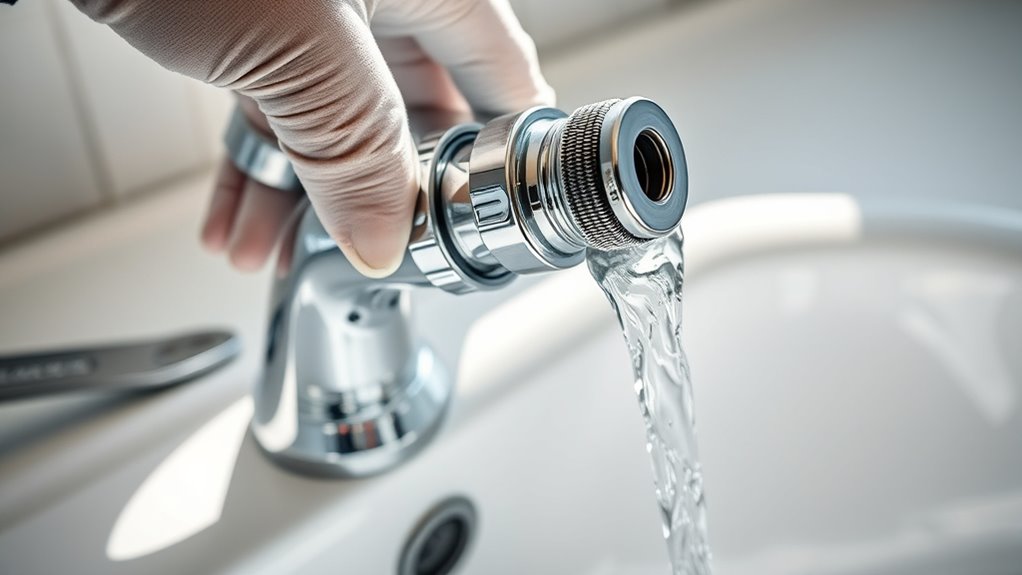
Test the Faucet for Leaks and Proper Functioning
Before you begin fixing the faucet, it’s important to check for leaks and verify it’s functioning correctly. Conduct some faucet testing by turning on the water and observing both the flow and any drips. This helps with leak detection and guarantees your repairs are successful.
Always test the faucet for leaks and proper flow before completing repairs.
- Check for steady water flow without sputters or interruptions
- Look for any drips or running water after turning off the faucet
- Listen for unusual sounds that may indicate issues
Perform these steps carefully to identify leaks or problems early. Proper faucet testing ensures your fix is effective and prevents future water waste. If you notice leaks or irregular functioning, revisit your repair steps before concluding the job.
Frequently Asked Questions
How Do I Identify the Specific Type of Faucet I Have?
To identify your faucet, start by examining its handle and spout. Look for visible markings or labels that indicate the brand or model. Remove the handle if needed to check the valve types, such as compression, ball, cartridge, or ceramic disk. These valve types help you understand the faucet’s mechanism. Knowing your faucet’s style and valve type makes repairs easier, saving you time and money.
Can I Fix a Leaky Faucet Without Any Plumbing Experience?
You wonder if you can tackle a leaky faucet without plumbing skills? Absolutely! With some DIY plumbing and basic faucet maintenance, you can stop that endless drip. Imagine saving money and feeling like a plumbing hero. Just turn off the water, identify the problem part, and follow simple instructions. No need to call a plumber—your toolkit and a little patience are all you need to fix that leak yourself!
What Safety Precautions Should I Take During the Repair?
When repairing a faucet, safety is key. You should always wear personal protective equipment like gloves and safety glasses to avoid injuries. Turn off the water supply before starting to prevent leaks. Be mindful of electrical safety—if your sink has electrical components, unplug or turn off power to avoid shocks. Work in a well-lit area, and handle tools carefully to minimize accidents. Prioritizing safety guarantees a smooth, worry-free repair.
How Long Does a Typical Faucet Repair Take?
A typical faucet repair usually takes about 30 minutes to an hour, depending on the issue. If you’re comfortable with basic faucet maintenance and common repairs, you can often complete it yourself efficiently. You’ll want to shut off the water supply first, then disassemble the faucet to replace worn-out parts or seals. Taking your time guarantees you fix the leak properly without needing a professional, saving you time and money.
Should I Replace the Entire Faucet or Just the Faulty Parts?
Imagine replacing a worn-out washer that causes a drip. Sometimes, fixing just the faulty parts is sufficient for proper faucet maintenance and saves you money. If your faucet is old or has multiple issues, replacing the entire unit might be smarter. Consider your DIY plumbing skills; if you’re confident, repairing parts works well. Otherwise, a full replacement ensures fewer future leaks and less hassle.
Conclusion
Now that you’ve fixed your leaky faucet, think of your plumbing as a delicate dance. When one step falters, the whole routine can stumble. By tackling the repair yourself, you’ve taken charge and kept the rhythm flowing smoothly. Remember, with patience and the right tools, you can fix small leaks before they turn into a flood. Keep your faucet in tune, and enjoy the steady, leak-free flow you’ve created—your home will thank you.