
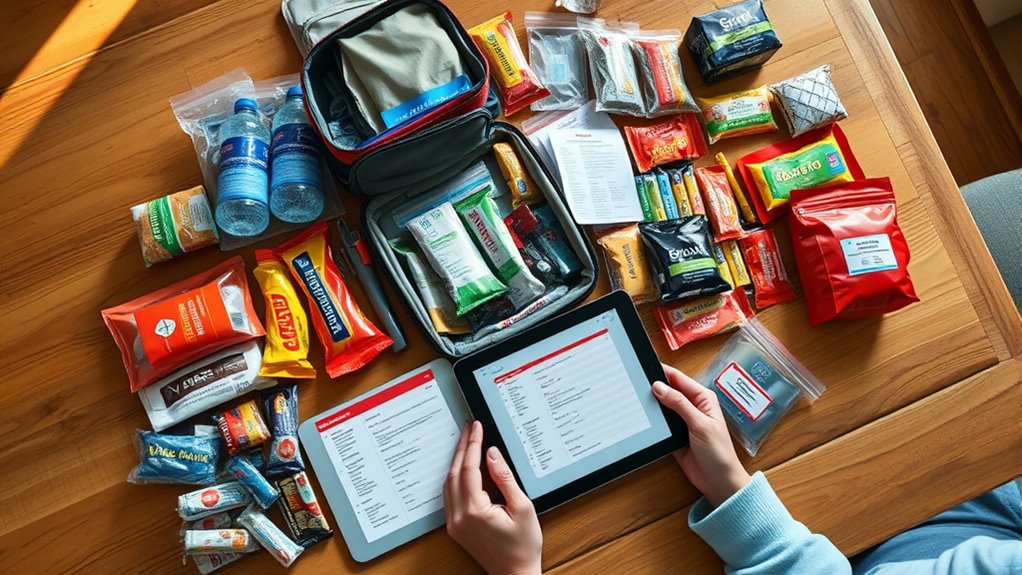
To troubleshoot your emergency kit quickly, start by gathering your supplies and reviewing your checklist. Inspect each item for damage, wear, and expiration dates, replacing outdated or damaged supplies. Test essential equipment like flashlights and radios to make certain they work properly. Organize everything in accessible, labeled containers, with frequently used items near the top. By following these steps, you’ll make certain your kit is always ready—continuing will help you master every detail.
Key Takeaways
- Quickly verify expiration dates and replace expired supplies to ensure readiness.
- Test all batteries and devices to confirm functionality and replace any weak or dead batteries.
- Check storage conditions for damage, leaks, or deterioration; reseal or replace compromised containers.
- Confirm accessibility by organizing supplies in clearly labeled, easy-to-reach containers for rapid deployment.
- Conduct a swift visual inspection to ensure all essential items are present and properly organized.
Gather Your Emergency Kit and Prepare a Checklist
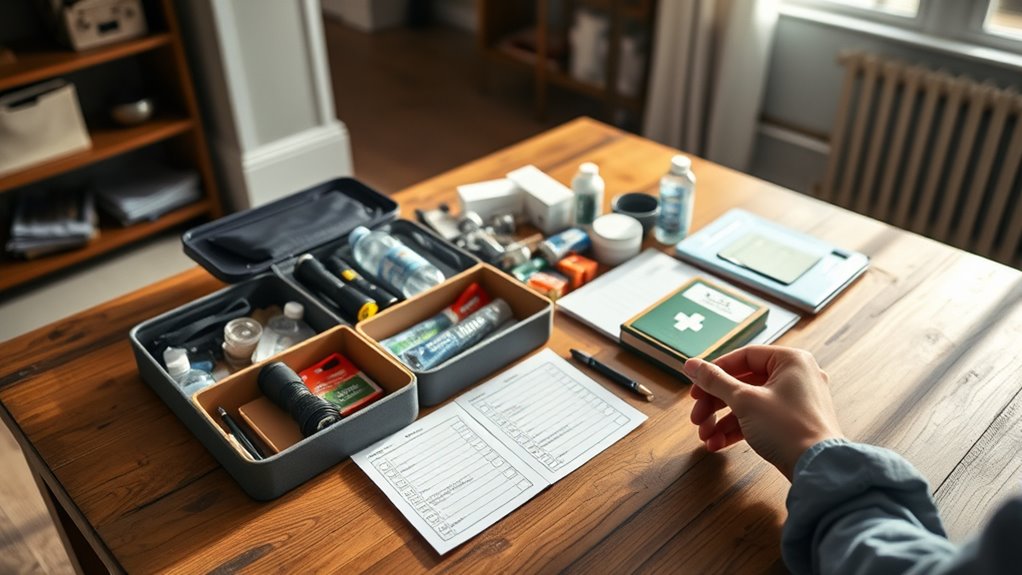
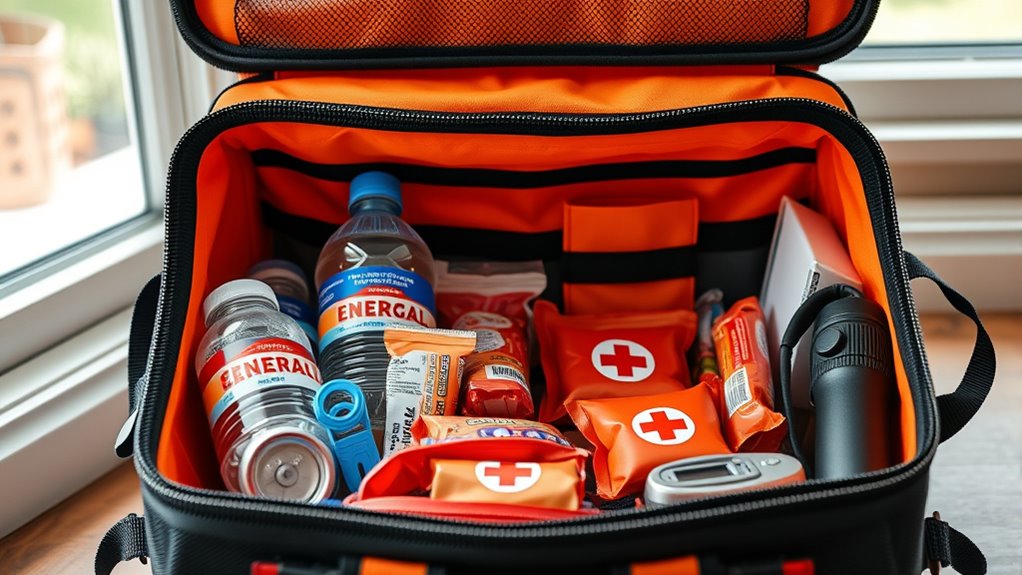
Have you already gathered your emergency kit? If not, start by collecting all the packing essentials you might need during an emergency, such as water, non-perishable food, first aid supplies, and medications. Once assembled, develop effective labeling strategies to keep everything organized. Use clear, durable labels to identify each item and its location, making it easier to find what you need quickly. A checklist is crucial; write down every item included and cross them off as you pack. This helps guarantee nothing gets overlooked and keeps your kit complete. Regularly update your checklist to reflect any changes, like expired items or added supplies. Proper organization and thorough preparation make troubleshooting your emergency kit faster and more efficient when it’s needed most. Incorporating high-quality supplies can also improve the overall effectiveness of your kit.
Inspect the Overall Condition of Your Supplies

You need to check the condition of your supplies to guarantee they’re still reliable in an emergency. Look for any signs of damage or wear that could compromise their effectiveness. Also, verify expiration dates and replace expired items to keep your kit ready. Regularly reviewing your kit helps prevent issues caused by deterioration of supplies.
Assess Supply Integrity
Regularly inspecting the overall condition of your emergency supplies guarantees they remain reliable when needed. Check for signs of wear, damage, or deterioration that could compromise supply durability. Pay close attention to containers, packaging, and seals, ensuring they’re intact and secure. Evaluate your storage conditions—moisture, extreme temperatures, and sunlight can weaken supplies over time. If you notice rust, corrosion, or broken seals, replace or repair affected items immediately. Ensure that all items are clean and free of pests. Maintaining good storage practices helps preserve the integrity of your supplies and prevents unnecessary replacements. Remember, a well-preserved kit responds effectively during emergencies, so regular assessments are essential to guarantee your preparedness remains intact. Incorporate storage best practices to maximize the longevity and reliability of your supplies.
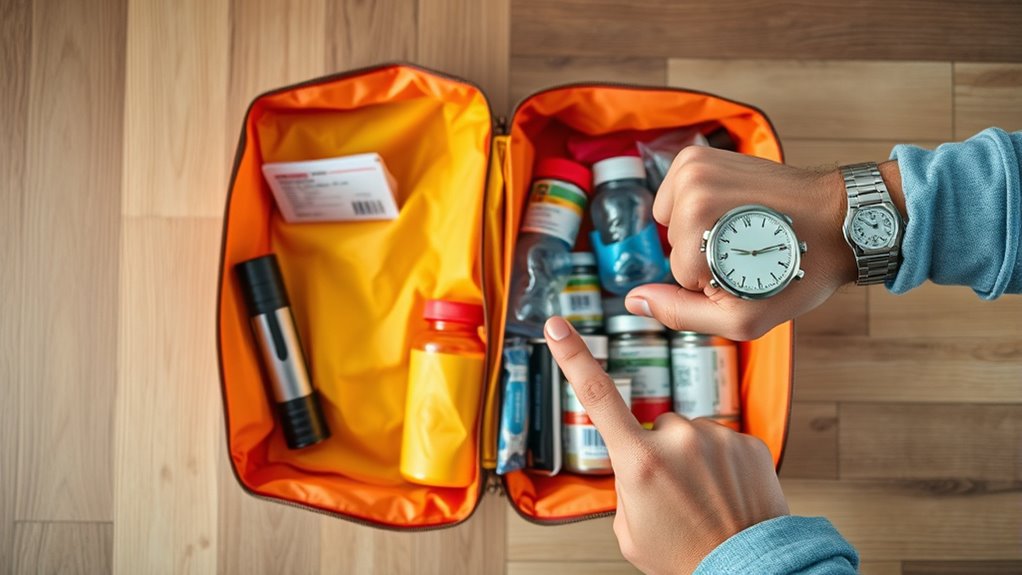
Check Expiration Dates
Since expiration dates indicate the shelf life of your supplies, it’s vital to verify them regularly to guarantee everything is still usable. Check each item’s expiration date and set aside expired products for replacement. Proper storage tips can help extend shelf life, so store supplies in a cool, dry, and accessible location. Use clear labeling strategies, such as date tags, to track freshness easily. Regular inspections prevent surprises during emergencies and keep your kit reliable. Additionally, maintaining a Dad and Daughter Bond can remind you of the importance of being prepared for those you love.
- Store items away from heat and sunlight
- Rotate supplies based on expiration dates
- Label everything with purchase or expiration dates
- Keep an organized, easily accessible kit
Staying organized and aware of expiration dates ensures your kit remains ready when needed most.
Check Expiration Dates and Replace Outdated Items
You need to regularly check the expiration dates on your emergency supplies. Expired items can be unsafe or useless during a crisis. Make sure to replace any outdated supplies promptly to keep your kit reliable. Incorporating safety standards into your review process ensures all items meet current guidelines and are safe for use.
Inspect Item Dates
Inspecting the expiration dates on your emergency preparedness items is essential to guarantee everything is safe and effective when you need it most. expired items can compromise food safety and may not function properly in emergencies. Check each item carefully, paying attention to storage conditions that might affect their longevity. Proper storage—cool, dry, and away from sunlight—helps maintain item quality. Remember, expired supplies might not provide the protection or nutrition you expect. Regular inspections prevent surprises during emergencies. Additionally, understanding essential survival gear and how it impacts your preparedness can help you identify which items need priority replacement.
Replace Expired Supplies
Regularly checking your emergency supplies for expired items is crucial to guarantee you’re prepared when it counts. Start by reviewing your kit’s supply labeling and expiration tracking system to identify outdated items quickly. Remove expired medications, food, and first aid supplies, and replace them with fresh, properly labeled replacements. Proper supply labeling ensures you can easily spot which items need updating during quick checks. Keep a log of expiration dates to streamline future inspections and avoid overlooking outdated supplies. Remember, expired items can be ineffective or unsafe, so timely replacement is essential. Incorporating proper storage practices can also help extend the shelf life of your supplies. By maintaining accurate expiration tracking and updating supplies as needed, you’ll ensure your emergency kit remains reliable and ready for any situation.
Verify Functionality of Essential Equipment

How can you guarantee your emergency kit is ready when you need it most? You need to verify the functionality of essential equipment. Start with battery testing to ensure flashlights, radios, and other devices have power. Don’t forget to check signal verification—test radios and communication devices to confirm they can send and receive signals. Additionally, review your backup power options such as portable generators or solar chargers to ensure they are operational and ready to deploy if needed.
- Test all batteries and replace weak or dead ones
- Power on and operate each device to confirm it works
- Verify that flashlights and headlamps light up properly
- Confirm radios pick up signals clearly
Regularly performing these checks prevents surprises during an emergency. Staying proactive with battery testing and signal verification keeps your kit dependable and ready to serve when it matters most.
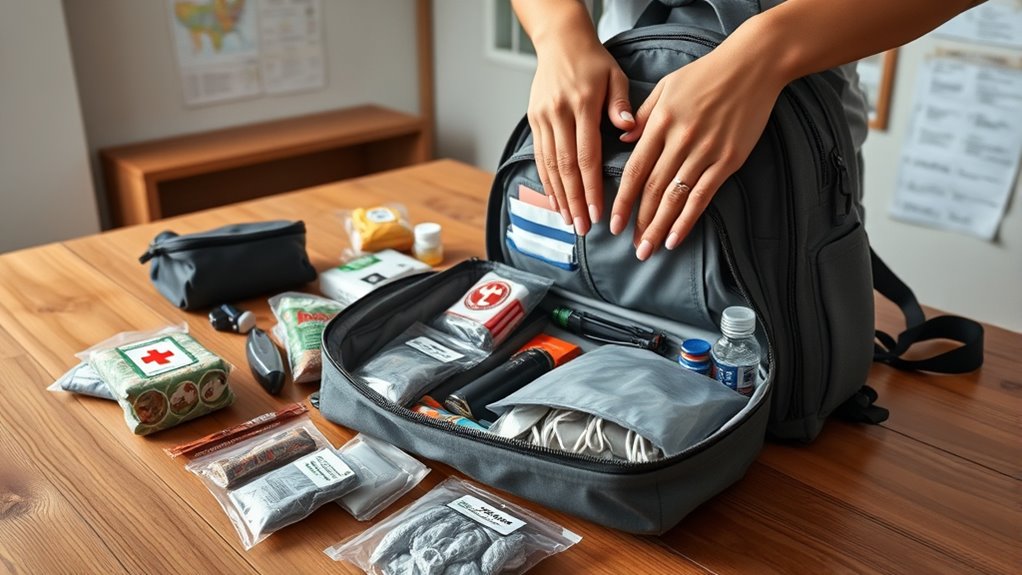
Ensure Accessibility and Organization of Items
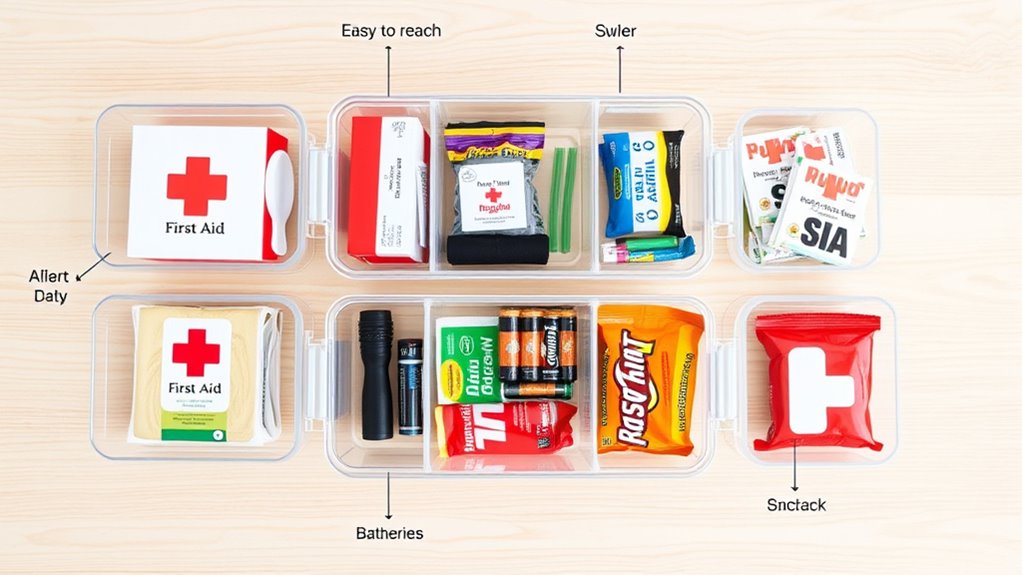
After verifying that your emergency equipment works properly, the next step is to organize your kit for quick access. Clear labeling is essential to guarantee you can find items rapidly during an emergency. Use large, legible labels with contrasting colors for better visibility. Implement effective storage solutions like stackable bins, waterproof containers, or compartmentalized bags to keep items sorted and protected. Arrange items based on priority, placing frequently used essentials at the top or front. Keep similar items together—first aid supplies, food, water, tools—to streamline retrieval. Regularly check that labels remain legible and storage solutions are intact. A well-organized kit reduces stress and saves precious minutes when every second counts. Proper accessibility and organization are key to an effective emergency response. Incorporating precise storage techniques can further enhance quick retrieval during critical moments.
Restock Consumables and Update Your Inventory
To guarantee your emergency kit remains ready for use, you need to restock consumables and update your inventory regularly. Check expiration dates, replace used items, and ensure supply duplication so you always have backups. Proper inventory labeling helps you quickly identify what’s in your kit and what needs replenishing. This prevents shortages during emergencies and maintains readiness. Keep track of the quantities for each item to avoid overstocking or understocking. Regularly reviewing your inventory ensures your supplies stay current and effective. Remember, consistent updates reduce stress when disaster strikes, and a well-maintained kit can make all the difference. Consider setting a calendar reminder to review your inventory periodically. Staying proactive keeps your emergency preparedness kit in top shape, ready for any situation. Utilizing vertical storage solutions can optimize space and make inventory management even more efficient.
Finalize and Store Your Ready-to-Go Kit
Once your supplies are restocked and inventory is up to date, it’s essential to finalize your emergency kit by assembling all items in a dedicated, easily accessible container. Choose a storage location that’s cool, dry, and known to everyone in your household. Use a clear labeling system to mark the container with its contents and the date of last update, ensuring quick identification during emergencies. Keep frequently used items near the top or in separate compartments for easy access. Make sure the container is sturdy and portable, like a plastic bin or a backpack, so you can grab it quickly if needed. Regularly review and update the contents, and always return items to their designated spots to maintain organization and readiness. Incorporating proper storage practices ensures your kit remains effective and ready for any emergency.
Frequently Asked Questions
How Often Should I Review and Update My Emergency Kit?
You should review and update your emergency kit at least every six months. During these checks, guarantee proper supply rotation by replacing expired items and verify storage conditions remain ideal. Regularly inspecting your kit helps identify any damaged supplies or needed updates, so you’re always ready. Set reminders to prompt these reviews, and adjust your kit as your needs change, keeping everything fresh and functional for emergencies.
What Are Common Signs of Expired Supplies?
You’ll notice expired supplies when items like food, water, or medicines have passed their shelf life or show signs of spoilage, such as discoloration or a bad smell. Always check expiration dates regularly, as item expiration impacts their effectiveness and safety. If an item’s shelf life has ended, replace it promptly to ensure your emergency kit remains reliable and ready for use when needed.
How Can I Test the Functionality of My Emergency Gadgets?
You should regularly test your emergency gadgets by checking device calibration and monitoring battery lifespan. Turn on devices like flashlights and radios to ensure they work properly, and replace batteries if they’re nearing the end of their lifespan. For calibration, follow the manufacturer’s instructions to confirm accurate readings. Doing these quick tests every few months guarantees your gadgets will perform reliably when you need them most.
What Should I Do if Supplies Are Damaged or Missing?
Like a detective solving a mystery, you should begin with damage assessment of your supplies. If items are damaged or missing, promptly replace supplies by conducting supply replacement. Check each item carefully, guaranteeing they’re in working order or fully stocked. This quick step keeps your kit reliable and ready, so you’re prepared when emergencies strike. Regularly updating your kit ensures it remains a trusted resource in critical moments.
How Do I Ensure My Kit Is Accessible During a Disaster?
You can guarantee your kit is accessible during a disaster by organizing it with clear storage techniques, like labeling containers and keeping it in a designated, easy-to-reach spot. Use accessibility techniques such as placing it near exits or in a high-visibility area. Regularly review and practice retrieving your kit, so you’re confident you can grab it quickly when needed. Proper storage organization makes sure your emergency supplies are always ready to go.
Conclusion
By following these quick steps, you’ll have your emergency kit ready in no time. Think of it as your safety net, always prepared to catch you when disaster strikes. Regularly checking and updating your supplies keeps your kit as fresh as a daisy and as reliable as a trusted friend. Staying proactive guarantees you’re not caught off guard—because preparedness isn’t just a task, it’s your lifeline in any emergency.