
To restore old furniture and make it look brand new, start by inspecting for damage and cleaning it with a gentle soap solution. Remove the old finish using a chemical stripper and sand the surfaces to smooth them out. After that, repair any flaws with wood filler and apply a new stain or finish in even coats. Don't forget to use protective coatings to extend the furniture's life. Regular maintenance like dusting and seasonal inspections will keep it looking stunning. If you're eager to uncover more tips, there's plenty more you can explore!
Key Takeaways
- Inspect the furniture for damage and authenticity to determine the best restoration approach.
- Clean surfaces thoroughly using a gentle solution and soft cloth to remove dirt and grime.
- Strip old finishes using a chemical remover and sand the surface with progressively finer grits for smoothness.
- Apply a new finish, such as gel stain or wipe-on poly, for a rejuvenated and protected appearance.
- Regularly maintain and care for the furniture to preserve its beauty and extend its lifespan.
As an affiliate, we earn on qualifying purchases.
Assess the Furniture

When you're ready to restore old furniture, it's crucial to assess its condition first. Start by inspecting for wear and damage, looking for scratches, dents, or watermarks. Check the joints for looseness and evaluate any upholstery for tears or stains.
Next, verify authenticity by examining markings or labels, and research the manufacturer to confirm the piece's origin. Understanding the history is important too; research its style and era to appreciate its significance. This is especially relevant as vintage furniture often enhances interior aesthetics and individuality.
Lastly, evaluate the craftsmanship and quality by examining materials, joinery techniques, and overall skill. This thorough assessment will guide your restoration process and help you preserve the piece's integrity while enhancing its value.
Clean the Furniture

Cleaning old furniture is a vital step in the restoration process, as it helps reveal the true beauty of the piece.
Start by preparing a cleaning solution using one ounce of oil soap mixed with six ounces of water, or a mild soap with warm water. Always test the cleaner on an inconspicuous area first.
Lightly dip a soft cotton cloth into the solution, wringing it out to avoid over-saturation. Begin at the top of the furniture and work your way down, moving in circular motions along the wood grain.
Rinse the cloth regularly to prevent soap residue and dry the furniture thoroughly with a clean cloth. If needed, repeat the process for a pristine finish. Refurbishing furniture not only enhances aesthetics but also promotes sustainability through recycling.
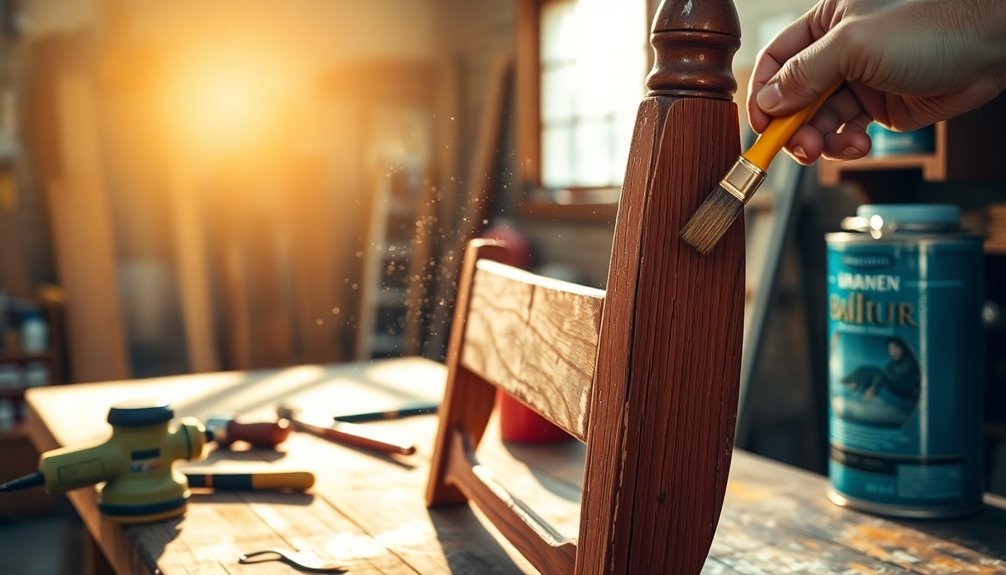
Remove Old Finish
To restore your old furniture effectively, removing the old finish is crucial as it sets the stage for a fresh look.
Start by applying a chemical finish remover, choosing a liquid or semi-paste product. Use a bristle brush for an even application, and let it work for about 5 to 10 seconds before wiping it off with a rough cloth or steel wool. If needed, apply more to other sections and wait 30 minutes to check results. For stubborn areas, use a plastic scraper or steel wool dipped in thinner, always scraping with the wood grain.
Remember to wear protective gear to ensure your safety during the process. Additionally, consider starting with stripping as it allows for more options in restoration or repainting.
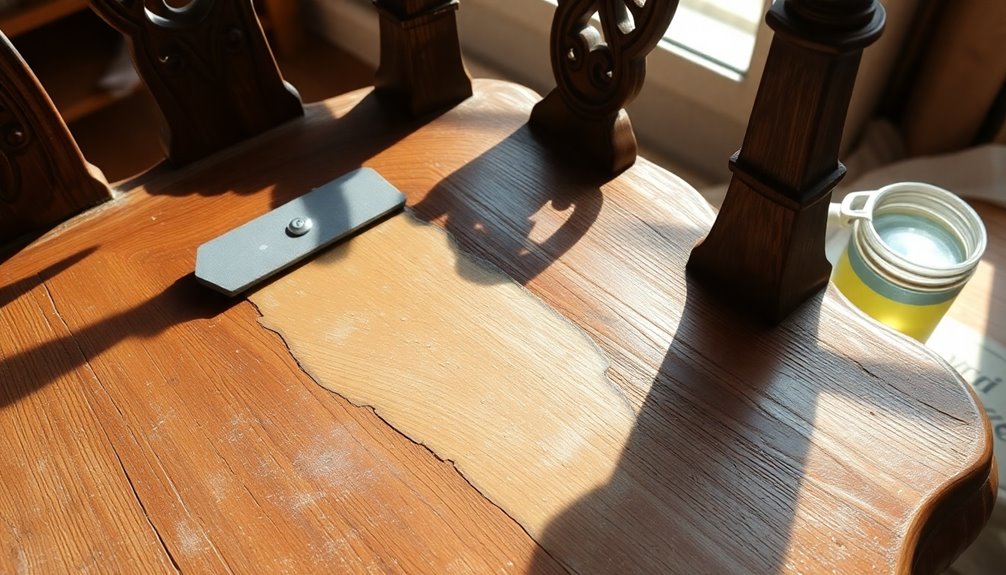
Sand and Smooth

Sanding and smoothing your old furniture is essential for achieving a flawless finish, as it removes imperfections and prepares the surface for new treatments. Start with coarse grit sandpaper (80-100) to eliminate old finishes. Always sand with the grain to protect the wood. As you progress, switch to finer grits, ending with 220 for a smooth surface. For larger pieces, a sanding block or electric sander can save time, but be careful not to over-sand. Use sanding sponges for corners and detail sanders for intricate areas.
Additionally, using the right sanding tools can greatly enhance your efficiency and effectiveness. After sanding, clean off dust with a vacuum or tack cloth to avoid scratches. Inspect your work regularly, and if needed, repeat sanding to ensure a perfectly smooth surface before moving on.
Repair and Touch Up

While assessing your old furniture, you'll likely find areas that need repair and touch-up work to restore its beauty.
Start by inspecting for deep scratches, dents, or cracks. For deeper imperfections, apply wood filler and let it dry completely before sanding the area smooth with high-grit sandpaper. It's important to ensure that the wood is properly sealed and protected to prevent future damage.
If paint touch-ups are needed, begin with a base coat and finish with a top coat for a seamless finish. To blend repairs with the original surface, use toner spray to achieve a uniform look. Remember that attention to detail can make a significant difference in the final appearance of your refinished piece.
Remember to remove any hardware before starting and clean the surfaces with mineral spirits to prepare them for repair. Proper cleaning ensures that any dust or grease is eliminated, allowing for better adhesion of the finishes.
Always wear protective gear and ensure good ventilation when working with chemicals or sanding materials.
Apply New Finish

Applying a new finish can breathe fresh life into your old furniture, making it look vibrant and well-cared for. Start by cleaning the piece with a mixture of liquid Ivory dish soap and water. Use a sponge for the surface and a paintbrush for any intricate details. Rinse and dry thoroughly, then assess if any repairs are needed. Thorough cleaning is essential to restore the original luster before starting repairs, as it helps reveal any hidden imperfections that may need attention.
Choose a gel stain that matches your desired color, applying it with a soft cloth to restore the finish and hide scratches. Consider using a multi-functional furniture approach to ensure the piece meets your current needs. Once dry, select a wipe-on finish like Minwax Wipe-on Poly. Apply it with a clean rag in a swirling motion and wipe off excess.
Usually, one coat is enough to rejuvenate the surface and protect it, leaving your furniture looking brand new.
Additional Restoration Techniques

After you've applied a new finish to your furniture, consider additional restoration techniques to further enhance its appearance and longevity.
Start by cleaning the surface with mild dish soap and warm water, using a soft cloth to remove dirt without soaking the wood.
After cleaning, inspect for any damage. Next, repair any loose joints with wood glue and clamps, and touch up small cracks with appropriate products. When assessing the piece, it's essential to evaluate the condition to determine if additional refinishing work is needed.
If necessary, you might strip the old finish using a paint stripper and a plastic scraper, working in sections for even removal.
Finally, sand the surface, starting with coarse-grit sandpaper and progressing to finer grits, always sanding along the grain for the best results.
Tools and Materials Needed

To successfully restore old furniture, you'll need a variety of tools and materials that will aid in every step of the process.
Start with basic hand tools like saws, chisels, screwdrivers, a hammer, and a utility knife. For sanding and smoothing, gather sandpaper of various grits and a random orbital sander, along with a heat gun for stubborn finishes. Orbital sander is preferred for adjustable speed control, which helps in achieving better results. Regular maintenance through proper cleaning of your tools can also enhance their longevity and effectiveness.
You'll also want wood filler and a putty knife for filling gaps, plus a pull scraper for removing old finishes.
When it comes to painting and coating, secure paintbrushes or a sprayer, your choice of stain or paint, and a varnish or sealant for protection.
Don't forget lint-free cloths and mineral spirits for cleaning surfaces.
Maintenance Tips for Longevity

While restoring old furniture is a rewarding endeavor, maintaining its beauty and functionality over time is equally important.
Regularly clean your pieces with a soft, lint-free cloth, and avoid abrasive cleaners that can damage finishes. For upholstered furniture, vacuum often using a soft brush attachment.
Position your furniture away from direct sunlight to prevent fading and degradation; consider UV-resistant coatings for added protection. Always use coasters for drinks and mats for hot dishes to avoid spills and heat damage. Additionally, regular cleaning helps maintain aesthetic appeal and prevents deterioration over time.
Dust frequently to keep surfaces pristine, especially in intricate carvings.
Lastly, conduct seasonal maintenance—apply wax in spring, inspect for wear in summer, and condition wood in winter to ensure your furniture remains in top condition for years to come.
Frequently Asked Questions
How Do I Determine the Value of My Old Furniture?
To determine the value of your old furniture, start by assessing its condition and identifying materials used.
Understand the different types of values, like fair market and retail value. Research comparable items online and consider professional appraisals for accuracy.
Take note of unique features or historical significance that may enhance its worth. Using multiple resources will help you get a clearer picture of what your furniture is truly worth.
Can I Restore Furniture Without Professional Help?
Absolutely, you can restore furniture without professional help!
Think of it as a fun DIY adventure where you get to transform a piece into something special. Start by cleaning and assessing its condition, then gather your supplies.
With a little patience and effort, you can sand, fill, and finish it to perfection.
Just remember to wear protective gear and take your time—your efforts will pay off when you see the final result!
What Is the Best Way to Store Furniture During Restoration?
The best way to store furniture during restoration is to assess and inventory each piece first.
Clean them thoroughly and disassemble larger items to save space. Use protective wrapping for fragile parts and keep track of screws in labeled bags.
Choose a suitable storage unit that's climate-controlled and secure. Organize your space efficiently, placing heavier items at the back and leaving clear walkways for easy access.
Always document the location and condition of each piece.
How Long Does the Restoration Process Usually Take?
You might feel like your furniture's been on an epic journey to a far-off land, but the restoration process usually takes anywhere from a few days to a few weeks.
It all depends on the damage and the complexity of the work. After that initial assessment, sanding, and final touches, you'll be waiting to get your beloved piece back.
Just hang tight; it'll be worth it when you see the transformation!
Are There Any Eco-Friendly Restoration Methods Available?
Absolutely! You can explore several eco-friendly restoration methods.
Start using sustainable materials like reclaimed wood and bamboo veneers.
When cleaning, opt for vinegar, baking soda, and essential oils instead of harsh chemicals.
Employ energy-efficient practices, such as hand tools and solar-powered equipment, to minimize your carbon footprint.
Finally, advanced techniques like nano-technology coatings and water-based finishes ensure durability while being kind to the environment.
You'll feel great about your choices!
Conclusion
Restoring old furniture is like breathing new life into a weary traveler. With each step, you peel back the layers of time, revealing the beauty hidden beneath. As you clean, sand, and apply a fresh finish, you're not just renewing wood; you're nurturing a story, giving it a chance to shine again. So, embrace this journey—your efforts will transform forgotten relics into vibrant treasures, ready to grace your home with their renewed spirit for years to come.