To refinish wood furniture, start by understanding key terminology like stripping, sanding, and finishing. Prepare your workspace with good ventilation and organize your tools. Assess your furniture’s condition, then strip the old finish using chemical strippers or sanding. Smooth the surface with various sandpaper grits, and choose to stain or paint for a fresh look. Finally, seal your piece to protect it. There’s much more to explore, so keep going for detailed steps and tips!
Key Takeaways
- Assess the condition of the furniture, checking for structural issues and the existing finish before starting the refinishing process.
- Prepare your workspace by organizing tools, ensuring good ventilation, and maintaining a clean environment to enhance efficiency and safety.
- Choose between sanding or chemical strippers for removing old finishes, followed by thorough cleaning of the surface.
- Apply multiple thin coats of stain or paint for even coverage, and finish with a sealant for moisture protection.
- Regular maintenance and protective measures will help preserve the appearance and longevity of your refinished furniture.

Merax Modern TV Stand Set w/Adjustable Bridge, Storage Media Console & Wall Units - Minimalist Entertainment Center for Living Room, White
CUSTOMIZABLE LAYOUT: Overhead bridge mounts to cabinets or wall separately for variable heights (match any TV setup)
As an affiliate, we earn on qualifying purchases.
A Bit of Backstory
Refinishing wood furniture started as a creative hobby, but it quickly transformed into something much bigger.
You mightn’t realize it, but each refinished piece you work on carries a personal story, connecting you to the rich heritage of the past. As you explore global flavors through this craft, you’ll find that it’s not just about the furniture; it’s about preserving history and the memories tied to those furniture pieces. Understanding sustainable building practices in your refinishing process can also contribute to a more eco-friendly outcome. Additionally, just as cacao’s health benefits can enhance emotional clarity, the act of refinishing can foster a sense of accomplishment and joy.
Through the refinishing process, a supportive community emerges, fostering skill development and sharing experiences. Calming decor can enhance the ambiance of your refinished pieces, allowing them to shine in any space.
A vibrant community blossoms through refinishing, nurturing skills and shared journeys in this heartfelt craft.
Every piece you restore contributes to a broader narrative, connecting you to your roots and ancestral sacrifices.

Closet System of 3 Sets, 6-15FT Closet Organizer System Wood with 3 Drawers & 7 Shelves, Walk in Closet Organizer Shelving System with 6 Hanging Rods, Modular Closet System Kits Adjustable, White
【Flexible 6FT Closet System—Tailored Fit for Any Space】Built with convenient mobility in mind, this 3-piece custom modular closet...
As an affiliate, we earn on qualifying purchases.
Understanding Refinishing Terminology
When diving into the world of furniture refinishing, understanding the terminology is essential for your success. Refinishing involves removing the old finish and applying a new one, focusing on techniques that enhance appearance without major repairs. In contrast, restoration aims to return furniture to its original state with minor touch-ups, while refurbishing may include significant repairs that transform the piece. For instance, you might take side tables from a vanity and rejuvenate them through staining or painting. Additionally, knowing the impact of color accuracy can help you choose finishes that enhance the overall aesthetic of your furniture. Incorporating natural materials like wood can further elevate the charm of your refinished pieces.
In the context of furniture, selecting moisture-resistant materials can enhance durability and longevity. Familiarizing yourself with these terms will clarify the level of work involved in your projects. A good guide will offer a step-by-step process, ensuring you confidently tackle each refinishing challenge. Additionally, knowing how to strip old finishes is a crucial step that can greatly affect the quality of your refinishing work.

Vomavex Closet System with 4 sets, 101.9" Closet Organizer Systems with 6 Drawers & 8 Hanging Rods & Adjustable Shelves, Walk in Closet Standing Closet System, Corner Closet System Set, White
【 4-in-1 Closet System, Custom/DIY as you like】- This Closet System sets includes 4 Separate closet Units: One...
As an affiliate, we earn on qualifying purchases.
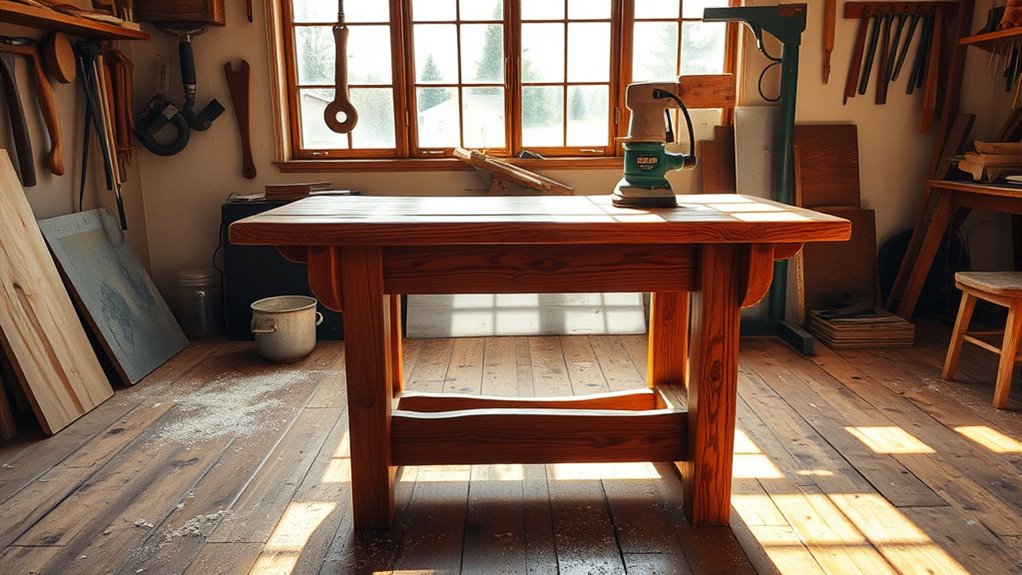
Preparing Your Workspace

Before you start refinishing, make sure your workspace is organized and safe.
Set up in a well-ventilated area with good lighting, and gather all your tools and materials to keep everything at hand. This way, you’ll create an efficient environment that helps you focus on achieving the best results. Additionally, ensure proper airflow around your workspace to prevent any buildup of dust and allergens, similar to the importance of air purifier maintenance. Consider using an air purifier with HEPA filters to help reduce airborne dust during your refinishing project. Using an air purifier can also enhance your comfort by improving air quality as you work on your furniture. Regular cleaning of the air purifier is crucial for maintaining its effectiveness and ensuring a healthy workspace.
Tool Organization Strategies
Organizing your tools is essential for a smooth refinishing experience. Start by grouping your essential tools by type and function. Place frequently used items, like sandpaper and brushes, within easy reach to enhance efficiency. Use labeled containers or a pegboard to store small items like screws, nails, and hardware, keeping your workspace clutter-free. To maintain freshness, consider the shelf life of any liquids or finishes you might use during the refinishing process. Regularly cleaning your tools also helps prevent cross-contact contamination from previous projects. A well-organized workspace can also lead to improved mental well-being, as it reduces stress and creates a more focused environment. Additionally, having a designated workspace helps streamline the refinishing process by minimizing distractions.
| Tool Type | Storage Solution | Usage Frequency |
|---|---|---|
| Sandpaper | Labeled Containers | High |
| Brushes | Mobile Workstation | High |
| Screws/Nails | Pegboard | Moderate |
Create a designated workspace, using drop cloths for protection. Regularly clean tools after use to prolong their lifespan and maintain organization.
Ideal Workspace Conditions
Creating the ideal workspace conditions for refinishing wood furniture is essential for a successful project.
Set up your workspace in a well-ventilated area, like a covered porch, to protect against sun and rain while guaranteeing proper airflow for safety during refinishing. Organize your tools and materials in a designated area to streamline the refinishing process and enhance your enjoyment. Additionally, ensure that you are aware of energy-efficient appliances that can help reduce overall energy consumption during any associated tasks. Implementing advanced safety features can also help mitigate any risks during the refinishing process. For example, utilizing sustainable building materials in your workspace setup can contribute to an eco-friendly environment.
If you’re spraying, consider using a pop-up canopy to create a paint booth that guards against overspray. Line the walls and floor with durable canvas drop cloths to catch paint drips and debris.
Finally, make sure you’ve got adequate lighting to spot imperfections and achieve a high-quality finish throughout your refinishing project. Additionally, incorporating natural materials can enhance the overall aesthetic of the furniture you’re refinishing.
Safety Precautions Required
While you might be enthusiastic to start refinishing your wood furniture, prioritizing safety precautions is essential to guarantee a smooth and secure process.
Begin by setting up your workspace in a well-ventilated area; open windows and use fans to circulate air, especially when using chemical strippers. HEPA filtration is particularly effective at capturing harmful dust particles that may arise during the refinishing process.
Make sure to wear appropriate safety gear, including gloves, goggles, and a dust mask, to protect yourself from harmful chemicals and dust.
Utilize drop cloths to cover floors and surrounding areas, preventing damage from spills and overspray.
Keep your workspace setup on a flat, stable surface for proper application of finishes.
Finally, always have a first aid kit nearby to address any minor injuries that may occur during your project. Additionally, consider following effective preventive maintenance strategies to prolong the life of your refinished furniture.

SUAWY 108 Inch Sectional Sleeper Sofa with Pull Out Bed, U Shaped 7 Seat Modular Sectional Sofa with Storage, Sectional Couches for Living Room, Cloud Modular Couch,Removable Sofa Cover, Dark Grey
Multiple Package Issues: Multiple package may not arrive at the same time. If you have any questions about...
As an affiliate, we earn on qualifying purchases.
Assessing the Condition of Your Furniture
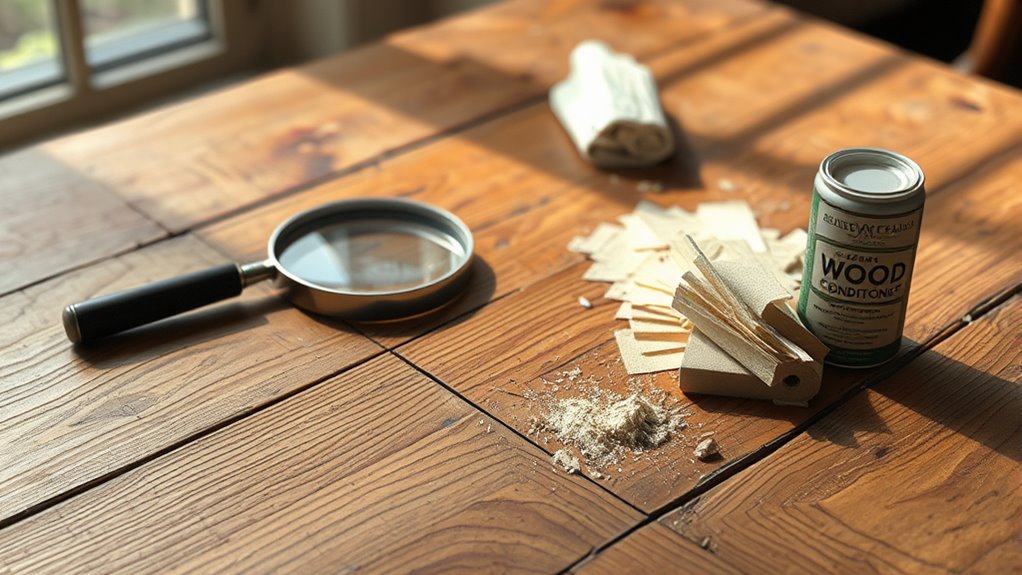
Before diving into the refinishing process, it’s vital to assess the condition of your furniture.
Start by checking for structural issues, like loose joints, to guarantee stability.
Begin by inspecting for any structural problems, such as loose joints, to ensure your furniture remains stable and secure.
Next, look for visible damage—scratches, dents, or gouges—that may require repair before refinishing.
Determine the existing finish; painted pieces might conceal imperfections needing attention.
Evaluate the integrity of the wood, searching for signs of rot or significant wear that could impact the refinishing outcome.
To further assess the furniture’s current state, apply mineral spirits to the surface.
This will help you decide if the existing finish is satisfactory or if a full refinishing is necessary.
Each step is fundamental for a successful transformation!
Stripping the Old Finish

Stripping the old finish is an essential step in refinishing your wood furniture, and you have a couple of effective methods to choose from, like sanding or using chemical strippers.
Remember to prioritize safety by working in a well-ventilated area and wearing protective gear.
Once you’ve removed the finish, don’t forget to clean the surface thoroughly to prepare for the next steps.
Methods for Stripping Finish
To successfully strip the old finish from your wood furniture, you have a couple of effective methods at your disposal: sanding or using chemical strippers.
For sanding, start with coarse grit sandpaper and progress to finer grits for a smooth finish. An electric sander makes this process more efficient, but handle it carefully to avoid damage.
If you opt for chemical strippers, apply thick coats with a stiff brush, following the manufacturer’s instructions closely. This method is great for stubborn finishes.
Remember to work in a well-ventilated area and wear safety gear, like gloves and eye protection, to protect yourself during the wood-stripping process.
Choose the method that best suits your project and preferences.
Safety Precautions Needed
When working on stripping the old finish from your wood furniture, taking safety precautions is vital. Always work in a well-ventilated area to minimize exposure to harmful fumes from chemical strippers. Equip yourself with personal protective equipment: safety goggles, rubber gloves, and a mask. Opt for environmentally friendly chemical strippers that require minimal cleanup. Use drop cloths to protect surfaces from spills and drips, guaranteeing a tidy workspace.
Here’s a quick reference table for safety precautions:
| Precaution | Description |
|---|---|
| Well-Ventilated Area | Reduces harmful fume exposure |
| Personal Protective Gear | Includes safety goggles, gloves, and masks |
| Environmentally Friendly | Choose strippers that are safe for the environment |
| Follow Manufacturer’s Instructions | Guarantee proper application and removal |
| Use Drop Cloths | Protects surfaces from spills |
Post-Removal Cleanup Steps
Once you’ve stripped the old finish from your wood furniture, it’s essential to clean the surface thoroughly.
Start your post-removal cleanup by using a damp cloth or tack cloth to eliminate any chemical residue or dust particles.
Next, inspect the wood for imperfections that may require additional sanding or filling before moving on.
To guarantee you haven’t missed any spots, use mineral spirits to wipe down the surface—this helps reveal any hidden flaws.
Allow the furniture to air dry completely for at least 24 hours, making sure all moisture evaporates.
Finally, gather and dispose of any used materials, like rags or drop cloths, according to local regulations, especially if they’ve been in contact with chemical strippers.
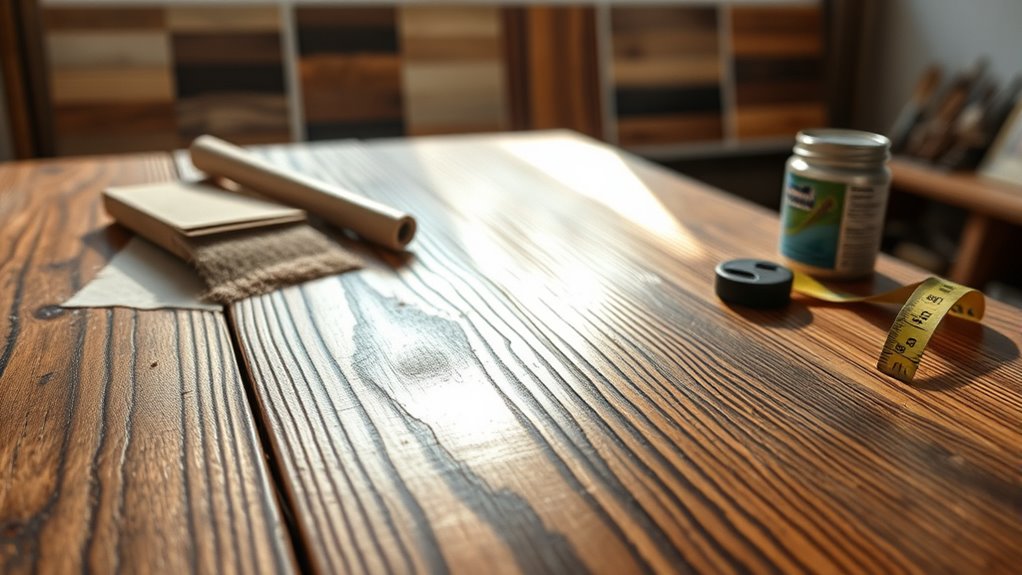
Sanding and Smoothing

Sanding and smoothing your wood furniture is an essential step that can make or break the final look.
Start with coarse grit sandpaper (80-100 grit) to effectively remove the old finish. Progress to medium grit (120 grit) and finish with fine grit (220 grit) for a smooth surface.
Begin with coarse grit sandpaper (80-100 grit) to strip the old finish, then refine with medium (120 grit) and fine (220 grit) for smoothness.
Remember to sand in the direction of the wood grain to avoid scratches and achieve a polished finish. For hard-to-reach areas, utilize sanding sponges or detail sanders.
Regularly wipe the surface with a damp cloth to remove dust and debris, ensuring a flawless outcome.
Finally, inspect the surface thoroughly, addressing any imperfections before applying your new finish. Attention to detail at this stage is vital for the best results.
Staining or Painting
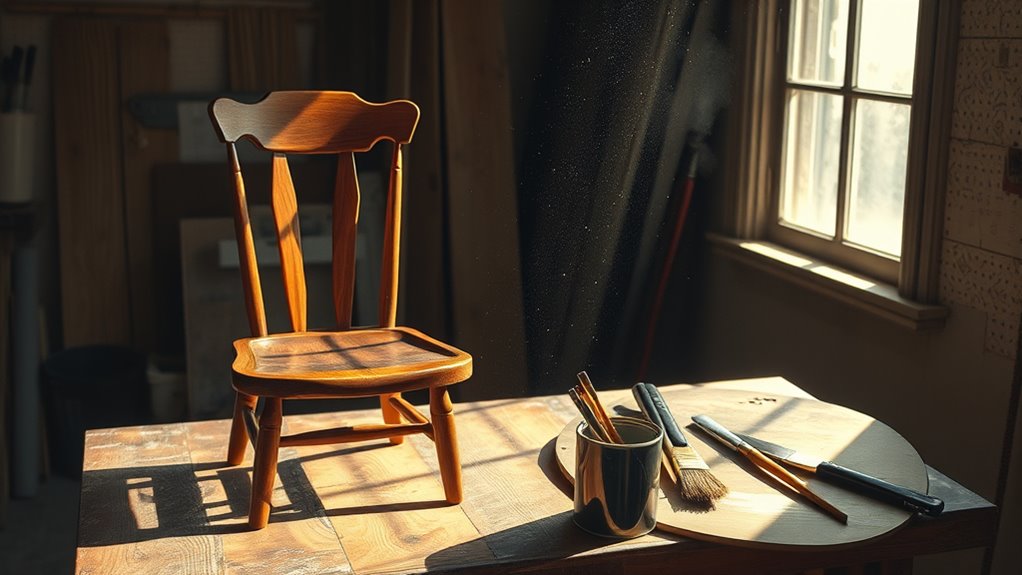
Refinishing wood furniture gives you two great options: staining or painting. Staining enhances the wood’s natural beauty, revealing its grain, while painting allows for creative freedom with endless colors. To achieve an even coverage, always clean the surface thoroughly before you apply.
| Staining | Painting |
|---|---|
| Reveals wood grain | Complete color transformation |
| Wipe off excess for desired depth | Use paint-wash for balanced finish |
| Needs drying time between coats | Multiple thin coats for durability |
When staining, allow it to penetrate before wiping off excess. For painting, remember to apply multiple coats for a smoother, durable finish. Your choice depends on your style and the desired look!
Sealing and Finishing
To protect your newly refinished wood furniture from moisture and damage, sealing it’s crucial. Start by applying a thick coat of sealant after stripping and sanding, then wipe off any excess with a clean rag. Allow it to dry before sanding again for a polished finish.
When choosing a finish, consider options like penetrating oil, polyurethane, or lacquer, keeping in mind that water-based polyurethane offers quick drying and user-friendly application.
For the best results, apply multiple thin coats rather than one thick coat to guarantee even coverage and minimize runs or sagging.
Regular maintenance, including reapplying finish as needed, will help preserve and enhance the appearance of your furniture over time.
Frequently Asked Questions
What Is the Best Way to Refinish Wood Furniture?
To refinish wood furniture, start by cleaning the surface with a soap and water mixture to remove any dirt.
Next, check for scratches or loose joints, and make necessary repairs.
You can then strip the old finish using sandpaper or a chemical stripper—don’t forget your gloves!
Once stripped, fill any gaps, sand it smooth, and apply stain or paint in thin coats.
Finally, seal it with a protective finish for durability.
Is It Better to Sand or Strip Wood Furniture?
When you’re faced with the choice of sanding or stripping wood furniture, think about the condition of your piece.
If it’s heavily damaged or layered with paint, stripping might be your best bet, as it removes finishes without harming the wood.
On the other hand, if the surface is just lightly worn, sanding can give you that smooth finish you desire.
Just remember, both methods require patience and attention to detail for excellent results!
What Furniture Should Not Be Refinished?
You shouldn’t refinish furniture that’s structurally damaged, like pieces with broken legs or loose joints, as they need more than just a cosmetic touch-up.
Antiques or heirlooms with original finishes also lose value when refinished.
Avoid laminate or particleboard items, since they can’t handle sanding or staining.
If your furniture has lead-based paint, seek professional help.
Finally, intricate carvings or delicate details may get damaged during the refinishing process, ruining their charm.
What Is the Difference Between Furniture Restoration and Refinishing?
Imagine you’ve inherited a beautiful, vintage dining table from your grandmother.
Restoring it means you’ll repair any damage and bring back its original charm, while refinishing it would simply refresh its surface with a new stain or finish.
The difference lies in your goal: restoration seeks to preserve history, while refinishing enhances appearance.
Understanding this distinction helps you choose the right approach for that treasured piece, ensuring it shines for generations to come.
Conclusion
Refinishing your wood furniture can feel like magic, transforming old, tired pieces into stunning showstoppers that steal the spotlight in any room. By following these steps, you’ve not only revived your furniture but also tapped into your creative side. Remember, each brushstroke and finish is a step toward making your personal space uniquely yours. So grab your tools, embrace the process, and watch as your furniture goes from drab to fab in no time!