
A French cleat system is a stylish and sturdy way to mount a floating desk securely on your wall. It involves two interlocking pieces cut at a 45-degree angle, which distribute weight evenly and make installation easy to adjust or remove. By using this system, you get a stable, minimalist look while protecting your wall. Keep exploring to discover how to select materials, install correctly, and guarantee your desk stays secure.
Key Takeaways
- The French cleat system uses interlocking angled wood or metal pieces to securely support floating desks on walls.
- It distributes weight evenly, allowing heavy desks to be mounted safely without wall damage.
- Installation involves attaching a bottom cleat to the wall and a matching top cleat on the desk for a flush, stable fit.
- Proper wall anchors and leveling are essential for stability and to prevent wobbling or sagging over time.
- Decorative finishes on the cleats offer customization and a sleek, minimalist aesthetic for modern floating desks.
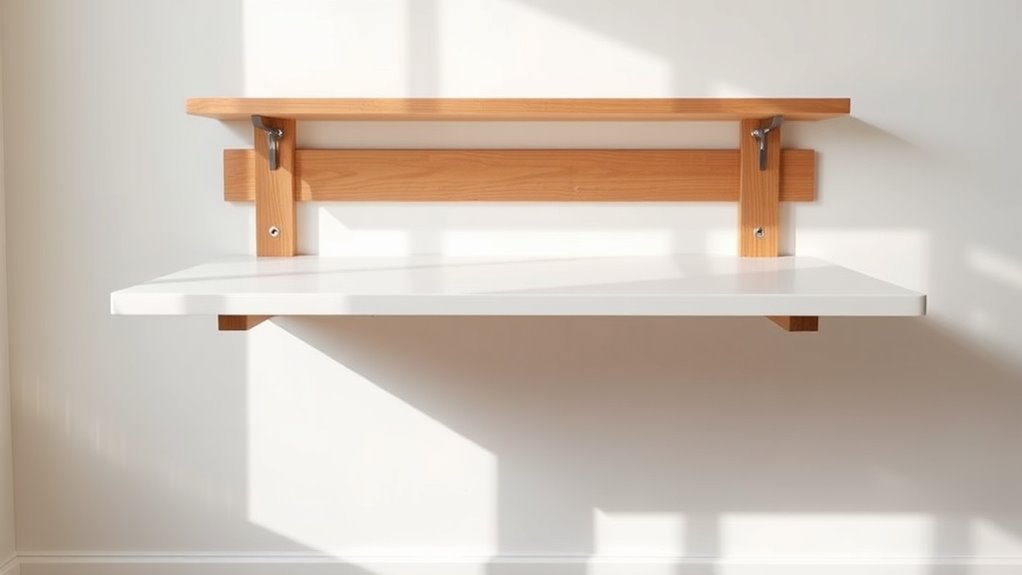
What Is a French Cleat System?
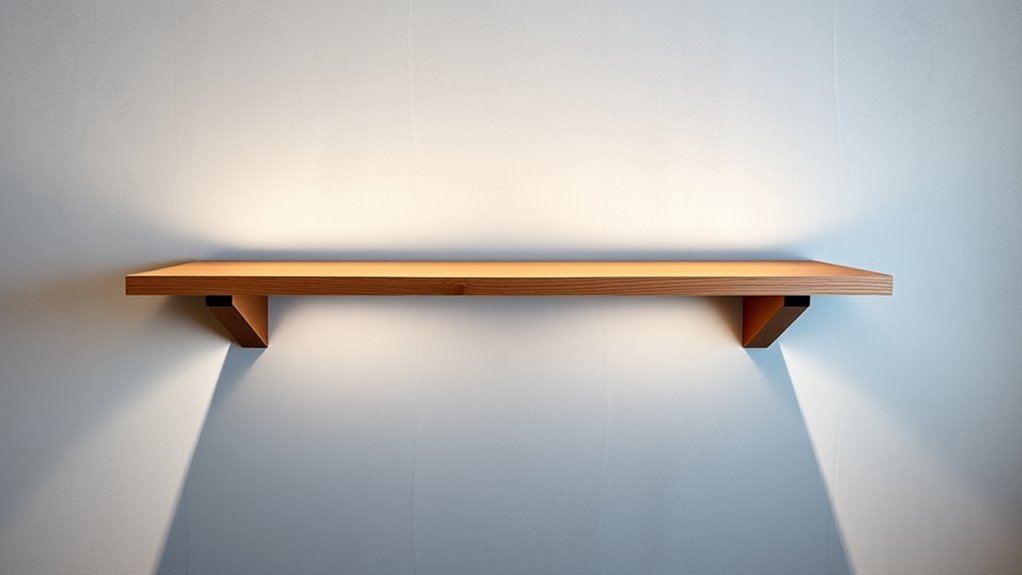
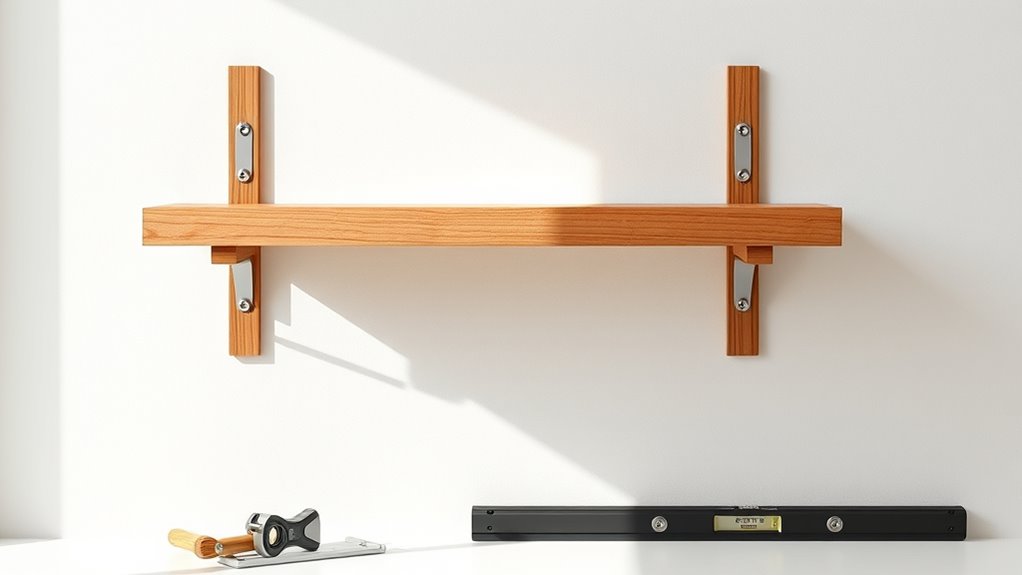
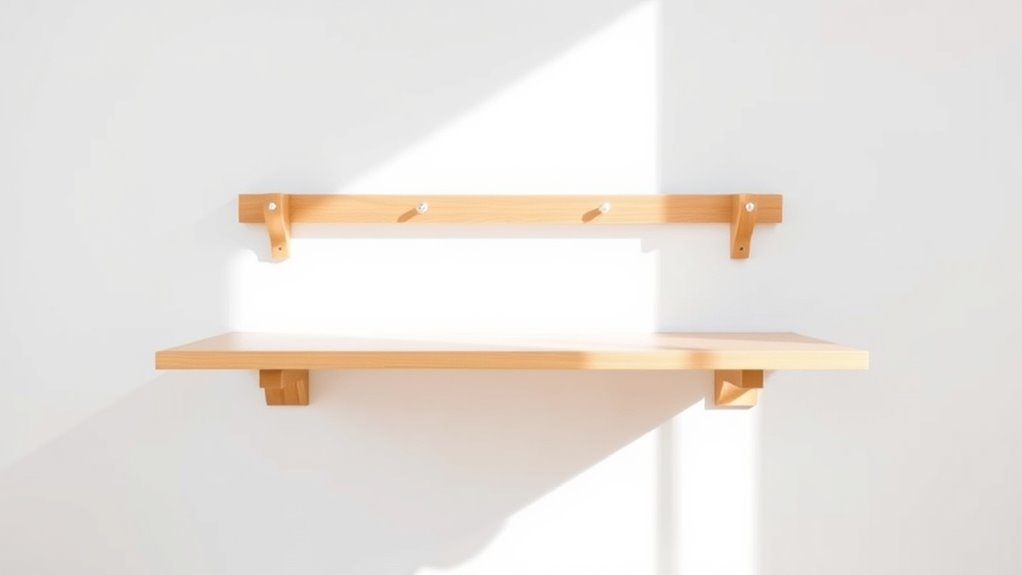
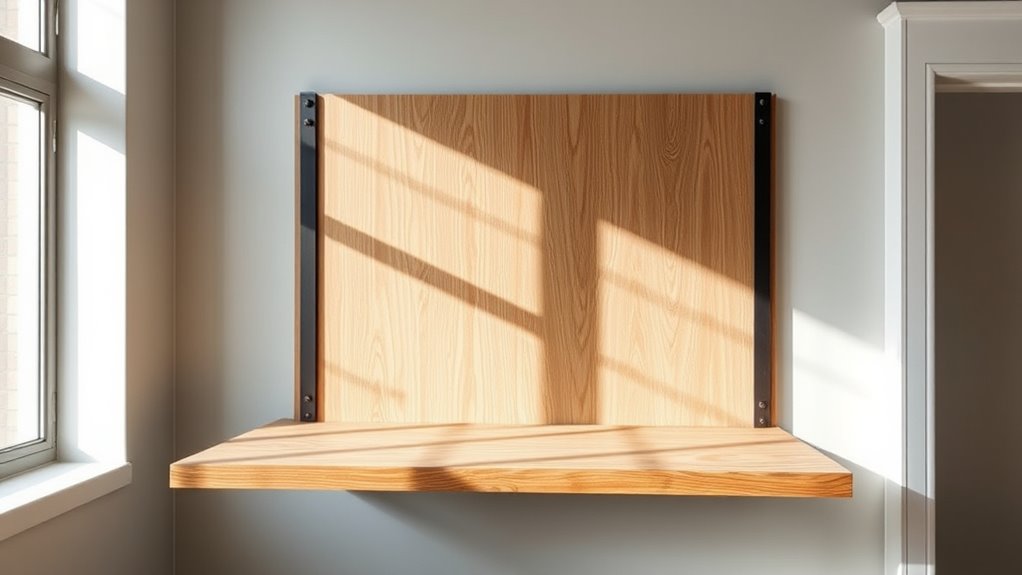
A French cleat system is a simple yet effective way to hang and support objects on a wall. Its history dates back centuries, originally used for heavy cabinetry and large furniture. The design involves two interlocking pieces of wood, each cut at a 45-degree angle, which securely hold items when mounted. This system offers a sturdy, level, and easily removable solution compared to alternative mounting methods like nails or brackets. Unlike traditional hooks or screws, French cleats distribute weight evenly, making them ideal for floating desks and other heavy fixtures. The simplicity of the system allows for quick adjustments or repositioning without damaging walls. Overall, its proven durability and versatility make it a popular choice for both professional and DIY applications.
Benefits of Using a French Cleat for Floating Desks
Using a French cleat for your floating desk offers several practical advantages. First, it guarantees a secure, level installation that can support substantial weight. Second, the system allows for easy removal or repositioning without damaging your wall. Third, it offers flexibility in design, letting you choose from various decorative finishes to match your aesthetic options. Fourth, a French cleat provides a clean, minimalist look that enhances the visual appeal of your space. This method also hides mounting hardware, creating a sleek appearance. Moreover, understanding ethical hacking can help you identify potential security vulnerabilities in your smart home setup, ensuring your floating desk remains protected from unauthorized access. Overall, using a French cleat combines durability with style, making your floating desk both functional and visually pleasing. It’s an excellent choice for achieving a modern, polished look while enjoying the benefits of easy maintenance and customization.
Materials Needed for Installing a French Cleat
To install a French cleat, you’ll need a few essential materials, including sturdy wood or metal strips and appropriate hardware. Make sure you have the right tools on hand, like a saw, level, and drill, to make the process smooth. Gathering these materials before starting will help guarantee a secure and professional-looking installation. Additionally, selecting the right grocery savings strategies can help fund your home improvement projects.
Materials Needed for Installing a French Cleat
Installing a French cleat system requires a few essential materials to guarantee a secure and level setup. First, you’ll need sturdy wood or metal strips to serve as the cleat itself. Second, a level ensures your floating desk stays perfectly horizontal. Third, screws or bolts secure the cleat to the wall and desk, depending on your preferred mounting method. Fourth, decorative finishes can be added to conceal hardware and enhance aesthetics, especially if you’re exploring alternative mounting methods. These materials help you achieve a clean, professional look while supporting the weight of your floating desk. Additionally, choosing appropriate hardware designed for your wall type is crucial for ensuring safety and durability. Make sure the wall anchors and hardware you choose are appropriate for your wall type, ensuring safety and durability. With these essentials, you’ll have a solid foundation for your floating desk project.
Tools and Hardware Essentials
Gathering the right tools and hardware sets the foundation for a successful French cleat installation. You’ll need basic items like a drill, level, measuring tape, and screwdriver. For hardware, select sturdy cleats, wall anchors, and screws suited for your wall type. Don’t forget cable management accessories to hide and organize cables, creating a clean look that complements decorative finishes.
| Tools | Hardware & Accessories |
|---|---|
| Drill with bits | French cleats |
| Level | Wall anchors and screws |
| Measuring tape | Cable management clips |
| Screwdriver | Decorative finishes for edges |
| Pencil for marking | Wall plugs for added support |
With these essentials, your floating desk will be secure, sleek, and beautifully finished.
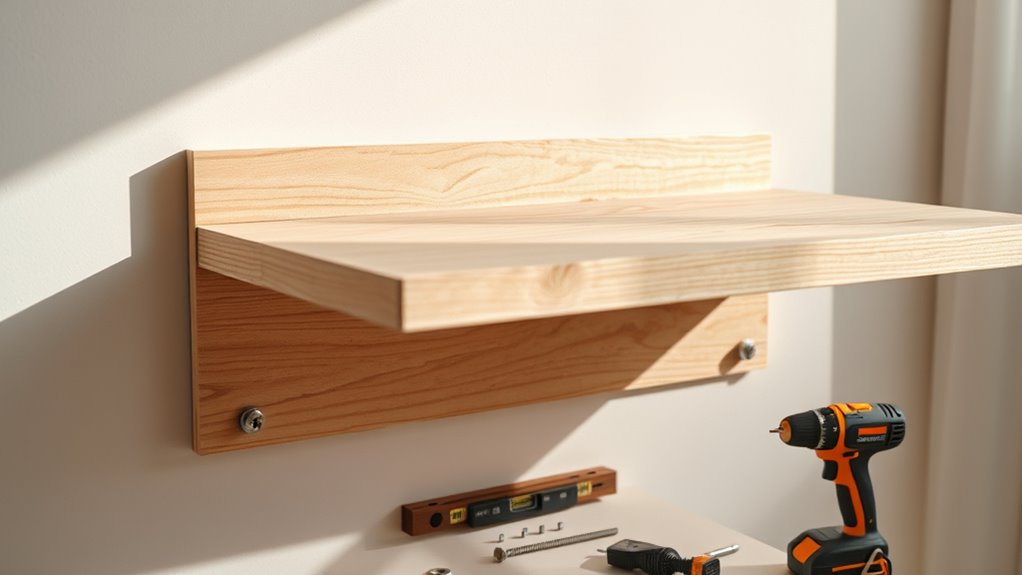
Step-by-Step Guide to Mounting a French Cleat

To properly mount your French cleat, you’ll need the right tools and materials to make certain of stability. Next, follow the steps for mounting and securing the cleat firmly to the wall and desk. Careful attention during this process guarantees your floating desk will stay level and secure. For optimal results, consider the hardware options that support various weight capacities and ensure durability.
Tools and Materials Needed
Before you start mounting your French cleat, having the right tools and materials on hand is vital. You’ll need these essential items:
- A level to ensure proper alignment of your French cleat design.
- A drill with appropriate bits for wall anchors and screws.
- Screws and wall anchors suited for your wall type.
- A measuring tape for precise placement.
- Understanding weight distribution is crucial for well-being tips to ensure your floating desk remains secure and safe over time.
While a standard French cleat system works well, consider alternative mounting methods if space or wall material demands it. These tools help you achieve a secure, level installation. Make sure to select high-quality hardware to support your floating desk’s weight safely. Having everything prepared beforehand ensures a smooth mounting process and a professional finish.
Mounting and Securing
Once you’re ready to mount your French cleat, start by marking the wall to guarantee accurate placement. Use a level to ensure the cleat will be straight, which is vital for maintaining the wall’s decorative finishes and overall wall aesthetics. Measure carefully to position the cleat at the desired height, and mark where the screws will go. Drill holes into the wall anchors or studs, then secure the bottom piece of the cleat first, followed by the top, ensuring they interlock tightly. Double-check alignment before tightening fully. Proper mounting not only guarantees stability but also preserves the visual appeal of your space. Take your time to ensure everything is level and secure for a sleek, floating desk that seamlessly blends with your decor. Remember that a well-executed installation can prevent issues like uneven weight distribution, ensuring the longevity and safety of your floating desk.
Tips for Ensuring Stability and Support

Ensuring stability and support when installing a floating desk with a French cleat system requires careful attention to the wall and the hardware used. First, choose a sturdy wall surface, like drywall with proper anchors or a solid wood panel, to support weight. Second, consider decorative finishes that won’t interfere with the cleat’s grip—smooth, non-porous surfaces work best. Third, if your wall isn’t ideal, explore alternative wall mounts designed for heavy loads, offering extra support. Fourth, double-check that your cleat hardware is rated for the weight of your desk and items placed on it. Properly installed, these tips help prevent wobbling or shifting, ensuring your floating desk remains stable and secure over time. Additionally, understanding self watering plant pots can help you maintain a lush, healthy environment on your floating desk workspace.
Customizing Your Floating Desk With a French Cleat
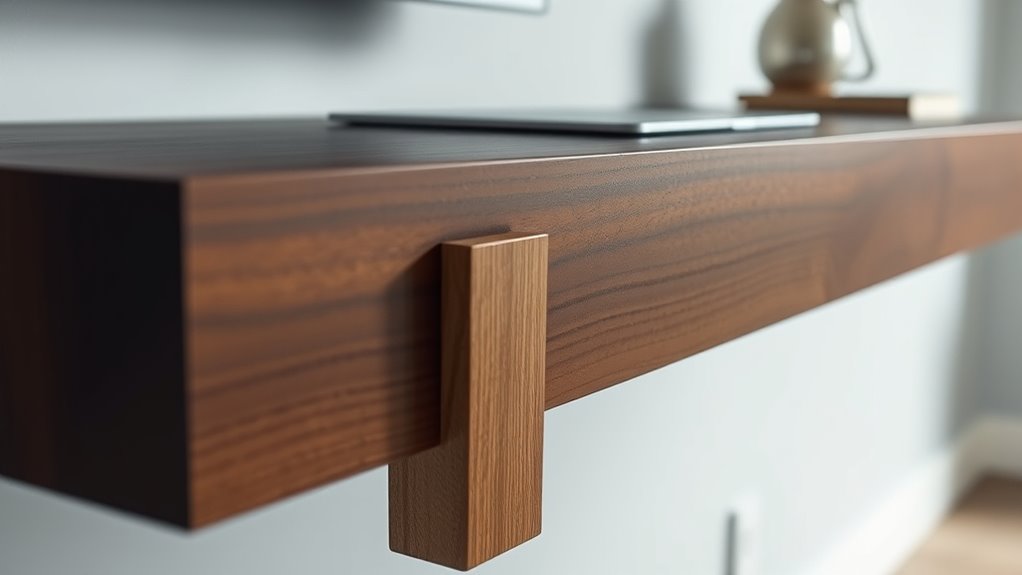
Customizing your floating desk with a French cleat allows you to personalize its appearance and functionality to suit your space. You can add artistic finishes like paint, stain, or decorative veneers to match your decor, creating a unique focal point. The French cleat system also supports ergonomic design by enabling you to adjust the desk’s height or position for ideal comfort. Whether you’re installing a sleek, modern look or a rustic style, the cleat provides a secure foundation that makes customization simple. With this system, you’re free to experiment with different finishes and configurations without compromising stability. Additionally, understanding design principles can help you optimize your setup for both aesthetics and usability, ensuring your floating desk not only complements your aesthetic but also enhances your workspace’s overall comfort and usability.
Troubleshooting Common Installation Issues
If your floating desk isn’t fitting securely, wall anchoring might be be the problem. You’ll also want to double-check that the brackets are level for a smooth, balanced look. Additionally, ensuring the weight distribution is even across the system can help prevent shifting or sagging over time.
Wall Anchoring Challenges
Wall anchoring can be tricky, especially when dealing with different wall materials or uneven surfaces. To guarantee your floating desk stays secure and looks great, consider these tips:
- Identify your wall type—drywall, concrete, or plaster—to choose the right anchors.
- Use appropriate hardware that supports the weight of your desk and complements decorative finishes.
- Drill carefully to avoid damaging surfaces, maintaining your aesthetic options.
- Check for levelness and stability before mounting to prevent future adjustments.
- Ensuring proper installation techniques can also improve overall safety and durability of your floating desk.
Proper anchoring prevents wobbling and keeps your desk safe. Remember, selecting the right anchors and hardware is key to maintaining both the functionality and visual appeal of your floating desk. This approach ensures your installation is both secure and visually seamless.
Leveling the Brackets
Leveling your brackets is a crucial step to guarantee your floating desk looks professional and functions properly. Properly leveling brackets ensures the desk sits even and avoids wobbling or gaps. To do this, start by attaching the brackets loosely to the wall, then place your floating desk on them. Use a level to check if the brackets are at the same height. If they aren’t, adjust the height of each bracket by loosening or tightening the mounting screws. Keep checking with your level until both brackets are perfectly aligned. Once you’re satisfied with the leveling brackets, tighten all screws securely. Taking your time to adjust height carefully prevents uneven surfaces and creates a clean, finished look for your floating desk.
Weight Distribution Tips
Making certain proper weight distribution is essential to prevent your floating desk from sagging or becoming unstable. To optimize load balancing and respect the weight capacity, follow these tips:
- Distribute heavier items evenly across the surface to avoid putting excess strain on one side.
- Attach the French cleats at an even height to ensure uniform load transfer.
- Check that the brackets are securely anchored into wall studs, not drywall alone.
- Avoid exceeding the recommended weight capacity for your specific system, and consider using additional support if needed.
Maintaining and Adjusting Your Floating Desk
To keep your floating desk secure and functional, regular maintenance and adjustments are essential. Check your wall anchoring periodically to verify it remains tight and secure, especially if the desk sees heavy use. Over time, screws can loosen, so tighten them as needed to prevent wobbling or detachment. Pay attention to weight distribution; uneven loads can stress the French cleat system and compromise stability. Adjust the positioning if you notice the desk shifting or sagging. Use a level to confirm the desk stays perfectly horizontal, and make small tweaks to the cleat alignment if necessary. Regularly inspecting and fine-tuning these elements keeps your floating desk in top condition, prolongs its lifespan, and maintains safety and usability.
Creative Variations of the French Cleat System
While maintaining your floating desk is important, exploring creative variations of the French cleat system can further enhance its functionality and aesthetics. You can incorporate innovative designs and decorative accents to personalize your setup. Consider these options:
- Use colorful or textured wood for a striking visual impact.
- Add LED strip lighting behind the cleats for ambient illumination.
- Integrate metal or acrylic elements to create a modern, industrial look.
- Incorporate decorative trims or carvings along the cleat edges for a unique touch.
These variations not only improve the visual appeal but also allow you to customize your floating desk to match your style. Experimenting with inventive designs makes your space more inviting and reflects your personality.
Safety Precautions When Installing a French Cleat

Installing a French cleat system requires careful attention to safety to prevent accidents and guarantee the fixture holds securely. Before mounting, check the wall for stability and avoid areas prone to wall damage, such as drywall without studs. Use appropriate anchors and hardware rated for the weight limits of your floating desk. Overloading the cleat can cause it to fail or damage the wall. Always measure and level the cleat precisely to ensure even weight distribution. Wear safety goggles and gloves to protect against debris and sharp tools. When drilling, go slow and avoid applying excessive force. Confirm the cleat is firmly anchored before hanging the desk to prevent slips or falls. Proper precautions ensure your floating desk remains safe and secure over time.
Frequently Asked Questions
Can I Install a French Cleat System on Uneven Walls?
You might wonder if you can install a French cleat system on uneven walls. Yes, it’s possible, but wall irregularities can affect mounting adjustments. To guarantee stability, you should use shims or spacers to level the cleat before securing it. Carefully evaluate the surface and make necessary adjustments, so your floating desk stays secure and level, even on uneven walls.
What Weight Capacity Can a French Cleat Support?
Did you know French cleats can support up to 100 pounds or more? When it comes to weight capacity, your mounting strength depends on the cleat’s material and how securely it’s installed. With proper anchoring into studs or solid wall anchors, a French cleat can hold heavy items like floating desks or cabinets. Just guarantee you use the right hardware for your wall type, and you’ll enjoy strong, reliable support.
Is It Possible to Remove and Reposition the Floating Desk Easily?
Yes, you can easily remove and reposition your floating desk with the right method. The removal process involves carefully lifting the desk off the cleats, which are designed for quick disengagement. Repositioning is simple—just align the cleats on the wall with the mounting on the desk and secure it back in place. This system allows you to change your setup effortlessly without tools, making it ideal for flexible workspace arrangements.
Can French Cleats Be Used for Other Furniture Types?
Think of French cleats as the Swiss Army knife of mounting solutions. You can definitely use them for other furniture types beyond floating desks. They serve as reliable alternative wall mounts, providing sturdy support and a clean look. Plus, you can incorporate decorative backing to hide hardware, making your furniture both functional and stylish. With French cleats, you turn your walls into versatile, hidden support systems—easy to install, reposition, and remove when needed.
How Do I Hide the Mounting Hardware for a Cleaner Look?
To hide the mounting hardware for a cleaner look, you should opt for concealed mounting techniques or hardware concealment methods. Use covers or caps designed for your system to hide screws or brackets, ensuring a seamless appearance. You can also paint or stain the covers to match your furniture, making the hardware virtually invisible. This approach maintains a sleek, professional look while keeping your installation secure and sturdy.
Conclusion
With a little patience and a steady hand, you can transform your space into a sleek, functional haven. The French cleat system offers a graceful way to keep your floating desk secure and stylish, almost like a gentle breeze supporting a delicate leaf. As you refine and enjoy your setup, you’ll find it’s not just about the installation but about creating a backdrop for your daily moments. Embrace the process, and let your space flourish effortlessly.