Decor
10 DIY Topiary Ideas for Your Home
Wondering how to bring elegance and nature into your home? Explore 10 creative DIY topiary ideas that will transform your space!

Discover a range of creative DIY topiary ideas for your home, including Styrofoam Ball Topiary, Succulent Topiary Centerpiece, Herb Topiary Garden, Moss-Covered Topiary, Hanging Topiary Basket, Topiary Animal Sculptures, Topiary Cone Trees, Mini Rosemary Topiaries, Topiary Wreath, and Topiary Wall Art. Create elegant decor with easy-to-follow steps using various materials like greenery, herbs, moss, and succulents. From stylish cone trees to charming hanging baskets, these ideas offer a mix of aesthetics and simplicity. Elevate your home decor effortlessly with these unique topiary options that add a touch of sophistication and natural beauty to any space.
Key Takeaways
- Styrofoam Ball Topiary: Easy to make with dowel rods and greenery, perfect for home decor.
- Succulent Topiary Centerpiece: Low maintenance, suitable for tables or shelves.
- Herb Topiary Garden: Grow rosemary, thyme, and basil for culinary use.
- Moss-Covered Topiary: Choose vibrant moss, shape into cones or balls.
- Hanging Topiary Basket: Feature cascading greenery like ivy or ferns for a beautiful display.
Styrofoam Ball Topiary
When crafting a styrofoam ball topiary, gather the necessary supplies like styrofoam balls, dowel rods, and greenery. To create a stunning DIY Topiary Tree, start by securing a faux greenery ball onto the top of a dowel rod using hot glue. Make sure the styrofoam ball is evenly covered with the greenery to achieve a lush and realistic look.
Next, insert the dowel rod into a stable base such as a decorative pot filled with foam or rocks for support.
These DIY topiary trees are versatile and can be customized to suit any space or occasion. Experiment with different types of greenery like boxwood, rosemary, or even artificial flowers to add a pop of color. The hot glue will securely attach the greenery to the styrofoam ball, guaranteeing a long-lasting topiary.
Whether placed indoors as an elegant centerpiece or outdoors to enhance a garden, these styrofoam ball topiaries are an affordable way to bring a touch of nature into your decor.
Succulent Topiary Centerpiece
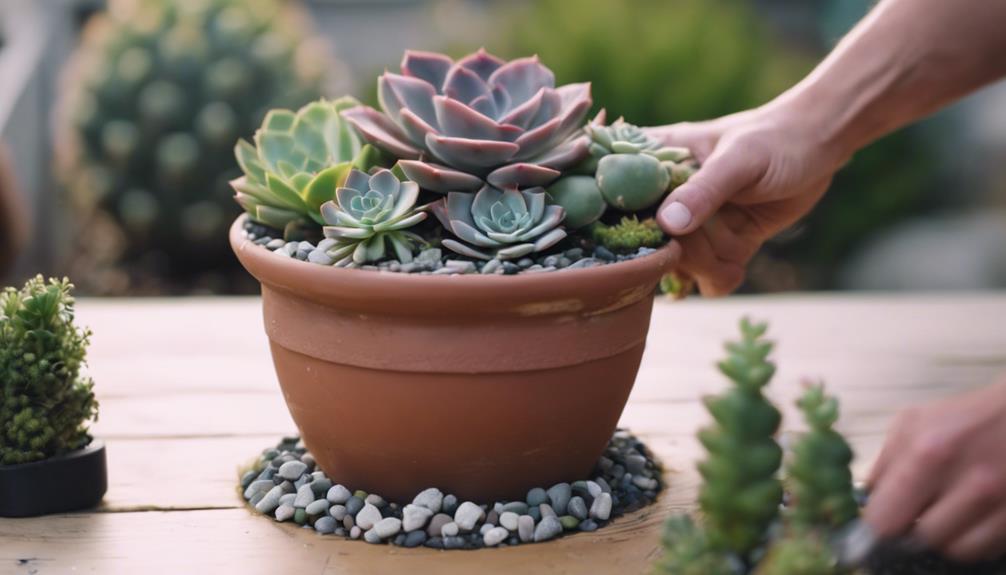
Crafting a succulent topiary centerpiece can add a touch of unique greenery to your home decor. These DIY projects aren't only visually appealing but also easy to care for, making them a practical choice for those looking to incorporate some nature indoors.
Succulent topiary centerpieces are versatile and can be placed on tables, mantels, or shelves, adding an invigorating element to any room. With various shapes and sizes available, you can tailor the topiary to suit your space perfectly.
The beauty of succulent topiaries lies in their longevity, requiring minimal maintenance to thrive. They offer a sustainable way to introduce greenery into your home without the need for constant watering or direct sunlight.
If you're seeking a low-maintenance yet striking green centerpiece, a succulent topiary could be the perfect addition to your living space.
Herb Topiary Garden

When it comes to creating a herb topiary garden, there are essential basics to keep in mind for a successful project.
Understanding the different herbs suitable for topiaries, such as rosemary, thyme, and basil, is vital in achieving both aesthetic beauty and practicality.
With proper maintenance tips, these herb topiaries can thrive, offering a delightful blend of visual appeal and culinary benefits.
Herb Topiary Basics
Creating a herb topiary garden is a delightful way to incorporate fresh herbs into your living space while adding a touch of greenery and fragrance. Herb topiaries are a creative and visually appealing method to grow and display herbs like rosemary, thyme, and basil, each imparting a unique scent and flavor.
Maintaining herb topiaries is relatively simple, requiring regular pruning to preserve their shape and encourage healthy growth. These charming creations can be positioned indoors on windowsills or outdoors on patios, offering both decorative and practical advantages.
Herb topiaries serve as fantastic gifts for gardeners and chefs, providing a sustainable source of fresh herbs for culinary endeavors. Their compact nature makes them ideal for those with limited space, bringing a touch of nature indoors.
Whether used for cooking or simply to enhance the ambiance of your home, herb topiaries are versatile and easy to care for, making them a wonderful addition to any living space.
Maintenance Tips
To keep your herb topiary garden looking its best, regular trimming is essential for maintaining the shape and promoting healthy growth. When it comes to maintaining your herb topiaries, having a green thumb is vital. Remember to water your herb topiaries when the top inch of soil feels dry to the touch. Placing them in a sunny spot with at least 6 hours of direct sunlight daily will help them thrive. Additionally, fertilize your herb topiaries with a balanced liquid fertilizer every 4-6 weeks during the growing season to provide them with essential nutrients for best growth.
Here is a helpful table outlining key maintenance tips for your herb topiary garden:
| Maintenance Task | Frequency |
|---|---|
| Trim | Regularly |
| Water | When soil feels dry |
| Fertilize | Every 4-6 weeks |
Moss-Covered Topiary

Moss-covered topiaries are a wonderful addition to any home decor, providing a natural and earthy vibe. The moss gives these topiaries a bushy and organic appearance, perfect for adding a touch of greenery indoors.
To maintain their charm, we'll be discussing important points such as moss selection tips, shaping the topiary forms, and how to effectively care for these delightful creations.
Moss Selection Tips
When selecting moss for your DIY topiary project, consider opting for fresh green moss to achieve a vibrant and natural appearance.
To make the process easier, choose sheet or preserved moss for simple application and maintenance.
For a more unique and airy texture, Spanish moss can be an excellent option for your moss-covered topiary design.
When securing the moss to the foam base of your topiary, utilize floral wire or hot glue to guarantee a lasting finish.
Shaping Topiary Forms
We can sculpt moss topiaries into a variety of shapes like cones, balls, or spirals, enhancing their natural and earthy appeal. Moss-covered topiaries offer a unique way to bring a touch of greenery indoors without the maintenance of real plants. These artificial topiaries can be shaped to fit any design scheme, adding texture and visual interest to your home decor. Whether you prefer a classic spherical shape or a more modern spiral design, moss-covered topiaries provide a versatile option to suit your style.
Using faux plants allows for endless creativity when shaping topiary forms. You can experiment with different sizes and arrangements to achieve the desired look for your space. The bushy appearance of moss-covered topiaries adds a sense of lushness to any room, making them a popular choice for interior decoration. To add a polished finish, consider wrapping a matching ribbon around the base of the topiary to complement your decor theme.
Maintenance and Care
To maintain the lush appearance of your moss topiaries, it's important to follow simple care practices that keep the moss fresh and vibrant. Moss-covered topiaries require minimal maintenance compared to live plants, making them an excellent choice for those seeking low upkeep greenery.
Here are some tips to guarantee your moss-covered faux topiary stays in top condition:
- Lightly mist the moss: Regularly misting the moss with water helps to keep it hydrated and looking healthy. Avoid overwatering to prevent soggy moss, which can lead to mold or mildew growth.
- Keep out of direct sunlight: Position your moss-covered topiary in a location with indirect sunlight to prevent the moss from drying out and browning. This simple step can greatly extend the lifespan of your faux topiary.
- Gently pat down and trim: If the moss starts to look unruly or messy, gently pat it down to maintain its shape. Additionally, trim any overgrown areas to keep the topiary looking neat and well-groomed.
Hanging Topiary Basket
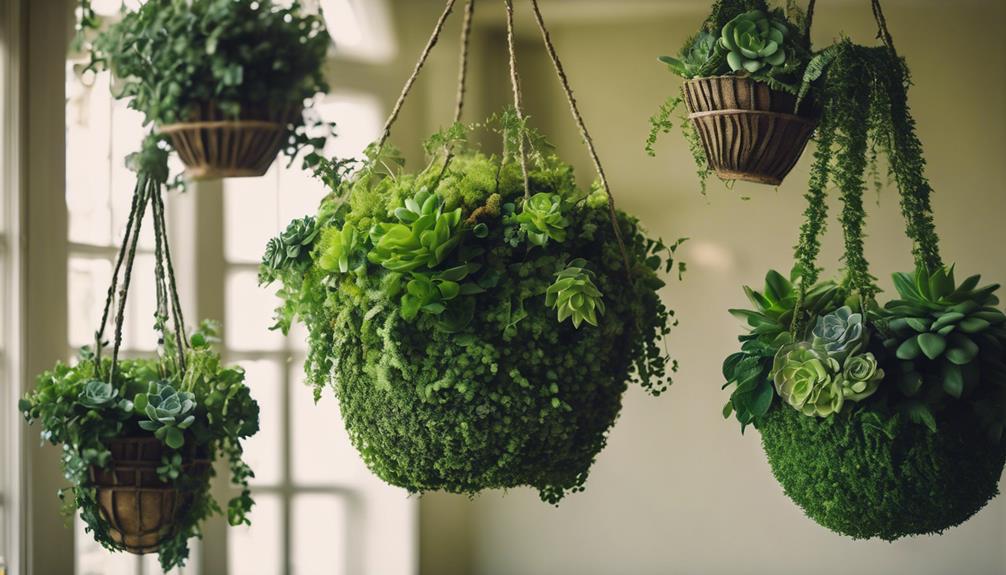
One popular way to incorporate greenery into home decor is by utilizing a hanging topiary basket. These baskets offer a versatile and space-saving option for adding a touch of nature to your living space.
Typically featuring cascading greenery like ivy or ferns, hanging topiary baskets provide a whimsical and elegant look that can be easily achieved. To minimize upkeep, consider using faux or artificial greenery, which not only requires low maintenance but also guarantees long-lasting beauty.
Hanging topiary baskets can be effortlessly hung from a ceiling hook or displayed on a wall bracket, allowing for easy customization and a charming aesthetic. For a personalized touch, you can enhance your hanging topiary basket with seasonal accents like flowers or ribbons, making it a dynamic element of your home decor that can be updated throughout the year.
Topiary Animal Sculptures

When contemplating topiary animal sculptures, it's important to understand the basics of creating these whimsical forms from plants. Choosing the right plant species is key as it impacts the sculpture's longevity and appearance.
To guarantee these animal-shaped topiaries maintain their charm, regular maintenance practices such as pruning and shaping need to be implemented.
Animal-Shaped Topiary Basics
Crafting animal-shaped topiaries involves meticulously pruning and shaping live plants to create intricate and whimsical animal forms in garden landscapes.
When looking to make realistic animal-shaped topiaries using artificial means, there are a few basics to take into account:
- Choose Quality Materials: Opt for high-quality artificial foliage that closely resembles the texture and color of real plants to achieve a lifelike appearance for your topiary animal sculptures.
- Invest in Sturdy Frames: Utilize durable metal frames designed specifically for creating topiary shapes to provide a stable structure for your artificial plant material and ensure longevity for your animal-shaped topiary.
- Regular Maintenance: Despite using artificial plants, regular cleaning and occasional touch-ups may be necessary to preserve the realistic look of your animal-shaped topiary and keep it looking fresh and vibrant in your garden or outdoor space.
Choosing Suitable Plant Species
Selecting plant species with dense foliage, like boxwood or rosemary, is crucial when creating topiary animal sculptures to guarantee a lush and vibrant appearance. Boxwood topiaries are particularly popular due to their ability to maintain a compact shape and withstand frequent pruning, making them ideal for intricate animal designs.
When choosing plants for your topiary project, consider the growth habit and maintenance requirements of the species to secure the longevity of your sculptures. Opt for greenery stems that are sturdy and flexible, allowing you to shape them into the desired animal form effortlessly.
Research the specific plant species that best suit the animal sculpture you have in mind to achieve the desired topiary look. Plants with vibrant green colors will enhance the visual appeal of your topiary animal sculptures, creating a striking focal point in your home or garden.
Topiary Maintenance Tips
To maintain the shape and design of topiary animal sculptures, regular pruning is important. When caring for these living sculptures, we must pay close attention to their needs. Here are some topiary maintenance tips for keeping your topiary animals healthy and vibrant:
- Use the Right Tools:
Sharp and clean pruning shears are essential for trimming the foliage of topiary animals. This guarantees precise cuts that promote healthy growth and maintain the desired shape.
- Monitor for Pests and Diseases:
Regularly check for pests and diseases that can harm your topiary sculptures. Early detection allows for prompt treatment, safeguarding the health of your green creations.
- Meet Water Requirements:
Different plant species used in topiary sculptures have varying water needs. Water your topiary animals according to the specific requirements of the plants involved to keep them hydrated and thriving.
Topiary Cone Trees
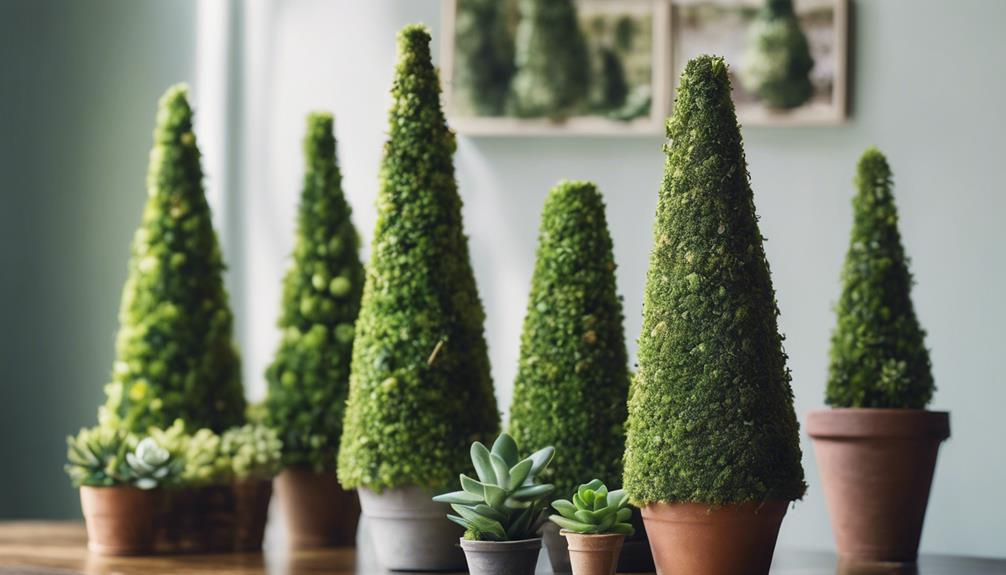
Let's explore how topiary cone trees can effortlessly elevate your home decor with a touch of elegance and sophistication. These DIY topiary cone trees are a fantastic way to bring greenery indoors without the maintenance of real plants.
By using faux greenery and simple materials like foam cones and decorative pots, you can create stunning topiary cone trees that suit your style and space perfectly. The DIY aspect of crafting these cone-shaped topiaries adds a personal touch to your home decor while also being budget-friendly.
These versatile decorations can be customized to match any color scheme or design aesthetic, making them a popular choice for various rooms in your home. Whether used as centerpieces, mantle decorations, or accents for shelves and tables, topiary cone trees infuse a sense of charm and sophistication into your living space.
Embrace the beauty of nature within your home with these elegant DIY topiary cone trees.
Mini Rosemary Topiaries
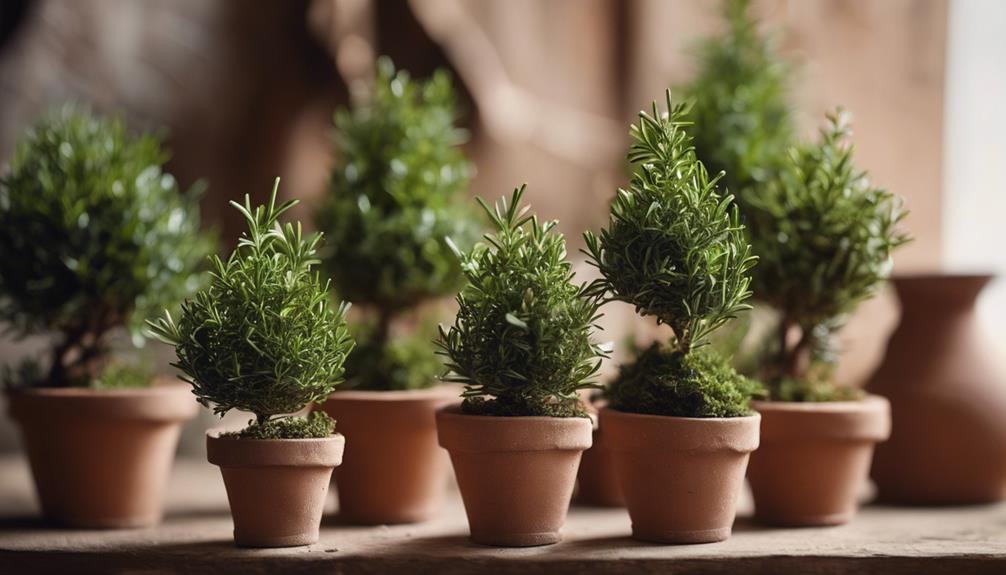
How can Mini Rosemary Topiaries enhance your home decor effortlessly?
Mini Rosemary Topiaries are a delightful addition to any living space, offering a touch of greenery and charm. Here are three ways these DIY rosemary topiaries can elevate your home decor:
- Versatile Decor Options: Mini Rosemary Topiaries can be placed on tables as elegant centerpieces, displayed on shelves to bring a fresh look, or even given as unique party favors. Their versatility allows you to incorporate them into various settings, adding a natural and organic feel to your surroundings.
- Easy to Customize: These topiaries can be personalized to match your decor style by choosing different pots, ribbons, or other embellishments. This DIY aspect enables you to create a cohesive look that complements the existing aesthetic of your home.
- Low-Maintenance Greenery: Mini Rosemary Topiaries aren't only visually appealing but also easy to care for, making them an ideal choice for those looking to introduce greenery into their home without the hassle of high maintenance plants. These topiaries provide a simple way to infuse nature into your living space effortlessly.
Topiary Wreath

Crafting a topiary wreath is a creative way to add a touch of elegance to your outdoor decor. Topiary wreaths, popular for front doors and outdoor spaces, can be made using faux greenery, wire wreath forms, and floral wire.
The classic and sophisticated look they offer can enhance any area. Personalizing these wreaths with ribbons, ornaments, or seasonal accents allows for a unique touch.
DIY topiary wreaths aren't only cost-effective but also offer the flexibility to tailor them to match any style or theme you desire. By making your own topiary wreath, you can bring a sense of charm and beauty to your outdoor setting.
Whether you prefer a more traditional design or a modern twist, a topiary wreath is a versatile decor piece that can elevate the aesthetic appeal of your home's exterior.
Topiary Wall Art
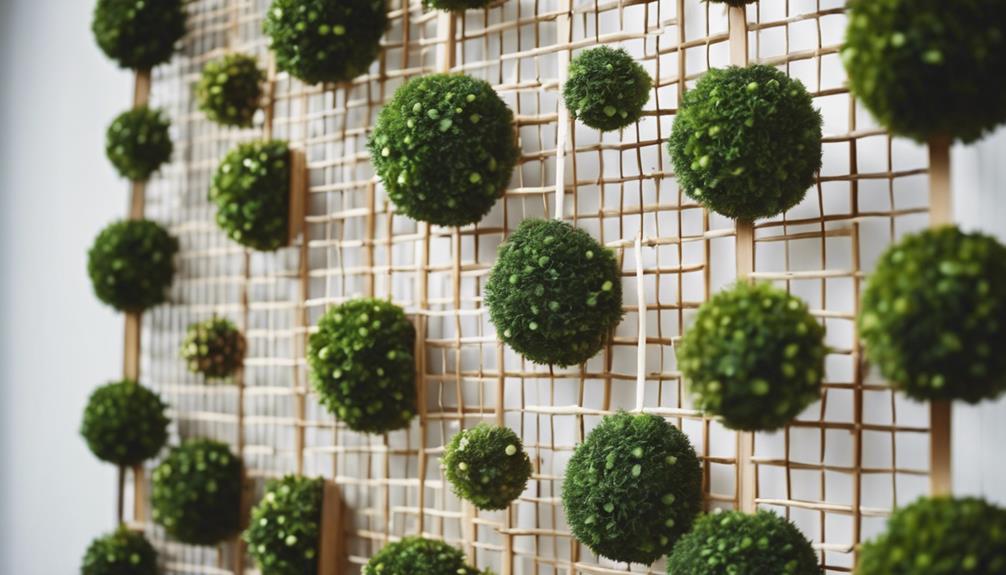
Creating topiary wall art using artificial greenery offers a stylish and innovative way to incorporate the beauty of greenery into your home decor. One key advantage of this type of art is its customizable designs, allowing you to tailor the look to match your space and style preferences. Whether you prefer geometric shapes, animals, or abstract patterns, the options are endless.
Another benefit is the low-maintenance display that artificial greenery provides. Unlike live plants, artificial greenery requires minimal upkeep, offering a lush green aesthetic without the need for watering, pruning, or concerns about sunlight exposure.
Additionally, topiary wall art is a budget-friendly option for adding a touch of nature and sophistication to your home. By choosing artificial greenery, you can achieve a stunning botanical display without exceeding your budget. This DIY project offers a versatile and affordable solution for enhancing your living space with a touch of greenery.
Frequently Asked Questions
How to Make Topiary at Home?
To make topiary at home, we start by selecting materials like foam balls, vintage vases, dowel rods, and greenery.
We prioritize using green foam balls to avoid visibility and thick greens for better coverage. Staining dowel rods with Early American stain or opting for natural branches can provide an authentic appearance. Securing dowel rods in foam blocks using hot glue enhances stability.
Filling foam balls with greenery stems by poking holes guarantees complete coverage for a desired topiary tree look.
What Are the Best Topiary Plants for Indoors?
When considering the best topiary plants for indoors, factors like compact growth and adaptability to indoor conditions are essential.
Boxwood, rosemary, myrtle, and lavender are top choices. Boxwood stands out for its ease of shaping and dense foliage, creating a timeless aesthetic.
Rosemary not only offers visual appeal but also emits a pleasant scent when pruned.
Lavender adds color and fragrance indoors, requiring minimal upkeep for a revitalizing touch to any space.
What Shrub Is Best for Topiary?
When considering shrubs for topiary, several factors come into play. Boxwood shrubs stand out for their durability and ability to be pruned into various shapes.
Rosemary shrubs offer a unique texture and aromatic foliage, adding a sensory dimension to topiary designs.
Privet shrubs, with their fast growth and versatility, are popular for creating intricate shapes.
Yew shrubs excel in intricate designs due to their dark green foliage.
English ivy can be trained into classic topiary shapes, adding elegance to any landscape.
How to Make a Boxwood Topiary?
To make a boxwood topiary, start by selecting a healthy boxwood shrub with dense foliage. Trim the shrub into the desired shape using sharp shears, maintaining a symmetrical design.
Carefully prune any excess branches and leaves to create clean lines.
Use a sturdy pot filled with well-draining soil to plant the boxwood.
Regularly water and fertilize the topiary to promote growth and maintain its shape.
Conclusion
To sum up, these 10 DIY topiary ideas are a creative way to add greenery and elegance to your home decor. Whether you choose to make a succulent centerpiece, herb garden, or moss-covered topiary, each project offers a unique touch of nature to your space.
With a little time and effort, you can transform your living space into a beautiful oasis that will surely impress your guests. Try your hand at one of these topiary projects and bring a touch of botanical beauty into your home today.
- About the Author
- Latest Posts
Introducing Ron, the home decor aficionado at ByRetreat, whose passion for creating beautiful and inviting spaces is at the heart of his work. With his deep knowledge of home decor and his innate sense of style, Ron brings a wealth of expertise and a keen eye for detail to the ByRetreat team.
Ron’s love for home decor goes beyond aesthetics; he understands that our surroundings play a significant role in our overall well-being and productivity. With this in mind, Ron is dedicated to transforming remote workspaces into havens of comfort, functionality, and beauty.
Decor
How to Create an Eye-Catching Brick Wall Accent
Wondering how to transform your space? Discover the secrets to creating a captivating brick wall accent that will leave you in awe.

To create an eye-catching brick wall accent, start by prioritizing areas with ample natural light and choosing a wall with minimal obstructions and a smooth surface. Meticulously clean the brick, repair any cracks, and sand rough areas before applying a suitable primer for masonry surfaces. Consider bold paint colors like navy blue or explore whitewashing for a rustic look. Enhance with lighting like uplighting and LED strip lights, and incorporate decorative elements such as open shelving and artwork. Admire the transformed space with red brick's pop of color, rough texture's history, and a cozy ambiance. A stunning design transformation awaits.
Key Takeaways
- Choose a focal point wall with ample natural light.
- Repair and prepare the brick surface meticulously.
- Opt for a bold paint color or consider leaving the brick natural.
- Enhance with strategic lighting for depth and texture.
- Decorate with elements that complement the brick's charm.
Choosing the Right Wall
When selecting the ideal wall for a brick accent, prioritize areas that receive ample natural light to enhance the texture and color variations of the bricks.
Accent walls with exposed brick can truly transform a space, adding character and warmth.
To create a focal point, opt for a wall that serves as a main feature in the room, drawing the eye and creating visual interest.
It's important to choose a wall with minimal obstructions such as windows or doors, as this allows for a seamless and uninterrupted display of the brick.
Additionally, selecting a wall with a smooth surface is vital to guarantee proper adhesion of the brick material, preventing any issues with installation or longevity.
Look for a wall with enough space to showcase the full beauty and impact of the brick accent, allowing it to stand out and make a statement in the room.
Surface Preparation and Repair

Before starting the accent wall project, it's essential to clean the brick surface meticulously, ridding it of any dirt, dust, or debris.
Next, repairing any cracks or holes with a suitable mortar or patching compound is vital to guarantee a flawless finish.
Sanding down rough areas on the brick will create a smooth base for the accent wall to be installed seamlessly.
Clean Brick Surface
To prepare the brick surface for accentuating, we must thoroughly clean and repair any imperfections to guarantee a flawless finish. Cleaning the brick wall is important to guarantee proper adhesion of coatings.
Begin by removing dust, dirt, and debris using a stiff brush or vacuum. For stubborn stains, mold, or mildew, consider pressure washing the wall before any treatments. Spot-treat remaining stains or discoloration with a mild detergent or brick cleaner for a pristine look.
Repair any damaged or crumbling bricks using brick repair mortar to create a smooth surface suitable for painting or sealing. It's essential to allow the brick wall to dry completely before proceeding with any decorative treatments. Moisture-related issues can be avoided by making sure the wall is thoroughly dry.
Repair Any Damage
Inspect the exposed brick wall thoroughly for any cracks, holes, or damage that requires repair before proceeding with the accent wall preparation.
Utilize a suitable mortar mix to fill in any gaps or cracks in the brick wall, ensuring a smooth and even surface for the accent application.
Sand down any rough or uneven areas on the brick wall to create a clean and uniform base for the accent design.
Cleaning the brick wall meticulously is essential to remove any dirt, dust, or debris that could compromise the adhesion of paint or other materials used for the accent.
Proper priming of the brick wall before applying any paint or finish is vital. This step will enhance adhesion and contribute to a more polished, professional-looking result for the accent wall.
Applying Primer for Brick

Applying primer for brick is essential in ensuring a successful paint job.
We need to focus on preparing the brick surface adequately, choosing a suitable primer, and applying it evenly.
These steps will help us achieve a professional finish and enhance the longevity of the paint on the brick surface.
Preparing Brick Surface
Why is it essential to apply a high-quality primer specifically designed for masonry surfaces before painting a brick wall?
When creating a brick accent wall, the use of primer plays an important role in ensuring the success of your project.
The primer acts as a bonding agent, enhancing adhesion between the porous brick surface and the paint to be applied. By sealing the brick's pores, the primer facilitates a more uniform and effective paint application, resulting in a smoother finish.
Additionally, the primer helps to prevent issues such as peeling or chipping of the paint over time, leading to a longer-lasting and professional-looking outcome.
It's imperative to select a primer that's compatible with both the brick surface and the type of paint intended for use, as this will contribute significantly to the durability and aesthetics of the final result.
Properly preparing the brick surface with a suitable primer lays the foundation for a successful and visually appealing brick accent wall.
Choosing Suitable Primer
How can we guarantee proper adhesion and a smooth finish when selecting a suitable primer for painting a brick wall? When it comes to priming an exposed brick wall for a fresh coat of white paint, choosing the right primer is essential. A high-quality bonding primer designed for masonry surfaces is vital to make sure the paint adheres properly to the rough texture of the brick. If the brick wall has any stains or discoloration that need to be concealed, opting for a stain-blocking primer is advisable. Additionally, using a tinted primer in a shade similar to the desired paint color can help reduce the number of paint coats required for full coverage.
Here is a table summarizing key points for selecting a suitable primer for painting a brick wall:
| Primer Type | Purpose | Recommendation |
|---|---|---|
| Bonding Primer | Ensures proper adhesion to brick | Use high-quality masonry bonding primer |
| Stain-blocking Primer | Conceals stains and discoloration | Opt for a primer with stain-blocking properties |
| Tinted Primer | Reduces number of paint coats needed | Consider using a tinted primer close to desired paint color |
Applying Primer Evenly
For a smooth and consistent base for painting the brick wall, we highly recommend using a high-quality primer specifically designed for masonry surfaces. When applying primer to brick, it's essential to guarantee proper adhesion and create an ideal surface for the paint or whitewash to adhere to.
Here are some key steps to follow when applying primer evenly:
- Choose the Right Primer: Select a primer that's formulated for masonry surfaces to promote adhesion and long-lasting results.
- Even Application: Use a paint roller or brush to apply the primer evenly across the brick surface, including mortar joints, to achieve a seamless base for painting.
- Complete Coverage: Make sure to cover the entire brick wall with primer to ensure consistent coverage and a uniform finish.
- Allow for Drying: Let the primer dry completely according to the manufacturer's instructions before proceeding with the next steps to guarantee optimal adhesion and a professional outcome.
Properly priming the brick wall is essential for a successful painting or whitewashing project, enhancing the overall aesthetic appeal and durability of the finish.
Selecting Paint Color or Leaving Natural

Considering the various options for the brick wall, whether to select a paint color or leave it natural is a key decision in creating an eye-catching accent.
Painting the brick wall in bold colors like navy blue or emerald green can make a striking statement, adding a vibrant touch to the space.
On the other hand, whitewashing the brick wall offers a softer, more rustic look, maintaining the brick's texture while brightening the room.
Leaving the brick wall natural enhances its organic charm, providing a warm and earthy feel to the area.
Opting for a light gray paint color gives a modern and elegant vibe, blending well with various decor styles.
Dark charcoal or black paint, on the other hand, introduces drama and sophistication, creating a striking contrast within the room.
Whether choosing a faux brick finish, a herringbone pattern, or a traditional brick layout, the paint color decision can have a significant impact on the overall aesthetic of the accent wall.
Enhancing With Lighting

Let's enhance the brick wall's appeal by strategically incorporating lighting techniques.
- Utilize uplighting: Highlight the texture and depth of the brick wall by positioning lights at the base to illuminate upwards, casting shadows that accentuate the rugged surface. This technique adds a sense of drama and architectural interest.
- Integrate wall sconces or pendant lights: These fixtures can provide a striking contrast against the brick surface, creating a visual focal point. By carefully selecting the design and placement, you can enhance the overall aesthetics of the wall.
- Install LED strip lights: For a modern touch, consider installing LED strip lights behind the brick. This subtle lighting option can bring a contemporary flair to the space while softly illuminating the wall's surface.
- Create a cozy ambiance with warm-toned fixtures: Choose light fixtures with warm tones that complement the brick's color, enhancing the overall atmosphere of the room. Adjust the lighting angles to experiment with shadows and highlights, adding depth and dimension to the brick wall.
Incorporating Decorative Elements

As we explore incorporating decorative elements, we can enhance the charm and character of the brick wall accent by strategically placing artwork and decorative objects. These elements provide a striking contrast to the ruggedness of the brick, adding depth and visual interest to the space.
Open shelving can be used to display treasured items, creating a personalized touch that complements the brick backsplash. To achieve a balanced and visually appealing design, consider pairing the brick wall with a variety of different rustic and refined elements.
Playful touches and unique decor pieces can inject a youthful and vibrant vibe into the interior design, elevating the overall aesthetic of the space. Opting for a color palette of white and wood can further enhance the natural appeal of the brick wall accent, creating a harmonious and inviting atmosphere.
Admiring the Transformed Space

We can't help but be entranced by the remarkable transformation that occurs when a brick wall accent is integrated into a space. The walls come alive with a dynamic energy, especially when the timeless allure of red brick meets the modern design trends of today.
Here are some key aspects to admire about the transformed space:
- Enhanced Walls: The red brick adds a pop of color that contrasts beautifully with surrounding elements, creating a striking focal point in the room.
- Rich Texture: The rough texture of the exposed brick brings a sense of history and depth, adding a layer of character that elevates the overall ambiance.
- Warmth and Coziness: The earthy tones of the brick radiate warmth, making the space feel inviting and cozy, perfect for relaxing or entertaining.
- Visual Interest: The play of light and shadow on the textured surface of the brick wall accentuates its unique features, creating a visually captivating experience for anyone who enters the room.
Frequently Asked Questions
How Can I Make My Brick Wall More Attractive?
To make a brick wall more attractive, we can incorporate lighting fixtures to accentuate texture and color variations.
Contrasting paint colors create a bold look, while floating shelves or artwork add interest and break visual monotony.
Mixing brick sizes or patterns offers a unique design.
Adding plants softens the industrial feel.
These methods combine to enhance the brick wall's aesthetic appeal and create an eye-catching focal point in any space.
How to Decorate a Brick Accent Wall?
When decorating a brick accent wall, consider incorporating artwork and open shelving for a contrasting effect.
Pair rustic and refined elements to achieve a balanced look.
Add playful touches to maintain a youthful and creative vibe.
Opt for a white and wood palette to enhance the wall's natural appeal.
Utilize vibrant paint colors to make a bold statement.
These strategies can help create an eye-catching brick accent wall that's visually appealing and unique.
How to Get Brick Effect on Wall?
To achieve a brick effect on a wall, one can opt for real bricks, faux brick panels, or brick wallpaper.
Real bricks provide an authentic appearance but require individual installation.
Faux options, such as lightweight and cost-effective faux brick panels, offer easier DIY projects.
Brick wallpaper is a convenient alternative that mimics the look of bricks without the need for actual masonry.
Consider factors like maintenance, cost, and installation complexity when choosing the method for your brick wall.
How to Make Exposed Brick Look Good?
When making exposed brick look good, consider the surrounding decor elements. Artwork and open shelving can counterbalance the rawness of brick, creating a harmonious blend.
Opting for a white and wood color scheme enhances the brick's natural charm. Adding playful touches injects a youthful energy into the space. Pairing rustic and refined pieces with the brick can elevate the overall design.
Whitewashing the brick can create a chic, aged aesthetic with red accents.
Conclusion
In choosing the right wall, preparing the surface, applying primer, selecting paint, enhancing with lighting, and incorporating decorative elements, we've transformed a simple brick wall into an eye-catching accent.
By following these steps, the space has been elevated to a new level of style and sophistication.
Embrace the beauty of your newly transformed brick wall and enjoy the impact it brings to your living space.
- About the Author
- Latest Posts
Introducing Ron, the home decor aficionado at ByRetreat, whose passion for creating beautiful and inviting spaces is at the heart of his work. With his deep knowledge of home decor and his innate sense of style, Ron brings a wealth of expertise and a keen eye for detail to the ByRetreat team.
Ron’s love for home decor goes beyond aesthetics; he understands that our surroundings play a significant role in our overall well-being and productivity. With this in mind, Ron is dedicated to transforming remote workspaces into havens of comfort, functionality, and beauty.
Decor
Step-by-Step Guide for a Navy Accent Wall in the Bedroom
Liven up your bedroom with a luxurious navy accent wall – discover the essential steps for a stunning transformation that will elevate your space.

When creating a navy accent wall in the bedroom, start by selecting the perfect navy paint shade like Compass from the Devine collection. Prepping the wall is essential; clean thoroughly, making sure to achieve a dust-free surface. Use high-quality painter's tape like FrogTape™ Multi-Surface for sharp edges. Create a grid pattern for visual interest by applying intersecting lines. Coordinate decor elements to harmonize with the deep blue hue for a cohesive look. Each step contributes to a polished and stylish outcome. Mastering these steps guarantees a stunning navy accent wall that transforms the bedroom into a sophisticated space.
Key Takeaways
- Choose a navy paint shade like Compass for a classic look.
- Prepare the wall by cleaning thoroughly and using painter's tape.
- Apply painter's tape with precision for clean edges.
- Create a grid pattern on the wall for visual interest.
- Coordinate decor to complement the navy accent wall for a cohesive look.
Selecting the Perfect Navy Paint Shade
When selecting the ideal navy paint shade for your bedroom's accent wall, focus on choosing a hue like Compass from the Devine collection for a timeless and sophisticated look.
This particular navy paint color offers a classic navy blue tone with minimal green undertones, ensuring a clean and modern appearance in the bedroom.
It's essential to find a navy paint shade that not only complements your room decor but also enhances the overall aesthetic of the space. By opting for a shade like Compass, you can create a bold and stylish focal point in your bedroom, adding depth and sophistication to the room.
When considering different options for navy paint colors, Target provides a range of choices for accent walls, catering to various preferences and styles.
Prepping the Wall for Painting
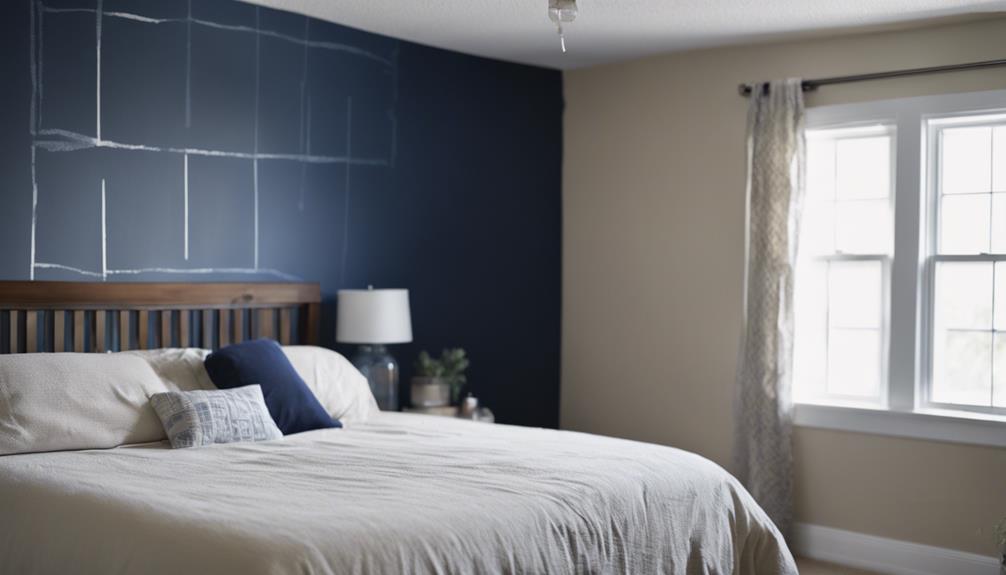
To prepare the wall for painting the navy accent color, it's essential to thoroughly clean and guarantee complete drying before beginning the painting process. Make sure that the surface is free of dust, dirt, and any previous paint imperfections to promote proper adhesion of the new navy blue paint. After cleaning, allow the wall to dry completely to avoid any issues with paint application.
Next, gather the necessary materials such as high-quality painter's tape like FrogTape™ Multi-Surface to tape off edges for sharp paint lines and prevent bleeding. Press down on each edge of the tape firmly to create a tight seal against the wall, ensuring crisp edges once the tape is removed.
Additionally, have premium paint with primer, a new roller, and brushes ready for painting the accent wall effectively. Remember to brush over the painter's tape and remove it while the paint is still wet to achieve clean and precise lines on the navy accent wall.
Applying Painter's Tape for Clean Edges

After prepping the wall for painting the navy accent color, the next step is to apply high-quality painter's tape like FrogTape® to guarantee clean edges on the accent wall.
To start, make sure the wall is clean and dry before applying the tape to promote ideal adhesion. When placing the tape, press down firmly on the edges to create a tight seal against the wall, preventing any blue paint from seeping underneath.
Remember, removing the painter's tape while the paint is still wet is essential to avoid peeling and ensure sharp lines along the edges. FrogTape® Multi-Surface painters tape, known for its patented PaintBlock® Technology, aids in achieving crisp paint lines with minimal effort.
Creating a Grid Pattern for Visual Interest

Let's explore how incorporating a grid pattern using painter's tape can elevate the visual appeal of the navy accent wall in the bedroom. Creating a grid pattern on an accent wall adds a touch of sophistication and modernity to the space. This technique can be achieved by using painter's tape to outline a series of intersecting lines, forming a structured grid on the wall surface. The grid pattern can vary in size and shape, allowing for customization to match personal design preferences.
To help visualize the concept, consider the following grid pattern layout:
| Column 1 | Column 2 | Column 3 |
|---|---|---|
| Row 1 | Row 1 | Row 1 |
| Row 2 | Row 2 | Row 2 |
| Row 3 | Row 3 | Row 3 |
| Row 4 | Row 4 | Row 4 |
| Row 5 | Row 5 | Row 5 |
Decorating the Space for Cohesive Look
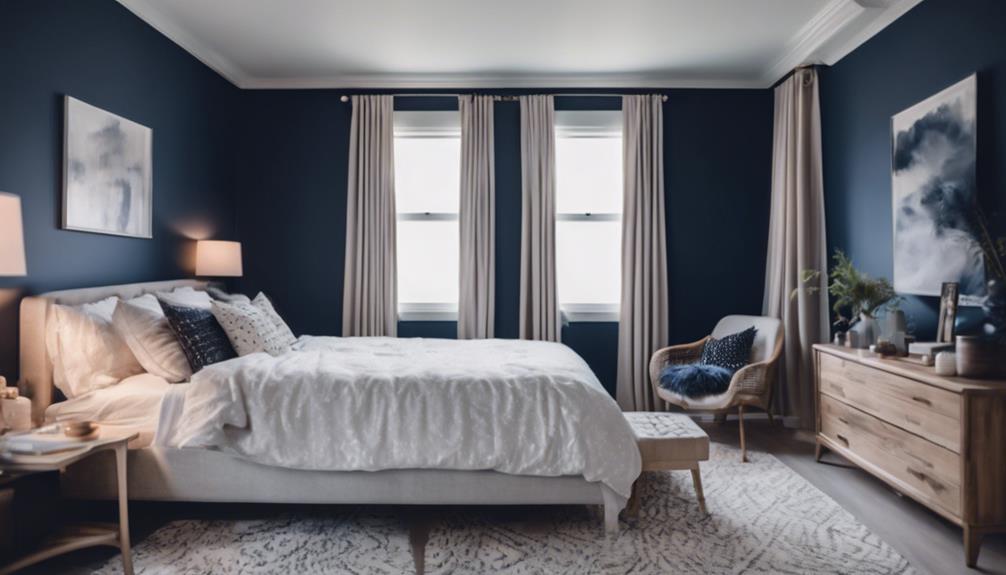
Exploring how to decorate the space for a cohesive look involves coordinating decor elements to complement the navy accent wall and integrating furniture finishes and textures that enhance the overall design.
When working with a navy accent wall, it's essential to select decor pieces like bedding, pillows, and wall art that harmonize with the deep blue hue. Opting for a color palette that complements the navy wall can create a visually appealing and unified appearance in the room. Additionally, incorporating furniture finishes and textures that align with the navy accent wall helps tie the space together.
To achieve a cohesive look, consider adding accent pieces such as rugs, curtains, and lighting fixtures that complement the navy wall. These elements can further enhance the overall design and create a balanced, well-curated space.
Frequently Asked Questions
How to Do a Navy Blue Accent Wall?
To achieve a navy blue accent wall, start by cleaning the wall and taping off edges with FrogTape® Multi-Surface painters tape. Use a roller for the wall and a brush for edges and corners. FrogTape® with PaintBlock® Technology guarantees sharp paint lines.
Decorate the wall with shelves, photos, nautical items, or clocks. This project can quickly enhance a room's aesthetic in just a few hours, offering a satisfying transformation.
How to Do an Accent Wall in a Bedroom?
To create an accent wall in a bedroom, choose a bold color like navy blue for a striking effect. Select premium paint with primer for better coverage and durability.
Utilize FrogTape® Multi-Surface painters tape for sharp, clean paint lines.
Consider adding decorative shelves for personal items and decor display.
Coordinate bedding, nightstand decor, and lighting with the accent wall to complete the room transformation.
What Color Goes With Navy Blue in a Bedroom?
We find that navy blue in a bedroom pairs beautifully with crisp white for a classic appeal. Gold or brass accents can bring an elegant touch, while soft blush pink or coral create a soothing contrast.
To add warmth and depth, natural wood tones work well with navy blue. For a modern twist, consider incorporating gray or silver accents for a sophisticated look. These color combinations complement navy blue in a bedroom seamlessly.
Is Navy Too Dark for a Bedroom?
Navy, while dark, can create a sophisticated and cozy ambiance in a bedroom. Its depth pairs well with light-colored furniture for balance.
Consider the room's natural light and size when deciding on a navy accent wall. When used strategically, navy can serve as a striking backdrop for artwork and decorative elements.
Conclusion
To sum up, adding a navy accent wall to your bedroom can bring a sense of calmness and sophistication to your space. By following the step-by-step guide provided, you can achieve a stunning look that enhances the overall aesthetic of your room.
Let the deep blue hue symbolize tranquility and elegance as you transform your bedroom into a stylish retreat. So, grab a paintbrush and get ready to create a beautiful navy accent wall that will make a lasting impression.
- About the Author
- Latest Posts
Introducing Ron, the home decor aficionado at ByRetreat, whose passion for creating beautiful and inviting spaces is at the heart of his work. With his deep knowledge of home decor and his innate sense of style, Ron brings a wealth of expertise and a keen eye for detail to the ByRetreat team.
Ron’s love for home decor goes beyond aesthetics; he understands that our surroundings play a significant role in our overall well-being and productivity. With this in mind, Ron is dedicated to transforming remote workspaces into havens of comfort, functionality, and beauty.
Decor
Creative White Brick Wall Decor Ideas
Harness the power of creative white brick wall decor ideas to elevate your space with style and sophistication.
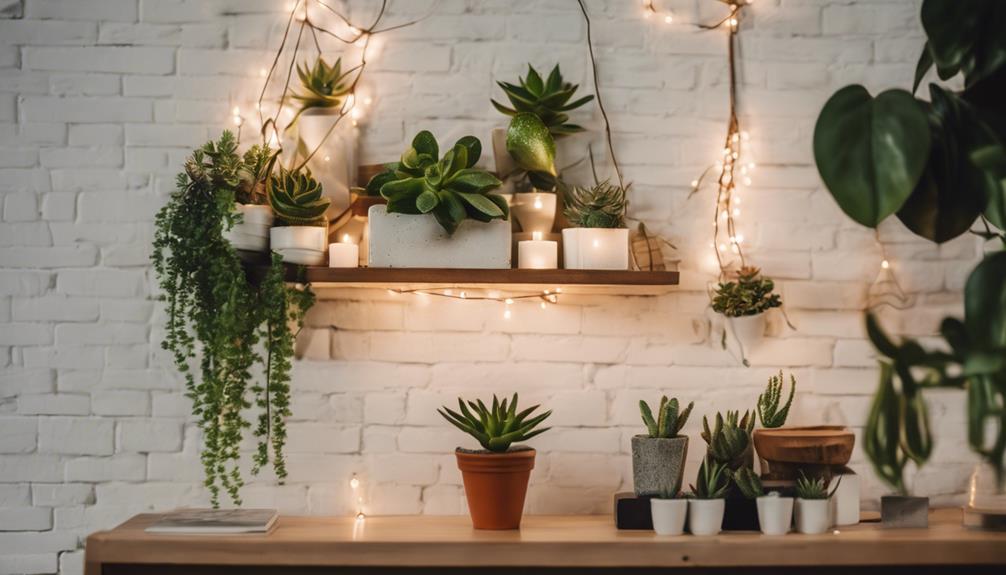
When seeking creative white brick wall decor ideas, consider blending various textures, styles, and decorative elements to elevate your space. Stylish gallery walls can incorporate diverse artwork and mirrors, infusing personal touches. For a farmhouse-inspired bedroom, embrace the rustic charm of white brick alongside wooden accents and soft textiles. Unique furniture pairings can create a balance between modernity and warmth. Industrial charm can be achieved by mixing metal accents with vintage pieces. To revamp a fireplace, whitewash the bricks, add wooden elements, and introduce cozy decor pieces. Exploring these ideas can transform your living spaces into visually striking environments.
Key Takeaways
- Mix industrial and rustic elements for a unique look.
- Incorporate vintage furniture pieces for charm.
- Add depth with metal accents and exposed pipes.
- Create visual interest with modern decor elements.
- Enhance with industrial-style lighting fixtures.
Stylish Gallery Wall Ideas
Let's explore stylish gallery wall ideas that can transform a white brick wall into an alluring focal point. When decorating a living room with a white brick backdrop, creating a gallery wall can be an excellent way to infuse personality and style into the space. By carefully selecting artwork, decor, and personal mementos to display, the gallery wall can become a visual centerpiece that reflects the inhabitants' tastes and interests.
Mixing various frame styles, sizes, and shapes on the white brick wall can add depth and dimension to the gallery display. This eclectic approach not only enhances the visual appeal of the wall but also allows for a creative arrangement that captures attention. Additionally, incorporating different types of artwork, such as paintings, prints, photographs, and wall sculptures, can further enhance the gallery wall's charm and uniqueness.
To add an extra layer of interest, consider including mirrors, clocks, shelves, or other decorative elements within the gallery wall. These additions can introduce texture and visual intrigue, making the white brick backdrop even more captivating. By combining personal touches with diverse decor elements, a gallery wall on a white brick wall can truly elevate the living room's aesthetic.
Farmhouse Bedroom Decor Inspiration

Exploring farmhouse bedroom decor inspiration involves embracing the rustic charm of white brick walls to create a cozy and inviting atmosphere. Whitewashed brick walls in farmhouse bedrooms exude a serene ambiance, perfect for unwinding after a long day.
To enhance this rustic charm, incorporating natural elements such as wooden accents and greenery can complement the white brick walls beautifully. Vintage furniture pieces or distressed items add a touch of shabby chic flair to the overall decor, creating a unique blend of old and new.
Soft textiles like linen and cotton further contribute to the cozy ambiance, offering warmth and comfort against the backdrop of the white brick walls. The combination of these elements results in a farmhouse bedroom that exudes a welcoming and tranquil feel, making it a perfect retreat for relaxation.
Unique Furniture Pairings for White Brick

Pairing unique furniture pieces with white brick walls can elevate the aesthetic of a space and create an intriguing design contrast. In contemporary living rooms, combining a sleek, modern sofa with a rustic wooden coffee table against a white brick wall can establish a striking balance between modernity and warmth.
For an impactful statement wall in a home office, juxtaposing vintage leather chairs with contemporary metal shelves can infuse depth and character into the interior design. When aiming for a focal point in room decor, balancing a bold colored accent chair with neutral furniture against the backdrop of a white brick wall can draw the eye and create visual interest.
In creating a harmonious blend of textures and styles, pairing a plush velvet couch with industrial-style metal side tables can offer a sophisticated and cozy ambiance. Opting for a minimalist Scandinavian design desk and chair setup can further enhance the clean and bright aesthetic of a white brick wall, making it a versatile choice for various interior styles.
Industrial Charm in Living Spaces

To achieve industrial charm in living spaces, incorporating white brick walls with metal accents and exposed pipes can create a distinctive aesthetic. By mixing vintage furniture pieces with modern decor elements against the backdrop of white brick walls, a unique industrial look can be achieved.
Industrial-style lighting fixtures, such as exposed bulbs and metal pendants, play an essential role in enhancing the ambiance of a living room adorned with white brick walls. Complementing the industrial charm, leather sofas, distressed wood coffee tables, and metal shelving units can be strategically placed to create a cohesive design.
Additionally, the inclusion of industrial-style artwork, such as metal wall sculptures or vintage signage, further enhances the industrial aesthetic of the living space. The combination of these elements adds depth and character to the room, making it a visually appealing and stylish environment that exudes industrial charm.
Rustic Fireplace Makeover Ideas

Let's explore rustic fireplace makeover ideas that incorporate white brick for a fresh and timeless look.
To achieve a rustic charm, consider whitewashing the white brick, adding warmth while maintaining the fireplace's original appeal.
Enhance the aesthetic by introducing wood accents such as a wooden mantel or reclaimed wood elements.
Complement the makeover with cozy decor elements like lanterns, candles, and blankets to create a welcoming and snug atmosphere around the fireplace.
For a complete transformation, infuse farmhouse-inspired or vintage decor pieces that align with the rustic theme.
This fusion of white brick, wood accents, and carefully curated decor elements won't only revamp your fireplace but also infuse it with a cozy, farmhouse-inspired ambiance.
Embrace the warmth and character that a rustic fireplace makeover can bring to your living space, making it a focal point that exudes comfort and style.
Frequently Asked Questions
What Looks Good on White Brick Wall?
When considering what looks good on a white brick wall, it's crucial to focus on enhancing the wall's unique texture and color.
Artwork like colorful paintings, black and white photography, or abstract pieces can create a striking contrast against the white backdrop.
Greenery such as hanging plants, potted succulents, or a vertical garden can bring a revitalizing touch.
Mirrors in various shapes and sizes reflect light, adding depth.
Macrame wall hangings, tapestries, or woven textiles introduce a bohemian vibe.
Floating shelves with books, decorative items, or plants offer both functionality and visual interest.
How Do You Make a Brick Wall Interesting?
To make a brick wall interesting, we suggest incorporating various textures, such as whitewashing or painting, to create depth.
Adding unique artwork, mirrors, or decorative shelving can enhance visual appeal.
Creative lighting techniques can highlight the wall's texture.
Integrate plants for a natural touch and soften the look.
A mix of furniture styles and colors can provide contrast against the white brick, making the wall a focal point in any space.
What Art Looks Good on a Brick Wall?
When selecting art for a brick wall, consider large, bold pieces to make a statement.
Gallery walls with an assortment of frames and artwork can add visual interest.
Abstract or minimalist art complements the brick wall texture.
Black and white photography creates striking contrast.
Mix and match different art styles and mediums for a dynamic display.
These choices can enhance the aesthetic appeal of a brick wall and reflect personal style preferences.
How Do You Dress up a Plain Brick Wall?
When dressing up a plain brick wall, we can add depth and character by incorporating wall art, like paintings or photographs.
Enhance the visual appeal with decorative shelving, plants, or mirrors for a personalized touch.
Lighting fixtures, such as sconces or spotlights, can highlight the textures.
Temporary decor options like removable wallpaper or decals offer versatility.
Furniture pieces like a cozy reading nook or a stylish console table can complement and elevate the overall look.
Conclusion
To sum up, white brick walls offer endless possibilities for creative decor ideas. Whether you choose to create a stylish gallery wall, add farmhouse charm to your bedroom, or incorporate unique furniture pairings, the options are truly limitless.
So why settle for ordinary walls when you can transform your space with the timeless elegance of white brick? Let your imagination run wild and let your walls become a canvas for your personal style.
- About the Author
- Latest Posts
Introducing Ron, the home decor aficionado at ByRetreat, whose passion for creating beautiful and inviting spaces is at the heart of his work. With his deep knowledge of home decor and his innate sense of style, Ron brings a wealth of expertise and a keen eye for detail to the ByRetreat team.
Ron’s love for home decor goes beyond aesthetics; he understands that our surroundings play a significant role in our overall well-being and productivity. With this in mind, Ron is dedicated to transforming remote workspaces into havens of comfort, functionality, and beauty.
-

 Vetted3 weeks ago
15 Best Contact Paper for Kitchen Cabinets to Elevate Your Home Decor
-

 Vetted1 week ago
15 Best Poe Cameras for Home Security – Reviews & Buying Guide
-

 Vetted4 weeks ago
15 Best Leather Restorer Products to Revive Your Furniture and Accessories
-

 Vetted3 weeks ago
15 Best Drain Snakes to Unclog Your Pipes Like a Pro
-

 Beginners Guides17 hours ago
I Inhaled Vinegar Fumes
-

 Vetted3 weeks ago
14 Best Stationery Brands for Your Next Writing Adventure
-

 Beginners Guides2 weeks ago
Swinger Porch Light Color
-

 Mardi Gras Decoration3 weeks ago
Why Does Hobby Lobby Not Do Mardi Gras?


