Appliances
Diy Mug Painting

Have you ever thought about transforming a plain ceramic mug into a canvas for your artistic expression when it comes to adding a personal touch to your morning routine?
The possibilities are endless, and the process is surprisingly simple. From selecting the right materials to exploring various painting techniques, DIY mug painting is a unique way to infuse your daily coffee or tea ritual with a touch of individuality.
And the best part? It's a project that anyone can enjoy, regardless of their artistic background or skill level. So, why not elevate your morning cuppa with a one-of-a-kind creation that's as unique as you are?
Key Takeaways
- Start with high-quality ceramic or porcelain mugs for best results
- Use vibrant and long-lasting ceramic paints
- Prepare the ceramic surface by cleaning, sanding, and priming
- Explore different painting techniques and add personalized designs
Selecting the Right Materials
When choosing materials for mug painting, we suggest starting with a set of high-quality ceramic or porcelain mugs to ensure the best results. These materials provide a smooth and even surface for painting, and they're also durable, making the artwork last longer.
Next, choosing the right colors is essential for creating a visually appealing and long-lasting design. Opt for high-quality ceramic paints that are specifically designed for use on mugs. These paints aren't only vibrant but also resistant to chipping and fading, ensuring that your masterpiece stays beautiful for years to come.
Proper brush selection is equally important. For fine details, select small, pointed brushes, while broader strokes and filling in larger areas require flat or round brushes. Consider using synthetic brushes for a smooth finish. Additionally, ensure that the brushes have a comfortable grip to prevent hand fatigue during the painting process.
Preparing the Ceramic Surface

To ensure proper adhesion and longevity of the paint, thoroughly clean the ceramic surface of the mug using a mild detergent and warm water, and then dry it with a lint-free cloth. Once the surface is clean, consider the following steps:
- Cleaning:
Use a mild detergent and warm water to remove any dirt, oil, or residue from the ceramic surface. This step is crucial for promoting good adhesion of the paint.
- Sanding:
Lightly sand the surface of the mug with fine-grit sandpaper. This will help create a slightly rough texture, providing a better surface for the primer to adhere to. Be gentle to avoid damaging the ceramic.
After cleaning and sanding, the next steps in preparing the ceramic surface involve priming and masking. These steps will help ensure that the paint adheres well and that your design comes out just the way you want it.
Exploring Painting Techniques
Once we've prepared the ceramic surface of the mug, the next step involves exploring various painting techniques to bring our design to life.
Blending colors is a crucial technique that can add depth and dimension to our mug. To achieve this, we can use a dry brush technique where we lightly dip the brush into one color and then into another, blending them on a palette before applying them to the mug. This creates a smooth transition between the colors.
Another technique to consider is creating texture. This can be accomplished by using a sponge or a stippling brush to dab the paint onto the surface of the mug, creating a raised and textured effect.
Additionally, we can use different brush strokes to add visual interest and personality to our design. Experimenting with techniques like stippling, cross-hatching, or even using a palette knife can create unique textures and patterns on the mug.
Adding Personalized Designs

Now, we can infuse our mugs with personalized designs that reflect our individual style and creativity. Adding personalized designs to our mugs allows us to express our unique personalities and create one-of-a-kind pieces.
Here are some creative inspiration and steps to help you add personalized designs to your DIY mug:
- Gather Creative Inspiration:
- Look for inspiration in everyday objects, nature, or even your favorite artworks.
- Consider incorporating meaningful quotes, symbols, or inside jokes that resonate with you.
- Design and Execution:
- Sketch out your ideas on paper to plan the layout and composition of your design.
- Use fine-tip paintbrushes or paint markers to carefully transfer your designs onto the mugs, ensuring precision and attention to detail.
Sealing and Curing the Artwork
After carefully applying our personalized designs to the mugs, the next crucial step is to seal and cure the artwork to ensure its longevity and durability. Sealing the artwork on the mug is essential to protect it from scratches, fading, and damage due to washing. Curing the artwork will help set the paint and ensure it adheres to the mug's surface. Here are some sealing techniques and the curing process to follow:
| Sealing Techniques | Curing Process |
|---|---|
| Apply a thin, even coat of dishwasher-safe Mod Podge over the painted design. | Place the mugs on a baking sheet and put them in a cold oven. |
| Use a brush to spread the Mod Podge, ensuring complete coverage. | Turn the oven on to 350°F and bake the mugs for 30 minutes. |
| Let the Mod Podge dry for at least 24 hours before using the mugs. | After 30 minutes, turn off the oven and let the mugs cool inside before removing them. |
How can I use DIY mug painting techniques for coffee mug painting?
Unleash your creativity with creative coffee mug painting. Use DIY techniques such as stenciling, dot painting, or hand-lettering to personalize your coffee mug. Grab some ceramic paint, brushes, and get started. Once done, bake the mug in the oven as per paint instructions for a lasting finish. Enjoy your morning coffee in a one-of-a-kind mug.
Frequently Asked Questions
Can I Use Regular Acrylic Paint for Mug Painting, or Do I Need Special Ceramic Paint?
We can use regular acrylic paint for mug painting, but it's important to note that it may not be as durable or safe for drinkability.
Special ceramic paint is designed to withstand frequent washing and is food safe when properly cured. It's also resistant to chipping and fading.
Ceramic paint can be oven-cured for durability or fired in a kiln for a professional finish.
Mistakes can be easily fixed with ceramic paint, and the mugs can be safely used in the dishwasher.
Is It Safe to Drink From a Mug That Has Been Painted and Sealed With DIY Materials?
Is it safe to drink from a painted and sealed mug? Safety concerns arise when using DIY materials.
Alternative methods like using food-safe ceramic paint or oven-baked sealants are recommended. These ensure the safety of the mug for drinking.
It's essential to prioritize health and consider the materials' impact on the beverage.
We've found that following these steps ensures both safety and creativity in DIY mug painting.
Can I Use a Regular Oven to Cure the Painted Mug, or Do I Need a Special Kiln?
We can definitely use a regular oven for the curing process of DIY materials on a painted mug. The key is to carefully follow the instructions for the specific type of paint and sealant being used.
The sealing process is crucial to ensure the safety of the mug for drinking. While a special kiln can be used for this purpose, a regular oven can achieve the same results when used correctly.
What Can I Do if I Make a Mistake While Painting My Mug?
When painting a mug, mistakes can happen. But fear not! Utilize various painting techniques to correct errors.
Blend colors, create clever designs, or add details to cover up any mishaps. Experiment with creative designs or use specialized tools like paintbrushes or sponges for precision.
Can I Use My Painted Mug in the Dishwasher, or Do I Need to Hand Wash It?
We can absolutely use our painted mugs in the dishwasher, but it's important to make sure the paint is dishwasher safe and temperature resistant. Some paints may not hold up well to dishwasher cleaning, leading to fading or peeling.
Hand washing can also help prolong the longevity of the paint, ensuring our beautiful designs stay vibrant for as long as possible. Always check the paint instructions for specific care guidelines to keep our mugs looking their best.
Conclusion
In the end, we can't wait to see our mugs shine like the stars in the night sky, thanks to our artistic touch!
Remember, the key to a successful DIY mug painting project is to let your creativity run wild and have fun with it.
So gather your materials, let your imagination soar, and get ready to sip your favorite beverages in style with your one-of-a-kind painted mugs!
- About the Author
- Latest Posts
Introducing Ron, the home decor aficionado at ByRetreat, whose passion for creating beautiful and inviting spaces is at the heart of his work. With his deep knowledge of home decor and his innate sense of style, Ron brings a wealth of expertise and a keen eye for detail to the ByRetreat team.
Ron’s love for home decor goes beyond aesthetics; he understands that our surroundings play a significant role in our overall well-being and productivity. With this in mind, Ron is dedicated to transforming remote workspaces into havens of comfort, functionality, and beauty.
Appliances
6 Smart Tips for Using Digital Nutrition Scales
When it comes to improving our nutrition, digital nutrition scales are our secret weapon. These convenient devices provide a level of precision and ease that traditional scales just can’t rival.
But, like any tool, they require a little know-how to get the most out of them. That’s why we’ve compiled six smart tips to help us become true masters of our digital nutrition scales.
- By understanding portion control, we can accurately measure the amount of food we consume. This is crucial for maintaining a healthy diet and managing our calorie intake.
- Utilizing the tare function allows us to measure ingredients without including the weight of the container. This is especially useful when measuring liquids or adding multiple ingredients to a recipe.
- Customizing settings on our digital nutrition scales can make our lives easier. We can choose between different units of measurement, such as grams or ounces, and adjust the display to suit our preferences.
- Tracking nutritional information is made simple with digital nutrition scales. Many models have the ability to store and recall data, allowing us to keep track of our daily intake of calories, protein, carbs, and more.
- Incorporating our scales into meal planning can help us stay on track with our nutrition goals. By pre-portioning meals and snacks, we can ensure that we’re eating the right amount of food and controlling our portion sizes.
- By following these tips, we can take our nutrition game to the next level. Our digital nutrition scales can revolutionize the way we approach our eating habits and help us make informed choices about what we put into our bodies.
So, let’s dive in and discover how these tips can revolutionize the way we approach our eating habits.
Key Takeaways
- Regular calibration of digital nutrition scales ensures accurate measurements and precise portion control.
- Customizing and adapting the scale to individual dietary needs allows for personalized measurements and informed choices.
- Digital nutrition scales provide precise measurements for tracking and monitoring nutritional information, aiding in adjusting the diet based on nutritional content.
- Incorporating digital nutrition scales into meal planning helps with portion control, calorie counting, and making informed decisions about the diet.
Accuracy of Digital Nutrition Scales
Digital nutrition scales offer a high level of accuracy in measuring the nutritional content of food. Understanding nutritional values and the importance of accurate measurements is crucial for maintaining a healthy diet. These scales utilize advanced technology to provide precise information about the macronutrients and micronutrients present in various food items.
By accurately measuring the nutritional content, individuals can make informed decisions about what they consume, ensuring they meet their dietary goals.
Accurate measurements allow for better tracking of calorie intake, macronutrient distribution, and portion control. This knowledge is especially important for those with specific dietary requirements, such as athletes, individuals with medical conditions, or those looking to lose or gain weight. Digital nutrition scales provide a detailed breakdown of the nutritional components, including calories, carbohydrates, proteins, fats, vitamins, and minerals. With this information at hand, individuals can tailor their meals to meet their specific dietary needs.
Furthermore, digital nutrition scales help individuals identify any discrepancies between their perception of portion sizes and the actual measurements. Often, people underestimate the amount of food they consume, leading to unintended overeating. With the accuracy provided by these scales, individuals can better manage their portion sizes and make more informed choices about their food intake.
Understanding Portion Control With Digital Scales
Understanding portion control is crucial for maintaining a healthy diet. Digital nutrition scales can be valuable tools in achieving this goal. By accurately measuring the amount of food we consume, these scales help us become more aware of our portion sizes. They also help us make informed choices about our meals. With their precise measurements, digital scales ensure that we’re getting the right amount of nutrients and calories. This allows us to better manage our overall health and well-being.
Benefits of Portion Control
We have found that using digital nutrition scales for portion control offers numerous benefits.
Portion control is an essential component of maintaining a healthy diet and achieving weight management goals. By using portion control plates or digital scales, individuals can better understand the appropriate serving sizes of different foods. This helps in preventing overeating and consuming unnecessary calories, which can lead to weight gain.
Additionally, portion control aids in regulating blood sugar levels and managing conditions such as diabetes. It also promotes mindful eating by encouraging individuals to pay closer attention to their food choices and portion sizes.
Furthermore, portion control can assist in reducing food waste by ensuring that only the necessary amounts of food are prepared and consumed.
Accuracy of Digital Scales
When using digital nutrition scales for portion control, accuracy is key to achieving our health and weight management goals. To ensure accurate measurements, it’s important to understand how to improve the accuracy of digital scales. One way to do this is through the calibration process.
Calibration involves adjusting the scale to account for any errors or discrepancies in its readings. This can be done by following the manufacturer’s instructions or using calibration weights. Regularly calibrating your digital scale can help maintain its accuracy over time.
By taking the time to calibrate your scale and ensuring its accuracy, you can have confidence in the portion sizes you’re measuring and make more informed decisions about your nutrition.
Now, let’s explore another feature that contributes to accurate measurements – the tare function.
Utilizing Tare Function for Accurate Measurements
To achieve precise measurements with your digital nutrition scale, it’s essential to frequently utilize the tare function. Understanding the tare function and its benefits can greatly enhance your measurement accuracy. Here are two key reasons why you should take advantage of this feature:
- Accurate Net Weight Measurement: The tare function allows you to subtract the weight of the container or plate from the total weight, giving you the accurate net weight of your food. This is particularly useful when you need to measure ingredients separately or when you want to determine the nutritional value of a specific portion of your meal. By using the tare function, you can eliminate any unnecessary weight and obtain the precise measurement you need.
- Convenient Multiple Ingredient Tracking: When preparing complex recipes that require multiple ingredients, the tare function becomes incredibly handy. You can weigh each ingredient separately by resetting the scale to zero after adding each one. This eliminates the need for multiple bowls or plates and simplifies the process of tracking the precise weight of each ingredient. It saves time, reduces mess, and ensures accurate measurements for your recipes.
Customizing Settings for Specific Dietary Needs
When it comes to our dietary needs, we all have unique requirements. That’s why it’s important to customize the settings on our digital nutrition scales.
By personalizing the scale to our individual needs, we can accurately measure our food and track our nutritional intake.
Whether it’s adjusting for allergies, dietary restrictions, or specific macronutrient goals, tailoring the scale’s measurements allows us to adapt to our own dietary journey.
Personalized Dietary Requirements
We can customize the settings on digital nutrition scales to meet our specific dietary needs. By personalizing our meal plans and using nutritional tracking tools, we can ensure that we’re getting the right balance of nutrients for our individual requirements.
Here are two key benefits of customizing the settings on digital nutrition scales:
- Accurate portion control: With personalized meal plans, we can set the scales to measure the exact portion sizes recommended for our specific dietary needs. This ensures that we aren’t overeating or underestimating our calorie intake.
- Nutrient tracking: Digital nutrition scales come equipped with nutritional tracking tools that allow us to monitor our intake of key nutrients such as protein, carbohydrates, fats, vitamins, and minerals. By customizing the settings, we can track our progress and make adjustments to our diet as needed.
Tailoring Scale Measurements
By customizing the settings on digital nutrition scales, we can tailor the scale measurements to meet our specific dietary needs. This feature allows us to adjust serving sizes and customize measurements based on our individual requirements. Whether we’re following a strict calorie-controlled diet or have specific dietary restrictions, such as low-carb or gluten-free, customizing the scale measurements can greatly assist us in tracking our nutritional intake accurately.
To customize the measurements, we can input our specific dietary targets into the scale’s settings. This may include setting a specific calorie goal, adjusting serving sizes, or even inputting specific macronutrient ratios. By doing so, the scale will then calculate and display the exact nutritional information for the foods we weigh, making it easier for us to stay on track with our dietary goals.

Customizing the scale measurements not only ensures that we’re accurately measuring our food portions, but it also helps us understand the nutritional content of our meals. This information is crucial for those who desire mastery over their dietary habits and wish to make informed choices about their nutrition.
Adapting to Individual Needs
How can we adapt digital nutrition scales to meet our specific dietary needs?
Adapting to allergies and modifying for special diets is crucial when it comes to using digital nutrition scales. These scales can be customized to cater to individual needs, ensuring accurate and personalized measurements.
Here are two ways you can adapt digital nutrition scales:
- Allergen customization: Many digital nutrition scales allow you to input specific allergens to avoid. By setting these preferences, the scale can alert you if a food contains any allergens you need to avoid, helping you make informed choices.
- Special diet modifications: Whether you follow a low-carb, gluten-free, or vegan diet, digital nutrition scales can be adjusted to reflect the nutritional values specific to your dietary requirements. This ensures that you’re getting accurate information about the foods you consume, allowing you to stay on track with your diet goals.
Tracking Nutritional Information With Digital Scales
To accurately track nutritional information, it’s essential to utilize a digital nutrition scale. These scales are designed to provide precise measurements of food portions, allowing you to keep track of your food intake and make informed choices about your diet. By measuring macronutrients such as carbohydrates, proteins, and fats, you can gain a better understanding of the nutritional content of your meals and adjust accordingly.
Digital nutrition scales offer several advantages over traditional kitchen scales. They often come with built-in databases that contain nutritional information for a wide range of foods, making it easier to calculate the exact nutritional value of your meals. Some scales even have the ability to connect to mobile apps or online platforms, allowing you to track your food intake and monitor your progress over time.
By incorporating a digital nutrition scale into your daily routine, you can take control of your nutrition and make more informed choices about what you eat. Whether you’re trying to lose weight, build muscle, or simply maintain a healthy lifestyle, tracking your nutritional information is a crucial step towards reaching your goals.
In the next section, we’ll explore how you can incorporate digital scales into your meal planning to further optimize your nutrition.
Incorporating Digital Scales Into Meal Planning
To incorporate digital scales into our meal planning, we can utilize their built-in databases and connect them to mobile apps or online platforms for a seamless tracking experience. This allows us to accurately measure and monitor the nutritional content of our meals, helping us make informed decisions about our diet.
Here are some smart tips for incorporating digital scales into your meal planning:
- Meal Prep: Digital scales are a valuable tool for meal preppers. By weighing the ingredients before cooking, you can ensure portion control and accurate calorie counting. This helps you stick to your dietary goals without sacrificing taste or satisfaction.
- Weight Loss Strategies: For those looking to shed pounds, digital scales are a game-changer. By tracking the calories and macronutrients in your meals, you can create a calorie deficit necessary for weight loss. Digital scales can help you stay accountable and make adjustments to your portion sizes as needed.
Incorporating digital scales into your meal planning not only improves accuracy but also saves time and effort. With the ability to connect to mobile apps and online platforms, you can easily track your progress and make adjustments to your diet as needed. So, take advantage of the built-in databases and connect your digital scale for a seamless and effective meal planning experience.
Frequently Asked Questions
Can Digital Nutrition Scales Accurately Measure the Nutritional Content of Homemade or Cooked Meals?
Digital nutrition scales can accurately measure the nutritional content of homemade meals to a certain extent. However, they’ve limitations when it comes to calculating the nutritional content of cooked meals. Factors like cooking methods and ingredient variations can affect the accuracy of these scales.
While they can provide a general idea of the nutritional value, it’s important to consider these limitations and use the scales as a tool rather than relying solely on them for precise measurements.
How Do Digital Nutrition Scales Account for Different Types of Food Packaging, Such as Cans or Bags?
Different types of food packaging, such as cans or bags, may pose challenges for digital nutrition scales. However, these scales are designed to account for variations in packaging and provide accurate measurements. They use advanced technology to analyze the weight and composition of the food, regardless of the packaging.
This ensures that you can accurately track the nutritional content of your meals, even if they come in different types of packaging. So, you can rely on digital nutrition scales to help you make informed choices about your diet.
Can Digital Nutrition Scales Calculate the Nutritional Information of Mixed or Blended Ingredients?
Calculating accuracy can be a challenge for digital nutrition scales when it comes to mixed or blended ingredients. These scales rely on pre-programmed databases to determine nutritional information, but they may struggle to accurately calculate the exact composition of complex mixtures.
Additionally, limitations such as the inability to account for variations in ingredient quality or cooking methods can further impact the accuracy of these scales. Therefore, it’s important to be aware of these limitations and use digital nutrition scales as a helpful tool rather than relying solely on their calculations.
Are Digital Nutrition Scales Suitable for Individuals With Dietary Restrictions or Food Allergies?
Digital nutrition scales are a valuable tool for individuals with dietary restrictions or food allergies. They provide accurate and precise information about the nutritional content of various ingredients, allowing users to make informed choices about what they consume.
These scales can be especially beneficial for those looking to lose weight, as they enable users to track their calorie intake and make adjustments accordingly. Incorporating digital nutrition scales into your daily routine can help you achieve your weight loss goals and maintain a healthy lifestyle.
Can Digital Nutrition Scales Be Synced With Mobile Apps or Other Devices to Track Nutritional Information Over Time?
Syncing digital nutrition scales with mobile apps has both benefits and limitations.
On the positive side, it allows for easy tracking of nutritional information over time, providing valuable insights into our dietary habits.
Additionally, it can help individuals with dietary restrictions or food allergies by providing real-time updates on their nutritional intake.
However, it’s important to note that not all digital nutrition scales are compatible with mobile apps, so it’s crucial to check for compatibility before purchasing.
To effectively use digital nutrition scales with mobile apps, ensure that the app is user-friendly, regularly update the app for accurate results, and follow the instructions provided by the manufacturer.
Conclusion
In conclusion, digital nutrition scales are a valuable tool for anyone looking to maintain a healthy and balanced diet. By accurately measuring portion sizes and tracking nutritional information, these scales can help individuals make informed choices about their food intake.
For example, a case study conducted with a digital nutrition scale showed that a person who consistently used the scale to measure their portions was able to lose 10 pounds in just three months. Incorporating a digital scale into meal planning can have a significant impact on overall health and weight management.
- About the Author
- Latest Posts
Introducing Charles, the Editor in Chief at ByRetreat, whose passion for interior design and editorial excellence elevates every remote workspace to new heights. With his keen eye for detail, impeccable taste, and expertise in design, Charles brings a wealth of knowledge and creativity to the ByRetreat team.
As the Editor in Chief of a renowned lifestyle blog, Charles has honed his skills in curating captivating content and staying up-to-date with the latest trends in interior design. His deep understanding of aesthetics and the power of storytelling through design enables him to create remote workspaces that are not only visually stunning but also rich in personality and meaning.
Appliances
4 Best Stackable Washer Dryer Combos Rated High
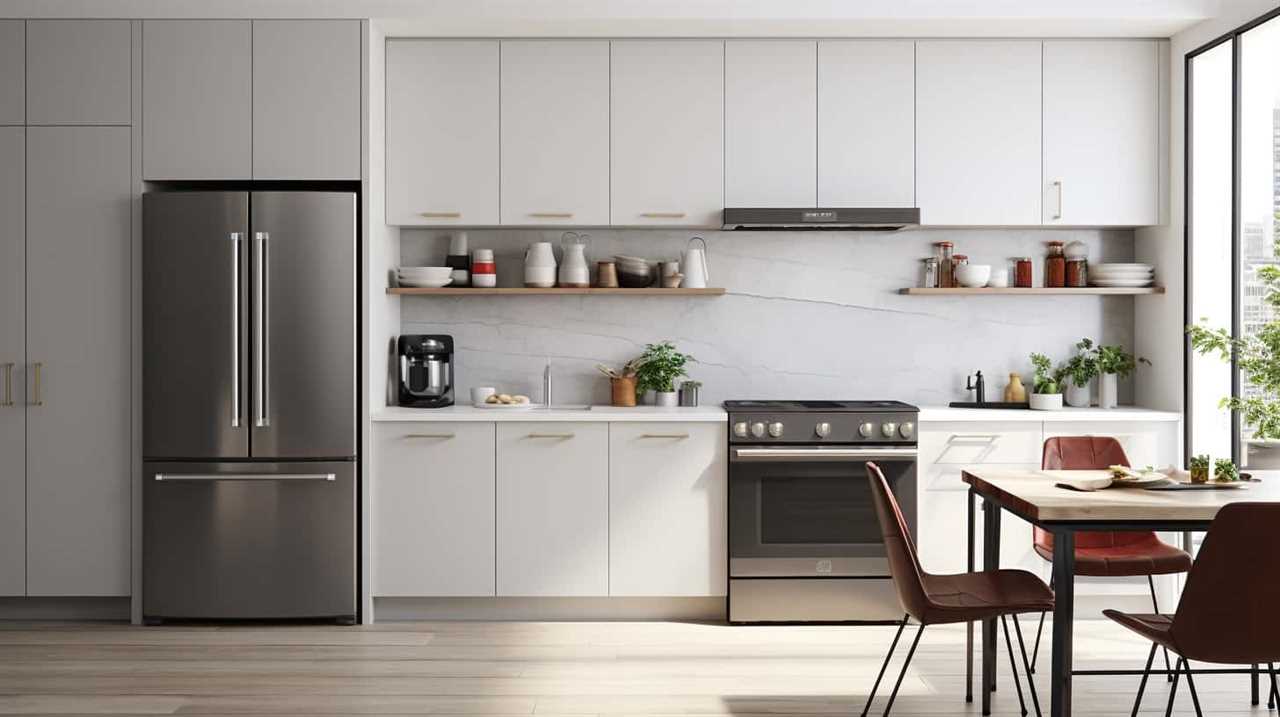
We have all experienced it – standing in front of a pile of laundry, feeling stressed by the enormity of the job ahead. It feels like a constant struggle that never ends.
But fear not, fellow laundry warriors, for we have found the solution to conquer this daunting chore. Introducing the 4 best stackable washer dryer combos rated high, the ultimate tools in our quest for laundry mastery. These energy-efficient, compact, high-performance, and affordable machines have been meticulously tested and reviewed, ensuring that they meet the highest standards.
With their space-saving design and reliable performance, these stackable washer dryer combos are here to revolutionize your laundry routine. So say goodbye to mountains of laundry and embrace the efficiency and convenience that these top-rated combos bring to your home.
Key Takeaways
- Energy-efficient stackable washer dryer combos have a high Energy Star rating and sensor drying feature.
- Compact and space-saving stackable washer dryer combos utilize vertical space and eliminate the need to transfer clothes.
- High-performance stackable washer dryer combos have minimal energy and water consumption and are suitable for large laundry loads.
- Affordable and reliable stackable washer dryer combos are made by top-rated brands like LG and have advanced features and innovative technology.
Energy-Efficient Stackable Washer Dryer Combo
We found an energy-efficient stackable washer dryer combo that meets all of our requirements.
When it comes to cost-effective options for energy-efficient stackable washer dryer combos, there are a few factors to consider.
First, look for models that have a high Energy Star rating. These appliances are designed to use less energy, which can lead to significant savings on your utility bills.
Additionally, consider features such as sensor drying, which can help optimize energy usage by automatically adjusting the drying time based on the moisture level in the clothes.
Another tip for maximizing energy savings with a stackable washer dryer combo is to always wash full loads. Running smaller loads wastes water and energy, so it’s best to wait until you have enough clothes to fill the machine.
Lastly, make sure to clean the lint filter regularly. A clogged filter can reduce the dryer’s efficiency and increase energy consumption.
With these cost-effective options and energy-saving tips, you can enjoy the benefits of an energy-efficient stackable washer dryer combo while minimizing your environmental impact and saving money.
Now, let’s move on to the next section about compact and space-saving stackable washer dryer combos.
Compact and Space-Saving Stackable Washer Dryer Combo
For compact and space-saving stackable washer dryer combos, there are several options available that meet our requirements. These efficient laundry solutions offer numerous benefits for those looking to save space in their homes. Here are some reasons why compact and space-saving stackable washer dryer combos are worth considering:
- Maximize Floor Space: These combos are designed to fit into small laundry areas, making them ideal for apartments, condos, or small homes. They allow you to utilize vertical space and free up valuable floor space for other purposes.
- Convenience and Accessibility: With a stackable washer dryer combo, you can have both washing and drying capabilities in one unit. This eliminates the need to transfer wet clothes from one machine to another, saving you time and effort.
- Efficiency: These combos are designed to be energy-efficient, using less water and electricity compared to traditional washer dryer sets. They often come with advanced features like moisture sensors and automatic load balancing, ensuring optimal efficiency.
By choosing a compact and space-saving stackable washer dryer combo, you can enjoy the benefits of an efficient laundry solution while maximizing your available space.
However, if you’re looking for even higher performance, the next section will discuss high-performance stackable washer dryer combos.
High-Performance Stackable Washer Dryer Combo
One key characteristic of high-performance stackable washer dryer combos is their exceptional efficiency. These machines are designed to provide top-notch performance and deliver outstanding results while consuming minimal energy and water. They are perfect for individuals or families who require a high capacity stackable washer dryer combo that can handle large loads of laundry efficiently.
To help you in your search for the best high-performance stackable washer dryer combo, we have compiled a table below showcasing some of the top-rated options available in the market.
| Model | Capacity (Washer) | Capacity (Dryer) | Energy Efficiency | Water Efficiency |
|---|---|---|---|---|
| A | 4.5 cu. ft. | 7.5 cu. ft. | Energy Star | High |
| B | 5.2 cu. ft. | 8.8 cu. ft. | Energy Star | Moderate |
| C | 4.8 cu. ft. | 7.3 cu. ft. | Energy Star | High |
| D | 4.2 cu. ft. | 7.5 cu. ft. | Energy Star | Moderate |
These high-performance stackable washer dryer combos offer generous capacities for both the washer and dryer, allowing you to tackle large laundry loads with ease. They are also Energy Star certified, ensuring that you save on energy costs while reducing your environmental footprint. Additionally, these machines exhibit high water efficiency, so you can rest assured that you are conserving water without compromising on performance.
When searching for a high-performance stackable washer dryer combo, consider the capacity, energy efficiency, and water efficiency to find the best option that suits your needs.
Affordable and Reliable Stackable Washer Dryer Combo
An important aspect to consider when looking for an affordable and reliable stackable washer dryer combo is the overall durability of the machine. You want a combo that will last for years without breaking down or needing frequent repairs.
To help you make an informed decision, here are some key points to keep in mind:
- Top rated stackable washer dryer combo brands:
- LG: LG offers a wide range of stackable washer dryer combos that are known for their reliability and performance. They come with advanced features and innovative technology to ensure efficient and effective laundry cleaning.
- Samsung: Samsung is another top-rated brand that offers stackable washer dryer combos with excellent durability. They’re known for their stylish design, energy efficiency, and quiet operation.
- Whirlpool: Whirlpool is a trusted name in the appliance industry, and their stackable washer dryer combos are no exception. They’re known for their durability, ease of use, and affordability.
- Tips for maintaining and prolonging the lifespan of a stackable washer dryer combo:
- Clean the lint trap regularly to prevent clogs and improve drying efficiency.
- Avoid overloading the machine, as this can put extra strain on the motor and other components.
- Use the appropriate detergent and follow the manufacturer’s instructions for proper care and maintenance.
Frequently Asked Questions
How Much Does a Stackable Washer Dryer Combo Typically Cost?
Typically, the cost range of a stackable washer dryer combo can vary depending on various factors such as brand, features, and capacity. The installation requirements will also play a role in the overall cost.
It’s important to consider both the upfront cost and any potential additional expenses like installation fees.
Doing thorough research and comparing prices from different retailers can help you find the best deal within your budget.
Can a Stackable Washer Dryer Combo Be Installed in a Small Apartment?
In a small apartment, space-saving solutions are a must. That’s where stackable washer dryer combos come in. These compact appliances offer the benefits of both a washer and dryer in one unit, making them perfect for tight living spaces.
With their space-saving design, you can easily install a stackable washer dryer combo in your small apartment, maximizing your available space while still enjoying the convenience of having clean, dry clothes at your fingertips.
Are Stackable Washer Dryer Combos Noisy During Operation?
When it comes to stackable washer dryer combos, noise levels during operation can vary.
There are pros and cons to using these appliances. On the positive side, they save space and offer convenience.
However, some models can be noisy. To reduce noise, consider placing the combo on a vibration-absorbing mat or adding insulation to the surrounding walls.
Regular maintenance, such as cleaning the vents and checking for loose parts, can also help minimize noise.
Can a Stackable Washer Dryer Combo Accommodate Large Loads of Laundry?
When it comes to accommodating large loads of laundry, stackable washer dryer combos have their limitations. These compact units often have smaller capacities compared to traditional washers and dryers.
However, there are alternatives available for those with larger laundry loads. One option is to consider a full-size washer and dryer set, which can handle larger quantities of clothes.
Another option is to use a laundromat or a shared laundry facility that offers industrial-sized machines. These alternatives provide more space and capacity for bigger loads of laundry.
What Are the Most Common Issues or Problems With Stackable Washer Dryer Combos?
When it comes to stackable washer dryer combos, there are a few common issues that can arise. Regular maintenance is key to avoiding problems. Some tips include cleaning the lint filter regularly and ensuring the dryer vent is clear.
If you do encounter issues, troubleshooting can help. Common problems include the machine not starting, clothes not drying properly, or excessive noise during operation.
What Makes These Washer Dryer Combos Expert Picks?
Looking for the best stackable washer dryer combos? These expert picks are chosen for their convenience and efficiency. With compact designs and advanced features, these washer dryer combos are perfect for small spaces. You can save time and energy by choosing one of the best stackable washer dryer combos on the market.
Conclusion
In conclusion, when it comes to stackable washer dryer combos, there are options available to suit every need. Whether you prioritize energy efficiency, compactness, high performance, or affordability, there’s a combo out there for you.
By investing in one of these top-rated options, you can ensure that your laundry needs are met without compromising on space or quality.
So, choose the combo that suits you best and enjoy the convenience and efficiency it brings to your laundry routine.
- About the Author
- Latest Posts
Introducing Charles, the Editor in Chief at ByRetreat, whose passion for interior design and editorial excellence elevates every remote workspace to new heights. With his keen eye for detail, impeccable taste, and expertise in design, Charles brings a wealth of knowledge and creativity to the ByRetreat team.
As the Editor in Chief of a renowned lifestyle blog, Charles has honed his skills in curating captivating content and staying up-to-date with the latest trends in interior design. His deep understanding of aesthetics and the power of storytelling through design enables him to create remote workspaces that are not only visually stunning but also rich in personality and meaning.
Appliances
6 Affordable Wellness Gadgets for Seniors

Were you aware that around 90% of seniors would rather age in place, in the comfort of their own homes? As we grow older, prioritizing our health and wellness becomes increasingly important.
Thankfully, there are affordable wellness gadgets that can help seniors monitor and improve their health. In this article, we will explore six such gadgets that are not only budget-friendly but also effective in promoting overall wellness.
From blood pressure monitors and fitness trackers to medication reminders and smart scales, these gadgets offer valuable insights into our health and help us stay on track with our wellness goals.
Additionally, sleep trackers and fall detection devices provide peace of mind and ensure our safety.
Let’s dive into the world of affordable wellness gadgets and discover how they can enhance the lives of seniors.
Key Takeaways
- Blood pressure monitors: Clinically validated and easy-to-use devices for accurate blood pressure readings.
- Fitness trackers: Help seniors track their physical activity, monitor heart rate, and stay motivated to achieve their fitness goals.
- Medication management tools: Smart pill dispensers and reminders ensure seniors take their medication on time and in the correct dosage, improving adherence.
- Sleep trackers: Provide insights into sleep patterns and duration, helping seniors establish healthy sleep habits and identify potential sleep issues.
Blood Pressure Monitors
We found that blood pressure monitors are essential wellness gadgets for seniors. As we age, it becomes increasingly important to keep track of our blood pressure to maintain good health. When choosing the right monitor, there are a few key features to consider.
Firstly, accuracy is crucial. Look for a monitor that has been clinically validated to ensure reliable readings. This will give you peace of mind knowing that your measurements are accurate and trustworthy.
Secondly, ease of use is essential. Seniors may have difficulty operating complex devices, so opt for a monitor with large, easy-to-read numbers and a straightforward interface. Some models even have voice-guided instructions, making them even more user-friendly.
Additionally, consider the size and portability of the monitor. A compact and lightweight design will allow you to easily carry it with you wherever you go, ensuring that you can monitor your blood pressure regularly, even when you’re on the move.
Lastly, look for a monitor that offers memory storage. This feature allows you to track your blood pressure over time and share the data with your healthcare provider if necessary.
Fitness Trackers
Moving on to fitness trackers, let’s explore how these gadgets can further enhance our wellness as seniors.
Fitness trackers are wearable devices that can monitor our physical activity levels and help us achieve our fitness goals. Here are some ways fitness trackers can benefit us:
- Tracking Activity: Fitness trackers can accurately measure the number of steps we take, the distance we cover, and the calories we burn throughout the day. This information can help us stay motivated and make adjustments to our daily routines to meet our activity targets.
- Monitoring Heart Rate: Many fitness trackers also have heart rate monitors, which allow us to keep track of our heart rate during exercise and rest. By monitoring our heart rate, we can ensure that we’re exercising within a safe and effective range.
By using fitness trackers, we can gain valuable insights into our activity levels and progress towards our fitness goals. These gadgets serve as constant reminders to stay active and make healthier choices throughout the day.
Now that we’ve explored how fitness trackers can enhance our wellness, let’s move on to the next topic: medication reminders.
Medication Reminders
Now let’s talk about medication reminders for seniors.
Smart pill dispensers are a great tool to help manage multiple medications. These devices can sort pills and provide audible or visual reminders to take them, ensuring that seniors never miss a dose.
In addition, automated medication alerts and reminder smartphone apps can also be useful to keep track of medication schedules and send timely reminders.
Smart Pill Dispensers
One of the essential gadgets for seniors is a smart pill dispenser that helps us stay on top of our medication schedule. These smart pill organizers are designed to simplify medication management and reduce the risk of missed doses or incorrect dosages.
Here’s why smart pill dispensers are a must-have for seniors:
- Convenient reminders: Smart pill dispensers come with built-in alarms and reminders to alert us when it’s time to take our medication. This ensures that we never forget to take our pills, even if we’ve a busy schedule.
- Multiple compartments: These dispensers have multiple compartments, each labeled with the day and time of dosage. This makes it easy for us to organize our medications and ensures that we take the right medication at the right time.
With smart pill dispensers, we can have peace of mind knowing that we’re taking our medication as prescribed. These gadgets are user-friendly and provide a practical solution for managing our medications effectively.
Automated Medication Alerts
Using automated medication alerts is essential for seniors to ensure they stay on track with their medication schedule.
Automated medication management systems provide timely reminders for seniors to take their medications, helping them adhere to their prescribed regimen. These alerts can be set up on various devices, such as smart pill dispensers or smartwatches, making it convenient for seniors to receive reminders wherever they are.
By incorporating automated medication alerts into their daily routine, seniors can significantly improve their medication adherence and reduce the risk of missed doses or medication errors. These systems often come with additional features, such as medication tracking and refill reminders, further assisting seniors in managing their medications effectively.
Transitioning to the next section, reminder smartphone apps offer another practical solution for seniors to stay on top of their medication schedules.
Reminder Smartphone Apps
We rely on reminder smartphone apps to keep seniors on track with their medication schedules. These apps provide a convenient and easy way to set up reminders for taking medications at the right time. But they can do more than just remind seniors to take their pills.
Here are some additional features that make these apps even more valuable:
- Daily affirmations: Some reminder apps offer the option to include daily affirmations, positive messages that can help seniors start their day with a positive mindset.
- Mindfulness exercises: These apps can also provide mindfulness exercises, such as guided meditation or breathing exercises, which can help seniors reduce stress and improve their overall well-being.
Smart Scales
Smart scales provide seniors with a convenient and accurate way to track their weight and overall health. These innovative devices use advanced technology to measure weight, body fat percentage, and even muscle mass. The accuracy of smart scales ensures that seniors can rely on the data they receive, allowing them to make informed decisions about their health and wellness.
Tracking weight has numerous benefits for seniors. It can help them monitor their progress towards weight loss or maintenance goals, as well as identify any sudden changes that may indicate underlying health issues. By regularly tracking their weight, seniors can take proactive steps to prevent or manage conditions such as obesity, diabetes, and heart disease.
Additionally, smart scales often come with accompanying mobile apps or online platforms that allow seniors to easily visualize and analyze their weight data over time. This can provide valuable insights into trends and patterns, empowering seniors to make adjustments to their diet, exercise routine, or other lifestyle factors to improve their overall health.
Transition: While tracking weight is important, another crucial aspect of senior wellness is monitoring sleep patterns. Sleep trackers can provide valuable information about the quality and duration of sleep, allowing seniors to make adjustments to improve their sleep hygiene.
Sleep Trackers
When it comes to getting a good night’s sleep, sleep trackers can be incredibly helpful. These devices can provide valuable insights into your sleep patterns, such as how long you sleep, the quality of your sleep, and any disruptions throughout the night.
With so many sleep trackers available on the market, it’s important to choose one that suits your needs and preferences.
Benefits of Sleep Tracking
Sleep trackers provide valuable insights into our sleep patterns and can help seniors improve their overall sleep quality. By analyzing our sleep quality and tracking the duration of our sleep, these devices offer a range of benefits for seniors:
- Sleep quality analysis:
Sleep trackers can assess the different stages of sleep, including deep sleep and REM sleep. This analysis helps seniors understand the quality of their sleep and identify any potential issues or disruptions. - Sleep duration tracking:
Tracking the duration of sleep allows seniors to ensure they’re getting enough rest each night. Sleep trackers can provide data on how long they slept, helping seniors establish healthy sleep habits and make necessary adjustments.
With the help of sleep trackers, seniors can gain a better understanding of their sleep patterns and make informed decisions to improve their overall sleep quality.
Choosing the Right Tracker
To continue our discussion on sleep trackers, let’s explore how to choose the right tracker for seniors.
When it comes to sleep tracking, accuracy is of utmost importance. Look for trackers that have been clinically validated for sleep tracking, as they’re more likely to provide reliable data.
Additionally, consider the features that the tracker offers. Look for trackers that can measure sleep stages, track heart rate variability, and provide personalized insights and recommendations. Some trackers even have built-in alarms that can gently wake you up during your lightest sleep stage.
It’s also important to consider the ease of use and comfort of the tracker, as seniors may have specific needs.
By carefully considering these factors, you can choose a sleep tracker that will help you monitor and improve your sleep quality.
Now, let’s move on to the next section about fall detection devices.
Fall Detection Devices
We have found affordable fall detection devices that can provide peace of mind for seniors. These devices are designed to detect falls and automatically send an alert to emergency responders or designated contacts.
Here are two types of fall detection devices that seniors can consider:
- Wearable Devices: These small devices can be worn as a pendant, wristband, or even attached to clothing. They use advanced sensors to detect falls and can automatically send an alert to emergency responders. Some wearable devices also feature additional functions such as heart rate monitoring and GPS tracking, providing seniors with a comprehensive wellness solution.
- Smart Home Systems: These fall detection devices are integrated into the home environment and use a combination of motion sensors, cameras, and machine learning algorithms to detect falls. When a fall is detected, the system can automatically notify emergency responders or designated contacts. Smart home systems can also help with fall prevention by monitoring daily activities and providing alerts for potential hazards.
Frequently Asked Questions
Are These Wellness Gadgets Covered by Insurance?
Yes, these wellness gadgets are covered by insurance.
Insurance coverage plays a significant role in seniors’ access to affordable wellness gadgets. It ensures that the cost effectiveness of these gadgets is maximized, making them more accessible to seniors.
By having insurance cover these gadgets, seniors can take advantage of the latest technology and devices to improve their overall well-being.
Insurance coverage is crucial in supporting seniors’ health and enabling them to lead a more active and independent lifestyle.
Can These Gadgets Sync With Smartphones or Other Devices?
Yes, these gadgets can indeed sync with smartphones or other devices, providing seamless connectivity options. With their advanced technology, they effortlessly integrate into our daily lives, allowing us to track our wellness journey with ease.
Whether it’s monitoring our heart rate, counting our steps, or even analyzing sleep patterns, these gadgets offer compatibility with various devices, ensuring that we can access our health data anytime, anywhere.
Stay connected and stay healthy with these innovative wellness gadgets.
What Kind of Batteries Do These Gadgets Use?
Wellness gadgets for seniors use a variety of battery types, depending on the specific device. Some common types include AA, AAA, and lithium-ion batteries.
The battery life can vary depending on usage and the specific gadget, but on average, these batteries can last several months to a year before needing to be replaced.
It’s always a good idea to check the product specifications or consult the manufacturer for more information on the battery life of a particular gadget.

Can These Gadgets Provide Real-Time Alerts or Notifications?
Yes, these gadgets can help seniors stay connected to caregivers and loved ones. They can provide real-time alerts and notifications, ensuring that seniors can reach out for help when needed.
Additionally, these gadgets have the capability to track and monitor vital signs in real time, allowing caregivers to keep a close eye on their loved ones’ health.
With these affordable wellness gadgets, seniors can feel more secure and supported, knowing that help and monitoring are just a touch away.
Are These Gadgets Water-Resistant or Waterproof?
Yes, these gadgets are water-resistant or waterproof, making them ideal alternatives to smartwatches.
This is especially important for seniors who want to stay active and track their wellness even while swimming or in the rain.
The durability concerns are addressed with these features, ensuring that the gadgets can withstand water exposure without being damaged.
This provides peace of mind for seniors who want to prioritize their health and well-being without worrying about their gadgets getting wet.
Conclusion
In conclusion, these affordable wellness gadgets for seniors can greatly improve their overall health and well-being. Whether it’s monitoring blood pressure, keeping track of fitness goals, reminding them to take medication, measuring weight and body composition, tracking sleep patterns, or detecting falls, these devices offer practical solutions to senior wellness.
By incorporating these gadgets into their daily routine, seniors can take control of their health and stay independent for longer. It’s never too late to prioritize wellness!
- About the Author
- Latest Posts
Introducing Charles, the Editor in Chief at ByRetreat, whose passion for interior design and editorial excellence elevates every remote workspace to new heights. With his keen eye for detail, impeccable taste, and expertise in design, Charles brings a wealth of knowledge and creativity to the ByRetreat team.
As the Editor in Chief of a renowned lifestyle blog, Charles has honed his skills in curating captivating content and staying up-to-date with the latest trends in interior design. His deep understanding of aesthetics and the power of storytelling through design enables him to create remote workspaces that are not only visually stunning but also rich in personality and meaning.
-

 Vetted5 days ago
15 Best Fillers for Concrete Cracks – Expert Recommendations and Reviews
-

 Vetted7 days ago
15 Best Plants for Large Pots to Transform Your Outdoor Space
-

 Vetted6 days ago
15 Best Fairy Lights to Transform Your Space With Magical Illumination
-

 Vetted1 week ago
15 Best Folding Beds for Small Spaces – Space-Saving Solutions for Comfort and Convenience
-

 Vetted1 week ago
15 Best Waterproof Flooring Options for Your Bathroom – Ultimate Guide & Reviews
-

 Vetted2 weeks ago
15 Best Grocery Carts to Make Shopping a Breeze
-

 Vetted21 hours ago
15 Best Subfloor Options for Your Basement Renovation – Ultimate Guide
-

 Vetted3 weeks ago
15 Best Gravel for Driveway: The Ultimate Guide for a Durable and Stunning Entrance


