You can easily make surfboard wall decor that brings a vibrant coastal vibe to your space. Start by gathering materials like two 1x8x6 boards or a foam core blank. Shape your surfboard with a jigsaw and sand the edges smoothly. For a fun touch, add details like shark bites or colorful stripes using ocean-inspired hues. Secure it to the wall with heavy-duty anchors for safety. Finish with a protective clear coat to guarantee longevity. This DIY project not only livens up your decor but also allows for personal touches that reflect your style. There's plenty more to explore in creating your unique piece.
Key Takeaways
- Choose your surfboard shape and outline it on foam or wood, ensuring a symmetrical design for balance.
- Use vibrant coastal colors and painter's tape to create clean lines and playful patterns for added visual interest.
- Incorporate unique elements like shark bites or routed divots to enhance the surfboard's aesthetic appeal.
- Securely mount the surfboard using wood screws or heavy-duty wall anchors to ensure safety, especially in children's rooms.
- Maintain the surfboard's quality by regularly inspecting for damage and applying a protective finish every few years.

Scotch Felt Pads 162 PCS Beige, Felt Furniture Pads for Protecting Hardwood Floors, Round, Assorted Sizes Value Pack, Self-Stick design, Protecting from nicks, dents and scratches (SP845-NA)
- Suitable for Various Furniture: Protects chair legs, tables, and more
- Easy to Install: Peel and stick for quick setup
- Universal Surface Protection: Safeguards hardwood, tile, laminate, vinyl
As an affiliate, we earn on qualifying purchases.
Project Overview
When you're looking to add a fun and unique touch to a coastal-themed room, creating a decorative surfboard can be the perfect project.
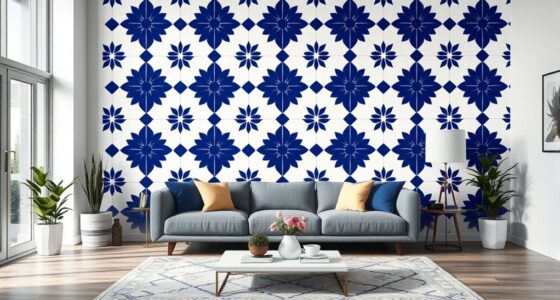
This DIY surfboard serves as a vibrant focal point, especially in a child's space. You'll start by choosing either wood or foam materials, shaping them to fit your vision, and adding playful details like shark bites for extra flair.
The construction typically takes two days—use the first for building and the second for painting and finishing. Experiment with various techniques, like distressing and multiple colors, to enhance the look while providing a protective finish.
Finally, secure the surfboard with wood screws or heavy-duty wall anchors, making sure it's safe for the little ones.
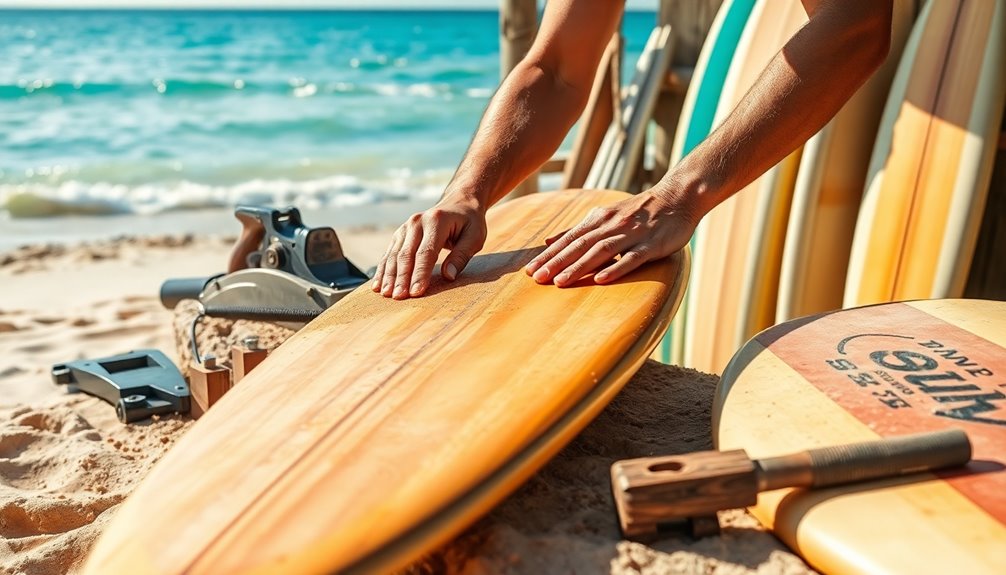
Materials and Tools
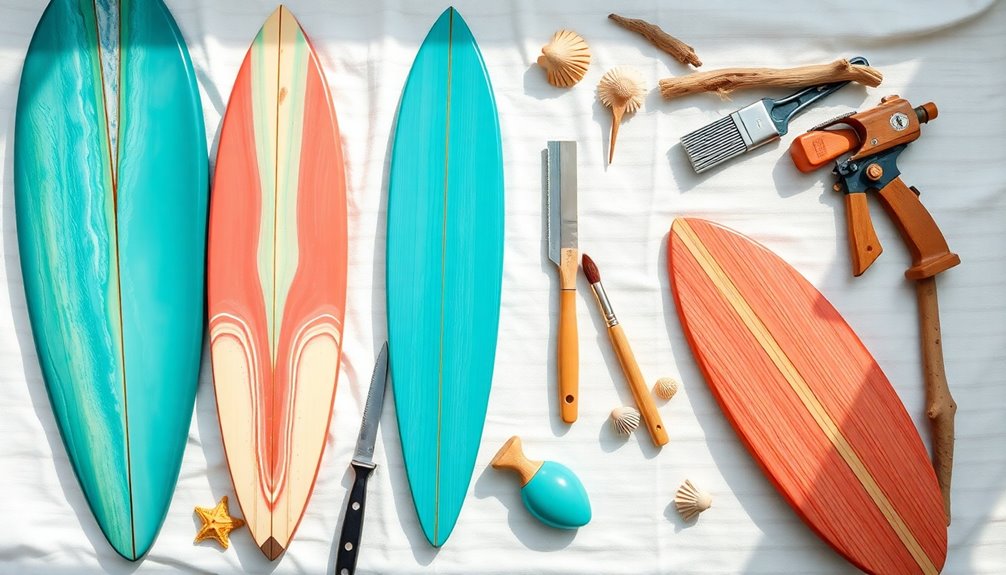
Gathering the right materials and tools is essential for crafting a stunning surfboard wall decor piece. You'll need two 1x8x6 boards or a surfboard blank made of foam core as your base.
For assembly, make sure you have wood glue, clamps, and screws to hold your piece of wood together securely. A jigsaw will help you cut the surfboard shape, while a Kreg Jig is perfect for joining wood without visible screws.
Don't forget a corner cat sander for smoothing edges and a router for rounded finishes. For painting, gather primer, painter's tape, and colors like white, orange, and gray.
Incorporating safety standards for children's toys during your crafting process will ensure a secure and enjoyable environment.
Finally, wear safety gear like gloves and goggles to keep yourself protected while you work.
Shaping the Surfboard
To shape your surfboard, start by outlining your desired design on the foam blank or wood piece, keeping rocker and tail features in mind.
Once you've got the basic shape, use sanding blocks to refine the edges, ensuring a smooth profile.
This attention to detail will help you create a balanced board that looks great and performs well.
Outline Desired Shape
As you begin shaping your surfboard, outlining the desired shape on the foam blank is vital for achieving the look you want. Use a pencil to sketch an outline that reflects your vision, typically around 5 to 7 feet long.
To guarantee precision, follow these steps:
- Utilize a straight edge or ruler to maintain symmetry along the centerline, which is essential for balance.
- Incorporate features like a defined nose and tail shape to enhance its aesthetic appeal and make it a focal point in your decor.
- After the outline, use a saw for rough cutting, leaving excess material for refinement later.
Refine With Sanding
After outlining your desired shape, it's time to refine the surfboard through sanding.
Start with sanding blocks that have coarser grits, around 80-120, to remove excess material. Gradually shift to finer grits, like 220-400, to achieve a smooth finish.
As you sand, focus on creating a symmetrical design by checking both sides frequently, ensuring balance and performance. Carefully sand the nose and tail areas to shape the rocker, which will affect how the board rides in the water.
Don't forget to round the edges slightly with sandpaper; this enhances aerodynamics and reduces the risk of sharp edges.
Remember to wipe down the board regularly with a clean cloth to keep track of your progress and shape accuracy.
Create Rocker Curve
Creating the rocker curve is crucial for shaping your surfboard, as it directly influences how the board performs in the water. To achieve the perfect rocker, follow these steps:
- Determine the curvature: Decide on a curve between 2 to 4 inches at the center, depending on your board's intended use.
- Mark the outline: Use a straight edge or level to outline the rocker on both ends of the foam blank, guaranteeing symmetry and smooth blending into the board's outline.
- Shape the rocker: Gradually remove foam with a planer or sanding block, blending the curve into the rails. Regularly check the shape with a straight edge to ascertain evenness.
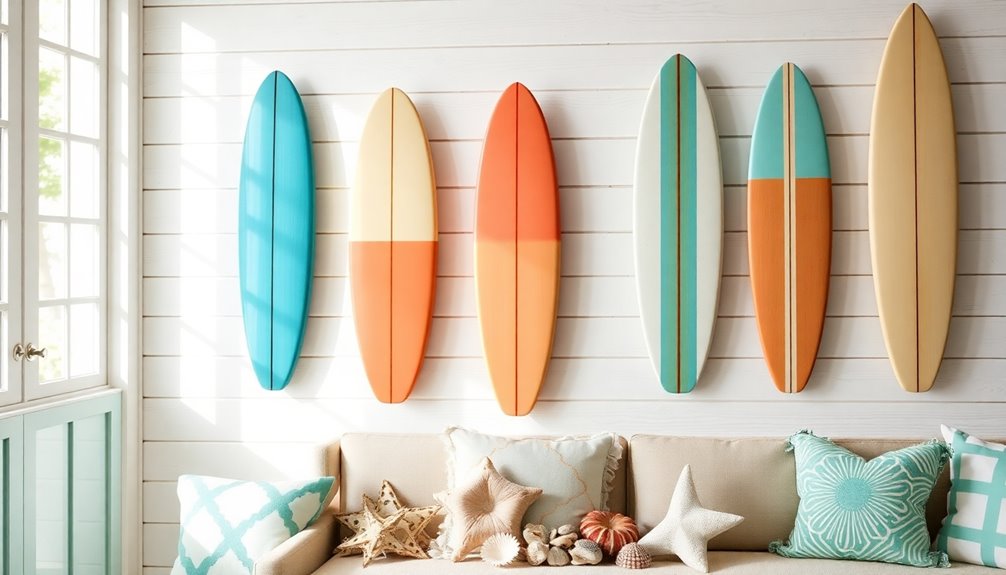
Design Elements
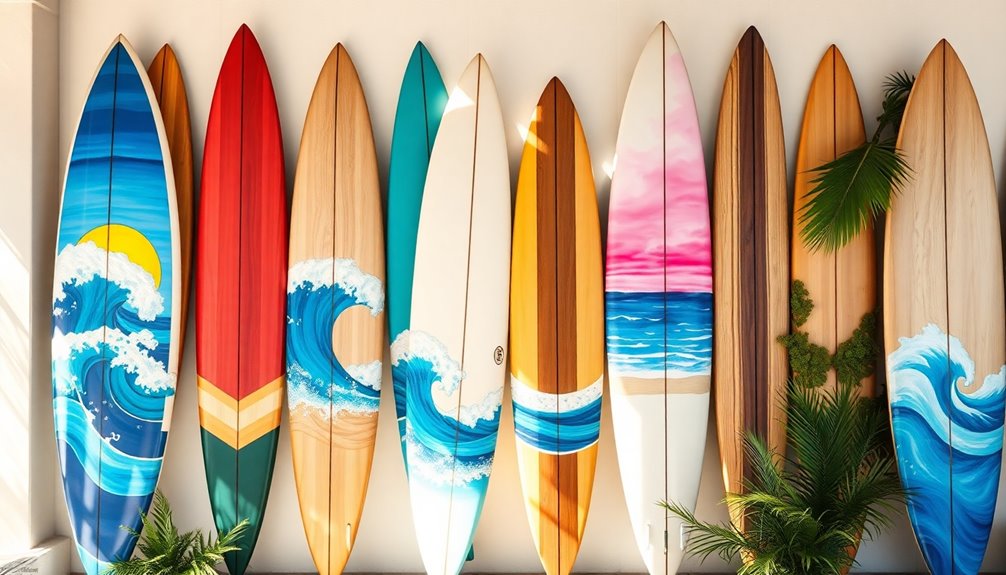
Design elements play an essential role in transforming a surfboard into a stunning wall decor piece.
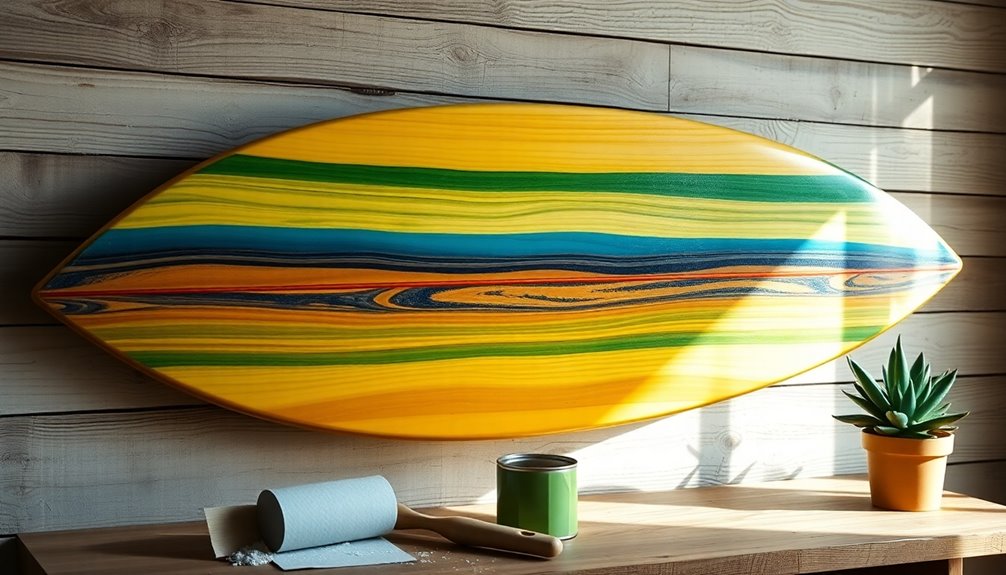
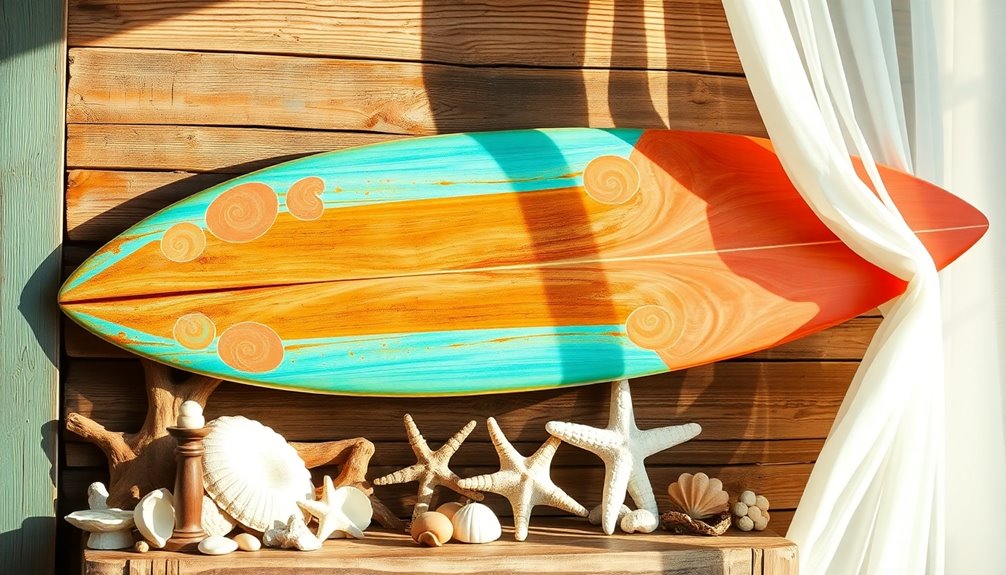
Consider adding a playful shark bite detail to resonate with coastal themes. Use vibrant colors like blue, orange, and white to create eye-catching stripes that reflect the waves and surf culture.
Implement a routed divot or poplar wood strip in the center for added visual interest and texture, enhancing the overall look.
Experiment with unique shapes, such as pintail or squash tail, to give your surfboard a distinctive silhouette that showcases your personal style.
Finally, add a matte polycrylic coat to protect your design and guarantee the decor piece remains a long-lasting focal point in your room.
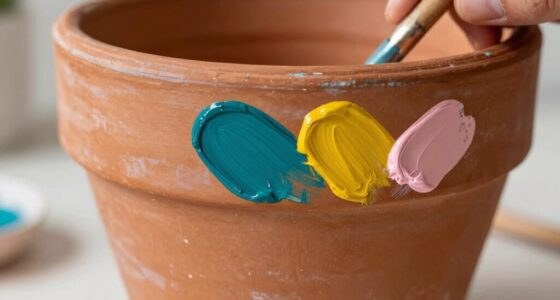
Painting Techniques
When it comes to painting your surfboard decor, choosing the right colors can make all the difference in achieving the desired vibe.
You'll want to explore various application methods to guarantee a smooth finish and vibrant results.
Let's look at some effective techniques to bring your creative vision to life.
Color Selection Tips
Selecting the right colors for your surfboard wall decor can transform it into a stunning focal point. To achieve a cohesive and inviting look, consider these tips:
- Choose Coastal Colors: Opt for ocean blues, sandy beiges, and coral hues that reflect the beauty of the beach.
- Use Painter's Tape: This guarantees clean lines and geometric patterns, making your stripes and designs crisp and professional.
- Experiment with Techniques: Incorporate sponging or dry brushing to add texture and depth to your design.
Don't forget to apply a primer coat for better adhesion and color vibrancy on wood surfaces. Additionally, using advanced filtration systems can help maintain a clean workspace by reducing dust and allergens while you paint.
Finally, finish with a protective clear coat to shield your artwork from wear while preserving its beauty.
Application Methods Explained
To achieve stunning surfboard wall decor, mastering various painting techniques is essential. Start with a primer coat to prevent paint absorption and create a smooth base for your colors.
When adding stripes or designs, use painter's tape for clean edges, and let each layer dry completely to avoid smudging. For a distressed look, lightly sand the surface with 220 grit sandpaper after the paint cures, giving it a weathered charm that enhances your coastal theme.
Finish off with a matte polycrylic to protect your artwork while maintaining a rustic feel.
Don't forget to experiment with ocean-inspired colors like blues and sandy beiges to make your surfboard truly vibrant and inviting, capturing the essence of beach life.
Installation Methods
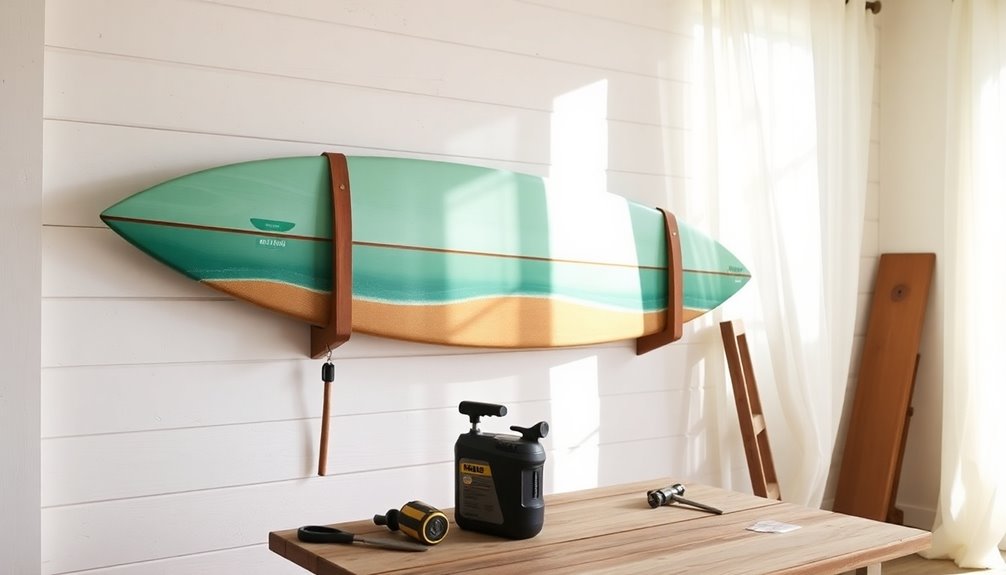
While securing your surfboard wall decor, you'll want to confirm it's both stable and visually appealing. Here are three effective installation methods to take into account:
- Wood Screws: Drive wood screws into wall studs for maximum stability, preventing damage to your walls.
- Heavy-Duty Wall Anchors: If wall studs aren't accessible, use heavy-duty anchors to support the surfboard's weight securely.
- D-Ring Hangers: For a non-invasive option, install D-ring hangers on the back of the surfboard. This allows for easy mounting and removal when needed.
Remember to hang the surfboard at an attractive height, and use a level to confirm it's straight.
An uneven installation can diminish its visual appeal, so take your time to get it right!
Safety Measures

When working on your surfboard wall decor, prioritizing safety is essential to guarantee a smooth and enjoyable process.
Always wear protective gear like gloves, masks, and goggles to shield yourself from harmful chemicals and dust. Make sure you're in a well-ventilated area to prevent inhaling toxic fumes from resins and paints.
Store chemicals away from heat sources and direct sunlight to reduce fire risks. Dispose of waste materials responsibly by following local hazardous waste disposal regulations.
Finally, familiarize yourself with and adhere to the safety guidelines provided by manufacturers for all materials used.
Maintenance and Care
Maintaining your surfboard wall decor is essential for keeping it looking vibrant and extending its life. Here are some key steps to follow:
- Rinse and dry: After exposure to saltwater or humidity, rinse your surfboard with fresh water to prevent deterioration.
- Store properly: When not in use, keep your surfboard in a cool, shaded area to avoid sun damage and warping.
- Regular checks: Inspect your surfboard for dings or cracks, and repair any damage promptly with wood filler or paint.
Additionally, tighten any hardware frequently to guarantee secure mounting, especially in children's rooms.
Apply a protective finish like matte polycrylic every few years to maintain the paint and wood quality.
With these steps, your surfboard decor will stay stunning for years to come!
Inspiration and Ideas
After ensuring your surfboard wall decor is in top shape, it's time to get creative with how you display it. Here are some inspiring ideas to ponder:
| Idea | Description | Application |
|---|---|---|
| Reclaimed Wood | Use eco-friendly materials for a unique piece. | Living rooms or hallways |
| Vibrant Colors & Patterns | Incorporate ocean-inspired designs for a playful touch. | Children's rooms |
| Diverse Shapes | Explore various surfboard shapes for dynamic visuals. | Beach-themed spaces |
| Custom Artwork | Personalize with family names or custom designs. | Centerpieces in any room |
These ideas not only enhance your decor but also reflect your coastal lifestyle, making your space feel inviting and personal. Additionally, consider investing in eco-friendly materials to further align your decor with sustainable practices. Happy crafting!
Frequently Asked Questions
How to Make a Surfboard for Decor?
To make a surfboard for decor, start by selecting two 1x8x6 boards and join them with a Kreg Jig for strength.
Sketch your desired shape and cut it out using a jigsaw, then smooth the edges with a corner cat sander.
Once you've prepped the surface, apply primer and paint in your chosen colors, letting each layer dry.
Finish with a protective coat, and secure it to the wall for a stunning display.
How to Hang a Surfboard as Art?
To hang a surfboard as art, first find the wall studs with a stud finder.
Use heavy-duty wood screws for secure installation, or opt for wall anchors if studs aren't available.
Attach D-ring hangers to the back for a clean look and easy adjustments.
Measure and mark where you want it, ideally at eye level, then use a level to guarantee it's straight.
This way, you'll create a stunning focal point in your space!
What Is the Best Wood to Make a Surfboard?
Imagine catching the perfect wave, your surfboard gliding effortlessly beneath you.
When choosing wood for your surfboard, lightweight options like balsa or paulownia are your best bets. They're strong and buoyant, making for an enjoyable ride.
If you want a classic look, mahogany or plywood can give you that beautiful finish, though they might be heavier.
Ultimately, it's all about balancing aesthetics and performance for your ideal surfboard design.
Can You Decorate a Surfboard?
Absolutely, you can decorate a surfboard! Use waterproof paints or markers to release your creativity with vibrant designs that reflect your style.
Stencils can help you create intricate patterns, while painter's tape guarantees clean edges for stripes or geometric designs.
Don't forget to seal your artwork with a clear coat to protect it from wear and humidity.
Adding decals or vinyl graphics can also enhance the surfboard's character, making it a standout piece in your space.
Conclusion
So, there you have it! With a little creativity and some elbow grease, you can turn a simple surfboard into a statement piece that practically screams, "I'm so laid-back, I might just float away!" Forget about buying overpriced decor; you've got this! Just remember, if your surfboard ends up looking more like a sad whale than a tropical paradise, you can always hang it upside down. Who needs perfection when you've got character, right? Happy crafting!