You can build reclaimed wood shelves without power tools by carefully selecting sturdy, warped-free wood from trusted sources. Use hand saws, chisels, and a hand drill to cut, shape, and assemble your pieces safely. Smooth edges with quality sandpaper, working carefully by hand to avoid splinters and guarantee a polished finish. Mount the shelves securely with traditional brackets or supports. To learn detailed steps and tips for a safe, stylish finish, keep exploring the process.
Key Takeaways
- Use hand saws or hand planes for cutting and shaping reclaimed wood safely without power tools.
- Employ manual drills or screwdrivers for mounting brackets and hardware securely.
- Smooth surfaces and edges with coarse and fine grit sandpaper, using sanding blocks for control.
- Measure and mark placement carefully to ensure precise cuts and accurate shelf positioning.
- Attach hardware firmly to the wall by hand, ensuring stability without power tools.
Selecting and Preparing Your Reclaimed Wood
When selecting reclaimed wood for your shelves, it’s important to look for pieces that are sturdy, free of severe warping, and have a pleasing grain or character. Start with reclaimed wood sourcing from reputable suppliers to guarantee quality and safety. Before using, consider proper wood treatment to remove any pests, mold, or old finishes. This process might include cleaning, sanding, or kiln drying, which helps stabilize the wood and prepares it for installation. Avoid wood with deep cracks or signs of rot, as these can compromise stability. Additionally, inspecting the history of the wood can provide insights into its previous use and durability. By carefully choosing and preparing your reclaimed wood, you’ll create sturdy, beautiful shelves that highlight the charm of recycled materials without needing power tools. Proper sourcing and treatment set the foundation for a successful project.
Designing Your Shelves and Planning the Layout
Start by deciding the size of your shelves and how much space you want between them. Visualize different arrangements to see what fits best with your room’s style and function. Choose materials and finishes that complement your reclaimed wood to create a cohesive look. Considering the overall design and how it aligns with your room’s decor can help ensure your shelves are both functional and visually appealing.
Choosing Shelf Dimensions
Choosing the right shelf dimensions is essential to guarantee your reclaimed wood shelves are both functional and visually appealing. Start by considering the shelf weight capacity needed for your items to prevent sagging or damage. If you plan to hold heavier objects, opt for thicker or wider boards that can support the load. Wall compatibility is also critical; measure your wall space carefully to ensure the shelves fit comfortably without overwhelming the area. Keep in mind that longer shelves may require additional support, especially if you’re using thinner wood. Balancing length, width, and thickness helps create a sturdy, attractive display that suits your space and purpose. Proper planning now ensures your shelves are durable and seamlessly integrated into your room. Additionally, understanding automation in business can inspire innovative design solutions that optimize shelf functionality and adaptability.
Visualizing Your Arrangement
Visualizing how your reclaimed wood shelves will look in your space helps you create a balanced and cohesive display. Think about the placement, spacing, and overall flow, considering your room’s color schemes. Incorporate decorative accents like small plants, framed photos, or unique trinkets to add personality. To plan your layout, imagine different arrangements:
| Shelf Arrangement | Decorative Accents Placement |
|---|---|
| Symmetrical layout | Centered or side-mounted accents |
| Asymmetrical layout | Clusters of decorative items |
| Single shelf focus | Minimal accessories for emphasis |
| Multiple shelves | Varying heights for visual interest |
This visualization process helps you refine your design, ensuring your reclaimed wood shelves complement your decor and reflect your style. Remember to consider rustic decor elements to enhance the farmhouse charm and create a warm, inviting atmosphere.
Material and Finish Selection
Selecting the right materials and finishes for your reclaimed wood shelves is essential to achieving the look and durability you envision. Start by choosing wood with appealing grain and minimal flaws, ensuring it suits your style. When it comes to finishes, a quality wood stain can enhance the natural character of the reclaimed wood while adding color or depth. After staining, apply a protective finish, such as a clear sealant or polyurethane, to guard against moisture, scratches, and wear. This layer preserves both the appearance and integrity of your shelves over time. Additionally, understanding the cost of different finishes can help you select options that balance aesthetics and budget. Remember, the right combination of wood stain and protective finish not only elevates the aesthetic but also ensures your shelves last for years to come.
Cutting and Shaping the Wood Using Hand Tools

To shape your reclaimed wood shelves, you’ll need to choose the right hand tools for the job. Using proper techniques guarantees safe cuts and precise shaping, so take your time and stay focused. With the right tools and methods, you’ll finish with smooth, professional-looking edges ready for assembly. Additionally, understanding self watering plant pots can inspire innovative ways to incorporate functional design elements into your projects.
Selecting Appropriate Hand Tools
When working with reclaimed wood, choosing the right hand tools is essential for clean cuts and precise shaping. You’ll want a sharp saw, like a hand saw or tenon saw, to make accurate cuts without power saws. For shaping edges or smoothing surfaces, a chisel and a hammer are indispensable. If you need to drill holes, select appropriate drill bits designed for wood; a hand drill or brace can give you control without electricity. Sharp, well-maintained tools help prevent splintering and ensure cleaner results. Avoid using dull blades or makeshift tools, as they can damage the wood and compromise safety. With the right combination of saws, chisels, and drill bits, you can confidently shape reclaimed wood into sturdy, beautiful shelves—all without power tools.
Safe Cutting Techniques
Using hand tools safely while cutting and shaping reclaimed wood is essential to guarantee injuries and assure quality results. Always wear appropriate safety equipment, such as safety goggles and gloves, to protect your eyes and hands from splinters and accidental slips. Choose the right blade type for your tool—whether a crosscut or rip blade—to ensure clean cuts and reduce the risk of kickback. When cutting, secure the wood firmly with clamps or a stable work surface to prevent slipping. Keep your hands clear of the blade’s path and cut slowly, maintaining control throughout. Regularly inspect your tools for damage or dullness, replacing blades when necessary. Following these safety techniques helps you work efficiently while minimizing hazards. Additionally, vetted safety practices should be followed when working with reclaimed wood to ensure optimal safety and effectiveness.
Shaping and Finishing Wood
Shaping and finishing reclaimed wood with hand tools requires careful control and attention to detail. To enhance your shelves, focus on understanding grain patterns and color matching. Proper shaping involves gentle planing, carving, or sanding to achieve smooth edges and desired profiles. Using crochet styles for locs techniques can inspire creative finishing details that highlight the wood’s natural beauty. Consider these key steps:
- Identify grain directions to prevent splintering and highlight natural patterns.
- Use hand planes or rasps for precise shaping, respecting the wood’s grain for cleaner cuts.
- Blend color variations by sanding lightly and applying finishes that match the wood’s unique hues.
Smoothing Surfaces and Edges Without Power Sanders
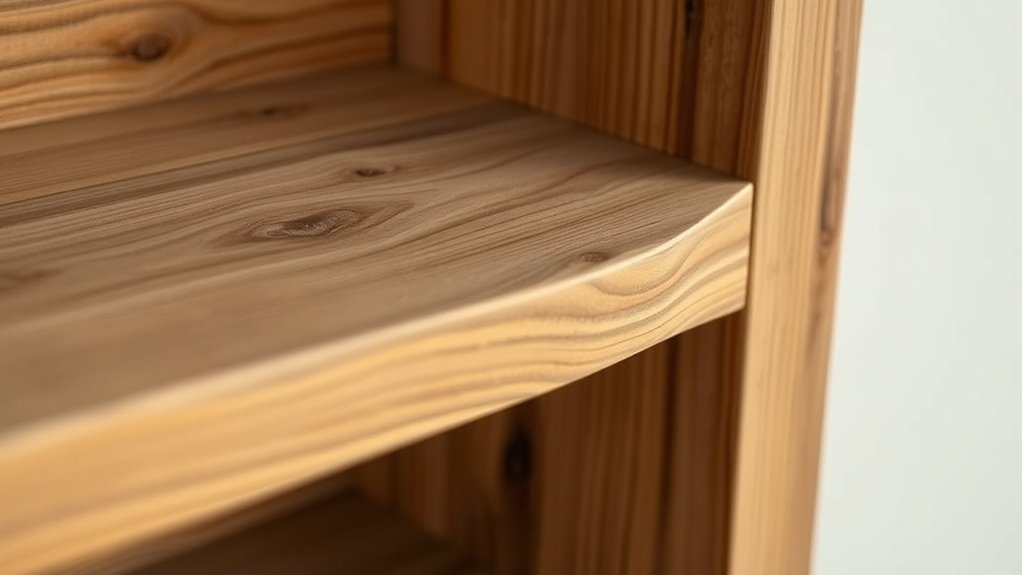
Even without power sanders, you can achieve smooth surfaces and clean edges by employing traditional hand tools. Hand sanding is an effective method to refine reclaimed wood, allowing you to control the amount of material removed. Start with a medium-grit sandpaper to smooth rough surfaces, progressing to finer grits for a polished finish. For edge smoothing, carefully run the sandpaper along the edges, maintaining a consistent angle to prevent gouging. Use a sanding block to keep even pressure and avoid uneven spots. If you encounter stubborn rough patches, apply more pressure or switch to a finer grit. Patience is key—taking your time ensures a professional-looking result without power tools. Proper filtration and pump protection can help prevent dust and debris from contaminating your workspace, making hand sanding more effective. With dedication, your reclaimed wood shelves will have smooth, attractive surfaces and crisp edges ready for finishing.
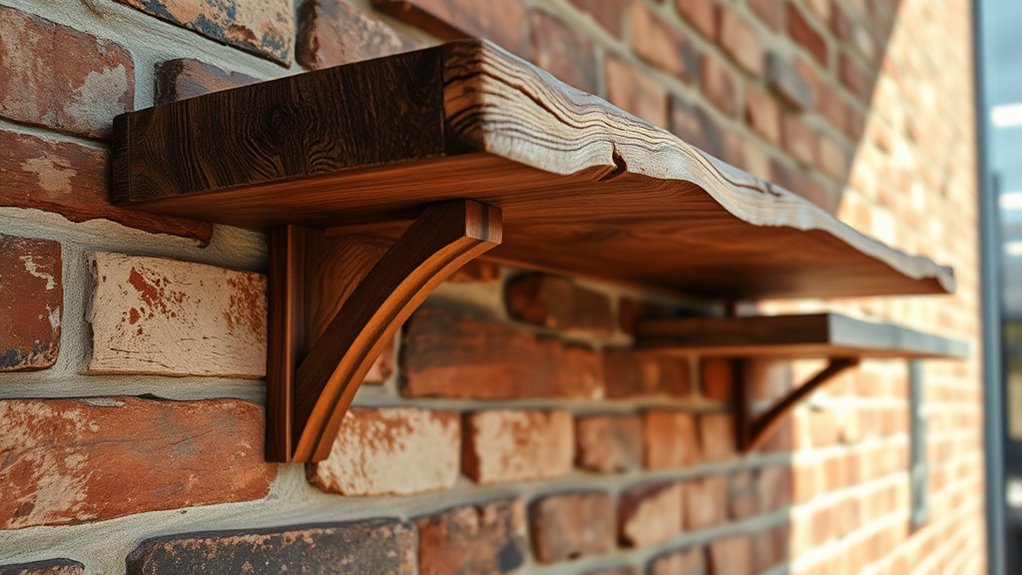
Assembling and Mounting Your Shelves Safely
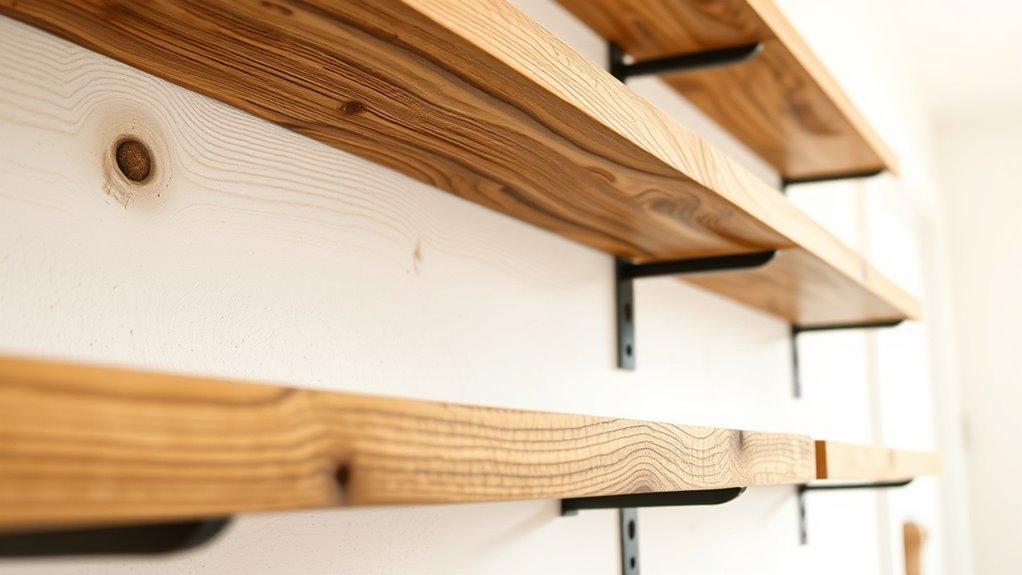
Once your reclaimed wood shelves have smooth surfaces and clean edges, it’s time to focus on assembling and mounting them securely. If you lack a drill, consider drill alternatives like a manual screwdriver or hand-powered drill. To guarantee safety and stability, follow these steps:
- Choose the right mounting hardware, such as heavy-duty brackets or wall anchors suited for your wall type.
- Mark the placement carefully, making sure shelves are level and evenly spaced.
- Attach brackets or mounting hardware securely to the wall, then carefully position your shelf onto the hardware, tightening any screws by hand.
- Proper hardware selection is essential for ensuring your shelves can hold weight safely and avoid damage over time.
Always double-check stability before placing items on your shelves. Using the proper hardware and tools ensures your reclaimed wood shelves stay safe and sturdy.
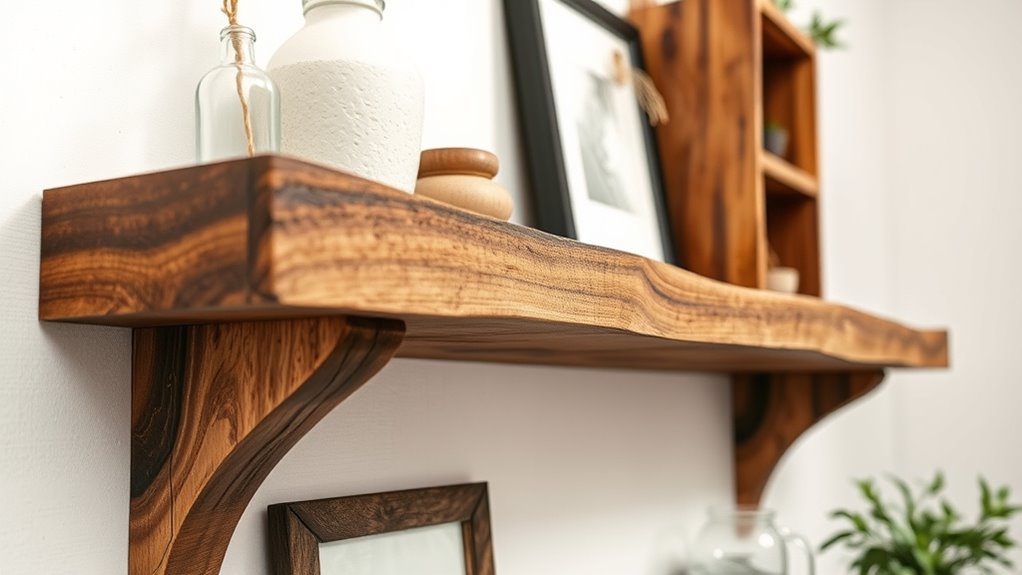
Adding Finishes and Personal Touches to Complete the Look
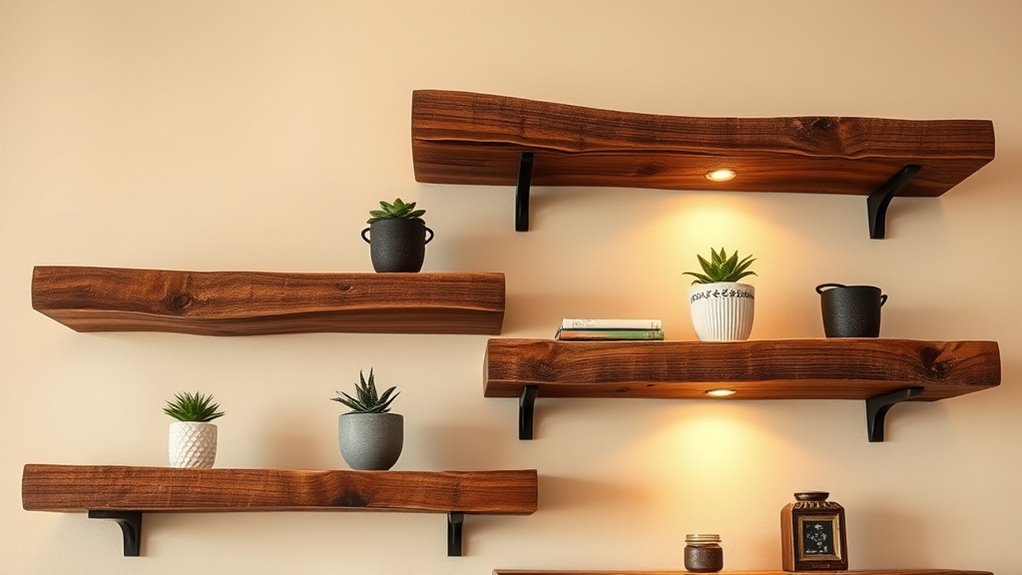
Adding finishes and personal touches is the final step to transforming your reclaimed wood shelves into a unique and polished display. Start by applying a protective finish, like clear wax or oil, to enhance the wood’s natural beauty and guarantee durability. This not only preserves the wood but also adds a subtle sheen, making your shelves stand out. Next, incorporate decorative accents such as vintage knobs, small plants, or framed photos to reflect your personality. These touches give your shelves character and make them more inviting. Take your time to arrange items thoughtfully, balancing function and style. With these simple enhancements, your reclaimed wood shelves will not only serve as practical storage but also as eye-catching decor that truly feels personalized.
Frequently Asked Questions
How Do I Ensure the Reclaimed Wood Is Free of Pests?
To guarantee your reclaimed wood is pest-free, start with a thorough pest inspection by checking for holes, droppings, or insects. You can also treat the wood with natural repellents like neem oil or diatomaceous earth, which are safe and effective. Let the wood sit in a well-ventilated area after treatment. These steps help prevent pests and keep your shelves looking great without using harsh chemicals or power tools.
What Safety Precautions Should I Take When Using Hand Tools?
When using hand tools, you should always wear personal protective gear like safety glasses and gloves to keep yourself safe. Make sure your tools are well-maintained, sharp, and in good condition to prevent accidents. Keep your workspace clear of clutter, and use proper technique to avoid injury. Regularly inspect your tools for damage, and store them safely after use. Staying cautious helps guarantee your project goes smoothly and safely.
How Can I Reinforce Shelves Without Power Tools?
To reinforce your shelves without power tools, focus on joint reinforcement techniques like dowels or corner blocks to strengthen connections. Guarantee proper weight distribution by evenly placing items across the shelves, reducing strain on joints. You can also use strong adhesives alongside mechanical fasteners for added stability. These methods improve durability and load capacity, making your shelves safer without needing any power tools, ensuring a sturdy and reliable setup.
Are There Eco-Friendly Finishes Suitable for Reclaimed Wood?
You’re asking about eco-friendly finishes suitable for reclaimed wood. You should look for eco-friendly stains that are low in VOCs and made from natural ingredients. Natural oil finishes, like tung or linseed oil, are excellent choices because they penetrate deeply and enhance the wood’s natural beauty without harmful chemicals. These options are safe for the environment and your home, giving your reclaimed wood a beautiful, sustainable finish.
How Do I Prevent Warping Over Time Without Power Equipment?
To prevent warping on your reclaimed wood shelves without power tools, focus on wood stabilization and moisture control. You should guarantee your wood is properly dried and acclimated to your environment before installation. Use moisture barriers or sealants to limit humidity exposure. Additionally, keep the shelves in stable conditions, avoiding direct sunlight or high humidity areas. Regularly check for moisture levels to maintain their shape and longevity over time.
Conclusion
With just your hands and simple tools, you’ve transformed reclaimed wood into beautiful shelves—no power tools needed. Imagine the satisfying feel of each cut and sanded edge, a demonstration to patience and craftsmanship. As you mount your creations, you’ll see the contrast: raw, natural wood against sleek, modern decor. This project shows that beauty and functionality come from both the wood and the care you put into it—crafted by your own hands, with heart.