To transform your KALLAX into a stylish bench, start by choosing the right unit that fits your space and style. Gather supplies like paint, cushions, and hardware, and organize your tools. Prepare the workspace, assemble the KALLAX unit, and add a comfy cushion or upholstery for seating. For stability, attach legs or support bases and reinforce the structure. Finish with decorative accents to match your decor—keep going to learn all the tips for a perfect hack!
Key Takeaways
- Select a sturdy KALLAX unit with reinforced shelves and a solid backing for seating durability.
- Prepare the surface by cleaning, sanding, and applying primer or stain to achieve a smooth finish.
- Add cushions and upholstery for comfort, securing them with non-slip pads or velcro strips.
- Reinforce stability by attaching the KALLAX to the wall and adding support brackets or adjustable legs.
- Decorate with accessories like baskets or plants to enhance style and functionality as a bench.
Top picks for "ikea hack transform"
Open Amazon search results for this keyword.
As an affiliate, we earn on qualifying purchases.
Selecting the Perfect KALLAX Unit for Your Bench
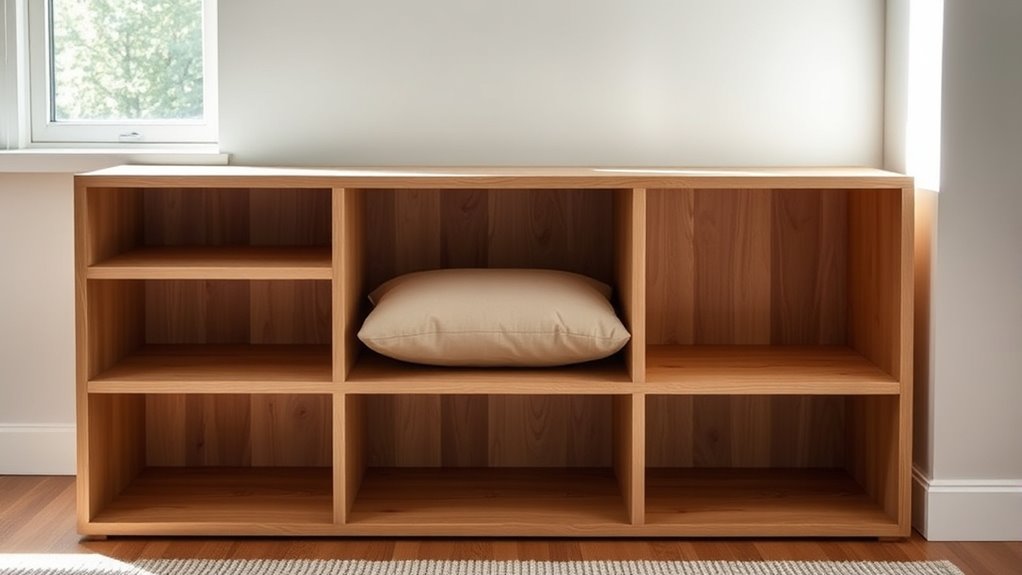
How do you choose the right KALLAX unit for your bench? Start by considering material selection; choose a sturdy, durable finish like laminated or veneered surfaces to withstand daily use. Think about design considerations that match your space and style—whether you prefer a sleek, modern look or something more rustic. Measure your intended area carefully to ensure the KALLAX unit fits comfortably without overcrowding. If you plan to sit on the bench frequently, opt for a unit with solid backing and reinforced shelves for added stability. Additionally, consider the number of compartments you need for storage and accessibility. When selecting a KALLAX for your project, self-watering plant pots can be integrated as functional and decorative features, enhancing both usability and aesthetic appeal. Picking the right KALLAX unit involves balancing material strength with aesthetic appeal, ensuring your bench is both functional and visually appealing.
Gathering Supplies and Tools for Your Hack
Before starting your IKEA hack, gather all necessary supplies and tools to guarantee a smooth process. Begin with furniture shopping to find the right materials, such as paint, fabric, or cushioning, depending on your design. Make a checklist to ensure you don’t forget essentials like screws, brackets, or adhesive. Proper tool organization is key—set up your screwdriver, drill, measuring tape, and other tools within easy reach. Having everything prepared beforehand saves time and reduces frustration. Double-check that your tools are in good condition. If you need additional supplies, visit a hardware store or order online. Being well-organized and prepared will help you stay focused and efficient during your project. This groundwork sets the stage for a successful and enjoyable IKEA hack. Additionally, understanding project planning can help you anticipate potential challenges and streamline your process.
Preparing the Workspace and Assembling the KALLAX
Before you start assembling your KALLAX, clear a spacious area to work comfortably. Make sure you have all your tools and materials ready to avoid interruptions. Then, follow the instructions carefully as you put together the cube frame to guarantee stability.
Gathering Tools and Materials
To guarantee a smooth assembly process, start by gathering all the necessary tools and materials beforehand. You’ll need basic items like a screwdriver, hammer, and measuring tape, along with any decorative accessories you plan to add later. Having everything ready prevents interruptions and keeps your project on track. When selecting decorative accessories, consider items that match your color coordination scheme to create a cohesive look. Double-check that you have enough shelf brackets, screws, and any paint or fabric for customization. Organize your tools and materials in your workspace to avoid searching during assembly. This preparation ensures a seamless process and helps you focus on transforming your KALLAX into a stylish, functional bench. Proper planning makes all the difference in achieving a professional finish.
Assembling the Cube Frame
Start by clearing your workspace and gathering all assembled parts of your KALLAX. Lay out the panels and shelves, making certain you have all the pieces needed for the cube frame. Follow the instructions carefully, connecting each section securely. As you assemble, consider adding decorative accents, like decorative knobs or paint, to personalize your bench later. Keep your workspace clean and organized to avoid losing small hardware. Remember to use proper cleaning tips, wiping down each piece before assembly to remove dust or fingerprints. This helps ensure a smooth finish when you add your finishing touches. Taking your time during this step ensures a sturdy frame, setting a solid foundation for the rest of your IKEA hack project. Additionally, practicing mindful decluttering can help you decide which items to incorporate into your new bench or storage solution.
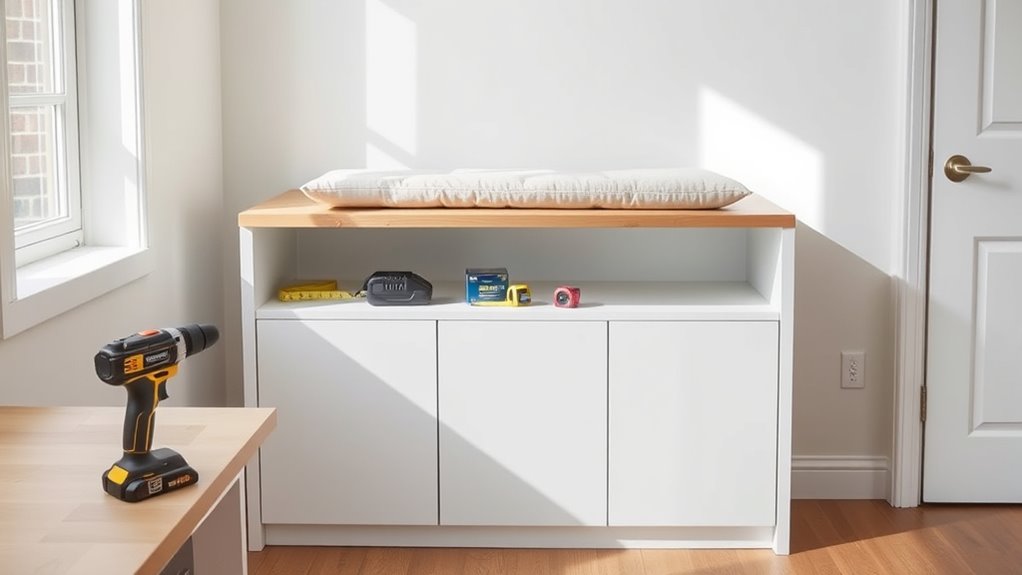
Adding a Comfortable Cushion or Upholstered Seat
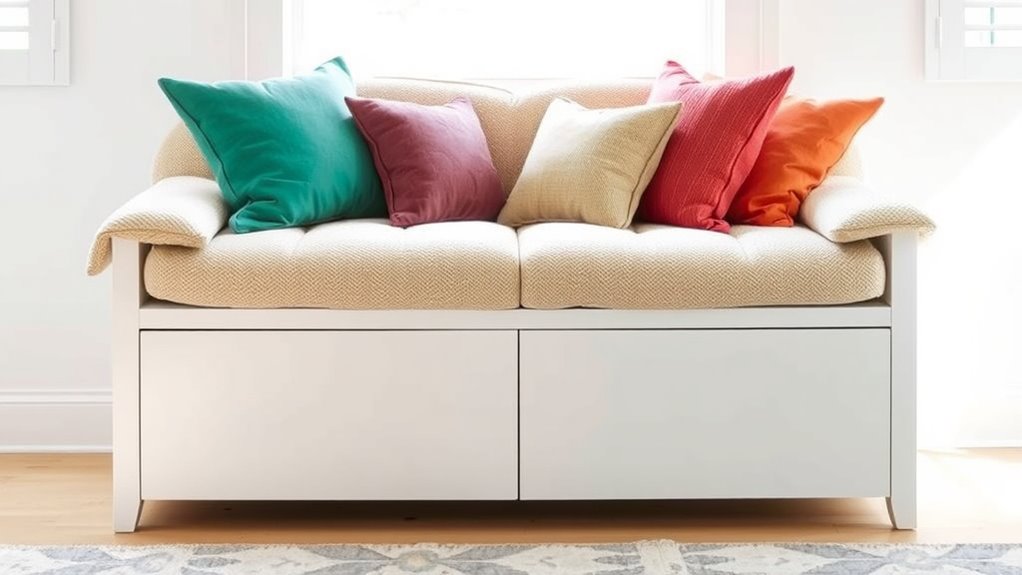
Have you ever wished your IKEA hack felt even more comfortable? Adding a cushion or upholstered seat is the perfect upgrade. When choosing a cushion, consider thickness and firmness to guarantee comfort and support. Look for cushions that fit your KALLAX dimensions, or opt for custom cuts. Upholstery options vary from slipcovers to foam padding, allowing you to match your decor style. You might choose a soft, washable fabric for easy maintenance or a textured material for added visual interest. Secure the cushion with non-slip pads or velcro strips to keep it in place. Incorporating personal development principles like mindfulness and emotional well-being can enhance your overall space and create a more inviting environment. This simple addition instantly transforms your bench into a cozy, inviting space, making it more functional and appealing for everyday use.
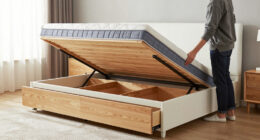
Enhancing Stability With Legs or a Base
Adding legs or a sturdy base to your IKEA hack can considerably improve its stability and durability. Proper leg stability guarantees your bench won’t wobble or tip over, especially if used frequently or placed on uneven floors. Using a solid base support distributes weight evenly, preventing sagging over time. You can choose from various options to enhance stability:
- Metal or wooden legs for a sturdy foundation
- Adjustable feet to level uneven surfaces
- Corner brackets for extra reinforcement
- T-legs for balanced support across the length
- Budget-friendly plastic or rubber pads for grip
- Incorporating proper support ensures your bench remains stable and safe over time.
Customizing the Finish With Paint or Stain
Choosing the right finish makes your piece truly stand out, whether you opt for paint or stain. Before you start, make sure to prepare the surface properly to guarantee a smooth, lasting result. Adding your personal touch with color or texture is the final step that turns a simple hack into a custom masterpiece.
Choosing the Right Finish
Selecting the right finish can dramatically transform your IKEA hack, giving it a personalized touch that matches your style. When choosing between paint or stain, consider your desired look and the material options available. Paint offers vibrant color choices and a smooth, uniform finish, perfect for modern or bold designs. Stain enhances the natural grain, providing a warm, rustic feel. Incorporating natural materials like wood and linen can further enhance the farmhouse aesthetic. Here are some tips to guide your decision:
- Think about your existing decor style.
- Test color choices on scrap wood first.
- Use quality paint or stain for durability.
- Decide if you want a matte, satin, or glossy finish.
- Consider the longevity and ease of maintenance.
Preparing the Surface Properly
Before applying paint or stain, it’s essential to prepare the surface properly to guarantee a smooth, durable finish. Proper surface preparation involves cleaning, sanding, and removing any existing finishes or imperfections. This step ensures the finish application adheres evenly and lasts longer. Use fine-grit sandpaper to smooth rough areas and create a key for the new finish. Clean dust thoroughly before painting or staining. Consider the table’s material and current finish when selecting your prep methods. Here’s a quick overview:
| Step | Purpose |
|---|---|
| Cleaning | Remove dust, grease, and debris |
| Sanding | Smooth surface, improve adhesion |
| Repairing | Fill holes or cracks for a uniform surface |
| Final wipe-down | Eliminate dust before finish application |
Additionally, understanding material compatibility can help you choose the most suitable preparation techniques for your project. Follow these steps to achieve the best results for your project.
Adding Personal Touches
Have you ever wondered how to give your IKEA hack a truly personalized look? Adding personal touches with paint or stain allows you to customize your KALLAX to match your style. You can explore a wide range of color options, from bold and vibrant to soft and muted, to create the perfect vibe. Material choices also matter—use high-quality paint for a smooth finish or stain to highlight the wood’s natural beauty. To make your project stand out, consider these ideas:
- Choose a bold hue for a statement piece
- Use a neutral stain for a sleek, modern look
- Add patterns or stenciling for visual interest
- Experiment with two-tone finishes for contrast
- Seal your work with a clear coat for durability
Personalizing your finish transforms the hack into a truly unique piece, especially when considering customization options that can elevate the overall look.
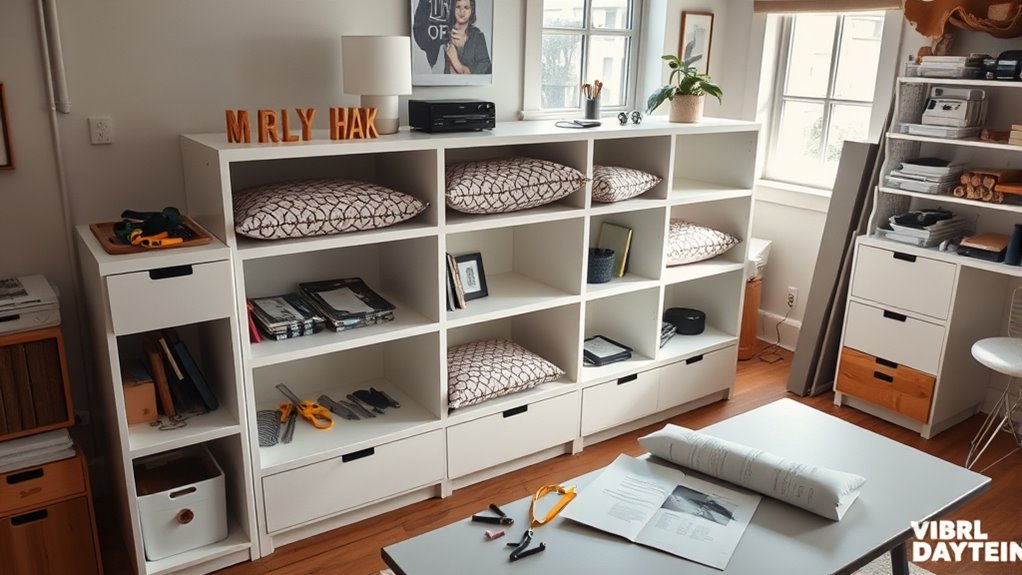
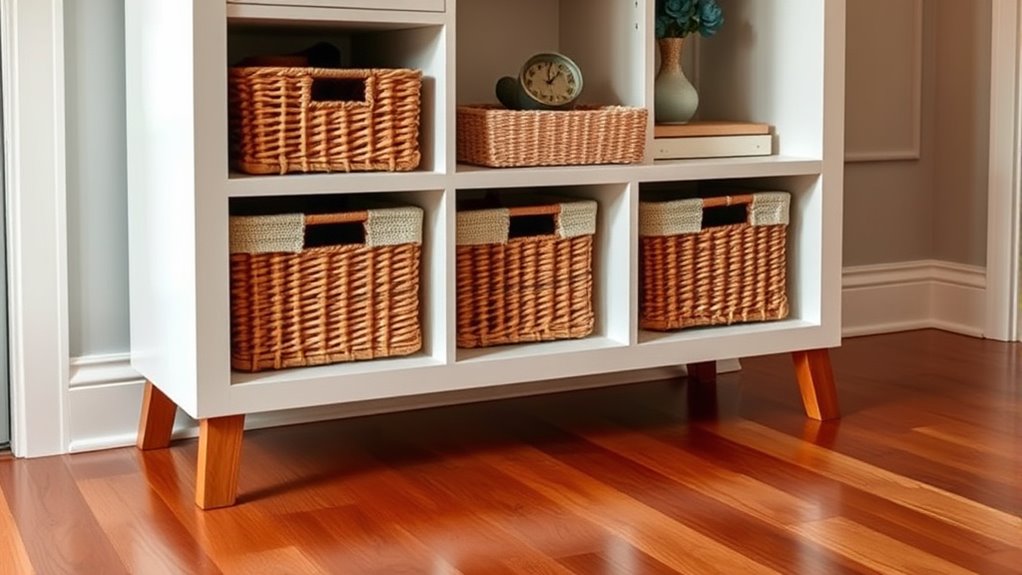
Incorporating Additional Storage or Decor Elements
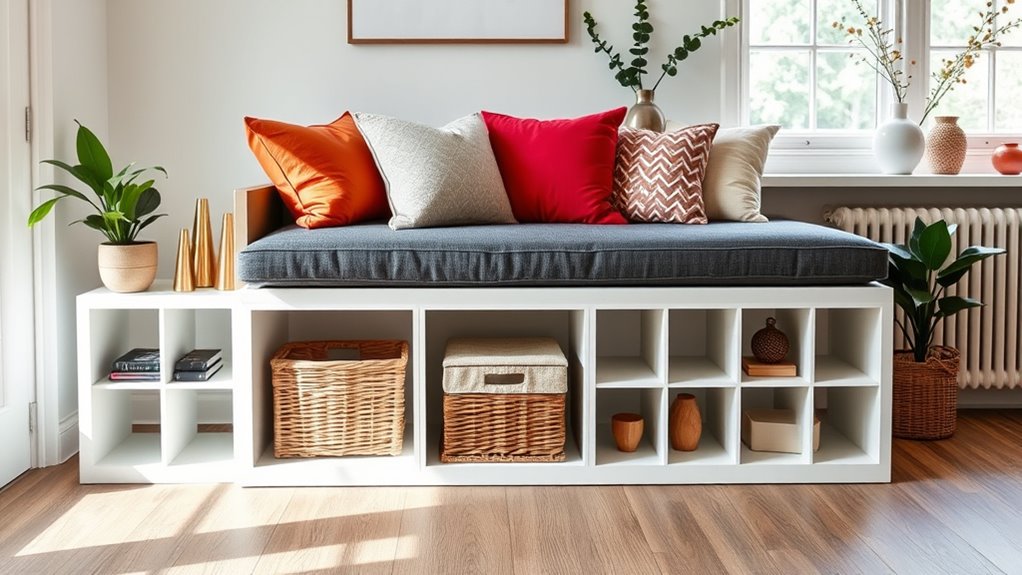
Adding extra storage or decorative elements can instantly elevate your IKEA hack by making the space more functional and personalized. Incorporate decorative accents like stylish vases, artwork, or quirky figurines to bring character to your bench. Organizational accessories, such as baskets, bins, or trays, help keep clutter at bay while adding visual interest. Use these accessories to hide or display essentials, making the area both practical and inviting. Consider layering different textures and colors to create a balanced look. Small decorative touches, like a cozy throw or decorative pillows, can also enhance comfort. The key is to choose elements that reflect your style and meet your needs, transforming your simple KALLAX into a more dynamic and inviting piece. Additionally, incorporating home organization principles can ensure your space remains tidy and stylish over time.
Securing the Components for Safety and Durability

Securing the components of your IKEA hack is essential to guarantee safety and long-lasting durability. Properly fastening the KALLAX to the wall and reinforcing joints ensures table safety and prevents accidents. You also want to consider the weight capacity to avoid overloading, which can compromise stability. Use sturdy brackets and screws designed for your wall type, and double-check that all connections are tight. Incorporating essential safety measures like wall anchors and reinforcement can further enhance stability and prevent tipping. Taking these steps helps ensure your bench remains safe, stable, and durable over time.
Styling Your New KALLAX Bench in Your Space
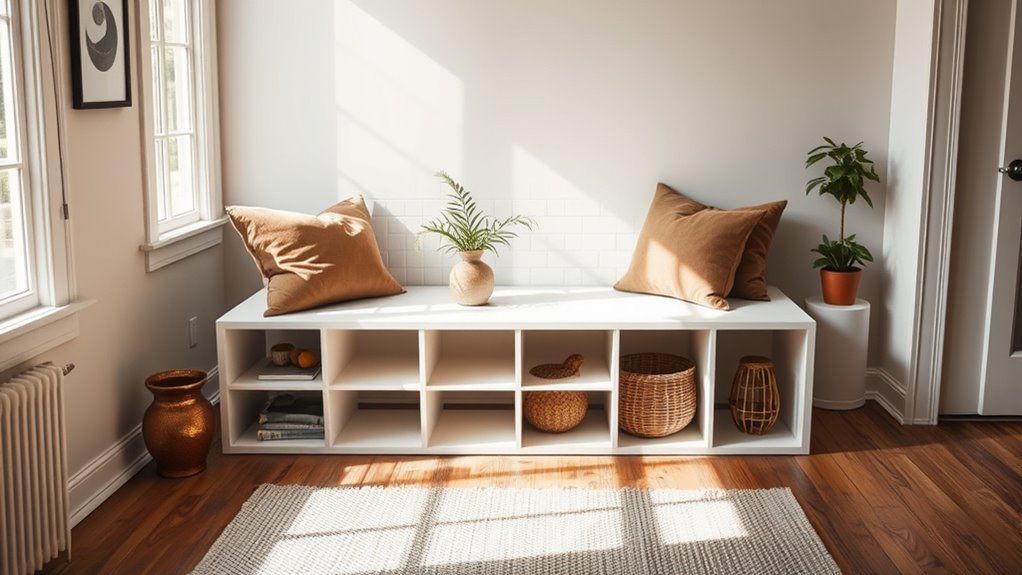
Once you’ve secured your KALLAX bench, it’s time to contemplate how to style it to enhance your space. Start by selecting decorative accessories that reflect your personality and complement the room’s decor. Use baskets, trays, or small plants to add visual interest and texture. Focus on color coordination by choosing accessories that match or contrast with your existing color palette, creating a cohesive look. If your room features neutral tones, add pops of color with vibrant pillows or vases. For a minimalist style, keep accessories simple and streamlined. Remember, the goal is to make your bench both functional and stylish, so balance decorative elements with practicality to create an inviting, well-designed space.
Frequently Asked Questions
Can I Convert Multiple KALLAX Units Into a Larger Bench?
Yes, you can convert multiple KALLAX units into a larger bench, but you need to take into account unit stability and weight distribution. Secure the units together with brackets or strong adhesive to ensure they stay stable. Distribute weight evenly when using the bench to prevent tipping or damage. Properly anchoring the units and balancing the load will make your larger bench safe and sturdy for everyday use.
What Weight Capacity Should I Consider for Sitting on the Bench?
When considering sitting on your bench, you should prioritize weight limits and safety considerations. Typically, KALLAX units can support around 50-100 pounds per shelf, but this varies based on how you reinforce it. To guarantee safety, use sturdy brackets, secure the units to the wall, and avoid exceeding the recommended weight capacity. Always check the manufacturer’s guidelines and consider adding extra support for heavier loads.
Is It Safe to Add Electrical Outlets or USB Ports?
Like a modern-day Leonardo da Vinci, you’re blending creativity with practicality. When adding electrical outlets or USB ports, focus on electrical safety—use proper wiring, secure connections, and follow local codes. For USB port installation, guarantee compatibility and proper grounding. This minimizes risks of shocks or fires. Always consult a professional if you’re unsure, and prioritize safety to keep your project both functional and secure.
How Do I Prevent the KALLAX From Wobbling Over Time?
To prevent your KALLAX from wobbling over time, focus on stability tips and proper assembly methods. Make sure you secure the units tightly using the provided fasteners and brackets, especially if stacking or customizing. Level the furniture on an even surface and consider anchoring it to the wall with brackets for extra stability. Regularly check and tighten screws or bolts to maintain its sturdiness and avoid wobbling.
Can I Customize the Color Without Painting or Staining?
You can customize the color of your KALLAX without painting or staining by exploring finish alternatives like adhesive contact paper, wallpaper, or fabric wraps. These options offer a variety of color choices and textures, allowing you to personalize your piece easily. Simply choose your preferred finish, cut it to size, and apply it smoothly to the surface. This way, you get a fresh look with minimal effort and mess.
Conclusion
Once you’ve transformed your KALLAX into a stylish bench, you’ll see that a little creativity goes a long way. With your newfound piece, you’ve truly hit two birds with one stone—adding both function and charm to your space. Remember, a well-made DIY project is worth its weight in gold, so take pride in your handiwork. Now, sit back and enjoy your custom creation, proving that beauty and practicality can indeed go hand in hand.