
To create DIY concrete planters, start by choosing simple molds like cardboard or plastic for that industrial look. Mix sustainable concrete with recycled materials for durability and eco-friendliness, aiming for a thick, workable consistency. Carefully pour and tap the mix into your mold to prevent air pockets, then cover and let it cure for at least 24 hours. Proper finishing and curing guarantee a rugged, authentic finish—continue exploring for detailed tips and tricks.
Key Takeaways
- Select simple molds like cardboard boxes or reclaimed materials to shape your concrete planter’s style and texture.
- Mix concrete to a thick, workable consistency, incorporating eco-friendly aggregates or recycled materials for sustainability.
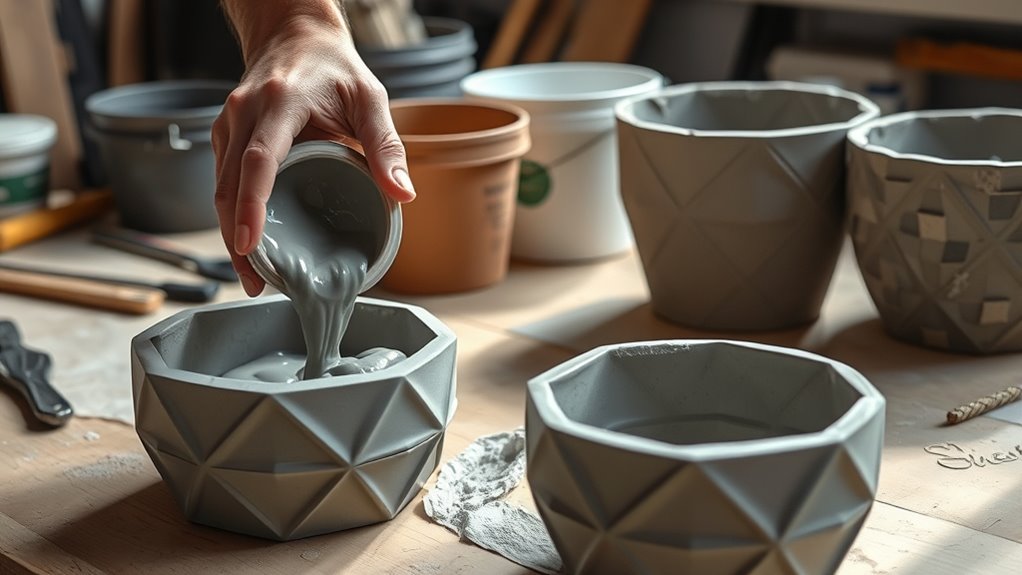
- Pour the concrete carefully into molds, tapping to eliminate air pockets, then cover to retain moisture during curing.
- Cure the planter undisturbed for at least 24-48 hours, maintaining consistent temperature and humidity for maximum strength.
- Remove the mold after curing, leaving rough edges or imperfections for an authentic industrial look, and add finishing touches as desired.

Creating your own concrete planters is a satisfying and cost-effective way to add a personal touch to your garden or indoor space. When you craft your own, you can customize the size, shape, and finish to match your style, especially if you lean toward industrial design. Industrial aesthetics often emphasize raw, unfinished textures, metal accents, and minimalist forms, which can be easily achieved with concrete. Using sustainable materials in your project not only benefits the environment but also aligns with a modern, eco-conscious approach to design. Opt for eco-friendly concrete mixes that incorporate recycled aggregates or low-carbon cement options, ensuring your planters are both stylish and sustainable.
Create sustainable, industrial-inspired concrete planters that are stylish, customizable, and eco-friendly.
The process begins with selecting the right mold, which can be anything from simple cardboard boxes to more elaborate forms like plastic containers or custom-built wooden frames. Your mold choice influences the final look, and for an industrial feel, consider using reclaimed or rough-textured molds that add character. When mixing your concrete, aim for a consistency that’s thick enough to hold shape but workable enough to pour smoothly. You’ll want to incorporate sustainable materials—such as fly ash or slag—into your mix to reduce environmental impact. These materials not only make your project greener but can also enhance the durability and texture of your planters, giving them that rugged, industrial vibe.
Pour the mixed concrete into your mold carefully, ensuring there are no air pockets that could weaken the structure. Use a trowel or stick to gently tap and settle the mix, especially around intricate details or corners. Once filled, cover the mold with plastic to retain moisture and promote proper curing. Patience is key here; curing typically takes at least 24 to 48 hours, but for the most effective strength, leave the planters to cure for up to a week. During this time, avoid disturbing them, as the concrete hardens and gains durability. The curing process also benefits from maintaining a consistent temperature and humidity level, which contributes to a more uniform finish.
After curing, carefully remove the mold, revealing your handcrafted concrete planter. If you want an industrial look, you might leave some rough edges or slight imperfections, highlighting the raw, authentic nature of concrete. You can further enhance this aesthetic by adding metallic accents or weathered finishes. Your DIY project not only results in a unique, functional piece but also emphasizes sustainable practices and industrial design principles. With patience and attention to detail, you create a durable, stylish planter that elevates your space while reflecting your eco-conscious choices. Remember, material selection plays a vital role in achieving the desired industrial aesthetic and environmental sustainability.
Frequently Asked Questions
Can I Use Recycled Materials in My Concrete Mix?
Yes, you can use recycled materials in your concrete mix. Incorporate recycled aggregate, like crushed concrete or glass, to reduce waste and boost sustainability. Additionally, eco-friendly additives, such as fly ash or slag, can enhance strength and workability while minimizing environmental impact. Just confirm the recycled materials are clean and properly prepared to maintain the durability and quality of your concrete planter.
How Do I Prevent Air Bubbles During Pouring?
To prevent air bubbles during pouring, think of your concrete as a flowing river that needs gentle guidance. Use slow, steady pouring techniques to let the mix settle naturally, avoiding splashes that trap air. Tap or vibrate the mold lightly after pouring to encourage bubbles to rise and escape. Mastering air bubble prevention guarantees your planters will shine with smooth, flawless surfaces, like calm lakes reflecting the sky.
What Safety Gear Is Recommended When Handling Concrete?
When handling concrete, you should wear protective gloves to prevent skin irritation and safety goggles to shield your eyes from splashes. These safety gears protect you from potential chemical burns and debris. Always work in a well-ventilated area, and consider a mask if you’re mixing large quantities. Prioritizing safety gear guarantees you avoid injuries, making your concrete project safer and more enjoyable.
How Do I Customize the Shape of My Planters?
To customize the shape of your planters, try using custom mold techniques like repurposing household items or making your own molds from silicone or plastic. You can also add decorative finishing options such as textured surfaces, painted patterns, or embedded decorative elements to make your planters unique. Experimenting with different mold shapes and finishes allows you to create personalized, eye-catching concrete planters that suit your style perfectly.
What Are the Best Sealing Methods for Durability?
Did you know that choosing the right sealant options can substantially boost your concrete planter’s durability? You should apply a high-quality silicone or acrylic sealant after curing, ensuring it’s fully dried. Using proper curing techniques, like sealing in the moisture during the curing process, helps prevent cracks and water damage. Regular resealing also keeps your planters protected, so they stay looking great and last longer.
Conclusion
Creating your own concrete planters is a rewarding project that adds a personal touch to your space. Did you know that concrete gardening containers can last over 50 years with proper care? By mold, mix, and curing, you not only craft something beautiful but also contribute to sustainable gardening practices. So, roll up your sleeves and start your DIY journey today—your plants and the environment will thank you for it!